Werbung
Quicklinks
INSTALLAZIONE E MONTAGGIO - INSTALLATION AND ASSEMBLY - INSTALLATION ET MONTAGE
INSTALLATION UND MONTAGE - INSTALACIÓN Y MONTAJE - СБОРКА И УСТАНОВКА
art. 2260
EASY
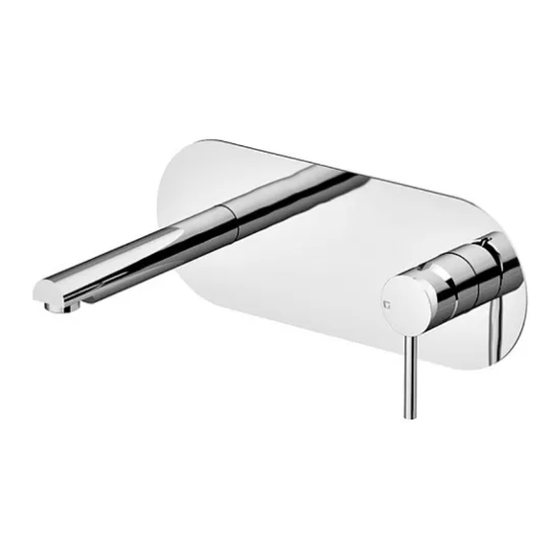
Miscelatore lavabo a muro con scatola ispezionabile
Basin mixer wall installation with control box
Mitigeur lavabo mural avec boîte controlable
Einhand-Waschtischmischer Wandmontage mit Steuerkasten
Mezclador monomando montaje en muro con caja de control
Настенный смеситель для раковины с коробкой, позволяющей выполнять осмотр и техобслуживание
Werbung

Verwandte Anleitungen für GATTONI 2260 EASY


Inhaltszusammenfassung für GATTONI 2260 EASY
- Seite 1 INSTALLAZIONE E MONTAGGIO - INSTALLATION AND ASSEMBLY - INSTALLATION ET MONTAGE INSTALLATION UND MONTAGE - INSTALACIÓN Y MONTAJE - СБОРКА И УСТАНОВКА art. 2260 EASY Miscelatore lavabo a muro con scatola ispezionabile Basin mixer wall installation with control box Mitigeur lavabo mural avec boîte controlable Einhand-Waschtischmischer Wandmontage mit Steuerkasten Mezclador monomando montaje en muro con caja de control Настенный...
- Seite 2 art. 2260 EASY - CONSIGLI PER IL BUON FUNZIONAMENTO Pressione di esercizio fi no a 3 bar; in caso di pressioni superiori a 3 bar si raccomanda l’installazione di un riduttore di pressione all’ingresso dell’impianto. Temperatura acqua calda non superiore a 65°C. Applicazione fi ltri all’ingresso dell’impianto.
- Seite 3 art. 2260 EASY - INDICE Assemblaggio miscelatore lavabo a muro Sostituzione cartuccia Dimensioni Cura del prodotto - CONTENTS Basin mixer assembly Cartridge replacement Dimensions Product maintenance - SOMMAIRE Montage mitigeur lavabo mural Remplacement de la cartouche Dimensions Entretien du produit - INHALTSVERZEICHNIS Zusammenbau Einhand-Waschtischmischer Kartuschenwechsel...
- Seite 4 art. 2260 EASY ASSEMBLAGGIO INCASSO DOCCIA - BUILT-IN SHOWER MIXER ASSEMBLY - MONTAGE DU MITIGEUR DOUCHE - ZUSAMMENBAU UNTERPUTZ BRAUSEMISCHER - ENSAMBLAJE MEZCLADOR MONOMANDO DE EMPOTRAR PARA DUCHA - МОНТАЖ ВСТРОЕННОГО СМЕСИТЕЛЯ ДУША Collegare le 2 entrate calda e fredda con raccordi da G1/2”. Per la profondità...
- Seite 5 art. 2260 EASY Utilizzare gli appositi riferimenti per la livella. Una volta posizionata la cassetta in modo corretto è possibile provare la tenuta dell’impianto senza installare le parti esterne (10 bar max). Use the special references for the level. Once the box appropriately the tightness of the system can be tested without installing the external parts (10 bar max). Utiliser les outils spécifi ques pour le niveau.
- Seite 6 art. 2260 EASY Per installare le parti esterne dopo la prova dell’impianto togliere il cartoncino. To install the external parts after testing the system remove the cardboard. Pour installer les parties externes après le test du système enlever le carton. Nach der Prüfung der Anlage, zur Installation der Außenteile, den Karton entfernen.
- Seite 7 art. 2260 EASY Togliere le n.4 viti che tengono il coperchio. Estrarre il coperchio con la sua guarnizione ed il tappo G1/2” con la sua guarnizione. Remove the 4 screws that hold the cover. Remove the cover with its gasket and the plug G1/2” with its gasket. Enlever les 4 vis qui tiennent le couvercle.
- Seite 8 art. 2260 EASY Inserire il corpo contenente la cartuccia miscelatrice facendo attenzione che la sua guarnizione sia correttamente posizionata; inserire la bocca di erogazione assicurandone la tenuta con della canapa o altro materiale idoneo. Insert the body containing the mixer cartridge paying attention that its gasket is properly positioned; insert the supply spout fi xing its sealing with hemp or similar material.
- Seite 9 art. 2260 EASY Inserire la piastra contro alla parete sigillando con del silicone. Insert the plate against the wall sealing with silicone. Insérer la plaque contre le mur en la scellant avec du silicone. Die Platte an der Wand befestigen und mit Silikon versiegeln. Introduzca la placa contra la pared sellándola con silicona.
- Seite 10 art. 2260 EASY Avvitare l’aeratore e la leva. Tighten the aerator and the lever. Visser le mousseur et le levier. Den Perlator und die Hebel einschrauben. Enrosque el aireador y la palanca. Привинтить аэратор и рычаг.
- Seite 11 art. 2260 EASY SOSTITUZIONE CARTUCCIA - CARTRIDGE REPLACEMENT - REMPLACEMENT DE LA CARTOUCHE - KARTUSCHENWECHSEL SUSTITUCIÓN CARTUCHO - ЗАМЕНА ПАТРОНА 29 mm 1,5 mm Prima di procedere a manutenzioni di questo tipo chiuderei rubinetti d’arresto, scaricare l’acqua e seguire le istruzioni seguenti: Svitare, con una chiave a brugola da 1,5 mm, il grano di fi ssaggio (2) della maniglia.
- Seite 12 art. 2260 EASY 29 mm 1,5 mm Before performing operations of this type, close the stop valves, drain the water and proceed as follows: Using a 1,5 mm Allen wrench, unscrew the fi xing screw (2) of the handle. Remove the handle (1) and ring nut cap (3). Now unscrew the ring nut (4) using the 29 mm spanner and remove the tap cartridge (5) by hand.
- Seite 13 art. 2260 EASY 29 mm 1,5 mm Avant d’eff ectuer ce genre d’opération, fermer les robinets d’arrêt, purger les canalisations et suivre les instructions ci-après: Dévisser, à l’aide d’une clé Allen 1,5 mm, la vis sans de tête de fi xation (2) de la manette. Enlever la manette (1) et le capuchon cache-bague (3).
- Seite 14 art. 2260 EASY 29 mm 1,5 mm Vor Wartungsarbeiten dieser Art zuerst die Stoppventile schließen, das Wasser ablassen und dann folgende Anweisungen befolgen: Mit einem 1,5 mm-Inbusschlüssel den Gewindestift (2) zum Befestigen des Griff s aufschrauben. Den Griff (1) und die Ringkappe (3) abnehmen. Nun den Verschlussring (4) mit dem 29 mm-Schlüssel abschrauben und die Kartusche (5) mit der Hand aus dem Hahn herausziehen.
- Seite 15 art. 2260 EASY 29 mm 1,5 mm Antes de proceder a realizar operaciones de mantenimiento de este tipo, se deberán cerrar las llaves de paso, vaciar el agua y seguir las instrucciones que se muestran a continuación: desenroscar, con una llave Allen de 1,5 mm, el tornillo sin cabeza de fi jación (2) de la manilla. Quitar la manilla (1) y el capuchón cubrevirola (3).
- Seite 16 art. 2260 EASY 29 mm 1,5 mm Перед началом работ этого типа закрыть отсечные вентиля, слить воду и выполнить следующие операции: Ключом-шестигранником на 1,5 мм отвинтить крепежный винт (2) ручки. Снять кран (1) и колпачок кольца (3). Затем специальным ключом на 29 мм отвинтить стопорное кольцо (4) и вручную извлечь патрон (5) из крана Выполнить...
- Seite 17 art. 2260 EASY DIMENSIONI - DIMENSIONS - DIMENSIONS - ABMESSUNGEN - DIMENSIONES - РАЗМЕРЫ 49.5 ±24 G1/2" 180.1 ±24 17.7 29.2 271.1...
-
Seite 18: Уход За Изделием
Ввиду постоянного совершенствования производства производитель оставляет за собой право вносить изменения в изделия без объявления. GATTONI RUBINETTERIA SPA Via Pietro Durio, 5 - 28010 Alzo di Pella (NO) Italy - Tel + 39 0322 969241 - Fax + 39 0322 969547...