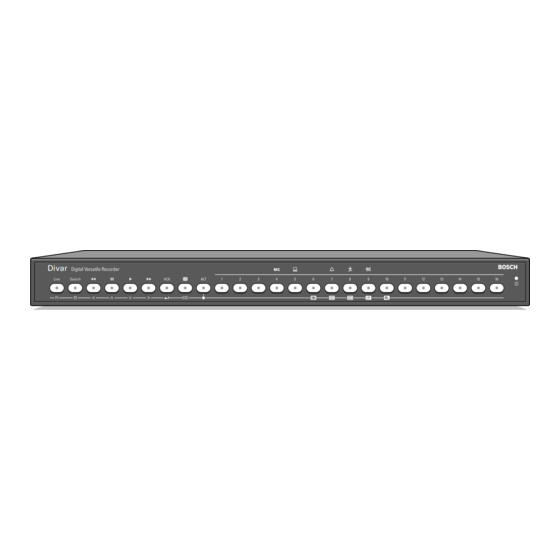
Bosch Divar 2 Schnellinstallation
Vorschau ausblenden
Andere Handbücher für Divar 2:
- Bedienungsanleitung (166 Seiten) ,
- Installationshandbuch (57 Seiten)
Inhaltsverzeichnis
Werbung
Verfügbare Sprachen
Verfügbare Sprachen
Quicklinks
Quick installation
PC
RS232
ATM/POS
bridge
External CD/DVD writer
Storage Array
AutoDome
Primary connections
1.
Connect the cameras to the BNC loop-through camera inputs* (automatically terminated).
2.
Connect monitor A to the BNC output MON A.
Optional connections
3.
Connect monitor B to the BNC output MON B.
4.
Connect up to 16 (alarm) inputs via the supplied 25-pole D-type connector board.
5.
Connect up to 4 alarm output relays via the supplied 25-pole D-type connector board.
6.
Connect a keyboard unit to the KBD IN socket.
7.
Connect a pan/tilt/zoom control unit via the supplied 15-pole D-type connector board.
8.
Connect to your network via the Ethernet port or use the RS232 connector to connect directly to a
PC serial port.
9.
Connect a CD/DVD writer or an external storage unit via the narrow 50-pin high density SCSI-2 port.
(Always connect the writer to the Divar first.)
Powering up
10.
Switch on all connected equipment.
11.
Connect the power cord to the unit.
First-time use
The Quick Install menu opens the first time you use the unit. Fill in these basic settings to get the unit
operational. (The Quick Install menu can be opened at any other time via the System Settings/Quick
Install submenus of the menu system.)
Menu use
•
To open the menu, press the ALT key
•
Use the arrow keys to move through a menu or list.
•
Use the select key
to select a submenu or item.
•
Use the escape key
to go back.
* can be 6, 9 or16 depending on model
Bosch Security Systems
6
8
LAN / WAN
9
7
R
SHIELD
1A
3A
E
+
1B
3B
CTRL 1
5
L
-
2A
4A
A
SHIELD
2B
Y
4B
GND
+
CTRL 2
-
1
9
IN
SHIELD
2
10
+
GND
CTRL 3
-
3
11
IN
4
12
SHIELD
+
GND
CTRL 4
4
-
5
13
IN
SHIELD
6
14
+
GND
CTRL 5
-
7
15
IN
SHIELD
8
16
to enter the alternate mode, then press the menu key
1
x16*
2
3
A
B
QUICK INSTALL
LANGUAGE
TIME ZONE
TIME FORMAT
TIME
DATE FORMAT
DATE
ACTIVE CAMS
ALARM MONITOR
RECORDING SETTINGS >
> DAY PERIOD
> WEEKEND
> REC DAY
> REC WEEKEND/NIGHT
> ENABLE ALARM INPUTS FOR
> ALARM INPUT RECORDING
> ENABLE MOTION FOR
> MOTION RECORDING
> APPROX. REC. DURATION
NETWORK SETTINGS >
> DHCP
> DVR NAME
> IP ADDRESS
> SUBNET MASK
.
> DEFAULT GATEWAY
> MAC ADDRESS
> BANDWIDTH LIMIT
SAVE & EXIT
CANCEL
Divar 2
Digital Versatile Recorder
AutoDome
11
Select the language for the menu from the list.
Select a time zone from the list.
Select either a 12 or a 24 hour clock format.
Fill in the actual time.
Select a date format to show either month (MM), day (DD) or year (YYYY) first.
Fill in the actual date.
Press the camera keys to activate cameras. Only activated cameras are configured.
Select the monitor on which input alarm images are displayed.
Open this submenu to fill in the basic recording settings.
Define the period when the day profile is active. The weekend/night profile is active
for the rest of the 24 hour period.
Define the weekend days (weekend/night profile active for full day) or select none
for the weekend to be same as other weekdays.
Select the normal recording speed to be used during the day profile.
Select the normal recording speed to be used during the weekend/night profile.
Select the profiles during which alarm inputs are enabled.
Select the recording speed to be used when an input is activated.
Select the profile and cameras (press camera key) for which motion events are enabled.
Select the recording speed to be used when motion is detected.
Estimate of recording duration based on the available storage space and the setup.
Open this submenu to fill in the settings that control the network.
Set to Yes for automatic assignment of IP address, subnet mask and default gateway.
Enter a Divar name to be used in the network.
Fill in the IP, subnet mask and default gateway addresses when DHCP is set to No.
The MAC address is read-only.
Restrict the network bandwidth by entering an MBPS between 0 and 100.
Select to save settings and close menu.
Select to exit menu without saving any changes.
110 - 240 Vac
3122 165 22551 EN
Werbung
Inhaltsverzeichnis

Inhaltszusammenfassung für Bosch Divar 2
- Seite 5 Mit den Pfeiltasten bewegen Sie sich durch ein Menü oder eine Liste. Mit der Auswahltaste wählen Sie ein Untermenü oder einen Menüpunkt aus. Mit der Escape-Taste gelangen Sie wieder zurück. * je nach Modell 6, 9 oder 16 Bosch Security Systems...
-
Seite 6: Alternativfunktionen
Drücken Sie die Kamerataste der gewählten Kamera um die Videoverlust Blinkt, wenn ein Videoverlust für eine Kamera erkannt wurde. KBA/POS-Anzeige ein- bzw. auszuschalten. Netz Brennt, wenn das Gerät mit Strom versorgt wird. * je nach Modell 6, 9 oder 16 Bosch Security Systems...


