Brunner PARA VERT Montageanleitung

Verwandte Anleitungen für Brunner PARA VERT


Inhaltszusammenfassung für Brunner PARA VERT
- Seite 1 PARA VERT Montageanleitung . Assembly instructions . Instructions de montage Design: Ippolito Fleitz Group...
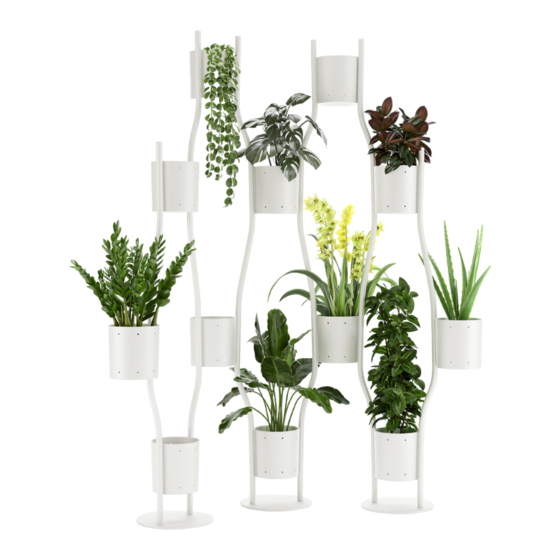
- Seite 3 Wir wünschen Ihnen viel Spaß bei der Gestaltung Ihres persönlichen PARA VERT! Thank you for choosing a quality Brunner product. PARA VERT is a partition that you can use for flexible room division and planting. The room partition system centres around an elegant combination of curved metal poles and planters.
- Seite 4 Impressum Produktdesign . Product design . Design de produit: Ippolito Fleitz Group Abbildungen . Figures . Illustrations: Brunner GmbH Text . Text . Texte: Brunner GmbH Gestaltung . Layout . Conception graphique: Raasch & Partner GmbH...
- Seite 5 Remarques sur le montage Übersicht Konfigurationen Overview of configurations Vue d’ensemble des configurations possibles Lieferumfang PARA VERT Scope of delivery of PARA VERT Livraison de PARA VERT PA1001 | Set S PA1001 | Set S PA1001 | Set S in Höhe 190 cm Height: 190 cm...
- Seite 6 · Pour le montage, seuls les matériaux fournis doivent être utilisés. · Brunner GmbH décline toute garantie pour les dommages survenant pendant le montage. Outils de montage pour PARA VERT : Clé Allen, dimension : 5 et 8 . Maillet en caoutchouc KONFIGURATIONEN . CONFIGURATIONS . CONFIGURATIONS | SET S U-Form .
- Seite 7 KONFIGURATIONEN . CONFIGURATIONS . CONFIGURATIONS | SET M U-Form . U-shape . Forme - U Y-Form . Y-shape . Forme - Y 263 cm 214,5 cm S-Form . S-shape . Forme - S V-Form . V-shape . Forme - V 282 cm 263 cm L-Form .
- Seite 8 KONFIGURATIONEN . CONFIGURATIONS . CONFIGURATIONS | SET L U-Form . U-shape . Forme - U Y-Form . Y-shape . Forme - Y 363 cm 263 cm S-Form . S-shape . Forme - S V-Form . V-shape . Forme - V 358 cm 415 cm L-Form .
- Seite 9 PARA VERT PA1001 | SET S 190 CM Im Lieferumfang enthalten: . Included in scope of delivery: . Compris dans la livraison : 6 x M10x45 40 x M6x20 10 x DE: Schrauben Schrauben Container Abdeckkappe EN: screws screws planters cover caps...
- Seite 10 PARA VERT PA1002 | SET S 190 & 250 CM Im Lieferumfang enthalten: . Included in scope of delivery: . Compris dans la livraison : 6 x M10x45 48 x M6x20 12 x DE: Schrauben Schrauben Container Abdeckkappe EN: screws screws...
- Seite 11 PARA VERT PA1003 | SET S 250 CM Im Lieferumfang enthalten: . Included in scope of delivery: . Compris dans la livraison : 6 x M10x45 56 x M6x20 14 x DE: Schrauben Schrauben Container Abdeckkappe EN: screws screws planters cover caps...
- Seite 12 PARA VERT PA2001 | SET M 190 CM Im Lieferumfang enthalten: . Included in scope of delivery: . Compris dans la livraison : 8 x M10x45 52 x M6x20 13 x DE: Schrauben Schrauben Container Abdeckkappe EN: screws screws planters cover caps...
- Seite 13 PARA VERT PA2002 | SET M 190 & 250 CM Im Lieferumfang enthalten: . Included in scope of delivery: . Compris dans la livraison : 8 x M10x45 64 x M6x20 16 x DE: Schrauben Schrauben Container Abdeckkappe EN: screws screws...
- Seite 14 PARA VERT PA2003 | SET M 250 CM Im Lieferumfang enthalten: . Included in scope of delivery: . Compris dans la livraison : 8 x M10x45 72 x M6x20 18 x DE: Schrauben Schrauben Container Abdeckkappe EN: screws screws planters cover caps...
- Seite 15 PARA VERT PA3001 | SET L 190 CM Im Lieferumfang enthalten: . Included in scope of delivery: . Compris dans la livraison : 12 x M10x45 76 x M6x20 19 x 12 x DE: Schrauben Schrauben Container Abdeckkappe EN: screws screws...
- Seite 16 PARA VERT PA3002 | SET L 190 & 250 CM Im Lieferumfang enthalten: . Included in scope of delivery: . Compris dans la livraison : 12 x M10x45 88 x M6x20 22 x 12 x DE: Schrauben Schrauben Container Abdeckkappe EN: screws...
- Seite 17 PARA VERT PA3003 | SET L 250 CM Im Lieferumfang enthalten: . Included in scope of delivery: . Compris dans la livraison : 12 x M10x45 104 x M6x20 26 x 12 x DE: Schrauben Schrauben Container Abdeckkappe EN: screws screws...
- Seite 18 PARA VERT PA0100 | ERGÄNZUNGSSET . EXTENSION SET . SETS DE COMPLÉMENT 190 CM Im Lieferumfang enthalten: . Included in scope of delivery: . Compris dans la livraison : 2 x M10x45 12 x M6x20 DE: Schrauben Schrauben Container Abdeckkappe EN: screws...
- Seite 19 PARA VERT PA0200 | ERGÄNZUNGSSET . EXTENSION SET . SETS DE COMPLÉMENT 250 CM Im Lieferumfang enthalten: . Included in scope of delivery: . Compris dans la livraison : 2 x M10x45 16 x M6x20 DE: Schrauben Schrauben Container Abdeckkappe EN: screws...
-
Seite 20: Montage . Assembly . Montage
MONTAGE . ASSEMBLY . MONTAGE MONTAGESCHRITT 1 . ASSEMBLY STEP 1 . ÉTAPE DE MONTAGE 1 DE: Schrauben Sie die Stangen mit zwei M10x45 Schrauben an den Fußteller. Ziehen Sie die Schrauben nur leicht an, sodass die Stangen noch drehbar sind. EN: Screw the poles to the disc base using two M10x45 screws. - Seite 21 MONTAGE . ASSEMBLY . MONTAGE Montage . Assembly . Montage 20 . 21...
- Seite 22 MONTAGE . ASSEMBLY . MONTAGE MONTAGESCHRITT 3 . ASSEMBLY STEP 3 . ÉTAPE DE MONTAGE 3 DE: Ziehen Sie die M10x40 Schrauben nun fest. EN: Now tighten the M10x40 screws. FR: Serrez maintenant complètement les vis M10x40. MONTAGESCHRITT 4 . ASSEMBLY STEP 4 . ÉTAPE DE MONTAGE 4 DE: Setzen Sie den Clip in den Spacer ein und clippen Sie den Spacer in das Verbindungsstück.
- Seite 23 MONTAGE . ASSEMBLY . MONTAGE MONTAGESCHRITT 5 . ASSEMBLY STEP 5 . ÉTAPE DE MONTAGE 5 DE: Setzen Sie den Spacer mit dem Verbindungsstück in die Stange ein. EN: Insert the spacer and connector into the pole. FR: Placez l’entretoise avec l’élément de jonction dans la tige. Montage .
- Seite 24 MONTAGE . ASSEMBLY . MONTAGE MONTAGESCHRITT 6 . ASSEMBLY STEP 6 . ÉTAPE DE MONTAGE 6 DE: Stecken Sie die Mittelstange (bei einer Gesamthöhe von 250 cm) bzw. die obere Stange (bei einer Gesamthöhe von 190 cm) auf das Verbindungsstück. EN: Connect the central pole (for a total height of 250 cm) or the upper pole (for a total height of 190 cm) to the connector.
- Seite 25 MONTAGE . ASSEMBLY . MONTAGE MONTAGESCHRITT 7 . ASSEMBLY STEP 7 . ÉTAPE DE MONTAGE 7 DE: Schrauben Sie jeweils einen Container mit zwei M6x20 Schrauben an der Außenseite der Stangen fest. EN: Screw a planter onto the outside of each pole using two M6x20 screws. FR: Vissez respectivement un bac à...
- Seite 26 MONTAGE . ASSEMBLY . MONTAGE DE: Montageschritte 8-10 sind nur bei Stangen mit einer Gesamthöhe von 250 cm erforderlich. EN: You only need to follow assembly steps 8-10 if using poles with a total height of 250 cm. FR: Les étapes de montage 8 à 10 ne sont requises que pour une hauteur totale de 250 cm. MONTAGESCHRITT 8 .
- Seite 27 MONTAGE . ASSEMBLY . MONTAGE MONTAGESCHRITT 10 . ASSEMBLY STEP 10 . ÉTAPE DE MONTAGE 10 DE: Stecken Sie die obere Stange auf das Verbindungsstück. EN: Connect the upper pole to the connector. FR: Enfoncez la tige supérieure dans l’élément de jonction. Montage .
- Seite 28 MONTAGE . ASSEMBLY . MONTAGE MONTAGESCHRITT 11 . ASSEMBLY STEP 11 . ÉTAPE DE MONTAGE 11 DE: Schrauben Sie den Container (bei einer Gesamthöhe von 190 cm zusätzlich einen Spacer ohne Clip) mit jeweils zwei M6x20 Schrauben an der Innenseite der Stangen fest. EN: Screw the planter (with the addition of a spacer without a clip for a total height of 190 cm) to the inside of the poles using two M6x20 screws in each case.
- Seite 29 MONTAGE . ASSEMBLY . MONTAGE DE: Montageschritt 12 ist nur bei Stangen mit einer Gesamthöhe von 250 cm erforderlich. EN: You only need to follow assembly step 12 if using poles with a total height of 250 cm. FR: L’étape de montage 12 n’est requise que pour une hauteur totale de 250 cm. MONTAGESCHRITT 12 .
- Seite 30 MONTAGE . ASSEMBLY . MONTAGE MONTAGESCHRITT 13 . ASSEMBLY STEP 13 . ÉTAPE DE MONTAGE 13 DE: Schlagen Sie die Abdeckkappe mit einem Gummihammer in die Stange. EN: Use a rubber hammer to tap the cover cap into the pole. FR: Enfoncez le capuchon dans la tige à...
- Seite 31 Nachfolgend sind die unterschiedlichen Winkelstellungen beispielhaft an ausgewählten Konfigurationen aufgezeigt. EN: Repeat the previous assembly steps to set up additional PARA VERT elements. Screw the individual elements in the 90°, 135° or 180° angle settings (depending on the desired configuration) via the planters’ hole grids.
- Seite 32 Plant pots You can use plant pots with a diameter of up to 21.5 cm and a height of up to 20.5 cm in the PARA VERT planters. We recommend that you use plant pots with a water reservoir and water level indicator. This type of watering system will cut down the work required to take care of your plants and you will find that you can be more organised.
- Seite 33 Vous trouverez à la suite des indications sur le choix des plantes et des pots. Ces recommandations sont uniquement fournies par Brunner GmbH. Pots pour plantes Les bacs de PARA VERT peuvent accueillir des pots pour plantes jusqu’à un diamètre de 21,5 cm et une hauteur de 20,5 cm.
- Seite 34 PFLANZENKUNDE . PLANTING . VÉGÉTALISATION Empfehlung - Echtpflanzen (Teil 1) . Recommendations – real plants (part 1) . Plantes naturelles conseillées (partie 1) Neutraler Standort . Neutral spot . Emplacement neutre Aeschynanthus „Rasta“ – Sinnblume . Calathea warscewiczii – Korbmarante . Cycas revoluta –...
- Seite 35 PFLANZENKUNDE . PLANTING . VÉGÉTALISATION Philodendron scandens „Brasil“ – Kletterphiloden- Philodendron squamiferum – Baumfreund . Philodendron „Monkey“ – Affenmaske . dron . Sweetheart Plant . Philodendron grimpant Hairy Philodendron . Espèce de philodendron Philodendron Monkey Mask . Masque de singe Rhipsalis heteroclada –...
- Seite 36 Careful and proper cleaning of the surfaces of your PARA VERT is particularly important to keep it in optimum condition for as long as possible. The following cleaning instructions are only intended as a recommendation. Brunner GmbH will not be held liable for damage to the finish caused by improper cleaning.
- Seite 37 PFLEGEHINWEISE . CARE INSTRUCTIONS . CONSEILS D‘ENTRETIEN Il est particulièrement important de nettoyer votre meuble PARA VERT de manière adéquate et en douceur afin de le main- tenir dans un état optimal le plus longtemps possible. Les consignes de nettoyage suivantes ne sont que des recommanda- tions.
- Seite 38 1. Do not fill your PARA VERT with large, intrusive plants if they will end up blocking busy areas and gangways. 2. Do not position your PARA VERT close to escape routes or emergency exits.
- Seite 40 © Brunner GmbH 2020 . Im Salmenkopf 10 . D-77866 Rheinau T. +49 78 44. 40 20 . F. +49 78 44. 40 28 00 . info@brunner-group.com...