EuroLite LED PAR-64 COB Bedienungsanleitung

Verwandte Anleitungen für EuroLite LED PAR-64 COB


Inhaltszusammenfassung für EuroLite LED PAR-64 COB
- Seite 1 PAR-64 RGBW 120W Zoom Bedienungsanleitung User Manual LED PAR-64 COB RGBW 120W Zoom PAR-Scheinwerfer mit 120-Watt-RGBW-LED und manuellem Zoom PAR spot with 120 W RGBW LED and manual zoom STAND MASTER RGBW SLAVE ALONE No. 41603605 www.eurolite.de...
-
Seite 2: Inhaltsverzeichnis
Diese Bedienungsanleitung gilt für die Artikelnummer / This user manual is valid for the article number: 41603605 Das neueste Update dieser Bedienungsanleitung finden Sie im Internet unter: You can find the latest update of this user manual in the Internet under: www.eurolite.de 2/32 00125480, Version 1.1... -
Seite 3: Einführung
BEDIENUNGSANLEITUNG LED PAR-64 COB RGBW 120W Zoom GEFAHR! Elektrischer Schlag durch Kurzschluss Seien Sie besonders vorsichtig beim Umgang mit gefährlicher Netzspannung. Bei dieser Spannung können Sie einen lebensgefährlichen elektrischen Schlag erhalten. Öffnen Sie das Gerät niemals und schützen Sie es vor Feuchtigkeit und Nässe. -
Seite 4: Sicherheitshinweise
SICHERHEITSHINWEISE WARNUNG! Lesen Sie aufmerksam die Sicherheitshinweise und benutzen Sie das Produkt nur wie in dieser Anleitung beschrieben, damit es nicht versehentlich zu Verletzungen oder Schäden kommt. Verwendungszweck • Bei diesem Gerät handelt es sich um einen Scheinwerfer, mit dem sich dekorative Lichteffekte erzeugen lassen. - Seite 5 Warnung vor Verbrennung und Brand • Der zulässige Umgebungstemperaturbereich (Ta) beträgt -5 bis +45 °C. Verwenden Sie das Gerät niemals außerhalb dieses Temperaturbereichs. • Die Gehäusetemperatur (Tc) kann im Betrieb bis zu 100 °C betragen. Vermeiden Sie den Kontakt mit Personen oder Gegenständen.
-
Seite 6: Gerätebeschreibung
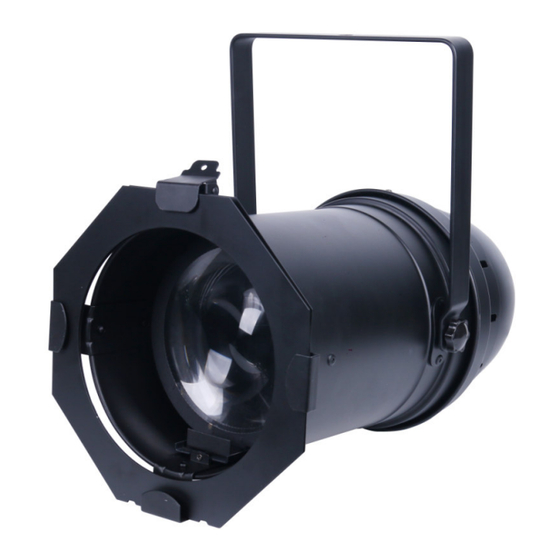
GERÄTEBESCHREIBUNG 260mm 435mm Display Bedientasten Fangseilöse Netzausgang Netzanschluss Sicherungshalter DMX-Eingang DMX-Ausgang ▲ ▼ MENU ENTER SAFETY ROPE T5A/250V DMX IN DMX OUT 100-240V ~ POWER IN POWER OUT 50/60 Hz 6/32 00125480, Version 1.1... -
Seite 7: Installation
INSTALLATION WARNUNG! Verletzungsgefahr durch Herabfallen Über Kopf installierte Geräte können beim Herabstürzen erhebliche Verletzungen verursachen! Stellen Sie sicher, dass das Gerät sicher installiert ist und nicht herunterfallen kann. Die Montage darf nur durch eine Fachkraft erfolgen, die mit den Gefahren und den einschlägigen Vorschriften hierfür vertraut ist. -
Seite 8: Dmx512-Ansteuerung
DMX512-ANSTEUERUNG Gerät 1 Gerät 2 Gerät 3 Startadresse 1 Startadresse 10 Startadresse 19 ▲ ▼ MENU ENTER ▲ ▼ MENU ENTER ▲ ▼ MENU ENTER DMX Controller SAFETY ROPE SAFETY ROPE T5A/250V DMX IN DMX OUT SAFETY ROPE T5A/250V DMX IN DMX OUT T5A/250V DMX IN... -
Seite 9: Bedienung
BEDIENUNG Nach dem Anschluss ans Netz ist das Gerät betriebsbereit. Das Display zeigt die zuletzt eingestellte Betriebsart. Nehmen Sie nun die notwendigen Menüeinstellungen für die jeweilige Betriebsart mit den Bedientasten vor. Auch wenn Sie das Gerät vom Stromnetz trennen, bleiben alle Einstellungen gespeichert. Das Gerät kann entweder im Standalone-Modus über das Bedienfeld oder im DMX-gesteuerten Modus über einen handelsüblichen DMX-Controller betrieben werden. -
Seite 10: Automatikbetrieb
Sh_1 Programm 1 (Farbwechsel) Automatikbetrieb Shnd Sh_2 Programm 2 (Strobe-Effekt) Sh_3 Programm 3 (Farbüberblendung) MASt Master-Einstellung Master/Slave-Modus SLnd SL 1 Slave-Einstellung hold Letzter DMX-Wert wird beibehalten Blac Dunkelschaltung Verhalten bei fehlendem Lost DMX-Signal Auto Automatikbetrieb Soun Musiksteuerung Mikrofonempfindlichkeit SEns S000-S099 Mikrofonempfindlichkeit, niedrig >... -
Seite 11: Musiksteuerung
Musiksteuerung Durch das integrierte Mikrofon lassen sich die integrierten Showprogramme im Rhythmus der Musik (bei deutlichem Bassschlag) optimal mit dem Gerät wiedergeben. Drücken Sie die Taste UP oder DOWN so oft, bis das Display die Betriebsart Lost anzeigt. Bestätigen Sie mit der Taste ENTER. Es werden vier Optionen angezeigt: Hold, Blackout, Auto sowie Sound. -
Seite 12: Master/Slave-Betrieb Mit Mehreren Geräten
Displayabschaltung Das Display lässt sich ein- oder ausschalten. Drücken Sie dazu die Taste UP oder DOWN so oft, bis das Display LEd anzeigt. Bestätigen Sie mit der Taste ENTER. Wählen Sie mit den Tasten UP und DOWN zwischen den Einstellungen On und oFF. In der Grundeinstellung oFF, ist das Display dauerhaft eingeschaltet. -
Seite 13: Dmx-Betrieb
DMX-Betrieb Für den Betrieb über einen Controller mit DMX512-Protokoll verfügt das Gerät über 9 Steuerkanäle. Es kann aber auch in einen Modus mit 2, 4, 5 oder 6 Kanälen umgeschaltet werden, wenn andere Funktionen benötigt werden. Damit das Gerät vom Controller angesteuert werden kann, muss außerdem die DMX- Startadresse für den ersten DMX-Kanal eingestellt werden. - Seite 14 Funktionen im 5-Kanal-Modus Kanal Funktion Wert Details CH 1 Dimmer Rot 000 – 255 Dimmer 0-100 % CH 2 Dimmer Grün 000 – 255 Dimmer 0-100 % CH 3 Dimmer Blau 000 – 255 Dimmer 0-100 % CH 4 Dimmer Weiß 000 –...
-
Seite 15: Reinigung Und Wartung
000 – 015 Ohne Funktion 016 – 095 Programm 1: Farbwechsel CH 8 Automatikprogramm 096 – 175 Programm 2: Farbiger Strobe 176 – 255 Programm 3: Farbüberblendung Ablaufgeschwindigkeit Automatikprogramme, 000 – 250 Geschwindigkeit, langsam > schnell CH 9 Musiksteuerung 251 – 255 Musikgesteuerter Modus REINIGUNG UND WARTUNG Das Gerät sollte äußerlich in regelmäßigen Abständen von Verunreinigungen wie Staub usw. -
Seite 16: Umweltschutz
UMWELTSCHUTZ Informationen zur Entsorgung Bitte übergeben Sie das Gerät bzw. die Geräte am Ende der Nutzungsdauer zur umweltgerechten Entsorgung einem örtlichen Recyclingbetrieb. Geräte, die mit diesem Symbol gekennzeichnet sind, dürfen nicht im Hausmüll entsorgt werden. Für weitere Informationen wenden Sie sich bitte an Ihren Händler oder die zuständige örtliche Behörde. Entnehmen Sie evtl.