Nedo PRIMUS 2 HVA2N Bedienungsanleitung

Verwandte Anleitungen für Nedo PRIMUS 2 HVA2N


Inhaltszusammenfassung für Nedo PRIMUS 2 HVA2N
- Seite 1 Bedienungsanleitung Operating instructions Mode d‘emploi Gebruiksanwijzing Manual de instrucciones...
- Seite 2 Fall der Patent-, Gebrauchsmuster- oder Geschmacksmus- tereintragung vorbehalten. Diese Bedienungsanleitung wurde mit Sorgfalt erstellt. Die NEDO GmbH & Co. KG übernimmt jedoch für even- tuelle Irrtümer in dieser Bedienungsanleitung und deren Folgen keine Haftung. Ebenso wird keine Haftung für di- rekte Schäden oder Folgeschäden übernommen, die sich...
-
Seite 3: Inhaltsverzeichnis
15.2 Pflege ..........................29 15.3 Prüfung der horizontalen Genauigkeit ................30 15.4 Prüfung der vertikalen Genauigkeit ................31 Warn- und Fehlermeldungen 16.1 Warnmeldungen PRIMUS 2 HVA2N ................32 16.2 Fehlermeldungen PRIMUS 2 HVA2N ................32 16.3 Fehlermeldungen COMMANDER HVA2N ..............32... -
Seite 4: Über Diese Bedienungsanleitung
Ebenso werden die Bedienung, die Wartung und Pflege sowie die Warn- und Fehlermeldungen beschrieben. • Setzen Sie den Rotationslaser PRIMUS 2 HVA2N nicht ein, bevor Sie diese Bedienungsanleitung vollständig gelesen und verstanden haben. • Diese Bedienungsanleitung immer beim Rotationslaser PRIMUS 2 HVA2N aufbewahren. -
Seite 5: Sicherheitsinformationen
Hinweise sorgfältig durch und befolgen Sie diese bei der Arbeit mit dem Laser. 2.2 Laserstrahlung Der Rotationslaser Primus 2 HVA2N ist je nach Ausführung ein Gerät der Laserklasse 2 oder der Laserklasse 3R und entspricht der DIN EN 60825-1:2014. LASER STRAHLUNG... -
Seite 6: Sicherheitshinweise
Warnschilder dürfen nicht entfernt werden! Laseraustrittsöffnungen 2.3 Bestimmungsgemäßer Gebrauch Der vollautomatische Rotationslaser PRIMUS 2 HVA2N ist geeignet um Höhen anzureißen, zum Nivellieren, Loten und Fluchten. Der Laser kann für den Außen- und Innenbereich eingesetzt werden. Reparaturen immer von NEDO oder einem autorisierten Kundendienst durch- führen lassen. -
Seite 7: Beschreibung Primus 2 Hva2N
Der Laser PRIMUS 2 HVA2N ist ein vollautomatischer Rotationslaser mit überwachter Zweiachs-Neigung für horizontalen und vertikalen Betrieb. Beim PRIMUS 2 HVA2N wird zusätzlich die Neigung überwacht (Kapitel 8.6)! Das innovative Shock-Protection-System und das robuste, wasser- und staubge- schützte Gehäuse schützen den High-Power-Laser unter nahezu allen Einsatz- bedingungen im Innen- und Außenbereich. -
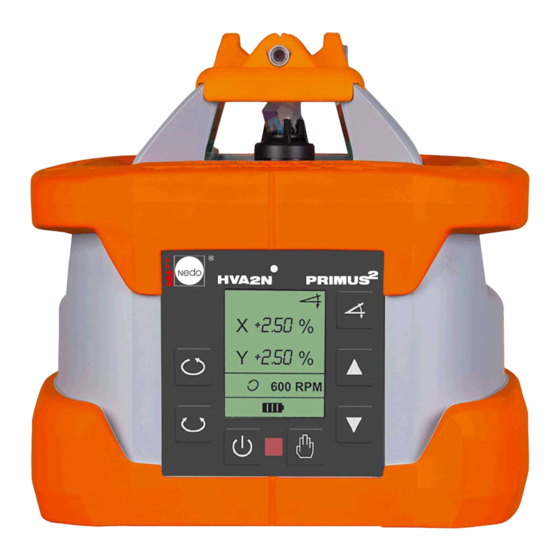
Seite 8: Bedienelemente Primus 2 Hva2N
DE Bedienungsanleitung 4 Bedienelemente PRIMUS 2 HVA2N 4.1 Tasten des Bedienfeldes Die Bedienung des Lasers erfolgt über das Bedienfeld. Warn-LED Achsen HVA2N NEIGEN/ Display DREHEN Funktion nach oben VARIABLE bewegen/ DREHZAHL/ nach rechts ROTATION drehen aktivieren nach unten Funktion bewegen/... -
Seite 9: Erstinbetriebnahme Primus 2 Hva2N
DE Bedienungsanleitung 5 Erstinbetriebnahme PRIMUS 2 HVA2N 5.1 Sicherheitshinweise Stromversorgung WARNUNG! Zerstörung! Explosionsgefahr! Nur Ladegerät des Lieferumfangs verwenden. Batterien nicht in Akku-Pack einlegen und mit Ladegerät laden. VORSICHT! Beschädigung! Leere und volle Batterien nicht mischen. Akkus und Batterien nicht auf Heizungen oder in der Sonne lagern. -
Seite 10: Inbetriebnahme Primus 2 Hva2N
DE Bedienungsanleitung 6 Inbetriebnahme PRIMUS 2 HVA2N 6.1 Laser für Einsatz montieren bzw. aufstellen Der Laser lässt sich je nach Einsatzsituation in horizontaler oder vertikaler Lage montieren bzw. aufstellen. Horizontal auf Stativ Horizontal aufgestellt Laser auf Arbeitshöhe einrichten Laserprojektion HORIZONTAL... -
Seite 11: Primus 2 Hva2N Einschalten
DE Bedienungsanleitung 7 PRIMUS 2 HVA2N einschalten Die Betriebsart AUTOMATIK, Modus ROTATION, ist nach jedem Einschalten die Standardeinstellung. HINWEIS Trotz sorgfältigem Aufbau können durch äußere Einflüsse und starke Erschütterungen in der Betriebsart AUTOMATIK im Display des Lasers Warn- und Fehlermeldungen erscheinen. -
Seite 12: Betriebsart Manuell
Betriebsart AUTOMATIK (Kapitel 7.1) wechseln. Mit der Taste die Betriebsart beenden, Laser ausschalten. 8 Funktionen des PRIMUS 2 HVA2N 8.1 VARIABLE DREHZAHL einstellen Die Standard-Drehzahl beträgt 600 rpm und ist für den Einsatz des Laseremp- fängers COMMANDER 2 HVA2N ausgelegt. -
Seite 13: Scanning Einstellen
DE Bedienungsanleitung 8.2 SCANNING einstellen Die beste Sichtbarkeit der Laserlinie wird erzielt, wenn sich der Laserstrahl zwischen zwei Punkten bewegt. Die Länge der Laserlinie kann durch Verän- derung des Winkel zwischen den beiden Punkten angepasst werden. Einstell- bare Winkel: 0°, 5°, 10°, 15°. HVA2N Modus SCANNING Displayanzeige:... -
Seite 14: X-Achse/Y-Achse Neigen
DE Bedienungsanleitung 8.3 X-Achse/Y-Achse NEIGEN Bei der Funktion Achsen NEIGEN können die Achsen unabhängig vonein- ander in einem Bereich von ±10 % geneigt werden. Beim Primus 2 HVA2N wird zusätzlich die Neigungseinstellung überwacht! X-Achse Die nebenstehende Abbildung zeigt die Neigung bei der Einstellung eines positiven Prozentwertes. - Seite 15 Nach 30 Sekunden ist die Funktion TILT-Alarm eingeschaltet. Der Laser erkennt eine HINWEIS grobe Erschütterung und löst die Warnmeldung aus. Beim Primus 2 HVA2N wer- den kleine Erschütterungen von der Automatik erkannt und nachgeregelt, so dass die eingestellte Neigung auch über einen längeren Zeitraum exakt beibehalten wird.!
-
Seite 16: Komfort-Funktionen Der Tasten
DE Bedienungsanleitung 8.4 Komfort-Funktionen der Tasten Feineinstellung (0,01 %-Schritte) Schneller Vor- und Rücklauf HVA2N HVA2N HVA2N HVA2N Taste Taste Schneller Schneller mehrmals mehrmals Vorlauf: Taste Rücklauf: Taste drücken drücken gedrückt halten gedrückt (+0,01 % (–0,01 % halten Schritt) Schritt) Grobeinstellung (1,00 %-Schritte) Eingabe positiver Werte HVA2N HVA2N... -
Seite 17: Achsen Neigen/Drehen In Der Betriebsart Manuell
Taste 2 mal angezeigt drücken HINWEIS PRIMUS 2 HVA2N muss in der Betriebsart MANUELL laufen. 8.6 Neigungsüberwachung Der Primus 2 HVA2N verfügt über eine Neigungsüberwachung d.h. die tatsächliche Neigung der Laserebene wird ständig mit dem Vorgabewert (Kapitel 8.3) verglichen. Bei Bedarf wird die Neigung nachgeregelt, so daß... -
Seite 18: Vertikale Ausrichthilfe
Drücken schrittweise oder bei längerem Betätigen der Tasten kontinuierlich in der gezeigten Drehrichtung bewegt werden. ____________________________________________________________________________________________________________________________________________________________________ Wurde der Primus 2 HVA2N mir der Funktion „Vertikale Ausrichthilfe“ gestartet kann danach in jede beliebige Funtkion gewechselt werden. ____________________________________________________________________________________________________________________________________________________________________ Die „Vertikale Ausrichthilfe“ ist ab Seriennummer P2-07500 im Primus 2 HVA2N serienmäßig... -
Seite 19: Autoalign
9.1 Funktion AUTOALIGN Bei der Funktion AUTOALIGN steuert der COMMANDER 2 HVA2N die Laserebene des PRIMUS 2 HVA2N so, dass der Laserstrahl automatisch auf die Nullmarke des COMMANDER 2 HVA2N ausgerichtet wird. Bei AUTOALIGN single rastet der Laserstrahl fix an der Nullmarke des COMMANDER 2 HVA2N ein, d.h. -
Seite 20: Autoalign Single
Am COMMANDER 2 HVA2N die -Taste Den COMMANDER 2 HVA2N auf den kurz drücken. PRIMUS 2 HVA2N ausrichten; horizontal: Y, vertikal: X. LEDs und das Symbol AUTOALIGN blinken Der Suchvorgang wird beendet, wenn der Laser- während des Suchvorgangs. Im Display des strahl die Nullmarke des Empfängers getroffen... -
Seite 21: Neigungen Mit Autoalign Single Messen Und Speichern
DE Bedienungsanleitung 9.3 Neigungen mit AUTOALIGN single messen und speichern PRIMUS 2 HVA2N horizontal aufstellen und Nach Abschluß von AUTOALIGN single wird die AUTOALIGN single wie oben beschrieben Neigung der Y-Achse im Display angezeigt starten (hier: 5,80%) HVA2N HVA2N Die Neigungsfunktion wie gewohnt aufrufen:... -
Seite 22: Autoalign Permanent
VORSICHT Wenn bei aktivem AUTOALIGN der COMMANDER 2 HVA2N ausgeschaltet wird, stoppt der PRIMUS 2 HVA2N die Rotation. Im Display erscheint die Warnung C04 und die rote LED blinkt. Zum Löschen der Warnung entweder PRIMUS 2 HVA2N aus- und wieder einschalten oder AUTOALIGN durch zweimaliges Drücken der -Taste am COMMANDER 2 HVA2N beenden. -
Seite 23: Autoalign Single Und Permanent Beenden
Taste kurz drücken Im Display erscheint „End AA“ Zur Bestätigung Taste nochmals kurz drücken. Danach befindet sich PRIMUS 2 HVA2N in der Betriebsart AUTOMATIK, Modus ROTATION. HINWEIS Bei aktiver AUTOALIGN Funktion gelten folgende Einschränkungen: PRIMUS 2 rotiert mit einer fest eingestellten Drehzahl von 600 U/min. -
Seite 24: Beschreibung Commander 2 Hva2N
Der COMMANDER 2 HVA2N ist ein robustes Kombigerät aus Laserempfän- ger und Fernbedienung für den professionellen Einsatz im Innen- und Außen- bereich. Die Funkfernbedienung des COMMANDER 2 HVA2N erlaubt das Steuern des PRIMUS 2 HVA2N in einem Radius von maximal 150 Metern. 10.2 Technische Daten Laserempfänger / Fernbedienung COMMANDER 2 HVA2N Bestell-Nr.:... -
Seite 25: Geräteaufbau Commander 2 Hva2N
DE Bedienungsanleitung 11 Geräteaufbau COMMANDER 2 HVA2N 11.1 Vorderseite Tastatur LCD-Anzeige für Fernbedienung LCD-Anzeige für Laserempfänger Libelle zum Ausrichten bei Markierarbeiten LED-Laserhöhenanzeige Sollniveau-Mittenmarkierung (50 mm von Gehäuseoberkante) Laser-Empfangsfeld (70mm) 11.2 Rückseite Batteriefach Halteklammer-Fixierung Gewinde M6 Kegelförmige Klammerführung Tonsignal - Ausgang LCD-Anzeige für Fernbedienung LCD-Anzeige für Laserempfänger LED-Laserhöhenanzeige... -
Seite 26: Fernbedienung Commander 2 Hva2N
Winkelanzeige Modus SCANNING Modus AUTOALIGN Funktion VARIABLE DREHZAHL / Die Bedienelemente auf der ROTATION aktivieren Fernbedienung haben die gleiche Funktion wie die des Funktion AUTOALIGN PRIMUS 2 HVA2N und sind in den Kapiteln 7 und 8 ausführlich Funktion SCANNING beschrieben. -
Seite 27: Zusatzfunktionen Der Fernbedienung
DE Bedienungsanleitung 12.2 Zusatzfunktionen der Fernbedienung Bedienschritt Anzeige Hinweise PRIMUS 2 HVA2N über Um die Betriebsart die Fernbedienung in die MANUELL wieder Betriebsart MANUELL zu verlassen und schalten. in die Betriebsart AUTOMATIK zu 1. Laserempfänger wechseln, Tasten einschalten. nochmals gleichzeitig drücken. -
Seite 28: Laserempfänger Commander 2 Hva2N
DE Bedienungsanleitung 13 Laserempfänger COMMANDER 2 HVA2N 13.1 Anzeige- und Bedienelemente des Laserempfängers LCD-Anzeige BATTERIE Anzeige leuchtet auf: begrenzte Restlaufzeit (Batterie ca. 5h / Akku ca. 0,5h). Anzeige blinkt: Abschaltung steht kurz bevor, Akkus/ Batterien ersetzen! LCD-Anzeige TIEFER Leuchtet auf, wenn sich die Laserlinie innerhalb des Sensorfensters, aber unterhalb der Nulllinie befin- det. -
Seite 29: Akkus/Batterien Tauschen Beim Commander 2 Hva2N
15.1 Wartung Der PRIMUS 2 HVA2N und der COMMANDER 2 HVA2N sind wartungsfreie Geräte. Ist der PRIMUS 2 HVA2N oder der COMMANDER 2 HVA2N durch interne Fehler (Fehlermeldungen Err9-Err11) oder Beschädigung nicht mehr funktionsfähig, die Geräte zur Reparatur einschicken an: NEDO GmbH &... -
Seite 30: Prüfung Der Horizontalen Genauigkeit
H 3 mm ist! HINWEIS Die Prüfschritte 1 und 2 müssen nun für die Y-Achse wie beschrieben durchgeführt werden. Liegt der Wert von H außerhalb der Toleranz, muss der Primus 2 von einem autorisierten Kundendienst oder von Nedo justiert werden. -
Seite 31: Prüfung Der Vertikalen Genauigkeit
Markierung A liegen. • Der Laser ist innerhalb der Tole- ranz, wenn H 5 mm ist! HINWEIS Liegt der Wert von H außerhalb der Toleranz, muss der Primus 2 von einem autorisier- ten Kundendienst oder von Nedo justiert werden. -
Seite 32: Warn- Und Fehlermeldungen
TILT-Alarm - Der Laser wurde nach Ablauf von 30 Sekunden erschüttert Zeitüberschreitung bei der automatischen Horizontierung. Unerlaubter Wechsel von Horizontal-Lage Vertikal-Lage. Fehler bei der Ausführung von AUTOALIGN (Anzeige PRIMUS 2 HVA2N) Fehler bei der Ausführung von AUTOALIGN ERR AA (Anzeige COMMANDER 2 HVA2N)