Inhaltsverzeichnis
Werbung
Verfügbare Sprachen
Verfügbare Sprachen
Quicklinks
LED
SLS-7
HCL Floor
Bedienungsanleitung
User Manual
LED SLS-7 HCL Floor
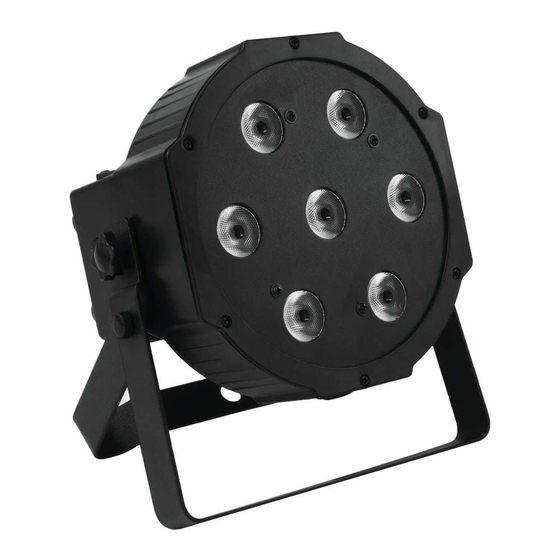
Flacher LED-Scheinwerfer mit RGBAW+UV-Farbmischung, inkl. IR-Fernbedienung
LED spotlight with RGBAW+UV color mixing, incl. IR remote control
STAND
DMX
ALONE
No. 51915379
No. 51915391
www.eurolite.de
MASTER
REMOTE
SLAVE
CONTROL
RGBAW+UV
STROBE
Werbung
Inhaltsverzeichnis

Verwandte Anleitungen für EuroLite LED SLS-7 HCL Floor

Inhaltszusammenfassung für EuroLite LED SLS-7 HCL Floor
- Seite 1 SLS-7 HCL Floor Bedienungsanleitung User Manual LED SLS-7 HCL Floor Flacher LED-Scheinwerfer mit RGBAW+UV-Farbmischung, inkl. IR-Fernbedienung LED spotlight with RGBAW+UV color mixing, incl. IR remote control STAND MASTER REMOTE RGBAW+UV STROBE SLAVE ALONE CONTROL No. 51915379 No. 51915391 www.eurolite.de...
-
Seite 3: Inhaltsverzeichnis
Diese Bedienungsanleitung gilt für die Artikelnummern / This user manual is valid for the article numbers: 51915379, 51915391 Das neueste Update dieser Bedienungsanleitung finden Sie im Internet unter: You can find the latest update of this user manual in the Internet under: www.eurolite.de 3/36 00125914, Version 1.2... -
Seite 4: Einführung
• Stufenlose RGBAW/UV-Farbmischung, Farbwechsel, Farbüberblendung, Dimmer und Strobe-Effekt • Adressierung und Einstellungen über Steuereinheit mit 4-stelliger LED-Anzeige • Bequeme Fernsteuerung per mitgelieferter IR-Fernbedienung EUROLITE IR-7 • Musiksteuerung über eingebautes Mikrofon mit einstellbarer Mikrofonempfindlichkeit • 2, 3, 4, 6 oder 10 DMX-Kanäle wählbar •... -
Seite 5: Sicherheitshinweise
SICHERHEITSHINWEISE WARNUNG! Lesen Sie aufmerksam die Sicherheitshinweise und benutzen Sie das Produkt nur wie in dieser Anleitung beschrieben, damit es nicht versehentlich zu Verletzungen oder Schäden kommt. Verwendungszweck • Bei diesem Gerät handelt es sich um einen Scheinwerfer, mit dem sich dekorative Lichteffekte erzeugen lassen. - Seite 6 Warnung vor Verbrennung und Brand • Der zulässige Umgebungstemperaturbereich (Ta) beträgt -5 bis +45 °C. Verwenden Sie das Gerät niemals außerhalb dieses Temperaturbereichs. • Die Gehäusetemperatur (Tc) kann im Betrieb bis zu 55 °C betragen. Vermeiden Sie den Kontakt mit Personen oder Gegenständen.
-
Seite 7: Gerätebeschreibung
GERÄTEBESCHREIBUNG Vorderseite (1) Feststellschrauben (2) Infrarotsensor für die Fernbedienung (3) Linsen mit RGBAW/UV-LEDs Rückseite (4) Netzanschluss mit Sicherungshalter (5) Mikrofon (6) Display und Bedientasten (7) DMX-Eingang (8) Netzausgang (9) Gummifüße MODE DOWN ENTER (10) Montagebügel (11) DMX-Ausgang 7/36 00125914, Version 1.2... -
Seite 8: Installation
Verformung und Lockerung zu vermeiden. DMX512-ANSTEUERUNG Gerät 3 Gerät 2 Gerät 1 Startadresse 6 Startadresse 3 Startadresse 1 DMX-Controller LED SLS-7 HCL Floor No. 51915379, 4026397612912 0-240V 50/60Hz ~ 20 W T0.5 /250V LED SLS-7 HCL Floor LED SLS-7 HCL Floor No. 51915379, 4026397612912 No. -
Seite 9: Netzanschluss
NETZANSCHLUSS LED SLS-7 HCL Floor No. 51915379, 4026397612912 LED SLS-7 HCL Floor 0-240V 50/60Hz ~ 20 W T0.5 /250V LED SLS-7 HCL Floor No. 51915379, 4026397612912 No. 51915379, 4026397612912 0-240V 50/60Hz ~ 20 W T0.5 /250V 0.1m 0-240V 50/60Hz ~ 20 W T0.5 /250V... - Seite 10 Anzeige Funktion Modus d001-512 2-Kanal-Modus und Startadresse d001-512 3-Kanal-Modus und Startadresse d001-512 4-Kanal-Modus und Startadresse DMX-Betrieb Addr d001-512 6-Kanal-Modus und Startadresse d001-512 10-Kanal-Modus und Startadresse 10CH S 01 S 02 Grün S 03 Blau S 04 Weiß S 05 Amber S 06 S 07 Gelb...
-
Seite 11: Standalone-Betrieb
Standalone-Betrieb Automatikbetrieb Im Automatikbetrieb stehen verschiedene 2 Showprogramme zur Verfügung. Drücken Sie die Taste MENU so oft, bis das Display die Betriebsart Auto anzeigt. Bestätigen Sie mit der Taste ENTER. Wählen Sie mit den Tasten UP und DOWN das gewünschte Showprogramm (Au-1 oder Au-2). Bestätigen Sie wieder mit der Taste ENTER. -
Seite 12: Dmx-Betrieb
DMX-Betrieb Anzahl der DMX-Kanäle und DMX-Startadresse einstellen Für den Betrieb über einen Controller mit DMX512-Protokoll verfügt das Gerät über 10 Steuerkanäle. Es kann aber auch in einen Modus mit 2, 3, 4 oder 6 Kanälen umgeschaltet werden, wenn andere Funktionen benötigt werden. - Seite 13 3-Kanal-Modus Kanal Wert Funktion 000 - 255 000 - 255 Grün 000 - 255 Blau 4-Kanal-Modus Kanal Wert Funktion 000 - 255 Helligkeit 0 – 100 % Master-Dimmer 000 - 009 Keine Funktion Strobe 010 - 255 Strobe mit zunehmender Geschwindigkeit 000 - 009 Keine Funktion 010 - 019...
- Seite 14 6-Kanal-Modus Kanal Wert Funktion 000 - 255 000 - 255 Grün 000 - 255 Blau 000 – 255 Weiß 000 – 255 Amber 000 - 255 10-Kanal-Modus Kanal Wert Funktion 000 - 255 Helligkeit 0 – 100 % Master-Dimmer 000 - 009 Keine Funktion Strobe 010 - 255...
-
Seite 15: Fernbedienung Ir-7
000 - 009 Keine Funktion 010 - 069 Farbüberblendung mit zunehmender Geschwindigkeit 070 - 129 Farbwechsel mit zunehmender Geschwindigkeit Interne Programme Musikgesteuerte Farbüberblendung mit zunehmender (wenn Kanal 9: 000-009) 130 - 189 Geschwindigkeit Musikgesteuerter Farbwechsel mit zunehmender 190 - 255 Geschwindigkeit Fernbedienung IR-7... -
Seite 16: Reinigung Und Wartung
REINIGUNG UND WARTUNG Das Gerät sollte äußerlich in regelmäßigen Abständen von Verunreinigungen wie Staub usw. gereinigt werden. Insbesondere die Linsen sollten sauber sein, damit das Licht mit maximaler Helligkeit abgestrahlt werden kann. Trennen Sie das Gerät vom Netz und lassen Sie es abkühlen, bevor Sie mit der Reinigung beginnen. Reinigen Sie die Oberflächen mit einem fusselfreien, angefeuchteten Tuch. -
Seite 17: Technische Daten
TECHNISCHE DATEN Spannungsversorgung: 100-240 V AC, 50/60 Hz Gesamtanschlusswert: 20 W Stromanschluss: Stromeinspeisung Kaltgeräte (M) Einbauversion Stromanschlusskabel mit Schutzkontakt (mitgeliefert) Stromausgang: 1 x Kaltgeräte (W) Einbauversion Sicherung: T 0,5 A LED: 7 x high-power 10 W 6in1 HCL RGBWA/UV (homogene Farbmischung) Schutzart: IP20 DMX-Kanäle:... -
Seite 18: Zubehör
Zubehör EUROLITE TPC-10 Klammer, silber Best.-Nr. 59006856 EUROLITE TPC-10 Klammer, schwarz Best.-Nr. 59006858 EUROLITE Sicherungsseil A 3x600mm bis 5kg, silber Best.-Nr. 58010310 EUROLITE Sicherungsseil A 3x600mm bis 5kg, schwarz Best.-Nr. 58010341 EUROLITE DMX Kabel XLR 3pol 3m sw Best.-Nr. 3022785H PSSO DMX Kabel XLR 3pol 3m sw Neutrik Best.-Nr. -
Seite 19: Introduction
• Stepless RGBAW/UV color blend, color change, color fade, dimmer and strobe effect • Addressing and setting via control panel with 4-digit LED display • Convenient wireless control via included IR remote control EUROLITE IR-7 • Sound-control via built-in microphone with adjustable microphone sensitivity •... -
Seite 20: Safety Instructions
SAFETY INSTRUCTIONS WARNING! Please read the safety warnings carefully and only use the product as described in this manual to avoid accidental injury or damage. Intended use • This device is a spotlight for creating decorative lighting effects. This device is designed for professional use in the field of event technology, e.g. - Seite 21 Warning – risk of burns and fire • The admissible ambient temperature range (Ta) is -5 to +45°C. Do not operate the device outside of this temperature range. • The housing temperature (Tc) can be up to 55°C during use. Avoid contact by persons and materials. •...
-
Seite 22: Description Of The Device
DESCRIPTION OF THE DEVICE Front (1) Fixation screws (2) Infrared sensor for the remote control (3) Lenses with RGBAW/UV LEDs Rear (4) Power input with fuseholder (5) Microphone (6) LED display with programming buttons (7) DMX input (8) Power output (9) Rubber feet MODE DOWN... -
Seite 23: Installation
DMX512 CONNECTION Device 1 Device 2 Device 3 Start Address 3 Start Address 1 Start Address 6 DMX Controller LED SLS-7 HCL Floor No. 51915379, 4026397612912 LED SLS-7 HCL Floor 0-240V 50/60Hz ~ 20 W T0.5 /250V LED SLS-7 HCL Floor No. -
Seite 24: Mains Connection
MAINS CONNECTION LED SLS-7 HCL Floor No. 51915379, 4026397612912 LED SLS-7 HCL Floor 0-240V 50/60Hz ~ 20 W T0.5 /250V LED SLS-7 HCL Floor No. 51915379, 4026397612912 No. 51915379, 4026397612912 0-240V 50/60Hz ~ 20 W T0.5 /250V 0.1m 0-240V 50/60Hz ~ 20 W T0.5 /250V... - Seite 25 Display Function Mode d001-512 2-channel mode & start address 3-channel mode & start address d001-512 4-channel mode & start address DMX operation Addr d001-512 6-channel mode & start address d001-512 10-channel mode & start address 10CH d001-512 S 01 S 02 Green S 03 Blue...
-
Seite 26: Stand-Alone Mode
Stand-alone mode Automatic mode In automatic mode you can choose from 2 preset show programs. Press the button MODE so many times until the display indicates the menu item Auto. Confirm with the ENTER button. Use the buttons UP and DOWN to select the desired show program (Au-1 or Au-2). Confirm again with the ENTER button. -
Seite 27: Dmx Operation
DMX operation Setting the number of DMX channels and the DMX starting address For operation with a controller with DMX512 protocol, the device is equipped with 10 control channels. However, it can also be switched to a mode with 2, 3, 4 or 6 channels if different functions are required. To be able to operate the device with a DMX controller, the DMX starting address must be set for the first DMX channel. - Seite 28 3-channel mode Channel Value Function 000 - 255 000 - 255 Green 000 - 255 Blue 4-channel mode Channel Value Function 000 - 255 Brightness 0 – 100 % Master dimmer 000 - 009 No function Strobe 010 - 255 Strobe with increasing speed 000 - 009 No function...
- Seite 29 6-channel mode Channel Value Function 000 - 255 000 - 255 Green 000 - 255 Blue 000 – 255 White 000 – 255 Amber 000 - 255 10-channel mode Channel Value Function 000 - 255 Brightness 0 – 100 % Master dimmer 000 - 009 No function...
-
Seite 30: Remote Control Ir-7
Remote control IR-7 The device must be activated for remote control. For this, set menu item InFr to on. When actuating a button, always direct the remote control towards the sensor. There must be no obstacles between remote control and the sensor. Button Function BLACKOUT... -
Seite 31: Cleaning And Maintenance
CLEANING AND MAINTENANCE The outside of the device should be cleaned periodically to remove contaminants such as dust etc. The lenses, in particular, should be clean to ensure that light will be emitted at maximum brightness. Disconnect the device from power and allow it to cool before cleaning. Clean the surface with a soft lint-free and moistened cloth. -
Seite 32: Technical Specifications
TECHNICAL SPECIFICATIONS Power supply: 100-240 V AC, 50/60 Hz Power consumption: 20 W Power connection: Mains input IEC connector (M) mounting version Power supply cord with safety plug (provided) Power output: 1 x IEC connector (F) mounting version Fuse: T 0.5 A LED: 7 x high-power 10 W 6in1 HCL RGBWA/UV (homogenous color mix) IP classification:... -
Seite 33: Accessories
EUROLITE TPC-10 Coupler, silver No. 59006856 EUROLITE TPC-10 Coupler, black No. 59006858 EUROLITE Safety Bond A 3x600mm up to 5kg, silver No. 58010310 EUROLITE Safety Bond A 3x600mm up to 5kg, black No. 58010341 EUROLITE DMX cable XLR 3pin 3m bk No. - Seite 36 Eurolite is a brand of Steinigke Showtechnic GmbH Andreas-Bauer-Str. 5 97297 Waldbüttelbrunn Germany D00125914 Version 1.2 Publ. 26/09/2019...