Herunterladen Diese Seite drucken

Werbung

Verfügbare Sprachen
  • DE

Verfügbare Sprachen

  • DEUTSCH, seite 19
R S
1
S c a n n e r

Werbung

loading

Inhaltszusammenfassung für Symbol RS 1

  • Seite 1 S c a n n e r...
  • Seite 2 Symbol reserves the right to make changes to any product to improve reliability, function, or design. Symbol does not assume any product liability arising out of, or in connection with, the application or use of any product, circuit, or application described herein.
  • Seite 3 Q u i c k R e f e r e n c e Introduction The RS 1 ring scanner is a modular, wearable laser scanner that allows the operator hands-free, unencumbered bar code scanning capability. The scanner can be used with the WSS 1000 wearable scanning system or other host terminals.
  • Seite 4 S c a n n e r Parts of the Ring Scanner Front View Mount Release button Scan Window Trigger Back View Scan LED Ring Mount Interface Port Ring Mount Straps...
  • Seite 5: Scanner Setup

    Q u i c k R e f e r e n c e Scanner Setup Adjust Mount Strap Adjust the strap on the ring mount to fit your right or left index and middle fingers. 1. Slip the mount onto your right or left index and middle fingers, oriented so the trigger is next to your thumb.
  • Seite 6 S c a n n e r Insert in Mount Insert the ring scanner in the ring mount, depending on right- or left-handed use. 1. Determine whether the scanner will be used on the right or left hand. 2. If necessary, remove the ring scanner by pressing the mount release latch and gently pushing the ring scanner out of the mount.
  • Seite 7 Q u i c k R e f e r e n c e Wearing the RS 1 Scanner 1. Slide the ring mount on your right or left index and middle fingers, with the trigger next to your thumb.
  • Seite 8 S c a n n e r Using the Scanner 1. Power the scanner on by pressing the trigger. 2. Aim the scanner at the bar code and press the trig- ger. The LED turns red to indicate the scanner is 3.
  • Seite 9 Q u i c k R e f e r e n c e Decode Zone The Decode Zone chart below illustrates the working range of the scanner, i.e., the range of distance from a bar code in which a bar code can be successfully decoded. This range varies with bar code density, which is determined by the width of the narrowest element (bar or space).
  • Seite 10 S c a n n e r Scanning Tips • For larger symbols, hold the symbol farther away from the scanner. • For symbols with bars that are closer together, hold the scanner closer to the symbol. • The optimal scanning distance varies with bar code density, but 4 to 10 inches (10 to 25 cm) gen- erally works.
  • Seite 11 G u i d e u t i l i s a t e u r Introduction Le lecteur en forme de bague RS 1 est un lecteur laser modulaire prêt-à-porter permettant à l’opérateur un maniement mains libres en toute liberté. Il peut être associé...
  • Seite 12 S c a n n e r Composants du lecteur en forme de bague Vue avant Bouton de déverrouillage du support Fenêtre de lecture Gâchette Vue arrière Témoin de lecture/décodage Support de bague Port d’interface Sangles du support de bague...
  • Seite 13: Réglage Du Lecteur

    G u i d e u t i l i s a t e u r Réglage du lecteur Réglage de la sangle du support Réglez la sangle du support de bague de manière à ce qu’elle s’adapte à votre doigt (index, majeur, droite, gauche).
  • Seite 14 S c a n n e r Insertion dans le support Insérez le lecteur en forme de bague dans son support selon la main utilisée. 1. Choisissez la main avec laquelle le lecteur va être utilisé. 2. Si nécessaire, retirez le lecteur en appuyant sur le loquet de déverrouillage et en poussant délicate- ment le lecteur.
  • Seite 15 G u i d e u t i l i s a t e u r Port du lecteur RS 1 1. Passez le support de bague à votre doigt et en plaçant la gâchette près du pouce. 2. Branchez le câble du WWC 1000 (ou d’un autre terminal central) au connecteur d’interface situé...
  • Seite 16: Utilisation Du Lecteur

    S c a n n e r Utilisation du lecteur 1. Mettez le lecteur en marche en appuyant sur la gâchette. 2. Pointez le lecteur vers le code à barres et appuyez sur la gâchette. Le témoin vire au rouge pour in- diquer la mise sous tension du lecteur.
  • Seite 17 G u i d e u t i l i s a t e u r Périmètre de décodage Le graphique ci-dessous représente la plage de travail du lecteur, c’est-à-dire la plage de distances dans lesquelles le code à barres peut être correctement décodé. Cette plage dépend de la densité...
  • Seite 18 S c a n n e r Conseils pour la lecture • Pour les codes grand format, éloignez le lecteur. • Pour les codes composés de barres peu espacées, rapprochez le lecteur. • La distance optimale de lecture varie selon la den- sité...
  • Seite 19 K u r z ü b e r s i c h t Einführung Beim RS 1 Ring-Scanner handelt es sich um einen modularen, tragbaren Ring-Scanner, der dem Bedienungspersonal ein freihändiges, leichtes Scannen von Strichcodes ermöglicht. Der Scanner kann in Verbindung mit dem tragbaren Scansystem WSS 1000 oder anderen Host-Terminals benutzt werden.
  • Seite 20: Teile Des Ring-Scanners

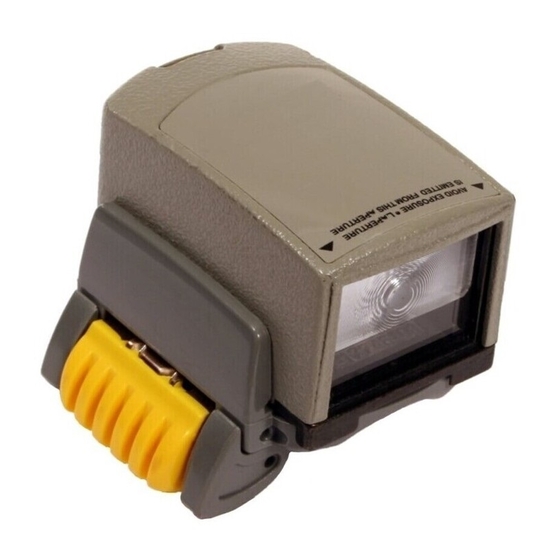
    S c a n n e r Teile des Ring-Scanners Vorderasicht Montage- entriegelungs-taste Laser-Austritts- Fenster Auslöser Rückansicht Scan-LED Ring-Montagevorrichtung Schnittstellen-Port Ring-Montagevorrichtung Riemen...
  • Seite 21 K u r z ü b e r s i c h t Scanner-Einstellung Einstellen des Montageriemens Stellen Sie den Riemen der Ringmontagevorrichtung auf die Stärke Ihres linken oder rechten Zeige- und Mittel- fingers ein. 1. Schieben Sie die Montagevorrichtung über Ihren rechten oder linken Zeige- und Mittelfinger, so daß...
  • Seite 22 S c a n n e r In Montagevorrichtung einführen Setzen Sie den Ring-Scanner in die Ringmontage- vorrichtung ein, und achten Sie auf die unterschiedliche Positionierung für Links- und Rechtshänder. 1. Stellen Sie fest, ob der Scanner mit der rechten oder linken Hand benutzt werden soll.
  • Seite 23 K u r z ü b e r s i c h t Tragen des RS 1 Scanners 1. Schieben Sie die Montagevorrichtung über Ihren rechten oder linken Zeige- und Mittelfinger, so daß der Auslöser neben Ihrem Daumen plaziert ist.
  • Seite 24: Benutzung Des Scanners

    S c a n n e r Benutzung des Scanners 1. Schalten Sie den Scanner ein, indem Sie den Aus- löser betätigen. 2. Zielen Sie mit dem Scanner auf den Strichcode, und drücken Sie den Auslöser. Die LED-Anzeige leuchtet rot auf und zeigt an, daß der Scanner eingeschaltet ist.
  • Seite 25 K u r z ü b e r s i c h t Decodierzone Die nachfolgende Übersicht über die Decodierzone zeigt den Arbeitsbereich des Scanners, d.h. den Bereich, in dem ein Strichcode erfolgreich decodiert werden kann. Diese Zone hängt von der Strichcodedichte, die durch die Breite des Elementes (Strich oder Leerraum) mit dem geringsten Abstand festgelegt wird.
  • Seite 26 Halten Sie den Scanner bei Symbolen mit größerer Auflösung in einem etwas größeren Abstand. • Bei Symbolen mit kleinerer Auflösung sollten Sie den Scanner näher an das Symbol heranführen. • Der optimale Scanabstand hängt zwar von der Strichcodedichte ab, in der Regel eignet sich jedoch ein Abstand zwischen 10 bis 25 cm.
  • Seite 27 K u r z ü b e r s i c h t Reinigung Reinigen Sie das Ausgangsfenster in bestimmten Abständen mit einem Linsenpflegetuch oder mit einem anderen geeigneten Tuch. Vorsicht: Gießen, spritzen oder verschütten Sie keine Flüs- sigkeit auf den Scanner.
  • Seite 28 S c a n n e r...
  • Seite 29 G u i d a r a p i d a Introduzione Il lettore ad anello RS 1 è uno scanner laser portatile che permette all’operatore di rilevare i codici a barre a “mani libere”, cioè, senza che si renda necessario impiegare una mano per impugnarlo.
  • Seite 30 S c a n n e r Componenti del lettore ad anello Vista frontale Pulsante di rilascio del Finestra di uscita del supporto raggio laser Leva di attivazione Vista posteriore LED di lettura Porta di uscita del cavo Supporto ad anello Cinghietta del supporto ad anello...
  • Seite 31 G u i d a r a p i d a Configurazione dello scanner Regolazione della cinghietta del supporto Regolare la cinghietta del supporto ad anello in modo da adattarla alle dita indice e medio della mano che si desidera utilizzare. 1.
  • Seite 32 S c a n n e r Inserimento nel supporto Inserire il lettore nel relativo supporto facendo attenzione a montarlo correttamente per la mano che si desidera utilizzare. 1. Stabilire se il lettore verrà indossato sulla mano de- stra o sinistra. 2.
  • Seite 33 G u i d a r a p i d a Come indossare lo scanner RS 1 1. Infilare la cinghietta del supporto ad anello sulle dita indice e medio prestando attenzione a mante- nere la leva di attivazione vicino al pollice.
  • Seite 34: Utilizzo Dello Scanner

    S c a n n e r Utilizzo dello scanner 1. Accendere il lettore premendo la leva di attivazi- one. 2. Puntare lo scanner sul codice a barre e premere la leva di attivazione. Il LED diventa rosso per indi- care che il lettore è...
  • Seite 35 G u i d a r a p i d a Area di decodifica Nel disegno riportato di seguito, viene illustrata la profondità del campo entro cui, il lettore, è in grado di decodificare un codice a barre. Le distanze minima e massima variano in funzione della densità...
  • Seite 36 S c a n n e r Consigli utili per una facile lettura • Su codici di bassa densità (grandi dimensioni), oc- corre tenere il lettore ad una distanza maggiore. • Su codici di alta densità (piccole dimensioni), oc- corre tenere il lettore ad una distanza minore. •...
  • Seite 37 G u í a r a p i d a Introducción El scanner de anillo RS 1 es un scanner láser modular y portátil que permite al operador la capacidad de lectura sin trabas de códigos de barras, con las manos libres. El scanner puede utilizarse con el sistema de lectura portátil...
  • Seite 38 S c a n n e r Partes del scanner de anillo Vista frontal Botón de li- beración del montaje Ventana de lectura Gatillo Vista posterior LED de lectura Puerto de interfaz Montaje de anillo Correas del montaje de anillo...
  • Seite 39 G u í a r a p i d a Configuración del scanner Ajuste de la correa de montaje Ajuste la correa en el montaje de anillo para adaptarlo a los dedos índice y medio de la mano derecha o izquierda. 1.
  • Seite 40 S c a n n e r Inserción en el montaje En función del uso en la mano derecha o en la izquierda, inserte el scanner de anillo en el montaje de anillo. 1. Determine si el scanner va a utilizarse en la mano derecha o en la izquierda.
  • Seite 41 G u í a r a p i d a Colocación del scanner RS 1 1. Deslice el montaje de anillo en los dedos índice y medio de la mano derecha o izquierda, con el ga- tillo junto al pulgar.
  • Seite 42 S c a n n e r Utilización del scanner 1. Encienda el scanner presionando el gatillo. 2. Apunte el scanner hacia el código de barras y pre- sione el gatillo. El LED pasa a estar rojo para indi- car que el scanner está encendido. 3.
  • Seite 43 G u í a r a p i d a Zona de descodificación El siguiente diagrama de la Zona de descodificación ilustra el rango de trabajo del scanner, es decir, el rango de distancias desde un código de barras en el que el código de barras puede descodificarse satisfactoriamente.
  • Seite 44 S c a n n e r Sugerencias para la lectura • Para símbolos de mayor tamaño, mantenga el sím- bolo más apartado del scanner. • Para símbolos con barras más unidas, mantenga el scanner más próximo al símbolo. • La distancia óptima varía con la densidad del códi- go de barras, pero una distancia de 4 a 10 pulgadas (de 10 a 25 cm) generalmente funciona.
  • Seite 45 Q u i c k R e f e r e n c e Ergonomic Recommendations Caution: In order to avoid or minimize the potential risk of ergonomic injury follow the recommendations below. Consult with your local Health & Safety Manager to ensure that you are adhering to your company’s safety programs to prevent employee injury.
  • Seite 46: Regulatory Information

    S c a n n e r Regulatory Information Laser Devices Symbol products using lasers comply with US 21CFR1040.10, and IEC825- 1:1993, EN60825-1:1994+A11:1996. The laser classification is marked on one of the labels on the product. Class 1 Laser devices are not considered to be hazardous when used for their intended purpose.
  • Seite 47 Q u i c k R e f e r e n c e In accordance with Clause 5, IEC 0825 and EN60825, the following information is provided to the user: ENGLISH HEBREW CLASS 1CLASS 1 LASER PRODUCT CLASS 2 LASER LIGHT DO NOT STARE INTO BEAM CLASS 2 LASER PRODUCT DANISH / DANSK...
  • Seite 48 S c a n n e r...
  • Seite 49 Q u i c k R e f e r e n c e...
  • Seite 50 North America. Shipments from the US or other locations will be made F.O.B. Symbol’s manufacturing plant. Symbol will use new or refurbished parts at its discretion and will own all parts removed from repaired products. Customer will pay for the replacement product in case it does not return the replaced product to Symbol within 3 days of receipt of the replacement product.
  • Seite 51 Q u i c k R e f e r e n c e Symbol’s Customer Service organization offers an array of service plans, such as on-site, depot, or phone support, that can be implemented to meet customer’s special operational requirements and are available at a substantial discount during warranty period.
  • Seite 52 Distributor Operations +44 208 945 7360 Customer support is available 24 hours a day, 7 days a week. For the latest version of this guide go to: http://www.symbol.com/manuals. 70-16190-04 Revision C — December 2001 Symbol Technologies, Inc. One Symbol Plaza Holtsville, NY 11742-1300...