V2 DEV-R1 Bedienungsanleitung
Inhaltsverzeichnis
Verfügbare Sprachen
Verfügbare Sprachen
Quicklinks
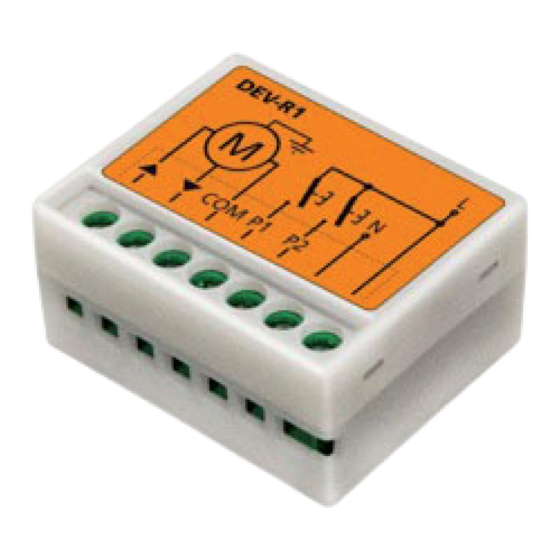
DEV-R1
MODULO DI COMANDO MINIATURIZZATO
I
PER TENDE DA SOLE E TAPPARELLE
MINIATURE CONTROL MODULE FOR AWNINGS
GB
AND ROLLING SHUTTERS
MODULE DE COMMANDE MINIATURISÉ POUR
F
STORES ET VOLETS ROULANTS
MÓDULO DE CONTROL MINIATURA PARA
E
TOLDOS Y PERSIANAS
MÓDULO DE CONTROLO EM MINIATURA PARA
P
TOLDOS E PERSIANAS DE ROLO
MINIATUR-STEUERMODUL FÜR MARKISEN
D
UND ROLLLÄDEN
MINIATUURBEDIENINGSMODULE VOOR
NL
ZONNESCHERMEN EN ROLLUIKEN
V2 S.p.A.
Corso Principi di Piemonte, 65/67
12035 RACCONIGI (CN) ITALY
tel. +39 01 72 81 24 11 - fax +39 01 72 84 050
info@v2home.com - www.v2home.com
IL n. 352
EDIZ. 20/06/2011
Inhaltsverzeichnis

Verwandte Anleitungen für V2 DEV-R1


Inhaltszusammenfassung für V2 DEV-R1
- Seite 2 CONSERVARE PER LA GARANZIA KEEP FOR WARRANTY CONSERVER POUR LA GARANTIE GUARDAR PARA LA GARANTÍA GUARDAR PARA GARANTIA BITTE BEWAHREN SIE FÜR DIE GARANTIE AUF TE HOUDEN VOOR DE GARANTIE...
-
Seite 23: Technische Daten
• Das Gerätegehäuse bietet keinerlei Schutz vor Wasser. Deshalb darf es nur in geschützten Umgebungen installiert werden. KONFORMITÄTSERKLÄRUNG V2 S.p.A. erklärt, dass die DEV-R1 Produkte mit den wesentlichen Voraussetzungen folgender Richtlinien konform sind: - 2004/108/CEE (EMC-Richtlinie gemäß den Normen EN 61000-6-2, EN 61000-6-3 + EN 50336) - 2006/95/CEE (Niederspannungsrichtlinie gemäß... -
Seite 24: Aktivierung Der Sensoren
L1 - Die Led leuchtet beim Betätigen der Taste SW1 auf, um die Sender zu speichern oder zu löschen. AKTIVIERUNG DER SENSOREN L2 - Die Led leuchtet auf, wenn das Modul DEV-R1 einen Code empfängt, der im Speicher abgelegt ist. Zur Aktivierung der Sensoren ist es notwendig, dass zumindest ein Sender gespeichert ist. - Seite 25 2. Stellen Sie den Schalter 3 eines Senders auf ON. 7. Stellen Sie den Switch 1 in die Position OFF. 3. Betätigen Sie die Taste SW1 des Moduls DEV-R1: Versuchen Sie, den Rollladen zu betätigen und pru ̈ fen Sie, ob er Die Led L1 leuchtet auf.
- Seite 26 P4 = PROG ACHTUNG: der erste Sender, der gespeichert wird, bestimmt die Bewegungsrichtung des Motors. 1. Betätigen Sie die Taste SW1 des Moduls DEV-R1: Die Led L1 leuchtet auf. Zum Speichern der Fernbedienungen in einer ungebrauchten 2. Tasten UP und DOWN dru ̈ cken und gedru ̈ ckt halten bis der Steuerung zur Steuerung eines Rollladens oder einer Markise (NICHT fu ̈...