Inhaltsverzeichnis
Werbung
Verfügbare Sprachen
Verfügbare Sprachen
Quicklinks
Werbung
Inhaltsverzeichnis

Verwandte Anleitungen für Elari FIXITIME


Inhaltszusammenfassung für Elari FIXITIME
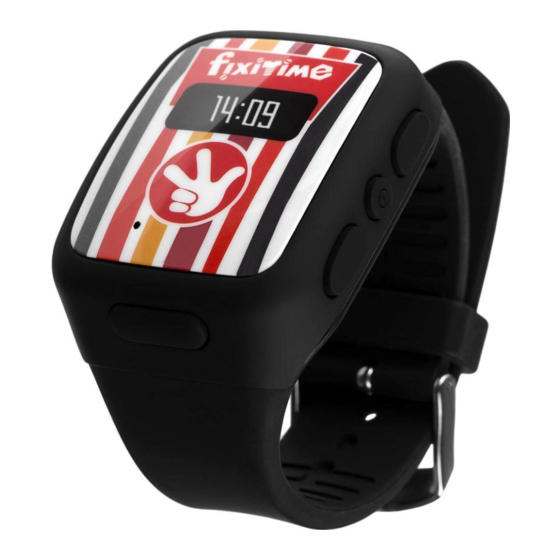
- Seite 1 FIXITIME SMARTWATCH/MOBILE PHONE WITH GPS/LBS TRACKING USER MANUAL...
-
Seite 2: Product Description
Product description 1. Screen Displays hour, date, level of the battery charge, intensity of the signal of the mobile network. 2. Key1 Click once to accept the incoming call. During the conversation click it to increase the volume. Hold down this button for 3 seconds to call a particular contact. - Seite 3 3. The power button On/off: press and hold during 2 seconds. The end of conversation: press the button during the convers ation Reject a call: press the button during the call Display date/time: press the button 1 time Display the signal of the mobile network and the battery level: double press Display GPS signal level: press 3 times...
- Seite 4 4. Hotkey 2 Press 1 time to accept the incoming call. During a call, press the button to decrease the volume. Press and hold for 3 seconds to call a particular contact. 5. SOS key Press and hold for 3 seconds to send an alarm signal to family mem- bers (set up via Wherecom application). 6. Slot for a SIM card 7. MicroUSB port Use only the USB cable provided in the package for charging of the watch.
- Seite 5 Quick Start Guide Insert the SIM card (microSIM) Type of the SIM card: microSIM, GSM 900/1800/850/1900, with GPRS internet access. Insert the SIM card with the chip facing upwards, as shown on the picture. Restart the watch after installing the SIM card and ...
- Seite 6 Downloading and installing Wherecom Method 1. Scan the QR code: For iOS For Android Method 2. For iOS: find the Wherecom application in App Store For Android: find the Wherecom application in Google Play...
- Seite 7 Opening Wherecom on your smartphone and signing up To run the application for the first time you need to create an account. To do this, click on «Registration», enter your e-mail address and click «Get the code». Wait until you receive the confirmation code on the specified e-mail address.
- Seite 8 After reading the barcode successfully, the phone will transfer you to a text input screen for entering your phone number (the field with the IMEI code will be filled in). You can also enter the IMEI code manually. To do this, click «Add manually». To find out the IMEI number, turn on the watch, press the power button for the signal and the battery levels to appear on the screen, and then quickly click the power button 3 times in a row.
- Seite 9 Configuring the list of family contacts To protect the child against attackers the watch tracker can be called on only from the phone numbers listed as family. To add a number to the list, open the side panel and click «Family mem- bers».
- Seite 10 Tracker configuration You can configure different work options for the watch tracker. To open tracker settings, click «Details» under the tracker name to the right of the user photo. The tracker can transmit its lo- cation data with different frequencies. To adjust the frequency, click «Frequency»...
- Seite 11 Adding family members You can authorise your family members to track the location of your kid’s watch. Open tracker settings, select «Information» and then click «Family members». A list of users who have access to the tracker will appear on the screen. To add a new user, click «+» on the top right corner of the screen and enter his Wherecom profile name (the application should already be installed on the user’s phone).
-
Seite 12: Technical Characteristics
Technical characteristics Dimensions 200mm x 38mm x 13mm Display 0.64” OLED display Frequency GSM 900/1800 SIM-card microSIM Tracker GPS / LBS Battery capacity 600 mAh Operational time in standby mode 1 week during the conversation 360 min Water resistance Moisture-proof, splash water protection Compatibility iOS 7.0 and later, Android 4.0 and later Other functions... -
Seite 13: Frequently Asked Questions
Frequently Asked Questions 1.What mobile operating systems are supported by the appli- cation? iOS version 7.0 and later. Android 4.0 and later. 2. No verification code is displayed on the screen after a tracker has been added. What should I do? (1) Check the signal reception of the cellular network. - Seite 14 6. How can the location of the watch be defined? Fixitime is one of the most accurate GPS-watches in its category. It determines coordinates using two technologies: GPS and LBS (positioning using cellular network base stations). However, due...
- Seite 15 Compared to the conventional lithium-ion batteries, the batteries used in Fixitime are more reliable, secure, compact, and resistant to damage. The battery of the watch consists of explosion-proof col- loidal electrolytes which do not emit gas even at elevated tempera- tures.This battery type has shown superior results during various...
- Seite 16 3. Children should use the watch only under adult supervision. 4. To charge the watch please use only the enclosed cable. 5. The position of the tracker shall not be updated when the device is switched off or out of coverage area. Contact info: www.elari.net...
-
Seite 17: Handy-Uhr Fixitime Mit Tracking-Funktion
HANDY-UHR FIXITIME MIT TRACKING-FUNKTION BENUTZERHANDBUCH... -
Seite 18: Produktbeschreibung
Produktbeschreibung 1. Display Auf dem Display werden im Ruhezustand der Uhr Zeit, Datum, Batterieanzeige, Signalhöhe des Mobilfunknetzes angezeigt. 2. Direktwahltaste 1 Drücken Sie die Taste einmal, um den eingehenden Anruf anzu- nehmen. Während des Anrufs drücken Sie diese Taste, um die Lautstärke zu erhöhen. - Seite 19 3. Einschalttaste Einschalten/Ausschalten: Halten Sie die Taste 2 Sekunden lang gedrückt Beendigung des Anrufs: Drücken Sie die Taste während des Anrufs Ablehnung des Anrufs: Drücken Sie die Taste, wenn Sie die Mitteilung für den eingehenden Anruf sehen Zeit/ Datum anzeigen: Drücken Sie die Taste einmal im Ruhezustand der Uhr Signalhöhe des Mobilfunknetzes und Batterieanzeige: Drücken Sie die Taste zweimal im Ruhezustand der Uhr GPS-Signalhöhe anzeigen: Drücken Sie die Taste dreimal im Ruhe-...
- Seite 20 4. Direktwahltaste 2 Drücken Sie die Taste einmal, um den eingehenden Anruf anzunehmen. Während des Anrufs drücken Sie diese Taste, um die Lautstärke zu erhöhen. Wenn Sie einen Anruf machen möchten, müssen Sie diese Taste 3 Sekunden lang gedrückt halten. 5. SOS-Taste Halten Sie die Taste 3 Sekunden lang gedrückt, um das Alarmsignal allen Familienmitgliedern aus der Kontaktliste...
- Seite 21 Los geht’s Legen Sie die SIM-Karte ein Die SIM-Karte muss in den GSM-Netzen 900/1800/850/1900 funktionieren, die SMS-Funktion und den Internet-Zugang durch GPRS unterstützen. Kartentyp: Micro-SIM-Karte. Legen Sie die SIM-Karte mit dem Chip nach oben ein, wie es auf dem Bild dargestellt ist. Nach der Einlegung der SIM-Karte laden Sie die Uhr um, um zu vergewissern, dass die Uhr das Mobilfunknetz finden kann.
- Seite 22 Wie kann man die Wherecom-App downloaden und installieren? Variante 1. Scannen Sie den QR-Code: Für iOS Für Android Variante 2. Für iOS: finden Sie die Wherecom-App in Арр Store Für Android: finden Sie die Wherecom-App in Google Play...
- Seite 23 Öffnen Sie die Wherecom-App in Ihrem Smartphone und melden Sie sich ein Bei der ersten Anwendung müssen Sie sich registrieren. Dafür drü- cken Sie «Anmeldung», geben Sie Ihre E-Mail-Adresse an und drü- cken Sie «Code erhalten». Warten Sie, bis der Bestätigungscode auf die angegebene E-Mail-Adresse kommt.
- Seite 24 Nachdem der QR-code erfolgreich erkannt ist, wird die App Ihnen vor- schlagen, die Telefonnummer der Uhr anzugeben. Das Feld des IMEI- Codes wird dabei bei der App automatisch ausgefüllt. Auch können Sie den IMEI-Code manuell eingeben. Dafür drücken Sie «manuell hinzufügen». Um den IMEI-Code der Uhr zu erfahren, schalten Sie die Uhr ein, drücken Sie die Einschalttaste zweimal, um Signalhöhe des Mobilfunknetzes und Batterieanzeige zu sehen, danach drücken Sie die Einschalttaste noch dreimal.
- Seite 25 Wie kann man die Liste der Telefonnummer der Famil- ienmitglieder in die Uhr einprogrammieren? Damit Ihr Kind vor den Verbrechern geschützt wird, kann man die Tracker-Uhr nur von den Handynummern anrufen, die in die Kon- taktliste der Uhr eingetragen sind. Um eine Nummer in die Liste hinzuzufügen, öffnen Sie die Seitenplatte und drücken Sie die Taste «Familienmitglieder».
- Seite 26 Trackereinstellungen Sie können verschiedene Parameter der Tracker-Uhr in der App auf Ih- rem Smartphone einstellen. Um in die Rubrik «Tracker-Einstellungen» zu gelangen, klicken Sie auf «Details» unter dem Namen des Trackers rechts vom Benutzerphoto des Trackerbesitzers. Die Tracker-Uhr kann den Kar- tenstandort mit verschiedener Häufigkeit übergeben.
- Seite 27 Sie sehen die Liste der Familienmitglieder, die den Standort des Trackers verfolgen können. Um ein neues Mitglied hinzuzufü- gen, drücken Sie «+» in der oberen rechten Ecke des Displays und danach geben Sie in dem geöffneten Menü den Profilnamen des Wherecom-Users an, dem Sie den Zugang zu den Daten des Trackers gewähren möchten (das Familienmitglied soll zuerst die Wherecom- App in sein Smartphone installieren und sich anmelden).
-
Seite 28: Technische Daten
Technische Daten Maße 200mm x 38mm x 13mm Display 0.64” OLED-display Frequenz GSM 900/1800 SIM-Karte Micro-SIM Tracker GPS / LBS Batteriekapazität 600 mAh Laufzeit im Ruhestand 1 Woche im Gesprächbetrieb 360 min Beständig gegen Feuchtigkeit: Wasserdichte Wassertropfen, Wasserstaub Programmverträglichkeit iOS ab 7.0. Android ab 4.0 Eingebauter Lautsprecher, Mikrofon, Andere Funktionen Beschleunigungsmesser, GPS-Antenne,... - Seite 29 1.Welche Betriebssysteme für Smartphones werden von der App unterstützt? iOS ab Version 7.0, Android ab Version 4.0. 2. Ich versuche, einen Tracker hinzuzufügen, der Bestätigungs- code kommt aber auf die Uhr nicht an. Was soll ich machen? (1) Überprüfen Sie, ob die Uhr das Mobilfunknetz finden kann (2) Überprüfen Sie, ob die SIM-Karte SMS und GPRS unterstützt (3) Überprüfen Sie, ob der richtige IMEI-Code eingegeben wurde Wenn diese Maßnamen nicht helfen, wenden Sie sich an unsere...
- Seite 30 Kind sprechen kann. 6. Auf welche Weise wird die Lage der Uhr bestimmt? Die Fixitime-Uhr ist eine der präzisesten GPS-Uhren in ihrer Kategorie. Die Fixitime-Uhr bestimmt die Koordinaten durch Verwendung von zwei Technologien: GPS und LBS (Bestimmung der Koordinaten im Bezug auf die Lage der Mobilfunkstationen).
- Seite 31 Temperaturen oder während der Aufladung explodiert? Im Verglich zu üblichen Lithium-Ionen-Batterien sind die Batterien in der Fixitime-Uhr sicherer, gefahrloser, kompakter und beschädigungs- fester. In diesen Batterien wird Kolloidelektrolyt verwendet, der ex- plosionssicher ist, weil er sogar bei hohen Temperaturen keine Gasen abgibt.
- Seite 32 3. Die Kinder müssen die Uhr nur unter Kontrolle der Erwachsenen benutzen. 4. Zur Aufladung der Uhr verwenden Sie nur das im Lieferumfang enthaltene USB-Kabel. 5. Der Standort des Trackers wird nicht aktualisiert, wenn das Gerät ausgeschaltet ist oder das Mobilfunknetz nicht finden kann. Kontaktinfo: www.elari.net...
-
Seite 33: Manuel D'utilisation
MONTRE-TÉLÉPHONE FIXITIME AVEC LA FONCTION DE ROUTEUR GPS/LBS MANUEL D’UTILISATION... -
Seite 34: Description Du Produit
Description du produit 1. L’écran Il affiche l’heure, la date, la vie de la batterie, l’intensité du signal du réseau cellulaire. 2. Une touche de raccourci 1 Appuyez-le une fois pour accepter un appel entrant. Pendant la conversation, appuyez sur ce bouton pour augmen- ter le volume. - Seite 35 3. Le bouton d’alimentation Marche/arrêt: Appuyez et maintenez pendant 2 secondes La conclusion de la conversation: appuyez sur le bouton au cours de la conversation Rejeter un appel: Appuyez sur le bouton pendant l’appel Afficher date/heure: appuyez 1 fois sur le bouton Afficher l’intensité...
- Seite 36 4. Un raccourci clavier 2 Appuyez-le 1 fois pour accepter l’appel entrant. Pendant un appel, appuyez le bouton pour diminuer le volume. Maintenez enfoncé pendant 3 secondes pour appeler l’abonné spécifié. 5. Un bouton SOS Maintenez enfoncé pendant 3 secondes pour envoyer un signal d’alarme à...
-
Seite 37: Guide De Démarrage Rapide
Guide de démarrage rapide Insérez la carte SIM (microSIM) carte devrait fonctionner réseaux 900/1800/850/1900, maintenir la réception des messages SMS et l’accès externe à l’Internet via GPRS. Type de la carte SIM : microSIM. Insérez la carte SIM avec la puce vers le haut, comme vous pou- vez voir sur l’image. - Seite 38 Téléchargez et installez l’application Wherecom Méthode 1. Scannez le code QR: Pour iOS Pour Android Méthode 2. Pour iOS: trouvez l’application Wherecom dans l’App Store Pour Android: trouvez l’application Wherecom dans Google Play...
- Seite 39 Ouvrez l’application Wherecom sur votre smartphone et inscrivez-vous Lorsque vous exécutez l’application pour la prémière fois, vous devrez créer un compte. Pour le faire, cliquez sur l’«enregistrement», entrez votre adresse email et cliquez sur «recevoir le code». Attendez jusqu’à ce que vous recevez le code de confirmation à l’adresse e-mail spé- cifiée.
- Seite 40 Après la lecture du code à barres avec succès, vous serez amené à l’écran pour entrer le numéro de téléphone et le champ du code IMEI est déjà rempli. Vous pouvez également spécifier le code IMEI manuellement. Pour le faire, cliquez sur «Ajouter manuellement». Pour connaître le code IMEI de la montre, prenez votre montre, allumez-la, appuyez sur le bouton d’alimentation pour voir le niveau du signal et le charge- ment de la batterie sur l’...
- Seite 41 Configurer la liste des numéros des membres de la famille Pour protéger l’enfant contre les attaquants on peut appeler sur la montre tracker uniquement des numéros de téléphone indiqués dans la liste des numéros des membres de la famille. Pour ajouter un numéro à...
- Seite 42 Configuration de traqueur Vous pouvez configurer les différentes options de travail pour la montre tracker. Pour ouvrir la section la Configuration du tracker cliquez sur «en detail» sous le nom du tracker à droit de la photo du propriétaire du tracker. Le tracker peut transmettre des données concernant son emplacement avec une fréquence variable.
- Seite 43 Vous verrez une liste d’utilisateurs qui ont accès au suivi de l’empla- cement du tracker. Pour ajouter un nouvel utilisateur cliquez la par- tie supérieure droite de l’écran, puis, spécifiez le nom du compte de l’utilisateur à Wherecom dans le menu que s’ouvre, à qui vous souhaitez accorder l’accès aux données sur l’emplacement du trac- ker (l’utilisateur doit tout d’abord installer l’application Wherecom sur son smartphone et passer par la procédure d’enregistrement).
-
Seite 44: Caractéristiques Techniques
Caractéristiques techniques Dimensions 200mm x 38mm x 13mm Ecran 0.64” écran OLED Fréquence GSM 900/1800 Carte SIM microSIM Tracker GPS / LBS Capacité de la batterie 600 mAh Temps de fonctionnement En standby 1 semaine Pendant la conversation 360 min Etanchéïté... -
Seite 45: Foire Aux Questions
Foire aux questions 1.Quels systèmes d’exploitation mobiles sont compatibles avec l’application? iOS version 7.0 et supérieur. Android 4.0 et supérieur. 2. Que faire si après l’ajout du tracker le code de vérification n’est pas affiché sur l’écran de la montre? 1) Vérifier l’intensité... - Seite 46 6. Comment l’emplacement de la montre peut-il être défini? La montre Fixitime est une des plus précises montres-GPS dans leur catégorie. Fixitime définit les coordonnées à l’aide de deux techno- logies: GPS et LBS (positionnement à l’aide des stations de base du réseau cellulaire).
- Seite 47 Par rapport aux batteries classiques lithium-ion, les batteries utilisées dans la montre Fixitime, sont plus fiables, sécurisées, compactes et résis- tantes aux dommages. On utilise des électrolytes colloïdales specials dans l’accumulateur de la montre Fixiitime, qui sont anti-déflagrant, parce que même en cas du chauffage de l’...
- Seite 48 3. Les enfants ne doivent utiliser la montre que sous la surveillance d’un adulte. 4. Utiliser uniquement le câble USB fourni pour le chargement de la montre. 5. La position du tracker n’est pas mis à jour lorsque l’appareil est éteint ou hors de portée d’un réseau cellulaire. Info contact: www.elari.net...
- Seite 49 OROLOGIO – TELEFONO FIXITAIM CON L’OPZIONE DI TRACKING MANUALE D’UTENTE...
-
Seite 50: Descrizione Del Prodotto
Descrizione del prodotto 1. Lo Schermo Segna il tempo, la data, percentuale della carica della batteria, livello del segnale della rete telefonica. 2. Il tasto della chiamata rapida1 Premere una volta sola per rispondere alla chiamata. Se premerla parlando, così si aumenta il volume. Premerla e mantenerla durante di 3 secondi Per chiamare il numero desi- derato. - Seite 51 3. Il tasto d’accendere Accendere/Spegnere: premere e trattenere in tempo di 2 secondi Terminare della chiamata: premere durante la chiamata Negare la chiamata: premere durante lo squillo Visualizzare il tempo/la data: premere 1 volta sola Visualizzare livello del segnale della rete e livello della carica della batteria: premere 2 volte Visualizzare livello del segnale GPS: premere 3 volte...
- Seite 52 4. Il tasto della chiamata rapida 2 Premere 1 volta sola per rispondere alla chiamata. Se premerla parlando, così si diminuisce il volume. Premerla e mantenerla durante di 3 secondi Per chiamare il numero de- siderato. 5. Il tasto d’emergenza S0S Premerla e mantenerla durante di 3 secon- di per mandare il segnale d’emergenza a tutti i membri della famiglia (viene impo-...
- Seite 53 La guida su come accenderlo rapido Inserire la SIM-card (microSIM) La SIM deve funzionare nelle reti GSM 900/1800/850/1900, essere fatta per ricezione degli SMS, ed essere capace d’accender- si sull’internet via GPRS. Il tipo della SIM-card: microSIM. Inserire la SIM-card con il cip diretto al di sopra, come è segnalato sull’immagine.
- Seite 54 Scaricare ed installare l’applicazione Wherecom Metodo 1. Scannerizzare il codice QR: Per iOS Per Android Metodo 2. Per iOS: cercare l’applicazione presso l’App Store Per Android: cercare l’applicazione presso il Google Play...
- Seite 55 Avviare l‘applicazione Wherecom sullo smartfone e poi si registra, per favore Avviando prima volta l’applicazione bisogna creare il profilo persona- le. A questo scopo preme «Registrazione», segna il proprio email e pre- mere «Ricevere il codice». Le arriva il codice della conferma sull’email segnalato.
- Seite 56 È possibile pure inserire il codice IМЕI a mano premendo – «Ag- giungere a mano». Per sapere il codice IMEI dell’orologio, accen- dere l’orologio, premere il tasto dell’alimentazione, per visualizzare sullo schermo livello della rete e della carica della batteria, e poi premere rapido sul tasto dell’alimentazione 3 volte di seguito.
- Seite 57 Impostazione della lista dei numeri dei membri della famiglia Per la protezione del proprio figlio o la figlia dai malfattori, sull’orolo- gio-tracker si potrà chiamare solamente dai numeri impostati nella lista dei numeri dei membri della famiglia Per aggiungere il numero alla lista, apra il panello laterale e prema «Membri della famiglia».
- Seite 58 Impostazioni del tracker Si potrebbe impostare dei diversi parametri del funzionamento dell’oro- logio-tracker. Per scendere sullo schermo delle Impostazioni, premere «Dettagliata- mente», sotto in nome del tracker a destra dell’immagine del proprietario del tracker. L’orologio-tracker possono trasmettere i dati della sua posizio- ne con la-frequenza diversa.
- Seite 59 Lei vedrà della lista degli utenti, i quali hanno il permesso a segui- re la posizione del tracker. Per aggiungere il nuovo utente premere «+» nell‘alto a destra dello schermo e poi nello schermo aperto se- gnalare in nome del profiloWherecomdell‘utente, al quale Lei vuole concedere l‘accesso ai dati della posizione del tracker (l‘utente deve prima impostare l‘applicazione Wherecom sul proprio smartfon e passare la procedura della registrazione).
-
Seite 60: Specificazioni
Specificazioni Dimensioni 200mm x 38mm x 13mm Schermo 0.64” OLED Frequenza GSM 900/1800 La SIM microSIM Tracker GPS / LBS Capacità della batteria 600 mAh Laufzeit Tempo dell’attesa 1 settimana Tempo della comunicazione 360 minuti Il dispositivo è stabile all‘influenza Impermeabilità... - Seite 61 Le domande frequenti 1. Quale softwear si attua dall‘applicazione? iOS 7.0 ed oltre, Android OS 4.0 ed oltre. 2. Che bisogna fare se nel momento dell’aggiungere il tracker sulla schermo dell’orologio non viene visualizzato il codice della conferma (1) Verificare il livello del segnale dell’operatore della rete. (2) Assicurarsi se la SIM impostata sul ricevimento degli SMS e ha l’accesso sull’Internet mediante GPRS.
- Seite 62 6. Come si effettua la definizione della posizione dell’orologio? L’orologio Fixitime è il dispositivo GPS più preciso che esiste nella ca- tegoria. Fixitime definisce la posizione usando due tecnologie: La GPS e la LBS (definizione dei coordinati attraverso delle stazioni base della rete telefonica).
- Seite 63 Relativamente alle batterie ordinarie LiON, quelli usati nell’orologio Fixitime, sono più sicuri, compatti, e resistenti ai guasti. Nella produ- zione della batteria dell’orologio Fixitime si usano le elettroliti colloi- dali, che son deflagranti, sicché nel caso del riscaldo della elettrolite, non fa l’emissione del gas.
- Seite 64 4. Per la carica batteria dell’orologio si usa solo il cavo USB che si trova nella confezione. 5. La posizione del tracker non si rinnova, se il dispositivo spento o si trova fuori della zona della rete telefonica. Informazione per gli eventuali contatti: www.elari.net...
-
Seite 65: Manual Del Usuario
TELÉFONO - RELOJ FIXITIME COMPLEMENTADO DE LA FUNCIÓN DE TRACKING MANUAL DEL USUARIO... -
Seite 66: Descripción Del Producto
Descripción del producto 1. Pantalla Muestra la hora, la fecha, del estado de la batería, nivel de señal de la red. 2. Botón de la llamada rápida 1 Presione una vez para el recibo de la llamada entrante. En momento de hablar hay que presionar para aumentar el volumen. - Seite 67 3. Botón Encender Encender/Apagar: presione y guarda durante 2 segundos Terminación de la llamada: presione durante la conversación Renegar la llamada: presione durante la llamada Mostrar la hora/fecha: presione 1 vez Mostrar el nivel de la señal de la red y del estado de la batería: pulse 2 veces Mostrar del nivel de la señal –...
- Seite 68 4. Botón de la llamada rápida 2 Presione 1 vez para el recibo de la llama- da entrante. En momento de hablar hay que presionar para disminuir el volumen. Presione y guarda durante 3 segundos, para ejecutar llamada a la persona deseada. 5.
-
Seite 69: Guía De Inicio Rápido
Guía de inicio rápido Inserte la tarjeta SIM (microSIM) La tarjeta SIM tiene que funcionar en las redes GSМ 900/1800/850/1900, y permitir el recibo de los mensajes SMS y también la salida en Internet vía GPRS. Tipo de la tarjeta SIM: microSIM Inserte la tarjeta SIM con los chips hacia arriba, como se muestra en la imagen. - Seite 70 Descargue e instale la aplicación Wherecom Modo 1. Escanear el código QR: Para iOS Para Android Modo 2. Para iOS: encontrar la aplicación Wherecom en la App Store Para Android: encontrar la aplicación Wherecom en Google Play...
- Seite 71 Abra la aplicación Wherecom en su teléfono y registrase La primera vez que ejecute la aplicación, usted tendrá que crear una cuenta. Para ello, haga clic en «Registrarse», introduzca su dirección de correo electrónico y haga clic en «Obtener código». Espere la ob- tención del código de confirmación a la dirección de correo electró- nico indicado antes.
- Seite 72 También puede usted indicar el código IМЕI a mano. Para hacer- lo pulse «Añadir a mano » . Para encontrar el código IMEI del reloj, tómelo el reloj, enciéndalo, pulse el botón de alimentación, para ver la intensidad del señal de la red en la pantalla y nivel de carga de la batería, y luego pulse rápidamente el botón de la alimen- tación 3 veces seguidas.
- Seite 73 Ajustamiento de la lista de los números de miembros de la familia Para protección del niño contra los delincuentes en el reloj-tracker se puede llamar sólo desde los números indicados en la lista de los miembros de la familia. Para adjunto del número en la lista abra del panel lateral y pulse «Miembros de familia».
- Seite 74 Configuración del tracker Se puede configurar varios parámetros de funcionamiento del reloj-tracker. Para pasar en la sección Configuración del tracker haga clic «Detallado» sobre el nombre del tracker a derecha de la imaginación del propietario del tracker. Reloj-tracker son capaz en trasmitir datos de su posición en variafrecuencia.
- Seite 75 Allí va a ver la lista de usuarios, cuales tienen acceso al seguir de ubicación del tracker. Para agregar un nuevo usuario elija «+» en la esquina de arriba en derecha de la pantalla y luego en el menú apa- recido indica nombre de la cuenta personal Wherecom del usuario, al cual usted quiere conceder el acceso a datos de la ubicación del tracker (usuario tiene que instalar la aplicación Wherecom sobre su...
-
Seite 76: Especificaciones
Especificaciones Dimensiones 200mm x 38mm x 13mm Pantalla 0.64” OLED Frecuencia GSM 900/1800 Tarjeta SIM microSIM Tracker GPS / LBS Capacidad de la batería 600 mAh Tiempo de espera 1 semana de conversación activa 360 min. Resistente a la humedad: gotas Resistencia al agua de agua, salpicaduras Apoyo técnico... -
Seite 77: Preguntas Más Frecuentes
Preguntas más frecuentes 1. Qué sistemas operativos móviles son compatibles con la apli- cación? iOS versión 7.0 y superiores, Android 4.0 y superiores. 2. Y si cuando se agrega el tracker en la pantalla del reloj no muestra un código de confirmación? (1) Compruebe la señal de la red. - Seite 78 6. Cómo se determina la ubicación del reloj? El reloj Fixitime es uno de los más precisos GPS relojes en su categoría. Fixitime determina la posición usando dos tecnologías: GPS y LBS (de- terminación de la posición mediante las estaciones base de la red mó-...
- Seite 79 En comparación con las baterías de litio-ion convencionales, las baterías usadas en reloj Fixitime son más confiables, seguros, com- pactos y resistentes a los daños. En la batería del reloj Fixitime se uti- lizan los electrolitos coloidales especiales, que son intrínsecamente seguros incluso a temperaturas elevadas del electrolito, no se pro- duce desprendimiento de gas.
- Seite 80 3. Los niños deben usar el reloj sólo bajo supervisión de un adulto. 4. Para cargar el reloj, utilice sólo cable USB suministrado. 5. La posición del tracker no se actualiza cuando el dispositivo está apagado o fuera de cobertura de una red celular. Información de contacto: www.elari.net...
-
Seite 81: Руководство Пользователя
ЧАСЫ-ТЕЛЕФОН С ФУНКЦИЕЙ ТРЕКИНГА РУКОВОДСТВО ПОЛЬЗОВАТЕЛЯ... -
Seite 82: Описание Продукта
Описание продукта 1. Дисплей Отображает время, дату, заряд батареи, уровень сигнала сотовой сети 2. Кнопка быстрого вызова 1 Нажмите один раз для приема входящего звонка. Во время разговора нажмите для увеличения громкости. Нажмите и удержите в течение 3-х секунд для вызова за- данного... - Seite 83 3. Кнопка Включения Включение/Выключение: нажмите и удерживайте в течение 2-х секунд Завершение разговора: нажмите во время разговора Отклонить вызов: нажмите во время вызова Отобразить время/дату: нажмите 1 раз Отобразить уровень сигнала сотовой сети и заряд батареи: нажмите 2 раза Отобразить уровень GPS-сигнала: нажмите 3 раза...
- Seite 84 4. Кнопка быстрого вызова 2 Нажмите 1 раз для приема входящего звонка. Во время разговора нажмите для увеличения громкости. Нажмите и удержите в течение 3-х секунд для вызова заданного абонента. 5. Кнопка SOS Нажмите и удерживайте 3 секунды для отправки сигнала тревоги всем членам семьи...
- Seite 85 Гид по быстрому старту Вставьте SIM-карту (microSIM) SIM-карта должна работать в сетях GSM 900/1800/850/1900, поддерживать прием SMS-сообщений и выход в Интернет через GRPS Тип SIM-карты: microSIM. Вставьте SIM-карту чипом вверх, как показано на картинке. Перезагрузите часы после установки SIM-карты, убедитесь в...
- Seite 86 Скачайте и установите приложение Wherecom Способ 1. Отсканируйте QR-код Для iOS Для Android Способ 2. Для iOS: найдите приложение Wherecom в App Store Для Android: найдите приложение Wherecom в Google Play...
- Seite 87 Откройте приложение Wherecom на смартфоне и зарегистрируйтесь При первом запуске приложения вам потребуется создать учетную запись. Для этого нажмите «Регистрация», укажите свой email и нажмите «Получить код». Дождитесь получения кода подтверждения на указанный адрес электронной по- чты. Введите полученный код в поле «Код подтверждения», придумайте...
- Seite 88 После успешного считывания QR-кода, вы попадете на экран ввода номера телефона, а поле IMEI-код будет уже заполнено. Вы также можете указать IMEI-код вручную. Для этого нажмите «Добавить вручную». Чтобы узнать IMEI-код часов, возьмите часы, включите их, нажмите на кнопку питания, чтобы увидеть на...
- Seite 89 Настройка списка номеров членов семьи Для защиты ребенка от злоумышленников на часы-трекер мож- но позвонить только с тех номеров телефонов, которые указа- ны в списке номеров членов семьи. Для добавления номера в список, откройте боковую панель и нажмите «Члены семьи». Вы увидите...
- Seite 90 Настройки трекера Вы можете настроить различные параметры работы часов- трекера. Для перехода в раздел Настройки трекера нажмите «Подробно» под названием трекера справа от картинки вла- дельца трекера. Часы-трекер могут передавать данные о своем местоположении с различной частотой. Для настройки частоты нажмите...
- Seite 91 Вы увидите список пользователей, которые имеют доступ к от- слеживанию местоположения трекера. Для добавления нового пользователя нажмите «+» в правом верхнем углу экрана и далее в открывшемся меню укажите имя учетной записи Wherecom поль- зователя, которому вы хотите предоставить доступ к данным о местоположении...
-
Seite 92: Технические Характеристики
Технические характеристики Размеры 200мм x 38мм x 13мм Экран 0.64” OLED дисплей Частота GSM 900/1800 Тип SIМ-карты microSIM Трекер GPS / LBS Емкость батареи 600 мАч Время работы в режиме ожидания 1 неделя в режиме разговора 360 мин. Водонепроницаемость Устойчив к воздействию влаги: капли... -
Seite 93: Часто Задаваемые Вопросы
Часто задаваемые вопросы 1. Какие мобильные операционные системы поддержива- ются приложением? iOS версии 7.0 и выше, Android 4.0 и выше. 2. Что делать, если при добавлении трекера на дисплее часов не отображается код подтверждения? 1) Проверьте уровень сигнала сотовой сети. 2) Убедитесь... - Seite 94 5. Как использовать функцию SOS? При нажатии на кнопку SOS в течение 3 секунд, часы записы- вают голововое сообщение и отсылают сигнал SOS вместе с записанным голосовым сообщением через сервер в прило- жения всех членов семьи на смартфонах. Члены семьи полу- чают...
- Seite 95 7. Нужен ли часам доступ в Интернет для передачи своих координат? Данные о местоположении передаются на сервер по сети Ин- тернет, поэтому передача данных на SIM-карте должна работать. 8. На детей какого возраста рассчитаны часы? Часы созданы для детей от 4 до12 лет. 9.
- Seite 96 2. Не подвергайте воздействию огня и высоких температур 3. Дети должны пользоваться часами только под присмотром взрослых 4. Для зарядки часов используйте только USB-кабель из ком- плекта поставки 5. Положение трекера не обновляется, если устройство выклю- чено или находится вне зоны действия сотовой сети Контактная информация: www.elari.net...