Inhaltsverzeichnis

Verwandte Anleitungen für Harrie Leenders Pharos Interior


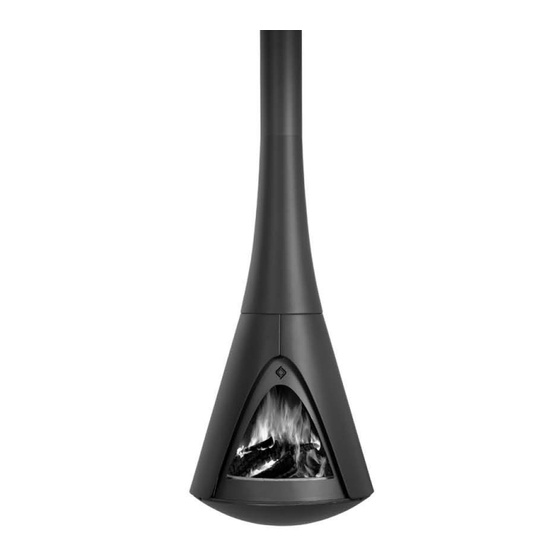
Inhaltszusammenfassung für Harrie Leenders Pharos Interior
- Seite 1 Handleiding + Installatie-instructie Manual + Installation instruction Manuel + Instruction d’installation Anleitung + Montageanleitung Manuale + Istruzione di montaggio Pharos Interior...
-
Seite 3: Inhaltsverzeichnis
Inhoud Onderdelen van de Pharos Interior Maatschetsen Voorschriften Handleiding Installatie instructies Content Parts of the Pharos Interior Connection sizes Regulations Manual Installation Instructions le Contenu Parties du Pharos Interior Mesures d’écarts standard Recommandations générales Manuel Instructions d’installation Inhalt Teile des Pharos Interior Anschlußmaße Holz... -
Seite 4: Onderdelen Van De Pharos Interior
Pharos InterIor Parts oF the Pharos InterIor PartIes du Pharos InterIor teIle des Pharos InterIor eleMentI della Pharos InterIor Convectiesleuven Convection slots Fentes de convection Konvektionsschlitze Fessure di convezione Glasraam Glass window Vitre Glasfenster Vetro Bedieningsklep Control flap... -
Seite 5: Maatschetsen
MaatsChetsen In MM ConneCtIon sIzes In MM Mesures d’éCarts standard en MM ansChlussMasse holz In MM MIsure Per l’allaCCIaMento In MM ø390 ø355... -
Seite 6: Conformiteitsverklaring
Harrie leenders Haardkachels, Industrieweg 25, 5688 DP Oirschot, Nederland verklaart hiermede dat het product Pharos Interior in overeenstemming is met de bepalingen van de hierna genoemde EU-richtlijnen wanneer geïnstalleerd volgens de installatie-instructies zoals vervat in de productdocumentatie: EN 13229:2001/A2:2004 “Openhaard gestookt met vaste brandstoffen”... -
Seite 7: Handleiding
Leest u, voordat u gaat stoken, eerst de tekst over het instoken goed door. Deze stookinstructie is van toepassing op type Pharos Interior en is bedoeld als richtlijn. Uw haard zal zich namelijk op elke andere plek anders gedragen, simpelweg om- dat de omstandigheden anders zijn. -
Seite 8: Instoken In Stappen
Instoken, een goed begIn U heeft een gloednieuwe haard gekocht; ‘nul op de teller’, nog geen vlammetje gezien. Het betekent dat u zelf gaat zorgen voor die eerste ‘kilometers’. De keramische vuurstenen zullen vocht gaan verdampen en uw haardkachel gaat zich zetten. Stook daarom de eerste keren niet te heet omdat de stenen dan kunnen scheuren. Het ontstaan van krimpscheurtjes kan geen kwaad. - Seite 9 Pharos InterIor 1. Zet de klep helemaal open. 3. Als de haard een tijdje goed brand, bijvullen met wat massievere blokken hout. Stapel luchtig. De hoeveelheid (max. 3,5 blokken) is afhankelijk van de warmte behoefte. 2. Maak de haard aan met papier, karton of aanmaakblokjes en flink wat klein hout.
-
Seite 10: Installatie Instructies
De minimale afstanden staan hieronder weergegeven. (maten in cm) • De onderstaande afstanden gelden voor niet brandbare wanden. Voor brandbare wanden (zoals bv hout) gelden andere afstanden. Vraag uw leverancier om advies. Specificaties Pharos Interior • Nominaal vermogen = 9 kWatt. -
Seite 11: Veiligheidsvoorschriften
InstallatIe InstruCtIes Pharos InterIor • Het installeren van de Pharos Interior dient te geschieden door een vakkundig installateur in dienst van een erkend Harrie Leenders dealer. • De mantels zijn krasgevoelig. Voorzichtigheid is geboden. • Stook de haard na plaatsing m.b.v. aanmaakhout om de trek te controleren. - Seite 12 Moer M8 (4x) Carrosseriering M8 (4x) Verdiepingsondersteuning Draadstang M8 (4x) Moer M8 (4x) Nisbus met stelplaat Indicatiestreepje aan de achterzijde 1. Voorbereiding 2. Verdiepingsondersteuning plaatsen • Laat een gat boren van Ø 280 mm door een betonboorder. • Zaag de vier meegeleverde draadstangen op de juiste lengte, lang genoeg •...
-
Seite 13: Waterpas Stellen
Zeskantbout M8 x 20 A: 4x bout M6x20 B: 4x bout M8x20 Afvoersteun Het middelste gat geeft het midden van de achterzijde van de loopplaat aan. 5. Afvoerkanaal bevestigen 6. Waterpas stellen • Houdt er bij montage rekening mee dat de achterzijde van de loopplaat •... - Seite 14 Afwerkkap Sierpijp Zuil Montage-ring 9. Sierpijp en zuil plaatsen 10. Haard voorbereiden • Schuif de sierpijp (met de sleuven omhoog) en de zuil over het afvoer- • Breng het voorgemonteerde frame ter plaatse m.b.v. een steekwagen. kanaal zover mogelijk omhoog (de sierpijp schuift over het koord en in de •...
- Seite 15 • Plaats de onderschaal op de Pharos-lift en krik deze omhoog tegen • Verwijder de Pharos-lift. de bodem van het frame. • De Pharos Interior is nu klaar voor gebruik. • Steek bout M6x75 met daaraan een M6-moer en een carrosseriering M6 Controleer de werking.
-
Seite 16: Regulations
Harrie leenders Haardkachels, Industrieweg 25, 5688 DP, Oirschot, Nederland herewith declare that the product Pharos Interior is in conformity with the provisions of the following EC Directives when installed in accordance with the installation instructions contained in the product documentation: EN 13229:2001/A2:2004 “Open-fire stove fired by solid fuel”... -
Seite 17: Manual
We congratulate you on the purchase of your stove. This manual will inform you about the best way of using the stove and the art of keeping a perfect fire. Before using the stove, carefully read the text about breaking in the stove. These heating instructions apply to the Pharos Interior. They are merely intended as a guideline as your stove will behave dif- ferently according to the place where it is installed, simply because the conditions are different. -
Seite 18: Initial Fire-Up In Steps
InItIal FIre-uP, a good start You have purchased a brand-new stove, ‘zero on the meter’, has not seen a flame yet. This means you are going to take care of the initial ‘miles’. The ceramic firebricks will start evaporating moisture and your woodburning stove will start setting. For this reason, the first few times, do not make your fire too hot because otherwise the bricks could crack. - Seite 19 Dust the stove using a non-fibrous cloth. Clean with lean soapsuds if necessary. • Damaged spots can be touched up using an abrasive cloth and the special Harrie Leenders stove paint. Ask you supplier for advice. Ceramic firebricks You need not worry about any cracks in the ceramic firebrick elements as long as the flame does not come into direct contact with the metal behind them. Should this be the case, however, then it will be necessary to replace the brick;...
-
Seite 20: Installation Instructions
The minimum distances are shown in the figure below. (sizes in mm) • The distances below apply to non-inflammable walls. Inflammable walls (e.g. wood) require different distances. Ask you supplier for advice. Specifications Pharos Interior • Nominal power of the stove is 9 kWatts. -
Seite 21: Materials Required
InstallatIon InstruCtIons Pharos InterIor • The installation of the Pharos Interior with decorative casing must be carried out by a skilled person employed by a dealer recognized by Harrie Leenders Haardkachels. • The casing parts are susceptible to scratching. Handle them gently. - Seite 22 Nut M8 (4x) Bodywork-ring M8 (4x) Ceiling-floor support plate Treaded rod M8 (4x) Nut M8 (4x) Pipe with ring plate Indication mark on the backside 1. Preparation 2. Installing the ceiling-floor support plate • Have a hole of Ø 280 mm drilled by a concrete driller. •...
- Seite 23 Hexagon- head bolt M8 x 20 A: 4x bolt M6x20 B: 4x bolt M8x20 Stovepipe The centre hole indicates support the middle of the rear side of the bearing plate. 5. Fixing the stove pipe 6. Levelling • The bearing plate has a rear side: when installing it, ensure it is in fact at •...
-
Seite 24: Preparing The Stove
Finishing cover Decorative pipe Column Mounting ring 9. Installing the decorative pipe and column 10. Preparing the stove • Slide the decorative pipe (the slots at the upper end) and the column on • Bring the pre-assembled frame to the place of installation using a the stove pipe and move them upwards as far as possible) (the decorative handtruck. - Seite 25 • Remove the Pharos lifting jack. against the bottom of the frame. • The Pharos Interior is now ready for use. Check its performance. • Insert the M6x75 bolt with an M6 nut and an M6 bodywork ring on it into the hole of the bottom shell, and tighten it until it cannot go any further (there is still some thread left).
-
Seite 26: Recommandations Générales
Harrie Leenders Haardkachels, Industrieweg 25, 5688 DP, Oirschot Pays-Bas déclare par la présente que le produit Pharos Interior est conforme aux dispositions des directives UE citées ci-après lorsque celui-ci est installé selon les instructions d’installation contenues dans la documentation de produit. EN 13240:2001/A2:2004 « “Foyer ouvert a combustible solide” »... -
Seite 27: Manuel
Manuel Pharos InterIor Nous vous félicitons de l’achat de votre Pharos Interior. Par l’intermédiaire de ce manuel, nous voulons vous informer de la meilleure façon d’utiliser ce poêle à bois et de l’art de faire un bon feu. Avant de mettre le poêle en service, lisez attentivement la section sur le rodage. - Seite 28 votre Poêle-CheMInée et vous, le début d’une longue aventure Vous venez d’acquérir un poêle-cheminée tout neuf, sorti de fabrication avec son “compteur à zéro” et sans jamais avoir vu la moindre flamme encore. Ceci signifie que vous allez vous même aider votre poêle-cheminée à parcourir ces premiers “kilomètres”. Les pierres céramiques réfractaires contiennent encore de l’eau qui va s’évaporer lors de sa période de rôdage.
- Seite 29 Essuyez votre poêle-cheminée à l’aide d’un chiffon non-pelucheux. Eventuellement utiliser un bol d’eau savonneuse. Rincer. • Utilisez un petit chiffon à récurer et la peinture spéciale pour poêles Harrie Leenders pour réparer de légères détériorations. Demandez conseil à votre revendeur.
-
Seite 30: Instructions D'installation
Les distances minimales sont représentées dans la figure à gauche. (Mesures en mm) • Les distances ci-dessous s’appliquent aux parois non-inflammables. D’autres distances s’appliquent aux parois inflammables (p.ex. celles en bois). Demandez conseil à votre fournisseur. Spécifications Pharos Interior • La puissance nominale du foyer est de 9 kWatts. •... -
Seite 31: Précautions De Sécurité
InstruCtIons d’InstallatIon Pharos InterIor • L’installation du poêle-cheminée doit être effectué par un installateur agrée member du réseau official de partenaires-distributeurs Harrie Leenders. • Les parties en fonte d’aluminium sont sensibles aux rayures. La prudence s’impose. • Après l’installation et l’embranchement du poêle-cheminée, procédez à l’allumage de l’appareil avec, par exemple, des bouts de bois rechappés permettant de vérifier le tirage de l’appareil. - Seite 32 Écrou M8 (4x) Anneau de carrosserie M8 (4x) Plaque d’appui d’étage Tige filetée M8 (4x) Écrou M8 (4x) Tuyau à plaque circulaire Indication à l’arrière 1. Préparation 2. Mise en place de la plaque d’appui d’étage • Faites percer un trou Ø 280 mm par un perceur de béton. •...
-
Seite 33: Mise À Niveau
Boulon M8 x 20 A: 4x boulon M6x20 B: 4x boulon M8x20 Support pour Le trou du milieu indique conduit de fumée le milieu du côté arrière de la plaque de roulement. 5. Fixation du conduit de fumée 6. Mise à niveau •... - Seite 34 Capot de finition Cache- conduit décoratif Colonne Anneau de montage 9. Montage du cache-conduit décoratif 10. Préparation du foyer • Placez le cache-conduit décoratif (les fentes en haut) et la colonne sur le • Portez le châssis prémonté à l’endroit de montage à l’aide d’un diable. conduit de fumée et poussez-les le plus haut possible (le cache-conduit •...
- Seite 35 être situés sur le devant du foyer. • Enlevez le cric Pharos. • Placez la coupe inférieure sur le cric Pharos et levez-la jusqu’au • Le Pharos Interior est à présent prêt à être utilisé. Vérifiez-en fond du châssis. le fonctionnement.
-
Seite 36: Vorschriften
Harrie leenders Haardkachels, Industrieweg 25, 5688 DP, Oirschot Niederlande, erklärt hiermit, dass das Produkt Pharos Interior mit den Bestimmungen der im folgenden genannten EU-Richtlinien übereinstimmt, wenn es gemäß den Installation- sanweisungen, die in der Produktdokumentation enthalten sind, installiert wird. EN 13240:2001/A2:2004 “Offener Ofen für feste Brennstoffe”... -
Seite 37: Sorgen Sie Immer Für Ausreichend Frische Luft
Verwendung und die Kunst des guten Heizens informieren. Lesen Sie vor dem ersten Heizen, erst den Text über die Inbetriebnahme gut durch. Diese Heizanweisung findet Anwendung auf den Typ Pharos Interior und ist als Richtlinie gedacht. Ihr Ofen wird sich nämlich an jeder Stelle anders verhalten, ganz einfach weil die Umstände andere sind. - Seite 38 erstMalIges heIzen; eIn guter anFang Sie haben einen brandneuen Ofen gekauft, ‘Null auf dem Zähler’, hat noch kein Flämmchen gesehen. Das bedeutet daß Sie jetzt selbst für die ersten ‘Kilometer’ sorgen werden. Aus den keramischen Steinen wird Feuchtigkeit verdunsten und Ihr Ofen wird sich setzen. Heizen Sie deshalb die ersten paarmal nicht zu heiß weil die Steine dann reißen könnten.
-
Seite 39: Wartung
• Den Ofen mit einem nichtfaserigen Tuch abstauben. Wenn nötig mit magerem Seifenwasser reinigen. • Leicht beschädigte Stellen lassen sich mit einem Schmirgeltuch und dem Harrie Leenders-Spezialofenlack wiederherstellen. Fragen Sie Ihren Lieferanten um Rat. Keramischer Stein Risse in den keramischen Steinelementen sind harmlos solang die Flamme das rückwärtige Metall nicht direkt berührt. Sollte das aber der Fall sein ist es notwendig den Stein auszuwechseln. -
Seite 40: Allgemeine Hinweise
Die Mindestabstände ergeben sich aus der Abbildung links. (Abmessungen in Mm) • Die nachstehenden Abstände gelten für nichtbrennbare Wände. Für brennbare Wände (wie z.B. Holz) gelten andere Abstände. Fragen Sie Ihren Lieferanten um Rat. Spezifikationen Pharos Interior • Die Nennleistung des Ofens beträgt 9 kWatt. -
Seite 41: Sicherheitsvorschriften
Pharos InterIor • Die Montage des Kaminofen Pharos Interior sollte nur durch geschulte Monteure eines Harrie Leenders Haardkachels Vertragshändlers erfolgen. • Die Gußaluminiumteile sind kratzempfindlich. Vorsicht ist geboten. • Mit dem Probefeuer nach der Installation überprüfen Sie den Kaminzug und die Luftregelung. -
Seite 42: Vorbereitung
Mutter M8 (4x) Karosseriering M8 (4x) Geschoßstützplatte Gewindestange M8 (4x) Mutter M8 (4x) Hülse mit Stellplatte Anzeichen an der Hinterseite 1. Vorbereitung 2. Geschoßstützplatte anbringen • Ein Loch Ø 280 mm von einem Betonbohrer bohren lassen. • Die vier mitgelieferten Gewindestangen ablängen; dabei dafür sorgen, •... -
Seite 43: Waagerecht Stellen
Sechskant- bolzen M8 x 20 A: 4x Bolz M6x20 B: 4x Bolz M8x20 Abzugs- Das mittlere Loch gibt kanalstütze die Mitte der Hinterseite der Laufplatte an. 5. Abzugskanal befestigen 6. Waagerecht stellen • Die Laufplatte hat eine Hinterseite: beim Montieren darauf achten, daß •... -
Seite 44: Zierrohr Und Säule Anbringen
Abdeckkappe Zierrohr Säule Montagering 9. Zierrohr und Säule anbringen 10. Ofen vorbereiten • Das Zierrohr (mit den Schlitzen nach oben) und die Säule über • Den vormontierten Rahmen mit Hilfe des Stechkarrens an seine Stelle den Abzugskanal soweit wie möglich nach oben schieben (Das bringen. -
Seite 45: Säule Senken
• Den Pharos-Heber entfernen. die Unterseite des Rahmens heben. • Der Pharos Interior ist jetzt einsatzbereit. Prüfen Sie das Funktionieren. • Den Bolzen M6x75 mit einer Mutter M6 und einem Karosseriering M6 in das Loch der Unterschale stecken und ihn andrehen bis er nicht weitergeht (es bleibt Gewinde übrig). -
Seite 46: Prescrizioni Di Carattere
Il sottoscritto, rappresentante della ditta: Harrie Leenders Haardkachels, Industrieweg 25, 5688 DP Oirschot Olanda dichiara che il prodotto Pharos Interior è conforme alle disposizioni delle direttive UE descritte di seguito, purché installato secondo le istruzioni di installazione riassunte nella documentazione. EN 13240:2001/A2:2004 “Stufa a camera aperta a combustibile solido”... -
Seite 47: Manuale
Manuale Pharos InterIor Complimenti per aver scelto una Pharos Interior. Il presente manuale le servirà per un uso corretto e per imparare l’arte del fuoco naturale a legna. Prima di procedere legga bene il testo su come si accende il fuoco. Queste istruzioni sono pensate per un’applicazione sul modello Pharos Interior e sono un riferimento di base. - Seite 48 aCCensIone InIzIale, ChI ben CoMInCIa... Avete appena acquistato una stufa nuova di zecca, mai accesa prima d’ora. Questo significa che dovrete “accompagnarla nei suoi primi passi”. Le mattonelle ceramiche interne cominceranno a liberare umidità e la stufa comincerà ad assestarsi. Ecco perché è primordiale non sovraccaricare la stufa durante le primissime accensioni.
- Seite 49 Spolverate la stufa utilizzando tessuti non fibrosi. Se necessario usate un prodotto generico per la pulizia che non sia abrasivo. • Per macchie che il polisher non è in grado di rimuovere, potete utilizzare uno straccio abrasivo e la vernice in Spray Harrie Leenders (rivolgetevi comunque al vostro rivenditore per un consiglio).
-
Seite 50: Specifiche Pharos Interior
Le distanze sottostanti si riferiscono alle pareti non infiammabili. Devono osservarsi altre distanze per le pareti fiammabili (p.es. legna). Rivolgetevi al vostro rivenditore per un consiglio. Specifiche Pharos Interior • La potenza nominale della stufa è di 9 kWatt. •... -
Seite 51: Utensili Ausiliari (Disponibili Separatamente)
IstruzIonI e PresCrIzIonI dI Carattere generale Pharos InterIor • L’installazione della Pharos Interior deve essere effettuata da personale specializzato. • Le parti in alluminio fuso sono sensibili ai graffi. Si consiglia pertanto di operare con cautela. • Accendere la stufa dopo averla installata per verificare il buon tiraggio della canna fumaria. - Seite 52 Anelli M8 (4x) un anello M8 ad ambo i lati (4x) Piastra di appoggio per il piano Asta filettata M8 (4x) Anelli M8 (4x) Tubo con piastra di fissaggio Tracciatura sul lato posteriore 1. Preparazione 2. Collocare la piastra di appoggio per il piano •...
-
Seite 53: Posizionare In Orizzontale
M8 x 20 A: 4x bulloni M6x20 B: 4x bulloni M8x20 Supporto Il foro centrale indica il mezzo del lato di scarico posteriore della piastra da sfere. 5. Fissare il canale di scarico 6. Posizionare in orizzontale • La piastra da sfere ha un lato posteriore. In fase di montaggio, fare •... - Seite 54 coperchio di finitura tubo ornamentale colonna anello di montaggio 9. Montare il tubo ornamentale e la colonna 10. Approntare la stufa • Fare scorrere il più possibile verso l’alto il tubo ornamentale (con le fessure • Portare il telaio premontato al luogo di installazione utilizzando un carrello verso l’alto) e la colonna facendoli passare sopra il canale di scarico a mano.
- Seite 55 • Disporre la sottocoppa sull’elevatore Pharos e sollevarla fino a raggi • Rimuovere l’elevatore Pharos. ungere il fondo del telaio. • La stufa Pharos Interior è ora pronta per l’uso. Controllarne il • Inserire il bullone M6x75 con un dado M6 ed un anello M6 nel foro del funzionamento.
- Seite 56 Datum / Date / Date / Datum / Data Handtekening voor gelezen en akkoord / Signature (read and approved) / Signature (lu et approuvé) / Unterschrift (gelesen und einverstanden) / Firma (letto e approvato) Harrie Leenders Haardkachels Industrieweg 25, 5688 DP Oirschot, The Netherlands Tel.