
Verwandte Anleitungen für Harrie Leenders Dia


Inhaltszusammenfassung für Harrie Leenders Dia
- Seite 1 Handleiding + Installatie-instructie Manual + Installation instruction Manuel + Instruction d’installation Anleitung + Montageanleitung Manuale + Istruzione di montaggio...
- Seite 2 TypeplaaTje IDenTIfIcaTIon plaTe plaqueTTe sIgnaléTIque TypenschIlD TargheTTa DI IDenTIfIcazIone...
-
Seite 3: Inhaltsverzeichnis
InhouD Onderdelen van de Dia Maatschetsen Voorschriften Handleiding Installatie instructies conTenT Parts of the Dia Connection sizes Regulations Manual Installation Instructions sommaIre Parties du Dia Mesures d’écarts standard Recommandations générales Manuel Instructions d’installations InhalT Teile des Dia Anschlußmaße Holz Vorschriften... -
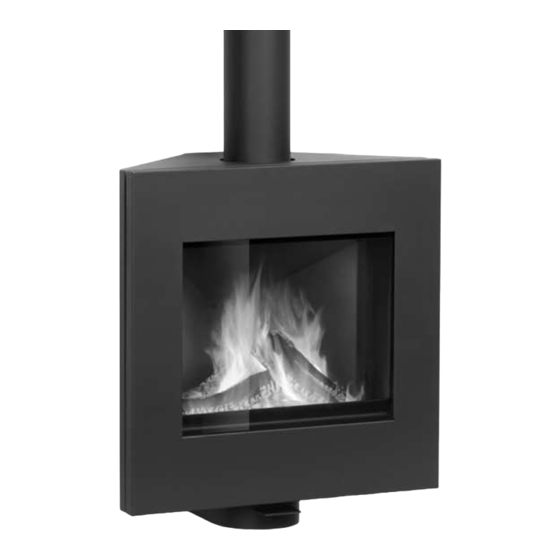
Seite 4: Onderdelen Van De Dia
De DIa parTs of The DIa pIéces Du DIa TeIle Des DIa elemenTI Della DIa Deur Door Porte Tür Antina Keramisch glas Ceramic glass Verre en ceramique Keramisches Glas Vetro antina Beluchtingsschuif Aeration slide Réglage de l’arrivée d’air Belüftungsriegel... -
Seite 5: Maatschetsen
maaTscheTsen In mm connecTIon sIzes In mm mesures D’écarTs sTanDarD en mm anschlussmasse holz In mm mIsure per l’allaccIamenTo In mm... -
Seite 6: Conformiteitsverklaring
Harrie leenders Haardkachels, Industrieweg 25, 5688 DP Oirschot, Nederland verklaart hiermede dat het product Dia in overeenstemming is met de bepalingen van de hierna genoemde EU-richtlijnen wanneer geïnstalleerd volgens de installatie- instructies zoals vervat in de productdocumentatie: EN 13229:2001/A2:2004 “Openhaard gestookt met vaste brandstoffen”... -
Seite 7: Handleiding
Leest u, voordat u gaat stoken, eerst de tekst over het instoken goed door. Deze stookinstructie is van toepassing op type Dia en is bedoeld als richtlijn. Uw haard zal zich namelijk op elke andere plek anders gedragen, simpelweg omdat de omstandigheden anders zijn. -
Seite 8: Instoken In Stappen
Stook altijd op een bed van as. Dit is een isolatie-laag voor het vuur en een goed bed voor de brandstof. • Als u de Dia te vol heeft geladen en de zuurstoftoevoer is maximaal (beluchtingsschuif helemaal open), kan het vuur ‘op hol slaan’. Sluit in dat geval de beluchtingsschuif. Laat de haard in zo’n geval nooit onbeheerd. - Seite 9 De DIa 1. Zet de beluchtingsschuif helemaal open door 3. Als de haard een tijdje goed brandt, bijvullen deze helemaal uit te trekken. met wat massievere blokken hout. Stapel luchtig. De hoeveelheid (max. 2,5 blokken) is afhankelijk van de warmtebehoefte.
-
Seite 10: Installatie Instructies
De minimale afstanden staan hieronder weergegeven. (maten in cm) • De onderstaande afstanden gelden voor niet brandbare wanden. Voor brandbare wanden (zoals bv hout) gelden andere afstanden. Vraag uw leverancier om advies. Specificaties Dia • Nominaal vermogen = 5,4 kWatt. -
Seite 11: Veiligheidsvoorschriften
InsTallaTIe InsTrucTIes DIa • Het installeren van de Dia dient te geschieden door een vakkundig installateur in dienst van een erkend Harrie Leenders dealer. • De mantels zijn krasgevoelig. Voorzichtigheid is geboden. • Stook de haard na plaatsing m.b.v. aanmaakhout om de trek te controleren. - Seite 12 3. Muurbeugel positioneren 4. Muurbeugel monteren • Bepaal het midden van de muurbeugel. • Monteer de muurbeugel m.b.v. de keilhulzen. • Bovenste gat boren op 712mm van de vloer met steenboor ø 6mm. • Plak 2x platte band tegen de verticale strips van de muurbeugel. •...
- Seite 13 7. Haard waterpas stellen 1 8. Haard waterpas stellen 2 • Gebruik de 2 M10 inbusbouten aan de onderzijde van de muurbeugel • Gebruik de 2 M8 inbusbouten aan de achterzijde van de muursteun om de haard ‘in de breedte’ waterpas te stellen (inbussleutel 5). om de haard ‘in de diepte’...
- Seite 14 11. Plaatsen afvoermateriaal 12. Draaibaar? • Plaats uw afvoermateriaal over de draaikrans aan de bovenzijde van de • Vaste opstelling: bouten laten zitten. haard. • 2 x 45 draaibaar: bouten no. 1 verwijderen en bout no. 2 vrijdraaien • Controleer de aansluiting. en borgen m.b.v moer.
-
Seite 15: Regulations
Harrie leenders Haardkachels, Industrieweg 25, 5688 DP, Oirschot, Nederland herewith declare that the product Dia is in conformity with the provisions of the following EC Directives when installed in accordance with the installation instructions contained in the product documentation: EN 13240:2001/A2:2004 (E) “Roomheaters fired by solid fuel”... -
Seite 16: Manual
Before using the stove, carefully read the text about breaking in the stove. These heating instructions apply to the Dia. They are merely intended as a guideline as your stove will behave differently according to the place where it is installed, simply because the conditions are different. -
Seite 17: Initial Fire-Up In Steps
InITIal fIre-up, a gooD sTarT You have purchased a brand-new stove, ‘zero on the meter’, has not seen a flame yet. This means you are going to take care of the initial ‘miles’. The ceramic firebricks will start evaporating moisture and your woodburning stove will start setting to cure. For this reason, the first few times, do not make your fire too hot because otherwise the bricks could crack. - Seite 18 Dust the stove using a non-fibrous cloth or soft stove brush. Clean with lean soapsuds if necessary. • Damaged spots can be touched up using an abrasive cloth and the special Harrie Leenders stove paint. Ask you supplier for advice. Ceramic firebricks You need not worry about any cracks in the ceramic firebrick elements as long as the flame does not come into direct contact with the metal behind them.
- Seite 19 The minimum distances are shown in the figure below. (sizes in mm) • The distances below apply to non-inflammable walls. Inflammable walls (e.g. wood) require different distances. Ask your supplier for advice. Specifications Dia • Nominal power of the stove is 5,4 kWatts.
-
Seite 20: Installation Instructions
InsTallaTIon InsTrucTIons DIa • The installation of the Dia with decorative casing must be carried out by a skilled person employed by a dealer recognized by Harrie Leenders Haardkachels. • The casing parts are susceptible to scratching. Handle them gently. -
Seite 21: Mounting The Wall Bracket
3. Positioning the wall bracket 4. Mounting the wall bracket • Determine the centre of the wall bracket. • Mount the wall bracket using the expansion-shell bolts. • Drill the upper hole at 712mm from the floor using a Ø 6mm masonry bit. •... - Seite 22 7. Levelling the stove 1 8. Levelling the stove 2 • Use the 2 M10 socket-head bolts provided on the underside of the wall • Use the 2 M8 socket-head bolts provided at the back of the wall bracket to level the stove “widthwise” (socket-head wrench 5). support to level the stove “depthwise”...
- Seite 23 11. Installing duct material 12. Rotatable? • Place the pipe on the turning ring at the top of the stove. • Fixed position: leave bolts in place as delivered. • Check the connection. • 2 x 45° rotatable: remove bolts no. 1 and release bolt no. 2 and secure it with the nut.
-
Seite 24: Recommandations Générales
Le soussigné, représentant l’entreprise suivante : Harrie Leenders Haardkachels, Industrieweg 25, 5688 DP, Oirschot Pays-Bas déclare par la présente que le produit Pharos Interior est conforme aux dispositions des directives UE citées ci-après lorsque celui-ci est installé selon les instructions d’installation contenues dans la documentation de produit. -
Seite 25: Manuel
DIa Nous vous félicitons de l’achat de votre Dia. Par l’intermédiaire de ce manuel, nous voulons vous informer de la meilleure façon d’utiliser ce poêle à bois et de l’art de faire un bon feu. Avant de mettre le poêle en service, lisez attentivement la section sur le rodage. - Seite 26 voTre poêle-chemInée eT vous, le DébuT D’une longue avenTure Vous venez d’acquérir un poêle-cheminée tout neuf, sorti de fabrication avec son “compteur à zéro” et sans jamais avoir vu la moindre flamme encore. Ceci signifie que vous allez vous même aider votre poêle-cheminée à parcourir ces premiers “kilomètres”. Les pierres céramiques réfractaires contiennent encore de l’eau qui va s’évaporer lors de sa période de rôdage.
- Seite 27 Essuyez votre poêle-cheminée à l’aide d’un chiffon non-pelucheux. Eventuellement utiliser un bol d’eau savonneuse. Rincer. • Utilisez un petit chiffon à récurer et la peinture spéciale pour poêles Harrie Leenders pour réparer de légères détériorations. Demandez conseil à votre revendeur.
-
Seite 28: Instructions D'installations
Les distances minimales sont représentées dans la figure à gauche. (Mesures en mm) • Les distances ci-dessous s’appliquent aux parois non-inflammables. D’autres distances s’appliquent aux parois inflammables (p.ex. celles en bois). Demandez conseil à votre fournisseur. Spécifications Dia • La puissance nominale du foyer est de 5,4 kWatts. •... -
Seite 29: Précautions De Sécurité
InsTrucTIons D’InsTallaTIon DIa • L’installation du poêle-cheminée doit être effectué par un installateur agrée membre du réseau official de partenaires-distributeurs Harrie Leenders. • Il est conseillé de manier l’appareil avec soin lors de son installation afin d’éviter taches et les rayures. Attention de ne pas poser d’outils à main sur le sommet de l’appareil. -
Seite 30: Montage Du Support Mural
3. Positionnement du support mural 4. Montage du support mural • Déterminez le centre du support mural. • Montez le support mural à l’aide des chevilles à béton. • Percez le trou supérieur à 712mm du sol à l’aide d’une mèche à pierre •... - Seite 31 7. Mise à niveau du poêle, 1 8. Mise à niveau du poêle, 2 • Utilisez les 2 boulons à six pans creux M10 en bas du support mural pour • Utilisez les 2 boulons à six pans creux M8 à l’arrière du support mural mettre le poêle à...
- Seite 32 11. Mise en place du matériel d’évacuation 12. Tournant? • Placez le conduit sur la buse pivotante en dessus du poêle. • Disposition fixe : laissez les boulons en place. • Vérifiez le raccordement. • Disposition tournante sur 2 x 45° : enlevez les boulons no. 1 et desserrez le boulon no.
-
Seite 33: Vorschriften
Harrie leenders Haardkachels, Industrieweg 25, 5688 DP, Oirschot Niederlande, erklärt hiermit, dass das Produkt Dia mit den Bestimmungen der im folgenden genannten EU-Richtlinien übereinstimmt, wenn es gemäß den Installationsanweisungen, die in der Produktdokumentation enthalten sind, installiert wird. EN 13240:2001/A2:2004 “Raumheizer für feste Brennstoffe”... -
Seite 34: Die Gute Wärme Von Holz
Kunst des guten Heizens informieren. Lesen Sie vor dem ersten Heizen, erst den Text über die Inbetriebnahme gut durch. Diese Heizanweisung findet Anwendung auf den Typ Dia und ist als Richtlinie gedacht. Ihr Ofen wird sich nämlich an jeder Stelle anders verhalten, ganz einfach weil die Umstände andere sind. -
Seite 35: Die Wucht Des Feuers
Heizen Sie immer auf einer Aschenschicht. Das ist eine Isolierschicht und bildet ein gutes Bett für den Brennstoff. • Wenn Sie den Dia zu voll geladen haben und die Sauerstoffzufuhr maximal ist (= Belüftungsriegel herausgezogen), kann das Feuer ‘durchgehen’. Schließen Sie dann die Belüftungsriegel. Bleiben Sie in solch einem Fall immer bei dem Kaminofen. -
Seite 36: Wartung
• Den Ofen mit einem nichtfaserigen Tuch abstauben. Wenn nötig mit magerem Seifenwasser reinigen. • Leicht beschädigte Stellen lassen sich mit einem Schmirgeltuch und dem Harrie Leenders-Spezialofenlack wiederherstellen. Fragen Sie Ihren Lieferanten um Rat. Keramischer Stein Risse in den keramischen Steinelementen sind harmlos solang die Flamme das rückwärtige Metall nicht direkt berührt. Sollte das aber der Fall sein ist es notwendig den Stein auszuwechseln. -
Seite 37: Spezifikationen Dia
DIa • Bei der Installation des Geräts sind alle örtlichen Vorschriften zu beachten, einschließlich derjenigen, die sich auf nationale und europäische Normen beziehen. • Für ausreichende Belüftung/Luftzufuhr in dem Raum sorgen, aus dem Ihr Ofen die Verbrennungsluft bezieht. Wenn Sie keine Wand- oder Fußbelüftung in Anspruch nehmen, ist das der Raum, wo sich der Ofen befindet. - Seite 38 InsTrukTIonen DIa • Die Montage des Kaminofen sollte nur durch geschulte Monteure eines Harrie Leenders Haardkachels Vertragshändlers erfolgen. • Die Oberflächen sind anfangs noch kratzempfindlich; hierauf ist bei der Montage zu achten. • Mit dem Probefeuer nach der Installation überprüfen Sie den Kaminzug und die Luftregelung.
-
Seite 39: Wandträger Positionieren
3. Wandträger positionieren 4. Wandträger montieren • Die Mitte des Wandträgers feststellen. • Den Wandträger mit Hilfe der Spreizhülsen montieren. • Das obere Loch mit einem Steinbohrer Ø 6mm 712mm vom • 2x flaches Band auf die vertikalen Streifen des Wandträgers kleben. Boden bohren. -
Seite 40: Den Ofen Waagerecht Stellen
7. Den Ofen waagerecht stellen 1 8. Den Ofen waagerecht stellen 2 • Den Ofen mit Hilfe der 2 M10-Inbusbolzen an der Unterseite des • Den Ofen mit Hilfe der 2 M8-Inbusbolzen an der Hinterseite der Wandträgers “in der Breite” waagerecht stellen (Inbusschlüssel 5). Wandstütze “in der Tiefe”... -
Seite 41: Service: Tür Nachstellen
11. Abzugsmaterial anbringen 12. Drehbar? • Das Rohr auf den Drehkranz an der Oberseite des Ofens stellen. • Feste Aufstellung: Bolzen sitzen lassen. • Den Anschluß kontrollieren. • 2 x 45° drehbar: Bolzen Nr. 1 entfernen und Bolzen Nr. 2 lockern und mit Hilfe der Mutter sichern. -
Seite 42: Prescrizioni Di Carattere
Il sottoscritto, rappresentante della ditta: Harrie Leenders Haardkachels, Industrieweg 25, 5688 DP Oirschot Olanda dichiara che il prodotto Dia è conforme alle disposizioni delle direttive UE descritte di seguito, purché installato secondo le istruzioni di installazione riassunte nella documentazione. EN 13240:2001/A2:2004 “Stufa a camera aperta a combustibile solido”... -
Seite 43: Manuale
3. Assicuratevi che ci sia sempre un buon apporto di aria. Le case moderne sono spesso molto bene isolate. Predisporre una griglia che dia sull’esterno garantirà un apporto sufficiente di aria fresca, sempre che la stufa non sia già stata diretta-mente collegata ad una presa d’aria esterna. - Seite 44 accensIone InIzIale, chI ben comIncIa... Avete appena acquistato una stufa nuova di zecca, mai accesa prima d’ora. Questo significa che dovrete “accompagnarla nei suoi primi passi”. Le mattonelle cerami- che interne cominceranno a liberare umidità e la stufa comincerà ad assestarsi. Ecco perché è primordiale non sovraccaricare la stufa durante le primissime accen- sioni.
- Seite 45 Spolverate la stufa utilizzando tessuti non fibrosi. Se necessario usate un prodotto generico per la pulizia che non sia abrasivo. • Per macchie che il polisher non è in grado di rimuovere, potete utilizzare uno straccio abrasivo e la vernice in Spray Harrie Leenders (rivolgetevi comunque al vostro rivenditore per un consiglio).
-
Seite 46: Specifiche Dia
Le distanze sottostanti si riferiscono alle pareti non infiammabili. Devono osservarsi altre distanze per le pareti fiammabili (p.es. legna). Rivolgetevi al vostro rivenditore per un consiglio. advies. Specifiche Dia • La potenza nominale della stufa è di 5,4 kWatt. •... -
Seite 47: Norme Di Sicurezza
InsTrIonI e prescrIzIonI DI caraTTere generale • L’installazione della Dia deve essere effettuata da personale specializzato. • I rivestimenti sono sensibili ai graffi. Si consiglia pertanto di operare con cautela. • Accendere la stufa dopo averla installata per verificare il buon tiraggio della canna fumaria. - Seite 48 3. Posizionare la staffa da muro 4. Montare la staffa da muro • Determinare il centro della staffa da muro. • Montare la staffa da muro con l’ausilio dei bulloni ad espansione. • Praticare il foro superiore al livello di 712 mm dal pavimento utilizzando •...
- Seite 49 7. Posizionare la stufa orizzontalmente 1 8. Posizionare la stufa orizzontalmente 2 • Utilizzare i 2 bulloni a testa esagonale cava M10 situati sul lato inferiore • Utilizzare i 2 bulloni a testa esagonale cava M8 situati sul lato posteriore della staffa da muro per posizionare la stufa orizzontalmente ‘in larghezza’...
- Seite 50 11. Posizionare il materiale di scarico 12. Girevole? • Collocare il tubo di scarico della stufa sulla corona girevole situata sul • Disposizione fissa: lasciare i bulloni in posizione. lato superiore della stufa. • Girevole verso sinistra e verso destra di 45°: rimuovere i bulloni n. 1, •...
- Seite 52 Datum / Date / Date / Datum / Data Handtekening voor gelezen en akkoord / Signature (read and approved) / Signature (lu et approuvé) / Unterschrift (gelesen und einverstanden) / Firma (letto e approvato) Harrie Leenders Haardkachels Industrieweg 25, 5688 DP Oirschot, The Netherlands Tel.
- Seite 56 Level of finishing AMERICAN PROJECTION Tolerances unless of surfaces of surfaces differently mentioned: unless differently : 0,5 mm conform TITLE: mentioned: Muurbeluchting Canta/Dia HLH LFS norm UNITS OF MEASUREMENT DRAWN: SCALE: REV.: HLH DRAWING NUMBER: 1:2.5 18692 DATE: SIZE: 09-03-2009...
- Seite 57 DATE DRAWN DESCRIPTION 18,065 rev; layou gew. 17-04-2009 Geen lasspetters toegestaan in en rondom gat 17,5 ±0,5 DETAIL B SCALE 1 : 2 SECTION A-A Spie-oog 18.068 Bevestigingstrip muurbeugel St. 37 18.065 ITEM QTY. DESCRIPTION LENGTH MATERIAL HLH # STATUS: RELEASED Level of finishing Level of finishing...