Inhaltsverzeichnis
Werbung
Verfügbare Sprachen
Verfügbare Sprachen
Quicklinks
Werbung
Inhaltsverzeichnis

Verwandte Anleitungen für Canon WP-DC34


Inhaltszusammenfassung für Canon WP-DC34
- Seite 1 WP-DC34...
- Seite 2 日本語 本書と保証書をよくお読みのうえ、 正しくお ●取り扱い上の不注意により、 万一、 水漏れ事 使いください。 また、 お読みになった後は、 大 故を起こした場合、 内部機材 (カメラやバッ 切に保管してください。 テリー、 メモリーカードなど) の損傷、 およ 保証書は必ず 「購入店 ・ 購入日」 などの記入を び記録内容や撮影に要した諸費用などの補 確かめて、 購入店でお受け取りください。 償はご容赦ください。 また、 本製品の不具合 により撮影されなかった場合の付随的損害 お使いになる前に (撮影、 撮影に要した諸費用および得るべき 利益の損失など) については、 補償いたしか ●お買い上げいただきありがとうございま ねます。 す。 キヤノンデジタルカメラにウォーター ●カメラに付属のカメラユーザーガイドもよ...
- Seite 3 付属品の確認 別売品 本製品のパッケージには、 以下の製品が入っ ・ キヤノンウォータープルーフケース ています。 万一、 不足のものがありましたら、 ウェイト WW-DC1 お手数ですがお買い求めの販売店までご連絡 ウォータープルーフケースを使って水中で ください。 撮影するとき、 ケースが浮かばないように ・ ウォータープルーフケース するためのおもりです。 ・ ネックストラップ ウェイトの推奨装着枚数は、 主な仕様 (p.17) ・ リストストラップ でご確認ください。 また、 取り付け方法は、 ・ 拡散板 ウェイトの取扱説明書をご覧ください。 ・ 防水パッキン用シリコングリース ・ ユーザーガイド (本書) ・ 保証書...
- Seite 4 安全上のご注意 警告 ●ご使用の前にこの 「安全上のご注意」 をよく ウォータープルーフケースを使用したあと お読みのうえ、 正しくお使いください。 は、必ずカメラを取り出してください。カ ●ここに示した注意事項は、 製品を安全に正 メラを入れたまま、直射日光のあたる場所 しくお使いいただき、 あなたや他の人々へ や高温になるところに放置しておくと、発 の危害や損害を未然に防止するためのもの 火や破裂などの原因になることがありま です。 その表示と意味は次のようになって す。 います。 内容をよく理解してから本文をお ウォータープルーフケースを浮き袋代わり 読みください。 に使用しないでください。 水 中 で の ネ ッ ク ス ト ラ ッ プ の ご 使 用 は、 この表示を無視して、誤った取り扱...
- Seite 5 取り扱い上のご注意 注意 ●ウォータープルーフケースを投げたり、 落と 水深 40m を超える水中では使用しないでく したりしないでください。 ださい。動作不良や故障、水漏れの原因とな ●付属のシリコングリース以外のオイル、 薬品な ります。 どは、 ウォータープルーフケースの強度を損な 水中でウォータープルーフケースのボタンや うことがありますので、 使用しないでください。 レバーを必要以上に強く押さないでください。 付着した場合は、 すぐに拭き取ってください。 ケースがゆがんで、水漏れの原因となります。 ●海辺や海上でのウォータープルーフケースの 洗浄する際、防水パッキンに水道水を勢いよく 開閉は、 できるだけ避けてください。 カメラの 当てないでください。 水漏れの原因となります。 取り付けやメモリーカード、 バッテリーの交 分解や改造をしないでください。水漏れの原 換などは、 湿気の少ない、 潮風の当たらない場 因となります。 所で行ってください。 防水パッキンやその接触面に傷を付けたり、 異 ●高温での長時間のご使用は避けてください。 物 (砂やゴミ、 頭髪など) を挟み込まないよう ●寒冷地でお使いのときは、...
- Seite 6 原因となりますので、 ご注意ください。 なお、 ●防水パッキンをウォータープルーフケース 結露してしまったときは、 ウォータープルー から取り外すときは、 防水パッキンに傷を フケースからカメラを取り出し、 ウォーター 付けないよう、 指で外してください (図1 参 プルーフケースとカメラについた水滴を乾い 照) 。 爪を立てたり、 先のとがったものや金 たやわらかい布で拭き取り、 それぞれ数時間 属などをお使いにならないでください。 放置してください。 ●防水パッキンは、 引っ張らないようにして ください。 防水パッキンを引っ張ると伸び 水漏れについて てしまい、 ケースが閉まりにくくなり、 水漏 万一、 水漏れが確認された場合には、 ただちに れの原因になります。 ●防水パッキンをウォータープルーフケース 撮影を中止してください。 そのまま使用する に取り付けるときは、 よじれたり、 無理に と発火や感電の原因となりますので、...
- Seite 7 ●シリコングリースを塗りすぎると、 水漏れの お手入れのしかた 原因になります (米粒1 粒程度が適量です) 。 ●使用後は、 ウォータープルーフケースの外 塗りすぎないように注意してください。 部を、 なるべく早く真水 (30℃以下の水道水 ●シリコングリースを塗るときには、 布や紙 など) で十分に洗ってください。 海で使用し などを使わないでください。 た場合は、 塩分を落とすため真水に数時間 ●防水パッキンの傷やひび割れは水漏れの原 漬けておくことをおすすめします。 ケース 因となります。 ただちに修理受付窓口へお 内 部 に 水 が 入 ら な い よ う に、 バ ッ ク ル が 持ちください。...
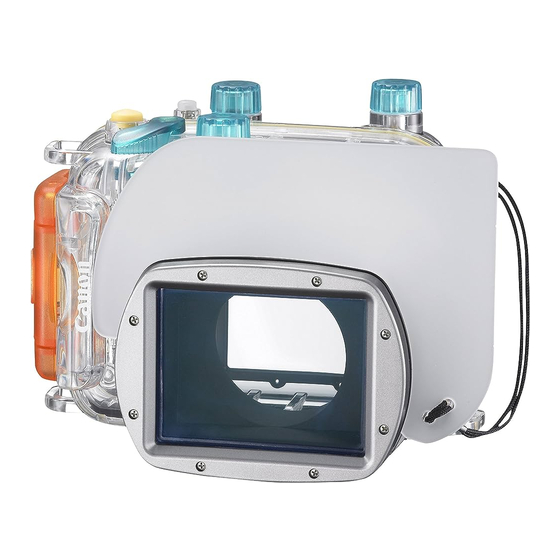
- Seite 8 各部の名称 前面 背面 モードダイヤル ストラップ取り付け部 ISOダイヤル シャッターボタン 露出補正 (AEロック/FEロック) ボタン 電源ボタン ダイヤル ズーム (測光) / (ジャンプ) 拡散板 レバー ボタン (マニュアル フォーカス) /oボタン (ストロボ) / rボタン FUNC./SET (ファンクション/ セット) ボタン ロック解除 レンズ窓 MENU (メニュー) スイッチ ボタン バックル (ショートカット) (セルフタイマー) / 三脚ねじ穴 ボタン...
- Seite 9 準備 カメラを準備します カメラのストラップを外します。 カメラの電源が入っていないことを確認 し、 カード / バッテリー収納部ふたを開き ます。 ストラップ バッテリーとメモリーカードを入れます。 ・ バッテリーとメモリーカードの入れかた は、 カメラユーザーガイドでご確認くだ さい。 ・ 十分に充電されたバッテリーをお使いく ださい。 ・ メモリーカードの撮影可能枚数をご確認 ください。 メモリー カード...
- Seite 10 ストラップを付けたま まカメラを取り付ける と、 ウ ォータ ープル ー フケース開閉部にスト ラ ップを 挟み、 水漏 れ の原因となります。 ウォータープルーフケースに、 カメラ用のスト ラップを使用しないでください。 リストストラップ を取り付ける場合 ウォータープルーフケースを準備 します ネックストラップを図のように2ヶ所に 取り付け、 首にかけやすい長さに調節して ください。 ネックストラップは、 海辺でカメラを首にかける ときにお使いください。 水中では、 ネックストラッ プを外して、 リストストラップをお使いください。 ネックストラップをお使いになると、 首に巻きつ くなど、 思わぬけがや事故の恐れがあります。...
- Seite 11 ロック解除スイッチを矢印の方向へずらしな 防水パッキンの摩耗や劣化を防ぐためウォー がら、 バックルを外してケースを開きます。 タープルーフケースを使用する前に、 パッキン ・ くもり止め (市販) をお使いになる場合 全面にごく薄くシリコングリースを塗ってく は、 レンズ窓の内側のみにお使いくださ ださい。 い。 くもり止めを塗る際には、 乾いたやわ 防水パッキンの取り扱い上の注意について らかい布をお使いください。 くもり止め は、 「 防水パッキンについて (p.5) 」 を参照して がレンズ窓の内側以外に付着した場合、 ください。 ウォータープルーフケースの劣化をまね く恐れがありますので、 すぐに拭き取っ 1. 防水パッキンを取り外します。 てください。 2. 防水パッキンと防水パッキンが埋め込ま れていた溝の異物 (砂やゴミ、 頭髪など) を綿棒などで拭き取ります。 ①...
- Seite 12 カメラにウォータープルーフケース ウォータープルーフケースを閉じます。 を取り付けます ・ 防水パッキンやその接触面、 接点部に異 物 (砂やゴミ、 頭髪など) が付いていない ことをよく確認してください。 髪の毛一 カメラの液晶モニターを開き、 図のように 本、 また微小な砂粒一個が挟まっている 入れます。 だけで、 水漏れすることがあります。 ② ・ バックルがしっかりロックされているこ とを確認してください。 ① ③ ① ②...
- Seite 13 撮影 ランプ モードダイヤル 必要に応じて、 各設定を行います。 ズームレバー ・ lボタンを押して液晶モニターをつ シャッターボタン けます。 ・ ズームレバーで画角を調整できます。 電源ボタン 撮影モードをスペシャルシーンモードの S (水中) に設定する 水中で撮影するときに、 スペシャルシーンモー rボタン ドの に設定すると、 水中に最適なホワイトバ ランスに設定され、 青みをおさえた自然な色あ いで撮影できます。 l (ディスプレイ) ボタン 1. モードダイヤルを (スペシャルシー qボタン ンモード) に合わせます。 (ショートカット) ボタン 2. (ショートカット) ボタンを押しなが ら、...
- Seite 14 E、 G、 M、 B、 Dで撮影するとき ・ 節電機能が働いて電源が切れたときは、 再度電源ボタンを押してください。 FUNC. メニューでホワイトバランスを (水 中) に設定できます。 ・ ファインダーを使っての撮影はできません。 また、 ボタンに または (マニュアルホ ・ ファインダーを使った撮影はできないため、 ワイトバランス1 または2) を登録しておく モードダイヤルを8にしても正しく撮影で と、 ボタンを押すだけで白データを取り込 きません。 むことができます。 状況に応じてホワイトバランスを調整したい 場合に、 おすすめします。 コントローラーホイールの使いかた コントローラーホイールの使いかたは、 カメラ 本体での操作方法と異なります。 液晶モニターを見ながら構図を決めます。 1. コントローラーホイールを時計回しした シャッターボタンを半押しし、 上側のラン いときは、...
- Seite 15 取り付けかた ストロボを使って撮影する場合 ストロボ光が均一に被写体にあたるように、 図のように、 拡散板のひもを取り付けます。 拡散板を取り付けて撮影してください。 ・ 拡散板の表面に傷を付けないでください。 ストロボ光が正しく拡散できなくなる場合 があります。 ・ ストロボ撮影したとき、 画像の周辺が暗く 拡散板 なることがありますので、 拡散板を取り付 けて撮影してください。 ただし、 被写体が近 すぎる場合には拡散板を使っても十分に効 果が表われないことがあります。 拡散板の端を、 溝に差し込んで装着します。 溝...
- Seite 16 取り外しかた 再生 拡散板を持ち上げて取り外します。 (再生) ボタンを押します。 電源ボタン 再生ボタン 使い終わったら、 カメラの電源を切ります。 ウォータープルーフケースを使用したあとは、 必ずカメラを取り出してください。 カメラを入 れたまま、 直射日光のあたる場所や高温になる ところに放置しておくと、 発火や破裂などの原 因になることがあります。...
- Seite 17 カメラを取り出す 使用後は、 ウォータープルーフケースに付 ① いている水滴を十分に拭き取ります。 ・ ウォータープルーフケースに付いている ゴミや砂、 頭髪などは取り除いてくださ い。 また、 真水でよく洗い流して、 塩分な どが残らないようにしてください。 ③ ロック解除スイッチを矢印の方向へずら しながらバックルを外し、 後部カバーを開 ② け、 カメラを取り出します。 ・ ウォータープルーフケースを開ける際 に、 体や頭髪から、 ケース内またはカメラ に水滴が落ちないように注意してくださ い。 ・ ウォータープルーフケース内部は、 乾い た布で拭き、 水洗いしないでください。...
- Seite 18 主な仕様 保管するときは 防水性能: IEC/JIS保護等級「IPX8」相当、 ●防水パッキンの変形を防いだり、 防水効果 水深:40m以内 を保つため、 ウォータープルーフケースを 防水構造:パッキン、Oリングなど 開いた状態で保管してください。 主要材質:ポリカーボネート、ABS、 ●防水パッキンにほこりや傷を付けないよう 白板ガラス、EPDMなど に保管してください。 ●高温、 低温、 多湿な場所や、 ナフタリンなど カメラ性能保証温度範囲:0~40℃ 防虫剤のある所での保管は避けてくださ 大きさ:153.5×107.5×119.1mm い。 (突起部を除く) 体積:約1150cm * 質量:約575g(ウォータープルーフケースのみ ) WW-DC1(別売)の推奨装着枚数:4枚 補修用性能部品について * 拡散板を含む 保守サービスの為に必要な補修用性能部 品の最低保有期間は、製品の製造打切り後 ・ 記載データはすべて当社試験基準によります。 7年間です。 (補修用性能部品とは、その製 ・ 製品の仕様、 および外観の一部を予告なく 品の機能を維持するために必要な部品で...
- Seite 19 MEMO...
- Seite 20 • While every effort has been made to ensure that the information contained in this guide is accurate and complete, no liability can be accepted for any errors or omissions. Canon reserves the right to change the specifications of the hardware and software described herein at any time without prior notice.
- Seite 21 Case. Once installed in the Waterproof Case, Perform a similar check after you install the you can use your Canon Digital Camera in the camera. If it leaks, contact your Canon rain, at the beach or on the ski slopes. You can Customer Support Help Desk.
- Seite 22 • Canon Waterproof Case Weight WW-DC1 listed below. Please check your package now to When using the Waterproof Case to take confirm that it is complete. Contact your Canon photographs underwater, the weights prevent dealer if anything is missing. the case from floating. Please refer to the •...
-
Seite 23: Safety Precautions
Safety Precautions • Do not press the buttons or the lever of the Waterproof Case with unnecessary force when Before you use the Waterproof Case, thoroughly in the water. This may warp the casing and read these precautions to ensure correct use. cause leaks. -
Seite 24: Handling Precautions
Handling Precautions • Battery life is reduced in cold temperatures. When you use the Waterproof Case in very • Do not drop or throw the Waterproof Case. cold places, keep it warm by putting it in a bag • Use only the supplied silicone grease. Use of whenever you are not shooting. - Seite 25 Waterproof Case interior and the camera dry. • When removing the seal from your Please contact your Canon Customer Support Waterproof Case, use your fingers so you Help Desk. do not damage the waterproof seal (as shown in Fig.
-
Seite 26: Care And Maintenance
• A damaged or cracked waterproof seal may cause leaks. Please contact your Canon Customer Support Help Desk. To ensure that the Waterproof Case remains waterproof, it is recommended to replace the seal once a year. Please contact your Canon Customer Support Help Desk. - Seite 27 Components Front Back Strap Mounts Mode Dial Shutter Button ISO Dial Power Button Exposure (AE Lock/FE Lock) Button Zoom Compensation (Light Metering)/ Diffusion Plate Lever Dial (Jump) Button (Manual Focus)/ o Button (Flash)/ r Button FUNC./SET Button Lock Switch Lens Window MENU Button Catch (Shortcut) Button...
-
Seite 28: Preparing The Camera
Preparations Preparing the Camera Remove the camera’s strap. Confirm that the camera’s power is off and open the memory card slot/ battery cover. Strap Insert the battery, and the memory card. • Please refer to the Camera User Guide for information regarding the installation methods for the battery and memory card. - Seite 29 Inserting the camera while the strap is attached could trap the strap in the Waterproof Case closure and cause leaks. Do not use the camera’s strap as a strap for the Waterproof Case. When attaching the wrist strap Preparing the Waterproof Case Fasten both ends of the neck strap to the strap mounts as shown, and adjust it to a comfortable length.
- Seite 30 Slide the lock switch as shown, Apply a thin coat of grease to the entire seal and release the catch to open the before using the Waterproof Case in order to back cover. prevent abrasion and deterioration. • When using commercially available For waterproof seal handling precautions, see anticondensation products, the “Waterproof Seal”...
-
Seite 31: Installing The Camera
Installing the Camera Close the Waterproof Case. • Make sure that the waterproof seal and its Open the LCD monitor, and insert contact surfaces are free of debris (e.g. the camera into the Waterproof sand, dirt or hair). Catching a single Case as shown. - Seite 32 Shooting Indicator Mode Dial Set the mode dial to the desired Zoom Lever mode. Shutter Button Adjust settings as required. • Press the l button to turn on the LCD monitor. Power Button • You can adjust the zoom with the zoom lever.
- Seite 33 Shooting when the mode dial is set to E, • If the power saving function activates and shuts G, M, B or D off the power, press the power button again. • You cannot shoot images using the viewfinder. You can set the white balance to •...
-
Seite 34: Using The Flash
Using the Flash Attaching the Diffusion Plate In order to evenly distribute light from the flash, Thread the cord through the mount please attach the diffusion plate. as shown. • Do not scratch the surface of the diffusion plate, as this may prevent flash light from being diffused properly. - Seite 35 Removing the Diffusion Plate Playback Lift and remove the diffusion plate. Press the (Playback) button. Power Button (Playback) Button When you have finished using the camera, turn the camera off. After you use the Waterproof Case, be sure to remove the camera from it. If you leave the Waterproof Case containing the camera in direct sunlight or in a high-temperature place, this may cause a fire or the case to burst.
- Seite 36 Removing the Camera After use, be sure to completely dry all the water from the Waterproof Case. • Remove any dirt, sand, hair or other debris from the Waterproof Case, and wash it with clean, running tap water to remove salt deposits.
- Seite 37 Storage • Store your Waterproof Case carefully, in an opened state to prevent the waterproof seal from deforming and to maintain its waterproof effect. • Protect the waterproof seal from dust or scratches during storage. • Do not store the Waterproof Case in hot, cold or humid places, or near substances such as naphthalene or insecticides.
-
Seite 38: Specifications
4 weights rating “IPX8” equivalent For use within a depth of * Including diffusion plate 40 m (130 ft.) • All data noted here are based on Canon’s Waterproofing: Seal, O-ring, etc. testing standards. • Product specifications and appearance are... - Seite 39 MEMO...
- Seite 40 übernommen werden. Canon behält sich das Recht auf unangekündigte jederzeitige Änderung der hier beschriebenen Hard- und Softwaremerkmale vor. • Dieses Handbuch darf ohne vorherige schriftliche Genehmigung von Canon weder ganz noch teilweise in irgendeiner Form oder mit irgendwelchen Mitteln vervielfältigt, übermittelt, abgeschrieben, in Informationssystemen gespeichert oder in andere Sprachen übersetzt werden.
- Seite 41 Wasser, um es auf Lecks zu prüfen. Gehäuses. Das wasserdichte Gehäuse erlaubt Führen Sie nach der Installation der Kamera es Ihnen, Ihre Canon-Digitalkamera im Regen, eine ähnliche Prüfung durch. Falls es eine am Strand oder auf der Skipiste einzusetzen.
-
Seite 42: Als Weiteres Zubehör Erhältlich
Lesen Sie diese Sicherheitshinweise vor aufgeführten Gegenständen geliefert. Bitte Gebrauch des wasserdichten Gehäuses überprüfen Sie die Vollständigkeit. Wenden Sie gründlich, um den korrekten Gebrauch sich an Ihren Canon-Händler, falls etwas fehlt. sicherzustellen. • Wasserdichtes Gehäuse Die unten beschriebenen • Schulterriemen Sicherheitsmaßnahmen dienen dem sicheren... - Seite 43 • Nehmen Sie vor dem Einsatz unter Wasser den • Beschädigen Sie den Dichtungsring nicht, Schulterriemen ab und bringen Sie die vermeiden Sie ein Verkratzen seiner Handschlaufe an. Es besteht die Gefahr, dass Kontaktflächen, und sorgen Sie dafür, dass der Schulterriemen sich verfängt, jemanden sich weder Schmutz, Sand, Haare noch andere stranguliert oder andere Unfälle verursacht.
-
Seite 44: Vorsichtsmaßnahmen Bei Der Bedienung
Vorsichtsmaßnahmen bei der • Bei niedrigen Temperaturen verkürzt sich die Leistungsdauer der Batterien/Akkus in der Bedienung Kamera. Wenn Sie das wasserdichte Gehäuse • Werfen Sie das wasserdichte Gehäuse nicht, an sehr kalten Orten benutzen, halten Sie es und lassen Sie es nicht fallen. warm, indem Sie es immer in eine Tasche •... -
Seite 45: Bei Eindringen Von Wasser
Wischen Sie das Innere des wasserdichten Dichtungsring gedehnt, wird das Gehäuse Gehäuses und die Kamera gründlich trocken. nicht einwandfrei abgedichtet, und es Bitte wenden Sie sich an Ihren Canon- könnte Wasser eindringen. Kundendienst. • Achten Sie beim Einsetzen des Dichtungsrings darauf, dass die Abdichtung Dichtungsring nicht verdreht oder gedehnt wird. -
Seite 46: Pflege Und Wartung
• Eine beschädigte oder rissige Dichtung kann ab, wenn noch Staub oder Sand daran haftet. Lecks verursachen. Bitte wenden Sie sich an Wenn Salzreste zurückbleiben, können Ihren Canon-Kundendienst. Metallteile zu rosten beginnen oder Tasten schwergängig werden.Wischen Sie das Innere Damit das wasserdichte Gehäuse auch des Gehäuses mit einem weichen, trockenen... -
Seite 47: Bezeichnung Der Teile
Bezeichnung der Teile Vorderseite Rückseite Riemenbefestigung ISO-Wahlrad Ein-/Aus-Schalter Modus-Wahlrad (Belichtungsmesswertspeicher/ Auslöser FE-Blitzbelichtungsspeicherung) Streuscheibe -Taste Zoom-Hebel Wahlrad für Belichtungskorrektur (Lichtmessung)/ (Sprung)-Taste (Manuelle Fokussierung)/ o-Taste (Blitz)/ r-Taste FUNC./SET Entriegelungstaste Objektiv-Fenster -Taste Verriegelung Stativgewinde MENU-Taste Objektiv-Fenster (Direktwahl)-Taste (Selbstauslöser)/ Da Schmutz oder Verunreinigungen auf dem p-Taste (Wiedergabe)-Taste Objektiv-Fenster auf Fotos zu sehen sind,... -
Seite 48: Vorbereitung Der Kamera
Vorbereitungen Vorbereitung der Kamera Entfernen Sie die Schlaufe der Kamera. Vergewissern Sie sich, dass die Kamera ausgeschaltet ist; öffnen Sie den Speicherkarten-/Batterie-/ Akkufachdeckel. Schlaufe Legen Sie die Batterien/Akkus und die Speicherkarte ein. • Informationen zum Einsetzen von Batterien/Akkus und Speicherkarten entnehmen Sie bitte dem Kamera- Benutzerhandbuch. - Seite 49 Wenn Sie bei angebrachter Schlaufe die Kamera in das wasserdichte Gehäuse einlegen, kann die Schlaufe im wasserdichten Gehäuse eingeklemmt werden und zu Undichtigkeiten führen. Verwenden Sie die Schlaufe der Kamera Öse zum Anbringen nicht für das wasserdichte Gehäuse. der Handschlaufe Vorbereitung des wasserdichten Gehäuses Befestigen Sie den Schulterriemen...
- Seite 50 Benutzen Sie den Schulterriemen, wenn Sie die Kamera am Strand tragen. Vor dem Einsatz unter Wasser nehmen Sie den Schulterriemen ab und bringen die Handschlaufe an. Es besteht die Gefahr, dass sich der Schulterriemen verfängt und zu Strangulation oder anderen Zwischenfällen führt.
-
Seite 51: Einsetzen Der Kamera
Einsetzen der Kamera Tragen Sie eine dünne Schicht Silikon-Paste Öffnen Sie den LCD-Monitor und auf den gesamten Dichtungsring auf, bevor setzen Sie die Kamera wie Sie das wasserdichte Gehäuse verwenden, um Verschleiß und Schäden zu vermeiden. abgebildet in das wasserdichte Gehäuse ein. - Seite 52 Fotografieren Schließen Sie das wasserdichte Gehäuse. Anzeigelampe Modus-Wahlrad • Stellen Sie sicher, dass die Dichtung und ihre Kontaktflächen frei von Ablagerungen Zoom-Hebel (z. B. Sand, Schmutz oder Haaren) sind. Auslöser Ein einziges Haar oder Sandkorn in der Dichtung kann Lecks verursachen. •...
- Seite 53 Stellen Sie den gewünschten Aufnehmen bei Einstellung des Modus- Modus mit dem Modus-Wahlrad ein. Wahlrads auf E, G, M, B oder D Sie können den Weißabgleich für die obigen Nehmen Sie die gewünschten Modi mithilfe des Menüs FUNC. auf S Einstellungen vor.
- Seite 54 Wählen Sie den Bildausschnitt mit Verwendung des Einstellungs-Wahlrads dem LCD-Monitor. Drücken Sie den Das Einstellungs-Wahlrad wird in Verbindung Auslöser halb hinunter, und warten mit dem wasserdichten Gehäuse ein wenig Sie, bis die obere Anzeigelampe anders verwendet als bei der Kamera selbst. grün oder orange leuchtet.
-
Seite 55: Handhabung Des Blitzes
Handhabung des Blitzes Fügen Sie die Kante der Streuscheibe Für eine gleichmäßige Lichtverteilung des wie abgebildet in die Aussparung ein. Blitzlichts verwenden Sie die Streuscheibe. • Vermeiden Sie Kratzer auf der Oberfläche der Streuscheibe, da dies die gleichmäßige Streuung des Blitzlichts verringert. •... - Seite 56 Wiedergabe Drücken Sie die Taste Wenn keine weitere Wiedergabe (Wiedergabe). erfolgen soll, schalten Sie die Kamera aus. Ein-/Aus-Schalter Denken Sie nach dem Gebrauch des wasserdichten Gehäuses daran, die Kamera aus diesem herauszunehmen. Wenn die (Wiedergabe) Kamera in dem wasserdichten Gehäuse -Taste verbleibt und direkter Sonneneinstrahlung oder hohen Temperaturen ausgesetzt wird,...
-
Seite 57: Herausnehmen Der Kamera
Herausnehmen der Kamera • Waschen Sie das Innere des Trocken Sie das wasserdichte wasserdichten Gehäuses nicht mit Wasser. Gehäuse nach Gebrauch Wischen Sie es mit einem weichen, unbedingt gründlich ab. trockenen Tuch ab. • Entfernen Sie Schmutz, Sand, Haare und andere Ablagerungen vom wasserdichten Gehäuse, und waschen Sie Salzrückstände mit klarem, fließenden... - Seite 58 Lagerung • Lagern Sie das wasserdichte Gehäuse sorgsam und in geöffnetem Zustand; dies verhindert, dass sich der Dichtungsring verformt und die Wasserdichtigkeit beeinträchtigt wird. • Schützen Sie die Dichtung während der Lagerung vor Staub oder Kratzern. • Lagern Sie das wasserdichte Gehäuse nicht an heißen, kalten oder feuchten Orten, oder in der Nähe von chemischen Substanzen wie Naphthalin oder Insektiziden.
-
Seite 59: Technische Daten
* Einschließlich Streuscheibe Wasserabdich- Dichtungsring, O-Ring • Alle hier angegebenen Daten basieren auf den tung: usw. Teststandards von Canon. • Änderungen am Aussehen und an den Hauptmaterialien: Polykarbonat, ABS, Spezifikationen des Produkts können jederzeit klares Flachglas, EPDM ohne vorherige Benachrichtigung usw. - Seite 60 • A pesar de que no se han escatimado esfuerzos para garantizar que la información de esta guía sea precisa y completa, Canon Inc. no se hace responsable de los errores u omisiones que pudiera haber. Canon se reserva el derecho a cambiar en cualquier momento y sin previo aviso las especificaciones del hardware y software aquí...
- Seite 61 Realice una comprobación funda impermeable, usted podrá utilizar su similar después de haber instalado la cámara digital Canon bajo la lluvia, en la playa cámara. Si se infiltra agua, póngase en o en pistas de esquí. También podrá utilizarla contacto con el Centro de Atención al...
-
Seite 62: Contenido Del Embalaje
Contenido del embalaje Accesorio opcional La funda impermeable se envía con los • Lastre para Funda impermeable Canon accesorios indicados a continuación. WW-DC1 Compruebe ahora si su paquete está completo. Cuando utilice la funda impermeable para Si falta algo, póngase en contacto con su hacer fotos debajo del agua, el lastre evitará... -
Seite 63: Precauciones De Seguridad
Precauciones de seguridad • No utilice la correa de cuello bajo el agua. Extraiga la correa de cuello y coloque la correa Antes de utilizar la funda impermeable, lea de muñeca antes de utilizarla debajo del agua. detenidamente estas precauciones para poder Existe el peligro de que la correa de cuello usarla correctamente. -
Seite 64: Precauciones De Manejo
Precauciones de manejo • No dañe la junta hermética, no raye sus superficies de contacto, ni permita que se • No deje caer ni lance la funda impermeable. acumule suciedad, arena, pelos, ni otros restos • Utilice solamente la grasa de silicona entre la junta hermética y la funda. - Seite 65 Seque bien el interior de la funda impermeable y alrededor de la ranura de montaje. Verifique la cámara. Póngase en contacto con su Centro la junta hermética para cerciorarse de que de atención al cliente Canon. funciona.
-
Seite 66: Cuidado Y Mantenimiento
Para asegurar la hermeticidad de la funda impermeable, se recomienda reemplazar anualmente la junta hermética. Póngase en contacto con su Centro de atención al cliente Canon. Cuidado y mantenimiento • Lave el exterior de la funda impermeable con suficiente agua limpia y fresca (agua corriente a menos de 30 °C/ 86 °F, etc.), lo antes posible... -
Seite 67: Parte Frontal
Componentes Parte frontal Parte posterior Anillas para la correa Dial de modo Botón de encendido Dial de ISO Botón de Dial de Botón (Bloqueo AE/Bloqueo FE) disparo compensación Placa de Botón (Medición de luz)/ Palanca de de la exposición difusión (Salto) zoom Botón... -
Seite 68: Preparación De La Cámara
Preparativos Preparación de la cámara Quite la correa de la cámara. Compruebe que la cámara está apagada y abra la tapa de la batería o la ranura de la tarjeta de Correa memoria. Inserte la batería y la tarjeta de memoria. - Seite 69 Si introduce la cámara mientras la correa está colocada, podría quedar pillada en la junta hermética de la funda impermeable y causar la infiltración de agua. No utilice la correa de la cámara como correa para la funda impermeable. Cuando coloque la correa de muñeca Preparación de la funda impermeable Fije la correa de cuello a las anillas...
- Seite 70 Deslice el interruptor de bloqueo como se muestra y suelte el cierre para abrir la cubierta trasera. • Cuando utilice productos contra condensación que se pueden adquirir en el mercado, la solución contra condensación se deberá aplicar sólo a la superficie interior del objetivo usando un paño suave.
-
Seite 71: Instalación De La Cámara
Instalación de la cámara Aplique una fina capa de grasa a toda la junta antes de utilizar la funda impermeable a fin Abra la pantalla LCD e introduzca de evitar la abrasión y el deterioro. la cámara en la funda impermeable En cuanto a las precauciones de manejo de tal como se muestra. - Seite 72 Fotografiado Cierre la funda impermeable. • Cerciórese de que la junta hermética y sus superficies de contacto estén libres de Dial de modo Indicador restos (p. ej., arena, suciedad o pelos). Palanca de zoom Si quedase pillado un solo pelo o un diminuto grano de arena en la junta Botón de disparo hermética, podría producirse una...
- Seite 73 Ajuste el conmutador de modo al Fotografiado con el dial de modo ajus- modo deseado. tado a E, G, M, B o D Usted podrá ajustar el balance de blancos a Realice los ajustes requeridos. S (Bajo el agua) utilizando el menú FUNC. •...
- Seite 74 Utilice la pantalla LCD para Utilización del dial de control encuadrar el motivo. Presione el La utilización del dial de control con la funda botón de disparo hasta la mitad de impermeable es un tanto diferente a la de la su recorrido y espere hasta que el propia cámara.
- Seite 75 Utilización del flash Para distribuir uniformemente la luz procedente del flash, fíjele la placa de difusión. • No raye la superficie de la placa de difusión, ya que esto podría evitar que la luz se Placa de difusión difundiese adecuadamente. •...
- Seite 76 Extracción de la placa de difusión Reproducción Levante y extraiga la placa de difusión de la forma que se muestra. Presione el botón (Reproducir). Botón de encendido Botón (Reproducir) Cuando haya terminado de utilizar la cámara, apáguela. Después de usar la funda impermeable, retire la cámara.
- Seite 77 Extracción de la cámara Después de haber utilizado la cámara, cerciórese de secar completamente el agua de la funda impermeable. • Elimine la suciedad, los pelos y demás partículas de la funda impermeable y lávela con agua corriente limpia para eliminar los depósitos de sal.
- Seite 78 Almacenamiento • Guarde la funda impermeable con cuidado, dejándola abierta para impedir que la junta hermética se deforme y para mantener el efecto impermeable. • Proteja la junta hermética contra el polvo y los arañazos durante el almacenamiento. • No guarde la funda impermeable en un lugar ni cálido, ni frío, ni húmedo ni cerca de substancias tales como naftalina o insecticidas.
-
Seite 79: Especificaciones
Policarbonato, ABS, cristal • Todos los datos indicados se basan en los plano claro, EPDM, etc. niveles de prueba de Canon. Temperatura de utilización de la cámara: • Las especificaciones y la apariencia del De 0 a 40 °C (De 32 a 104 °F) producto están sujetos a cambio sin previo... - Seite 80 Français Clause de non-responsabilité • Canon a apporté tout le soin requis afin de garantir l’exactitude et l’exhaustivité des informations contenues dans ce manuel, mais ne peut être tenue responsable des éventuelles erreurs ou omissions. Canon se réserve le droit de modifier à tout moment les caractéristiques du matériel et des logiciels décrits, sans avis préalable.
- Seite 81 étanche, vous pouvez l’utiliser sous la pluie, Canon. aux sports d’hiver ou à la plage. Vous pourrez • Canon Inc., ses filiales et succursales, ainsi que même l’utiliser sous l’eau jusqu’à 40 mètres les distributeurs du boîtier étanche déclinent (130 pieds) de profondeur et dans un toute responsabilité...
-
Seite 82: Contenu De L'emballage
Contenu de l’emballage Vendu séparément Le boîtier étanche est fourni avec les articles • Poids du boîtier étanche Canon WW-DC1 suivants. Vérifiez qu’ils figurent dans l’emballage Les poids empêchent le boîtier étanche de et contactez votre revendeur Canon si l’un flotter lorsque vous prenez des photos sous d’entre eux devait manquer. -
Seite 83: Précautions De Sécurité
Précautions de sécurité • N’utilisez pas ce boîtier étanche à une profondeur supérieure à 40 mètres (130 pieds). Avant d’utiliser le boîtier étanche, lisez Le boîtier pourrait ne pas fonctionner attentivement ces précautions afin d’en faire un correctement, être endommagé ou subir des usage correct. -
Seite 84: Précautions D'emploi
• Ne laissez pas le boîtier étanche en plein soleil, • La durée de vie des batteries diminue par dans une voiture par temps chaud ou près d’un temps froid. Si vous utilisez le boîtier dans un appareil de chauffage car le boîtier pourrait se endroit très froid, protégez-le en le plaçant gondoler, entraînant une perte d’étanchéité. -
Seite 85: Joint D'étanchéité
• Pour retirer le joint du boîtier étanche, étanche ainsi que l’appareil photo numérique et utilisez vos doigts de façon à ne pas contactez le service clientèle Canon. l’endommager (comme illustré sur la Fig. 1). N’utilisez pas vos ongles, des objets pointus ou métalliques pour retirer le joint. - Seite 86 Essuyez peut provoquer une infiltration d’eau dans le aussi l’intérieur du boîtier avec un chiffon doux boîtier. Contactez le service clientèle Canon. et sec. Ne le lavez pas à l’eau. Pour que le boîtier reste toujours bien étanche, il est recommandé...
-
Seite 87: Face Avant
Désignations Face avant Face arrière Attaches du collier Molette modes Déclencheur Bouton d’alimentation Molette ISO Plaque de Levier du diffusion Molette de Bouton (Mémorisation zoom correction de d’exposition/Mémorisation l’exposition d’exposition au flash) Bouton (Mesure de lumière)/ (Saut) Bouton (Mise au point manuelle)/ o (Flash)/ r Bouton... -
Seite 88: Préparation De L'appareil Photo
Préparatifs Préparation de l’appareil photo Retirez le collier de l’appareil photo. Vérifiez que l’appareil photo est éteint et ouvrez le couvercle du logement de la carte mémoire/ batterie. Collier Insérez la batterie et la carte mémoire. • Reportez-vous également au Guide d’utilisation de l’appareil photo pour en savoir plus sur l’installation de la batterie et de la carte mémoire. - Seite 89 Si vous insérez l’appareil photo alors que le collier est attaché, il risque de se coincer dans le joint d’étanchéité lors de la fermeture du boîtier étanche et d’entraîner des infiltrations d’eau. N’utilisez pas le collier de l’appareil photo Pour attacher la comme collier pour le boîtier étanche.
- Seite 90 Faites glisser le bouton de verrouillage comme indiqué sur l’illustration et libérez le cliquet pour ouvrir le couvercle arrière. • Lors de l’utilisation de produits anti-buée en vente dans le commerce, la solution anti- buée ne doit être appliquée que sur la surface intérieure de la fenêtre de l’objectif à...
- Seite 91 Mise en place de l’appareil photo Pour éviter l’usure du joint d’étanchéité, enduisez toute la surface du joint d’une fine Ouvrez l’écran LCD et insérez couche de graisse. l’appareil photo dans le boîtier Pour de plus amples informations concernant étanche, comme indiqué. les précautions de manipulation du joint d’étanchéité, reportez-vous à...
- Seite 92 Prise de vue Refermez le boîtier étanche. • Assurez-vous que le joint d’étanchéité et ses surfaces de contact ne sont pas Molette modes Voyant souillés par des saletés (grains de sable, Levier du zoom poussières, cheveux). Un minuscule grain de sable ou un cheveu sur le joint Déclencheur peut entraîner des infiltrations d’eau.
- Seite 93 Positionnez la molette de sélection Prise de vue quand la molette modes des modes jusqu’au mode est réglée sur E, G, M, B ou D souhaité. Vous pouvez régler la balance des blancs sur S (Sous-marin) en utilisant le menu FUNC. Faites les réglages nécessaires.
- Seite 94 Utilisez l’écran LCD pour Utilisation de la molette de sélection composer la prise de vue. Appuyez L’utilisation de la molette de sélection avec le à mi-course sur le déclencheur et boîtier étanche diffère légèrement de celle attendez que le voyant supérieur avec l’appareil photo seul.
-
Seite 95: Utilisation Du Flash
Utilisation du flash Pour une répartition uniforme de la lumière, fixez la plaque de diffusion. • Ne rayez pas la surface de la plaque de diffusion car cela pourrait empêcher le flash Plaque de diffusion d’être diffusé correctement. • Lors de la prise de vue au flash, certaines parties de l’image peuvent être sombres. - Seite 96 Retrait de la plaque de diffusion Lecture Soulevez et retirez la plaque de diffusion comme indiqué. Appuyez sur le bouton (Lecture). Bouton d’alimentation Bouton (Lecture) Lorsque vous avez fini d’utiliser l’appareil, éteignez-le. Lorsque vous n’utilisez plus le boîtier étanche, veillez à en sortir l’appareil photo. Si vous laissez l’appareil photo dans le boîtier étanche et que vous laissez celui-ci en plein soleil ou à...
- Seite 97 Retrait de l’appareil photo Prenez soin d’enlever toute trace d’eau du boîtier étanche. • Enlevez la poussière, les cheveux et autres particules du boîtier étanche et lavez-le à l’eau courante pour éliminer les dépôts de sel. Faites glisser le bouton de verrouillage comme indiqué...
- Seite 98 Stockage • Rangez soigneusement le boîtier étanche ouvert pour éviter de déformer le joint d’étanchéité et préserver ses performances d’étanchéité. • Protégez le joint d’étanchéité contre la poussière et les éraflures pendant les périodes d’inactivité. • Ne rangez pas le boîtier étanche dans un endroit chaud, froid ou humide, ou à...
-
Seite 99: Fiche Technique
Matériaux : Polycarbonate, ABS, plaque • Toutes les données indiquées ici reposent sur de verre transparente, les normes d’essai de Canon. EPDM, etc. • Les caractéristiques techniques et l’aspect sont Température d’utilisation de l’appareil photo : susceptibles d’être modifiés sans préavis. - Seite 100 Canon. • Canon non risponde dei danni derivanti da alterazioni o perdite di dati dovute ad un uso errato o al malfunzionamento del prodotto, del software, delle schede di memoria, dei personal computer o delle periferiche.
- Seite 101 Canon più vicino. Potete anche utilizzarla sott’acqua fino a 40 • Canon Inc., le sue consociate e affiliate e i metri di profondità e in ambienti umidi o distributori della Custodia Impermeabile non polverosi.
-
Seite 102: Precauzioni Di Sicurezza
Se dovesse Precauzioni di sicurezza mancare qualcosa, contattate il rivenditore Prima di utilizzare la Custodia Impermeabile, Canon da cui avete acquistato la Custodia leggete accuratamente queste precauzioni per Impermeabile. utilizzarla in modo sicuro. • Custodia Impermeabile Le precauzioni descritte sotto riportano •... - Seite 103 • Non utilizzate la cinghia da collo nell’acqua. materiale si depositi tra la Guarnizione Prima di utilizzare la Custodia in acqua, Impermeabile e la custodia. Potrebbero rimuovete la cinghia da collo e montate la verificarsi infiltrazioni d’acqua. cinghia da polso. La cinghia da collo potrebbe •...
-
Seite 104: Precauzioni Di Impiego
Precauzioni di impiego • Il repentino spostamento della Custodia Impermeabile da un luogo caldo a uno freddo • Non fate cadere la Custodia Impermeabile. può causare la formazione di condensa (gocce • Utilizzate solamente il grasso al silicone fornito. d’acqua) sulle sue superfici interne. In questo L’utilizzo di altri prodotti impermeabilizzanti caso, smettete immediatamente di utilizzare la potrebbe diminuire la resistenza della Custodia... - Seite 105 Impermeabile e la fotocamera digitale. • Usate le dita per rimuovere la guarnizione Contattate il Centro Assistenza Canon più vicino. dalla Custodia Impermeabile così da non danneggiarla (come mostrato in Fig. 1). Non infilate le unghie nella guarnizione e non usate oggetti appuntiti o metallici per rimuoverla.
- Seite 106 Pulite la parte interna della custodia Contattate il Centro Assistenza Canon più vicino. con un panno morbido e asciutto. Non lavatela con acqua. Per mantenere l’impermeabilità della Custodia Impermeabile, vi raccomandiamo di sostituire la guarnizione una volta all’anno.
-
Seite 107: Parte Anteriore
Componenti Parte anteriore Parte posteriore Gancetti per l’inserimento della cinghia Ghiera di selezione Pulsante di alimentazione Ghiera di ISO Ghiera di Pulsante di Pulsante (Blocco AE/Blocco FE) compensazione scatto Pulsante (Lettura luce)/ esposizione Leva dello Diffusore (Salto) zoom Pulsante (Messa a fuoco manuale)/ o (Flash)/ r Pulsante... - Seite 108 Preparazioni Preparazione della fotocamera Rimuovete la cinghia della fotocamera. digitale Controllate che la fotocamera sia spenta e aprite lo slot della scheda di memoria/coperchio della Cinghia batteria. Inserite la batteria e la scheda di memoria. • Per informazioni sui metodi di installazione della batteria e della scheda di memoria, consultate la Guida dell’utente della fotocamera.
- Seite 109 L’inserimento della fotocamera con la cinghia attaccata potrebbe intrappolare la cinghia nella Custodia Impermeabile e causare infiltrazioni. Non utilizzate la cinghia della fotocamera come cinghia per la Custodia Impermeabile. Per applicare la Cinghia da polso Preparazione della Custodia Impermeabile Fissate entrambe le estremità della cinghia da collo agli appositi gancetti come indicato, e regolatela a una lunghezza...
- Seite 110 Spostate l’interruttore di blocco come mostrato nell’illustrazione, e rilasciate il fermo per aprire il coperchio posteriore. • Quando utilizzate prodotti anticondensa, disponibili in commercio, applicate la soluzione anticondensa solo all’interno della finestra dell’obiettivo, usando un panno morbido. Se la soluzione anticondensa viene a contatto con una superficie che non sia quella della finestra dell’obiettivo, strofinatela via...
- Seite 111 Installazione della fotocamera Prima di usare la Custodia Impermeabile, digitale applicate uno strato sottile di grasso su tutta la guarnizione in modo da prevenire rischi di Aprite il monitor LCD e inserite la abrasioni e deterioramento. fotocamera nella Custodia Per le precauzioni su come maneggiare la Impermeabile, come illustrato.
- Seite 112 Ripresa Chiudete la Custodia Impermeabile. • Assicuratevi che non vi sia alcun materiale estraneo sulla Guarnizione Impermeabile e Ghiera di selezione Indicatore sulle sue superfici di contatto (ad es. Leva dello zoom sabbia, polvere o capelli). Anche un solo capello o un granellino di sabbia Pulsante di scatto depositatosi sulla guarnizione potrebbe essere causa d’infiltrazioni.
- Seite 113 Impostate il selettore di modalità Fotografare quando la ghiera di sulla modalità desiderata. selezione è posizionata su E, G, M, B o D Regolate le impostazioni come Usando il menu FUNC. per le suddette richiesto. modalità, potete regolare il bilanciamento del •...
- Seite 114 Utilizzate il monitor LCD per • Anche se impostate il selettore di modalità su 8, non potrete scattare le fotografie comporre lo scatto. Premete il pulsante di scatto fino a metà correttamente poiché non potete utilizzare corsa ed attendete fino a quando la funzione di ricerca.
- Seite 115 Utilizzo del Flash Per distribuire uniformemente la luce del flash, fissate il diffusore. • Non graffiate la superficie del diffusore, perché ciò potrebbe impedire alla luce del Diffusore flash di diffondersi correttamente. • Quando si usa il flash, nell’angolo inferiore destro dell’immagine potrebbe apparire un’ombra.
-
Seite 116: Rimozione Del Diffusore
Rimozione del diffusore Riproduzione Sollevate e rimuovete il diffusore. Premete il pulsante (Riproduzione). Pulsante di alimentazione Pulsante (Riproduzione) Al termine dell’utilizzo della fotocamera, spegnetela. Dopo aver usato la Custodia Impermeabile, rimuovete la fotocamera dalla stessa. Se lasciate la custodia con la fotocamera all’interno, esposta alla luce solare diretta o in un luogo molto caldo, potrebbero verificarsi un incendio o la custodia potrebbe scoppiare. - Seite 117 Rimozione della fotocamera digitale • Non lavate la parte interna della Custodia Dopo l’utilizzo, asciugate Impermeabile con acqua. Pulitela con un completamente la Custodia panno morbido e asciutto. Impermeabile. • Togliete ogni traccia di sporco, sabbia, capelli o altri detriti dalla Custodia Impermeabile e lavatela con acqua corrente di rubinetto per rimuovere i depositi di sale.
- Seite 118 Conservazione • Riponete la Custodia Impermeabile con cura, lasciandola aperta per evitare che la Guarnizione Impermeabile si deformi e per mantenere la sua impermeabilità. • Proteggete la Guarnizione Impermeabile da polvere o da scalfiture durante la conservazione. • Non conservate la Custodia Impermeabile in luoghi caldi, freddi o umidi, o vicino a sostanze come naftalina o insetticidi.
-
Seite 119: Specifiche Tecniche
* Incluso il diffusore Guarnizione, anello di • Tutti i dati elencati qui si basano su standard di tenuta, ecc. collaudo di Canon. Materiali principali: • Le specifiche di prodotto e l’aspetto sono soggetti a modifiche senza preavviso. Policarbonato, ABS, vetro trasparente, EPDM, ecc. - Seite 120 中文 免责声明 • 本说明书所包含的数据已力求内容的正确与完整,如有任何错误或遗漏恕不承担任何责任。佳能公 司保留随时变更本说明书所提及的硬件及软件的规格的权利而无须事先声明。 • 未经佳能公司事先书面授权,不得以任何形式,任何手段将本说明书的任何部分复制、传输、转录、 存储于可检索系统中或翻译为任何语言。 • 佳能公司对于因本相机、软件、存储卡、个人计算机、外围设备的错误使用或故障而导致的数据损 毁或遗失所带来的损失,不负任何责任。 版权所有 © Canon Inc. 2009 保留所有权利。...
- Seite 121 请仔细阅读本说明书,以确保您能正确地使用本 • 使用前,请务必检查本防水套是否能正常操 防水套。 作并确保不漏水。将相机装入防水套之前, 并请在读完后妥善保存本说明书,以备日后查阅。 先关闭防水套,将防水套浸入水深约 15 厘米 处三分钟左右,检查是否漏水。装入相机后 简介 请执行同样防漏检查程序。 • 竭诚感谢购买本商品。将防水套装在佳能数码相 如果漏水,请与佳能热线中心联系。 机上后,您可在下雨时或在海滩、滑雪场拍摄。 • 佳能、佳能的子公司和分支机构以及防水套的经 并可在水深 40 米以内的水中以及潮湿或多尘的 环境下进行拍摄。 销商对于因错误操作防水套、相机、电池或存储 卡,或者因为这些产品的故障造成的无法记录图 像,引起的数据损坏或丢失而带来的任何后果概 不负责。 • 也请仔细阅读相机随附的 相机使用说明书 。...
- Seite 122 检查包装内的物品 另购件 • 佳能防水罩配重器 WW-DC1 本产品的包装中应有下列产品。请检查包装中的 物品以确认其是否齐全。如果产品不齐全,请与售 使用防水套在水下拍摄照片时,配重器可防止防 出该产品的佳能经销商联系。 水套漂浮。有关推荐安装的配重器数量的详细说 • 防水套 明,请参阅主要规格 (第 18 页) 。有关安装方 • 背带 式的详细说明,请参阅配重器使用者指南。 • 腕带 • 扩散闪光板 • 防水封条用硅润滑脂 • 使用说明书 (本书)...
- Seite 123 • 请勿损坏防水封条,擦伤其接触表面,或让脏 安全注意事项 物、沙尘、毛发或其他异物积聚在防水封条和防 使用前请仔细阅读这些安全注意事项,以确保您 水套之间。这可能会导致漏水。 能正确使用本产品。 • 请勿在水温超过40℃的水中使用本产品。 否则可 此处所列的注意事项是为了用户能安全正确地使 能会受热变形、引致漏水。 用本产品,防止您或他人遭受危害或损失。请完全 • 请勿放在阳光直射的地方,加热器附近或炎热天 理解其内容后,再阅读本说明书的其余部分。 气下的汽车内。否则可能会使外壳受热变形,引 • 使用防水套后,请务必从中取出相机。如果将装 致漏水。在阳光直射的地方请盖上毛巾等遮挡阳 有相机的防水套放在直射阳光下或高温处时,可 光。 能会导致起火或使防水套爆裂。 • 请勿将防水套当作个人漂浮装置 (救生衣)使 用。 • 请勿在水中使用背带。在水中使用前,请解下背 带并系上腕带。否则会有背带缠绕引起窒息或其 他伤害的危险。 • 请勿在水深超过40米的水中使用本产品。 否则可 能会导致防水套故障、损坏或漏水。 • 在水中时,请勿用过大的力按压防水套的按钮或 杆。否则可能会使外壳变形,引致漏水。 • 在清洗时,请勿用湍急的自来水冲洗防水封条, 否则可能会导致漏水。...
- Seite 124 使用时的注意事项 关于漏水 • 请勿投掷或摔落防水套。 如果防水套漏水,请立即停止拍摄。如果在这种情 • 请勿使用所附的硅润滑脂之外的防水产品,否则 况下继续使用,可能会导致起火或引起触电。故在 可能会降低防水套的防水强度。若意外沾上时请 这种情况下切勿继续使用。请彻底擦干防水套内 立即擦去。 部和相机的水分,请联系佳能热线中心。 • 请尽量避免在水边打开或关闭防水套。应在湿度 防水封条 低,海风吹不到的地方安装相机、更换存储卡或 电池等。 • 沾在防水封条上的异物 (例如沙尘、脏物或毛 • 请避免长时间在高温环境下使用本产品。 发)可能会造成漏水。封条上的一丝毛发或一粒 • 在寒冷的地区使用时,请将电池放入包中保温, 细沙也会造成漏水。 只在拍摄时取出使用(在寒冷地区,电池的使用 • 要取出防水套的防水封条时,请用手指进行 寿命会缩短) 。不建议在周围温度低于 0 ℃的条 (请参照图 1) ,才不会损坏防水封条。切勿 件下使用本产品。 用指甲挑起,或使用尖利物或金属物取出防 • 短时间内在温差很大的场所间移动可能会使防 水封条。...
- Seite 125 保养方法 图 1 防水封条 • 使用后请尽快用足够的清水 (低于30℃的自来水 等)彻底清洗防水套的外部。在海水中使用过 后,为了去除沉淀的盐分,建议在清水中浸泡几 小时。请确保已将扣环锁紧以防水分进入防水 套。清洗后,请用软布擦干防水套。为避免刮 伤,请勿在防水套上有任何沙子或砂砾时擦防水 套。如果盐分残留,金属部分可能会生锈或者按 钮难以按下。请用柔软干布擦拭防水套的内部, 不要用水洗涤。 • 注意请勿涂抹过多的润滑脂。将过多的润滑脂涂 抹 在 封 条 上 可 能 会 造 成 漏 水 (约 一 小 滴 已 足 够) 。 • 请勿用纸张或布片将润滑脂涂抹在封条上。 • 防水封条的损伤和裂缝可能会引致漏水。请联系 佳能热线中心。...
- Seite 126 部件 正面 背面 模式转盘 背带 / 腕带带扣 ISO 转盘 快门按钮 (自动曝光锁定 / 闪光曝光锁 电源键 扩散闪光板 定) 键 变焦杆 曝光补偿转盘 (测光方式) / (跳换) 键 (手动对焦) /o 键 (闪光灯) /r 键 FUNC./SET (功能 / 设置) 键 锁定开关 镜头窗 MENU (菜单) 键 扣环 三脚架螺丝孔...
- Seite 127 准备 准备相机 取下相机的系带。 确认相机电源已关闭, 然后打开存储 卡插槽 / 电池盖。 系带 插入电池和存储卡。 • 关于电池和存储卡的安装方式等信息, 请参 相机使用者指南 阅 。 • 请用已充足电的电池。 • 请确定您的存储卡上有足够的存储空间记录 图像。 存储卡...
- Seite 128 不取下系带时插入相机, 关闭防水套时系带可能会 夹在防水套中, 从而导致 漏水。 请勿将相机的系带用作防水套的系带。 腕带的装法 准备防水套 请如图所示将背带两端固定在背带带 扣上, 并调节至舒适长度 。 在海边时请使用背带携带相机。 在水中使用前, 请解下背带并系上腕带。 否则会有背带缠绕引 起窒息或其他伤害的危险。...
- Seite 129 将锁定开关往箭头方向移动, 解开扣 使用防水套之前, 请在整个封条上涂一层薄薄 环, 打开背盖。 的润滑脂, 以防擦伤和损坏。 • 使用市面销售的防结露产品时, 只能用软布 有关处理防水封条的注意事项, 请参照第 5 页 将防结露溶液涂抹在镜头窗的内表面。 如果 的 “防水封条” 。 防结露溶液沾在镜头窗内表面之外的地方, 请立即用软布将其擦去, 否则会损坏防水 1.把防水封条取出。 套。 2.用棉花球清除所有出现在封条上和防水套 的封条安装槽内的异物 (如脏物、 沙尘或 毛发等) 。 3.用手指沾上一小滴润滑脂。 4.将润滑脂均匀涂满整个防水封条表面, 注 意不要擦伤表面。 5.将防水封条装回防水套的安装凹槽内。...
- Seite 130 将相机插入防水套 关上防水套。 • 请检查防水封条和其接触面是否有异物 (沙 打开液晶显示屏, 然后如图所示将相 尘、 脏物或毛发等) 。 封条上的一丝毛发或 机插入防水套。 一粒细沙也会造成漏水。 • 请检查扣环是否锁紧。...
- Seite 131 拍摄 模式转盘 按电源键打开电源。 指示灯 变焦杆 将模式转盘设在所需模式。 快门按钮 根据需要, 进行各种设置。 • 按下 l (显示) 键, 打开液晶显示屏。 • 可用变焦杆调节变焦。 电源键 将特殊场景模式设为 S (潜水) 在水下拍摄时, 将特殊场景模式设为 S (潜 水) 可以获得更自然的色彩。 该模式选择了水 r 键 下光线最佳的白平衡, 同时抑制了蓝色调。 1.将模式转盘设为 (特殊场景模式) 。 2.按住 (快捷) 按钮时, 使用 q 或 r 按钮 l (显示)...
- Seite 132 当模式转盘设于 E、 G、 M、 B 或 • 如果节电功能启动并且关闭了相机电源,请 D 模式的拍摄方法 再次按下电源键。 • 不能用取景器拍摄照片。 相机在上述模式时, 可使用 FUNC. 菜单将白平 衡设于 S (潜水) 。 • 由于无法使用取景器,即使将模式开关设为 8 也无法正常拍摄图像。 或 请注意, 如果您将 (自定义白平衡 1 或 2) 的功能指定于 键, 进行手动设置白平衡 时, 只需按下一个按键便可。 使用控制转盘 建议使用此方法在各种拍摄环境下进行白平衡 加装防水套前后, 控制转盘的使用方法略有不 调整工作。...
- Seite 133 使用闪光灯 加装扩散闪光板 为了要使闪光灯的光线平均分布, 请加装扩散闪 将细绳如图穿过带扣。 光板。 • 切勿刮擦扩散闪光板表面,否则可能会阻碍 闪光灯光线均匀扩散。 • 当使用闪光灯拍摄时,部分图像可能会出现 阴影。在此情况下,请加装扩散闪光板来进行 扩散闪光板 拍摄。但是,如果拍摄目标太接近相机时,扩 散闪光板的效果可能不明显。 将扩散闪光板的边缘插入凹入处。 凹入处...
- Seite 134 取下扩散闪光板 播放 抬起并取下扩散闪光板。 按下 (播放) 键。 电源键 (播放) 键 相机用完后, 请关闭相机电源。 用完防水套后, 请务必取出相机。 将装有相机 的防水套放在阳光下直射或高温处, 可能会导 致起火或使防水套破裂。...
- Seite 135 取出相机 使用后, 请将沾在防水套上的水滴全 部擦干。 • 请将沾在防水套上的脏物、 沙子、 头发或其 他异物去掉, 并用清洁的流动的自来水冲掉 盐渍。 将锁定开关往箭头方向移动, 解开扣 环, 打开背盖, 取出相机。 • 打开防水套时, 请注意不要使水滴从身上或 头发上掉落进防水套内或相机上。 • 用软布擦拭防水套内部, 请勿用水洗涤。...
- Seite 136 存放时的注意事项 • 小心存放防水套,存放时将其展开,防止防水封 条变形,以维持其防水性能。 • 存放防水封条时请注意不要沾上灰尘,或擦伤防 水封条。 • 请勿将防水套存放在高温、低温、潮湿或放有卫 生球或防虫剂的地方。...
- Seite 137 规格 防水能力: 符合 IEC/JIS 防水保护规 格,相当于第 8 级 适用于 40 米深度內 防水结构: 防水封条、 O 形环等 主要材料: 聚碳酸脂、ABS、透明玻 璃片、EPDM 等 相机的操作温度: 摄氏 0-40 度 尺寸: 153.5 × 107.5 × 119.1 毫米 (不包括突出部分) 容积: 约 1150 立方厘米 约 575 克 (仅防水套 *) 重量:...
- Seite 138 MEMO...
- Seite 139 MEMO...
- Seite 140 MEMO...
- Seite 141 MEMO...
- Seite 142 MEMO...
- Seite 143 MEMO...
- Seite 144 MEMO...
- Seite 145 MEMO...
- Seite 146 FOR P.R.C. ONLY 进 口 商:佳能 ( 中国 ) 有限公司 进口商地址:北京市东城区金宝街 89 号金宝大厦 15 层 邮编 100005 日本制造 初版:2009.07 PRINTED IN JAPAN CDI-M442-010 XXXXXXXX © CANON INC. 2009 IMPRIMÉ AU JAPON...