Herunterladen Diese Seite drucken

Werbung

Verfügbare Sprachen
  • DE

Verfügbare Sprachen

  • DEUTSCH, seite 4
Bauanleitung
D
Notice de construction
F
Building instructions
GB
Instruzioni di montaggio 28 - 35
I
Instrucciones de montaje 36 - 43
E
RTF-Modell 40 MHz #
RTF-Modell 41 MHz #
RTF-Modell 35 MHz #
RTF-Modell 72 MHz #
1 3200
1 3201
1 3202
1 3203
04 - 11
12 - 19
20 - 27
1

Werbung

loading

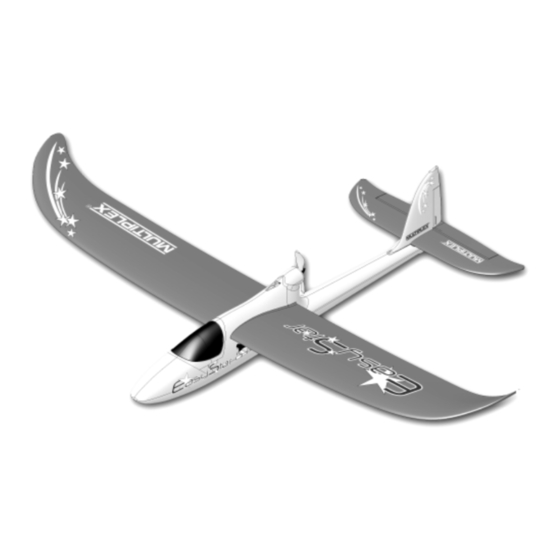
Inhaltszusammenfassung für Multiplex EasyStar RTF Serie

  • Seite 1 RTF-Modell 40 MHz # 1 3200 RTF-Modell 41 MHz # 1 3201 RTF-Modell 35 MHz # 1 3202 RTF-Modell 72 MHz # 1 3203 Bauanleitung 04 - 11 Notice de construction 12 - 19 Building instructions 20 - 27 Instruzioni di montaggio 28 - 35 Instrucciones de montaje 36 - 43...
  • Seite 3: Sicherheitshinweise

    Sicherheitshinweise Prüfen Sie vor jedem Start den festen Sitz des Motors und der Luftschrauben - insbesondere nach dem Transport, härteren Landungen sowie Abstürzen. Prüfen Sie ebenfalls vor jedem Start den festen Sitz und die richtige Position der Tragflächen auf dem Rumpf.
  • Seite 4: Zusätzlich Erforderlich

    # 1 3200 bis # 1 3203 Machen Sie sich mit dem Modell vertraut! MULTIPLEX - Modelle unterliegen während der Produktion einer ständigen Materialkontrolle. Wir hoffen, dass Sie mit dem Modell (sehr) zufrieden sind. Wir bitten Sie jedoch, alle Teile (nach Stückliste) vor Verwendung zu prüfen, da benutzte Teile vom Umtausch ausgeschlossen sind.
  • Seite 5 4. Den Einbau überprüfen Rumpf sicher, dass der Akku immer an derselben Stel- Alle Komponenten sollten am vorgesehenen Platz le positioniert wird. eingebaut und mit Klettband befestigt sein: Vorne in der Rumpfnase sitzt der Flugakku und dahin- ter der Empfänger. Achten Sie bereits bei der Positio- nierung dieser Bauteile auf die Schwerpunktvorgabe unter Punkt 6.
  • Seite 6 Garantie für die nächste Flugminute. 8. Sicherheit Sicherheit ist oberstes Gebot beim Fliegen mit Flug- Wir, das MULTIPLEX -Team, wünschen Ihnen beim modellen. Eine Haftpflichtversicherung ist obligatorisch. Bauen und später beim Fliegen viel Freude und Er- Falls Sie in einen Verein oder Verband eintreten, kön- folg.
  • Seite 7 Grundlagen am Beispiel eines Flugmodells Ein Flugzeug bzw. Flugmodell läßt sich mit den Rudern um folgende 3-Achsen steuern - Hochachse, Querachse und Längs- achse. Die Betätigung des Höhenruders ergibt eine Veränderung der Fluglage um die Querachse. Bei Seitenruderausschlag dreht das Modell um die Hochachse. Wird Querruder gesteuert, so rollt das Modell um die Längsachse. Da unser EasyStar V- Stellung im Tragflügel hat, kann hier auf Querruder verzichtet werden.
  • Seite 8 # 7 2270 Regler MULTIcont X-08 Diese Anleitung ist Bestandteil des Produktes. Sie beinhaltet wich- 2. Motoranschlusskabel des Reglers am Motor anlöten Das Motoranschlusskabel -durch „MOTOR“ auf dem Regler ge- tige Informationen und Sicherheitshinweise. Sie ist deshalb jeder- zeit griffbereit aufzubewahren und beim Verkauf des Produktes kennzeichnet- am Antriebsmotor anlöten: an Dritte weiterzugeben.
  • Seite 9 Bereich weniger Bedeutung, jedoch evtl. bei Ver- B: Empfänger wendung der Fernsteuerung in anderen Modellen. - 4 K-FM Empfänger - Wechselbarer Steckquarze Informieren Sie sich über das weitere MULTIPLEX/ - Leicht und kompakt HiTEC-Programm an Fernsteuerungen für Einsteiger, Hobby-Piloten und Expert bei Ihrem Fachhändler. C: Servos Diese Anleitung ist Bestandteil des Produktes.
  • Seite 10: Ladezustand

    IV. Inbetriebnahme und Anschluß a) Batteriemontage 1. Sender • Der Sender benötigt acht Batterien der Größe AA. Dies kön- nen entweder Trockenbatterien oder wiederaufladbare NiCd- Lesen Sie bitte den folgenden Abschnitt sorgfältig durch, be- Zellen sein. Letztere können mt dem optional erhältlichen vor Sie beginnen, die Ranger 3 FM Sky Anlage zu installie- HiTEC-Lader CG-22 über Nacht geladen werden.
  • Seite 11 3. Prüfung und Einstellungen Ist der Sender mit Batterien bestückt, sind die richtigen Quarze in Sender und Empfänger eingesteckt, Servos und evtl Regler am Empfänger angeschlossen und der Empfänger/Antriebsakku frisch geladen, dann steht der ersten Inbetriebnahme nichts mehr im Weg. Senderantenne voll ausziehen, Sender einschalten.
  • Seite 12 # 1 3200 bis # 1 3203 Familiarisez vous avec le kit d’assemblage! Le matériel utilisé pour la réalisation des pièces des kits MULTIPLEX est perpétuellement soumis à des contrôles pendant la phase de production. Nous espérons que vous êtes (pleinement) satisfait du contenu de ceux-ci.
  • Seite 13 4. Vérifier le montage Tous les éléments doivent se trouver aux emplacements prévus à cet effet et fixés avec du ruban adhésif : L’accu de vol se trouve devant dans le nez et, juste derrière, le récepteur. Veuillez lors du positionnement de ces éléments aux indications du centre de gravité...
  • Seite 14 Sécurité est un maître mot dans le monde de l’aéromodélisme. Une assurance est obligatoire. Dans Nous, le Team MULTIPLEX, vous souhaitons beaucoup le cas où vous êtes membre au sein d’un club, vous de plaisir et de succès pendant la construction et le pouvez y souscrire une assurance qui vous couvre pilotage.
  • Seite 15 Bases du pilotage d’un modèle réduit Un avion, comme un modèle réduit se pilote avec les gouvernes suivant 3 axes - l’axe vertiical, l’axe longitudinal et l’axe latéral. Une action sur la commande de profondeur conduit à une modification de la position de vol autour de l’axe latéral. Une action sur la gouverne de direction conduit à...
  • Seite 16 Mise en marche Alimentation du récepteur (BEC): 1. Connecter le câble de liaison (REC) du variateur au récepteur. BEC-Tension Pour les radio MULTIPLEX dont le canal 4= Gaz/Moteur 2. Pour les radios programmables, régler le débattement du servo BEC-Courant max. 1 A Gaz/Moteur à...
  • Seite 17 - prise de charge pour les accus 8 éléments NiCd vous équiperez d’autres modèles avec cette installation. de type AA - Quartz interchangeable à connecter Renseignez-vous sur notre programme MULTIPLEX/ - contrôle de charge de l’accu par LED HiTEC concernant les radiocommandes pour les B: Récepteur débutants, pilotes occasionnels ou confirmés, auprès...
  • Seite 18 IV. Mise en service et connexion a) Montage de l’accu 1. Emetteur - L’émetteur nécessite huit accus de la taille AA. Ceux- ci peuvent être des piles sèches ou des accus du type Lisez attentivement les prochains paragraphes avant éléments NiCd. Les dernières peuvent être chargées de démarrer l’installation du système de ou rechargées avec le chargeur HiTEC CG-22 en option.
  • Seite 19 3. Remarques importantes : - toujours mettre d’abord en marche l’émetteur puis le récepteur, le contraire pour l’arrêt de l’ensemble. Dans le cas d’une alimentation par l’accu de propulsion, la mise en marche ou l’arrêt du récepteur se fait en branchant/ débranchant l’accu ! - pour effectuer un test de fonctionnement, il ne faut pas encore installer les tringles de commande aux servos.
  • Seite 20 1. Examine your kit carefully! MULTIPLEX model kits are subject to constant quality checks throughout the production process, and we sincerely hope that you are (very) happy with the contents of your kit. However, we would ask you to check all the parts before you start construction, as we cannot exchange components which you have already worked on.
  • Seite 21 3. Adjusting the servo linkages This setting corresponds to about 78 mm from the Set the servos and the control surfaces to “neutral” root leading edge, measured on both sides of the (centre), then tighten the screws in the pushrod fuselage.
  • Seite 22 Safety is the First Commandment when flying any model aircraft. Third party insurance should be considered a We - the MULTIPLEX team - hope you have many hours basic essential. If you join a model club suitable cover of pleasure building and flying your new model.
  • Seite 23 Basic information relating to model aircraft Any aircraft, whether full-size or model, can be controlled around the three primary axes: vertical (yaw), lateral (pitch) and longitudinal (roll). When you operate the elevator, the model’s attitude alters around the lateral axis. If you apply a rudder command, the model swings around the vertical axis.
  • Seite 24 # 7 2270 Speed Controller MULTIcont X-08 These operating instructions are an integral part of the product, 1. Motor suppression: if the motor you wish to use is not and contain important information and safety notes. They should suppressed as standard, we strongly recommend the use of the therefore be kept accessible at all times, and must be passed on suppressor set # 8 5020, to avoid potential problems with to the new owner if you ever dispose of the product.
  • Seite 25: System-Layout

    I. Introduction II. Features and Specifications III. System Layout touch your dreams IV. Setting and Operation 1. Transmitter a. Loading Batteries b. Reading the LED Battery Indicators c. Recharging Nicad Batteries d. Changing Crystals ANGER III 2. Installation of Receiver and Servos 3.
  • Seite 26 1. Transmitter a. Loading Batteries arrow then lift up the cover You may use either Alkaline "AA" size batteries or 3rd · Load 8 AA batteries (Be sure the polarity is correct) party Nicad batteries. · Reinstall battery case with installed AA batteries. ·...
  • Seite 27 Transmitter, Receiver and Servo Settings Now we come to the critical part as proper installation of these components are essential. a. Checking Operation of the Servo After installation of the servo and receiver into your model is complete, turn the power "ON" the transmitter (fully extend the antenna) now turn on the receiver.
  • Seite 28 Prenda confidenza con il contenuto della scatola di montaggio! Le scatole di montaggio MULTIPLEX sono soggette, durante la produzione, ad un continuo controllo della qualità del materiale e siamo pertanto certi che Lei sarà (molto) soddisfatto con il modello. La preghiamo tuttavia, di controllare tutte le parti prima del loro utilizzo (consultando la lista materiale), poiché...
  • Seite 29 di questi componenti, cercare di rispettare il baricentro, come indicato al punto 6. Incollare nella posizione del pacco batteria e della ricevente la parte uncinata del velcro, sul fondo della fusoliera. Se il velcro non dovesse aderire a sufficienza, incollarlo ulteriormente con colla ciano.
  • Seite 30 Fare attenzione che la copertura assicurativa sia sufficiente (aeromodello con motore). Noi, il Suo team MULTIPLEX , Le auguriamo tanta Tenere i modelli ed il radiocomando sempre in perfetta soddisfazione e successo nella costruzione e più tardi efficienza.
  • Seite 31 Nozioni fondamentali Come ogni aereo, anche gli aeromodelli, possono muoversi, grazie ai timoni, intorno ai seguenti 3 assi – d’imbardata, di beccheggio e di rollio. Il movimento dell’elevatore fa variare la direzione di volo attorno all’asse di beccheggio. Muovendo il direzionale, il modello gira sull’asse d’imbardata.
  • Seite 32 11 W UNZIONAMENTO 1. Collegare il cavo del regolatore (BEC) alla ricevente (ad 8 celli ca. 5 W) Con impianti RC MULTIPLEX, al canale 4 = motore 2. Con radio programmabili, regolare la corsa per il Dimensioni (senza cavo) 10x21x6 mm motore al 100%.
  • Seite 33 - possibilità di cambiare il quarzo radio in un altro modello. - segnalazione batteria scarica con LED B: Ricevente Per altri componenti radio della gamma MULTIPLEX/ - 4 anali, FM HiTEC, adatti sia per il modellista principiante che - possibilità di cambiare il quarzo esperto, si rivolga al Suo rivenditore di fiducia.
  • Seite 34 a) inserire le batterie IV. Messa in funzione e regolazioni - Per funzionare, la radio necessita di 8 batterie tipo AA. Possono essere usate le comuni batterie usa e 1. Radio getta oppure batterie ricaricabili al NiCd. Queste Prima di installare l’impianto radio Ranger 3 FM Sky, ultime, possono essere caricate in una notte con il le leggere attentamente il seguente capitolo.
  • Seite 35 3. Regolare la radio, la ricevente ed i servi Prima della messa in funzione dell’impianto, controllare l’avvenuto inserimento delle batterie nella radio, l’inserimento dei quarzi giusti, il corretto collegamento dei servi ed eventualmente del regolatore di giri. Controllare inoltre che il pacco batteria della ricevente si carico. Estrarre completamente l’antenna della radio e accendere la radio.
  • Seite 36 ¡Familiarícese con el kit de montaje! Los kit de montaje MULTIPLEX están sometidos durante su producción a constantes controles de calidad de los materiales empleados. Esperamos que el modelo sea (muy) de su agrado. En cualquier caso, le pedimos que compruebe todas las piezas (según lista de piezas) antes de su uso, ya que las piezas usadas no serán...
  • Seite 37 4. Comprobar el montaje Todos los componentes deben estar colocados en el lugar previsto y con cinta adhesiva: La batería de vuelo va delante en el morro del fuselaje y detrás de ella irá el receptor. Mientras coloca éstas piezas, fijase en la indicación del centro de gravedad en el punto 6.
  • Seite 38 Coja confianza con las reacciones de su avión a MULTIPLEX están realizados de la práctica para la suficiente altura cuando se apague el motor. Simule práctica por experimentados pilotos de radio control. aterrizajes a gran altura, para cuando se quede sin ¡Vuele con sentido de la responsabilidad! Realizar...
  • Seite 39 Como funciona el ajuste se puede leer en las en grados de ángulo, con el que la cola se ajusta respecto al instrucciones de montaje de la emisora. MULTIPLEX Modellsport GmbH & Co.KG Neuer Weg 2 D-75223 Niefern-Öschelbronn www.multiplex-rc.de...
  • Seite 40 1. Conexión del cable de conexión del regulador (BEC) en el perdida de potencia con BEC max. 11 W receptor. En emisoras MULTIPLEX en el canal 4 = Gas/Motor (con 8 celulas apr. 5 W) 2. En emisoras programables ajustar el recorrido del servo de gas/ Tamaño (sin cable)
  • Seite 41 Indice I. introducción II. contenido y datos técnicos touch your dreams III. illustración IV. Poner en marcha y ajustes a) Montaje de la batería b) La carga de baterías NiCd ANGER III c) Cambio de cuarzos d) cambiar cuarzos 2. conectar el receptor y los servos 3.
  • Seite 42 IV. Puesta en funcionamiento con conexión a) Montaje de la batería - La emisora necesita ochos baterías del tamaño AA. Por favor, lea atentamente el siguiente párrafo antes Pueden ser baterías normales o de recarga de células de empezar a instalar el equipo Ranger 3 FM SkY . NiCd.
  • Seite 43 De ésta manera conseguirá el recorrido total para el vuelo. MULTIPLEX Modellsport GmbH & Co.KG Neuer Weg 2 D-75223 Niefern-Öschelbronn www.multiplex-rc.de...
  • Seite 44 MULTIPLEX Modellsport GmbH & Co.KG Neuer Weg 2 D-75223 Niefern-Öschelbronn www.multiplex-rc.de...