Multiplex ParkMaster PRO Anleitung
Verfügbare Sprachen
Verfügbare Sprachen
Quicklinks
Bauanleitung
D
Building instructions
GB
Notice de construction
F
Instruzioni di montaggio
I
Instrucciones de montaje
ES
Abbildungen
Illustrations
Illustrations
Illnstrazioni
Iiustraciónes
Erhältliche Varianten / Available versions / Version disponible / Varianti disponibili / Variantes disponibles
# 21 4275
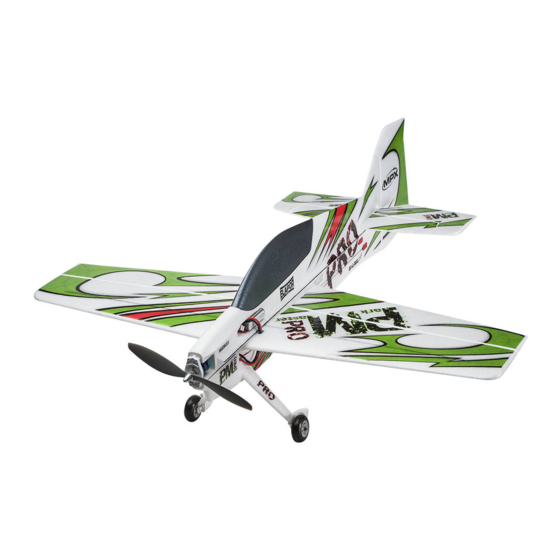
ParkMaster PRO
© Copyright by MULTIPLEX 2015
24 .. 29
48 + 49
# 26 4275
ParkMaster PRO
vorgesehen für den MULTIPLEX
Brushless-Antrieb
Designed for the MULTIPLEX
brushless power set
Ersatzteile
Replacement parts
Pièces de rechanges
Parti di ricambio
Repuestos
# 21 4275
ParkMaster PRO
# 33 2652
# 33 2652
2 ... 9
10 ... 17
18 ... 31
32 ... 39
40 ... 47
50 - 51
Version 1.0

Verwandte Anleitungen für Multiplex ParkMaster PRO


Inhaltszusammenfassung für Multiplex ParkMaster PRO
- Seite 1 48 + 49 Parti di ricambio Illnstrazioni Repuestos Iiustraciónes Erhältliche Varianten / Available versions / Version disponible / Varianti disponibili / Variantes disponibles # 21 4275 # 26 4275 ParkMaster PRO ParkMaster PRO © Copyright by MULTIPLEX 2015 Version 1.0...
- Seite 2 WERDEN! ABNEHMBARE KLEINTEILE DES MODELLS KÖNNEN VON KINDERN UNTER 3 JAHREN VERSCHLUCKT WERDEN. ERSTICKUNGSGEFAHR! Beim Betrieb des Modells müssen alle Warnhinweise der BETRIEBSANLEITUNG beachtet werden. Die Multiplex Mo- dellsport GmbH & Co. KG ist nicht haftungspflichtig für Verluste und Beschädigungen jeder Art, die als Folge falschen Betriebes oder Missbrauches dieses Produktes, einschließlich der dazu benötigten Zubehörteile entstehen.
- Seite 3 Modell, des Akkus und des Ladegerätes beachten, Elektronik vor Wasser schützen. Auf ausreichende Kühlung bei Regler und Akku achten. Die Anleitungen unserer Produkte dürfen nicht ohne ausdrückliche Erlaubnis der Multiplex Modellsport GmbH & Co. KG (in schriftlicher Form) - auch nicht auszugsweise in Print- oder elektronischen Medien reproduziert...
- Seite 4 Fehler und Nachlässigkeiten beim Bau und Betrieb können Personen- und Sachschäden zur Folge haben. Da der Hersteller keinen Einfluss auf ordnungsgemäßen Zusammenbau, Wartung und Betrieb hat, weisen wir ausdrücklich auf diese Gefahren hin. Auch wenn das Modell „ParkMaster PRO“ heißt, dürfen Sie im Park nur fliegen, wenn es erlaubt ist! Warnung: Das Modell hat, wie jedes Flugzeug, statische Grenzen! Sturzflüge und unsinnige Manöver im Unverstand können zum...
- Seite 5 Das ist in diesem Stadium am günstigsten. Kleben Sie also um die Haube mit Klebeband ab und 4. Seitenruder vorbereiten benutzen Sie am besten MULTIPLEX MULTIprimer # 60 An den Markierungen für die Scharniere 22 mit einem Klin- 2700 (dünn abwischen) und anschliessend MULTIPLEX genmesser mittig Schlitze einschneiden.
- Seite 6 Die Ruderhörner 23 wie in Abb. 8 gezeigt vorbereiten (1x der Wellensicherung 39 gesichert. links / 1x rechts) und in die Vertiefungen der Querruder Abb.18 6+7 einkleben. Sechskantmuttern mit einem Tropfen Klebstoff sichern! Zum Montieren der Wellensicherungen 39 legen Sie eine wenig geöffnete Zange wie in Abb.19 auf den Tisch und 6.
- Seite 7 Abtriebshebel des Servos einhängen. Servo in Neutral- 22. Propeller wuchten Der Propeller eines Modellflugzeuges muss gewuchtet stellung bringen und das Gestänge mit dem Inbus-Gewin- destift 27 im Gestängeanschluß 24 festklemmen. werden um rund und vibrationsfrei zu laufen. Die von uns Abb.
- Seite 8 Steigflug darf das Modell weder rechts noch links ausbre- Funktion aller Ruder! chen. Falls nicht den Seitenzug sinngerecht verändern. Lassen Sie sich jedoch nicht von eventuell vorhandenem Wir, das MULTIPLEX -Team, wünschen Ihnen beim Bauen Wind täuschen. und später beim Fliegen viel Freude und Erfolg. 31. Motorsturz MULTIPLEX Modellsport GmbH &...
- Seite 9 Stückliste KIT ParkMaster PRO # 21 4275 Lfd. Stück Bezeichnung Material Abmessungen Bauanleitung Papier 80g/m² DIN-A4 2 „A“ Dekorbogen bedruckte Klebefolie 500 x 750mm 2 „B“ Dekorbogen bedruckte Klebefolie 500 x 750mm Rumpf Elapor geschäumt Fertigteil Tragfläche links Elapor geschäumt Fertigteil Tragfläche rechts...
- Seite 24 2„A“ 2„B“ Abb. 1 14-17 27+42 Abb. 2...
- Seite 25 Abb. 3 Abb. 4 Abb. 5 Abb. 6 Abb. 7 Abb. 8 Abb. 9 Abb. 10...
- Seite 26 2x Servo Nano-KARBONITE # 6 5118 Abb. 11 Abb. 12 43(2x) 36+37 Abb. 14 Abb. 13 40+41 40+41 Abb. 15 Abb. 16 Abb. 17 Abb. 18...
- Seite 27 11+12 40+41 Abb. 19 Abb. 20 36+37 Abb. 21 Abb. 22 Abb. 23 Abb. 24 Abb. 25 Abb. 26...
- Seite 28 Abb. 27 Abb. 28 Abb. 29 Abb. 30 Servo Nano-KARBONITE # 6 5118 Abb. 31 Abb. 32 Abb. 33 Abb. 34...
- Seite 29 # 33 2652 110-120 Abb. 35 Abb. 36 4x Servo Nano Karbonite motor battery controller RX-5 light M-Link Abb. 37...
- Seite 52 MULTIPLEX Modellsport GmbH & Co.KG Westliche Gewerbestrasse 1 D-75015 Bretten-Gölshausen www.multiplex-rc.de...