Herunterladen Inhalt Inhalt Diese Seite drucken
Klarstein 10032863 Handbuch
Vorschau ausblenden Andere Handbücher für 10032863:

Werbung

Verfügbare Sprachen
  • DE

Verfügbare Sprachen

  • DEUTSCH, seite 1
Dunstabzugshaube
Range Hood
Campana extractora
Hotte aspirante
Cappa aspirante
10032863

Werbung

Inhaltsverzeichnis
loading

Inhaltszusammenfassung für Klarstein 10032863

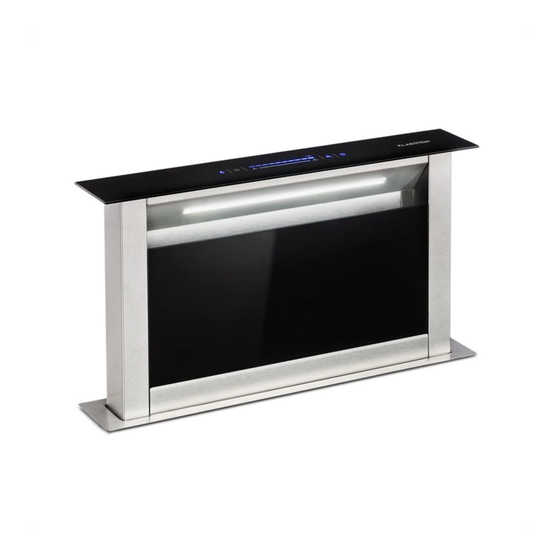
  • Seite 1 Dunstabzugshaube Range Hood Campana extractora Hotte aspirante Cappa aspirante 10032863...
  • Seite 3: Technische Daten

    Bedienungsanleitung und weitere Informationen rund um das Produkt zu erhalten. INHALT Technische Daten 3 Sicherheitshinweise 4 Montage 6 Bedienfeld 1 1 Reinigung und Pflege 13 Fehlerbehebung 15 Hinweise zur Entsorgung 16 TECHNISCHE DATEN Artikelnummer 10032863 Stromversorung 220-240 V~ 50 Hz...
  • Seite 4: Sicherheitshinweise

    SICHERHEITSHINWEISE • Lesen Sie sich alle Hinweise vor der Benutzung sorgfältig durch und bewahren Sie die Bedienungsanleitung zum späteren Nachschlagen gut auf. • Die Montagearbeiten dürfen nur von einem Elektrofachmann oder einer Fachkraft durchgeführt werden. Bevor Sie die Dunstabzugshaube verwenden, stellen Sie sicher, dass die Spannung (V) und die auf der Dunstabzugshaube angegebene Frequenz (Hz) der Spannung (V) und Frequenz (Hz) ihrer Stromversorgung entsprechen.
  • Seite 5 Wichtige Hinweise zum Abluftbetrieb WARNUNG Vergiftungsgefahr durch zurückgesaugte Abgase! Betreiben Sie das Gerät nicht im Abluftbetrieb, wenn es zusammen mit einer raumluftabhängigen Feuerstätte betrieben wird und keine ausreichende Luftzirkulation garantiert wird. Raumluftabhängige Feuerstätten, wie Gas-, Öl-, Holz- oder Kohleheizungen, Boiler oder Durchlauferhitzer) beziehen die Luft aus dem Raum und führen Sie durch ein Abluftrohr oder eine Kamin ins Freie.
  • Seite 6: Abmessungen

    MONTAGE Bei der Montage muss der Mindestabstand zwischen Kochfeld und Haube exakt eingehalten und die Schritte und die zusätzlichen Hinweise beachtet werden. Beri der Ausführung der Abluft ins Freie (A- siehe auch Montagehinweise), werden die Dämpfe über einen am Anschlussring befestigten Abluftschlauch abgesaugt. Der Durchmesser des Abluftschlauches muss dem des Anschlussringes entsprechen.
  • Seite 7 Verwendung der Dunstabzugshaube als Ablufthaube (mit Abluft nach außen) Wenn die Dunstabzugshaube werkseitig mit einem Aktivkohlefilter ausgestattet ist, muss dieser entfernt werden. Dies ist nur sinnvoll, wenn Sie Ihre Abzugshaube im Umluftbetrieb verwenden. Umbau der Dunstabzugshaube zur Umlufthaube Wenn Sie eine entsprechend montierte Haube als Umlufthaube verwenden möchten, müssen Sie den/die Aktivkohlefilter vor dem Einsatz der Haube am Lüftermotor montieren.
  • Seite 8 Montage der Dunstabzugshaube Bitte besorgen Sie sich einen Abluftka- Versehen Sie die Arbeitsplatte mit nal 150 mm mit zwei Schlauchschellen einem Ausschnitt für das Kochfeld. (nicht im Lieferumfang enthalten!). Setzen Sie die Lüftungsanlage in Versehen Sie die Arbeitsplatte mit den Ausschnitt ein und verbinden Sie den passenden Ausschnitten für die diese über die Halteschienen mit der Lüftungsanlage.
  • Seite 10 • Montage des Motors: • Sie haben die Möglichkeit, den Motor rechts oder links am Entlüftungsgehäuse anzuschließen. • Schließen Sie dann die verschiedenen Rotorblätter an und überprüfen Sie die Funktion des Gerätes. Hinweis: Das Belüftungssystem hat scharfe Kanten. Tragen Sie Schutzhandschuhe (Abbildung 10).
  • Seite 11: Bedienfeld

    BEDIENFELD Haube hoch/runter heben: Wenn Sie die -Taste 2 Sekunden lang drücken, hebt sich die Haube an und bleibt in der höchstmöglichen Position. Durch erneutes Drücken der Taste fährt sich die Haube ein. Wichtig: Stellen Sie sicher, dass der Schlauch beim Ein- und Ausfahren nicht blockiert oder verstopft ist.
  • Seite 12: Abluft-Rohrleitung

    Abluft-Rohrleitung 1 Luftauslass nach außen 2 Luftauslass über einen Luftschacht • Die Abluftleitung sollte so kurz und gerade wie möglich sein. • Um übermäßigen Lärm oder eine verminderte Absaugleistung zu vermeiden, sollte der Durchmesser der Abluftleitung nicht kleiner als 150 mm sein. •...
  • Seite 13: Reinigung Und Pflege

    REINIGUNG UND PFLEGE Vor Wartungs- und Reinigungsarbeiten ist die Haube von der Stromversorgung zu trennen, indem Sie den Gerätestecker herausziehen oder den Sicherungsschalter der Hausinstallation abschalten oder die schraubbare Sicherung vollständig aus der Hausinstallation herausschrauben. • Die Dunstabzugshaube darf nicht mit einem Dampfreiniger gereinigt werden. •...
  • Seite 14 einmal im Monat von Hand oder in der Spülmaschine (60°) gewaschen werden. Lassen Sie den Filter gründlich trocknen und setzen Sie ihn vorsichtig in die Dunstabzugshaube ein. Verwenden Sie keine alkalischen Geschirrspülmittel (pH-Wert über 7). Aktivkohlefilter a) Herkömmliche Aktivkohlefilter (normalerweise rund) können weder gewaschen noch wiederverwendet werden.
  • Seite 15 FEHLERBEHEBUNG Fehler Mögliche Ursache Lösung Das Licht geht an aber der Das Lüfterblatt ist kaputt. Schalten Sie das Gerät Lüfter arbeitet nicht. aus und lassen Sie es Der Motor ist beschädigt. von einem Fachbetrieb untersuchen. Das Licht und der Lüfter Die Birne ist durchge- Ersetzen Sie die Birne funktionieren nicht.
  • Seite 16: Konformitätserklärung

    HINWEISE ZUR ENTSORGUNG Befindet sich die linke Abbildung (durchgestrichene Mülltonne auf Rädern) auf dem Produkt, gilt die Europäische Richtlinie 2012/19/ EU. Diese Produkte dürfen nicht mit dem normalen Hausmüll entsorgt werden. Informieren Sie sich über die örtlichen Regelungen zur getrennten Sammlung elektrischer und elektronischer Gerätschaften. Richten Sie sich nach den örtlichen Regelungen und entsorgen Sie Altgeräte nicht über den Hausmüll.
  • Seite 17: Technical Data

    CONTENTS Technical DAta 17 Safety Instructions 18 Installation 20 Control Panel 26 Cleaning and Care 27 Troubleshooting 29 Disposal Considerations 30 TECHNICAL DATA Item number 10032863 Power supply 220-240 V~ 50 Hz...
  • Seite 18: Safety Instructions

    SAFETY INSTRUCTIONS • Thank you for purchasing this cooker hood. Please read the instruction manual carefully before you use the cooker hood, and keep it in a safe place. • The installation work must be carried out by a qualified electrician or competent person.
  • Seite 19 Important notes about the extraction mode WARNING: Risk of poisoning Risk of poisoning from exhaust gases sucked back. Never operate the device in extraction mode simultaneously with an open flue appliance when there is not adequate airflow guaranteed. Open flue combustion equipment (for example, gas, oil, wood or coal-fired heaters, tankless water heaters, water heaters) pulls combustion air from the room and runs it through an exhaust pipe or chimney to the outside.
  • Seite 20 INSTALLATION On installation, the minimum distance between the hob and the hood must be exactly complied with (see chapter 7.1 “Installation data“) and follow the numbering of the steps and the additional instructions. Execution with air exhausted outdoors (A- see also the installation data).
  • Seite 21 Using the extractor hood as an exhaust air hood (with air extracted to outdoors) If the extractor hood has been fitted at the factory with a carbon filter, this must be removed. It is only practicable to use this when operating your hood in circulation mode. Converting the extractor hood to a circulation hood If you wish to use an appropriately fitted hood as a circulation hood, you must mount the active carbon filter(s) to the fan motor before using the hood.
  • Seite 22 Installation of the hood Please get an exhaust duct 150 mm Provide the worktop with the matching with two hose clamps (not included!). cutouts for the ventilation system. Provide the countertop with a cutout for Insert the ventilation system in the the cooktop.
  • Seite 24 • Mounting the motor unit: • You have the option to connect the motor unit to the right or left on the vent housing • Then connect the different blades and check the unit for function. Note: The ventilation system has sharp edges. Use safety gloves (Figure 10).
  • Seite 25 Abluft-Rohrleitung 1 Air outlet to outdoors 2 Air outlet via an air shaft • The exhaust air line should be as short and straight as possible. • To avoid excessive noise or a reduced extraction capacity the diameter of the exhaust air pipeline should not be less than 150 mm.
  • Seite 26: Control Panel

    CONTROL PANEL Lift hood up/down If you press the extract button for 2 seconds, the hood begins to lift up and remain in the highest position available. By again pressing the key, the hood retracts.. Important: Check that the core when moving in and out is not blocked or obstructed. There is a risk that a container is lifted (handle, etc.) and possibly hot contents may spill.
  • Seite 27: Cleaning And Care

    CLEANING AND CARE Prior to any maintenance or cleaning work, isolate the hood from the electrical supply by: pulling out the appliance connector plug or tripping the house installation circuit breaker or fully unscrew the screw type fuse from the house installation. •...
  • Seite 28 b) Washable and regeneratable carbon filters (normally square in shape) are to be washed once a month in a dishwasher, using a standard rinsing agent and with the intensive rinsing program (at the highest temperature). Washable and regeneratable carbon filters absorb kitchen odours for a maximum of 3 years when cleaned monthly. The filter should then be replaced by a new item.
  • Seite 29 TROUBLESHOOTING Fault Cause Solution Light on, but fan does not The fan blade is jammed. Switch of the unit and work repair by qualified service The motor is damaged. personnel only. Both light and fan do not light bulb burn. Replace the bulb with cor- work rect rating.
  • Seite 30: Disposal Considerations

    DISPOSAL CONSIDERATIONS According to the European waste regulation 2012/19/EU this symbol on the product or on its packaging indicates that this product may not be treated as household waste. Instead it should be taken to the appropriate collection point for the recycling of electrical and electronic equipment. By ensuring this product is disposed of correctly, you will help prevent potential negative consequences for the environment and human health, which could otherwise be caused by inappropriate waste handling of this...
  • Seite 31: Inhaltsverzeichnis

    à d'autres informations concernant le produit. SOMMAIRE Fiche technique 31 Consignes de sécurité 32 Montage 34 Panneau de commande 39 Nettoyage et entretien 41 Résolution des problèmes 43 Informations sur le recyclage 44 FICHE TECHNIQUE Numéro d’article 10032863 Alimentation 220-240 V~ 50 Hz...
  • Seite 32: Consignes De Sécurité

    CONSIGNES DE SÉCURITÉ • Lisez bien toutes les indications avant d'utiliser l'appareil et conservez le mode d'emploi en lieu sûr pour vous y référer ultérieurement. • Les travaux de montage ne doivent être effectués que par un électricien professionnel ou une personne qualifiée. Avant d’utiliser la hotte aspirante, assurez-vous que la tension (V) et la fréquence indiquée sur la hotte aspirante (Hz) correspondent à...
  • Seite 33 Remarques importantes concernant le mode d‘extraction MISE EN GARDE Danger de mort, risques d‘intoxication ! Par la ré-aspiration de gaz de combustion. Ne jamais utiliser la fonction d’aspiration de l’appareil en même temps qu’un foyer dépendant de l’air ambiant si l’air frais est insuffisant.
  • Seite 34: Montage

    MONTAGE Lors du montage, la distance minimale entre la plaque de cuisson et la hotte doit être strictement respectée de même que les étapes et les instructions supplémentaires. En ce qui concerne l'évacuation de l'air vers l'extérieur (A - voir également les instructions d'installation), les fumées sont aspirées par un conduit d'évacuation fixé...
  • Seite 35: Branchement Électrique

    Utilisation de la hotte en mode d'extraction (avec l'air refoulé à l'extérieur) Si la hotte est équipée en usine d'un filtre à charbon actif, celui-ci doit être retiré. Cela n'a de sens que si vous utilisez votre hotte en mode recyclage d'air. Transformation de la hotte en mode recyclage d'air Si vous souhaitez utiliser une hotte montée en mode de recirculation, vous devez monter le(s) filtre(s) à...
  • Seite 36 Montage de la hotte aspirante Veuillez vous procurer un conduit Prévoyez une découpe dans le plan de d‘extraction de 150 mm avec deux travail pour la plaque de cuisson. colliers de serrage (non fournis !). Insérez le système de ventilation dans Prévoyez les découpes appropriées la découpe et connectez-le à...
  • Seite 38 • Montage du moteur : • Vous avez la possibilité de connecter le moteur à droite ou à gauche du boîtier d'extraction. • Fixez ensuite les différentes pales de rotor et vérifiez le fonctionnement de l'appareil. Remarque : les bords du système de ventilation sont coupants. Portez des gants (illustration 10).
  • Seite 39: Panneau De Commande

    PANNEAU DE COMMANDE Soulever / abaisser la hotte : Si vous appuyez sur la touche pendant 2 secondes, la hotte se relève et reste dans la position la plus haute. Un nouvel appui sur la touche fait rentrer la hotte. Important : Assurez-vous que le conduit n'est pas bloqué...
  • Seite 40: Conduit D'évacuation

    Conduit d'évacuation 1 évacuation extérieure 2 évacuation par une colonne intérieure • Le conduit d'évacuation doit être aussi court et droit que possible. • Pour éviter un bruit excessif ou une puissance d'aspiration réduite, le diamètre du conduit d'évacuation ne doit pas être inférieur à 150 mm. •...
  • Seite 41: Nettoyage Et Entretien

    NETTOYAGE ET ENTRETIEN Avant d'effectuer des travaux d'entretien et de nettoyage, débranchez la hotte de l'alimentation électrique en débranchant la fiche de l'appareil ou en débranchant le disjoncteur de l'installation domestique ou en dévissant complètement le fusible à visser de l'installation domestique. •...
  • Seite 42 Filtres à charbon actif a) Les filtres à charbon actif courants (ronds en principe) ne peuvent être ni lavés ni réutilisés. En cas d'utilisation normale et en fonction de leur taille, ils doivent être changés tous les 4 à 6 mois. Respectez les conseils inscrits sur l'emballage. b) Les filtres à...
  • Seite 43: Résolution Des Problèmes

    RÉSOLUTION DES PROBLÈMES Problème Cause possible Solution L'éclairage s'allume mais Une pale du ventilateur est Eteignez l'appareil et le ventilateur ne fonction- cassée. faites-le contrôler par un ne pas. professionnel. Le moteur est endom- magé. L'éclairage ni le ventilateur L'ampoule est grillée. Remplacez l'ampoule ne fonctionnent.
  • Seite 44: Informations Sur Le Recyclage

    INFORMATIONS SUR LE RECYCLAGE Vous trouverez sur le produit l’image ci-contre (une poubelle sur roues, barrée d‘une croix), ce qui indique que le produit se trouve soumis à la directive européenne 2012/19/UE. Renseignez-vous sur les dispositions en vigueur dans votre région concernant la collecte séparée des appareils électriques et électroniques.
  • Seite 45: Datos Técnicos

    ÍNDICE Datos técnicos 45 Instrucciones de seguridad 46 Instalación 48 Panel de control 53 Limpieza y mantenimiento 55 Subsanación de errores 57 Indicaciones sobre la retirada del aparato 58 DATOS TÉCNICOS Número de artículo 10032863 Alimentación 220-240 V~ 50 Hz...
  • Seite 46: Instrucciones De Seguridad

    INSTRUCCIONES DE SEGURIDAD • Lea atentamente todas las instrucciones antes del uso y guarde el manual de instrucciones en un lugar seguro para poder consultarlo en el futuro. • Los trabajos de ensamblaje sólo pueden ser realizados por un electricista o un especialista.
  • Seite 47 Indicaciones importantes para la campana en modalidad aspirante ATENCIÓN Peligro de intoxicación por gases de escape aspirados! No utilice la unidad en modalidad aspirante si se utiliza junto con una chimenea dependiente del aire y si no está garantizada una circulación de aire suficiente.
  • Seite 48: Instalación

    INSTALACIÓN Durante la instalación hay que mantener exactamente la distancia mínima entre la placa de cocina y la campana extractora y hay que tener en cuenta los pasos y las instrucciones adicionales. Durante la extracción del aire al exterior (A- véase también las instrucciones de instalación), los vapores son aspirados a través de una manguera de aire de escape conectada a un anillo de conexión.
  • Seite 49 Utilización de la campana extractora como campana de extracción (con aire extraído al exterior) Si la campana extractora viene equipada de fábrica con un filtro de carbono, deberá ser retirada. Sólo es factible utilizarlo cuando utilice la campana en modo de circulación.
  • Seite 50 Instalación de la campana extractora Por favor, compre un tubo de salida Prepare en la superficie de trabajo de aire de 150 mm con dos abra- los recortes correspondientes para el zaderas de manguera (¡no incluidas sistema de ventilación. en el alcance de suministro!). Inserte el sistema de ventilación en Proporcione la superficie de trabajo el recorte y conéctelo a través de los...
  • Seite 52 • Instalación del motor: • Tiene la opción de conectar el motor a la derecha o a la izquierda de la carcasa de aireación. • A continuación, conecte las distintas palas del rotor y compruebe el funcionamiento del dispositivo. Nota: El sistema de ventilación tiene bordes afilados. Use guantes protectores (Figura 10).
  • Seite 53: Panel De Control

    PANEL DE CONTROL Levantar/bajar la campana : Pulsando la tecla durante 2 segundos, la campana se levanta y permanece en la posición más alta posible. Pulse de nuevo el botón para que la campana se vuelva a bajar. Importante: Asegúrese de que la manguera no esté bloqueada u obstruida al retraerse y extenderse.
  • Seite 54 Tubería de aire de salida 1 Salida de aire hacia el 2 Salida de aire a través de un pozo de aire exterior • La tubería de salida de aire debe ser lo más corta y recta posible. • Para evitar ruidos excesivos o un rendimiento de aspiración reducido, el diámetro de la tubería de salida de aire no debe ser inferior a 150 mm.
  • Seite 55: Limpieza Y Mantenimiento

    LIMPIEZA Y MANTENIMIENTO Antes de realizar cualquier trabajo de mantenimiento y limpieza, hay que desconectar la campana de la red eléctrica desenchufando el enchufe del aparato, desconectando el interruptor de la instalación doméstica o desenroscando completamente el fusible atornillable de la instalación doméstica. •...
  • Seite 56 Filtros de carbón a) Los filtros de carbón tradicionales (normalmente de forma redonda) no pueden ser ni lavados ni reciclados. En condiciones de un uso normal y dependiendo de su tamaño, debe sustituirlo cada 4 a 6 meses. Cumpla con las instrucciones que figuran en el embalaje.
  • Seite 57: Subsanación De Errores

    SUBSANACIÓN DE ERRORES Error Causa posible Solución La luz se enciende pero el Une pale du ventilateur est Eteignez l'appareil et ventilador no funciona. cassée. faites-le contrôler par un professionnel. La luz y el ventilador no funcionan. El aparato vibra fuerte- La pala del ventilador Sustituya la bombilla por mente.
  • Seite 58: Indicaciones Sobre La Retirada Del Aparato

    INDICACIONES SOBRE LA RETIRADA DEL APARATO Vous trouverez sur le produit l’image ci-contre (une poubelle sur roues, barrée d‘une croix), ce qui indique que le produit se trouve soumis à la directive européenne 2012/19/UE. Renseignez-vous sur les dispositions en vigueur dans votre région concernant la collecte séparée des appareils électriques et électroniques.
  • Seite 59: Dati Tecnici

    INDICE Dati tecnici 59 Avvertenze di sicurezza 60 Montaggio 62 Pannello di controllo 67 Pulizia e manutenzione 69 Ricerca e correzione degli errori 71 Smaltimento 72 DATI TECNICI Numero articolo 10032863 Alimentazione 220-240 V~ 50 Hz...
  • Seite 60: Avvertenze Di Sicurezza

    AVVERTENZE DI SICUREZZA • Leggere attentamente tutte le avvertenze prima dell’utilizzo e conservare il manuale d’uso per future consultazioni. • Il montaggio deve essere realizzato da un elettricista o da un tecnico specializzato. Prima di utilizzare la cappa aspirante, assicurarsi che la tensione (V) e la frequenza (Hz) indicate sulla cappa corrispondano a tensione (V) e frequenza (Hz) dell’alimentazione elettrica.
  • Seite 61 Avvertenze importanti sulla modalità di funzionamento di scarico dell’aria ATTENZIONE Pericolo di intossicazione dovuto ai gas di scarico riaspirati! Non utilizzare il dispositivo in modalità di scarico dell’aria se viene utilizzato con focolari dipendenti dall’aria della stanza e non viene garantita sufficiente ventilazione.
  • Seite 62: Montaggio

    MONTAGGIO Durante il montaggio, è necessario rispettare esattamente la distanza minima tra cappa e piano di cottura e seguire i passaggi e le indicazioni aggiuntive. Nella modalità di scarico all’aperto (a- vedere anche avvertenze per il montaggio), i vapori vengono aspirati tramite un anello di collegamento fissato al tubo di scarico. Il diametro del tubo di scarico deve corrispondere a quello dell’anello di collegamento Se si utilizza o si prevede di utilizzare una valvola di ritorno per il fumo, è...
  • Seite 63 Utilizzo della cappa aspirante come cappa di scarico dell’aria (con scarico verso l’esterno) Se la cappa aspirante è dotata di filtro ai carboni attivi nella configurazione di fabbrica, è necessario rimuoverlo. Il filtro ai carboni attivi è utile solo se si utilizza la cappa in funzione di ricircolo.
  • Seite 64 Montaggio della cappa aspirante Procurarsi un canale di scarico da 150 Realizzare un intaglio sul pannello di mm con due fascette per tubi flessibili lavoro per il piano cottura. (non inclusi in consegna). Posizionare l’impianto di ventilazione Realizzare intagli appropriati sul nell’intaglio e collegarlo con pannello di lavoro per l’impianto di le guide di supporto alla parte...
  • Seite 66 • Montaggio del motore: • Il motore può essere montato a destra o a sinistra dell’alloggiamento di aspirazione. • Collegare poi le diverse pale del rotore e controllare il funzionamento del dispositivo. Avvertenza: il sistema di ventilazione ha bordi taglienti. Indossare guanti protettivi (immagine 10).
  • Seite 67: Pannello Di Controllo

    PANNELLO DI CONTROLLO Sollevare/abbassare la cappa : Premendo il tasto per 2 secondi, la cappa si solleva e resta nella posizione più alta possibile. Premendo di nuovo il tasto, la cappa si abbassa. Importante: assicurarsi che il tubo flessibile non venga bloccato o otturato durante il sollevamento o l’abbassamento.
  • Seite 68 Condotto di scarico dell’aria 1 Fuoriuscita dell’aria verso 2 Fuoriuscita dell’aria tramite un pozzo di l’esterno ventilazione • Il condotto di scarico dell’aria deve essere il più corto e dritto possibile. • Per evitare rumore eccessivo e una capacità aspirante limitata, il diametro del condotto di scarico deve essere di almeno 150 mm.
  • Seite 69: Pulizia E Manutenzione

    PULIZIA E MANUTENZIONE Prima di effettuare pulizia e manutenzione, è necessario scollegare la cappa dalla rete elettrica, staccando la spina o spegnendo l’interruttore di sicurezza in casa o svitando completamente il fusibile avvitabile. • Non utilizzare pulitori a vapore per pulire la cappa aspirante. •...
  • Seite 70 Filtro ai carboni attivi a) I tradizionali filtri ai carboni attivi (solitamente rotondi) non possono essere lavati o riutilizzati. In caso di normale utilizzo e in base alle dimensioni, sostituirli ogni 4-6 mesi. Rispettare le indicazioni sulla confezione. b) I filtri ai carboni attivi lavabili e riutilizzabili (solitamente quadrati) devono essere lavati in lavastoviglie una volta al mese con normale detersivo per piatti e il programma intensivo (alla temperatura massima).
  • Seite 71: Ricerca E Correzione Degli Errori

    RICERCA E CORREZIONE DEGLI ERRORI Problema Possibile causa Soluzioni La luce si accende, ma la La ventola è guasta. Spegnere il dispositivo ventola non funziona. e farlo controllare da un Il motore è danneggiato. tecnico. Luce e ventola non funzi- La lampadina è...
  • Seite 72: Smaltimento

    SMALTIMENTO Se sul prodotto è presente la figura a sinistra (il bidone dei rifiuti con le ruote), si applica la direttiva europea 2012/19/UE. Questi prodotti non possono essere smaltiti con i rifiuti normali. Informarsi sulle disposizioni vigenti per la raccolta di dispositivi elettrici ed elettronici. Attenersi alle disposizioni vigenti e non smaltire i vecchi dispositivi con i rifiuti domestici.

Inhaltsverzeichnis