Herunterladen Inhalt Inhalt Diese Seite drucken

Werbung

Verfügbare Sprachen
  • DE

Verfügbare Sprachen

  • DEUTSCH, seite 67
EN -
Instructions and warnings for
TT 6
installation and use
IT -
Istruzioni ed avvertenze per
l'installazione e l'uso
Control unit for tubular motors
RS232 interface
FR -
Instructions et avertissements
pour l'installation et l'utilisation
ES -
Instrucciones y advertencias
para la instalación y el uso
DE -
Installierungs-und Gebrauchsan-
leitungen und Hinweise
PL -
Instrukcje i ostrzeżenia do
instalacji i użytkowania
NL -
Aanwijzingen en aanbevelingen
voor installatie en gebruik

Werbung

Inhaltsverzeichnis
loading

Inhaltszusammenfassung für Nice TT6

  • Seite 1 EN - Instructions and warnings for TT 6 installation and use IT - Istruzioni ed avvertenze per l’installazione e l’uso Control unit for tubular motors RS232 interface FR - Instructions et avertissements pour l’installation et l’utilisation ES - Instrucciones y advertencias para la instalación y el uso DE - Installierungs-und Gebrauchsan-...
  • Seite 3: Product Description And Intended Use

    2 – PRODUCT DESCRIPTION AND INTENDED ENGLISH Original instructions The TT6 control unit is designed for use in automation sys- tems applied to awnings, shutters, skylights, vertical cur- tains, blinds and for controlling video projection screens. 1 – WARNINGS Any other use is to be considered improper and is •...
  • Seite 4: Electrical Connections

    cables and control cables against possible trac- 4 – ELECTRICAL CONNECTIONS tion or torsion. Warnings 03. Fix the control unit housing to the wall (Fig. 2). • When connecting the aerial provided, leave the wire at the Caution! – The receiver must be positioned so that supplied length and lay it straight so as to avoid excessive the cables enter the housing exclusively from the bending.
  • Seite 5 – The activation timer can be adjusted to between 1 sec. TABLE 1 and 240 sec. through the serial port with an internal com- Wiring diagram mand. – The default address of the motor connected to the control Electrical phase unit is 1.
  • Seite 6 3 - Close TABLE 2 - Signalling LEDs 4 - Stop Description 5 - Close after 10 sec. Red LED Power supply indicator. 6 - Open after 10 sec. 7 - Close after 20 sec. Yellow LED If on, transmitter memorisation is 8 - Open after 20 sec.
  • Seite 7 02. On the receiver, press P1 the same number of times as mitter to be deleted from the memory within ten sec- the number identifying the selected function (in our onds (yellow LED DL2 on); the green LED DL1 will emit example, 8 times).
  • Seite 8 sent to the device: some commands Delete transmitter do not require data (for example, the Delete all memorised transmitters Open command), while others do (for Delete motor parameters example, the Open percentage com- mand). Memorise the motor upper limit switch in current position [Carriage Return] Decimal code 13, hexadecimal code 0D;...
  • Seite 9 Move a little step down Response Move to partial position 1 Start TT ADR TT ENDPOINT Command Data [XX] [YY] [AA] Move to partial position 2 RISP – – Move to partial position 3 Move to partial position 4 5.5.2 – STOP command Move to partial position 5 Stops the motor.
  • Seite 10 5.5.3 – UP command Example Commands the motor’s “up” movement until the set limit Start TT ADR TT ENDPOINT Command Data switch. [XX] [YY] [AA] Structure – – Start TT ADR TT ENDPOINT Command Data Response [XX] [YY] [AA] Start TT ADR TT ENDPOINT Command...
  • Seite 11 Response 5.5.7 – Memorise partial position 1, 2, 3, 4, 5, 6 and limit switch 0 and 1 positions Start TT ADR TT ENDPOINT Command Data Assigns the current position to a variable position. [XX] [YY] [AA] Structure RISP – –...
  • Seite 12 Example Response Start TT ADR TT ENDPOINT Command Data Start TT ADR TT ENDPOINT Command Data [XX] [YY] [AA] [XX] [YY] [AA] – – RISP – Response Start TT ADR TT ENDPOINT Command Data 5.5.10 – Move to percentage position 0 - 255; 0 = [XX] [YY] [AA]...
  • Seite 13 5.5.11 – Delete all memorised transmitters Example command Start TT ADR TT ENDPOINT Command Data Deletes all the transmitters from the motor. [XX] [YY] [AA] Structure – – Start TT ADR TT ENDPOINT Command Data Response [XX] [YY] [AA] Start TT ADR TT ENDPOINT Command...
  • Seite 14 [XX] Address of the device to which the command Using the previous example, we obtain: must be sent, it is mandatorily composed of two digits in hexadecimal form. MEM_OFF 02 05 03 04 05 12 [Carriage Return] [YY] Command to be sent to the device, it is manda- torily composed of two digits based on the The response will be of the following type: above-mentioned commands table.
  • Seite 15 CMD 2--> addr: 3, cmd: 4 [XX] Current address of the motor; the address must CMD 3--> addr: 5, cmd: 12 mandatorily contain two digits and must be in hexadecimal form. 5.8 – Command for setting the duration [YY] New address of the motor; the address must of the mechanical motor movements mandatorily contain two digits and must be in hexadecimal form.
  • Seite 16 5.11.1 – Displaying radio codes on serial in the following way: If the TT6 receives a radio signal from one of the saved remote controls, the following info is sent, related to the POS # 02 04 0500 FFFF FF transmitter, via the serial.
  • Seite 17 Where xxxx is the instantaneous position of the motor. The response is of the type below: In case of errors of syntax in the command, the error field will be added to the response with the value 01, the fields will be POS * 02 04 0500 FFFF FF filled up to the first incorrect field and the subsequent ones will be filled with 0xF, e.g.:...
  • Seite 18: Disposal Of The Product

    – All technical specifications stated herein refer to an ambi- ent temperature of 20° C (± 5° C). – Nice reserves the right to effect modifications to the prod- uct whenever it deems necessary, while preserving the product’s intended use and functionality.
  • Seite 19: Descrizione Del Prodottoe Destinazione D'uso

    2 – DESCRIZIONE DEL PRODOTTO ITALIANO E DESTINAZIONE D’USO Istruzioni originali La centrale TT6 è destinata ad essere utilizzata negli impianti di automatizzazione per tende da sole, tapparelle, lucernari, tende verticali, oscuranti e per comandare teli da video pro- 1 – AVVERTENZE iezione.
  • Seite 20: Collegamenti Elettrici

    per garantire la protezione dei cavi di alimentazione 4 – COLLEGAMENTI ELETTRICI e comando da possibili trazioni o torsioni. Avvertenze 03. Fissare sulla parete il contenitore dela centrale (fig. 2). • Per effettuare il collegamento dell’antenna in dotazio- Attenzione! – Il ricevitore deve essere orientato in ne, occorre lasciare il filo con la lunghezza fornita e modo che i cavi entrino nel contenitore solo ed posizionarlo in modo rettilineo, evitando curvature ec -...
  • Seite 21 mabili, attivate dai due ingressi a pulsante Pup () e Pdown TABELLA 1 () del “Trigger” 12 V o via Radio. Schema dei collegamenti elettrici – Tramite seriale con un comando interno è possibile variare il timer di attivazione da 1 s a 240 s. Fase elettrica –...
  • Seite 22 3- Chiudi TABELLA 2 - Led di segnalazione 4- Stop Descrizione 5- Chiudi dopo 10 s Led rosso Indicatore alimentazione. 6- Apri dopo 10 s Led giallo Se acceso memorizzazione tele- 7- Chiudi dopo 20 s comandi attiva. 8- Apri dopo 20 s 9 - Chiudi a uomo presente Led verde Segnalazioni.
  • Seite 23 02. Sul ricevitore, premere il tasto P1 un numero di volte rilasciare il tasto esattamente durante il 5° lampeggio del pari al numero che identifica la funzione prescelta nel Led verde DL1. nostro esempio, 8 volte). Al termine, il Led verde DL1 07.
  • Seite 24 inviabile secondo la lista comandi già elen- Leggi trasmettitore in memoria cati (ad esempio: 04 apre; 05 chiude...). Memorizzazione in memoria [Campo dati] Campo opzionale di lunghezza variabile. Cancellazione in memoria La sua dimensione dipende dal tipo di Cancellazione di tutti i trasmettitori in memoria comando inviato al dispositivo: vi saran- Cancellazione parametri motore no comandi che non richiederanno dati...
  • Seite 25 Muovi a piccoli passi in discesa Risposta Muovi a quota parziale 1 Start TT ADR TT ENDPOINT Comando Dati [XX] [YY] [AA] Muovi a quota parziale 2 RISP – – Muovi a quota parziale 3 Muovi a quota parziale 4 5.5.2 –...
  • Seite 26 5.5.3 – Comando di SALITA Esempio Comanda la salita del motore fino al finecorsa settato. Start TT ADR TT ENDPOINT Comando Dati [XX] [YY] [AA] Struttura – – Start TT ADR TT ENDPOINT Comando Dati [XX] [YY] [AA] Risposta – –...
  • Seite 27 Risposta 5.5.7 – Memorizzazione quota parziale 1, 2, 3, 4, 5, 6 e quota fincorsa 0 e 1 Start TT ADR TT ENDPOINT Comando Dati Assegna la quota corrente ad una variabile. [XX] [YY] [AA] Struttura RISP – – Start TT ADR TT ENDPOINT Comando...
  • Seite 28 Esempio Risposta Start TT ADR TT ENDPOINT Comando Dati Start TT ADR TT ENDPOINT Comando Dati [XX] [YY] [AA] [XX] [YY] [AA] – – RISP – Risposta Start TT ADR TT ENDPOINT Comando Dati 5.5.10 – Muovi alla posizione percentuale 0 - 255 [XX] [YY] [AA]...
  • Seite 29 5.5.11 – Comando di Cancellazione di tutti i Esempio trasmettitori in memoria Start TT ADR TT ENDPOINT Comando Dati Cancella tutti i radio comandi dal motore. [XX] [YY] [AA] Struttura – – Start TT ADR TT ENDPOINT Comando Dati Risposta [XX] [YY] [AA]...
  • Seite 30 [XX] Indirizzo del dispositivo a cui si vuole inviare il Utilizzando l’esempio precedente si ha: comando, è obbligatoriamente composto da due cifre con rappresentazione esadecimale. MEM_OFF 02 05 03 04 05 12 [Carriage Return] [YY] Comando che si vuole inviare al dispositivo, è obbligatoriamente composto da due cifre se - La risposta sarà...
  • Seite 31 CMD 2--> addr: 3, cmd: 4 [XX] Indirizzo attuale del motore, l’indirizzo va scritto CMD 3--> addr: 5, cmd: 12 obbligatoriamente con due cifre e in formato esadecimale. 5.8 – Comando per impostare la durata [YY] Nuovo indirizzo del motore, l’indirizzo va scritto dei movimenti del motore meccanico obbligatoriamente con due cifre e in formato esadecimale.
  • Seite 32 (0500) della sua corsa dovremo comporre il comando 5.11.1 – Visualizzazione codici radio su seriale nel seguente modo: Se la TT6 riceve un segnale radio da uno dei telecomandi memorizzati trasmette le seguenti info, relative al trasmetti- POS # 02 04 0500 FFFF FF tore, via seriale.
  • Seite 33 Dove xxxx è la posizione istantanea del motore. POS * 02 04 0500 FFFF FF Nel caso di errore di sintassi del comando verrà aggiunto il campo errore alla risposta con valore 01 i campi saranno Dove viene indicata la posizione attuale del motore. riempiti fino al primo campo errato e i successivi saranno riempiti con 0xF, ad esempio: 5.12 –...
  • Seite 34: Smaltimento Del Prodotto

    – Tutte le caratteristiche tecniche riportate, sono riferite ad una temperatura ambientale di 20° C (± 5° C). – Nice si riserva il diritto di apportare modifiche al prodotto in qualsiasi momento lo riterrà necessario, mantenendone la stessa destinazione d’uso e funzionalità.
  • Seite 35: Description Du Produit Et Type D'utilisation

    2 – DESCRIPTION DU PRODUIT ET TYPE FRANÇAIS D’UTILISATION La logique de commande TT6 est prévue pour utilisation dans Recommandations spécifiques des installations d’automatismes de stores, volets roulants, lan- terneaux, stores verticaux, occultants et pour commander des 1 – RECOMMANDATIONS écrans de projection.
  • Seite 36: Branchements Électriques

    garantir la protection des câbles d’alimentation et de 4 – BRANCHEMENTS ÉLECTRIQUES commande contre le risque de tractions ou de torsions. Recommandations 03. Fixer au mur le boîtier de la logique de commande (fig. 2). • Pour procéder au branchement de l’antenne fournie, laisser la Attention ! –...
  • Seite 37 – Par l’intermédiaire d’un port série avec commande interne, il est TABLEAU 1 possible de modifier la minuterie d’activation de 1 à 240 s. – L’adresse par défaut du moteur raccordé à la logique de Schéma des branchements électriques commande est 1. Phase électrique Pour vérifier les Led présentes, voir Tableau 2.
  • Seite 38 3- Fermer TABLEAU 2 - Led de signalisation 4- Stop Description 5- Fermer au bout de 10 s 6- Ouvrir au bout de 10 s Led rouge Indicatrice d’alimentation 7- Fermer au bout de 20 s Led jaune Allumée elle indique que la mé mo - 8- Ouvrir au bout de 20 s risation des télécommandes est 9 –...
  • Seite 39 02. Sur le récepteur, appuyer sur la touche P1 un nombre de touche exactement durant le 5e clignotement de la led fois égal au nombre qui identifie la fonction choisie (dans verte DL1. notre exemple, 8 fois). À la fin, la led verte DL1 émet un 07.
  • Seite 40 à envoyer selon la liste des commandes Lire émetteur en mémoire déjà énumérées (par exemple : 04 ouvre ; Enregistrement en mémoire 05 ferme...). Effacement en mémoire [Champ données] Champ optionnel de longueur variable. Sa Effacement de tous les émetteurs en mémoire dimension dépend du type de commande envoyée au dispositif ...
  • Seite 41 Manœuvrer par petits pas en descente Réponse Manœuvrer à hauteur partielle 1 Start TT ADR TT ENDPOINT Commande Données CR [XX] [YY] [AA] Manœuvrer à hauteur partielle 2 RISP – – Manœuvrer à hauteur partielle 3 Manœuvrer à hauteur partielle 4 5.5.2 –...
  • Seite 42 Structure Exemple Start TT ADR TT ENDPOINT Commande Données CR Start TT ADR TT ENDPOINT Commande Données CR [XX] [YY] [AA] [XX] [YY] [AA] – – – – Le champ données est vide. Réponse Exemple Start TT ADR TT ENDPOINT Commande Données CR [XX]...
  • Seite 43 Réponse 5.5.7 – Mémorisation hauteur partielle 1, 2, 3, 4, 5, 6 et de fin de course 0 et 1 Start TT ADR TT ENDPOINT Commande Données CR Attribuer la hauteur courante à une variable. [XX] [YY] [AA] Structure RISP –...
  • Seite 44 Exemple Réponse Start TT ADR TT ENDPOINT Commande Données CR Start TT ADR TT ENDPOINT Commande Données CR [XX] [YY] [AA] [XX] [YY] [AA] – – RISP – Réponse Start TT ADR TT ENDPOINT Commande Données CR 5.5.10 – Déplacer à la position percentile 0 - 255 0 = [XX] [YY] [AA]...
  • Seite 45 5.5.11 – Commande d’effacement de tous les Exemple émetteurs en mémoire Start TT ADR TT ENDPOINT Commande Données CR Efface toutes les commandes radio du moteur. [XX] [YY] [AA] Structure – – Start TT ADR TT ENDPOINT Commande Données CR Réponse [XX] [YY]...
  • Seite 46 [XX] Adresse du dispositif auquel on souhaite envoyer la En utilisant l’exemple précédent, on obtient : commande, elle est obligatoirement composée de deux chiffres en représentation hexadécimale. MEM_OFF 02 05 03 04 05 12 [Carriage Return] [YY] Commande que l’on souhaite envoyer au disposi- tif, elle est obligatoirement composée de deux La réponse sera du type : chiffres selon le tableau des commandes qui pré-...
  • Seite 47 CMD 2--> addr: 3, cmd: 4 Les champs sont : CMD 3--> addr: 5, cmd: 12 [XX] Adresse actuelle du moteur, l’adresse doit être écrite obligatoirement avec deux chiffres et en for- mat hexadécimal. 5.8 – Commande pour sélectionner la durée des mouvements du moteur mécanique [YY] Nouvelle adresse du moteur, l’adresse doit être...
  • Seite 48 [ZZZZ] [TT] Les deux derniers paramètres des moteurs sérielle screen sont mis à FF FFFF pour les développe- Si le TT6 reçoit un signal radio à partir d’une télécommande ments futurs. mémorisée, il communique les informations suivantes, rela- tives à l’émetteur, via le port série.
  • Seite 49 Pendant le mouvement, les chaînes de caractères (mes- Où: sages) sont envoyés indiquant la position actuelle du moteur jusqu’à ce que soit atteinte la position demandée, sous la [XX] Est l’adresse du moteur. forme de messages asynchrones, le format est: [YY] Est le nœud (pour les moteurs screen la valeur de défaut est 04).
  • Seite 50: Mise Au Rebut Du Produit

    – Toutes les caractéristiques techniques se réfèrent à une tem- pérature ambiante de 20°C (± 5°C). – Nice se réserve le droit d’apporter des modifications au pro- duit à tout moment si elle le juge nécessaire, en assurant dans tous les cas les mêmes fonctions et le même type d’utilisation prévu.
  • Seite 51: Descripción Del Productoy Uso Previsto

    2 – DESCRIPCIÓN DEL PRODUCTO ESPAÑOL Y USO PREVISTO Instrucciones originales La central TT6 está destinada a utilizarse en sistemas de auto- matización para toldos, persianas, claraboyas, cortinas vertica- les y pantallas, y para controlar pantallas de proyección de víde- 1 – ADVERTENCIAS os.
  • Seite 52: Conexiones Eléctricas

    los cables de alimentación y mando contra posi- 4 – CONEXIONES ELÉCTRICAS bles tirones o torsiones. Advertencias 03. Fije en la pared el contenedor de la central (fig. 2). • Cuando conecte la antena en dotación, no altere la longi- ¡Atención! El receptor se debe orientar de manera tud de cable suministrada y coloque el cable en forma que los cables entren en la caja sólo y exclusiva-...
  • Seite 53 – Es posible variar el timer de activacion entre 1 y 240 s, por TABLA 1 medio de un mando enviado al puerto serial. Esquema de conexiones eléctricas – La direccion de fabrica del motor conectado a la central es 1. Fase eléctrica Para verificar los leds ver la Tabla 2.
  • Seite 54 2- Abrir TABLA 2 - Leds de señalización 3- Cerrar Descripción 4- Parada Led rojo Indicador alimentación. 5- Cerrar a los 10 s Led amarillo Si está encendido, está activa la 6- Abrir a los 10 s memorización de los telemandos. 7- Cerrar a los 20 s 8- Abrir a los 20 s Led verde...
  • Seite 55 ra programar (ej. “Función 8”). 06. Para borrar toda la memoria (incluidas las configuraciones y 02. En el receptor, pulse la tecla P1 una cantidad de veces la familia de codificación de los transmisores), suelte la tecla equivalente al número que identifica la función seleccio- exactamente durante el 5°...
  • Seite 56 res. Representa el ID del mando envia- Bajada ble según la lista de mandos indicada 0 = Final de carrera inferior 255 = Final de carrera (por ejemplo: 04 abrir; 05 cerrar...). superior [Campo datos] Campo opcional de tamaño variable. Leer transmisor en la memoria Su dimensión depende del tipo de man- Memorización en la memoria...
  • Seite 57 Subida Ejemplo Mover de a pequeños pasos en subida Start TT ADR TT ENDPOINT Mando Datos [XX] [YY] [AA] STOP – – Mover de a pequeños pasos en bajada Mover a altura parcial 1 Respuesta Mover a altura parcial 2 Start TT ADR TT ENDPOINT...
  • Seite 58 5.5.3 – Mando de SUBIDA Ejemplo Controla la subida del motor hasta el final de carrera confi- Start TT ADR TT ENDPOINT Mando Datos gurado. [XX] [YY] [AA] Estructura – – Start TT ADR TT ENDPOINT Mando Datos Respuesta [XX] [YY] [AA] Start...
  • Seite 59 Respuesta 5.5.7 – Memorización altura parcial 1, 2, 3, 4, 5, 6 y altura final de carrera 0 y 1 Start TT ADR TT ENDPOINT Mando Datos Asigna la altura corriente a una variable. [XX] [YY] [AA] Estructura RISP – –...
  • Seite 60 Ejemplo Respuesta Start TT ADR TT ENDPOINT Mando Datos Start TT ADR TT ENDPOINT Mando Datos [XX] [YY] [AA] [XX] [YY] [AA] – – RISP – Respuesta Start TT ADR TT ENDPOINT Mando Datos 5.5.10 – Mover a la posición porcentual 0 - 255 0 = [XX] [YY] [AA]...
  • Seite 61 5.5.11 – Mando de Eliminación de todos los Ejemplo transmisores en la memoria Start TT ADR TT ENDPOINT Mando Datos Borra todos los mandos de radio del motor. [XX] [YY] [AA] Estructura – – Start TT ADR TT ENDPOINT Mando Datos Respuesta [XX]...
  • Seite 62 [XX] Dirección del dispositivo al que se desea enviar Utilizando el ejemplo anterior tenemos: el mando; se compone obligatoriamente de dos cifras con representación hexadecimal. MEM_OFF 02 05 03 04 05 12 [Carriage Return] [YY] Mando que se desea enviar al dispositivo; se compone obligatoriamente de dos cifras según La respuesta será...
  • Seite 63 CMD 2--> addr: 3, cmd: 4 [XX] Dirección actual del motor; la dirección debe CMD 3--> addr: 5, cmd: 12 ser obligatoriamente de dos cifras en formato hexadecimal. 5.8 – Mando para programar la duración [YY] Nueva dirección del motor; la dirección debe de los movimientos del motor mecánico ser obligatoriamente de dos cifras en formato hexadecimal.
  • Seite 64 FFFF y FF para futu- del puerto serie ros desarrollos. Si TT6 recibe una señal de radio de uno de los telecoman- dos memorizados, transmite la siguiente información a tra- Por ejemplo, para configurar el motor número 02 en el valor vés del puerto serie relativa al transmisor.
  • Seite 65 Durante el movimiento, se envían los parámetros con la Donde: posición actual del motor hasta alcanzar la posición solicita- da en forma de mensajes asíncronos; el formato es: [XX] Es la dirección del motor. [YY] Es el nodo (para los motores de per- POS * 02 04 xxxx FFFF FF siana, el valor predeterminado es 04.
  • Seite 66: Eliminación Del Producto

    – Todas las características técnicas indicadas se refieren a una temperatura ambiente de 20°C (± 5°C). – Nice se reserva el derecho de modificar el producto en cualquier momento, manteniendo las mismas funcionalida- des y el mismo uso previsto.
  • Seite 67: Produktbeschreibung Und Verwen- Dungszweck

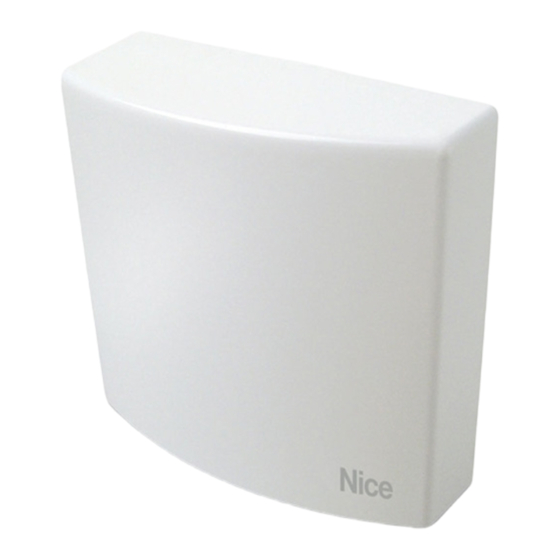
    2 – PRODUKTBESCHREIBUNG UND VERWEN- DEUTSCH DUNGSZWECK Originalanweisungen Die Steuerung TT6 ist für eine Verwendung in Automatisie- rungsanlagen bei Markisen, Rollläden, Dachfenstern, Vertikal- jalousien, Verdunkelungsrollos sowie für Leinwände zur Video- 1 – HINWEISE vorführung bestimmt. Jeder andere Gebrauch ist unsach- •...
  • Seite 68: Elektrische Anschlüsse

    art zu garantieren. Insbesondere sind Kabelhalter 4 – ELEKTRISCHE ANSCHLÜSSE (nicht mitgeliefert) vorzusehen, um den Schutz der Hinweise Speise- und Steuerkabel vor einem möglichem Ver- • Beim Anschluss der mitgelieferten Antenne das Kabel in ziehen oder Verdrehen zu gewährleisten. der gelieferten Länge lassen und gerade ausrichten; star- 03.
  • Seite 69 rungen (Hoch- und Herunterfahren), aktiviert von zwei Pup- TABELLE 1 () und Pdown ()-Tastern des 12 V-Triggers oder per Funk. Plan der elektrischen Anschlüsse – Über einen seriellen Anschluss mit interner Steuerung kann der Aktivierungstimer von 1 s bis 240 s verändert werden. Stromleiter –...
  • Seite 70 3- Schließen TABELLE 2 – Anzeige-Leds 4- Stopp Beschreibung 5- Schließen nach 10 Sek. Rote Led Anzeige Stromversorgung. 6- Öffnen nach 10 Sek. Gelbe Led Falls eingeschaltet, ist die Speiche- 7- Schließen nach 20 Sek. rung der Sender aktiviert. 8- Öffnen nach 20 Sek. Grüne Led Anzeigen.
  • Seite 71 02. Am Empfänger die Taste P1 so oft drücken, wie es der 07. Zum Löschen eines einzelnen Senders die Taste exakt Kennzahl der gewählten Funktion entspricht (in unserem beim 7. Aufblinken loslassen; anschließend innerhalb Beispiel 8 Mal). Bei Beendigung blinkt die grüne Led von zehn Sekunden eine Taste (*) auf dem Sender drü- DL1 so oft kurz auf, wie die Taste gedrückt wurde (in cken, der im Speicher gelöscht werden soll (die gelbe...
  • Seite 72 das die ID des zu sendenden Befehls Befehl ÖFFNEN Prozentsatz 0 - 255 gemäß der bereits aufgelisteten Befehls- 0 = niedriger Endschalter 255 = hoher Endschalter liste anzeigt (beispielsweise: 04 Öffnen; Sender im Speicher lesen 05 Schließen...). Im Speicher abspeichern [Datenfeld] Optionales Feld veränderlicher Länge.
  • Seite 73 Up-Bewegung in kleinen Schritten Antwort STOPP Start TT ADR TT ENDPOINT Befehl Daten [XX] [YY] [AA] Down-Bewegung in kleinen Schritten RISP – – Zur Teilhöhe 1 bewegen Zur Teilhöhe 2 bewegen 5.5.2 – STOPP-Befehl Zur Teilhöhe 3 bewegen Stoppt den Motor. Zur Teilhöhe 4 bewegen Struktur Zur Teilhöhe 5 bewegen...
  • Seite 74 5.5.3 – Befehl HOCHFAHREN Beispiel Steuert das Hochfahren des Motors bis zum eingestellten Start TT ADR TT ENDPOINT Befehl Daten Endschalter. [XX] [YY] [AA] Struktur – – Start TT ADR TT ENDPOINT Befehl Daten Antwort [XX] [YY] [AA] Start TT ADR TT ENDPOINT Befehl Daten...
  • Seite 75 Antwort 5.5.7 – Speichern der Teilhöhe 1, 2, 3, 4, 5, 6 und der Höhe der Endschalter 0 + 1 Start TT ADR TT ENDPOINT Befehl Daten Weist einer Variablen die laufende Höhe zu. [XX] [YY] [AA] Struktur RISP – –...
  • Seite 76 Beispiel Antwort Start TT ADR TT ENDPOINT Befehl Daten Start TT ADR TT ENDPOINT Befehl Daten [XX] [YY] [AA] [XX] [YY] [AA] – – RISP – Antwort Start TT ADR TT ENDPOINT Befehl Daten 5.5.10 – Bewegung zur Prozentposition 0 = niedri- [XX] [YY] [AA]...
  • Seite 77 5.5.11 – Befehl zum Löschen aller Sender im Beispiel Speicher Start TT ADR TT ENDPOINT Befehl Daten Löscht alle Funkbefehle des Motors. [XX] [YY] [AA] Struktur – – Start TT ADR TT ENDPOINT Befehl Daten Antwort [XX] [YY] [AA] Start TT ADR TT ENDPOINT Befehl...
  • Seite 78 [XX] Adresse der Vorrichtung, an die der Befehl Unter Hinzuziehung des vorherigen Beispiels ergibt sich gesandt werden soll; besteht notwendigerweise dadurch: aus zwei Zahlen mit hexadezimaler Darstellung. [YY] Befehl, der an die Vorrichtung gesandt werden MEM_OFF 02 05 03 04 05 12 [Carriage Return] soll;...
  • Seite 79 CMD 2--> addr: 3, cmd: 4 [XX] Derzeitige Adresse des Motors, muss notwen- CMD 3--> addr: 5, cmd: 12 digerweise mit zwei Buchstaben und hexadezi- mal geschrieben sein. 5.8 – Befehl zur Eingabe der Bewegungsdauer des [YY] Neue Adresse des Motors, muss notwendiger- mechanischen Motors weise mit zwei Buchstaben und hexadezimal geschrieben sein.
  • Seite 80 Auf diese Weise wird die Anzeige der Codes aktiviert. Entwicklungen eingestellt. 5.11.1 – Anzeige der Radiocodes auf serieller Leitung Wenn die TT6 ein Radiosignal von einer der gespeicherten Um den Motor Nummer 02 zum Beispiel auf einen Zwi- Fernbedienungen empfängt, überträgt sie folgende Informa- schenwert (0500) seines Weges zu bringen, muss der Befehl tionen in Bezug auf den Transmitter auf serieller Leitung.
  • Seite 81 on in Form von asynchronen Meldungen ausgesendet; das Format ist: [XX] Die Adresse des Motors ist. POS * 02 04 xxxx FFFF FF [YY] Der Knoten ist (für Motoren Screen Default 04). Wo xxxx è la posizione istantanea del motore. [PPPP] [ZZZZ] [TT] Alle aufgefüllt mit 0xF im Fall der Erfas- die augenblickliche Position des Motors ist.
  • Seite 82: Entsorgung Des Produktes

    Umgebung mit derselben Frequenz einge- gleichwertigen Produktes zurückgeben. setzt werden (beispielsweise Alarmsysteme, Kopfhörer Achtung! – Die örtlichen Verordnungen können schwere usw.). In diesem Fall kann Nice keine Garantie über die reelle Strafen im Fall einer widerrechtlichen Entsorgung dieses Reichweite ihrer Vorrichtungen geben. Produktes vorsehen.
  • Seite 83: Opis Produktui Jego Przeznaczenie

    2 – OPIS PRODUKTUI JEGO PRZEZNACZENIE POLSKI Centrala TT6 jest przeznaczona do wykorzystania w syste- Instrukcja oryginalna mach automatyzacji do markiz, rolet zewnętrznych i wewnętrz- nych, świetlików, zasłon pionowych oraz do sterowania ekra- nami do projekcji wideo. Wszelkie inne użycie jest uznane 1 –...
  • Seite 84: Połączenia Elektryczne

    przepusty kablowe (niedostarczone w opakowaniu) 4 – POŁĄCZENIA ELEKTRYCZNE w celu zabezpieczenia przewodów zasilających i Ostrzeżenia sterujących przed naciąganiem lub skręceniem. • W celu przyłączenia anteny dostarczonej na wyposaże- 03. Przymocować do ściany obudowę centrali (rys. 2). Uwa- niu, należy pozostawić przewód w dostarczonej długości i ga! –...
  • Seite 85 ne wrami (podnoszenie i opuszczanie), aktywowanymi dwo- TABELA 1 ma wejściami z przyciskiem Pup () i Pdown () „Triggera” Schemat połączeń elektrycznych 12 V lub drogą radiową. – Dzięki portowi szeregowemu ze sterowaniem wewnętrz- Faza elektryczna nym można zmieniać timer aktywacji w zakresie od 1 do Neutralny 240 sekund.
  • Seite 86 3- Zamknij TABELA 2 - Kontrolki sygnalizacyjne 4- Stop Opis 5- Zamknij po 10 s Dioda czerwona Wskaźnik zasilania. 6- Otwórz po 10 s Dioda żółta Zapalona oznacza, że zapisy- 7- Zamknij po 20 s wanie pilotów jest aktywne. 8- Otwórz po 20 s Dioda zielona Sygnalizacje.
  • Seite 87 02. Na odbiorniku nacisnąć przycisk P1 tyle razy, ile wynosi przycisk dokładnie w chwili piątego mignięcia zielonej numer identyfikujący wybraną funkcję (w naszym przy- diody DL1. kładzie należy nacisnąć go 8 razy). Po zakończeniu tej 07. W celu wykasowania pojedynczego nadajnika, należy zwol- czynności zielona dioda DL1 miga krótko tyle razy, ile nić...
  • Seite 88 nionych wcześniej poleceń (np: 04 Odczytaj nadajniki zapisane w pamięci otwórz; 05 zamknij...). Zapamiętaj nadajnik [Pole danych] Pole opcjonalne o zmiennej długości. Skasuj nadajnik Jego długość zależy od rodzaju polece- Kasowanie wszystkich nadajników zapisanych w nia wysłanego do urządzenia: niektóre z pamięci poleceń...
  • Seite 89 STOP Odpowiedź Opuszczaj małymi krokami Start TT ADR TT ENDPOINT Polecenie Dane [XX] [YY] [AA] Przesuń do wartości częściowej 1 RISP – – Przesuń do wartości częściowej 2 Przesuń do wartości częściowej 3 5.5.2 – Polecenie STOP Przesuń do wartości częściowej 4 Zatrzymuje silnik.
  • Seite 90 5.5.3 – Polecenie PODNOSZENIE Przykład Steruje podnoszeniem silnika aż do ustawionej krańcówki. Start TT ADR TT ENDPOINT Polecenie Dane [XX] [YY] [AA] Struktura – – Start TT ADR TT ENDPOINT Polecenie Dane [XX] [YY] [AA] Odpowiedź – – Start TT ADR TT ENDPOINT Polecenie Dane...
  • Seite 91 Odpowiedź 5.5.7 – Zapisywanie wartości częściowej 1, 2, 3, 4, 5, 6 oraz wartości krańcówki 0 i 1 Start TT ADR TT ENDPOINT Polecenie Dane Przypisuje bieżącą wartość położenia do zmiennej. [XX] [YY] [AA] Struktura RISP – – Start TT ADR TT ENDPOINT Polecenie Dane...
  • Seite 92 Przykład Odpowiedź Start TT ADR TT ENDPOINT Polecenie Dane Start TT ADR TT ENDPOINT Polecenie Dane [XX] [YY] [AA] [XX] [YY] [AA] – – RISP – Odpowiedź Start TT ADR TT ENDPOINT Polecenie Dane 5.5.10 – Przesuń do położenia procentowego 0 - 255 [XX] [YY] [AA]...
  • Seite 93 5.5.11 – Polecenie Usuwanie wszystkich Przykład nadajników zapisanych w pamięci Start TT ADR TT ENDPOINT Polecenie Dane Usuwa wszystkie urządzenia sterowania drogą radiową z sil- [XX] [YY] [AA] nika. – – Struktura Odpowiedź Start TT ADR TT ENDPOINT Polecenie Dane Start TT ADR TT ENDPOINT...
  • Seite 94 [XX] Adres urządzenia, do którego chce się wysłać Wykorzystując poprzedni przykład otrzymujemy: polecenie; składa się obowiązkowo z dwóch cyfr w systemie szesnastkowym. MEM_OFF 02 05 03 04 05 12 [Carriage Return] [YY] Polecenie, jakie chce się przesłać do urządze- nia; składa się obligatoryjnie z dwóch cyfr Odpowiedzią...
  • Seite 95 CMD 2--> addr: 3, cmd: 4 [XX] Bieżący adres silnika; jest on zapisywany obli- CMD 3--> addr: 5, cmd: 12 gatoryjnie dwoma cyframi przy użyciu systemu szesnastkowego. 5.8 – Polecenie służące do ustawienia czasu [YY] Nowy adres silnika; jest on zapisywany obliga- trwania ruchu silnika z krańc.
  • Seite 96 5.11.1 – Wyświetlanie kodów radiowych w układzie rozwinięcia. szeregowym Jeżeli urządzenie TT6 otrzyma sygnał radiowy z jednego z Na przykład, aby przesunąć silnik 02 do wartości pośredniej zapisanych pilotów, przesyła za pomocą układu szeregowe- (0500) jego skoku, należy wybrać polecenie w następujący go następujące informacje na temat nadajnika.
  • Seite 97 aż do osiągnięcia żądanej pozycji w formie asynchronicz- [YY] To węzeł (dla silników do ekranów nych komunikatów. Format: domyślna wartość to 04). [PPPP] [ZZZZ] [TT] Wszystkie wypełnione za pomocą 0xF POS * 02 04 xxxx FFFF FF w przypadku odczytu. Gdzie xxxx to bieżąca pozycja silnika.
  • Seite 98: Usuwanie Produktu

    W takich przypadkach firma Nice nie jest w stanie udzielać produktu. gwarancji dotyczących rzeczywistego zasięgu swych urządzeń. Uwaga! – Lokalne przepisy mogą przewidywać wysokie –...
  • Seite 99: Beschrijving Van Het Product En Gebruiksbestemming

    1 – WAARSCHUWINGEN GEBRUIKSBESTEMMING • Let op! - Voor de veiligheid van de betrokken perso- De besturingseenheid TT6 is bestemd voor het gebruik in nen is het belangrijk deze aanwijzingen op te volgen. automatiseringsinstallaties voor zonneschermen, rolluiken, • Let op! - Belangrijke aanwijzingen voor de veilig- daklichten, verticale elementen, zonweringen en om projec- heid: bewaar deze aanwijzingen.
  • Seite 100: Elektrische Aansluitingen

    02. Boor in de houder op de aanwezige merktekens gaten 4 – ELEKTRISCHE AANSLUITINGEN voor de kabeldoorvoer en gaten voor de bevestiging Waarschuwingen van de besturingseenheid aan de wand. Let op! - • Om de meegeleverde antenne aan te sluiten moet het Neem de maatregelen die nodig zijn om de door snoer zijn gehele lengte behouden en recht en zonder te het installatietype vereiste IP beschermingsklasse...
  • Seite 101 noeuvres (omhoog en omlaag), geactiveerd door twee toetsin - TABEL 1 gangen Pup () en Pdown () van de 12V trigger of via radio. Schema van de elektrische aansluitingen – Middels seriële poort met interne instructie kan de active- ringstimer ingesteld worden van 1 s tot 240 s. Elektrische fase –...
  • Seite 102 3- Sluit TABEL 2 - Signaleringsleds 4- Stop Beschrijving 5- Sluit na 10 s Rode led Voedingsindicator. 6- Open na 10 s Gele led Als de led brandt is de geheugen- 7- Sluit na 20 s opslag van de zenders actief. 8- Open na 20 s 9 - Sluit als er iemand aanwezig is Groene led Signaleringen.
  • Seite 103 5.2 – Een zender in het geheugen opslaan volgens van de ontvanger precies tijdens de 3de knippering van “Procedure II” de groene led DL1 los; 06. Om het volledige geheugen te wissen (inclusief de confi- 01. Kies uit de lijst van de “Procedure II” de functie die u guraties en de coderingsfamilie van de zenders), laat u wilt programmeren (bijv.
  • Seite 104 knooppunt van de inrichting aangeven. 5.5 – Lijst met instructies Deze twee velden zijn verplicht en moe- ten in hexadecimalen worden geschre- Beschrijving ven. LEZING VAN DE POSITIE percentage 0 - 255 [AA] Veld dat de te versturen instructie aan- 0 = Eindaanslag laag 255 = Eindaanslag hoog geeft.
  • Seite 105 Omhoog Antwoord Beweeg in kleine stappen omhoog Start TT ADR TT ENDPOINT Instructie Gegevens STOP [XX] [YY] [AA] Beweeg in kleine stappen omlaag RISP – – Beweeg naar deelafstandswaarde 1 Beweeg naar deelafstandswaarde 2 5.5.2 – Instructie voor STOP Beweeg naar deelafstandswaarde 3 Stopt de motor.
  • Seite 106 5.5.3 – Instructie voor OMHOOG Voorbeeld Instructie voor het omhooggaan van de motor tot de inge- Start TT ADR TT ENDPOINT Instructie Gegevens stelde eindaanslag. [XX] [YY] [AA] Structuur – – Start TT ADR TT ENDPOINT Instructie Gegevens Antwoord [XX] [YY] [AA] Start...
  • Seite 107 Antwoord 5.5.7 – Deelafstandswaarde 1, 2, 3, 4, 5, 6 en eindaanslagwaarde 0 en 1 opslaan Start TT ADR TT ENDPOINT Instructie Gegevens Wijst de huidige afstandswaarde aan een variabele toe. [XX] [YY] [AA] Structuur RISP – – Start TT ADR TT ENDPOINT Instructie Gegevens...
  • Seite 108 Voorbeeld Antwoord Start TT ADR TT ENDPOINT Instructie Gegevens Start TT ADR TT ENDPOINT Instructie Gegevens [XX] [YY] [AA] [XX] [YY] [AA] – – RISP – Antwoord Start TT ADR TT ENDPOINT Instructie Gegevens 5.5.10 – Beweeg naar de positie percentage 0 - 255 [XX] [YY] [AA]...
  • Seite 109 5.5.11 – Instructie Alle opgeslagen zenders uit het Voorbeeld geheugen verwijderen Start TT ADR TT ENDPOINT Instructie Gegevens Annuleert alle radio-instructies van de motor. [XX] [YY] [AA] Structuur – – Start TT ADR TT ENDPOINT Instructie Gegevens Antwoord [XX] [YY] [AA] Start TT ADR...
  • Seite 110 [XX] Het adres van de inrichting waarnaar de instruc- Gebruikmakend van het voorgaande voorbeeld wordt het: tie wordt gestuurd. Dit bestaat verplicht uit twee hexadecimale cijfers. MEM_OFF 02 05 03 04 05 12 [Carriage Return] [YY] De instructie die naar de inrichting wordt gestuurd.
  • Seite 111 CMD 2--> addr: 3, cmd: 4 De velden zijn: CMD 3--> addr: 5, cmd: 12 [XX] Actuele adres van de motor. Het adres wordt verplicht met twee hexadecimale cijfers ge sch - 5.8 – Instructie om de duur van de bewegingen reven.
  • Seite 112 FFFF 5.11.1 – Weergave van seriële radiocodes en FF zijn ingesteld. Als de TT6 een radiosignaal van een van de opgeslagen afstandsbedieningen ontvangt, worden de volgende gege- Om motor nummer 02 bijvoorbeeld naar de middenwaarde vens over de zender serieel verzonden.
  • Seite 113 den, totdat de motor de gewenste positie bereikt; de nota- Waarbij: tie is: [XX] Het adres van de motor is. POS * 02 04 xxxx FFFF FF [YY] Het knooppunt is (voor screenmoto- ren is de standaard 04). Waarbij xxxx de instantpositie van de motor is. [PPPP] [ZZZZ] [TT] Allemaal gevuld met 0xF in geval van In geval van een fout in de syntaxis van de opdracht wordt lezen.
  • Seite 114: Afvalverwerking Van Het Product

    20° C (± 5° C). duct. – Nice behoudt zich het recht voor om, op elk moment dat dit noodzakelijk geacht wordt, wijzigingen aan het product aan te brengen, waarbij hoe dan ook de gebruiksbestem- ming en de functionaliteit ervan gelijk blijven.
  • Seite 115 Il testo qui presente è stato riadattato per A copy of the original declaration can be requested from Nice S.p.a. (prov. of Treviso – Italy). motivi editoriali. Copia della dichiarazione originale può essere richiesta a Nice S.p.a. (TV) I.
  • Seite 116 Note – Le contenu de cette déclaration correspond en tous points au document officiel cial depositado en la sede de Nice S.p.a. y, en particular, a su última revisión disponible déposé au siège de la société Nice S.p.a., et plus particulièrement, à sa dernière révision dis- antes de la impresión de este manual.
  • Seite 117 Erklärung in Übereinstimmung mit der Richtlinie 1999/5/EG Deklaracja zgodna z Dyrektywą 1999/5/WE Hinweis – Der Inhalt dieser Erklärung stimmt mit dem offiziell beim Geschäftssitz der Nice Uwagi – Treść niniejszej deklaracji odpowiada oświadczeniom zawartym w oficjalnym S.p.a. hinterlegten Dokument überein, insbesondere mit der letzten, vor dem Druck dieses dokumencie złożonym w siedzibie firmy Nice S.p.a., a w szczególności jego ostatniej,...
  • Seite 118 Opmerking - De inhoud van deze verklaring stemt overeen met hetgeen verklaard is in het officiële document dat is neergelegd bij de vestiging van Nice S.p.a., en in het bijzon- der aan de laatste revisie hiervan die voor het afdrukken van deze handleiding beschikbaar was.
  • Seite 120 Nice SpA Oderzo TV Italia www.niceforyou.com info@niceforyou.com...

Inhaltsverzeichnis