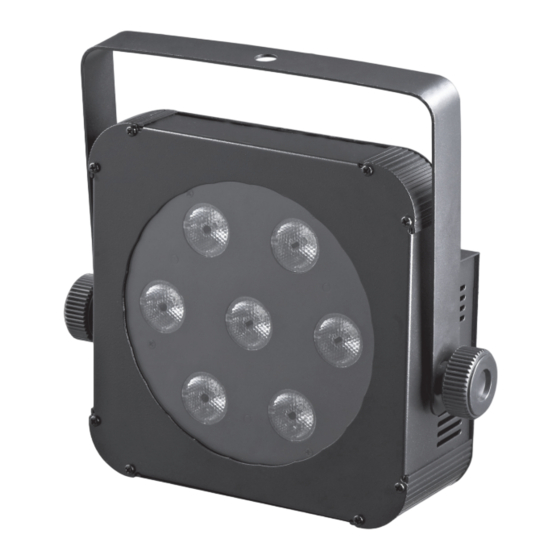
Herunterladen Inhalt Inhalt Diese Seite drucken

Werbung

Verfügbare Sprachen
  • DE

Verfügbare Sprachen

  • DEUTSCH, seite 35

Werbung

Inhaltsverzeichnis
loading

Inhaltszusammenfassung für JB Systems Light Plano Spot 7TC

  • Seite 3: Before Use

     Keep this booklet in a safe place for future consultation. If you sell the fixture, be sure to add this user manual. Check the contents: Check that the packing contains the following items:  Operating instructions  PLANO SPOT 7TC  Hanging bracket  2 Knobs to fasten the hanging bracket JB SYSTEMS 1/65 PLANO SPOT 7TC ®...
  • Seite 4: Safety Instructions

     Never repair a fuse or bypass the fuse holder. Always replace a damaged fuse with a fuse of the same type and electrical specifications!  In the event of serious operating problems, stop using the fixture and contact your dealer immediately. JB SYSTEMS 2/65 PLANO SPOT 7TC ®...
  • Seite 5: Electrical Installation

     Done! Remark: You can connect a CA-8 remote controller to the master unit if you want to have more control over the master/slave operation. You can also connect the LEDCON 02 remote controller JB SYSTEMS 3/65 PLANO SPOT 7TC ®...
  • Seite 6: Overhead Rigging

     Once the required menu option is selected, press the ENTER button to select. Remark: Press the MENU button for about 2 seconds to return to running mode or just wait 8 seconds. JB SYSTEMS 4/65 PLANO SPOT 7TC ®...
  • Seite 7 ENGLISH OPERATION MANUAL JB SYSTEMS 5/65 PLANO SPOT 7TC ®...
  • Seite 8  You will also be asked to select a running speed for the static mode. With the UP/DOWN buttons you can select (slow) to (fast).  Once the right show is selected, press the ENTER button to confirm.  Press the MENU button for about 2 seconds to return to running mode. JB SYSTEMS 6/65 PLANO SPOT 7TC ®...
  • Seite 9  Press the ENTER button.  Use DOWN and UP buttons to select (display always on) or (display off when not used).  Once the mode is selected, press the ENTER button to confirm. JB SYSTEMS 7/65 PLANO SPOT 7TC ®...
  • Seite 10 (see chapter HOW TO SETUP the slave mode)  Connect all units to the mains and put on some music. The units will start working automatically to the rhythm of the music and show the internal chase programs. JB SYSTEMS 8/65 PLANO SPOT 7TC ®...
  • Seite 11 Since each unit has its own DMX-address, you can control them individually. Remember that each unit uses 4 DMX-channels as shown in the DMX chart below: Channel4 can have 4 different behaviors, depending on the channel mode (1,2,3 or 4) you selected. JB SYSTEMS 9/65 PLANO SPOT 7TC ®...
  • Seite 12: Maintenance

    Size: see drawing below Weight: 2.5 kg Every information is subject to change without prior notice You can download the latest version of this user manual on our website: www.beglec.com JB SYSTEMS 10/65 PLANO SPOT 7TC ®...
  • Seite 13: Caractéristiques

    à joindre ce manuel. Vérifiez le contenu : Vérifiez que l'emballage contient les éléments suivants :  Guide d'utilisation  PLANO SPOT  Support de suspension  2 Boutons pour fixer le support de suspension JB SYSTEMS 11/65 PLANO SPOT 7TC ®...
  • Seite 14: Instructions De Securite

    électriques !  En cas de sérieux problèmes de fonctionnement, cessez d'utiliser l'appareil et contactez immédiatement votre revendeur.  Le boîtier et la lentille doivent être remplacés s'ils sont visiblement endommagés. JB SYSTEMS 12/65 PLANO SPOT 7TC ®...
  • Seite 15: Installation Électrique

     C'est fait ! Remarque : Vous pouvez connecter une télécommande CA-8 à l'appareil maître, si vous voulez avoir plus de contrôle sur le fonctionnement maître/esclave. Vous pouvez également connecter la télécommande LEDCON 02 JB SYSTEMS 13/65 PLANO SPOT 7TC ®...
  • Seite 16: Montage Au Plafond

     Une fois l'option souhaitée est sélectionnée, appuyez sur la touche ENTER pour sélectionner.  Remarque : Maintenez appuyée la touche MENU pendant environ 2 secondes pour retourner au mode de fonctionnement ou patientez 8 secondes. JB SYSTEMS 14/65 PLANO SPOT 7TC ®...
  • Seite 17 FRANCAIS GUIDE D’UTILISATION JB SYSTEMS 15/65 PLANO SPOT 7TC ®...
  • Seite 18 Utilisé pour sélectionner l'un des fondus enchaînés préprogrammés lorsqu'il est utilisé en mode autonome ou mode maître/esclave. Tous les projecteurs produisent toujours une sortie identique.  Appuyez sur la touche MENU jusqu'à ce que soit affiché à l'écran. JB SYSTEMS 16/65 PLANO SPOT 7TC ®...
  • Seite 19 (vert) : Appuyez sur ENTER. Puis utilisez les touches Haut et Bas pour définir une valeur entre 000 et 255. Validez avec le bouton ENTER. Utilisez les touches Haut et Bas pour sélectionner la couleur suivante. JB SYSTEMS 17/65 PLANO SPOT 7TC ®...
  • Seite 20 Utilisé pour afficher la version du logiciel de l'appareil.  Appuyez sur la touche MENU jusqu'à ce que soit affiché à l'écran.  Appuyez sur la touche ENTER pour afficher la version du logiciel de l'appareil. JB SYSTEMS 18/65 PLANO SPOT 7TC ®...
  • Seite 21: Instructions D'utilisation

    PLANO SPOT sont tous réglés sur mode1 canal (Md 1). Ainsi vous pouvez contrôler tous les appareils connectés en mode 4 ou 8 canaux. Reportez-vous au manuel d'utilisation de la télécommande LEDCON-02 pour plus d'informations sur l'adressage automatique. JB SYSTEMS 19/65 PLANO SPOT 7TC ®...
  • Seite 22: Entretien

     Afin de protéger l'appareil de toute surchauffe, les ventilateurs de rafraîchissement (le cas échéant) et les ouvertures de ventilation doivent être nettoyés mensuellement.  L'intérieur de l'appareil doit être nettoyé une fois par an à l'aide d'un aspirateur ou d'un jet d'air. JB SYSTEMS 20/65 PLANO SPOT 7TC ®...
  • Seite 23: Spécifications

    Dimensions : Voir dessin ci-dessous Poids : 2,5 kg Toutes les informations peuvent être modifiées sans préavis Vous pouvez télécharger la dernière version de ce manuel sur notre site web : www.beglec.com JB SYSTEMS 21/65 PLANO SPOT 7TC ®...
  • Seite 24: Gebruiksaanwijzing

    Controleer de inhoud: Controleer of de verpakking de volgende items bevat:  Gebruiksaanwijzing  PLANO SPOT  Ophangbeugel  2 knoppen om de ophangbeugel vast te zetten JB SYSTEMS 22/65 PLANO SPOT 7TC ®...
  • Seite 25: Veiligheidsinstructies

     Om elektrische schokken te voorkomen, open de afdekking niet. Er zijn geen door de gebruiker te repareren onderdelen binnenin het apparaat aanwezig.  Repareer nooit een zekering of sluit nooit de zekeringhouder kort. Vervang altijd een kapotte zekering met een zekering van hetzelfde type en elektrische specificaties! JB SYSTEMS 23/65 PLANO SPOT 7TC ®...
  • Seite 26: Elektrische Installatie

     Zie het hoofdstuk “HOE IN TE STELLEN” voor meer informatie.  Klaar! Opmerking :U kunt een CA-8-afstandsbediening op de master-unit aansluiten als u meer controle over de master/slave-werking wilt hebben. U kunt ook de LEDCON 02-afstandsbediening aansluiten JB SYSTEMS 24/65 PLANO SPOT 7TC ®...
  • Seite 27  Zodra de gewenste menuoptie is geselecteerd, druk op de “ENTER”-knop om te bevestigen. Opmerking:Druk op en houd de “MENU”-knop ongeveer 2 seconden ingedrukt om naar de werkingsmodus terug te keren of wacht gewoon 8 seconden. JB SYSTEMS 25/65 PLANO SPOT 7TC ®...
  • Seite 28 NEDERLANDS GEBRUIKSAANWIJZING JB SYSTEMS 26/65 PLANO SPOT 7TC ®...
  • Seite 29 (snel) selecteren.  Zodra de juiste show is geselecteerd, druk op de “ENTER”-knop om te bevestigen.  Druk op en houd de “MENU”-knop ongeveer 2 seconden ingedrukt om naar de werkingsmodus terug te keren. JB SYSTEMS 27/65 PLANO SPOT 7TC ®...
  • Seite 30  Druk op de “ENTER”-knop om te bevestigen.  Gebruik de “DOWN”- en “UP”-knoppen om één van de beschikbare opties te selecteren:  Selecteer één van de vooraf ingestelde kleuren en druk op de “ENTER”-knop om te bevestigen. JB SYSTEMS 28/65 PLANO SPOT 7TC ®...
  • Seite 31  Zodra de modus is geselecteerd, druk op de “ENTER”-knop om te bevestigen. Om zonder enige wijziging naar het hoofdmenu terug te gaan, druk kort op de “MENU”-knop. Als u naar de normale bedrijfsmodus wilt terugkeren: druk ongeveer 2 seconden lang op de “MENU”-knop. JB SYSTEMS 29/65 PLANO SPOT 7TC ®...
  • Seite 32 12 verschillende multi- de verschillende Dezelfde kleuren kleuren. kanaal shows. kleuren FUNCTIE chase vervagingmodi. Verschillende kleuren stroboscoop Stroboscoop Kleur selecteren Selecteer show Chase selecteren MODUS (LED UIT) (LED AAN) (LED knippert (LED knippert snel) langzaam) JB SYSTEMS 30/65 PLANO SPOT 7TC ®...
  • Seite 33  Wanneer een optische lens zichtbaar door scheuren of diepe krassen is beschadigd, moet het worden vervangen.  De netsnoeren moeten in perfecte conditie zijn en onmiddellijk worden vervangen wanneer zelfs een klein probleem wordt gedetecteerd. JB SYSTEMS 31/65 PLANO SPOT 7TC ®...
  • Seite 34 Lichtsterkte: zie tabel hieronder: Afmetingen: zie tekening hieronder Gewicht: 2,5 kg Alle informatie is onderhevig aan verandering zonder voorafgaande kennisgeving. U kunt de nieuwste versie van deze handleiding van onze website downloaden: www.beglec.com. JB SYSTEMS 32/65 PLANO SPOT 7TC ®...
  • Seite 35: Vor Der Erstbenutzung

    Verkauf oder sonstiger Weitergabe des Geräts bitte die Bedienungsanleitung beifügen. Packungsinhalt prüfen: Bitte überprüfen Sie, ob die Verpackung folgende Artikel enthält:  Bedienungsanleitung  PLANO SPOT  Bügel zum Aufhängen  2 Knöpfe zum Befestigen der Bügel zum Aufhängen JB SYSTEMS 33/65 PLANO SPOT 7TC ®...
  • Seite 36: Sicherheitshinweise

     Eine Sicherung niemals reparieren oder überbrücken. Eine durchgebrannte Sicherung stets durch eine gleichwertige Sicherung ersetzen!  Bei Fehlfunktion das Gerät nicht benutzen und sich mit dem Händler in Verbindung setzen.  Bei sichtbaren Beschädigungen müssen Gehäuse und Optik ersetzt werden. JB SYSTEMS 34/65 PLANO SPOT 7TC ®...
  • Seite 37: Elektrische Installation

     Schlagen Sie im Kapitel „EINSTELLUNGSANLEITUNG“ für weitere Informationen nach.  Fertig! Hinweis: Sie können einen Fernsteuerungscontroller CA-8 das Master-Gerat anschließen, wenn Sie zusätzliche Steuerungsmöglichkeiten des Master-/Slave-Betriebs verwenden möchten. Sie können auch die Fernbedienung LEDCON 02 anschließen. JB SYSTEMS 35/65 PLANO SPOT 7TC ®...
  • Seite 38: Überkopf-Montage

     Wählen Sie Mit DOWN (ABWÄRTS) und UP (AUFWÄRTS) die gewünschte Menüoption.  Sobald die gewünschte Menüoption gewählt wurde, bestätigen Sie mit ENTER. Hinweis: Halten Sie MENU für ungefähr 2 Sekunden gedrückt, um zum Betriebsmodus zurückzukehren oder warten Sie einfach 8 Sekunden. JB SYSTEMS 36/65 PLANO SPOT 7TC ®...
  • Seite 39 DEUTSCH BEDIENUNGSANLEITUNG JB SYSTEMS 37/65 PLANO SPOT 7TC ®...
  • Seite 40 Modus Alle Projektoren zeigen stets eine identische Ausgabe.  Drücken Sie die Taste MENU, bis auf dem Display angezeigt wird.  Zur Auswahl ENTER drücken.  Benutzen Sie DOWN (Abwärts) und UP (Aufwärts), um eine der vorprogrammierten Shows zu wählen. JB SYSTEMS 38/65 PLANO SPOT 7TC ®...
  • Seite 41 Drücken Sie ENTER. Anschließend stellen Sie mit DOWN (Abwärts) und UP (Aufwärts) den Wert zwischen 000 und 255 ein. Bestätigen Sie mit ENTER. Wählen Sie mit DOWN (Abwärts) und UP (Aufwärts) die nächste Farbe. JB SYSTEMS 39/65 PLANO SPOT 7TC ®...
  • Seite 42  Drücken Sie die Taste MENU, bis auf dem Display angezeigt wird.  Drücken Sie ENTER, um die Software-Version des Geräts anzuzeigen.  Halten Sie MENU ungefähr 2 Sekunden gedrückt, um in den Betriebsmodus zurückzukehren. JB SYSTEMS 40/65 PLANO SPOT 7TC ®...
  • Seite 43: Bedienungshinweise

    PLANO SPOT-Projektoren alle auf Kanalmodus 1 (Md 1) eingestellt wurden. Nun können Sie alle angeschlossenen Einheiten im 4- oder 8-Kanalmodus steuern. Schlagen Sie in der Bedienungsanleitung des LEDCON-02-Controllers für weitere Informationen und über die automatische Adressierung nach. JB SYSTEMS 41/65 PLANO SPOT 7TC ®...
  • Seite 44: Wartung

    Umgebung führen zu größerer Verschmutzung auf den Linsen.  Mit einem weichem Tuch und gewöhnlichem Glasreiniger säubern.  Alle Teile stets gut abtrocknen. Achtung: Wir empfehlen dringend, die Reinigung des Geräteinneren nur von qualifiziertem Personal durchführen zu lassen! JB SYSTEMS 42/65 PLANO SPOT 7TC ®...
  • Seite 45: Technische Daten

    25° Lichtstärke: Siehe Tabelle unten Abmessungen: Siehe Abbildung unten Gewicht: 2,5 kg Diese Angaben können sich ohne gesonderten Hinweis ändern. Sie können sich die neueste Version dieses Benutzerhandbuches von unserer Website herunterladen: www.beglec.com. JB SYSTEMS 43/65 PLANO SPOT 7TC ®...
  • Seite 46: Antes Del Uso

    Compruebe el contenido: Compruebe que el embalaje contiene los siguientes elementos:  Instrucciones de operación  PLANO SPOT  Soporte para colgar  2 mandos para apretar el soporte JB SYSTEMS 44/65 PLANO SPOT 7TC ®...
  • Seite 47: Instrucciones De Seguridad

     Nunca repare un fusible ni haga una derivación en el portafusibles. ¡Sustituya siempre un fusible dañado por otro que sea del mismo tipo y que tenga las mismas especificaciones eléctricas! JB SYSTEMS 45/65 PLANO SPOT 7TC ®...
  • Seite 48: Instalación Eléctrica

     Consulte el capítulo CÓMO CONFIGURARLO para más información.  ¡Hecho! Observación: Puede conectar a la unidad un mando a distancia CA-8 si desea tener un mayor control sobre el funcionamiento maestro/esclavo. También puede conectar el controlador LEDCON 02. JB SYSTEMS 46/65 PLANO SPOT 7TC ®...
  • Seite 49  Una vez seleccionada la opción deseada del menú, pulse el botón ENTER para confirmar. Observación: Pulse el botón MENU durante unos 2 segundos para volver al modo activo, o espere 8 segundos. JB SYSTEMS 47/65 PLANO SPOT 7TC ®...
  • Seite 50 ESPAÑOL MANUAL DE INSTRUCCIONES JB SYSTEMS 48/65 PLANO SPOT 7TC ®...
  • Seite 51 Todos los proyectores mostrarán una salida idéntica.  Pulse el botón MENU, hasta que en la pantalla aparezca  Pulse el botón ENTER para seleccionar.  Utilice los botones ABAJO y ARRIBA para seleccionar uno de los espectáculos preprogramados. JB SYSTEMS 49/65 PLANO SPOT 7TC ®...
  • Seite 52 (azul): pulse ENTER. Después, utilice los botones ABAJO y ARRIBA para ajustar el valor entre 000 y 255. Confirme con el botón ENTER. Utilice los botones ABAJO y ARRIBA para seleccionar el siguiente color. JB SYSTEMS 50/65 PLANO SPOT 7TC ®...
  • Seite 53  Pulse el botón MENU, hasta que en la pantalla aparezca  Pulse el botón ENTER para visualizar la versión del software de la unidad.  Pulse el botón MENU durante unos 2 segundos para volver al modo activo. JB SYSTEMS 51/65 PLANO SPOT 7TC ®...
  • Seite 54: Instrucciones De Funcionamiento

    PLANO SPOT estén todos establecidos en el modo 1 de canal (Md 1). Ahora usted puede controlar todas las unidades conectadas en modo de 4 u 8 canales. Consulte el manual de usuario del mando LEDCON-02 para más información y direccionamiento automático. JB SYSTEMS 52/65 PLANO SPOT 7TC ®...
  • Seite 55: Mantenimiento

     Límpielo con un paño suave utilizando productos normales para la limpieza del vidrio.  Siempre seque cuidadosamente las piezas. Atención: ¡Recomendamos enfáticamente que la limpieza se lleve a cabo por personal cualificado! JB SYSTEMS 53/65 PLANO SPOT 7TC ®...
  • Seite 56: Especificaciones

    Tamaño: ver la siguiente imagen Peso: 2.5 kg Esta información está sujeta a cambios sin notificación previa. Puede descargar la versión más reciente de este manual de usuario en nuestro sitio Web: www.beglec.com JB SYSTEMS 54/65 PLANO SPOT 7TC ®...
  • Seite 57: Manual De Funcionamento

    Verifique o conteúdo: Verifique que a caixa contém os seguintes elementos:  Instruções de funcionamento  PLANO SPOT  Suporte de suspensão  2 apertos para o suporte de suspensão JB SYSTEMS 55/65 PLANO SPOT 7TC ®...
  • Seite 58: Instruções De Segurança

     Esta unidade deverá estar ligada à terra, a fim de cumprir com os regulamentos de segurança.  Não conectar a unidade a um dimmer externo.  Utilize sempre um cabo de segurança apropriado e certificado ao instalar a unidade. JB SYSTEMS 56/65 PLANO SPOT 7TC ®...
  • Seite 59: Instalação Eléctrica

     Conecte 2 a 16 unidades (máximo) utilizando cabos de microfone equilibrados e de boa qualidade. A unidade que não tem nenhum cabo conectado à sua entrada DMX é a “master”, as outras são as JB SYSTEMS 57/65 PLANO SPOT 7TC ®...
  • Seite 60  Para seleccionar qualquer das opções do menu, pressione o botão MENU para até que a opção desejada seja mostrada no visor.  Seleccione a função com a tecla ENTER. O visor piscará.  Use os botões DOWN e UP para escolher a opção desejada. JB SYSTEMS 58/65 PLANO SPOT 7TC ®...
  • Seite 61  Uma vez seleccionada a opção do menu necessária, pressione a tecla ENTER para seleccionar. Observação: Pressione o botão MENU durante cerca de 2 segundos para retornar ao modo de execução ou espere 8 segundos. JB SYSTEMS 59/65 PLANO SPOT 7TC ®...
  • Seite 62 Todos os projectores exibirão sempre uma saída idêntica.  Pressione o botão MENU até que seja exibido no visor.  Pressione o botão ENTER para seleccionar.  Use os botões DOWN e UP para seleccionar um dos espectáculos pré programados JB SYSTEMS 60/65 PLANO SPOT 7TC ®...
  • Seite 63 (verde): pressione ENTER. Em seguida use os botões DOWN e UP para definir um valor entre 000 e 255. Confirme com a tecla ENTER. Use os botões DOWN e UP para seleccionar a cor seguinte. JB SYSTEMS 61/65 PLANO SPOT 7TC ®...
  • Seite 64  Pressione a tecla ENTER para mostrar a versão do software da unidade.  Pressione o botão MENU durante cerca de 2 segundos para voltar ao modo de execução. JB SYSTEMS 62/65 PLANO SPOT 7TC ®...
  • Seite 65: Instruções De Funcionamento

    SPOT estão todos configurados para o modo 1 de canal (Md 1). Agora pode controlar todas as unidades conectadas em modo de 4 ou 8 canais. Consulte o manual do utilizador do controlador LEDCON-02 para mais informações e endereçamento automático. JB SYSTEMS 63/65 PLANO SPOT 7TC ®...
  • Seite 66  Limpe com um pano macio usando produtos normais de limpeza de vidro.  Seque sempre as peças cuidadosamente. Atenção: Recomendamos que a limpeza interna seja ser realizada por pessoal qualificado! JB SYSTEMS 64/65 PLANO SPOT 7TC ®...
  • Seite 67 Tamanho: ver figura em baixo Peso: 2.5 kg Estas informações estão sujeitas a alterações sem aviso prévio. Poderá fazer o download da versão mais recente deste manual no nosso site: www.beglec.com JB SYSTEMS 65/65 PLANO SPOT 7TC ®...
  • Seite 68 WWW.BEGLEC.COM Copyright © 2012 by BEGLEC NV ‘t Hofveld 2C ~ B1702 Groot-Bijgaarden ~ Belgium Reproduction or publication of the content in any manner, without express permission of the publisher, is prohibited.

Inhaltsverzeichnis