Herunterladen Inhalt Inhalt Diese Seite drucken

Werbung

Verfügbare Sprachen

Verfügbare Sprachen

DTD 4W 02 - 24
DTD 2W 02 - 10
Unique - Serie
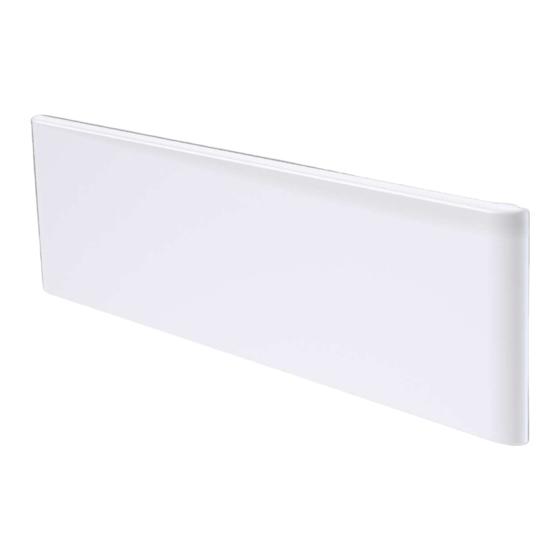
Wandkonvektor
Konvektorleiste
Wall Convector
Low Profile Convector
Montage- und
Gebrauchsanweisung
Installation and
Operating Instructions
Instructions de montage
et d'utilisation
Istruzioni d'uso e di
montaggio
Convecteur mural
Plinthe chauffante
Convettore da parete
Convettore compatto

Werbung

Inhaltsverzeichnis
loading

Inhaltszusammenfassung für Dimplex DTD 4W 02 - 24

  • Seite 1 DTD 4W 02 - 24 DTD 2W 02 - 10 Unique - Serie Montage- und Gebrauchsanweisung Installation and Operating Instructions Instructions de montage et d’utilisation Istruzioni d'uso e di montaggio Wandkonvektor Convecteur mural Konvektorleiste Plinthe chauffante Wall Convector Convettore da parete...
  • Seite 2 Teile, die den Wert oder die Gebrauchstauglichkeit des Gerätes nur unwesentlich beeinträchtigten. Kundendienst Im Kundendienstfall ist die Glen Dimplex Deutschland GmbH als zuständiger Kundendienst zu informieren. Für die Auftragsbearbeitung wird die Typenbezeichnung des Gerätes benötigt. Diese Angabe befindet sich auf dem Typenschild auf der Rückseite des Gerätes.
  • Seite 3 DTD 2W 02 - 10, DTD 4W 02 - 24 Deutsch 1 Hinweise für den Benutzer ACHTUNG! Diese Gerät kann von Kindern ab 8 Jahren HINWEIS und darüber sowie von Personen mit verrin- Sehr geehrter Kunde, gerten physischen, sensorischen oder menta- bitte lesen Sie alle in dieser Anweisung aufgeführten...
  • Seite 4: Technische Daten, Mindestabstände

    Deutsch DTD 2W 02 - 10, DTD 4W 02 - 24 2 Technische Daten, Mindestabstände Mindestabstände unbedingt einhalten. An der Geräte- vorderseite ein Abstand von mindestens 50 mm einhal- ten. Min. Min.200 mm 30 mm Min. 50 mm Min. 50 mm Abb.
  • Seite 5 DTD 2W 02 - 10, DTD 4W 02 - 24 Deutsch Wandmontage 4 Elektrischer Anschluss ACHTUNG! ACHTUNG! Das Heizgerät darf nicht unter einer Wand- Die aktuellen Installationsvorschriften müs- steckdose installiert werden sen zwingend beachtet werden. ACHTUNG! ACHTUNG! Heizgerät so installieren, dass seine Bedie-...
  • Seite 6: Betrieb

    Deutsch DTD 2W 02 - 10, DTD 4W 02 - 24 Netzzuleitung an den Klemmen der Anschlussbox lischt. anschließen: Die eingestellte Temperatur kann jederzeit am Dreh- Phasenleiter - L knopf verändert werden. Nullleiter - L(N) 6 Überhitzungsschutz Deckel der Anschlussbox aufstecken.
  • Seite 7: Garantie

    DTD 2W 02 - 10, DTD 4W 02 - 24 Deutsch 10 Zubehör 11 Garantie 10.1 Timer DCU 2T Für dieses Produkt übernehmen wir 2 Jahre Garantie gemäß unseren Garantiebedingungen. Wochenprogramm-Timer mit frei einstellbaren Kom- fort- und Absenkzeiten von 7° bis 30° C. Mit Tasten- sperre.
  • Seite 8 English DTD 2W 02 - 10, DTD 4W 02 - 24 1 Notes for the user ATTENTION! This device can be used by children aged 8 NOTE NOTE and over and by persons with limited physical, Dear customer, sensory or mental aptitude or lack of Please read all the information in this manual carefully.
  • Seite 9 DTD 2W 02 - 10, DTD 4W 02 - 24 English 2 Technical data, minimum distances Observe the minimum clearances! A distance of at least 50 mm must be complied with on the front of the device. Min. Min.200 mm 30 mm Min.
  • Seite 10: Electrical Connection

    English DTD 2W 02 - 10, DTD 4W 02 - 24 Wall mounting 4 Electrical connection ATTENTION! ATTENTION! Do not place the heating device directly below The relevant installation requirements must a wall socket. be observed. ATTENTION! ATTENTION! Install the heating device in such a manner...
  • Seite 11: Operation

    DTD 2W 02 - 10, DTD 4W 02 - 24 English Connect the power cable to the terminals on the tary knob slowly to the left until the LED goes out. connection box: The set temperature can be changed at any time via the Phase conductor - L rotary knob.
  • Seite 12: Warranty

    English DTD 2W 02 - 10, DTD 4W 02 - 24 10 Accessories 11 Warranty This product is supplied with a two-year warranty ac- 10.1 Timer DCU 2T cording to our terms of guarantee. Week programme timer with freely adjustable comfort and lower times from 7°...
  • Seite 13 DTD 2W 02 - 10, DTD 4W 02 - 24 Français 1 Remarques à l’attention de l’utilisateur ATTENTION! Les enfants âgés de plus de 8ans ainsi que les REMARQUE Remarque personnes dont les facultés physiques, Cher client, sensorielles et mentales sont réduites ou qui ne Vous êtes prié...
  • Seite 14 Français DTD 2W 02 - 10, DTD 4W 02 - 24 2 Caractéristiques techniques, Respecter les écartements minimaux. Laisser un dé- gagement d’au moins 50 mm devant la façade de l’ap- écartements minimaux pareil. Min. Min.200 mm 30 mm Min.
  • Seite 15: Branchements Électriques

    DTD 2W 02 - 10, DTD 4W 02 - 24 Français Montage mural 4 Branchements électriques ATTENTION! ATTENTION! Ne pas installer l’appareil de chauffage en Il est absolument impératif de respecter les dessous d’une prise murale. instructions d’installation afférentes. ATTENTION! ATTENTION! Installer l’appareil de chauffage de sorte qu’une...
  • Seite 16 Français DTD 2W 02 - 10, DTD 4W 02 - 24 Raccorder le câble d’alimentation secteur aux Mise en service bornes de la boîte de raccordement : Placer l’interrupteur de réseau (A) – à droite sur l’appa- Phase - L reil de chauffage –...
  • Seite 17: Commande De Pièces De Rechange

    DTD 2W 02 - 10, DTD 4W 02 - 24 Français 8 Commande de pièces de rechange 11 Garantie Commande de pièces de rechange sur Internet auprès Conformément aux conditions de garantie, nous accor- de Glen Dimplex Deutschland GmbH, sous : dons 2 ans de garantie sur ce produit.
  • Seite 18 Italiano DTD 2W 02 - 10, DTD 4W 02 - 24 1 Note per l'utente ATTENZIONE! L'apparecchio può essere usato dai bambini a REFERENCE partire dagli 8 anni di età e anche dalle Gentile cliente, persone con ridotte capacità fisiche, mentali o...
  • Seite 19 DTD 2W 02 - 10, DTD 4W 02 - 24 Italiano Fare attenzione che l'aria possa entrare nell'apparec- ATTENZIONE! chio da riscaldamento e uscirne dal basso e dall'alto Le riparazioni e gli interventi all'interno senza ostacoli dell'apparecchio da riscaldamento possono Prestare attenzione davanti a oggetti infiammabili! essere svolti solo da uno specialista.
  • Seite 20 Italiano DTD 2W 02 - 10, DTD 4W 02 - 24 Montaggio a parete 4 Allacciamento elettrico ATTENZIONE! ATTENZIONE! L'apparecchio da riscaldamento non deve Rispettare scrupolosamente le attuali norme i essere installato sotto una presa a muro. requisiti di installazione pertinenti.
  • Seite 21: Protezione Antisurriscaldamento

    DTD 2W 02 - 10, DTD 4W 02 - 24 Italiano Collegare il cavo di alimentazione ai morsetti della Avviamento scatola di giunzione: Portare l'interruttore di rete (A) situato su lato destro fase - L dell'apparecchio da riscaldamento in posizione "I". Gi-...
  • Seite 22: Garanzia

    Italiano DTD 2W 02 - 10, DTD 4W 02 - 24 9 Pulizia 11 Garanzia Per la pulizia occorre scollegare l'apparecchio da ri- Questo prodotto è garantito 2 anni secondo le condi- scaldamento dalla rete elettrica e lasciarlo raffreddare. zioni di garanzia.
  • Seite 23 DTD 2W 02 - 10, DTD 4W 02 - 24 Italiano www.dimplex.de DTD W_BA · 09/16/B IT-23...
  • Seite 24 Deutsch, English, Français, Italiano DTD 2W 02 - 10, DTD 4W 02 - 24 Glen Dimplex Deutschland GmbH Telefon: +49 (0) 9221 709-545 Am Goldenen Feld 18 Telefax: +49 (0) 9221 709-924 545 D-95326 Kulmbach E-Mail: 09221709545@dimplex.de DTD W_BA · 09/16/B...

Diese Anleitung auch für:

Dtd 2w 02 - 10

Inhaltsverzeichnis