Herunterladen Inhalt Inhalt Diese Seite drucken
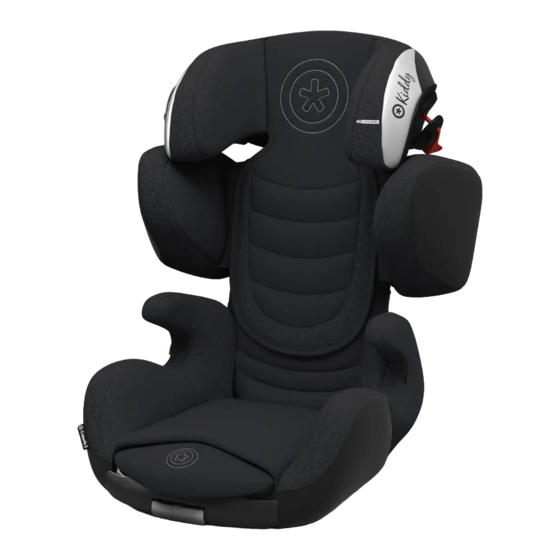
KIDDY Cruiserfix 3 Bedienungsanleitung
Vorschau ausblenden Andere Handbücher für Cruiserfix 3:
Inhaltsverzeichnis

Werbung

Verfügbare Sprachen
  • DE

Verfügbare Sprachen

  • DEUTSCH, seite 1
Car Seat
INSTRUCTION MANUAL
DE / EN / NL / FR / IT / ES / PT
Booklet 1

Werbung

Inhaltsverzeichnis
loading

Inhaltszusammenfassung für KIDDY Cruiserfix 3

  • Seite 1 Car Seat INSTRUCTION MANUAL DE / EN / NL / FR / IT / ES / PT Booklet 1...
  • Seite 4 3 cm...
  • Seite 9: Inhaltsverzeichnis

    Inhaltsverzeichnis Einleitung . . . . . . . . . . . . . . . . . . . . . . . . . . . . . . . . . . 4 Eignung .
  • Seite 10: Einleitung

    Wir freuen uns, dass Sie sich bei der Wahl eines Kinderrückhaltesystems (A) für den KIDDY Cruiserfix 3 entschieden haben. Der Cruiserfix 3 ist ein weiteres, innovatives KIDDY Produkt. Durch besonders energieableitende Materialien bietet Ihr KIDDY die größtmögliche Sicherheit beim Seitenaufprall. Ihr Kindersitz ist ebenfalls mit KIDDY Shock-Absorbern (F) und dem k-fix Befestigungssystem für umfassenden Schutz beim Frontalaufprall, aus-...
  • Seite 11: Allgemeine Sicherheitshinweise

    Die aktuellste Version finden Sie unter http://www.kiddy.de/vehicletypelist Das Kinderrückhaltesystem Cruiserfix 3 ist geeignet für die Gewichtsklassen II bis III, das heißt für Kinder mit einem Körpergewicht von 15–36 kg (ca. 3 bis ca. 12 Jahre) oder bis zu einer Körpergröße von maximal 150 cm.
  • Seite 12 Achten Sie vor allem bei Vans und Caravans darauf, dass das Kinderrückhaltesystem (A) im Falle einer Rettung durch Dritte möglichst an einem leicht zugänglichen Platz eingebaut ist. Der Gurt darf niemals locker anliegen. Bei einem Unfall sind die Belastungen um ein Vielfaches höher als bei einem straffen Gurt. Achten Sie auf die korrekte Lage des Fahrzeuggurtschlosses.
  • Seite 13: Einstellungen

    Gönnen Sie Ihrem Kind bei längeren Fahrten Pausen und achten Sie darauf, dass Ihr Kind nicht zur Fahrbahn hin unbeaufsichtigt aus dem Fahrzeug steigt. Benutzen Sie immer, falls vorhanden, die Kindersicherung in den PKW-Türen. Verwenden Sie das Kinderrückhaltesystem (A) nicht weiter, wenn Teile nach einem Unfall (Unfallgeschwindigkeit größer als 10 km/h) oder durch andere Einwirkungen beschädigt wurden oder sich gelöst haben.
  • Seite 14: Sitzplatzauswahl Und -Einstellung

    Das Kinderrückhaltesystem (A) Cruiserfix 3 kann in Fahrzeugen auf jedem Platz eingebaut werden, der über ein 3-Punkt-Gurtsystem verfügt (Abb. 6). Der Cruiserfix 3 kann ebenfalls auf rückwärts gerichteten Autositzen, die mit ei- nem 3-Punkt-Gurtsystem ausgerüstet sind, benutzt werden (Abb. 6).
  • Seite 15: Semi-Universaler Einbau Ins Fahrzeug Mit K-Fix

    Das Kinderrückhaltesystem (A) Cruiserfix 3 kann in Fahrzeugen und auf Sitzplätzen eingebaut werden die in der Typenliste aufgeführt sind. Die Typenliste wird ständig aktualisiert, die aktuellste Version finden Sie unter http://www.kiddy.de/vehicletypelist Der Hersteller empfiehlt, wenn möglich, den semi-universalen Einbau des Kinderrückhaltesystems (A) mit den k-fix...
  • Seite 16: Sichern Des Kindes

    Sie die k-fix Konnektoren (E) drehen und in den Sitz (I) hinein einfahren! Positionieren Sie ihren KIDDY wie in Punkt 5.1 + 5.2, bzw. 5.1 + 5.3 beschrieben auf dem Fahrzeugsitz. Wenn Sie ihn semi-universal (mit k-fix befestigt) benutzen möchten, folgen Sie den Anweisungen aus Punkt 6.
  • Seite 17: Öffnen Der Diagonalgurtführung

    Ziehen Sie den Fahrzeuggurt heraus und legen Sie den Beckengurt unter beide Armlehnen (D) des Sitzes (I) (Abb. 13). Achten Sie darauf, dass der Beckengurt so tief wie möglich sitzt. Nun verschließen Sie das Gurtschloss. Prüfen Sie, ob das Gurtschloss ordnungs- gemäß...
  • Seite 18: Abziehen Und Aufziehen Des Bezuges

    Konnektor (E) indem Sie die Entrie- gelungen (P) nach vorn hin (über die “grüne” Verschlussanzeige (N) hinweg) verschieben (Abb. 19). Erst wenn beide Konnektoren (E) geöffnet sind, ist der Cruiserfix 3 von der Fahr- zeugstruktur entkoppelt. Als abschließenden Schritt müssen die k-fix Konnektoren (E) in den Sitz (I) eingefahren werden.
  • Seite 19: Abziehen Des Sitzbezuges

    Öffnen Sie anschließend die Klettverschlüsse des Schulterstützenbezugs an der Rückseite und nehmen Sie diesen von der Schulterstütze (H) ab. 10.2 Abziehen des Sitzbezuges Öffnen Sie zunächst die Druckknöpfe an der Unter- und Rückseite des Sitzes (I) sowie vorne an der Rückenlehne (C). Lösen Sie nun die beiden Klettverschlüsse links und rechts unter dem Bezug und ziehen Sie danach den Bezug nach oben ab.
  • Seite 20: Reinigung Der Kunststoffteile

    überprüft und kann gegebenenfalls kostenlos ausgetauscht werden. 13 Garantie Für Ihren KIDDY leisten wir eine Garantie für Fabrikations- oder Materialfehler von 2 Jahren. Die Garantiezeit beginnt am Tage des Kaufes. Grundlage der Reklamation ist der Kaufbeleg des Erstkäufers. Die Garantieleistung beschränkt sich auf die Kinderrückhaltesysteme, die sachgemäß...
  • Seite 21 Materialfehler, sondern um normale Verschleißerscheinungen, für die keine Garantie übernommen wird. Im Garantiefall wenden Sie sich unverzüglich an Ihren Fachhändler. Das KIDDY Team wünscht Ihnen und Ihrem Kind eine allzeit gute und sichere Fahrt.
  • Seite 23 Table of contents Introduction . . . . . . . . . . . . . . . . . . . . . . . . . . . . . . . . . 18 Suitability .
  • Seite 24: Introduction

    Cruiserfix 3 must be used in the manner described in this manner. The parts of your Cruiserfix 3 are identified by letters in the text of these directions for use and are explained under the headings with the same name.
  • Seite 25: General Safety Instructions

    The child restraint system is suitable for children in weight classes II to III, which means for children with a body weight of 15-36 kg (approx. 3 to approx. 12 years) or up to a maximum height of 150 cm. For use in the vehicle, refer also to the recommendations in the owner's manual for your vehicle or contact your contract workshop.
  • Seite 26 Never leave your child unattended in the child restraint system (A). Do not place heavy objects on the rear shelf which could become dangerous projectiles in the event of an accident. When driving with the child restraint system (A) in your vehicle without a child, always secure it in the prescribed manner with the 3-point vehicle seat belt (point 7) or with the k-fix + connec- tors (E) to the ISOFIX anchoring points of the vehicle (point 6).
  • Seite 27: Adjustments

    Only the belt path prescribed by the manufacturer may be used. 4 Adjustments 4.1 Head and shoulder support adjustment The correct head support setting is reached when the child's temples are within the narrowest part of the head support (G) (Fig. 1+2). To adjust the head (G) and shoulder supports (H), actuate the height adjust- ment handle (M) on the back side of the head support (G) by gently pulling it outwards and then sliding the head support (G) up or down depending on the...
  • Seite 28: Seat Location For Universal Installation

    With the moving back rest (C) of the Cruiserfix 3, it can be assured that it rests against vehicle seat back rest. Position the adjustable back rest of the vehicle seat appropriately. 5.2 Seat location for universal installation The Cruiserfix 3 child restraint system (A) can be installed on any seat of vehicles equipped with a 3-point vehicle seat belt system (Fig.
  • Seite 29: Semi-Universal Installation In The Vehicle With K-Fix

    (S) forward. If the locking indicators (T) do not show 'green' , the connector hooks are open (Fig. 14). Place the Cruiserfix 3 in a vehicle seat location which allows for semi-universal installation (point 5.3) and adjust the vehicle seat as necessary according to point 5.1.
  • Seite 30: Securing The Child

    (E) and retract them into the seat (I)! Position your KIDDY on the vehicle seat as described in point 5.1+5.2 or 5.1+5.3. If you would like to use it in semi-universal mode (fastened with k-fix ), following the instructions under point 6.
  • Seite 31: Opening The Diagonal Belt Guide

    Open the left and right k-fix connectors (E) by sliding the unlocking mechanisms (P) forward (over the 'green' locking display (N)) (Fig. 19). The Cruiserfix 3 is uncoupled from the vehicle structure when both connectors (E) are open. Finally, the k-fix connectors (E) must be retracted into the seat.
  • Seite 32: Removing And Applying The Cover

    10 Removing and applying the cover Never use your KIDDY child restraint system without the original cover. The cover is part of the safety concept. 10.1 Removing the back rest cover The back rest cover consists of two pieces. One part covers the headrest (G) and back rest, the other covers the shoulder supports (H).
  • Seite 33: Applying The Cover

    13 Warranty We offer a two-year warranty for manufacturing or material defects for your KIDDY child restraint system. The warranty period starts on the day of purchase. A receipt is required for all claims. The warranty covers child restraint systems...
  • Seite 34 It is normal wear and tear, which is not covered by the warranty. Contact your specialist dealer immediately in the event of warranty claim. The KIDDY team wishes you and your child a good and safe trip at all times.
  • Seite 35 Inhoud Inleiding . . . . . . . . . . . . . . . . . . . . . . . . . . . . . . . . . . . 30 Geschiktheid .
  • Seite 36: Inleiding

    2 Geschiktheid De Cruiserfix 3 is getest en toegelaten volgens de actuele versie van de toelatings- norm ECE-R44/04. Hij ontving het typtetestcertificaat voor de klassen "universeel" en "semi-universeel".
  • Seite 37: Algemene Veiligheidsaanwijzingen

    De meest actuele versie vindt u onder http://www.kiddy.de/vehicletypelist Het kinderautostoeltje Cruiserfix 3 is geschikt voor de gewichtscategorieën II t/m III, d.w.z. voor kinderen met een lichaamsgewicht van 15–36 kg (ca. 3 tot ca. 12 jaar) of tot een lichaamslengte van maximaal 150 cm.
  • Seite 38 Let er vooral bij busjes en campers of dat het kinderstoeltje (A) altijd ingebouwd is op een plek die in noodgevallen goed toegankelijk is voor een redding door derden. De gordel mag nooit te los aanliggen. Bij een ongeluk zijn de belastingen dan een veelvoud hoger dan bij een strak aanlig- gende gordel.
  • Seite 39: Instellingen

    Gun uw kind tijdens langere ritten voldoende pauzes en let erop dat het niet zonder toezicht aan de rijbaanzijde uit de auto stapt. Gebruik altijd het kinderslot in de autoportieren (indien aanwezig). Gebruik het kinderstoeltje (A) niet meer, wanneer er door een ongeval (aanrijdingssnelheid van meer dan 10 km/h) onderdelen beschadigd of losgekomen zijn of wanneer die door andere oorzaken beschadigd zijn.
  • Seite 40: Keuze En Instelling Van De Autostoel

    Indien de inbouw wordt belemmerd door een hoofdsteun, moet deze in de bovenste stand worden gebruikt of verwijderd worden (afb. 5). Door de beweegbare rugleuning (C) van de Cruiserfix 3 is gegarandeerd dat deze tegen de rugleuning van de autostoel aanligt. Zet de verstelbare rugleuning van de auto in een overeenkomstige stand.
  • Seite 41: Semi-Universele Inbouw In Een Auto Met K-Fix

    Het kinderstoeltje (A) Cruiserfix 3 kan in auto's en op zitplaatsen worden inge- bouwd die in de typelijst vermeld staan. De typelijst wordt continu geactualiseerd, de nieuwste versie vindt u onder http://www.kiddy.de/vehicletypelist De fabrikant adviseert om - indien mogelijk - gebruik te maken van de semi- universele inbouw van het kindersteoltje (A) met de k-fix connectoren (E).
  • Seite 42: Vastzetten Van Het Kind In Het Stoeltje

    6 op te volgen. Zet uw kind in het stoeltje en verzeker u ervan dat de KIDDY ingesteld is voor de lichaamsgrootte van uw kind (punt 4). Om uw kind met de 3-puntsgordel van de auto vast te zetten, gaat u als volgt...
  • Seite 43: Openen Van De Diagonale Gordelgeleiding

    trek de autogordel uit en leg de bekkengordel onder de beide armleuningen (D) van het stoeltje (I) door (afb. 13). Let erop dat de bekkengordel zo laag mogelijk zit. Sluit nu de gordelsluiting. Controleer of de gordelsluiting correct vergrendeld is (afb. 13). Trek de bekkengordel strak en leg de diagonale gordel aan de gordelsluitingzijde onder de armleuning (D) (afb.
  • Seite 44: Verwijderen En Aanbrengen Van De Bekleding

    (E) door de ontgrendelingen (P) naar voren toe (over de "groene" sluitindicatie (N) heen) te verschuiven (afb. 19). Pas wanneer beide connectoren (E) geopend zijn, is de Cruiserfix 3 losgekoppeld van de autostructuur. Als afsluiten de stap moeten de k-fix connectoren (E) in de zitting (I) worden geschoven.
  • Seite 45: Verwijdering Van De Zittingbekleding

    10.2 Verwijdering van de zittingbekleding Open eerst de drukknopen aan de onder- en achterzijde van de zitting (I) en aan de voorzijde van de rugleuning (C). Maak nu de beide klittenbandsluitingen links en rechts onder de bekleding los en trek vervolgens de bekleding naar boven weg. 10.3 Verwijdering van de bekleding van de beenverlenging Trek eerst de beenverlenging (J) naar de voorste positie.
  • Seite 46: Reiniging Van De Kunststofonderdelen

    Het gaat daarbij niet om materiaalfouten maar om gewone slijtage waarvoor geen garantie geboden wordt. Als u gebruik wilt maken van de garantie, dient u contact op te nemen met uw vakdealer. Het team van KIDDY wenst u en uw kind altijd een aangename en veilige rit.
  • Seite 47 Sommaire Introduction . . . . . . . . . . . . . . . . . . . . . . . . . . . . . . . . . 42 Conformité...
  • Seite 48: Introduction

    à l'avant dans le point portant le même nom. 2 Conformité Le Cruiserfix 3 a été testé et homologué conformément à la norme la plus récente en vigueur ECE-R44/04. Il a obtenu l'autorisation pour les classes « universelle » et « semi-universelle ».
  • Seite 49: Consignes Générales De Sécurité

    La version actuelle est disponible sur http://www.kiddy.de/vehicletypelist Le système de retenue Cruiserfix 3 est adapté pour les classes de poids II à III, c'est à dire pour des enfants pesant entre 15 et 36 kg (d'environ 3 à environ 12 ans) ou jusqu'à...
  • Seite 50 Vérifiez qu'aucune pièce du système de retenue pour enfant (A) n'est coincée dans une porte ou un siège réglable. Veillez en particulier dans le cas de monospaces ou de caravanes à ce que le système de retenue pour enfant (A) soit installé de façon à...
  • Seite 51: Réglages

    Le système de retenue pour enfant (A) peut uniquement être utilisé aux places disposant d'une ceinture à trois points confor- mément à la norme ECE 16 ou à des normes équivalentes. Assurez-vous que le système de retenue pour enfant (A) a été installé...
  • Seite 52: Réglage De L'allonge Pour Les Jambes

    5.2 Place assise pour l'installation universelle Le système de retenue pour enfant (A) Cruiserfix 3 peut être installé à toutes les places dans les véhicules pour autant qu'elles soient munies d'un système de ceinture à 3 points (ill. 6).
  • Seite 53: Place Assise Pour Installation Semi-Universelle

    L'installation semi-universelle du système de retenue pour enfant (A) est unique- ment possible sur les places assises des véhicules équipés de fixations ISOFIX. Le Cruiserfix 3 peut être attaché à la structure du véhicule au niveau de ces points de fixation ISOFIX à l'aide des connecteurs k-fix (E).
  • Seite 54 Placez le Cruiserfix 3 sur une place assise du véhicule qui permet l'installation semi-universelle (point 5.3) et, le cas échéant, installez le siège du véhicule conformément au point 5.1. Glissez à présent les deux connecteurs k-fix (E) sur les fixations en métal (points de fixation ISOFIX) et poussez-les fermement contre celles-ci afin de verrouiller les connecteurs (E) (ill.
  • Seite 55: Sécurisation De L'enfant

    , vous devez faire pivoter les connecteurs k-fix (E) et les rentrer à l'intérieur du siège (I) ! Positionnez votre KIDDY sur le siège du véhicule tel que décrit aux points 5.1+5.2 ou 5.1+5.3. Si vous souhaitez l'utiliser en mode semi-universel (fixé avec k-fix ), veuillez suivre les instructions du point 6.
  • Seite 56: Ouverture Du Guide-Sangle Diagonal

    diagonal (B). Veillez à ce que la sangle ne soit pas tordue et puisse circuler à travers le guide-sangle (ill. 15). Veuillez noter que c'est le guide-sangle diagonal opposé à la boucle de ceinture (B) qui est utilisé (ill. 16). Les sangles ne peuvent pas être tordues et doivent être ajustées au corps de votre enfant.
  • Seite 57: Enlever Et Remettre La Housse

    Relâchez à présent la poignée de verrouillage (R). 10 Enlever et remettre la housse N'utilisez jamais votre KIDDY sans la housse d'origine. La housse est un élément essentiel en matière de sécurité. 10.1 Retrait de la housse du dossier La housse du dossier se compose de deux pièces.
  • Seite 58: Remettre La Housse

    Détachez à présent la housse du crochet sur le fond de l’allonge pour les jambes (J). À présent, tirez délicatement vers le haut la housse au-dessus du bord de l’allonge pour les jambes (J). 10.4 Remettre la housse Pour remettre la housse, suivez dans le sens inverse les étapes du retrait de la housse (Voir 10.1.
  • Seite 59: Garantie

    En cas de recours à la garantie, veuillez vous adresser immédiatement à votre commerçant spécialisé. L'équipe KIDDY vous souhaite ainsi qu'à votre enfant un bon voyage en toute sécurité.
  • Seite 61 Indice Introduzione . . . . . . . . . . . . . . . . . . . . . . . . . . . . . . . . . 56 Idoneità...
  • Seite 62: Introduzione

    La ringraziamo per avere scelto uno dei sistemi di ritenuta per bambini (A) per il Cruiserfix 3. Cruiserfix 3 è un altro prodotto innovativo di KIDDY. Grazie a materiali che dissipano l'energia in modo particolarmente efficace, il vostro KIDDY offre la massima sicurezza in caso di urto laterale.
  • Seite 63: Avvertenze Generali Sulla Sicurezza

    Il sistema di ritenuta per bambini Cruiserfix 3 è idoneo per le classi di peso da II a III, ovvero per bambini con un peso compreso tra 15 e 36 kg (da ca. 3 a ca. 12 anni) oppure fino a un'altezza max. di 150 cm.
  • Seite 64 Soprattutto per quanto riguarda furgoni e caravan, accertarsi che il sistema di ritenuta per bambini (A) sia stato montato in un punto di facile accesso da parte di terzi in caso di soccorso. La cintura deve essere sempre tesa. In caso di incidente, i carichi sono molto più...
  • Seite 65: Regolazioni

    In caso di lunghi viaggi, concedere al bambino delle pause e assicurarsi che non scenda dal veicolo incustodito per andare in strada. Se presente, usare sempre la sicura per bambini prevista nelle porte delle vetture. Non continuare ad utilizzare il sistema di ritenuta per bambini (A) se dopo un incidente (velocità...
  • Seite 66: Sitzplatzauswahl Und -Einstellung

    5.2 Seduta per il montaggio universale Il sistema di ritenuta per bambini (A) Cruiserfix 3 può essere montato su qualsiasi sedile del veicolo provvisto di un sistema di cintura a 3 punti (Fig. 6). Il Cruiserfix 3 può essere anche usato su sedili orientati all'indietro provvisti di sistema di cintura a 3 punti (Fig.
  • Seite 67: Montaggio Semi-Universale In Veicoli Con K-Fix

    Il sistema di ritenuta per bambini (A) Cruiserfix 3 può essere montato in veicoli e su sedili che sono riportati nell'elenco delle omologazioni. L'elenco delle omologazioni viene aggiornato costantemente: la versione più attuale è consultabile all'indirizzo: http://www.kiddy.de/vehicletypelist Il costruttore suggerisce, se possibile, il montaggio semi-universale del sistema di ritenuta per bambini (A) con i connettori k-fix (E).
  • Seite 68: Fissaggio Del Bambino

    , ruotare i connettori k-fix (E) e inserirli nel sedile (I)! Posizionare KIDDY sul sedile del veicolo come descritto al Punto 5.1+5.2, e 5.1+5.3. Se lo si vuole utilizzare nella modalità semi-universale (fissato con k-fix ), seguire le istruzioni riportate al Punto 6.
  • Seite 69: Apertura Della Guida Della Cintura Diagonale

    Per fissare il bambino con la cintura a 3 punti del veicolo, procedere come segue: Tirare la cintura del veicolo e posizionare la cintura addominale sotto i due brac- cioli (D) del sedile (I) (Fig. 13). Assicurarsi che la cintura addominale sia il più possibile in basso, quindi chiudere la fibbia della cintura.
  • Seite 70: Rimozione E Sostituzione Del Rivestimento

    (E) spingendo in avanti i meccanismi di sblocco (P) (oltre l'indicatore di blocco “verde” (N)) (Fig. 19). Solo quando i due connettori (E) sono aperti, Cruiserfix 3 è staccato dalla struttura del veicolo. Infine i connettori k-fix (E) devono essere spinti nel sedile (I).
  • Seite 71: Rimozione Del Rivestimento Della Prolunga Delle Gambe

    Staccare le due chiusure in velcro a sinistra e a destra sotto il rivestimento e tirare il rivestimento verso l’alto. 10.3 Rimozione del rivestimento della prolunga delle gambe Tirare la prolunga per le gambe (J) nella posizione più avanzata. Staccare il rivestimento dai ganci nella parte inferiore della prolunga per le gambe (J).
  • Seite 72: Misure Da Adottare In Caso Di Incidente

    13 Garanzia Per KIDDY offriamo una garanzia per difetti di fabbricazione o materiali di 2 anni. Il periodo della garanzia inizia il giorno dell'acquisto. Per eventuali reclami è necessario presentare lo scontrino di acquisto. La garanzia è...
  • Seite 73 Índice Introducción . . . . . . . . . . . . . . . . . . . . . . . . . . . . . . . . . 68 Adecuación .
  • Seite 74: Introducción

    Manual de instrucciones del KIDDY Cruiserfix 3 1 Introducción Nos alegramos de que se haya decidido por el KIDDY a la hora de elegir su sistema de retención infantil (A). El Cruiserfix 3 es otro producto innovador de KIDDY. Gracias a sus materiales, capaces de derivar la energía de forma especial, su KIDDY le ofrece la mayor...
  • Seite 75: Advertencias De Seguridad Generales

    El sistema de retención infantil Cruiserfix 3 es adecuado para las categorías de peso II-III, es decir, para niños que pesan 15–36 kg (aprox. entre 3 y aprox. 12 años) o tienen hasta una estatura de 150 cm como máximo.
  • Seite 76 El cinturón nunca puede quedar holgado. En caso de accidente, las cargas soportadas son varias veces mayores que con el cinturón bien tensado. Preste atención a la correcta posición del cierre del cinturón del vehículo. No deje nunca a su hijo sin vigilancia dentro del sistema de retención infantil (A).
  • Seite 77: Ajustes

    Si procede, utilice siempre el seguro para niños que presentan las puertas de los vehículos. No siga utilizando el sistema de retención infantil (A) si hay piezas que se han dañado o soltado tras un accidente (velocidad de choque superior a los 10 km/h) o por otras causas. Solo se puede usar la forma de cinturón prescrita por el fabri- cante.
  • Seite 78: Selección Y Ajuste De La Posición De Asiento

    Si el montaje se ve impedido por un reposacabezas, es necesario utilizarlo en su posición más elevada o bien retirarlo por completo (fig. 5). Gracias al respaldo móvil (C) del Cruiserfix 3 se garantiza que este queda en contacto con el respaldo del asiento del coche. Coloque correspondientemente el respaldo regulable del asiento del vehículo.
  • Seite 79: Montaje Semiuniversal En El Vehículo Con K-Fix

    Cruiserfix 3 con la ayuda de los conectores k-fix (E). El sistema de retención infantil (A) Cruiserfix 3 se puede montar en vehículos y sobre asientos recogidos en la lista de modelos. La lista de modelos se actualiza continuamente, y puede encontrar la versión más actualizada en...
  • Seite 80: Colocación Segura Del Niño

    , debe girar los conectores k-fix (E) e introducirlos en el asiento (I)! Coloque su KIDDY sobre el asiento del vehículo tal como se describe en los pun- tos 5.1+5.2 y 5.1+5.3. Si desea usarlo de forma semiuniversal (fijado con k-fix ), siga las instrucciones del punto 6.
  • Seite 81: Apertura De La Guía Del Cinturón Diagonal

    Coloque a su hijo y asegúrese de que su KIDDY está ajustado conforme al tamaño del niño (punto 4). Para sujetar a su hijo con el arnés de seguridad de 3 puntos propio del vehículo, proceda de la siguiente manera: Tire hacia afuera del cinturón del vehículo y coloque el cinturón pélvico bajo...
  • Seite 82: Desmontaje De K-Fix + Después De Un Uso Semiuniversal

    (E) izquierdo y derecho desplazando los bloqueos (P) hacia delante (más allá del indicador de cierre «verde» (N)) (fig. 19). Solo cuando ambos conectores (E) están abiertos queda el Cruiserfix 3 desaco- plado de la estructura del vehículo. Como último paso, los conectores k-fix (E) se deben introducir en el asiento (I).
  • Seite 83: Retirar La Funda Del Asiento

    A continuación, abra los cierres de velcro de la funda de los tirantes en la parte trasera y retírela del tirante (H). 10.2 Retirar la funda del asiento Abra en primer lugar los botones automáticos que hay en el lado inferior y trasero del asiento (I), así...
  • Seite 84: Limpieza De Las Piezas De Plástico

    13 Garantía Ofrecemos para su KIDDY una garantía de 2 años que cubre defectos de fabrica- ción y de material. El período de vigencia de la garantía comienza en el mismo día de la compra.
  • Seite 85 En un caso cubierto por la garantía, diríjase sin demora a su distribuidor especializado. El equipo de KIDDY le desea a usted y a su hijo que disfrute siempre de una movilidad buena y segura.
  • Seite 87 Índice Introdução . . . . . . . . . . . . . . . . . . . . . . . . . . . . . . . . . . 82 Adequação .
  • Seite 88: Introdução

    2 Adequação O Cruiserfix 3 foi testado e aprovado de acordo com a versão atual da norma de homologação ECE-R44/04. Obteve o certificado de homologação para as classes "universal" e "semiuniversal".
  • Seite 89: Recomendações Gerais De Segurança

    Poderá encontrar a versão mais recente em: http://www.kiddy.de/vehicletypelist O sistema de retenção para crianças Cruiserfix 3 é adequado para as classes de peso II a III, ou seja, para crianças com um peso de 15-36 kg (aprox. 3 até aprox.
  • Seite 90 Especialmente no caso de furgonetas e caravanas, tenha em atenção que o sistema de retenção para crianças (A) deve estar montado, se possível, num local de fácil acesso, para o caso de salvamento por terceiros. O cinto nunca deve ficar colocado de forma frouxa. Em caso de acidente, a solicitação é...
  • Seite 91: Ajustes

    Quando fizer viagens mais longas, faça pausas e assegure-se de que a criança não sai da viatura para o lado da faixa de rodagem. Caso exista, utilize sempre a proteção para crianças nas portas dos veículos ligeiros de passageiros. Não utilize o sistema de retenção para crianças (A) se alguma peça tiver sido danificada após um acidente (a uma velocidade superior a 10 ...
  • Seite 92: Localização E Regulação Da Cadeira

    Se a montagem for impedida por um apoio de cabeça, este deve ser utilizado na posição superior ou retirado (fig. 5). Através do encosto móvel (C) do Cruiserfix 3, é possível garantir que a cadeira fica apoiada no encosto do banco do veículo. Posicione o encosto ajustável do banco do veículo em conformidade.
  • Seite 93: Montagem Semiuniversal No Veículo Com K-Fix

    O sistema de retenção para crianças (A) Cruiserfix 3 pode ser montado nos veí- culos e nos bancos indicados na lista de modelos. A lista de modelos é constantemente atualizada. Poderá encontrar a versão mais recente em: http://www.kiddy.de/vehicletypelist O fabricante recomenda, se possível, a montagem semiuniversal do sistema de retenção para crianças (A) em combinação os conectores k-fix...
  • Seite 94: Prender A Criança

    , deve rodar os conectores k-fix (E) e empurrá-los para dentro da cadeira (I)! Posicione o seu KIDDY no banco do veículo, conforme descrito nos pontos 5.1+5.2 ou 5.1+5.3. Se desejar uma instalação semiuniversal (fixação com k-fix ), siga as instruções...
  • Seite 95: Abrir A Guia Do Cinto Diagonal

    Coloque a criança e assegure-se de que o seu KIDDY está ajustado ao compri- mento da criança (ponto 4). Para fixar a criança com o cinto de segurança de 3 pontos do veículo, proceda do seguinte modo: puxe o cinto do veículo para fora e coloque o cinto abdominal por baixo de ambos os apoios de braços (D) da cadeira (fig.
  • Seite 96: Desmontagem Do K-Fix + Após A Utilização Semiuniversal

    (E), deslocando os dispositivos de desbloqueio (P) para a frente (para além da indicação de fecho "verde" (N) (fig. 19). Quando ambos os conectores (E) estiverem abertos, o Cruiserfix 3 é desacoplado da estrutura do veículo. Como passo final, é necessário introduzir os conectores k-fix (E) na cadeira (I).
  • Seite 97: Retirar O Revestimento Da Cadeira

    Depois, descole os fechos de velcro na parte de trás do revestimento dos apoios de ombros e solte o revestimento dos apoios de ombros (H). 10.2 Retirar o revestimento da cadeira Comece por soltar os botões de pressão na parte inferior e na parte de trás da cadeira (I), bem como na parte da frente, junto ao encosto (C).
  • Seite 98: Limpeza Das Peças Em Plástico

    13 Garantia O seu KIDDY está protegido por uma garantia de 2 anos para defeitos de fabrico ou de material. O período de garantia começa no dia da compra. Para acionar a garantia, é necessária a apresentação do talão de compra. A pres- tação de garantia limita-se a sistemas de retenção para crianças que tenham...
  • Seite 99 A equipa KIDDY deseja-lhe a si e ao seu filho uma viagem sempre boa e segura.
  • Seite 101 Kiddy GmbH Schaumbergstrasse 8 95032 Hof   Germany P +49  .  9281  .  7080  .  0 F +49  .  9281  .  7080  .  21 info@kiddy.de www.kiddy.de...

Inhaltsverzeichnis