
Verwandte Anleitungen für auna Kara Projectura


Inhaltszusammenfassung für auna Kara Projectura
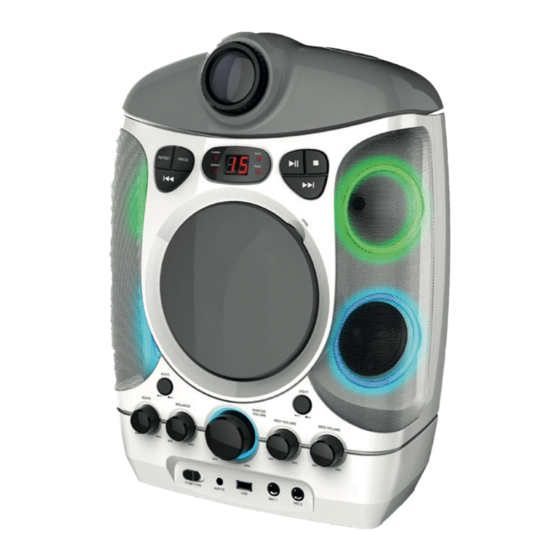
- Seite 1 Kara Projectura Karaokemachine mit Projektor 10030546 10030547 10030548 www.auna-multimedia.com...
-
Seite 2: Inhaltsverzeichnis
Sehr geehrter Kunde, wir gratulieren Ihnen zum Erwerb Ihres Gerätes . Lesen Sie die folgenden Anschluss- und Anwendungs- hinweise sorgfältig durch und befolgen Sie diese, um möglichen technischen Schäden vorzubeugen . Für Schäden, die durch Missachtung der Sicherheitshinweise und unsachgemäßen Gebrauch entstehen, übernehmen wir keine Haftung . -
Seite 3: Sicherheitshinweise
Sicherheitshinweise Schutz vor dem Aussetzen von Laserstrahlen • Der Laserstrahl des CD-Players in diesem Gerät schadet den Augen . Versuchen Sie nicht das Ge- häuse auseinanderzunehmen . • Schalten Sie das Gerät umgehend aus, wenn Flüssigkeiten oder harte Gegenstände in das Gehäuse gefallen sind . -
Seite 4: Geräteübersicht
Geräteübersicht... - Seite 5 14 Mikrofoneingang: MIC2 Elemente auf der Vorderseite 15 Mikrofoneingang: MIC1 Projektorlinse 16 USB-Anschluss 2 LED: Programm 17 AUX-Anschluss 3 Taste: Wiederholen / Programm 18 Funktionswahlschalter: CD/USB 4 Taste: Nächster Titel 19 Drehregler: Balance 5 Taste: Stopp 20 Drehregler: Echo 6 LED: Wiederholung 21 Taste: AVC (automatische Stimmsteuerung) 7 Display 22 Lautsprecher links...
- Seite 6 Elemente auf Rückseite 36 AUDIO-OUT-Ausgang (links) 37 AUDIO-OUT-Ausgang (rechts) 38 Schieber: Anheben des Projektors 39 Videoausgang 40 DC-Stromanschluss...
-
Seite 7: Einführung
Einführung Die Karaokeanlage Dieses Grafik-CD-Karaokesystem versorgt Sie mit Jahren Spaß und Unterhaltung. Werden Sie ein Star, wenn Sie indem Sie zu Ihren liebsten Karaoke-CDs mitsingen und Ihre Stimme über die Lautsprecher hören . Das Karaokesystem hat ein kompaktes Design und ist trotz seiner vielen Funktionen leicht zu benutzen . Nach einigen einfachen Anleitungen werden Sie zum Profi. -
Seite 8: Leistungsmerkmale
Leistungsmerkmale: Liedtext auf dem Fernsehbildschirm Bei bei der Wiedergabe wird der Liedtext syn- chron zur Musik angezeigt . Balance-Steuerung Lässt Sie die Balance zwischen der voraufge- zeichneten Stimme und der Musik steuern, wenn Sie eine Multiplex-Karaoke-CD verwen- Audio Voice Control (AVC) Damit können Sie die Originalstimme durch Ihre eigene Stimme ersetzen . -
Seite 9: Einrichtung
Einrichtung Anschluss Schließen Sie das dabeiliegende Netzgerät auf der Rückseite des Gerätes an und stecken Sie es in eine Steckdose mit einer Stromversorgung von 220-240 V~ 50/60 Hz . Hinweis: Wenn das Gerät lange benutzt wird, trennen Sie das Netzgerät vom Gerät und von der Steckdose. - Seite 10 Wenn Ihr Fernseher nicht über den erforderlichen Videoeingang verfügt, brauchen Sie einen RF-Modu- lator, der eine Verbindung über den Antenneneingang herstellt . Der RF-Modulator kann im Fachhandel erworben werden . Wenn Sie die Anlage mit Videoanschluss eines Fernsehers verbinden, müssen Sie am Fernseher die Quelle wählen .
-
Seite 11: Projektor
Projektor Projektor einrichten Die Linseneinstellung ermöglicht mehr Auswahl bei der Aufstellung der Anlage und dem Betrachten des Bildes . A: Den Schalter schieben, um den Projektorkopf anzuheben . B: Den Projektorkopf drehen . C: Den Projektorkopf nach unten drücken, um ihn festzustellen . - Seite 12 Die Karaokeanlage aufstellen Die Entfernung der Anlage zur Projektionsfläche variiert und hängt von der Größe der Leinwand ab und davon, wie Sie die Linse einstellen . Stellen Sie die Anlage so auf, dass sie zur Größe der Leinwand passt . Einzelheiten zum Abstand zwischen Gerät und der Projektionsfläche 1 .
- Seite 13 3 . Projizieren Sie ein Bild auf die Projektionsfläche und stellen Sie das Bild so ein, dass es zur Fläche passt . Wenn Sie eine unebene Projektionsfläche verwenden, können Streifenmuster im Bild und auf dem Gerät entstehen, abhängig vom Abstand zwischen Gerät und Projektionsfläche und dem Vergrößerungsfaktor .
-
Seite 14: Bedienung Der Funktionen
Bedienung der Funktionen Einschalten und Playback 1 . Funktionswahl (CDG/USB) • Den CD/USB-Wahlschalter in die Stellung CD schieben, um CDs, MP3, CD+G und CD-R/CD-RW- Disks wiederzugeben . • Den CD/USB-Wahlschalter in die Stellung USB schieben, um MP3 auf einem USB-Stick wiederzu- geben . - Seite 15 Programmfunktion Mit dieser Funktion können die Titel in einer programmierten Reihenfolge abgespielt werden . Dazu muss die Wiedergabe angehalten sein ( drücken) . 1 . Die PROGRAM-Taste drücken . Die Programmnummer 01 erscheint im Display und die Programm- LED blinkt . 2 .
- Seite 16 Die -Taste drücken, um mit der Wiedergabe fortzufahren . Hinweis: Wenn Sie 2x drücken, brechen Sie die Programmwiedergabe ab und löschen die Programmliste vollständig. Die Programmanzeige im Display verschwindet. Ansehen der Programmliste: Bei angehaltenem Gerät können Sie die Programmliste mit den Tasten und betrachten . Eingänge •...
-
Seite 17: Musikwiedergabe Via Cd+G, Usb Und Aux-In
Musikwiedergabe via CD+G, USB und AUX-IN Vorbereitung • Verbinden Sie die Karaokeanlage über das mitgelieferte AV-Kabel mit einem kompatiblen Fernseh- gerät . • Schließen Sie das beiliegende Mikrofon an den Anschluss MIC1 oder MIC2 an . Hinweis: Stellen Sie das Mikrofon stets in die Position AUS bis Sie bereit sind zu singen, um mögliche Rückkopplungsgeräusche zu vermeiden. - Seite 18 Falls die Anzahl der Titel auf CD/USB mehr als 99 beträgt, werden die ersten zwei Zahlen der Track-Nummer durch die Buchstaben A bis F ersetzt (a=10, b=11, c=12, d=13, e=14, f=15) . Wenn die CD beispielsweise 118 Titel enthält, gibt das Display für den Titel 118 die Anzeige [b8] aus . Falls Anzahl der Titel mehr als 159 beträgt, gibt das Display ab Titel 160 die Anzeige [99] aus .
- Seite 19 So singen Sie zu Musik von AUX-Geräten Das Gerät ermöglicht es, zu Musik von externen AUX-Geräten, wie iPod, MP3-Player oder anderen digi- talen Ausgabegeräten zu singen . 1 . Verbinden Sie den Kopfhörer-Ausgang ihres externen Geräts mit dem AUX-Eingang an der Karao- keanlage .
-
Seite 20: Problembehebung
Problembehebung Problem Mögliche Ursache Lösung Das Gerät geht beim Das Netzgerät ist nicht Schließen Sie das Netzgerät an Drücken der Ein/Aus- angeschlossen oder der Stecker und stecken Sie den Stecker in die Taste nicht an . ist nicht an die Steckdose Steckdose . -
Seite 21: Hinweise Zur Entsorgung
Problem Mögliche Ursache Lösung Es erscheinen keine Das Videokabel ist nicht richtig am Verbinden Sie das Videokabel Songtexte auf dem TV angebracht . mit dem Video-Ausgang der TV-Bildschirm . Karaokeanlage und dem Video- Eingang am TV . Als Quelle wurde am TV nicht der Stellen Sie am TV als Eingangsquelle Video- oder AV-Eingang gewählt . -
Seite 22: Entsorgung
Entsorgung Befindet sich die linke Abbildung (durchgestrichene Mülltonne auf Rädern) auf dem Produkt, gilt die Europäische Richtlinie 2012/19/EU . Diese Produkte dürfen nicht mit dem normalen Hausmüll entsorgt werden . Informieren Sie sich über die örtlichen Re- gelungen zur getrennten Sammlung elektrischer und elektronischer Gerätschaften . Richten Sie sich nach den örtlichen Regelungen und entsorgen Sie Altgeräte nicht über den Hausmüll . - Seite 23 Kara Projectura #Karaoke machine with projector 10030546 10030547 10030548 www.auna-multimedia.com...
-
Seite 24: Technical Data
Dear Customer, Congratulations on purchasing this equipment . Please read this manual carefully and take care of the following hints on installation and use to avoid technical damages . Any failure caused by ignoring the items and cautions mentioned in the operation and installation instructions are not covered by our warranty and any liability . -
Seite 25: Safety Instructions
Safety Instructions Protection against laser energy exposure • As the laser beam used in this compact disc player is harmful to the eyes, do not attempt to disas- semble the casing . • Stop operation immediately if any liquid or solid object should fall into the cabinet . •... -
Seite 26: Device Description
Device Description... - Seite 27 14 Microphone jack: MIC2 Elements on the front 15 Microphone jack: MIC1 Projector lens 16 USB jack 2 LED: Program indicator 17 AUX jack 3 Button: Repeat / Program 18 Switch: CD/USB 4 Button: NEXT 19 Knob: Balance control 5 Button: Stop 20 Knob: Echo 6 LED: Repeat indicator 21 Button: AVC (automatic voice control)
- Seite 28 Elements on the back 36 Audio LEFT out 37 Audio RIGHT out 38 Projector lift switch 39 VIDEO out jack 40 DC jack...
-
Seite 29: Introduction
Introduction Introduction • Your CD+Graphics Karaoke System will provide you with many years of fun and entertainment . It makes you a "star" as you sing along with your favourite karaoke discs and hear your voice with the music through the system's speakers . •... - Seite 30 CD+G This is an acronym for Compact Disc plus Graphics . You will also see variations CD+G and CD+Graphics . This is a regular CD with information stored on a data track simultaneous to music . CD+G has video output for simple graphics (not full motion video) . In the case of karaoke, the graphics function is used to store song lyrics and display the lyrics in sync with music .
-
Seite 31: Setting Up For Operation
Setting up for Operation Connecting power Plug the supplied AC adapter into the DC jack on the rear side of the unit and connect to a standard AC wall socket with 220-240V~ 50/60Hz continuous power supply . Note: When the unit is not operated for long periods of time, unplug the AC adapter from the unit and wall outlet. - Seite 32 If your television does not have the required Video Input, you will need a RF modulator (Radio Frequen- cy Modulator), which connects through your TV Antenna or cable line and serves as your Video Input . The RF Modulator can be purchased at almost any consumer electronics retailer . If you are connecting the video from the karaoke system to a television video input jack, you must specify the source the TV is to display .
-
Seite 33: Projector Functions
Projector Functions Installing the unit The lens shift allows you to have broader options for placing the unit and viewing pictures easily . A: Push switch, lift the lens B: Rotating lens C: Press down the lens will be auto locked... -
Seite 34: Installing The Unit
Installing the unit The installation distance between the unit and a screen varies depending on the size of the screen or whether or not you use the lens shift features. Install this unit so that it fits the size of your screen. For details on the distance between the unit and the screen (the projection distance) and the size of pro- jected video, see “Projection Distance and Lens . - Seite 35 3 . Project an image on the screen and adjust the picture so that it fits the screen Note: When using a screen with an uneven surface, stripes pattern may rarely appear on the screen depending on the distance between the screen and the unit or the zooming magnifications.
-
Seite 36: Using The Control Functions
Using the Control Functions Power and playback functions 1 . Functions selector (CDG/USB) • Slide the CD/USB FUNCTION switch to CD position to playback a CD, MP3, CD+G, CD-R/CD-RW isc . • Slide the CD/USB FUNCTION switch to USB position to playback MP3 files on a USB flash drive. •... -
Seite 37: Program Function
PROGRAM function This function allows music tracks to be played in a programmed sequence . NOTE: Program function can only be set in STOP mode 1 . Press the PROGRAM button once . Program Number 01 will display and PROGRAM INDICATOR will flash. - Seite 38 Tap PLAY BUTTON to resume program play . Note: if you tap the STOP BUTTON twice consecutively, you will cancel program play and erase the program list permanently. The PROG INDICATOR in the LED DISPLAY and TV screen will go OFF. Program review: In stop mode, you can review the program list by pressing the NEXT or PREV BUTTON .
-
Seite 39: Singing With Cd+G, Usb Or Aux-In Music Source
Singing with CD+G, USB OR AUX-IN Music Source Getting prepared • Connect your unit to a compatible TV using the included A/V cable . • Plug in the included MICROPHONE into either the MIC 1 or MIC 2 JACK Note: Always set the mic to OFF until you are ready to sing to avoid possible sharp feedback noises. - Seite 40 If the number of songs on the disc/USB drive is more than 99, the 10th digit of LED DISPLAY will show letter A to F (A=10, b=11, C=12, d=13, E=14 & F=15) . For example, if it contains “118” songs, “b8” will show on the LED DISPLAY.
- Seite 41 Singing along from aux input sources This karaoke unit features an AUX-IN jack for connecting your iPod, MP3 player or other digital music player . 1 . Connect the headphone jack of your external device to the AUX IN jack located on the lower side of this unit (The connection cable is not included) .
-
Seite 42: Troubleshooting
Troubleshooting Problem Possible Cause Solution No power when DC plug of the AC adapter is not Re-insert the DC plug of the AC POWER ON/OFF plugged into the DC JACK properly. adapter properly . BUTTON is pressed No power when The AC outlet may not have power . - Seite 43 Problem Possible Cause Solution No song lyrics Video cable is not connected Connect the video cable to the appear on the TV properly to the TV . VIDEO OUT of the unit and to the screen TV’s Video In jack . Source selector on TV is not set to Use your TV Remote to select VIDEO VIDEO or A/V IN .
-
Seite 44: Disposal Considerations
Disposal Considerations According to the European waste regulation 2012/19/EU this symbol on the product or on its packaging indicates that this product may not be treated as household waste . Instead it should be taken to the appropriate collection point for the recycling of electrical and electronic equipment . -
Seite 45: Fiche Technique
Cher client, Toutes nos félicitations pour l’acquisition de ce nouvel appareil . Veuillez lire attentivement les instruc- tions suivantes afin d’éviter d’éventuels dommages. Le fabricant ne saurait être tenu pour responsable des dommages dus au non-respect des consignes de sécurité et à la mauvaise utilisation de l’appareil . Sommaire Fiche technique . -
Seite 46: Consignes De Sécurité
Consignes de sécurité • Protection contre l’exposition aux faisceaux laser • Le faisceau laser du lecteur de CD de cet appareil est dangereux pour les yeux . N’essayez pas de démonter le boîtier . • Débranchez immédiatement l’appareil si des liquides ou des objets durs sont tombés à l’intérieur du boîtier . -
Seite 47: Aperçu De L'appareil
Aperçu de l’appareil... - Seite 48 18 Bouton de sélection de fonction : CD/USB Eléments sur la face avant 19 Molette : Balance Lentille du projecteur 20 Molette : Écho 2 LED : Programme 21 Touche : AVC (Contrôle automatique de la 3 Touche : Répétition / Programme voix) 4 Touche : Titre suivant 22 Haut-parleur gauche...
- Seite 49 Eléments au dos 36 AUDIO-OUT-Sortie (gauche) 37 AUDIO-OUT-Sortie (droite) 38 Réglage : régler la hauteur du projecteur 39 Sortie Vidéo 40 Alimentation DC...
-
Seite 50: Introduction
Introduction La chaîne karaoké Cette chaîne karaoké CD graphique vous apportera des années de plaisir et de divertissement . Devenez une star lorsque vous accompagnez vos CD karaoké préférés et entendez votre voix dans les haut- parleurs . La chaîne karaoké est de design compact et est simple à utiliser malgré ses nombreuses fonctions . Vous deviendrez un pro après avoir pris connaissance de quelques instructions simples . -
Seite 51: Caractéristiques De Fonctionnement
Caractéristiques de fonctionnement : Paroles de la chanson sur l’écran du Lors de la lecture, le texte de la chanson s’af- téléviseur fiche de façon synchronisée avec la musique. Contrôle de la balance Vous permet de contrôler la balance entre la voix préenregistrée et la musique, lorsque vous utilisez un CD karaoké... -
Seite 52: Installation
Installation Branchement Branchez l’adaptateur secteur fourni au dos de l’appareil et branchez-le dans une prise de courant déli- vrant une tension de 220-240 V~ 50/60 Hz . Remarque : En cas de non utilisation prolongée, débranchez l’adaptateur secteur de l’appareil ainsi que de la prise murale. Prise murale 220-240 V~ Adaptateur... - Seite 53 Si votre téléviseur ne dispose pas de l’entrée vidéo requise, il vous faut alors un modulateur RF qui per- met la connexion par la prise d’antenne . Vous trouverez un modulateur RF dans le commerce spécialisé . Lorsque vous connectez la chaîne à l’entrée vidéo d‘un téléviseur, vous devez sélectionner la source à...
-
Seite 54: Projecteur
Projecteur Installation du projecteur Le réglage de l'objectif permet plus de choix lors de la configuration du système et l'affichage de l'image. A : Faites glisser l’interrupteur pour surélever la tête du projecteur. B : Tournez la tête du projecteur. C : Poussez la tête du projecteur vers le bas pour la fixer. - Seite 55 Installation de la chaîne karaoké L’éloignement de la chaîne par rapport à l‘écran de projection est variable et dépend de la taille de l’écran et de la façon dont vous réglez l’objectif. Installez la chaîne afin qu’elle corresponde à la taille de l’écran .
- Seite 56 3 . . Projetez une image sur la surface de projection et réglez l’image de sorte qu’elle s’adapte à la surface . Si vous utilisez une surface de projection non plane, des bandes peuvent apparaître dans l’image et sur l’appareil, en fonction de la distance entre l’appareil et la surface de projection et le facteur de grossissement .
-
Seite 57: Utilisation Des Fonctions
Utilisation des fonctions Démarrage et lecture 1 . Choix de fonction (CDG/USB) • Mettez l’interrupteur de sélection CD/USB en position CD pour lire les CD, MP3, CD+G et CD-R/ CD-RW . • Mettez l’interrupteur de sélection CD/USB en position USB pour lire des MP3 sur une clé USB . •... - Seite 58 Fonction programme Avec cette fonction vous pouvez lire des titres selon un ordre programmé. Pour cela, la lecture doit être arrêtée ( appuyez sur) . 1 . Appuyez sur le bouton PROGRAM . Le numéro de programme 01 apparaît à l’écran et le témoin LED programme clignote .
- Seite 59 Appuyez sur - pour poursuivre la lecture . Remarque : Si vous appuyez deux fois sur vous stoppez la lecture du programme et vous effacez entièrement la liste programmée. L’affichage du programme disparaît de l’écran. Voir la liste programmée : Lorsque l’appareil est à...
-
Seite 60: Lecture De Musique Via Cd+G, Usb Et Aux-In
Lecture de musique via CD+G, USB et AUX-IN Préparation • Branchez la chaîne karaoké sur un téléviseur compatible grâce au câble AV fourni . • Branchez le micro fourni sur la prise MIC1 ou MIC2 . Remarque : laissez toujours le micro sur position AUS jusqu’à ce que vous soyez prêt à chanter, pour éviter les éventuels larsens. - Seite 61 Si le nombre de titres dépasse 99 sur un CD ou support USB, les deux premiers chiffres du numéro de piste sont remplacés par les lettres A à F (a=10, b=11, c=12, d=13, e=14, f=15) . Par exemple, si le CD conti- ent 118 titres, l’écran affiche [b8] pour le numéro 118.
- Seite 62 Pour chanter sur un accompagnement en utilisant des appareils AUX L’appareil permet de chanter sur des musiques stockées sur des appareils externes AUX tels que iPod, lecteur MP3 ou d’autres appareils numériques . 1 . Branchez la sortie casque de votre appareil externe sur l’entrée AUX de la chaîne karaoké . RE- MARQUE : Le câble nécessaire n’est pas fourni .
-
Seite 63: Résolution Des Problèmes
Résolution des problèmes Problème Cause possible Solution L’appareil ne L’adaptateur secteur n’est pas Branchez l‘adaptateur secteur et s’allume pas branché ou la fiche n’est pas branchez la fiche dans la prise lorsqu’on appuie sur branchée dans la prise murale . murale . -
Seite 64: Hinweise Zur Entsorgung
Problème Cause possible Solution Aucun texte de Le câble vidéo n’est pas Branchez le câble vidéo sur la sortie chanson n’apparaît correctement relié à la TV . vidéo de la chaîne karaoké et sur sur l’écran de la TV . l’entrée vidéo de la TV . -
Seite 65: Recyclage
Recyclage Le pictogramme ci-contre apposé sur le produit signifie que la directive européenne 2012/19/UE s‘applique (poubelle à roulettes rayée). Ces produits ne peuvent être jetés dans les poubelles domestiques courantes . Renseignez-vous concernant les règles appliquées pour la collecte d’appareils électriques et électroniques . Conformez-vous aux réglementations locales et ne jetez pas vos anciens produits avec les ordures ménagères .