Herunterladen Inhalt Inhalt Diese Seite drucken
D-Link DES-1016D Kurzanleitung Für Die Installation

D-Link DES-1016D Kurzanleitung Für Die Installation

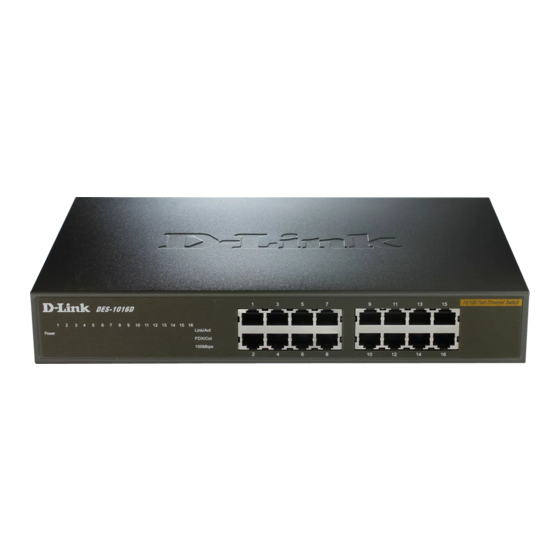
16-port 10/100mbps fast ethernet switch
Vorschau ausblenden Andere Handbücher für DES-1016D:

Werbung

Verfügbare Sprachen
  • DE

Verfügbare Sprachen

  • DEUTSCH, seite 4
1
Setup
The setup of the Switch can be performed using the following steps:
The surface must support at least 5 kg.
The power outlet should be within 1.82 meters (6 feet) of the
device.
Visually inspect the power cord and see that it is secured fully to
the AC power connector.
Make sure that there is proper heat dissipation from and adequate
ventilation around the Switch. Do not place heavy objects on the
Switch.
2
Desktop or Shelf Installation
When installing the Switch on a desktop or shelf, the rubber feet
included with the device must be first attached. Attach these cushioning
feet on the bottom at each corner of the device. Allow enough
ventilation space between the device and the objects around it.
Fast Ethernet Switch installed on a Desktop or Shelf
Quick Install Guide
Quick Install Guide
Quick Install Guide
Quick Install Guide
DES-1016D
16-Port 10/100Mbps Fast Ethernet Switch
1

Werbung

Inhaltsverzeichnis
loading

Inhaltszusammenfassung für D-Link DES-1016D

  • Seite 1 Quick Install Guide Quick Install Guide Quick Install Guide Quick Install Guide DES-1016D 16-Port 10/100Mbps Fast Ethernet Switch Setup The setup of the Switch can be performed using the following steps: The surface must support at least 5 kg. The power outlet should be within 1.82 meters (6 feet) of the device.
  • Seite 2: Rack Installation

    Rack Installation The Switch can be mounted in an EIA standard size, 19-inch rack, which can be placed in a wiring closet with other equipment. To install, attach the mounting brackets on the switch’s front panel (one on each side) and secure them with the screws provided. Attaching the mounting brackets to the Switch Then, use the screws provided with the equipment rack to mount the Switch in the rack.
  • Seite 3: Led Indicators

    The Switch can be used with AC power sources 100 - 240 VAC, 50 - 60 Hz. The Switch’s power supply will adjust to the local power source automatically and may be turned on without having any or all LAN segment cables connected.
  • Seite 4: Installation

    Kurzanleitung für die Installation Kurzanleitung für die Installation Kurzanleitung für die Installation Kurzanleitung für die Installation DES-1016D 16-Port 10/100Mbit/s Fast Ethernet Switch Installation Beachten Sie bei der Auswahl des Standorts bitte Folgendes: Die Tragfähigkeit der Unterlage muss mindestens 5 kg betragen.
  • Seite 5: Netzwerkkabel Anschließen

    Rackmontage Der Switch kann in einem 19-Zoll-Rack (EIA-Standardgröße) montiert und mit weiteren Geräten in einem Verkabelungsschrank installiert werden. Befestigen Sie dazu die beiden Montagewinkel mit den mitgelieferten Schrauben vorne auf beiden Seiten des Switch. Anbringen der Montagewinkel am Switch Montieren Sie danach den Switch mit den zum Rack gehörenden Schrauben im Rack.
  • Seite 6: Led-Anzeigen

    Stromversorgung Der Switch kann an Wechselspannungsquellen von 100 bis 240 V und 50 bis 60 Hz betrieben werden. Die Stromversorgung des Switch passt sich automatisch an die jeweilige Stromquelle an. Der Switch kann eingeschaltet werden, ohne dass bereits LAN-Segmente angeschlossen sind.
  • Seite 7: Conditions D'installation

    Guide d’installation rapide Guide d’installation rapide Guide d’installation rapide Guide d’installation rapide DES-1016D Commutateur Fast Ethernet à 16 ports 10/100 Mbit/s Conditions d’installation Le plan de pose doit supporter au moins 5 kg. La prise de courant ne doit pas se trouver à plus de 1,82 m du commutateur.
  • Seite 8 Installation dans un bâti Le commutateur peut être monté dans un bâti 19"normalisé EIA qui peut être placé dans une armoire avec d’autres équipements. Pour le montage en bâti, fixez les équerres sur la face avant du commutateur (une de chaque côté) à l’aide des vis prévues à cet effet. Montage des équerres sur le commutateur Puis utilisez les vis fournies avec le bâti pour fixer le commutateur dans le bâti.
  • Seite 9: Voyants Lumineux

    Le commutateur peut être alimenté en courant alternatif 100 à 240 V, 50/60 Hz. Le circuit d’alimentation du commutateur s’adapte automatiquement à la tension secteur disponible et peut être activé quel que soit le nombre de segments LAN connectés. Voyants lumineux Les voyants lumineux du commutateur sont les voyants Power, Link/Act, FDX/Col et 100Mbps.
  • Seite 10: Instalación

    Guía de instalación rápida Guía de instalación rápida Guía de instalación rápida Guía de instalación rápida DES-1016D Conmutador Fast Ethernet a 10/100 Mbps de 16 puertos Instalación La configuración del Conmutador se puede realizar mediante los siguientes pasos: La superficie donde instalará el Conmutador debe soportar como mínimo 5 Kg.
  • Seite 11 Conmutador Fast Ethernet instalado en una mesa o estante Instalación sobre un soporte Este conmutador se puede instalar sobre un soporte de tamaño estándar EIA de 19 pulgadas que se puede situar en un armario de instalación eléctrica con otros equipos. Para instalarlo, adjunte los soportes de montaje al panel frontal del conmutador (uno a cada lado) y fíjelos con los tornillos que se proporcionan.
  • Seite 12: Conexión Del Cable De Red

    Conexión del cable de red El Conmutador da soporte a cuatro puertos 10/100 Mbps. Estos puertos funcionan tanto en modo half-dúplex como full-dúplex mientras funciona a 10 Mbps o 100 Mbps. Estos puertos son de tipo Auto-MDI y se pueden transformar automáticamente en el tipo MDI-II o MDI-X, de modo que puede establecer una conexión sencilla sin tener que preocuparse de si utiliza un cable estándar o un cable cruzado.
  • Seite 13: Installazione

    Mbps en cualquiera de los puertos. Manuale rapido d’installazione Manuale rapido d’installazione Manuale rapido d’installazione Manuale rapido d’installazione DES-1016D Switch Fast Ethernet a 16 porte 10/100Mbps Installazione Durante l’installazione dello Switch è necessario tenere conto dei seguenti punti: La superficie deve supportare almeno 5 kg.
  • Seite 14: Installazione Su Rack

    Attorno al dispositivo è necessario lasciare uno spazio sufficiente per una corretta ventilazione. Switch Fast Ethernet installato sulla scrivania o su uno scaffale Installazione su Rack Lo Switch può essere montato in un rack EIA da 19 pollici, che a sua volta può...
  • Seite 15 Connessione dei cavi di rete Lo Switch supporta quattro porte 10/100Mbps. A una velocità di 10Mbps o 100Mbps, le porte funzionano in modalità sia half duplex sia full duplex. Le porte sono di tipo Auto-MDI e sono in grado di passare automaticamente dalla modalità...
  • Seite 16: Размещение Устройства

    ♦ 100Mbps. Si accendono in presenza di una connessione (o link) a un dispositivo a 100Mbps in corrispondenza della relativa porta. Краткая инструкция по установке DES-1016D 16-х портовый коммутатор Fast Ethernet 10/100 Mбит/c Размещение устройства При размещении Коммутатора на рабочем месте необходимо...
  • Seite 17: Установка В Стойку

    достаточную вентиляцию между Коммутатором и другими предметами вокруг него. Установленный на поверхность стола коммутатор Fast Ethernet Установка в стойку Коммутатор может быть смонтирован в стойку стандартного размера EIA 19”, которая, как правило, размещается в серверной комнате вместе с другим оборудованием. Для установки устройства приложите...
  • Seite 18: Подключение К Локальной Сети

    Крепление Коммутатора к стойке Подключение к локальной сети Коммутатор снабжен Fast Ethernet 10/100Mбит/с. Порты поддерживают как полу- так и полнодуплексный режимы при скоростях 10Mбит/с или 100 Мбит/с. Порты имеют режим автоопределения полярности соединения Auto-MDI (автоматический переход от MDI-II к MDI-X), что позволяет не задумываться...
  • Seite 19 Светодиодные индикаторы ♦ POWER. Горит зеленым светом при включенном питании Коммутатора, в противном случае не горит. ♦ Link/Act. Горят в том случае, если успешно установлено соединение по данному порту. Моргают в процессе приема/передачи данных по порту. ♦ FDX/Col Данный индикатор загорается зеленым цветом, когда соответствующий...

Inhaltsverzeichnis