Brother STAR 240E Bedienungsanleitung
Inhaltsverzeichnis
Inhaltsverzeichnis

Verwandte Anleitungen für Brother STAR 240E


Inhaltszusammenfassung für Brother STAR 240E
- Seite 1 Instruction Manual Bedienungsanleitung Руководство по эксплуатации...
-
Seite 2: Bedienung Ihrer Nähmaschine
BEDIENUNG IHRER ПОЛЬЗОВАНИЕ МАШИНОЙ NÄHMASCHINE Соединительные штепсели Kabelanschlüsse 1. Вставьте штепсель ножного контроллера, расположенный на участке шнура между ножным контроллером и 1. Schließen Sie das Netzkabel an der Maschine an. штепселем шнура питания, в разъем на швейной машине. 2. Stecken Sie den Netzstecker in eine Netzsteckdose. 2. -
Seite 3: Netz- Und Nählichtschalter
Main Power/Sewing (Model STAR 240E, STAR 230E) Light Switch This switch turns the main power/sewing light on or off. 1 Turn on (toward the “I” mark) 2 Turn off (toward the “O” mark) (Model PS-57, PS-55, STAR-50, RSR-55, XRX-55, PS-53) Netz- und Nählichtschalter... -
Seite 4: Foot Controller
NOTE (For U.S.A. only): (Model STAR 240E, STAR 230E) Foot Controller: Model N5V This foot controller can be used for Model STAR 240E, STAR 230E. (Model PS-57, PS-55, STAR-50, RSR-55, XRX-55, PS-53) Foot Controller: Model N This foot controller can be used for Model PS-57, PS-55, STAR-50, RSR- 55, XRX-55, PS-53. -
Seite 5: Checking The Needle
Checking the Needle The sewing needle must always be straight and sharp for smooth sewing. To Check the Needle Correctly: To check the needle, place the flat side of the needle on a flat surface. Check the needle from the top and the sides. Throw away any bent needles. -
Seite 6: Nadel Prüfen
Nadel prüfen Проверка иглы Die Nähnadel muß für problemloses Nähen immer gerade und spitz sein. Во избежание проблем в процессе шитья швейная игла всегда должна быть строго прямолинейной и остро заточенной. Richtiges Überprüfen der Nadel: Для того, чтобы правильно проверить состояние иглы: Um die Nadel zu überprüfen, legen Sie sie mit der abgeflachten Seite auf Для... -
Seite 7: Changing The Presser Foot
Changing the Presser Foot CAUTION • Always turn off the power before changing the presser foot. If the power is on and the Start/Stop button is pressed or foot controller is stepped on, the machine will start and may cause injury. •... -
Seite 8: Anschiebetisch (Mit Zubehörfach)
Flat Bed Attachment The accessories are stored in a compartment under the flat bed attachment cover, which can be opened by flipping it toward you. Anschiebetisch (mit Zubehörfach) Платформа-приставка Das Zubehör wird in einem Fach unter der Abdeckung des Anschiebe- Принадлежности... -
Seite 9: Various Controls
If the Stitch Length Dial is set to SS, any of the stitches in the bottom row can be selected. 3 Stitch length dial (Model STAR 240E, STAR 230E, PS-57, PS-55, STAR-50, RSR-55, XRX-55) NOTE:... -
Seite 10: Verschiedene Regler
ручка регулирования длины стежка установлена на SS, то Вы сможете выбрать любой тип стежка нижнего ряда. 3 Stichlängen-Einstellrad 3 Ручка регулирования длины стежка (Modell STAR 240E, STAR 230E, PS-57, PS-55, STAR-50, RSR-55, XRX-55) (Модели STAR 240E, STAR 230E, PS-57, PS-55, STAR-50, RSR-55, XRX-55) NOTIZEN: Das Stichmuster-Einstellrad kann nicht über den letzten Stich hinaus auf... - Seite 11 RECOMMENDED WIDTHS AND LENGTHS FOR STITCHES (Model STAR 240E, PS-57) RECOMMENDED WIDTH RECOMMENDED INSTRUCTION PATTERN STITCH NAME [mm(inch)] LENGTH [mm(inch)] MANUAL PAGE 1-STEP AUTOMATIC 3-5 (Dial 4-7) F-1.5 BUTTONHOLE (1/8-3/16) (1/64-1/16) 1-4.5 STRAIGHT STITCH 50, 73, 75 (1/4) (1/16-3/16) 0-6.5 F-4.5...
- Seite 12 RECOMMENDED WIDTHS AND LENGTHS FOR STITCHES (Model STAR 230E, PS-55, STAR-50, RSR-55, XRX-55) RECOMMENDED WIDTH RECOMMENDED INSTRUCTION PATTERN STITCH NAME [mm(inch)] LENGTH [mm(inch)] MANUAL PAGE 1-STEP AUTOMATIC 3-5 (Dial 4-7) F-1.5 BUTTONHOLE (1/8-3/16) (1/64-1/16) 1-4.5 STRAIGHT STITCH 50, 73, 75 (1/4) (1/16-3/16) 0-6.5...
-
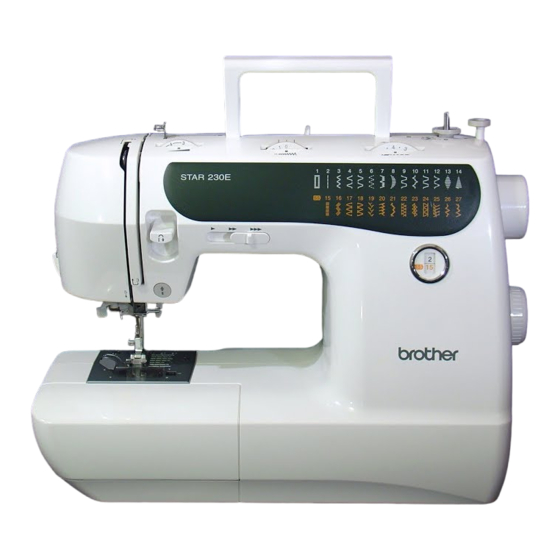
Seite 13: Principal Parts
2. Always unplug before changing the light bulb. Replace bulb with same type rated 12 volts 5 watts (for Model STAR 240E, STAR 230E). Replace bulb with same type rated 15 watts (for Model PS-57, PS-55, STAR-50, RSR-55, XRX-55, PS-53). -
Seite 14: Anschliessen An Das Stromnetz
ANSCHLIESSEN AN DAS STROMNETZ ACHTUNG • Als Stromquelle darf nur gewöhnlicher Haushaltsstrom verwendet werden. Das Verwenden andersartiger Stromquellen kann Brand, elektrischen Schlag und Beschädigungen der Maschine zur Folge haben. • Schalten Sie die Maschine in den folgenden Situationen am Netzschalter aus und ziehen Sie den Stecker aus der Steckdose: Wenn Sie die Maschine unbeaufsichtigt stehen lassen Wenn Sie die Maschine nicht länger benutzen Wenn während der Benutzung ein Stromausfall auftritt... - Seite 15 2. Всегда отключайте машину от сети перед заменой осветительной лампочки. Для замены используйте однотипную лампочку мощностью 5 Вт для сети с напряжением 12 В. (для моделей STAR 240E, STAR 230E) Для замены используйте однотипную лампочку мощностью 15 Вт. (для моделей PS-57, PS-55, STAR-50, RSR-55, XRX-55, PS-53) ПРЕДУПРЕЖДЕНИЕ...
-
Seite 16: Important (In The United Kingdom)
In the event of replacing the plug fuse, use a fuse approved by ASTA to BS 1362, i.e. carrying the mark, rating as marked on plug. Connecting Plugs and Main Power / Sewing Light Switch ( Model STAR 240E, STAR 230E ) - Seite 17 (Model PS-57, PS-55, STAR-50, RSR-55, XRX-55, PS-53) Turn on or off the switch for the main power and sew-light. 1. Connect the power cord or three-prong plug into the machine. 1 Turn on 2. Connect the electrical supply plug into a wall outlet. 2 Turn off - When leaving the machine unattended, the main switch of - When servicing the machine, or when removing covers or...
- Seite 18 PLEASE READ BEFORE USING THIS MACHINE For safe operation 1. Be sure to keep your eye on the needle while sewing. Do not touch the balance wheel, thread take-up, needle, or other moving parts. 2. Remember to turn off the power switch and unplug the cord when: •...
- Seite 19 BITTE VOR BENUTZUNG DIESER MASCHINE LESEN Für sicheren Betrieb: 1. Behalten Sie während des Nähens immer die Nadel im Auge. Handrad, Fadenhebel, Nadel und andere bewegliche Teile dürfen nicht berührt werden. 2. Denken Sie daran, den Netzschalter auszuschalten und den Stecker aus der Steckdose zu ziehen, wenn: •...
- Seite 20 ПОЖАЛУЙСТА, ПРОЧИТАЙТЕ ПЕРЕД НАЧАЛОМ ЭКСПЛУАТАЦИИ МАШИНЫ В целях безопасности 1. Всегда следите за иглой во время шитья. Не прикасайтесь к маховику, механизму подтягивания нитки, игле или иным движущимся деталям машины. 2. Помните о необходимости выключить выключатель питания и отсоединить шнур питания от розетки в следующих случаях: •...
-
Seite 21: Inhaltsverzeichnis
TABLE OF CONTENTS KNOWING YOUR SEWING MACHINE BUTTONHOLE AND BUTTON SEWING PRINCIPAL PARTS ............1 Making a Buttonhole (For 1-step BH Type) ..63 ACCESSORIES ............... 5 Odd-shaped buttons that do not fit into Optional Accessories ..........5 the button holder plate .......... 65 OPERATING YOUR SEWING MACHINE ....... -
Seite 22: Foot Controller
INHALT KENNENLERNEN IHRER MASCHINE KNOPFLÖCHER UND KNÖPFE NÄHEN HAUPTBESTANDTEILE ............2 Knopfloch nähen ZUBEHÖR ................6 (Für 1-Stufen-Knopfloch BH-Typ) ....... 64 Optionales Zubehör ............6 Knöpfe die nicht in den Halter passen ......65 BEDIENUNG IHRER NÄHMASCHINE ........ 8 Knopfloch nähen Kabelanschlüsse .............. -
Seite 23: Checking The Needle
ОГЛАВЛЕНИЕ КРАТКОЕ ТЕХНИЧЕСКОЕ ОПИСАНИЕ МАШИНЫ ОБМЕТЫВАНИЕ ПЕТЕЛЬ И ПРИШИВАНИЕ ПУГОВИЦ ОСНОВНЫЕ ЧАСТИ МАШИНЫ ........2 Обметывание петель ПРИНАДЛЕЖНОСТИ ............. 6 (Для 1-ступенчатого обметывания петли) ..64 Дополнительные принадлежности ..... 6 Пуговицы нестандартной формы, ПОЛЬЗОВАНИЕ МАШИНОЙ ......... 8 не входящие в пуговичный зажим ......65 Соединительные... - Seite 24 PRINCIPAL PARTS (Model STAR 240E, STAR 230E) 1 BOBBIN WINDER (Page 33) Winds the thread onto the bobbin to be used for the lower thread. 2 STITCH LENGTH DIAL (Page 15, 26) Controls the length of the stitches. 3 SPOOL PIN AND SPOOL CAP (Page 33, 39) 4 STITCH WIDTH DIAL (Page 28) Controls the stitch width.
-
Seite 25: Changing The Presser Foot
HAUPTBESTANDTEILE ОСНОВНЫЕ ЧАСТИ МАШИНЫ (Modell STAR 240E, STAR 230E) (Модели STAR 240E, STAR 230E) 1 1 1 1 1 МЕХАНИЗМ НАМОТКИ ШПУЛЬКИ (Стр. 34) 1 SPULER (Seite 34) Наматывает на шпульку нитку, используемую в качестве Spult den Faden auf die Unterfadenspule. -
Seite 26: Flat Bed Attachment
PRINCIPAL PARTS (Model PS-57, PS-55, STAR-50, RSR-55, XRX-55, PS-53) 1 BOBBIN WINDER (Page 33) Winds the thread onto the bobbin to be used for the lower thread. 2 STITCH LENGTH DIAL (Page 15, 26) Controls the length of the stitches. 3 SPOOL PIN AND SPOOL CAP (Page 33, 39) 4 STITCH WIDTH DIAL (Page 28) Controls the stitch width. -
Seite 27: Various Controls
HAUPTBESTANDTEILE ОСНОВНЫЕ ЧАСТИ МАШИНЫ (Modell PS-57, PS-55, STAR-50, RSR-55, XRX-55, PS-53) (Модели PS-57, PS-55, STAR-50, RSR-55, XRX-55, PS-53) 1 1 1 1 1 МЕХАНИЗМ НАМОТКИ ШПУЛЬКИ (Стр. 34) 1 SPULER (Seite 34) Наматывает на шпульку нитку, используемую в качестве Spult den Faden auf die Unterfadenspule. нижней. -
Seite 28: Accessories
(Model STAR 240E, STAR 230E) Foot Controller: Model N5V Parts Code: XA3931-051 NOTE (For U.S.A. only): This foot controller can be used for Model STAR 240E, STAR 230E. (Model PS-57, PS-55, STAR-50, RSR-55, XRX-55, PS-53) 8 X59476-051 9 130920-051 Foot Controller: Model N... - Seite 29 9 Вставной катушечный стержень (1 шт.) A Knopflochschneider (1 St.) 0 Отвертка (1 шт.) B Tragekoffer (1 St.) (Modell STAR 240E, STAR 230E, STAR-50, A Нож для распарывания швов (1 шт.) RSR-55, XRX-55) B Твердый чехол (1 шт.) (Модели STAR 240E, STAR 230E, C Staubabdeckung (1 St.) (Modell PS-57, PS-55, PS-53)
-
Seite 30: Operating Your Sewing Machine
OPERATING YOUR (Model STAR 240E, STAR 230E) SEWING MACHINE Connecting Plugs 1. Connect the power cord plug into the machine. 2. Connect the power supply plug into a wall outlet. CAUTION 1. When leaving the machine unattended, the main switch of the machine should be switched off or the plug must be removed from the socket-outlet. -
Seite 31: Recommended Widths And Lengths For Stitches
RECOMMENDED WIDTHS AND LENGTHS FOR STITCHES (Model PS-53) RECOMMENDED WIDTH RECOMMENDED INSTRUCTION PATTERN STITCH NAME mm (inch) LENGTH mm (inch) MANUAL PAGE 4-STEP AUTOMATIC 3-5 (Dial 4-7) F-1.5 BUTTONHOLE (1/8-3/16) (1/64-1/16) 1-4.5 STRAIGHT STITCH 50, 73, 75 (1/4) (1/16-3/16) 0-6.5 F-4.5 ZIGZAG STITCH 53, 72, 76, 77... -
Seite 32: Empfohlene Stichlängen Und Stichbreiten
EMPFOHLENE STICHLÄNGEN UND STICHBREITEN (Modell STAR 240E, PS-57) VOREINGESTELLTE EMPFOHLENE SEITE IN DER STICHMUSTER STICHNAME BREITE [mm (Zoll)] LÄNGE [mm (Zoll)] ANLEITUNG 1-STUFEN- 3-5 (Drehschalter 4-7) F-1,5 KNOPFLOCHAUTOMATIK (1/8-3/16) (1/64-1/16) 1-4,5 GERADSTICH 51, 74, 75 (1/4) (1/16-3/16) 0-6,5 F-4,5 ZICKZACKSTICH... - Seite 33 EMPFOHLENE STICHLÄNGEN UND STICHBREITEN (Modell STAR 230E, PS-55, STAR-50, RSR-55, XRX-55) VOREINGESTELLTE EMPFOHLENE SEITE IN DER STICHMUSTER STICHNAME BREITE [mm (Zoll)] LÄNGE [mm (Zoll)] ANLEITUNG 1-STUFEN- 3-5 (Drehschalter 4-7) F-1,5 KNOPFLOCHAUTOMATIK (1/8-3/16) (1/64-1/16) 1-4,5 GERADSTICH 51, 74, 75 (1/4) (1/16-3/16) 0-6,5 F-4,5 ZICKZACKSTICH...
- Seite 34 EMPFOHLENE STICHLÄNGEN UND STICHBREITEN (Modell PS-53) VOREINGESTELLTE EMPFOHLENE SEITE IN DER STICHMUSTER STICHNAME BREITE [mm (Zoll)] LÄNGE [mm (Zoll)] ANLEITUNG 4-STUFEN- 3-5 (Drehschalter 4-7) F-1,5 KNOPFLOCHAUTOMATIK (1/8-3/16) (1/64-1/16) 1-4,5 GERADSTICH 51, 74, 75 (1/4) (1/16-3/16) 0-6,5 F-4,5 ZICKZACKSTICH 53, 72, 76, 78 (0-1/4) (1/64-3/16) 3-6,5...
- Seite 35 РЕКОМЕНДУЕМАЯ ДЛИНА СТЕЖКА (Модели STAR 240E, PS-57) ЗАДАННАЯ ШИРИНА РЕКОМЕНДУЕМАЯ ДЛИНА НОМЕР СТРАНИЦЫ СТРОЧКА НАИМЕНОВАНИЕ СТЕЖКА [мм(дюймы)] [ мм(дюймы)] РУКОВОДСТВА 1-СТУПЕНЧАТОЕ АВТОМАТИЧЕСКОЕ 3-5 (Отметки на ручке 4-7) F-1,5 ОБМЕТЫВАНИЕ ПЕТЛИ (1/8-3/16) (1/64-1/16) 1-4,5 ПРЯМОЙ СТЕЖОК 51, 74, 75 (1/4) (1/16-3/16) ЗИГЗАГООБРАЗНЫЙ...
- Seite 36 РЕКОМЕНДУЕМАЯ ДЛИНА СТЕЖКА (Модели STAR 230E, PS-55, STAR-50, RSR-55, XRX-55) ЗАДАННАЯ ШИРИНА РЕКОМЕНДУЕМАЯ ДЛИНА НОМЕР СТРАНИЦЫ СТРОЧКА НАИМЕНОВАНИЕ СТЕЖКА [мм(дюймы)] [ мм(дюймы)] РУКОВОДСТВА 1-СТУПЕНЧАТОЕ АВТОМАТИЧЕСКОЕ 3-5 (Отметки на ручке 4-7) F-1,5 ОБМЕТЫВАНИЕ ПЕТЛИ (1/8-3/16) (1/64-1/16) 1-4,5 ПРЯМОЙ СТЕЖОК 51, 74, 75 (1/4) (1/16-3/16) ЗИГЗАГООБРАЗНЫЙ...
- Seite 37 РЕКОМЕНДУЕМАЯ ДЛИНА СТЕЖКА (Модели PS-53) ЗАДАННАЯ ШИРИНА РЕКОМЕНДУЕМАЯ ДЛИНА НОМЕР СТРАНИЦЫ СТРОЧКА НАИМЕНОВАНИЕ СТЕЖКА [мм(дюймы)] [ мм(дюймы)] РУКОВОДСТВА 4-СТУПЕНЧАТОЕ АВТОМАТИЧЕСКОЕ 3-5 (Отметки на ручке 4-7) F-1,5 ОБМЕТЫВАНИЕ ПЕТЛИ (1/8-3/16) (1/64-1/16) 1-4,5 ПРЯМОЙ СТЕЖОК 51, 74, 75 (1/4) (3/64-3/16) ЗИГЗАГООБРАЗНЫЙ 0-6,5 F-4,5 53, 72, 76, 78 СТЕЖОК...
-
Seite 38: Stitch Length Dial
Stitch Length Dial Depending on your selected stitch, you may need to adjust the stitch length for best results. The numbers marked on the Stitch Length Dial represent the length of the stitch in millimeters (mm). THE HIGHER THE NUMBER, THE LONGER THE STITCH. The “0”... -
Seite 39: Stichlängen-Einstellrad
· · A A A A A · 4 · 3 · 2 · 1 · F · 0 ....Stichlängen-Einstellrad Ручка регулирования длины стежка Abhängig vom gewählten Stich kann es sein, daß Sie für beste Ergebnisse В зависимости от типа выбранного Вами шва для обеспечения die Stichlänge ändern müssen. -
Seite 40: Stitch Width Dial
Stitch Width Dial Depending on the stitch selected, you may need to adjust the stitch width. The numbers marked on the dial represent the stitch width. THE HIGHER THE NUMBER, THE WIDER THE STITCH. 1 Stitch width dial CAUTION Do not adjust the stitch width while the needle is in the fabric. Otherwise, the needle or fabric may be damaged. -
Seite 41: Reverse Sewing Lever
To sew forward, release the Reverse Sewing Lever. The machine will then sew forward. (Model STAR 240E, STAR 230E) To sew in reverse when the foot controller is not used, push the Reverse Sewing Lever in as far as possible and hold it. The machine will sew slowly in reverse. -
Seite 42: Feed Dog Position Switch
Feed Dog Position Switch Use the Feed Dog Position Switch to raise or lower the feed dogs according to the job that is being done. When monogramming, embroidering, darning or sewing on buttons, the feed dogs should be lowered. (The garment will not be fed.) NOTE: When raising or lowering the feed dogs, move the Feed Dog Position Switch as far as possible to the appropriate side. -
Seite 43: Start/Stop Button
(Model STAR 240E, STAR 230E) Start/Stop Button Pressing the Start/Stop Button once starts the machine; pressing the button again stops the machine. • The machine sews at a slow speed when sewing with the button held down. • The needle stops in its highest position when sewing stops. -
Seite 44: Sewing Speed Controller
(Model STAR 240E, STAR 230E) Sewing Speed Controller Controls the speed range. When the foot controller is used, you can control maximum speed with the sewing speed controller. The sewing speed controller should be set at right (fastest) position for normal usage with foot controller. -
Seite 45: Threading The Machine
Use the spool cap (large, medium, or small) that is closest in size to the thread spool. If a spool cap smaller (Model STAR 240E, STAR 230E) than the thread spool is used, the thread may become caught in the slit on the end of the spool. -
Seite 46: Fadenführung
Используйте только шпульки, рекомендованные к применению заводом-изготовителем данной швейной машины (см. стр. 6). Применение шпулек других типов (Modell STAR 240E, STAR 230E) может привести к повреждению машины или травме. 2. Setzen Sie die Spule auf den Spuler und schieben Sie den Spuler nach rechts. - Seite 47 (Model STAR 240E, STAR 230E) (Model STAR 240E, STAR 230E) 4. Slide the sewing speed controller to its maximum (as far to the right as possible). 5. Push the Start/Stop button. The machine will stop automatically when the bobbin is full.
- Seite 48 (Modell STAR 240E, STAR 230E) (Модели STAR 240E, STAR 230E) 4. Stellen Sie den Geschwindigkeitshebel auf Maximum (ganz nach 4. Сдвиньте контроллер скорости шитья в положение rechts). наибольшей скорости (до упора вправо). 5. Drücken Sie die Taste Start/Stopp. Die Maschine stoppt automatisch, 5.
-
Seite 49: Lower Threading
Lower Threading CAUTION Setting the bobbin improperly may cause the thread ten- sion to loosen, breaking the needle and resulting in injury. 1 Wound evenly 2 Wound poorly CAUTION Be sure to turn off the power. If you accidentally press the Start/Stop button or step on the foot controller and the machine begins to operate, injury could result. -
Seite 50: Unterfadenführung
Unterfadenführung Заправка нижней нитки VORSICHT ПРЕДОСТЕРЕЖЕНИЕ Fehlerhaftes Einsetzen der Spule kann zur Folge haben, dass die Неправильная установка шпульки может привести к Fadenspannung zu locker ist und die Nadel hierdurch abbricht, ослаблению натяжения нити, поломке иглы и травме. was zu Verletzungen führen kann. 1 Gleichmäßig gewickelt 1 Ровная... -
Seite 51: Upper Threading
Upper Threading 1. Raise the presser foot using the Presser Foot Lever. 2. Raise the needle to its highest position by turning the balance wheel toward you (counterclockwise). 1 Presser foot lever 3. Place a spool of thread on the horizontal spool pin and press a spool cap onto the spool pin to hold the thread spool firmly in place. -
Seite 52: Oberfadenführung
Oberfadenführung Заправка верхней нитки 1. Heben Sie den Nähfuß mit dem Nähfußhebel. 1. С помощью рычага нажимной лапки поднимите нажимную 2. Bringen Sie die Nadel auf die höchste Position, indem Sie das Handrad лапку. auf sich zu bewegen (entgegen dem Uhrzeigersinn). 2. -
Seite 53: Using Needle Threader
Using Needle Threader Turn power switch to “O”. 1. Lower the presser foot lever. 2. Turn the balance wheel toward you (counter-clockwise) to raise the needle holder to the highest position. 1 Needle holder 2 Needle threader lever CAUTION When using the needle threader, be sure the needle holder is in the highest position. -
Seite 54: Bedienung Der Fadeneinfädelung
Использование приспособления Bedienung der Fadeneinfädelung для заправки нити в иглу Hauptschalter auf “O” stellen. 1. Senken Sie den Nähfußhebel. Установите выключатель питания в положение "O" (ВЫКЛ.). 2. Drehen Sie das Handrad zu sich hin (gegen den Uhrzeigersinn), um 1. Опустите рычаг нажимной лапки. den Nadelhalter in höchste Position zu bringen. -
Seite 55: Manually Drawing Up Lower Thread
Manually Drawing Up Lower Thread When sewing gathers or darts, the lower thread can be manually drawn up so that it will have some excess. 1. Pass the thread along the groove in the direction of the arrow, and leave it there without cutting it. •... -
Seite 56: Twin Needle Sewing
Twin Needle Sewing Your machine is designed for twin needle sewing, which allows you to sew with two top threads. You can use the same color or two different colors of thread for making decorative stitches. Any of the patterns, except the buttonhole pattern, can be sewn with the twin needle. - Seite 57 PLACING THE EXTRA SPOOL PIN Place the vertical spool pin in the hole found on top of the machine near the horizontal spool pin. Place the second spool of thread onto the vertical spool pin as shown in fig. A. TWIN NEEDLE THREADING Each needle should be threaded separately.
-
Seite 58: Thread Tension
Thread Tension Thread tension will affect the quality of your stitches. It may need to be adjusted when you change fabric or thread type. NOTE: It is recommended that a test sample be made on a fabric scrap before sewing on your project. Possible misadjustments and their results. -
Seite 59: Fabric/Thread/Needle Combinations
FABRIC/THREAD/NEEDLE COMBINATIONS Thread Fabric Size of needle Type Size Medium weight fabric Broadcloth Cotton 60 - 80 75/11 - 90/14 Taffeta Synthetic mercerized 60 - 80 Flannel, Silk or silk finished 50 - 80 Gabardine Lightweight fabric Lawn, Batiste Cotton 60 - 80 65/9 - 75/11 Georgette... - Seite 60 ТАБЛИЦА КОМБИНАЦИЙ ТКАНЕЙ/НИТОК/ИГЛ Швейная нитка Номер иглы Ткань Номер Тип Ткани среднего веса Тонкое сукно Хлопковая 60 - 80 75/11 - 90/14 Синтетическая мерсеризованная 60 - 80 Тафта 50 - 80 Фланель, Шелк или Г абардин шелковая отделка Легкие ткани Батист...
-
Seite 61: Please Read Before Sewing
PLEASE READ BEFORE SEWING CAUTION • To avoid injury, pay special attention to the needle while the machine is in operation. Keep your hands away from moving parts while the machine is in operation. • Do not stretch or pull the fabric during sewing. Doing so may lead to injury. •... -
Seite 62: Straight Stitching
7. Release the Reverse Sewing Lever and start sewing in the forward direction by applying pressure to the foot controller. (Model STAR 240E, STAR 230E) 6. To backtack, push down the Reverse Sewing Lever as far as possible to start reverse sewing. -
Seite 63: Geradstich
Drücken auf den Fußanlasser beginnen. контроллера, чтобы выполнить строчку в обратном направлении. 7. Для продолжения строчки в прямом направлении отпустите рычаг (Modell STAR 240E, STAR 230E) реверсирования строчки и надавите на ножной контроллер. 6. Zum verdeckten Zusammenheften die Rückwärts-Nähtaste so weit wie möglich eindrücken, um das Rückwärtsnähen zu beginnen. -
Seite 64: Applizieren Und Stretch-Materialien
Fadenhebel sich ebenfalls auf höchster Position befindet. в том, что рычаг подтягивания нитки при этом также находится в крайней верхней позиции. (Modell STAR 240E, STAR 230E) 1. Drücken Sie nochmals die Taste Start/Stopp. Die Nadel stoppt auf (Модели PSTAR 240E, STAR 230E) höchster Stellung. -
Seite 65: Zigzag Stitching
Zigzag Stitching Pattern Stitch Length Stitch Width (Zigzag Stitch) F-4.5 0-6.5 ZIGZAG STITCH Select the Zigzag Stitch using the Pattern Selection Dial. Then, select the Stitch Length and the Stitch Width. It is recommended to sew using the Straight Stitch at the beginning and end of the Zigzag Stitches. -
Seite 66: Blind Hem Stitching
Blind Hem Stitching Pattern Stitch Length Stitch Width (Blind Hem Stitch) 3-6.5 (Stretch Blind Hem Stitch) F-1.5 The Blind Hem Stitch is used to finish the edge of a project like the hem of a pair of pants without the stitch showing. Use the Blind Hem Stitch for any non-stretch fabrics and the Stretch Blind Hem Stitch for stretch fabrics. -
Seite 67: Shell Tuck Stitching
Shell Tuck Stitching Pattern Stitch Length Stitch Width (Shell Tuck Stitch) 3-6.5 The Shell Tuck Stitch can be used to sew a picot (lace like) edge on a lightweight fabric. 1. Set the Pattern Selection Dial to Shell Tuck Stitch. 2. -
Seite 68: Elastic Stitching
Elastic Stitching Pattern Stitch Length Stitch Width (Elastic Stitch) F-2.5 3-6.5 The Elastic Stitch can be used for 3 functions: mending, sewing elastic or joining fabric. Each is explained below. Set the Pattern Selection Dial to Elastic Stitch. MENDING 1. Place the reinforcement fabric under area to be mended. 2. -
Seite 69: Double Action Stitching
Double Action Stitching Pattern Stitch Length Stitch Width (Double Action Stitch) (Bridging Stitch) 3-6.5 (Rampart Stitch) (Decorative Hem Stitch) 3-6.5 These stitches are used for joining two pieces of fabric, for example, when making patchwork. Set the Pattern Selection Dial to Double Action Stitch, Bridging Stitch, etc. -
Seite 70: Scallop Stitching
Scallop Stitching Pattern Stitch Length Stitch Width (Scallop Stitch) F-1.5 3-6.5 This machine automatically produces a Scallop Stitch which may be used as a decorative edging. 1. Set the Pattern Selection Dial to Scallop Stitch. 2. Sew the Scallop Stitch along the edge of the material. 3. -
Seite 71: Decorative Stitching
Decorative Stitching Pattern Stitch Length Stitch Width (Bead Stitch) (Arrowhead Stitch) 3-6.5 (Parallelogram Stitch) (Triangle Stitch) (Lighting Stitch) (Square Stitch) (Decorative Stitch) (Decorative Stitch) 3-6.5 (Decorative Stitch) These stitches can be used for making decorative top stitching and for smocking. Set the Pattern Selection Dial to Triangle Stitch, Bead Stitch, etc. -
Seite 72: Patchwork
Patchwork Pattern Stitch Length Stitch Width (Fagoting Stitch) 3-6.5 (Link Stitch) These stitches are used to join two pieces of fabric while leaving a space between their edges. 1. Fold over the edges of the two pieces of fabric for the hem and baste the edges to a thin piece of paper leaving a small space between them. -
Seite 73: Overedge Stitching
Overedge Stitching Pattern Stitch Length Stitch Width (Elastic Shell Tuck Stitch) (Elastic Overlock Stitch)* 3-6.5 (Elastic Overlock Stitch) (Comb Stitch) These stitches are used to join together seams and finish them in one operation. The Elastic Overlock Stitches are useful when sewing stretch materials. -
Seite 74: Feather Stitching
Feather Stitching Pattern Stitch Length Stitch Width (Feather Stitch) 3-6.5 Use the Feather Stitch as a decorative top stitch or when hemming blankets, tablecloths or draperies or when embroidering. 1. Set the Pattern Selection Dial to Feather Stitch. 2. Place the fabric right side up and sew 1 cm (3/8") from the edge of the fabric. -
Seite 75: Making A Buttonhole (For 1-Step Bh Type)
(Model STAR 240E, STAR 230E, PS-57, PS-55, STAR-50, RSR-55, XRX-55) Making a Buttonhole (For 1-step BH Type) Pattern Stitch Length Stitch Width Foot F-1.5 Buttonhole Foot (Dial 4-7) NOTE: 1. It is recommended to practice making a buttonhole on a scrap piece of fabric before attempting it on the actual garment. -
Seite 76: Knopfloch Nähen (Für 1-Stufen-Knopfloch Bh-Typ)
(Modell STAR 240E, STAR 230E, PS-57, PS-55, STAR-50, RSR-55, (Модели STAR 240E, STAR 230E, PS-57, PS-55, STAR-50, XRX-55) RSR-55, XRX-55) Knopfloch nähen Обметывание петель (Für 1-Stufen-Knopfloch BH-Typ) (Для 1-ступенчатого обметывания петли) Stichmuster Stichlänge Stichbreite Fuß Стежок Длина стежка Ширина стежка... -
Seite 77: Odd-Shaped Buttons That Do Not Fit Into The Button Holder Plate
3 Button holder plate 4 Scale 5 Diameter + thickness [2.5 cm (1")] 6 0.5 cm (3/16") (Modell STAR 240E, STAR 230E, PS-57, PS-55, STAR-50, RSR-55, (Модели STAR 240E, STAR 230E, PS-57, PS-55, STAR-50, XRX-55) RSR-55, XRX-55) Knöpfe die nicht in den Halter passen Пуговицы... -
Seite 78: Making A Buttonhole (For 4-Step Bh Type )
(Model PS-53) Making a Buttonhole (For 4-step BH Type ) Pattern Stitch Length Stitch Width Foot F-1.5 Buttonhole Foot (Dial 4-7) NOTE: 1. It is recommended to practice making a buttonhole on a scrap piece of fabric before attempting it on the actual garment. 2. - Seite 79 MAKING A BUTTONHOLE Step Sewn Portion Pattern How to Sew 1. Set the pattern selection dial to “a”. Step 1 2. Lower the presser foot and sew 5 to 6 stitches. (Front bar 3. Stop the machine when the needle is at the left side of the stitches, then raise tack) the needle from the material.
-
Seite 80: Stiche Sichern Und Knopfloch Aufschneiden
When using the seam ripper to open the buttonhole, do not put your hand or finger in the path of the ripper. The ripper may slip and cause injury. (Modell STAR 240E, STAR 230E, PS-57, PS-55, STAR-50, RSR-55, (Модели STAR 240E, STAR 230E, PS-57, PS-55, STAR-50, XRX-55, PS-53) -
Seite 81: Buttonhole Fine Adjustment
Buttonhole Fine Adjustment If the stitching on the two sides of the buttonhole do not appear uniform, the following adjustments can be made. 1. Set the Stitch Length Dial at “F-1.5” and stitch the right side of the buttonhole on a scrap of fabric while observing how the material is fed. -
Seite 82: Knopfloch-Feineinstellung
Knopfloch-Feineinstellung Тонкая настройка для обметывания петель Wenn die Stiche zu beiden Seiten des Knopfloches nicht einheitlich erscheinen, können die folgenden Einstellungen vorgenommen werden. Если стежки с обеих сторон петли не идентичны по размеру, то можно выполнить описанные ниже регулировки. 1. Stellen Sie den Stichlängen-Einstellrad auf “F-1,5” und nähen Sie auf einem Stoffrest die rechte Raupe des Knopfloches, während Sie 1. - Seite 83 20 stitches. Then sew the intended stitch. Für 1-Stufen-Knopfloch BH-Typ Для 1-ступенчатого обметывания петли (Modell STAR 240E, STAR 230E, PS-57, PS-55, STAR-50, RSR-55, (Модели STAR 240E, STAR 230E, PS-57, PS-55, STAR-50, XRX-55) RSR-55, XRX-55) Wenn das Knopfloch nicht richtig genäht wird:...
-
Seite 84: Button Sewing
Button Sewing Pattern Stitch Length Stitch Width Foot Zigzag Presser (Zigzag Stitch) Less than 6.5 Foot 1. Measure the distance between the holes and set the appropriate stitch width using the Stitch Width Dial. For example, if the distance between the holes is 1.5 mm, set the stitch width to 1.5. 2. -
Seite 85: Zipper Insertion
Zipper Insertion Pattern Stitch Length Stitch Width Foot (Straight Stitch) 3.5 (center) Zipper Foot The zipper foot is used to sew various types of zippers and can easily be positioned to the right or left side of the needle. When sewing the right side of the zipper, attach the shank to the left pin of the zipper foot. -
Seite 86: Einnähen Eines Reißverschlusses
Einnähen eines Reißverschlusses Вшивание застежек-молний Stichmuster Stichlänge Stichbreite Fuß Cтежок Длина стежка Ширина стежка Лапка Лапка для (Прямой (Geradstich) Reißverschlußfuß 3,5 (центр) вшивания (Mitte) стежок) застежек-молний Der Reißverschlußfuß wird benutzt, um verschiedene Reißverschlüsse Лапка для вшивания застежек-молний предназначена для einzunähen und kann einfach auf der linken oder rechten Seite der Nadel вшивания... -
Seite 87: Darning
Darning Pattern Stitch Length Foot Feed Dog Zigzag Presser (Straight Stitch) Down Position Foot 1. Lower the feed dogs by setting the Feed Dog Position Switch to the Down Position as shown on page 30. 2. Set the Pattern Selection Dial to Straight Stitch. 3. -
Seite 88: Appliqués
Appliqués Pattern Stitch Length (Zigzag Stitch) An appliqué is created by cutting a contrasting piece of fabric into a shape to be used as a decoration on a garment or project. 1. Baste the cut design to the fabric in the location where desired. 2. -
Seite 89: Monogramming And Embroidering
Monogramming and Embroidering Pattern Stitch Length Stitch Width Foot Feed Dog (Zigzag Stitch) None Down Position PREPARING FOR MONOGRAMMING AND EMBROIDERING 1. Lower the feed dogs by setting the Feed Dog Position Switch to the Down Position as shown on page 30. 2. -
Seite 90: Monogramme Und Stickarbeiten
Monogramme und Stickarbeiten Изготовление монограмм и вышивание Зубчатая рейка Stichmuster Stichläng Stichbreite Fuß Transporteur Длина Ширина Ширина механизма Стежок продвижения стежка стежка Лапка ткани (Zickzackstich) Beliebig Beliebig Kein Position unten (Зигзагообразный Нижнее Любая Любая Не нужна стежок) положение VORBEREITUNG FÜR MONOGRAMME UND STICKARBEITEN 1. -
Seite 91: Optional Accessories
OPTIONAL ACCESSORIES Using the Walking Foot Pattern Stitch Length Stitch Width (Straight Stitch) 1-4.5 (Zigzag Stitch) 0-6.5 This foot is very useful for sewing materials such as vinyl cloth, synthetic leather, thin leather, etc. These materials are difficult to feed when sewing. The walking foot prevents such materials from crumpling, slipping or sticking between presser foot and material due to even feeding of upper and lower materials. -
Seite 92: Optionales Zubehör
OPTIONALES ZUBEHÖR ДОПОЛНИТЕЛЬНЫЕ ПРИНАДЛЕЖНОСТИ Einsatz des Obertransporteurs Использование шагающей лапки Stichmuster Stichlänge Stichbreite Стежок Длина стежка Ширина стежка (Geradstich) (Прямой стежок) 1-4,5 1-4,5 (Zickzackstich) 0-6,5 (Зигзагообразный стежок) 0-6,5 Dieser Fuß eignet sich besonders beim Nähen von Materialien wie Эта лапка очень полезна при сшивании таких материалов, Vinylstoffen, synthetischem Leder, dünnem Leder etc. -
Seite 93: Using The Spring-Action Quilting Foot
B Quilting design (Line) 8. The stitch length depends on how quickly the fabric is moved (Model STAR 240E, STAR 230E) and on the machine’s sewing speed. Sew slowly and move the fabric at a constant speed to sew uniform stitches. (See fig. D) -
Seite 94: Einsatz Des Stopffußes
Sie den Stoff möglichst gleichmäßig, um eine gleichmäßige Naht zu для выполнения строчки по контуру нарисованного узора. erhalten (siehe Abb. D). (См. рис. C) (Modell STAR 240E, STAR 230E) B Стеганый узор (Линия) 8. Длина стежка определяется скоростью перемещения материала и скоростью машины. Шейте медленно и... -
Seite 95: Using The 1/4-Inch Quilting Foot
OPTIONAL ACCESSORIES Using the 1/4-Inch Quilting Foot Pattern Stitch Length Stitch Width (Straight Stitch) 2-2.5 3.5 (center) The 1/4-Inch Quilting Foot is used to sew fixed seam allowance 6.5 mm (1/4") when piecing together a quilt. (See fig. A) 1. Set the Pattern Selection Dial to Straight Stitch. Set the Stitch Length between 2 and 2.5. -
Seite 96: Einsatz Des Patchworkfußes
OPTIONALES ZUBEHÖR ДОПОЛНИТЕЛЬНЫЕ ПРИНАДЛЕЖНОСТИ Einsatz des Patchworkfuß Использование направляющей лапки 1/4 дюйма (6,5 мм) Stichmuster Stichlänge Stichbreite (Geradstich) 2-2,5 3,5 (Mitte) Стежок Длина стежка Ширина стежка (Прямой стежок ) 2-2,5 3,5 (центр) Der Patchworkfuß wird benutzt, um z. B. bei Stepparbeiten mit einer festen Nahtzugabe von 6,5 mm zu nähen (siehe Abb. -
Seite 97: Changing The Light Bulb
2. Loosen the screw on the reverse side of sewing head as shown in fig. A. 3. Remove the light cover from the machine as illustrated in fig. A. (Model STAR 240E, STAR 230E) (Model STAR 240E, STAR 230E) 4. Replace the sewing light bulb. (See fig. B) -
Seite 98: Nählichtlampe Auswechseln
2. Отвинтите винт крепления крышки с обратной стороны швейной головки, как показано на рис. А. 3. Снимите крышку с машины, как показано на рис. А. (Modell STAR 240E, STAR 230E) (Модели STAR 240E, STAR 230E) 4. Ersetzen Sie die Nählichtlampe. (Siehe Abb. B) 4. -
Seite 99: Cleaning
Cleaning CAUTION Be sure to unplug the machine before cleaning it. Other- wise, electric shock or injury may result. 1. Remove the power supply plug from the outlet. 2. Raise the needle and the presser foot. 3. Loosen the presser foot screw and the needle clamp screw to remove the presser foot holder and the needle. -
Seite 100: Reinigung
Reinigung Чистка машины VORSICHT ПРЕДОСТЕРЕЖЕНИЕ Ziehen Sie zum Reinigen der Nähmaschine das Netzkabel aus der Перед чисткой машины обязательно отсоедините Steckdose, da Sie sonst der Gefahr von Verletzung und Strom- штепсель шнура питания от розетки. В противном schlag ausgesetzt sind. случае... -
Seite 101: Performance Check List
If you still have difficulties, contact your nearest authorized service center. With the model STAR 240E and STAR 230E, you can use the sewing speed controller to adjust the sewing speed. When sewing at the slowest speed, skipped stitches may easily occur depending on the type of thread and fabric used. If this occurs, sew at a faster speed. - Seite 102 Start/Stop button will not position. work when foot controller is plugged into machine. Page 30 Page 10 (Model STAR 240E, STAR 230E, PS-57, PS-55, STAR-50, RSR-55, XRX-55) The buttonhole lever is pushed toward the back of the machine. Page 63...
-
Seite 103: Checkliste
Wenn die Probleme weiterbestehen, wenden Sie sich an den nächsten Reparaturservice. Bei dem Modell STAR 240E und STAR 230E können Sie das Nähgeschwindigkeit-Steuerteil verwenden, um die Nähgeschwindigkeit einzustellen. Beim Nähen mit der niedrigsten Geschwindigkeit kann Überspringen von Stichen leicht auftreten, je nach verwendetem Stoff und Faden. In diesem Fall mit höherer Geschwindigkeit nähen. - Seite 104 Transporteur den Stoff nicht richtig benutzt. transportieren. Ziehen Sie nicht am Stoff. Seite 40 Nein Nein Seite 10 Nein (Modell STAR 240E, STAR 230E) Transporteur ist Die Start/Stopp-Taste versenkt. arbeitet nicht, wenn das Fußanlasser in die Maschine eingesteckt ist. Seite 30...
- Seite 105 таблицы, не представляется возможным, обратитесь за квалифицированной консультацией в ближайший центр технического обслуживания. На моделях STAR 240E и STAR 230E Вы можете воспользоваться контроллером скорости шитья для регулирования скорости выполнения строчки. При выполнении строчки на самой малой скорости при использовании определенных типов нитки и ткани...
- Seite 106 ножной только за счет действия зубчатой контроллер. рейки механизма подачи ткани. Стр.40 Нет Нет Стр.10 Нет Зубчатая рейка (Модели STAR 240E, STAR 230E) механизма Если к машине продвижения ткани в подсоединен ножной контроллер, кнопка нижем положении. пуска/остановки машины не действует.
-
Seite 107: Repacking The Machine
Instructions for repacking the machine are illustrated. * Hard case (1) and packing materials (2, 3) are included only with STAR-50, RSR-55, XRX-55, STAR 240E and STAR 230E. (Model STAR 240E, STAR 230E, STAR-50, RSR-55, XRX-55) - Seite 108 Page Page 1/4-Inch Quilting Foot ..........5, 83 Needle Accessories ..............5 Inspection ............11 Appliqués ..............76 Replacement ............11 Arrowhead Stitch ............59 Needle Threader ............41 Bead Stitch ..............59 Overedge Stitching ............61 Blind Hem Stitch ............54 Bobbin Winder ..............
- Seite 109 Seite Seite Anschiebetisch & Zubehörfach ........14, 32 Nadel Applizieren ................76 ersetzen ............... 12 Aufspulen ................34 prüfen ................12 Automatischer Einfädler ............64 Nadel prüfen ................12 Nähen mit Doppelnadel ............44 Nähfuß wechseln ..............13 Biesenstich ................55 Nähfußhebel ................
- Seite 110 Страница Страница А О Обметочный стежок ..........61 Аппликации ..............76 Обметывание петель ..........64 Б Обойма ................ 88 Бисерный стежок ............59 Обработка сборок ............74 Окошко индикации типа стежка ......16 В Основные части машины ..........4 Винт тонкой настройки для обметывания петель ... 70 П...
- Seite 111 ENGLISH DEUTSCH РУССКИЙ 194277-213 Printed in Taiwan...