
Verwandte Anleitungen für ZENEC ZE-MC192


Inhaltszusammenfassung für ZENEC ZE-MC192
- Seite 1 MODEL NO: ZE-MC192 1-DIN DVD-MONICEIVER WITH MOTORIZED 7" LCD DISPLAY INSTRUCTION MANUAL...
-
Seite 2: Inhaltsverzeichnis
INHALTSVERZEICHNIS 1. SICHERHEITSHINWEISE ........................... 6-7 2. BEDIENELEMENTE ..........................8-11 BEDIENTEIL ..............................8-10 TOUCHSCREEN ............................... 11 3. DIE FERNBEDIENUNG ..........................12-18 DIE FERNBEDIENUNG FÜR DEN VORDEREN BEREICH ................12-14 DIE FERNBEDIENUNG FÜR DEN HINTEREN BEREICH ................15-17 SMART-DIAL FERNBEDIENUNG ........................18 4. BEDIENUNG UND HANDHABUNG DES MONITORS ................19-20 ÖFFNEN UND SCHLIESSEN DES MONITORS .................... - Seite 3 DEUTSCH AUFRUFEN DES DVD-MENÜS ......................... 39 KAPITELAUSWAHL ............................39 SCHNELLER VORLAUF/RÜCKLAUF ........................ 39 2-CH UND 6-CH AUDIOWIEDERGABE ......................40 GOTO-FUNKTION ............................41-42 DIREKTE AUSWAHL EINES KAPITELS/TRACKS ..................... 43 AUSWAHL VON VERSCHIEDENEN KAMERAPERSPEKTIVEN ............... 43 ZOOM-FUNKTION ............................. 43 AUSWAHL VON VERSCHIEDENEN TONSPUREN ................... 43 WIEDERGABEINFORMATIONEN ........................
- Seite 4 ZE-MC192 Vielen Dank für den Kauf dieses ZENEC-Produktes! Mit dem Kauf des ZE-MC192 haben Sie sich für ein technisch ausgereiftes Produkt entschieden, das Ihnen durch die Verwendung von hochwertigen Materialien und Bauteilen eine lange Lebensdauer garantiert. Bei dem ZE-MC192 von ZENEC handelt es sich um einen 1-DIN DVD-Moniceiver mit motorbetriebenem 7"/16:9 Bildschirm.
- Seite 5 DEUTSCH GERÄTE-FEATURES INTEGRIERTER DVD/CD/MP3/WMA-PLAYER ■ Wiedergabe von CD, CD-R/RW, MP3, WMA, OGG, DVD, DVD-R/RW, DVD+R/RW, DVD-MP3, VCD, SVCD, DIVX5, MPEG4, JPEG und Picture CD ■ Regional Code 2 ■ Integrierter Dolby Digital und Pro Logic II Decoder ■ Elektronisches (ESP) und mechanisches Anti-Shock System ■...
-
Seite 6: Sicherheitshinweise
Spannungsversorgung resultiert, müssen Sie die defekte Sicherung gegen ein neues Exemplar mit identischen Werten austauschen. Sollte der Kurzschluss immer noch vorhanden sein, wenden Sie sich bitte an Ihren ZENEC-Händler. 7. Achten Sie darauf, dass bei ausgeschaltetem Motor die Batterie des Fahrzeuges nicht entladen wird. - Seite 7 Wird der Sicherheitscode dreimal hintereinander falsch eingegeben, wird das Gerät automatisch für den weiteren Gebrauch gesperrt und es ist nötig, das Gerät kostenpflichtig über einen ZENEC-Händler einzuschicken, um es wieder encodieren zu lassen. 15. Wenn Sie Fragen oder Probleme bei der Installation haben, wenden Sie sich bitte an...
-
Seite 8: Bedienelemente
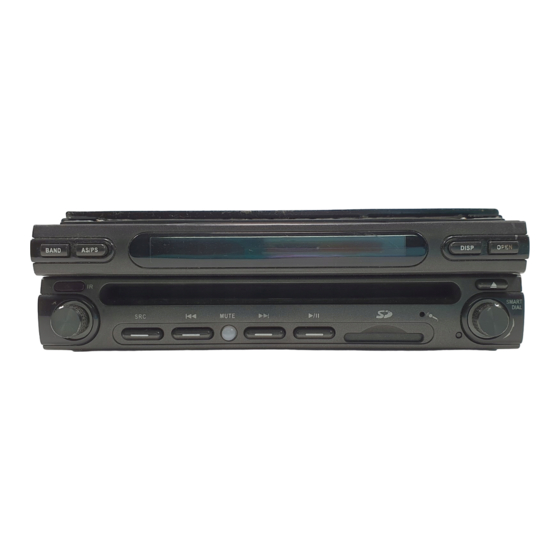
2. BEDIENELEMENTE BEDIENTEIL... -
Seite 9: Smart Dial
DEUTSCH 1. POWER/VOL-Drehregler ■ Drücken Sie den POWER/VOL-Drehregler, um das Gerät einzuschalten. Halten Sie den Drehregler etwas länger gedrückt, um das Gerät wieder auszuschalten. ■ Betätigen Sie den POWER/VOL-Drehregler, um die Lautstärke entsprechend einzustellen und halten Sie anschließend den Drehregler für 2 Sekunden gedrückt, bis ein kurzer Signalton zu hören ist, um die von Ihnen eingestellte Lautstärke zu speichern. - Seite 10 13. ANGLE( z )-Taste ■ Drücken Sie die ANGLE( z )-Taste, um den Neigungswinkel des Bildschirms schrittweise zu erhöhen. ■ Halten Sie die ANGLE( z )-Taste gedückt, um den Neigungswinkel des Bildschirms stufenlos zu erhöhen. 14. ANGLE( b )-Taste ■ Drücken Sie die ANGLE( b )-Taste, um den Neigungswinkel des Bildschirms schrittweise zu verringern.
-
Seite 11: Touchscreen
DEUTSCH TOUCHSCREEN Der Bildschirm des Gerätes ist in verschiedene Bereiche aufgeteilt, um die Bedienung per Touchscreen zu erleichtern. Area A Area F Area B Area C Area D Area E Bereich A: ■ Berühren Sie Bereich A, um das Hauptmenü des Gerätes aufzurufen. Bereich B: ■... -
Seite 12: Remote Control
Remote Control 3. DIE FERNBEDIENUNG Remote Control DIE FERNBEDIENUNG FÜR DEN VORDEREN BEREICH DIE EINZELNEN TASTEN 1. POWER-Taste ■ Drücken Sie die POWER-Taste, um das Gerät ein- bzw. auszuschalten. Name Signal Function 2. OPEN-Taste ■ Drücken Sie die OPEN-Taste, um den Bildschirm herauszufahren bzw. einzufahren. Power Turns the power on/ off Op e n... - Seite 13 DEUTSCH 7. VOL(-)-Taste ■ Drücken Sie die VOL(-)-Taste, um die Lautstärke zu verringern. 8. INFORMATION-Taste ■ Drücken Sie die INFORMATION-Taste, um die Wiedergabeinformationen anzuzeigen. 9. (-/--)-Taste ■ Drücken Sie die (-/--)-Taste, um die GOTO Suchfunktion für VCD/DVD aufzurufen. 10. STOP/BAND-Taste ■...
- Seite 14 21. NEXT-Taste ■ Drücken Sie die NEXT-Taste, um zum nächsten Kapitel/Track einer Disc zu springen. ■ Drücken Sie die NEXT-Taste, um einen empfangbaren Sender eines Frequenzbandes durch erhöhen der Frequenz auszuwählen. 22. PREVIOUS-Taste ■ Drücken Sie die PREVIOUS-Taste, um zum vorherigen Kapitel/Track einer Disc zu springen.
-
Seite 15: Die Fernbedienung Für Den Hinteren Bereich
R everse Fast Fast forward the disc content Forward DEUTSCH Audio Change the audio language for disc playback Slower Play Slow forward playback DIE FERNBEDIENUNG FÜR DEN HINTEREN BEREICH Angle Plays back disc in different angel for a sce ne SUB Title Language selection for subtitle DIE EINZELNEN TASTEN... -
Seite 16: Fast Forward
6. ROOT-Taste ■ Drücken Sie die ROOT-Taste, um das Hauptmenü einer DVD aufzurufen. ■ Drücken Sie die ROOT-Taste, um das PBC-Menü während der Wiedergabe einer VCD aufzurufen. 7. OK-Taste ■ Drücken Sie die OK-Taste, um die Wiedergabe einer CD/DVD zu starten, zu pausieren oder Ihre Auswahl (Menü) zu bestätigen. - Seite 17 DEUTSCH 18. AUDIO-Taste ■ Drücken Sie die AUDIO-Taste, um zwischen den verschiedenen Tonspuren einer DVD zu wechseln. Beachten Sie dabei, dass die gerade wiedergegebene DVD dieses Ausstattungsmerkmal unterstützen muss. 19. SUBTITLE-Taste ■ Drücken Sie die SUBTITLE-Taste, um zwischen den verschiedenen Sprachen des Untertitels zu wechseln.
-
Seite 18: Smart-Dial Fernbedienung
SMART-DIAL FERNBEDIENUNG DIE EINZELNEN TASTEN Name Signal Function 1. VOL(+)-Taste VOL down Decrease volum e VOL up Incre ase volu m e ■ Drücken Sie die VOL(+)-Taste, um die Lautstärke zu erhöhen. Press this encoder to ac cess system set-up. Smart Dial Rotate clockwise/anti clockwise to select desired item 2. -
Seite 19: Bedienung Und Handhabung Des Monitors
■ Wenn Sie den Rückwärtsgang einlegen und eine optional erhältliche Rückfahrkamera entsprechend angeschlossen haben, schaltet das Gerät automatisch auf den entsprechenden Videoeingang “CAMERA“ um. BILDEINSTELLUNGEN ■ Die folgende Tabelle zeigt die Wiedergabequellen des ZE-MC192 und das jeweilige Videoformat. Wiedergabequelle Videoformat... -
Seite 20: Anschluss Der Handbremse
ANSCHLUSS DER HANDBREMSE ■ Wenn Sie das “PRK SW” Anschlusskabel entsprechend angeschlossen haben, wird das Bild einer DVD nur dann wiedergegeben, wenn das Fahrzeug steht bzw. wenn die Handbremse angezogen ist. Wenn Sie das Kabel nicht anschließen, ist es nicht möglich das Bild einer DVD wiederzugeben. -
Seite 21: Allgemeine Bedienung
DEUTSCH 5. ALLGEMEINE BEDIENUNG EIN- UND AUSSCHALTEN DES GERÄTES ■ Drücken Sie den POWER/VOL Drehregler, um das Gerät einzuschalten. ■ Halten Sie den POWER/VOL Drehregler gedrückt, um das Gerät wieder auszuschalten. AUSWAHL EINER WIEDERGABEQUELLE ■ Drücken Sie die SRC-Taste auf der Fernbedienung oder die SCR-Taste auf dem Bedienteil, um zwischen den verschiedenen Programmquellen in folgender Reihenfolge zu wählen. -
Seite 22: Allgemeine Audioeinstellungen
3. Verändern des Wertes eines Menüpunktes: ■ Drücken Sie eine der -Tasten auf der Fernbedienung, betätigen Sie den Drehregler [] / [] POWER/VOL auf dem Bedienteil oder berühren Sie das entsprechende Icon auf dem Bildschirm, um den Wert des ausgewählten Menüpunktes zu verändern. 4. -
Seite 23: Eingabe Des Sicherheitscode
REAR ZONE ■ Wenn Sie im hinteren Bereich des Fahrzeuges Monitore installiert haben und diese entsprechend mit den Rear-View Ausgängen des ZE-MC192 verbunden haben, können die Mitfahrer mit der Fernbedienung für den hinteren Bereich des Fahrzeuges z.B. einen angeschlossenen DVB-T Tuner (ZE-DVBT25) nutzen und direkt bedienen. -
Seite 24: Systemeinstellungen
6. SYSTEMEINSTELLUNGEN HAUPTMENÜ ■ Sie haben zwei verschiedene Möglichkeiten das Hauptmenü aufzurufen: 1. Drücken Sie den SMART-DIAL Drehknopf auf dem Bedienteil. 2. Drücken Sie die MENU-Taste auf der Fernbedienung. 3. Berühren Sie Bereich A des Touchscreens. Berühren Sie das Icon, um in den Tuner-Modus zu gelangen. Berühren Sie das Icon, um in den CD/DVD-Modus zu gelangen. -
Seite 25: Bildschirmeinstellungen
DEUTSCH BITTE BEACHTEN ■ Alle Menüs bzw. Menüpunkte lassen sich mit der Fernbedienung, dem SMART-DIAL Drehknopf auf dem Bedienteil oder per Touchscreen aufrufen und auch entsprechend verändern. In den folgenden Kapiteln wird beschrieben, wie die einzelnen Menüpunkte aufgerufen werden und entsprechend verändert werden können. BILDSCHIRMEINSTELLUNGEN 1. -
Seite 26: Funktion
Einstellung Einstellbereich Funktion Drücken Sie eine der [] /[]-Tasten auf der Fernbedienung, betätigen Sie den POWER/VOL Helligkeit 0 bis 20 Drehregler auf dem Bedienteil oder berühren Sie das entsprechende Icon auf dem Bildschirm, um die Helligkeit des Bildschirms einzustellen. Drücken Sie eine der [] /[]-Tasten auf der Fernbedienung, betätigen Sie den POWER/VOL Neigungswinkel 1 bis 6... -
Seite 27: Setup
DEUTSCH SETUP 1. Aufrufen des Menüs: 1. Drücken Sie den SMART-DIAL Drehknopf auf dem Bedienteil oder die MENU-Taste auf der Fernbedienung, um das Hauptmenü aufzurufen. 2. Berühren Sie das Icon auf dem Bildschirm, um das General Setup aufzurufen. 2. Auswahl eines Menüpunktes: 1. - Seite 28 Einstellung Option Funktion TA Vol Einstellen der Lautstärke von Verkehrsdurchsagen. Radio Wählen Sie das Land aus, in welchem das Gerät S-Amerika1 bzw. der eingebaute Tuner benutzt wird. Europa Einstellen der Uhrzeit (HH:MM) Einstellen der Uhrzeit. 12 Stunden Anzeige der Uhrzeit im 12-Stunden-Modus (AM und PM).
-
Seite 29: Asp Setup
DEUTSCH ASP SETUP 1. Aufrufen des Menüs: 1. Drücken Sie die MENU-Taste auf der Fernbedienung, um das Hauptmenü aufzurufen. 2. Berühren Sie das Icon auf dem Bildschirm, um das ASP Menü aufzurufen. - Seite 30 2. Auswahl eines Menüpunktes: 1. Drücken Sie eine der Tasten auf der Fernbedienung, um den Menüpunkt auszu- []/[]- wählen, dessen Wert sie verändern möchten. 2. Betätigen Sie den SMART-DIAL Drehknopf auf dem Bedienteil, um den Menüpunkt aus- zuwählen, dessen Wert Sie verändern möchten. 3.
- Seite 31 DEUTSCH Einstellung Option Funktion 60Hz 80Hz Wählen Sie die Mitten-Frequenz 100Hz Frequenzeinstellung Bass des Basses in Abhängigkeit von der 130Hz Wiedergabequelle aus. 150Hz 200Hz 10KHz Wählen Sie die Mitten-Frequenz 12.5KHz Frequenzeinstellung Höhen der Höhen in Abhängigkeit von der 15KHz Wiedergabequelle aus. 17KHz 80Hz Wählen Sie die Trennfrequenz für den...
-
Seite 32: Multi-Zone
■ Das Gerät bietet Ihnen die Möglichkeit zwei verschiedene Wiedergabequellen gleich- zeitig wiederzugeben. Als Beispiel können Sie im vorderen Bereich des Fahrzeuges den Ton des integrierten FM/AM-Tuners wiedergeben und diesen auch mit dem ZE-MC192 Grundgerät steuern, während die Mitfahrer im hinteren Bereich des Fahrzeuges DVB-T über externe Monitore anschauen. -
Seite 33: Ukw/Mw-Tuner
DEUTSCH 7. UKW/MW-TUNER AUSWAHL DES RADIOMODUS ■ Drücken Sie mehrmals die SRC-Taste auf der Fernbedienung oder auf dem Bedienteil, um den Radiomodus als Wiedergabequelle auszuwählen. ■ Berühren Sie das Icon auf dem Bildschirm, um den Radiomodus als Wieder- gabequelle auszuwählen. BENUTZEROBERFLÄCHE 1 2 3 4 5 6... -
Seite 34: Auswahl Des Frequenzbandes (Fm/Am)
13. Berühren Sie das Icon, um den manuellen Suchlauf zu starten. Mit jeder weiteren Berührung wird die Frequenz um einen Schritt erhöht. 14. Berühren Sie das Icon, um jeden gespeicherten Sender des ausgewählten Frequenzbandes kurz anzuspielen. 15. Berühren Sie das Icon, um den gewünschten Programmtyp auszuwählen. -
Seite 35: Automatisches Speichern Von Sendern (As)
DEUTSCH AUTOMATISCHES SPEICHERN VON SENDERN (AS) ■ Drücken Sie die AS/PS-Taste auf der Fernbedienung oder berühren Sie das Icon auf dem Bildschirm, um den automatischen Suchlauf zu starten und auf den 6 Speicherplätzen des gerade ausgewählten Frequenzbandes zu speichern. ■ Drücken Sie die Taste bzw. berühren Sie das Icon erneut, um den automatischen Such- lauf zu beenden. -
Seite 36: Dvd-Wiedergabe
8. DVD-WIEDERGABE AUSWAHL DES DVD-MODUS ■ Drücken Sie mehrmals die SCR-Taste auf der Fernbedienung oder auf dem Bedienteil, um den DVD-Modus als Wiedergabequelle auszuwählen. ■ Berühren Sie das Icon auf dem Bildschirm, um den DVD-Modus als Wieder- gabequelle auszuwählen. BITTE BEACHTEN ■... -
Seite 37: Benutzeroberfläche
DEUTSCH BENUTZEROBERFLÄCHE 1. Berühren Sie das Icon, um die Wiedergabe einer DVD zu starten oder zu pausieren. 2. Berühren Sie das Icon, um die Wiedergabe einer DVD zu beenden. 3. Berühren Sie das Icon, um den schnellen Rücklauf zu starten. 4. - Seite 38 ZEITLUPE ■ Drücken Sie die -Taste auf der Fernbedienung, um die DVD bzw. ein Teil der DVD in Zeitlupe wiederzugeben. Durch wiederholtes drücken der Taste können Sie die Geschwindigkeit (1/2, 1/4, 1/6 oder 1/7) der Zeitlupenwiedergabe entsprechend einstellen. ■ Drücken Sie während der Zeitlupe die OK-Taste, um wieder zum normalen Wiedergabe- modus zurückzukehren.
-
Seite 39: Aufrufen Des Dvd-Menüs
DEUTSCH AUFRUFEN DES DVD-MENÜS 1. Berühren Sie während der Wiedergabe einer DVD Bereich E und anschließend das Icon auf dem Bildschirm des Gerätes, um das DVD-Menü aufzurufen. 2. Betätigen Sie den SMART-DIAL Drehknopf auf dem Bedienteil oder drücken Sie eine der Pfeiltasten auf der Fernbedienung, um die Titelauswahl aus dem Menü... -
Seite 40: 2-Ch Und 6-Ch Audiowiedergabe
2-CH UND 6-CH AUDIOWIEDERGABE 2-CH (Down Mix) Audiowiedergabe für CD, SD-Karte, Aux-In und DVD ■ Verwenden Sie die 2-CH Audiowiedergabe für die Wiedergabe von LPCM und PCM Signalen von CD, SD-Karte oder DVD. 6-CH Audiowiedergabe für CD, SD-Karte und DVD ■... -
Seite 41: Goto-Funktion
DEUTSCH GOTO-FUNKTION ■ Während der Wiedergabe einer DVD oder VCD können Sie mit der GOTO-Funktion direkt an einer bestimmten Stelle der Disc mit der Wiedergabe fortfahren. 1. Betätigen Sie den SMART-DIAL Drehknopf auf dem Bedienteil oder drücken Sie die GOTO-Taste auf der Fernbedienung oder berühren Sie Bereich F auf dem Bildschirm, um die GOTO-Funktion zu aktivieren. -
Seite 42: Direkte Auswahl Eines Kapitels/Tracks
DIREKTE AUSWAHL EINES KAPITELS/TRACKS ■ Während der Wiedergabe einer CD, VCD oder DVD können Sie durch drücken einer der numerischen Tasten auf der Fernbedienung direkt einen Track bzw. ein Kapitel auswählen. AUSWAHL VON VERSCHIEDENEN KAMERAPERSPEKTIVEN (NUR DVD) ■ Einige DVDs bieten die Möglichkeit, einzelne Szenen aus verschiedenen Kameraperspek- tiven wiederzugeben. -
Seite 43: Generelle Informationen
DEUTSCH 1. Anzeige des aktuellen Wiedergabemodus. 2. Der vierte Titel einer DVD mit 16 Titeln wird gerade wiedergegeben. 3. Das erste Kapitel einer DVD mit 20 Kapiteln wird gerade wiedergegeben. 4. Anzeige der Spielzeit des aktuellen Titels. 5. Anzeige der Equalizer Einstellung. 6. - Seite 44 C SYMBOLE Symbol Bedeutung Anzahl der Tonspuren, die auf der DVD enthalten sind (maximal 8). Anzahl der Untertitel, die auf der DVD enthalten sind (maximal 32). Anzahl der Kameraperspektiven die auf der DVD enthalten sind (maximal 9). Angabe über die verschiedenen Bildformate, die auf der Disc gespeichert sind.
-
Seite 45: Dvd-Setup
DEUTSCH 9. DVD-SETUP ■ Folgende Menüpunkte stehen Ihnen zur Auswahl: Sprache ➔ Audio ➔ Video ➔ Lautsprecher ➔ Surrround ➔ Rating AUFRUFEN DES DVD-SETUPS ■ Sie haben mehrere Möglichkeiten das DVD-Setup aufzurufen: 1. Berühren Sie Bereich A auf dem Bildschirm, um das Hauptmenü aufzurufen. Berühren Sie anschließend das Icon, um das DVD-Setup aufzurufen. -
Seite 46: Sprachwahl
SPRACHWAHL ■ Wenn eine DVD mehr als eine Tonspur oder mehr als einen Untertitel enthält, können Sie während der Wiedergabe zwischen den verschiedenen Optionen wählen. Wenn die von Ihnen ausgewählte Tonspur bzw. der Untertitel nicht auf der DVD enthalten ist, wird die DVD in der voreingestellten Sprache wiedergegeben. -
Seite 47: Audioeinstellungen
DEUTSCH AUDIOEINSTELLUNGEN ■ Das Gerät verfügt unter anderem über einen eingebauten Tongenerator (rosa Rauschen), mit dessen Hilfe die einzelnen Kanäle entsprechend eingestellt werden können. AUDIOMENÜ Einstellung Option Funktion Rosa Rauschen Links Rosa Rauschen auf dem linken Kanal. Rechts Rosa Rauschen auf dem rechten Kanal. Verbessern der Dynamik bei leiseren Lautstärken. -
Seite 48: Videoeinstellungen
VIDEOEINSTELLUNGEN Einstellung Option Funktion TV Shape (Aspect 16:9 Wiedergabe im 16:9 Format. Ratio) Anzeige des Symbols für mehrere vorhandene Kamerapositionen während der Wiedergabe. Verschiedene Kamerapositionen Keine Anzeige des Symbols für mehrere Kamerapositionen während der Wiedergabe . Fill Original H FIT Erweiterte Bildformat- Ohne Funktion. -
Seite 49: Lautsprechermenü
DEUTSCH LAUTSPRECHERMENÜ Einstellung Option Funktion 6-Kanal 6-Kanal Audiowiedergabe. Modus Lautsprecher- modus 2-Kanal Audiowiedergabe Downmix (die nachfolgenden Einstellungen können dann nicht geändert werden). Groß Vordere Klein Lautsprecher Nicht vorhanden Groß Hintere Lautsprecher Klein (Surround) Nicht vorhanden Vorhanden Subwoofer Nicht vorhanden Groß Center Klein Nicht vorhanden... -
Seite 50: Surroundmenü
SURROUNDMENÜ Einstellung Option Funktion Surround 1 Das originale Audioformat wird wiedergegeben. Umwandeln eines Monosignals in ein Surround Surround Matrix Surroundsignal. Modus Surround Movie Wiedergabe eines Films mit Surroundeffekten. Surround Music Musikwiedergabe mit Surroundeffekten. Um eine räumlichere Audiowiedergabe zu Panorama schaffen, wird die Klangkulisse von vorne nach hinten verschoben. -
Seite 51: Jugendschutzkontrolle
DEUTSCH JUGENDSCHUTZKONTROLLE ■ Das Gerät verfügt über eine eingebaute Jugendschutzkontrolle, um zu verhindern, das Kinder und Jugendliche DVD’s mit ungeeigneten Inhalten mit dem Gerät wiedergeben können. Im Auslieferungszustand ist die RATING-Funktion deaktiviert. Nach der Eingabe eines 4-stelligen Codes wird die RATING-Funktion aktiviert und lässt sich auch nur durch die Eingabe des Codes wieder deaktivieren. -
Seite 52: Cdda/Mp3/Wma/Jpeg-Wiedergabe
10. CD/MP3/WMA/JPEG-WIEDERGABE AUSWAHL DES CD/MP3/WMA/JPEG-MODUS ■ Drücken Sie mehrmals die SRC-Taste auf der Fernbedienung oder auf dem Bedienteil, um den CD/MP3/WMA/JPEG-Modus als Wiedergabequelle auszuwählen. ■ Berühren Sie das Icon auf dem Bildschirm, um den CD/MP3/WMA/JPEG-Modus als Wiedergabequelle auszuwählen. ■ Die Bedienung der folgenden Funktionen sind während der Wiedergabe einer DVD, CD oder MP3-Disc nahezu identisch. -
Seite 53: Wiedergabe Von Cdda Discs
DEUTSCH 1. Anzeige der ausgewählten Programmquelle. 2. Name der gerade wiedergegebenen Disc. 3. Name des gerade wiedergegebenen Tracks. 4. Anzeige der Uhrzeit. 5. Berühren Sie das Icon, um die Wiedergabe eines Tracks zu starten bzw. zu pausieren. 6. Berühren Sie das Icon, um die Wiedergabe eines Tracks zu stoppen. - Seite 54 WIEDERGABE VON MP3/WMA DISCS BENUTZEROBERFLÄCHE 1. Anzeige der ausgewählten Programmquelle. 2. Name des gerade wiedergegebenen Ordners. 3. Name des gerade wiedergegebenen Tracks. 4. Anzeige der Uhrzeit. 5. Berühren Sie das Icon, um die Wiedergabe eines Tracks zu starten bzw. zu pausieren.
-
Seite 55: Wiedergabe Von Mp3/Wma Dateien
DEUTSCH WIEDERGABE VON MP3/WMA DATEIEN ■ Nachdem Sie eine MP3/WMA Disc eingelegt haben, werden die darauf gespeicherten Ordner bzw. Tracks nacheinander wiedergegeben. Während der Wiedergabe können Sie die einzelnen Tracks direkt durch drücken einer der numerischen Tasten auf der Fernbedienung oder durch drücken der entsprechenden Icons auf dem Bildschirm auswählen. -
Seite 56: 11. Bedienung Des Sd-Kartenlesers
11. BEDIENUNG DES SD-KARTENLESERS AUSWAHL DES SD-KARTEN-MODUS ■ Drücken Sie mehrmals die SRC-Taste auf der Fernbedienung oder auf dem Bedienteil, um den SD-Kartenleser als Wiedergabequelle auszuwählen. ■ Berühren Sie das Icon auf dem Bildschirm, um den SD-Kartenleser als Wieder- gabequelle auszuwählen. BENUTZEROBERFLÄCHE 1. -
Seite 57: 12. Das Ipod Interface
DEUTSCH 12. DAS IPOD INTERFACE AUSWAHL DES IPOD-MODUS ■ Drücken Sie mehrmals die SRC-Taste auf der Fernbedienung oder auf dem Bedienteil, um den iPod als Wiedergabequelle auszuwählen. ■ Berühren Sie das Icon auf dem Bildschirm, um den iPod als Wiedergabequelle auszuwählen. -
Seite 58: Das Hautmenü
16. Berühren Sie das Icon, um das numerische Tastenfeld auf dem Bildschirm aufzurufen. 17. Berühren Sie das Icon, um das Inhaltsverzeichnis des iPods anzuzeigen. 18. Anzeige des gerade wiedergegebenen Tracks und die Gesamtanzahl der sich im Ordner befindlichen Tracks. 19. Anzeige der abgelaufenen Spielzeit des gerade wiedergegebenen Tracks. 20. -
Seite 59: 13. Das Bluetooth Interface
Icon, um den Bildschirminhalt nach oben zu scrollen. VOR DER INBETRIEBNAHME DER BLUETOOTH-FUNKTION Bevor Sie die Bluetooth-Funktion des ZE-MC192 verwenden können, ist es nötig, die folgenden Schritte zu beachten und auszuführen: 1. Aktivieren Sie die Bluetooth-Funktion im Hauptmenü. Nähere Informationen finden Sie im Abschnitt “SETUP“... -
Seite 60: Der Bluetooth-Indikator
Bluetooth-Verbindung anzeigt. ■ Wenn die Bluetooth-Funktion deaktiviert ist, ist der Indikator grau eingefärbt. ■ Wenn die Bluetooth-Funktion aktiviert ist und kein Mobiltelefon mit dem ZE-MC192 verbunden ist, ist der Indikator blau eingefärbt und blinkt. ■ Wenn die Bluetooth-Funktion aktiviert ist und ein Mobiltelefon mit dem ZE-MC192 verbunden ist, ist der Indikator blau eingefärbt und blinkt nicht. -
Seite 61: Verbinden Mit Einem Mobiltelefon (Pairing)
DEUTSCH VERBINDEN MIT EINEM MOBILTELEFON (PAIRING) ■ Um ein Mobiltelefon mit dem ZE-MC192 zu verwenden, müssen Sie die beiden Geräte vorher miteinander verbinden (Pairing). Aktivieren Sie im Setup den Menüpunkt “Ver- binden“ um ein Mobiltelefon mit dem Gerät zu verbinden. Nachdem auf dem Bildschirm der Schriftzug “Verbindungsaufbau“... -
Seite 62: Ein Telefonat Beginnen
Kombination mit dem ZE-MC192 unterstützen. ANNEHMEN EINES TELEFONATES ■ Wenn die Bluetooth-Funktion aktiviert ist und das Mobiltelefon mit dem ZE-MC192 verbunden ist, schaltet das Gerät im Falle eines eingehenden Telefonates automatisch in den Bluetooth-Modus, unabhängig davon, welcher Wiedergabemodus gerade aktiv ist. -
Seite 63: Bedienung Des Navigationssystems Ze-Na100/150
DEUTSCH 14. BEDIENUNG DES NAVI-SYSTEMS ZE-NA100/150 AUSWAHL DES NAVIGATIONS-MODUS ■ Drücken Sie mehrmals die SRC-Taste auf der Fernbedienung oder auf dem Bedienteil, um das Navigationssystem als Modus auszuwählen. ■ Berühren Sie das Icon auf dem Bildschirm, um das Navigationssystem als Modus auszuwählen. -
Seite 64: 16. Fehlersuche
16. FEHLERSUCHE GENERELLE PROBLEME: Problem Ursache Lösung Das Gerät lässt sich nicht einschalten. 1. Die Sicherung des Gerätes ist defekt. 1. Wechseln Sie die defekte Sicherung aus. 2. Die Fahrzeugsicherung ist defekt. 2. Wechseln Sie die defekte Sicherung aus. 3. Falsche Bedienung. 3. - Seite 65 DEUTSCH TUNER: Problem Ursache Lösung Der Radioempfang ist schlecht. 1. Die automatische Antenne ist nicht 1. Überprüfen Sie entsprechend die vollständig ausgefahren. Installation bzw. die Verkabelung der automatischen Antenne. 2. Die automatische Antenne ist nicht 2. Überprüfen Sie entsprechend die richtig angeschlossen.
-
Seite 66: Eingabe Des Sicherheitscodes
Das Gerät ist gesperrt und es 1. Der Sicherheitscode wurde dreimal 1. Wenden Sie sich direkt an den ZENEC- ist nicht länger möglich, einen hintereinander falsch eingegeben. Aus Händler, bei welchem Sie das Gerät Sicherheitscode einzugeben. -
Seite 67: 17. Spezifikationen
DEUTSCH 17. SPEZIFIKATIONEN CEA power ratings Main amplifier Power output: 35 Watts RMS x 4 channels into 4 Ohms @ < 10% THD+N Signal to noise ratio: 70dBA below reference. (Reference: 1 Watt, 4 Ohms) MAX power: 50 x 4 Watts into 4 Ohms, all channels driven Frequency response: 20Hz to 20kHz, -3dB. - Seite 68 AM tuner section Tuning range: 530kHz – 1710kHz Sensitivity (–20dB): 20dBu Signal to noise ratio @ 1kHz: 50dB Image rejection: 60dB Frequency response: 50Hz – 2kHz, –3dB Monitor section Screen size: 7" (measured diagonally). Screen type: TFT Liquid Crystal Display (LCD) active matrix Response time: 30mSec rise time, 50mSec fall time Resolution, DVD/Composite Video in: 336'960 sub pixels, 1440mm (W) x 234mm (H)
- Seite 69 DEUTSCH...
- Seite 133 ENGLISH...
-
Seite 134: Garantieeinschränkungen
2 YEARS LIMITED WARRANTY Dear customer Thank you for purchasing this ZENEC product. It is advisable to keep the original packing material for any future transporting of the product. Should your ZENEC product require warranty service, please return it to the retailer from whom it was purchased or the distributor in your country.