Inhaltsverzeichnis
Werbung
Verfügbare Sprachen
Verfügbare Sprachen
Quicklinks
Werbung
Kapitel
Inhaltsverzeichnis

Verwandte Anleitungen für Zehnder ComfoAir XL Eco 800 CFE


Inhaltszusammenfassung für Zehnder ComfoAir XL Eco 800 CFE
- Seite 1 ComfoAir XL ComfoAir Eco ComfoAir XL Eco Installatie handleiding Installer manual Installationsanleitung Manuel de l’installateur Manuale installatore Instrukcja obsługi dla instalatora Heating Cooling Fresh Air Clean Air...
- Seite 2 Alle rechten voorbehouden. Bij de samenstelling van deze handleiding is uiterste zorg betracht, de uitgever kan echter niet verantwoordelijk worden gehouden voor enige schade ontstaan door het ontbreken of onjuist vermelden van informatie in deze handleiding. In geval van onenigheid is de Nederlandse tekst leidend. 2 - NL...
-
Seite 3: Inhaltsverzeichnis
Inhoudsopgave Inhoudsopgave ................................. 3 Voorwoord ..................................4 1 Inleiding en veiligheid ..............................4 2 Transport en uitpakken ..............................5 3 Installatievoorwaarden en maatschetsen ........................5 4 ComfoAir samenstelling ............................... 6 5 Installatie ..................................7 5.1 Hijsinstructies ............................... 7 5.2 Plaatsing en montage ............................7 5.3 Aansluiting van de luchtkanalen .......................... -
Seite 4: Voorwoord
Voorwoord Veiligheidsvoorschriften Neem steeds de veiligheidsvoorschriften in deze handleiding in acht. Indien de Lees de handleiding vóór gebruik zorgvuldig veiligheidsvoorschriften, waarschuwingen, door. opmerkingen en instructies niet worden opgevolgd kan dit leiden tot persoonlijk letsel of schade aan de De handleiding bevat alle informatie die bijdraagt ComfoAir. -
Seite 5: Transport En Uitpakken
De ComfoAir wordt in de volgende groottes De maatschets van de ComfoAir bevindt zich tussen geleverd: de technische specificatiebladen. ComfoAir XL Eco 800 CFE ComfoAir XL Eco 3300 CFE ComfoAir XL Eco 1500 CFE ComfoAir XL Eco 4400 CFE ComfoAir XL Eco 2200 CFE... -
Seite 6: Comfoair Samenstelling
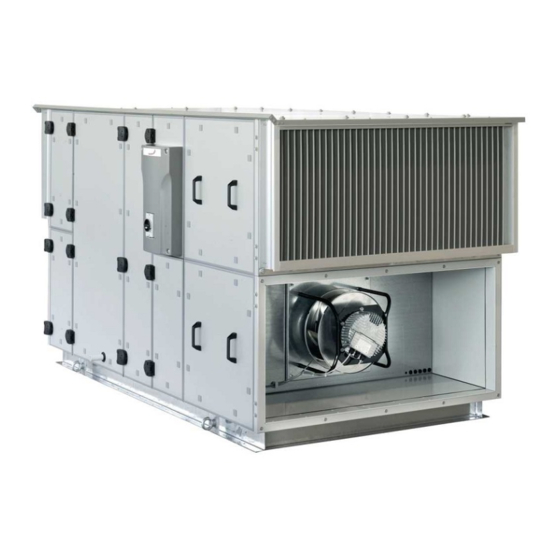
4 ComfoAir samenstelling De ComfoAir bestaat standaard uit de volgende onderdelen: ■ 2 Filters (A) voor de luchtzuivering, type F7 voor de buitenlucht en type G4 voor de retourlucht; ■ Platenwisselaar (C) voor de warmteterugwinning; ■ Werkschakelaar (D) voor het veilig installeren en onderhouden van de ComfoAir; ■... -
Seite 7: Installatie
■ Monteer een afdoende geluidsdemper direct op de toevoer- en retouraansluitingen. Voor advies hierover kunt u contact opnemen met Zehnder. ■ Verwijder na plaatsing de hijsogen. 5.2 Plaatsing en montage 1. De ComfoAir op hoogte en waterpas stellen. - Seite 8 Binnenopstelling (I) Linker uitvoering Rechter uitvoering Buitenopstelling (O) Linker uitvoering Rechter uitvoering Platenwisselaar Koudwaterbatterij Luchtinrichting (Optioneel) Bypassklep Warmwaterbatterij Druppelvanger (Optioneel) Filter Ventilator Lekbak met condensafvoer ODA = Buitenlucht EHA = Afvoerlucht ETA = Retourlucht SUP = Toevoerlucht 8 - NL...
-
Seite 9: Aansluiting Van De Condensafvoer
5.4 Aansluiting van de 5.5 Elektrische aansluitingen condensafvoer De ComfoAir dient aangesloten te worden conform de nationale normen en de plaatselijk geldende De platenwisselaar en koudwaterbatterij zijn ieder voorschriften. in een eigen lekbak geplaatst. Op de lekbak van de platenwisselaar is standaard een ingebouwde De werkschakelaar heeft een hangslot vergrendeling. -
Seite 10: In Bedrijf Nemen
■ Het inspecteren en (indien nodig) reinigen van de bestand met de standaard fabrieksinstellingen te platenwisselaar; verkrijgen bij Zehnder. Dit digitaal bestand kan met ■ Het inspecteren en (indien nodig) reinigen van de speciale uitleessoftware in de ComfoAir worden ventilatoren;... -
Seite 11: Filter Vervangen
7.1 Filter vervangen 7.3 Luchtkanalen inspecteren en Hoe vaak het filter moet worden vervangen is reinigen afhankelijk van de omstandigheden. Inspecteer de luchtkanalen minimaal elke 4 Vervang het filter minimaal één maal per jaar. jaar. Vervang de filters alleen door originele Voer de volgende controles uit op de luchtkanalen: exemplaren van de fabrikant. -
Seite 12: Platenwisselaar Inspecteren En Reinigen
7.5 Platenwisselaar inspecteren en 7.7 Batterij(en) inspecteren en reinigen reinigen Inspecteer minimaal één maal per jaar de Inspecteer minimaal één maal per jaar de platenwisselaar batterij(en). 1. Verwijder de spanning van de ComfoAir. 1. Verwijder de spanning van de ComfoAir. 2. -
Seite 13: Technische Specificaties
De fabrikant garandeert de ComfoAir voor een toepassing in een “balansventilatiesysteem” met periode van 24 maanden na installatie tot een warmteterugwinning van Zehnder. Elk ander gebruik maximum van 30 maanden na productie- wordt gezien als onbedoeld gebruik en kan leiden datum van de ComfoAir. -
Seite 14: I Installatie Rapport
Installatie rapport Activiteit Paraaf Controleer de behuizing op beschadigingen. Controleer de kitnaden op scheuren. Controleer of de deuren en luiken gesloten zijn voor opstarten. Controleer of de aarding volgens voorschriften is aangelegd. Controleer of de batterij(en) goed zijn aangesloten. Controleer of de batterij(en) niet lekken. Controleer de vorstthermostaat op een goede werking (indien aanwezig). -
Seite 15: Onderhoud Log
II Onderhoud log 3 maanden na installatie: Activiteit Controle (vlak)filter (drukval, beschadigingen en afdichting). 6 maanden na installatie: Activiteit Controle (vlak)filter (drukval, beschadigingen en afdichting). Controle buitenplaten van de buitenopstelling (vuil en beschadigingen). Controle deurrubbers (scheuren). Controle servomotoren van de kleppen (werking). 9 maanden na installatie: Activiteit Controle (vlak)filter (drukval, beschadigingen en... - Seite 16 3 maanden na installatie: Activiteit Controle (vlak)filter (drukval, beschadigingen en afdichting). 6 maanden na installatie: Activiteit Controle (vlak)filter (drukval, beschadigingen en afdichting). Controle buitenplaten van de buitenopstelling (vuil en beschadigingen). Controle deurrubbers (scheuren). Controle servomotoren van de kleppen (werking). 9 maanden na installatie: Activiteit Controle (vlak)filter (drukval, beschadigingen en afdichting).
- Seite 17 Datum Activiteit Paraaf NL - 17...
- Seite 18 All rights reserved. This manual has been compiled with the utmost care. However, the publisher cannot be held liable for any damage caused as a result of missing or incorrect information in this manual. In case of disputes the Dutch version of these instructions will be binding. 18 - EN...
-
Seite 19: Inhaltsverzeichnis
Table of contents Table of contents ................................19 Foreword ..................................20 1 Introduction and safety .............................. 20 2 Transport and unpacking ............................21 3 Installation conditions and dimensional sketches ....................21 4 ComfoAir composition ..............................22 5 Installation ................................... 23 5.1 Hoisting instructions ............................ -
Seite 20: Foreword
Foreword 1 Introduction and safety This manual is intended for fitters and engineers who fit and maintain the ComfoAir XL, ComfoAir Read this manual carefully before use. Eco and ComfoAir XL Eco, hereinafter referred to as ComfoAir. This manual contains all information required for safe and optimal installation, operation and maintenance Ensure that the engineer can locate this manual of the ComfoAir XL, ComfoAir Eco and ComfoAir XL... -
Seite 21: Transport And Unpacking
The ComfoAir dimension sketch is located between the technical specification sheets. The ComfoAir is supplied in the following sizes: ComfoAir XL Eco 800 CFE ComfoAir XL Eco 3300 CFE ComfoAir XL Eco 1500 CFE ComfoAir XL Eco 4400 CFE... -
Seite 22: Comfoair Composition
4 ComfoAir composition As standard, the ComfoAir comprises the following elements: ■ 2 Filters (A) for air cleaning, type F7 for outside air and type G4 for exhaust air; ■ Plate exchanger (C) for heat recovery; ■ Primary circuit-breaker (D) for safe installation and maintenance of the ComfoAir; ■... -
Seite 23: Installation
■ Fit an adequate silencer directly to the supply and exhaust connectors. For relevant advice, please contact Zehnder. ■ Remove the hoisting lugs after placing the unit. 5.2 Installation and fitting 1. Set the height of the ComfoAir and ensure it stands level. - Seite 24 Indoor set-up (I) Left-hand version Right-hand version Outdoor set-up (O) Left-hand version Right-hand version Plate exchanger Cold water battery Air direction (option) Bypass Hot water battery Drip collectors (Option) Filter Condensate tray with condensation drain ODA = Outside air EHA = Exhaust air ETA = Extract air SUP = Supply air 24 - EN...
-
Seite 25: Connecting The Condensation Drain
5.4 Connecting the condensation 5.5 Electrical connections drain The connection must comply with national equivalent CEN standards and the locally applicable The plate exchanger and cold water battery must regulations. each be placed in a condensate tray. The plate exchanger condensate tray features a fitted The operating switch can be locked with a padlock. -
Seite 26: Commissioning
■ Inspecting and (where necessary) cleaning the air Zehnder. This digital file can be loaded using the ducts; special control software in the ComfoAir. ■ Inspecting and (where necessary) cleaning the ComfoAir casing;... -
Seite 27: Replacing Filters
7.1 Replacing filters 7.3 Inspecting and cleaning the air The replacement period of the filter depends on local ducts circumstances. Inspect the air ducts at least every four Replace the filter (at least) once every six years. months. Carry out the following checks on the air ducts: Filters must be replaced with the original ■... -
Seite 28: Inspecting And Cleaning The Plate Exchanger
7.5 Inspecting and cleaning the 7.7 Inspecting and cleaning the plate exchanger battery or batteries Inspect the plate exchanger at least once a Inspect the battery or batteries at least once year. a year. 1. Disconnect the ComfoAir from its power supply. 1. -
Seite 29: Technical Specifications
24 months after fitting Zehnder heat recovery systems. Any other up to a maximum of 30 months after the date of application is seen as inappropriate use and can manufacture. -
Seite 30: I Installation Report
Installation report Activity Initials Check the internal and external plating for damage. Check the sealant beads for splitting. Check if the doors/hatches are closed before starting. Check the earthing is according to guidelines. Check if the battery or batteries are connected correctly. Check if the battery or batteries are not leaking. - Seite 31 2 or 3 months after installation: Activity Check (flat)filter (pressure drop, damage and seal). 6 months after installation: Activity Check (flat)filter (pressure drop, damage and seal). Check the outdoor plating of the outdoor assembly (soiling and damage). Check the draught excluders (splitting). Check the servo motors of the valves (functioning).
- Seite 32 Date Activity Initials 32 - EN...
- Seite 33 Alle Rechte vorbehalten. Die Zusammenstellung dieser Bedienungsanleitung erfolgte mit größter Sorgfalt. Dennoch haftet der Herausgeber nicht für Schäden aufgrund von fehlenden oder nicht korrekten Angaben in dieser Bedienungsanleitung. Bei Meinungsverschiedenheiten ist der Niederländische Originaltext letztendlich verbindlich. DE - 33...
- Seite 34 Inhaltsverzeichnis Vorwort ................................... 35 1 Einleitung und Sicherheit ............................35 2 Transport und Auspacken ............................36 3 Installationsvoraussetzungen und Maßskizzen ....................... 36 4 Zusammensetzung ComfoAir ............................ 37 5 Installation ................................... 38 5.1 Hinweise zum Anheben ............................38 5.2 Aufstellung und Montage ............................ 38 5.3 Anschluss der Luftkanäle ............................
-
Seite 35: Vorwort
Vorwort Sicherheitsvorschriften Beachten Sie jederzeit die Sicherheitsvorschriften in dieser Anleitung. Eine Nichtbeachtung der Lesen Sie sich die Anleitung vor Gebrauch Sicherheitsvorschriften, Warnungen, Hinweise aufmerksam durch. und Anweisungen kann zu Personenschäden oder Schäden am ComfoAir führen. Diese Anleitung enthält alle Informationen, die zu ■... -
Seite 36: Transport Und Auspacken
Eine Maßskizze des ComfoAir liegt den technischen Spezifikationsblättern bei. Das ComfoAir ist in den folgenden Größen erhältlich: ComfoAir XL Eco 800 CFE ComfoAir XL Eco 3300 CFE ComfoAir XL Eco 1500 CFE ComfoAir XL Eco 4400 CFE ComfoAir XL Eco 2200 CFE ComfoAir XL Eco 6000 CFE Bedeutung der Zusätze:... -
Seite 37: Zusammensetzung Comfoair
4 Zusammensetzung ComfoAir Das ComfoAir besteht aus folgenden Elementen: ■ 2 Filter (A) zur Luftfilterung, Typ F7 für die Außenluft und Typ G4 für die Abluft; ■ Plattenwärmetauscher (C) zur Wärmerückgewinnung; ■ Betriebsschalter (D) zur sicheren Installation und Wartung des ComfoAir; ■... -
Seite 38: Installation
Funktion des Systems; ■ Bringen Sie direkt an den Zu- und Abluftleitungen geeignete Schalldämpfer an. Empfehlungen dazu erhalten Sie von der Firma Zehnder. ■ Entfernen Sie nach der Platzierung die Hubösen. 5.2 Aufstellung und Montage 1. Das ComfoAir auf die richtige Höhe und waagrecht stellen. - Seite 39 Innenmontage (I) Linksseitige Ausführung Rechtsseitige Ausführung Außenmontage (O) Linksseitige Ausführung Rechtsseitige Ausführung Plattenwärmetauscher Kaltwasserbatterie Luftrichtung Bypass Warmwasserbatterie Lüfterblende (optional) Filter Ventilator Ablaufblech mit Kondensatablauf ODA = Außsenluft EHA = Fortluft ETA = Abluft SUP = Zuluft DE - 39...
-
Seite 40: Anschluss Des Kondensatablaufs
5.4 Anschluss des 5.5 Elektrische Anschlüsse Kondensatablaufs Das Gerat ist gemäß den nationalen Normen und den jeweils vor Ort geltenden Vorschriften anzuschließen. Plattenwärmetauscher und Kaltwasserbatterie sind jeweils in einem eigenen Tropfbehälter montiert. Der Betriebsschalter ist mit einem Vorhängeschloss Am Tropfbehälter des Plattenwärmetauschers ist gesichert. -
Seite 41: Inbetriebnahme
Gehäuse finden. Daneben ■ Plattenwärmetauscher inspizieren und ggf. ist es möglich, eine digitale Datei mit den reinigen; Standardwerkseinstellungen bei Zehnder anzufragen. ■ Ventilatoren inspizieren und ggf. reinigen; Diese digitale Datei kann mit einer speziellen ■ Batterie(n) inspizieren und ggf. reinigen. -
Seite 42: Filter Ersetzen
7.1 Filter ersetzen 7.3 Luftkanäle inspizieren und Wie häufig der Filter ersetzt werden muss, hängt von reinigen den Betriebsbedingungen ab. Luftkanäle mindestens alle 4 Jahre Ersetzen Sie (mindestens) einmal inspizieren. halbjährlich den Filter. Die Luftkanäle sind auf folgende Punkte hin zu Ersetzen Sie die Filter nur durch originale überprüfen: Exemplare des Herstellers. -
Seite 43: Plattenwärmetauscher Inspizieren Und Reinigen
7.5 Plattenwärmetauscher 7.7 Batterie(n) inspizieren und inspizieren und reinigen reinigen Plattenwärmetauscher mindestens einmal Batterie(n) mindestens einmal pro Jahr pro Jahr inspizieren. inspizieren. 1. Entfernen Sie die Spannung vom ComfoAir. 1. Entfernen Sie die Spannung vom ComfoAir. 2. Öffnen Sie die Wartungstür zum 2. -
Seite 44: Technische Spezifikationen
■ Das Gerät nicht entsprechend den Anweisungen ■ Normaler Verschleiß. installiert wird; ■ Nicht vom Hersteller gelieferte Teile eingebaut werden; EWG-Konformitätserklärung Zehnder Group Nederland B.V. Lingenstraat 2 8028 PM Zwolle-NL Tel.: +31 (0)38-4296911 Fax: +31 (0)38-4225694 Handelsregister Zwolle 05022293 EWG-Konformitätserklärung Bezeichnung des Geräts:... -
Seite 45: I Installationsbericht
Installationsbericht Aktivität Unterschrift Überprüfen Sie das Gehäuse auf Beschädigungen. Überprüfen Sie die Kittnahte auf Risse. Überprüfen Sie ob alle Türen und Luken vor dem Einschalten geschlossen sind. Überprüfen Sie das die Erdung korrekt, gemäß Vorschriften installiert ist. Überprüfen Sie ob die Batterie(n) korrekte angeschlossen ist. Überprüfen Sie ob die Batterie(n) nicht lecken. -
Seite 46: Wartungslog
II Wartungslog 3 Monaten nach Installation Aktivität Kontrolle (Flachen)Filter (Druckabfall, Beschädigungen und Abdichtung). 6 Monaten nach Installation Aktivität Kontrolle (Flachen)Filter (Druckabfall, Beschädigungen und Abdichtung). Kontrolle Gehäuse von Außenmontage (Schmutzablagerungen und Beschädigungen). Kontrolle Türgummis (Risse). Kontrolle Servomotoren von Ventilen (Funktion). 9 Monaten nach Installation Aktivität Kontrolle (Flachen)Filter (Druckabfall, Beschädigungen und Abdichtung). - Seite 47 3 Monaten nach Installation Aktivität Kontrolle (Flachen)Filter (Druckabfall, Beschädigungen und Abdichtung). 6 Monaten nach Installation Aktivität Kontrolle (Flachen)Filter (Druckabfall, Beschädigungen und Abdichtung). Kontrolle Gehäuse von Außenmontage (Schmutzablagerungen und Beschädigungen). Kontrolle Türgummis (Risse). Kontrolle Servomotoren von Ventilen (Funktion). 9 Monaten nach Installation Aktivität Kontrolle (Flachen)Filter (Druckabfall, Beschädigungen und Abdichtung).
- Seite 48 Datum Aktivität Unterschrift 48 - DE...
- Seite 49 Tous droits reserves. Ce manuel a ete compose avec le plus grand soin. L‘editeur ne peut neanmoins pas etre tenu responsable de dommages decoulant d‘informations manquantes ou erronees dans ce manuel. En cas de différend, seule la version néerlandaise de ce mode d’emploi est contraignante. FR - 49...
- Seite 50 Table des matieres Avant-propos ................................. 51 1 Introduction et sécurité .............................. 51 2 Transport et déballage ............................... 52 3 Conditions d’installation et croquis cotés ........................ 52 4 Configuration du ComfoAir ............................53 5 Installation ................................... 54 5.1 Instructions de levage ............................54 5.2 Pose et montage ..............................
-
Seite 51: Avant-Propos
Avant-propos Consignes de sécurité Observez toujours les consignes de sécurité contenues dans ce manuel. Le non respect des Lisez attentivement le manuel avant consignes de sécurité, des mises en garde, des utilisation. observations et des instructions peut provoquer des blessures corporelles ou des dommages au Le manuel contient toutes les informations ComfoAir. -
Seite 52: Transport Et Déballage
Le ComfoAir est disponible dans les modèles Le Plan d‘encombrement du ComfoAir est compris suivants: dans les fiches de spécifications techniques. ComfoAir XL Eco 800 CFE ComfoAir XL Eco 3300 CFE ComfoAir XL Eco 1500 CFE ComfoAir XL Eco 4400 CFE... -
Seite 53: Configuration Du Comfoair
4 Configuration du ComfoAir Le ComfoAir est composé en standard des éléments suivants: ■ 2 Filtres (A) pour purification d‘air. Classe de filtre : air neuf F7, air repris G4; ■ Echangeur a plaques (C) pour la récupération de chaleur; ■... -
Seite 54: Installation
Si la porte de commande. vous souhaitez des conseils à ce sujet, contactez 3. Enfoncez-y les chevilles (B) (fournies avec Zehnder. l'appareil). 4. Puis mettez en place le bouchon extrémité (C, fourni avec l'appareil). - Seite 55 Montage a l‘interieur (I) Modele gauche Modele droite Montage a l‘exterieur (O) Modele gauche Modele droite Echangeur à plaques Batterie à eau froide Circulation de l‘air (optionnel) Bypass Batterie à eau chaude Bouches d‘aération à lames (optionnel) Filtre Ventilateur Bac collecteur avec évacuation du condensat ODA = Air neuf EHA = Air d‘extraction...
-
Seite 56: Raccordement De Évacuation Du Condensat
5.4 Raccordement de l’evacuation 5.5 Branchements electriques des condensats L‘appareil doit etre raccordé conformément aux normes nationales et aux prescriptions locales en L‘échangeur à plaques et la batterie à eau froide sont vigueur. placés chacun dans un bac collecteur séparé. Le bac collecteur de l‘échangeur à... -
Seite 57: Mise En Service
■ L‘inspection et (si nécessaire) le nettoyage de est également possible de demander un fichier l‘échangeur à plaques ; numérique à Zehnder reprenant les réglages d‘usine. ■ L‘inspection et (si nécessaire) le nettoyage des Ce fichier numérique peut être chargé dans le ventilateurs ;... -
Seite 58: Remplacement Du Filtre
7.1 Remplacement du filtre 5. S’il n’y a plus d’opérations de maintenance à effectuer: La fréquence de remplacement du filtre dépend des Refermez le panneau d‘accès pour l‘entretien et conditions d‘utilisation. remettez le ComfoAir sous tension. Remplacez le filtre (au moins) une fois tous 7.3 Inspection et nettoyage des les six mois. -
Seite 59: Inspection Et Nettoyage De L'échangeur À Plaques
7.5 Inspection et nettoyage de 7.7 Inspection et nettoyage de la l‘échangeur à plaques batterie(s) Inspectez l‘échangeur à plaques au moins Inspectez la/les batterie(s) au moins une fois une fois par an. par an. 1. Mettez le ComfoAir hors tension. 1. -
Seite 60: Specifications Techniques
Conditions de garantie utilisation dans un système de ventilation équilibré Le fabricant garantit le ComfoAir pour une période avec récupération de chaleur de Zehnder. Tout autre allant de 24 mois après l’installation jusqu’à un usage est considéré comme usage impropre et peut maximum de 30 mois après la date de fabrication... -
Seite 61: I Raport D'installation
Raport d’installation Activité Paraphe Vérifiez les dommages sur l’enveloppe. Vérifiez les joints et l’étanchéité. Vérifiez les portes sont fermées avant la mise en marche. Vérifiez que la mise à la terre est conforme. Vérifiez que les batteries sont bien connectées. Vérifiez que les batteries sont étanches. -
Seite 62: Journal De Maintenance
II Journal de maintenance 3 mois après l‘installation: Activité Contrôle (plaques)filtre (chute de pression, dommages et étanchéité). 6 mois après l‘installation: Activité Contrôle (plaques)filtre (chute de pression, dommages et étanchéité). Contrôle revêtement externe en tôle de montage a l'exterieur (accumulation de salissures et dommages). Contrôle joint de porte (fissures). - Seite 63 3 mois après l‘installation: Activité Contrôle (plaques)filtre (chute de pression, dommages et étanchéité). 6 mois après l‘installation: Activité Contrôle (plaques)filtre (chute de pression, dommages et étanchéité). Contrôle revêtement externe en tôle de montage a l'exterieur (accumulation de salissures et dommages). Contrôle joint de porte (fissures).
- Seite 64 Date Activité Paraphe 64 - FR...
- Seite 65 Tutti i diritti riservati. La presente documentazione e stata redatta con la massima attenzione. L‘editore non puo comunque essere ritenuto responsabile di eventuali danni derivanti dalla mancanza o dall‘inesattezza delle informazioni qui fornite. In caso di disaccordo, il testo olandese leader. IT- 65...
- Seite 66 Sommario Premessa ..................................67 1 Introduzione e sicurezza ............................67 2 Trasporto e rimozione dell’imballo ..........................68 3 Condizioni di installazione e disegni quotati ......................68 4 ComfoAir configurazione ............................69 5 Installazione ................................70 5.1 Istruzioni per il sollevamento ..........................70 5.2 Posizionamento e montaggio ..........................
-
Seite 67: Premessa
Premessa Norme di sicurezza Rispettare sempre le norme di sicurezza contenute in questo manuale. Il mancato rispetto delle norme Leggere attentamente il presente manuale di sicurezza, delle avvertenze, dei commenti e delle prima dell’utilizzo del prodotto. istruzioni, potrebbe provocare lesioni personali o danni al ComfoAir. -
Seite 68: Trasporto E Rimozione Dell'imballo
Il disegno quotato del ComfoAir si trova fra le schede Il ComfoAir è disponibile nelle seguenti dimensioni: con le specifiche tecniche. ComfoAir XL Eco 800 CFE ComfoAir XL Eco 3300 CFE ComfoAir XL Eco 1500 CFE ComfoAir XL Eco 4400 CFE... -
Seite 69: Comfoair Configurazione
4 ComfoAir configurazione La versione standard del ComfoAir è costituita dai seguenti componenti: ■ 2 filtri (A) per la depurazione dell‘aria, del tipo F7 per l‘aria esterna e del tipo G4 per l‘aria di ritorno; ■ Scambiatore a piastre (C) per il recupero di calore; ■... -
Seite 70: Installazione
■ Montare un silenziatore adeguato direttamente 3. Inserirvi i tappi di chiusura (B) (forniti in sui collegamenti di immissione e ritorno. Per una dotazione). consulenza, è possibile contattare Zehnder. 4. Posizionare il cappuccio di protezione (C) (fornito in dotazione). 5. Bloccare cerniere/serrature. - Seite 71 Installazione all’interno interno (I) Versione sinistra Versione destra Installazione all’esterno (O) Versione sinistra Versione destra Scambiatore a Batteria ad Direzione d‘aria piastre acqua fredda (opzionale) Bypass Batteria ad Schermi acqua calda (opzionale) Filtri Ventilatori Vassoio di raccolta con scarico condensa ODA = Esterna EHA = Scarico ETA = Ritorno...
-
Seite 72: Collegamento Dello Scarico Condensa
5.4 Collegamento dello scarico 5.5 Collegamenti elettrici condensa Il collegamento deve essere conforme alle norme nazionali e alle norme applicate a livello locale. Lo scambiatore a piastre e la batteria ad acqua fredda sono collocati nei rispettivi vassoi di raccolta L‘interruttore di servizio ha un meccanismo di blocco condensa. -
Seite 73: Messa In Funzione
■ Controllo e pulizia del sifone interno (se specifica cassa. È anche possibile richiedere a necessario); Zehnder un file con le impostazioni di fabbrica ■ Controllo e pulizia dei condotti dell’aria (se standard. Questo file può essere caricato mediante necessario);... -
Seite 74: Sostituzione Filtro
7.1 Sostituzione filtro 7.3 Controllo e pulizia del condotti La frequenza di sostituzione del filtro dipende dalle dell’aria condizioni. Controllare i condotti dell’aria almeno una Sostituire il filtro (almeno) una volta ogni sei volta ogni 4 anni. mesi. Effettuare i seguenti controlli sui condotti dell’aria: Sostituire i filtri esclusivamente con modelli ■... -
Seite 75: Controllo E Pulizia Del Scambiatore A Piastre
7.5 Controllo e pulizia del 7.7 Controllo e pulizia del batteria/e scambiatore a piastre Controllare almeno una volta l‘anno la/le batteria/e. Controllare almeno una volta l‘anno lo scambiatore a piastre. 1. Togliere la corrente dal ComfoAir. 2. Aprire lo sportello per la manutenzione della/e 1. -
Seite 76: Dati Tecnici
24 mesi l’applicazione all’interno di ‘sistemi di ventilazione dall’installazione, fino ad un massimo di 30 mesi bilanciata’ con recupero di calore Zehnder. Qualsiasi dalla data di fabbricazione. Le richieste d’intervento altra applicazione verra considerata come uso... -
Seite 77: Rapporto Di Installazione
Rapporto di installazione Attivita Sigla Controllare eventuali danni sulle carene dell'unità. Controllare le siliconature delle fessure. Controllare che tutti gli sportelli siano chiusi prima di avviare il ComfoAir. Controllare che la messa a terra sia fatta secondo le istruzioni. Controllare il corretto allacciamento alla/e batteria/e. Controllare eventuali perdite della/e batteria/e. -
Seite 78: Log Di Manutenzione
II Log di manutenzione 3 mesi dopo l‘installazione: Attivita Controllo (piatto)filtri (perdite di carico, danni e la guarnizione). 6 mesi dopo l‘installazione: Attivita Controllo (piatto)filtri (perdite di carico, danni e la guarnizione). Controllo del rivestimento esterno di la impianto esterno (depositi di sporco e danni). Controllo delle guarnizioni in gomma (fessure). - Seite 79 3 mesi dopo l‘installazione: Attivita Controllo (piatto)filtri (perdite di carico, danni e la guarnizione). 6 mesi dopo l‘installazione: Attivita Controllo (piatto)filtri (perdite di carico, danni e la guarnizione). Controllo del rivestimento esterno di la impianto esterno (depositi di sporco e danni). Controllo delle guarnizioni in gomma (fessure).
- Seite 80 Data Attivita Sigla 80 - IT...
- Seite 81 Wszelkie prawa zastrzeżone. Niniejsza instrukcja obsługi została sporządzona z najwyższą starannością. Wydawca nie ponosi odpowiedzialności za jakiekolwiek szkody powstałe na skutek nieumieszczenia w niej informacji lub umieszczenia w niej nieprawidłowych informacji. W przypadku sporów wiążąca jest wersja niniejszej instrukcji w języku holenderskim. PL - 81...
- Seite 82 Spis treści Wstęp ....................................83 1 Wprowadzenie ................................83 2 Transport i rozpakowanie ............................84 3 Warunki instalacji oraz rysunki wymiarowe ......................84 4 Budowa centrali wentylacyjnej ComfoAir ......................... 85 5 Montaż ..................................86 5.1 Uwagi dotyczące podnoszenia urządzenia ......................86 5.2 Instalacja i montaż...
-
Seite 83: Wstęp
Wstęp Przepisy dotyczące bezpieczeństwa Należy stosować się do przepisów dotyczących bezpieczeństwa zawartych w niniejszej instrukcji Przed rozpoczęciem eksploatacji urządzenia obsługi. Niestosowanie się do przepisów należy dokładnie zapoznać się z treścią dotyczących bezpieczeństwa, ostrzeżeń, komentarzy niniejszej instrukcji obsługi. i uwag umieszczonych w niniejszej instrukcji obsługi może doprowadzić... -
Seite 84: Transport I Rozpakowanie
Szkic z wymiarami ComfoAir znajduje się pomiędzy kartami z danymi technicznymi. Urządzenia ComfoAir dostarczane są w następujących rozmiarach: ComfoAir XL Eco 800 CFE ComfoAir XL Eco 3300 CFE ComfoAir XL Eco 1500 CFE ComfoAir XL Eco 4400 CFE ComfoAir XL Eco 2200 CFE ComfoAir XL Eco 6000 CFE Objaśnienie oznaczeń:... -
Seite 85: Budowa Centrali Wentylacyjnej Comfoair
4 Budowa centrali wentylacyjnej ComfoAir Standardowo ComfoAir składa się z następujących elementów: ■ 2 filtry (A) służące do oczyszczania powietrza, typu F7 dla powietrza czerpanego z zewnątrz, oraz typu G4 dla powietrza wywiewanego z wewnątrz; ■ Wymiennik płytowy (C) służący do odzysku ciepła; ■... -
Seite 86: Montaż
■ Zamontuj odpowiedni tłumik bezpośrednio 3. Zamontować korki uszczelniające (B) (dostarczone do króćców nawiewu i wywiewu. Aby uzyskać w komplecie). odnośną poradę, należy się skontaktować z firmą 4. Zamontować pokrywę uszczelniającą (C) Zehnder. (dostarczona w komplecie). 5. Blokowanie zawiasów/mocowań. 86 - PL... - Seite 87 Montaż wewnątrz budynku (I) Wersja lewa wersja prawa Montaż zewnątrz budynku (O) Wersja lewa wersja prawa Wymiennik płytowy Chłodnica wodna Przepływ powietrza (Opcja) Bypass Nagrzewnica wodna Żaluzja (Opcja) Filtr Wentylator Taca ociekowa z odpływem skroplin ODA = Czerpnia EHA = Wyrzutnia ETA = Wywiew SUP = Nawiew PL - 87...
-
Seite 88: Podłączanie Odpływu Skroplin
5.4 Podłączanie odpływu skroplin 5.5 Podłączenie elektryczne Zarówno płytowy wymiennik ciepła, jak i chłodnicę Comfoair należy podłączać zgodnie z ogólnymi wodną trzeba umieścić w tacy ociekowej. Taca przepisami bezpieczeństwa, jak również z ogólnie ociekowa płytowego wymiennika ciepła jest znanymi zasadami techniki. standardowo wyposażona w zamontowany syfon membranowy. -
Seite 89: Pierwsze Uruchomienie
■ Kontrola i (w razie potrzeby) czyszczenie konkretnej skrzynki. Alternatywnie można poprosić wentylatorów; firmę Zehnder o przesłanie pliku z ustawieniami ■ Kontrola i (w razie potrzeby) czyszczenie fabrycznymi. Można wgrać plik z danymi do chłodnicy/nagrzewnicy. -
Seite 90: Wymiana Filtrów
7.1 Wymiana filtrów 7.3 Sprawdzenie i czyszczenie Częstotliwość wymiany filtrów zależy od kanałów wentylacyjnych miejscowych warunków. Sprawdzaj kanały wentylacyjne co najmniej Filtr należy wymieniać (co najmniej) raz na co cztery lata. pół roku. Przeprowadź następujące testy kanałów: Zużyte filtry można wymieniać wyłącznie na ■... -
Seite 91: Sprawdzenie I Czyszczenie Wymiennika Płytowego
7.5 Sprawdzenie i czyszczenie 7.7 Sprawdzenie i czyszczenie wymiennika płytowego chłodnicy/nagrzewnicy Sprawdzaj wymiennik płytowy co najmniej Sprawdzaj chłodnice/nagrzenice co najmniej raz w roku. raz w roku. 1. Odłącz zasilanie urządzenia ComfoAir. 1. Odłącz zasilanie urządzenia ComfoAir. 2. Otwórz drzwiczki serwisowe dostępu do 2. -
Seite 92: Dane Techniczne
■ Urządzenie nie zostało zainstalowane zgodnie z ■ Normalnego zużycia i zniszczenia. instrukcjami; ■ Używane są części, które nie zostały dostarczone przez producenta; Deklaracja zgodności WE Zehnder Group Nederland B.V. Lingenstraat 2 8028 PM Zwolle-NL Tel.: +31 (0)38-4296911 Faks.: +31 (0)38-4225694 Rejestr sądowy 05022293 Deklaracja zgodności WE... -
Seite 93: I Raport Z Instalacji
Raport z instalacji Czynność Podpis Sprawdź obudowę urządzenia pod kątem uszkodzeń. Sprawdź uszczelnienia dla klap. Sprawdź czy drzwi/pokrywy są zamknięte przed uruchomieniem. Sprawdźczy uziemienie jest wykonane zgodnie z rzepisami. Sprawdź czy chłodnica/nagrzewnice są prawidłowo podłączone. Sprawdź szczelność chłodnicy/nagrzewnicy. Sprawdź działanie termostatu zabezpieczającego przed zamarzaniem (jeśli występuje). -
Seite 94: Dziennik Czynności Serwisowych
II Dziennik czynności serwisowych 3 miesiące po instalacji: Czynność Sprawdzenie (kasetowy/płaski) filtra (spadek ciśnienia, uszkodzenia i szczelność). 6 miesięcy po instalacji: Czynność Sprawdzenie (kasetowy/płaski) filtra (spadek ciśnienia, uszkodzenia i szczelność). Sprawdzenie obudowy przy montażu zewnętrznym (zanieczyszczenia i uszkodzenia). Sprawdzenie uszczelnienia drzwi (klapy). Sprawdzenie siłowników klap (działanie). - Seite 95 3 miesiące po instalacji: Czynność Sprawdzenie (kasetowy/płaski) filtra (spadek ciśnienia, uszkodzenia i szczelność). 6 miesiące po instalacji: Czynność Sprawdzenie (kasetowy/płaski) filtra (spadek ciśnienia, uszkodzenia i szczelność). Sprawdzenie obudowy przy montażu zewnętrznym (zanieczyszczenia i uszkodzenia). Sprawdzenie uszczelnienia drzwi (klapy). Sprawdzenie siłowników klap (działanie). 9 miesiące po instalacji: Czynność...
- Seite 96 Data Czynność Podpis 96 - PL...
- Seite 100 Great Britain (Russia) Asia Zehnder Comfosystems Sevastopolsky Prospect 11G A division of Zehnder Group UK Ltd (2nd Floor) (China) Unit 1, Brookside Avenue 117152 Moscow Zehnder (China) Rustington West Sussex T +7 495 988 50 15 Indoor Climate Co., Ltd.