Herunterladen Inhalt Inhalt Diese Seite drucken

Werbung

Verfügbare Sprachen
  • DE

Verfügbare Sprachen

  • DEUTSCH, seite 4
Diese Bedienungsanleitung bitte sorgfältig lesen und aufbewahren.
Please read and keep these instuctions.
Veuillez lire attentivement et conserver précieusement cette notice d'utilisation.
Si prega di leggere attentamente e conservare con cura le seguenti istruzioni di funzionamento.
Por favor leer detenidamente y conservar estas instrucciones de manejo.
Пожалуйста, внимательно прочитать и бережно хранить это руководство по эксплуатации.
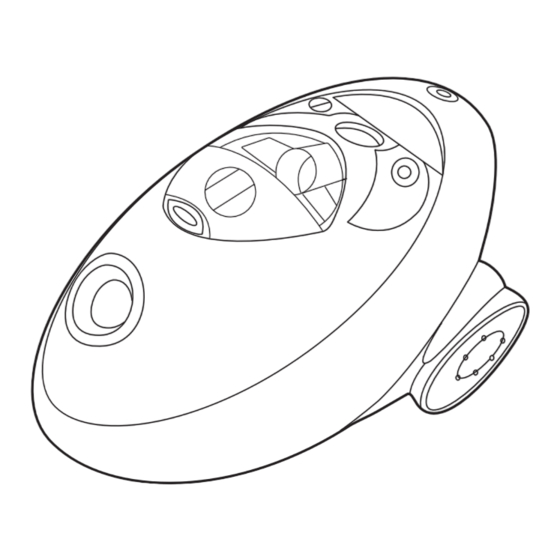
Bodenstaubsauger
Vacuum cleaner
Aspirateur traîneau
Aspirapolvere per pavimenti
Aspiradora rodante
Напольный пылесос
„JOLLY"

Werbung

Inhaltsverzeichnis
loading

Inhaltszusammenfassung für EIO JOLLY Series

  • Seite 1 Diese Bedienungsanleitung bitte sorgfältig lesen und aufbewahren. Please read and keep these instuctions. Veuillez lire attentivement et conserver précieusement cette notice d’utilisation. Si prega di leggere attentamente e conservare con cura le seguenti istruzioni di funzionamento. Por favor leer detenidamente y conservar estas instrucciones de manejo. Пожалуйста, внимательно...
  • Seite 3 Aufbau Accessories you should have: Folgendes Zubehör sollten Sie haben: Features Á Crevice tool with flip action furniture brush ⁄ Schlauchanschluß Á Fugendüse ⁄ Hose inlet Ë Upholstery nozzle ¤ Staubraumdeckel mit Möbelpinsel } im Gerät ¤ Dust compartment cover È...
  • Seite 4 Inbetriebnahme Automatisches Aufrollen Quick start Automatic cable rewind des Kabels 1 Düse, Rohre und Schlauch wie auf Seite 3 dargestellt zusammensetzen. A. 1 Assemble the nozzle, tubes and hose as After use, unplug and press the cable shown on page 3. A. rewind button ‡...
  • Seite 5 Wechsel des Papierbeutels Bei verringerter Saugkraft oder bei andauernd und vollständig roter Anzeige „Staubbeutel voll“ › muß der Staubbeutel gewechsel werden. Außerdem ist zu prüfen, ob Saugschlauch, Rohr oder Düse zugesetzt sind. 1 Staubfachdeckel durch Zurückschieben der Deckel- Entrieglungs-Taste öffnen. D. 2 Staubbeutel Halterung aus der Aufnahme herausheben.
  • Seite 6 Motorschutzfilter Reinigung der Filter Motor protection filter Cleaning the filters Der Filter sollte beim Entleeren des Beutels Filter durch Ausschütteln reinigen. Um die immer gereinigt werden, um angesammelte Leistungsfähigkeit der Filter auch weiter zu ge- The filter should be cleaned everytime the Clean the filters by shaking them.
  • Seite 7 So bringen Sie Ihren neuen Staubsauger zu Höchstleistungen: Lässt die Saugleistung Ihres Staubsaugers nach, dann kontrollieren Sie bitte Folgendes: • Staubbeutel Bei roter Staubbeutelanzeige müssen die Staubbeutel ausgetauscht werden, ansonsten lässt die Saugleistung des Geräts nach. • Filter Die Filter müssen regelmäßig gereinigt bzw. ausgetauscht werden, damit Luft durch das Gerät hindurchströmen kann.
  • Seite 9 Sehr geehrter Kunde, IE HABEN MIT DEM EIN QUALITATIV HOCHWERTIGES AUSHALTSGERÄT ERWORBEN OLLTEN NFRAGEN ODER ROBLEME HABEN WENDEN IE SICH BITTE AN UNSER ERVICETEAM GLEN DIMPLEX DEUTSCHLAND GMBH Otto-Bergner-Str. 28 96515 Sonneberg Telefon: 03675 879-323/383/389 Telefax: 03675 879235 e-mail: servicecenter@glendimplex.de...
  • Seite 11 Accessories you should have: Features Á Crevice tool with flip action furniture brush ⁄ Hose inlet Ë Upholstery nozzle ¤ Dust compartment cover È Dust bag holder ‹ Rubber anti scuff bumper Í Paper dust bag according to the set of ›...
  • Seite 12: Quick Start

    Quick start Automatic cable rewind 1 Assemble the nozzle, tubes and hose as After use, unplug and press the cable shown on page 3. A. rewind button ‡ to retract the cable. 2 Pull out the cable to it’s full length and plug WARNING: When using the cable in to the mains supply.
  • Seite 13: Changing The Dustbag

    Changing the dustbag If suction power is reduced or if the “dust bag full” indicator › is permanently fully red, the dust bag needs changing. Also check whether the suction hose, tube or nozzle are blocked. 1 Open the dust compartment cover by sliding the release button back.
  • Seite 14: Motor Protection Filter

    Motor protection filter Cleaning the filters The filter should be cleaned everytime the Clean the filters by shaking them. To further bag is emptied to remove the fine dust maintain performance, wash them regularly by particles collected. rinsing in warm water and allowing to dry The motor protection filter is in the naturally.
  • Seite 15 getting the best from your new cleaner… If your cleaner isn’t picking up as well as it schould, please check • Dustbags It is important to replace them when the dustbag indicator shows red, otherwise the performance of the cleaner will be impaired. Call our parts helpline. •...
  • Seite 17 Construction Accessories you should have: Features  Filtre de protection du moteur Ê Ouverture du filtre de protection du moteur Á Crevice tool with flip action furniture brush ⁄ Raccordement pour tuyau ⁄ Hose inlet Ë Upholstery nozzle ¤ Couvercle du compartiment pour la pous- Il est conseillé...
  • Seite 18: Mise En Marche

    Mise en marche Enroulement automatique Quick start Automatic cable rewind du câble 1 Emboîtez les buses, tubes et tuyaux comme cela l’est indiqué sur la page 3. A. 1 Assemble the nozzle, tubes and hose as After use, unplug and press the cable shown on page 3.
  • Seite 19 Echange du sac à possière Si la puissance d’ aspiration est réduite ou en cas d’ affichage rouge permanent « sac à pous- sière plein » ›, le sac à poussière doit être rem- placé. De plus, vous devez contrôler si le tuyau, le tube ou la buse sont usés.
  • Seite 20: Nettoyage Du Filtre

    Filtre de protection du Nettoyage du filtre moteur Nettoyez le filtre en le secouant. Afin de garantir la performance du filtre, veuillez le Lors du vidage du sac, le filtre doit toujours rincer régulièrement avec de l’eau chaude et être nettoyé afin d’éliminer de fines particules le faire sécher à...
  • Seite 21 Voici la marche à suivre pour que votre aspirateur atteigne une performance extrême: Si votre aspirateur ne fonctionne plus comme il le devrait, veuillez procéder aux contrôles suiv- ants: • Sac à poussière Si le voyant du sac à poussière est rouge, il est nécessaire de changer le sac, sinon la puissance d’aspiration de l’appareil diminue.
  • Seite 23 Costruzione Accessories you should have: Dovreste avere i seguenti accessori: Features Á ⁄ collegamento tubo Á bocchetta con pennello Crevice tool with flip action furniture brush ⁄ Hose inlet Ë Upholstery nozzle ¤ copertura del vano polvere per mobili } nell’apparecchio ¤...
  • Seite 24: Messa In Funzione

    Messa in funzione Avvolgimento automatico del cavo 1 Montare le bocchette e i tubi come rappre- sentato a pagina 3. A. 2 Estrarre completamente il cavo e collegare Dopo l’uso estrarre la spina ed azionare il tasto ‡ per l’avvolgimento del cavo. alla rete elettrica.
  • Seite 25 Sostituzione del sacchetto di carta In caso di diminuzione della forza di aspira- zione o in presenza della segnalazione continua in rosso «Sacchetto della polvere pieno» ›, è necessario sostituire il sacchetto della polvere. Inoltre occorrerà controllare se il tubo di aspira- zione, il tubo o la bocchetta siano otturati.
  • Seite 26 Filtro di protezione motore Pulizia dei filtri Quando si svuota il sacchetto della polvere Pulire i filtri scotendoli. Per continuare a bisognerebbe anche pulire sempre il filtro per garantire il corretto funzionamento dei filtri, sci- eliminare le particelle di polvere annidatesi. acquarli regolarmente con acqua calda e farli Il filtro di protezione motore Â...
  • Seite 27 Come ottenere il massimo rendimento dal Vostro nuovo aspirapolvere: Se dovesse verificarsi un calo della forza di aspirazione del Vostro aspirapolvere, controllate quanto segue: • Sacchetto della polvere Se la spia del sacchetto della polvere è rossa, è necessario cambiare il sacchetto, altri- menti si comprometterà...
  • Seite 29 Estructura Accessories you should have: Los siguientes accesorios debería de tener: Features Á ⁄ Conexión de tubo flexible Á Tobera de ranuras con Crevice tool with flip action furniture brush ⁄ Hose inlet Ë Upholstery nozzle ¤ Tapa de la cámara de polvo pincel para muebles } en el aparato ¤...
  • Seite 30: Puesta En Marcha

    Puesta en marcha Enrollado automático del cable 1 Ensamblar la tobera, los tubos y el tubo flexi- ble como se ilustra en la página 3. A. 2 Extraer completamente el cable y conectarlo Tras la utilización extraer el cable de la red y accionar la tecla ‡...
  • Seite 31 Cambio de la bolsa de papel En caso de reducción de la potencia de as- piración o una indicación continua y completa de la indicación roja «Bolsa de polvo llena» › se debe cambiar la bolsa de polvo. Además se debe verificar, si el tubo flexible de aspiración, el tubo o la tobera están obstruidos.
  • Seite 32 Filtro de protección del Limpieza de los filtros motor Limpiar los filtros por sacudidas. Para contin- uar garantizando la capacidad de prestación El filtro de protección del motor debe ser del filtro, aclararlo regularmente con agua limpiado siempre que se vacíe la bolsa, para re- caliente y dejar secar al aire.
  • Seite 33 Así obtendrá de su nueva aspiradora la máxima potencia: En caso que disminuya la potencia de aspiración de su aspiradora, por favor controle lo siguiente: • Bolsa de aspiración En caso de que el indicador de bolsa de aspiración indique rojo, debe sustituir la bolsa, en caso contrario disminuye la potencia de aspiración del aparato.
  • Seite 35 Конструкция Следующие принадлежности Вы должны иметь: Accessories you should have: Features Á ⁄ Подключение шланга Á Узкие насадки для щелей Crevice tool with flip action furniture brush ⁄ Hose inlet Ë Upholstery nozzle ¤ Крышка камеры пыли с кистью для мебели } в...
  • Seite 36: Ввод В Эксплуатацию

    Ввод в эксплуатацию Автоматическое наматывание кабеля 1 Собирать как изображено на странице 3 соединить насадку, трубопровода и шланг. A. 2 Кабель вытянуть полностью и подключить к сетевому Вытащить после употребления штепсельную вилку и нажать на кнопку ‡ для наматывания кабеля. питанию.
  • Seite 37 Замена бумажнего пылесборника При уменьшеной силе всасывания или при постоянном и полном красном показании «Пылесборнок заполнен» › необходимо заменить пылесборник. Кроме того нужно проверить не заполнены ли шланг всасывания, трубопровод или насадка . 1 Открыть крышку камеры пыли посредством нажатия кнопки...
  • Seite 38 Защитный фильтр Очистка фильтров электродвигателя Посредством встряхивания очистить фильтры. Чтобы обеспечивать и в дальнейшем При опорожнении сборника должен быть всегда работоспособность фильтров, полоскать регулярно очищен фильтр, чтобы удалить накопленные мелкие теплой водой и сушить на воздухе. частицы пыли. ВНИМАНИЕ: Обратите внимание на то, чтобы Защитный...
  • Seite 39 Так Вы повысите мощность Вашего нового пылесоса до максимума: Если уменьшается мощность всасывания Вашего пылесоса, проверьте, пожалуйста, следующее: • Пылесборник При красном показании пылесборника заменяются пылесборники, иначе уменьшается мощность всасывания прибора. • Фильтр Фильтры должны регулярно очищаться или заменяются, для того чтобы воздух мог насквозь продуваться...

Inhaltsverzeichnis