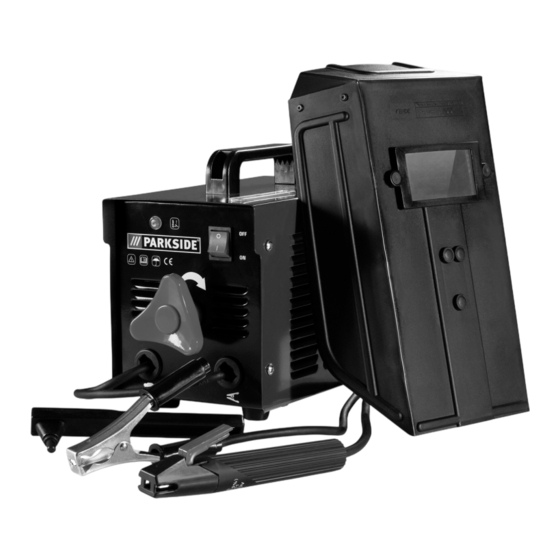
Herunterladen Inhalt Inhalt Diese Seite drucken
Inhaltsverzeichnis

Werbung

Verfügbare Sprachen
  • DE

Verfügbare Sprachen

  • DEUTSCH, seite 53
SOLDADOR ELÉCTRICO PESG 120 A1
SALDATRICE ELETTRICA PESG 120 A1
H
SOLDADOR ELÉCTRICO
Instrucciones de utilización y de seguridad
Manual de instrucciones original
S
MÁQUINA DE SOLDAR ELÉTRICA
Instruções de utilização e de segurança
Manual de instruções original
F A C
ELEKTRO-SCHWEISSGERÄT
Bedienungs- und Sicherheitshinweise
Originalbetriebsanleitung
IAN 85053
Anl_1549055.indb 1
Anl_1549055.indb 1
P Q
SALDATRICE ELETTRICA
Indicazioni per l'uso e per la sicurezza
Istruzioni per l'uso originali
K Q
ARC WELDER
Operation and Safety Notes
Original operating instructions
H P S
17.10.12 16:33
17.10.12 16:33

Werbung

Inhaltsverzeichnis
loading

Inhaltszusammenfassung für Parkside PESG 120 A1

  • Seite 1 SOLDADOR ELÉCTRICO PESG 120 A1 SALDATRICE ELETTRICA PESG 120 A1 SALDATRICE ELETTRICA SOLDADOR ELÉCTRICO Indicazioni per l’uso e per la sicurezza Instrucciones de utilización y de seguridad Istruzioni per l’uso originali Manual de instrucciones original MÁQUINA DE SOLDAR ELÉTRICA ARC WELDER Instruções de utilização e de segurança...
  • Seite 2 Antes de empezar a leer abra la página que contiene las imágenes y, en seguida, familiarícese con todas las funciones del dispositivo. Prima di leggere aprire la pagina con le immagini e prendere confi denza con le diverse funzioni dell’apparecchio. Antes de começar a ler abra na página com as imagens e, de seguida, familiarize-se com todas as funções do aparelho.
  • Seite 3 - 3 - Anl_1549055.indb 3 Anl_1549055.indb 3 17.10.12 16:33 17.10.12 16:33...
  • Seite 4 k,l,m - 4 - Anl_1549055.indb 4 Anl_1549055.indb 4 17.10.12 16:33 17.10.12 16:33...
  • Seite 5: Inhaltsverzeichnis

    Índice de contenidos 1. Introducción ..............................7 2. Instrucciones de seguridad ........................7 3. Descripción del aparato y volumen de entrega ...................10 4. Uso adecuado ............................10 5. Símbolos y características técnicas ......................10 6. Montaje de la pantalla de soldadura ......................1 1 7.
  • Seite 6 Vor Inbetriebnahme Bedienungsanleitung und Sicherheitshinweise lesen und beachten - 6 - ES_1549055.indd 6 ES_1549055.indd 6 23.10.12 08:41 23.10.12 08:41...
  • Seite 7: Introducción

    • 1. Introducción Prestar atención al estado del cable de solda- dura, del portaelectrodos, así como del bor- ne de masa; el desgaste en el aislamiento y ¡Felicidades por la compra de este nuevo apa- en las piezas bajo corriente puede provocar rato! una situación peligrosa y mermar la calidad Al hacerlo se ha decidido por un producto de...
  • Seite 8 en un radio de 15 m. también han de aislar de la humedad. No • Protéjase (también a las personas que se son adecuados los zapatos bajos ya que las encuentren en las inmediaciones) contra los gotas de metal incandescente que caigan posibles efectos peligrosos del arco.
  • Seite 9: Ropa De Protección

    ciones eléctricas puede resultar destruido por Ropa de protección la corriente de soldadura en caso de impru- dencia, p. ej., el borne de masa se coloca en ¡Cuidado! • la carcasa del aparato soldador, el cual está Durante el trabajo, la ropa y la protección unido al conductor protector de la instalación facial ha de proteger al soldador en todo el eléctrica.
  • Seite 10: Descripción Del Aparato Y Volumen De Entrega

    3. Descripción del aparato y 4. Uso adecuado volumen de entrega Con el soldador eléctrico se pueden soldar distin- tos tipos de metal utilizando los electrodos revesti- 3.1 Descripción del aparato (fi g. 1) dos correspondientes. 1. Asa de transporte 2.
  • Seite 11: Montaje De La Pantalla De Soldadura

    40A/19,6V - 80 A/21,2 V Tensión de red: .......230 V ~ 50 Hz Corriente máxima de soldadura y la correspon- Corriente de soldadura (A) diente tensión de trabajo [A/V] normalizada si cos Ê = 0,73: ........... 40 - 80 ø (mm) ......1,6 ...2,0 ...2,5 Ø...
  • Seite 12: Preparación Para Soldadura

    en cada lado (fig. 6/4.) Este es el mejor método de encender el arco • Una vez unidas las dos esquinas superiores voltaico. de la pantalla de soldadura, según se mues- Ensayar sobre una pieza de prueba para com- tra en la fig. 7, introducir los tornillos para el probar que se ha elegido la intensidad de corri- asidero (p) desde fuera en las 3 perforacio- ente y electrodo apropiados.
  • Seite 13: Transporte

    10. Transporte 14. Eliminación y reciclaje A la hora de transportar el soldador es preciso El aparato está protegido por un embalaje para primero desenchufarlo de la red eléctrica y quitar evitar daños producidos por el transporte. Este el borne de masa de la pieza. A continuación, embalaje es materia prima y, por eso, se puede enrollar el cable de forma adecuada.
  • Seite 14: Esquema De Conexiones

    15. Esquema de conexiones - 14 - ES_1549055.indd 14 ES_1549055.indd 14 23.10.12 08:41 23.10.12 08:41...
  • Seite 15: Declaración De Conformidad

    EU-direktivet og a cikkekhez az EU-irányvonal és Normák szerint a standarder for artikkel következő konformitást jelenti ki Lýsir uppfyllingu EU-reglna og annarra staðla vöru Elektro-Schweißgerät PESG 120 A1 (Parkside) 87/404/EC_2009/105/EC 2006/42/EC Annex IV 2005/32/EC_2009/125/EC Notifi...
  • Seite 16: Certifi Cado De Garantía

    17. Certifi cado de garantía Estimado cliente: Nuestros productos están sometidos a un estricto control de calidad. No obstante, lamentaríamos que este aparato dejara de funcionar correctamente, en tal caso, le rogamos que se dirija a nuestro servicio de atención al cliente en la dirección indicada en la parte inferior de la presente tarjeta de garantía.
  • Seite 17 IT/MT Indice 1. Introduzione .............................. 19 2. Avvertenze di sicurezza ........................... 19 3. Descrizione dell’apparecchio ed elementi forniti ...................22 4. Utilizzo proprio ............................22 5. Simboli e caratteristiche tecniche ......................22 6. Montaggio della visiera protettiva per saldatura .................23 7. Operazioni preliminari alla saldatura .....................24 8.
  • Seite 18 IT/MT Prima della messa in esercizio leggete e osservate le istruzioni per l’uso e le avvertenze di sicurezza. - 18 - Anl_1549055.indb 18 Anl_1549055.indb 18 17.10.12 16:33 17.10.12 16:33...
  • Seite 19: Introduzione

    IT/MT • 1. Introduzione Fate attenzione allo stato del cavo per salda- tura, del portaelettrodo nonché dei morsetti di massa; l’usura dell’isolamento e delle parti Complimenti per aver acquistato questo nuovo che conducono corrente possono essere fonte apparecchio. di rischio e ridurre la qualità del lavoro di sal- Avete scelto un prodotto di alta qualità.
  • Seite 20 IT/MT morte. gano anche in caso di umidità. Le scarpe • Non avvicinatevi direttamente all’arco voltai- basse non sono adatte, dato che le gocce di co nel raggio di 15 m. metallo incandescente che cadono possono • Proteggete voi stessi (e le persone vicine) provocare ustioni.
  • Seite 21: Indumenti Protettivi

    IT/MT è collegato con il conduttore di protezione Indumenti protettivi dell’impianto elettrico. I lavori di saldatura vengono effettuati su un apparecchio con at- Attenzione! • tacco del conduttore di protezione. È dunque Durante il lavoro il saldatore deve essere possibile eseguire operazioni di saldatura protetto in ogni parte del corpo da radiazioni sull’apparecchio senza avere applicato il e ustioni mediante indumenti e dispositivi di...
  • Seite 22: Descrizione Dell'apparecchio Ed Elementi Forniti

    IT/MT 3. Descrizione dell’ apparecchio 4. Utilizzo proprio ed elementi forniti Con la saldatrice elettrica è possibile saldare di- versi metalli utilizzando i rispettivi elettrodi rivestiti. 3.1 Descrizione dell’ apparecchio (Fig. 1) 1. Maniglia di trasporto L’apparecchio deve essere usato solamente per 2.
  • Seite 23: Montaggio Della Visiera Protettiva Per Saldatura

    IT/MT 40A/19,6V - 80 A/21,2 V Corrente massima di saldatura e la relativa tensio- Collegamento morsetto di massa ne di esercizio standardizzata [A/V] Ø Collegamento alla rete: ....230 V ~ 50 Hz Diametro dell’elettrodo [mm] Corrente di saldatura (A) con cos Ê = 0,73: ........40 - 80 ø...
  • Seite 24: Operazioni Preliminari Alla Saldatura

    IT/MT Ad ogni lato si devono sentire 2 chiari click allo stesso modo in cui si accende un fi ammifero. quando i prigionieri scattano in posizione Questo è il modo migliore per innescare l’arco (Fig. 6/4.) voltaico. • Quando i due angoli superiori della masche- Eseguite un test con un pezzo di prova per verifi...
  • Seite 25: Trasporto

    IT/MT 10. Trasporto 14. Smaltimento e riciclaggio Durante il trasporto della saldatrice, dovete pri- L’apparecchio si trova in una confezione per evi- ma togliere la spina dalla presa di corrente e il tare i danni dovuti al trasporto. Questo imballag- morsetto di massa dal pezzo da lavorare.
  • Seite 26: Schema Elettrico

    IT/MT 15. Schema elettrico - 26 - Anl_1549055.indb 26 Anl_1549055.indb 26 17.10.12 16:33 17.10.12 16:33...
  • Seite 27: Dichiarazione Di Conformità

    EU-direktivet og a cikkekhez az EU-irányvonal és Normák szerint a standarder for artikkel következő konformitást jelenti ki Lýsir uppfyllingu EU-reglna og annarra staðla vöru Elektro-Schweißgerät PESG 120 A1 (Parkside) 87/404/EC_2009/105/EC 2006/42/EC Annex IV 2005/32/EC_2009/125/EC Notifi...
  • Seite 28: Certifi Cato Di Garanzia

    IT/MT 17. Certifi cato di garanzia Gentili clienti, i nostri prodotti sono soggetti ad un rigido controllo di qualità. Se l’apparecchio non dovesse tuttavia funzionare correttamente, ci scusiamo e vi preghiamo di rivolgervi al nostro servizio di assistenza clienti all’indirizzo indicato in questa scheda di garanzia.
  • Seite 29 Índice 1. Introdução ..............................31 2. Instruções de segurança........................... 31 3. Descrição do aparelho e material a fornecer ..................34 4. Utilização adequada ..........................34 5. Símbolos e dados técnicos ........................34 6. Montagem da máscara para soldar ......................35 7. Preparação para a soldadura .........................36 8.
  • Seite 30 Leia e respeite as instruções de serviço e de segurança antes de colocar o aparelho em funcionamento. - 30 - Anl_1549055.indb 30 Anl_1549055.indb 30 17.10.12 16:33 17.10.12 16:33...
  • Seite 31: Introdução

    • 1. Introdução Tenha em atenção o estado dos cabos de soldadura, do porta-eléctrodos, bem como das pinças crocodilo de ligação à massa; Parabéns pela aquisição do seu novo aparelho. o desgaste do isolamento e das partes con- Optou por um produto de grande qualidade. O dutoras de corrente pode causar situações manual de instruções é...
  • Seite 32 bertados vapores que podem ser prejudiciais. cuito eléctrico da soldadura), de radiações Qualquer choque eléctrico pode ser mortal. prejudiciais (calor e raios UV), bem como da • Não se aproxime directamente do arco vol- projecção de metal incandescente e de escó- taico num raio de 15 m.
  • Seite 33: Vestuário De Protecção

    acoplamentos de reboques, etc. trabalho suado), a tensão de saída do aparelho • Instruções: de soldar não pode ser superior a 42 Volts (va- Nunca se esqueça de que o condutor de lor efectivo) durante o funcionamento em vazio. protecção em instalações eléctricas ou apa- Neste caso, o aparelho não pode ser utilizado relhos pode ser destruído pela corrente de devido à...
  • Seite 34: Descrição Do Aparelho E Material A Fornecer

    3. Descrição do aparelho e 4. Utilização adequada material a fornecer Com o aparelho de soldar eléctrico pode soldar diferentes metais utilizando respectivamente os 3.1 Descrição do aparelho (fi gura 1) eléctrodos revestidos adequados. 1. Pega de transporte 2. Escala da corrente de soldadura A máquina só...
  • Seite 35: Montagem Da Máscara Para Soldar

    40A/19,6V - 80 A/21,2 V Ligação à rede: ......230 V ~ 50 Hz Corrente máxima de soldadura e respectiva Corrente de soldadura (A) tensão de trabalho [A/V] normalizada com cos Ê = 0,73: ........40 - 80 ø (mm) ......1,6 ...2,0 ...2,5 Ø...
  • Seite 36: Preparação Para A Soldadura

    de retenção (fig. 6/4.) como se estivesse a acender um fósforo. Este é o • Se ambos os cantos superiores da máscara melhor método para acender um arco voltaico. para soldar estiverem ligados, conforme ilust- Teste sobre uma peça à parte, para verifi car se rado na figura 7, insira os parafusos para o escolheu o eléctrodo e a intensidade da corrente punho de apoio (p) pelo lado exterior nos 3...
  • Seite 37: Transporte

    10. Transporte 14. Eliminação e reciclagem Antes de transportar o aparelho de soldar, é O aparelho encontra-se dentro de uma embala- necessário retirar a fi cha da rede e a pinça cro- gem para evitar danos de transporte. Esta emba- codilo de ligação à...
  • Seite 38: Esquema De Ligações

    15. Esquema de ligações - 38 - Anl_1549055.indb 38 Anl_1549055.indb 38 17.10.12 16:33 17.10.12 16:33...
  • Seite 39: Declaração De Conformidade

    EU-direktivet og a cikkekhez az EU-irányvonal és Normák szerint a standarder for artikkel következő konformitást jelenti ki Lýsir uppfyllingu EU-reglna og annarra staðla vöru Elektro-Schweißgerät PESG 120 A1 (Parkside) 87/404/EC_2009/105/EC 2006/42/EC Annex IV 2005/32/EC_2009/125/EC Notifi...
  • Seite 40: Certifi Cado De Garantia

    17. Certifi cado de garantia Estimado(a) cliente, Os nossos produtos são submetidos a um rigoroso controlo de qualidade. Se, ainda assim, o aparelho não funcionar nas devidas condições, lamentamos esse facto e pedimos-lhe que se dirija ao nosso serviço de assistência técnica na morada indicada no presente certifi...
  • Seite 41 GB/MT Table of contents 1. Introduction ..............................43 2. Safety information .............................43 3. Layout and items supplied ........................45 4. Proper use ..............................46 5. Symbols and technical data........................46 6. Assembling the welding screen .......................47 7. Welding preparations ..........................47 8. Welding ..............................47 9. Overheating guard ...........................48 10.
  • Seite 42 GB/MT Read and follow the operating instructions and safety information before using for the fi rst time. - 42 - Anl_1549055.indb 42 Anl_1549055.indb 42 17.10.12 16:34 17.10.12 16:34...
  • Seite 43: Introduction

    GB/MT 1. Introduction quality of the welding work. • Arc welding generates sparks, molten metal particles and smoke, so the following is requi- Congratulations on your new purchase. red: Remove all inflammable substances and/ You have decided in favor of a high-quality pro- or materials from the working area.
  • Seite 44 GB/MT Warning! symptoms on unprotected parts of the body. • If the supply mains and circuits are overloaded, Personnel or assistants in the vicinity of the other consumers may suffer interference during arc must also be notified of the dangers and the welding work.
  • Seite 45: Layout And Items Supplied

    GB/MT Constricted and wet areas are to be kept away from the welding work. • The walls in the immediate vicinity of stationa- Caution! ry workplaces may not have a light color or a When working in constricted, wet or hot areas, sheen.
  • Seite 46: Proper Use

    GB/MT Important! 40A/19.6V - 80 A/21.2 V The equipment and packaging material Maximum welding current and the corresponding are not toys. Do not let children play with standardized operating voltage [A/V] plastic bags, foils or small parts. There is a danger of swallowing or suffocating! Ø...
  • Seite 47: Assembling The Welding Screen

    GB/MT Mains connection: ......230 V ~ 50 Hz handle (r) over the threads on the three screws for the handle (p). Secure the handle (r) to Welding current (A) at cos Ê = 0.73: ..40 - 80 the welding screen using the three nuts for the ø...
  • Seite 48: Overheating Guard

    GB/MT Important! 12. Storage Do not dab the workpiece with the electrode since it could be damaged, making it more diffi cult to Store the equipment and accessories out of ignite the arc. children’s reach in a dark and dry place at above As soon as the arc has ignited, attempt to keep it freezing temperature.
  • Seite 49 GB/MT For EU countries only Never place any electric power tools in your household refuse. To comply with European Directive 2002/96/EC concerning old electric and electronic equipment and its implementation in national laws, old elec- tric power tools have to be separated from other waste and disposed of in an environment-friendly fashion, e.g.
  • Seite 50: Circuit Diagram

    GB/MT 15. Circuit diagram - 50 - Anl_1549055.indb 50 Anl_1549055.indb 50 17.10.12 16:34 17.10.12 16:34...
  • Seite 51: Declaration Of Conformity

    EU-direktivet og a cikkekhez az EU-irányvonal és Normák szerint a standarder for artikkel következő konformitást jelenti ki Lýsir uppfyllingu EU-reglna og annarra staðla vöru Elektro-Schweißgerät PESG 120 A1 (Parkside) 87/404/EC_2009/105/EC 2006/42/EC Annex IV 2005/32/EC_2009/125/EC Notifi...
  • Seite 52: Warranty Certifi Cate

    GB/MT 17. Warranty certifi cate Dear Customer, All of our products undergo strict quality checks to ensure that they reach you in perfect condition. In the unlikely event that your device develops a fault, please contact our service department at the address shown on this guarantee card. Of course, if you would prefer to call us then we are also happy to offer our assistance under the service number prin- ted below.
  • Seite 53 DE/AT/CH Inhaltsverzeichnis 1. Einleitung ..............................55 2. Sicherheitshinweise ...........................55 3. Gerätebeschreibung und Lieferumfang ....................58 4. Bestimmungsgemäße Verwendung ......................58 5. Symbole und technische Daten .......................58 6. Schweißschirm-Montage ........................59 7. Schweißvorbereitungen ...........................60 8. Schweißen ..............................60 9. Überhitzungsschutz ...........................60 10. Transport ..............................61 1 1. Wartung ..............................61 12.
  • Seite 54 DE/AT/CH Vor Inbetriebnahme Bedienungsanleitung und Sicherheitshinweise lesen und beachten - 54 - Anl_1549055.indb 54 Anl_1549055.indb 54 17.10.12 16:34 17.10.12 16:34...
  • Seite 55: Einleitung

    DE/AT/CH 1. Einleitung bevor Sie es andernorts aufstellen wollen. • Achten Sie auf den Zustand der Schweißka- bel, des Elektrodenhalters sowie der Masse- Herzlichen Glückwunsch zum Kauf Ihres neuen klemmen; Abnützung an der Isolierung und Gerätes. an den stromführenden Teilen können eine Sie haben sich damit für ein hochwertiges Produkt gefährliche Situation hervorrufen und die entschieden.
  • Seite 56 DE/AT/CH • Beim Lichtbogenschweißen werden Dämpfe und Schlackenspritzern. • frei, die möglicherweise schädlich sind. Jeder Festes isolierendes Schuhwerk tragen, die Elektroschock kann möglicherweise tödlich Schuhe müssen auch bei Nässe isolieren. sein. Halbschuhe sind nicht geeignet, da herabfal- • Nähern Sie sich dem Lichtbogen nicht direkt lende, glühende Metalltropfen Verbrennun- im Umkreis von 15 m.
  • Seite 57: Enge Und Feuchte Räume

    DE/AT/CH oder Geräten bei Fahrlässigkeit durch den Schutzkleidung Schweißstrom zerstört werden kann, z.B. die Masseklemme wird auf das Schweißgeräte- Vorsicht! • gehäuse gelegt, welches mit dem Schutzleiter Während der Arbeit muss der Schweißer an der elektrischen Anlage verbunden ist. Die seinem ganzen Körper durch die Kleidung Schweißarbeiten werden an einer Maschine und den Gesichtschutz gegen Strahlen und...
  • Seite 58: Gerätebeschreibung Und Lieferumfang

    DE/AT/CH 3. Gerätebeschreibung und 4. Bestimmungsgemäße Lieferumfang Verwendung 3.1 Gerätebeschreibung (Bild 1) Mit dem Elektro-Schweißgerät können 1. Tragegriff verschiedene Metalle unter Verwendung der 2. Schweißstromskala entsprechenden Mantelelektroden geschweißt 3. Ein-/ Ausschalter werden. 4. Masseklemme 5. Elektrodenhalter Die Maschine darf nur nach ihrer Bestimmung 6.
  • Seite 59: Schweißschirm-Montage

    DE/AT/CH Nennleerlaufspannung [V] Anschluss Masseklemme 40A/19,6V - 80 A/21,2 V Netzanschluss .........230 V ~ 50 Hz Maximaler Schweißstrom und die entsprechende Schweißstrom (A) bei cos Ê = 0,73: ..40 - 80 genormte Arbeitsspannung [A/V] ø (mm) ......1,6 ...2,0 ...2,5 ........40 ....55 ....80 Ø...
  • Seite 60: Schweißvorbereitungen

    DE/AT/CH verbunden, Schrauben für Haltegriff (p) von Lichtbogen zu zünden. außen durch die 3 Löcher im Schweißschirm Testen Sie auf einem Probestück, ob Sie die richti- stecken. (Abb. 8) ge Elektrode und Stromstärke gewählt haben. • Schweißschirm umdrehen und Handgriff (r) über die Gewinde der 3 Schrauben für Elektrode Ø...
  • Seite 61: Transport

    DE/AT/CH 10. Transport 14. Entsorgung und Wiederverwertung Beim Transport des Schweißgerätes muss zuerst der Stecker vom Netz und die Masseklemme vom Das Gerät befi ndet sich in einer Verpackung um Werkstück entfernt werden. Anschließend müssen Transportschäden zu verhindern. Diese Verpa- die Kabel ordnungsgemäß...
  • Seite 62: Schaltplan

    DE/AT/CH 15. Schaltplan - 62 - Anl_1549055.indb 62 Anl_1549055.indb 62 17.10.12 16:34 17.10.12 16:34...
  • Seite 63: Konformitätserklärung

    EU-direktivet og a cikkekhez az EU-irányvonal és Normák szerint a standarder for artikkel következő konformitást jelenti ki Lýsir uppfyllingu EU-reglna og annarra staðla vöru Elektro-Schweißgerät PESG 120 A1 (Parkside) 87/404/EC_2009/105/EC 2006/42/EC Annex IV 2005/32/EC_2009/125/EC Notifi...
  • Seite 64: Garantieurkunde

    DE/AT/CH 17. Garantieurkunde Sehr geehrte Kundin, sehr geehrter Kunde, unsere Produkte unterliegen einer strengen Qualitätskontrolle. Sollte dieses Gerät dennoch einmal nicht einwandfrei funktionieren, bedauern wir dies sehr und bitten Sie, sich an unseren Servicedienst unter der auf dieser Garantiekarte angegebenen Adresse zu wenden. Gern stehen wir Ihnen auch telefonisch über die unten angegebene Serviceruf- nummer zur Verfügung.
  • Seite 65 - 65 - Anl_1549055.indb 65 Anl_1549055.indb 65 17.10.12 16:34 17.10.12 16:34...
  • Seite 66 IAN: 85053 PESG 120 A1 Einhell Germany AG Wiesenweg 22 D-94405 Landau/Isar Estado de las informaciones · Versione delle informazioni Estado das informações · Last Information Update · Stand der Informationen: 1 1/2012 · Ident.-No.: 15.490.55 1 12012 - 5 IAN 85053 Anl_1549055.indb 66...

Inhaltsverzeichnis