Inhaltsverzeichnis
Werbung
Verfügbare Sprachen
Verfügbare Sprachen
Quicklinks
Werbung
Inhaltsverzeichnis

Verwandte Anleitungen für Mettler Toledo IND226


Inhaltszusammenfassung für Mettler Toledo IND226
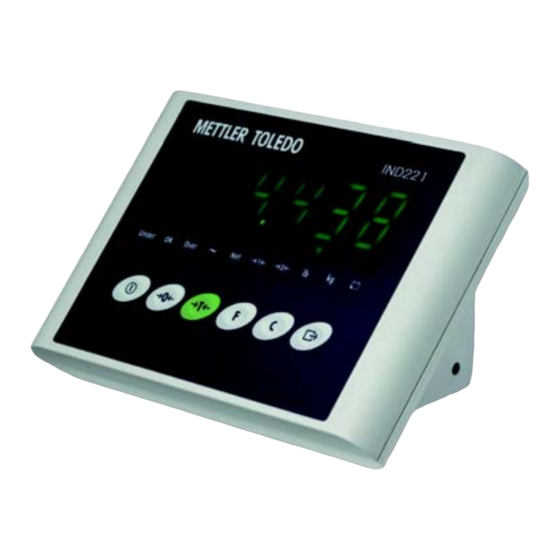
- Seite 1 User manual Bedienungsanleitung Mode d'emploi Instrucciones de manejo Istruzioni d'uso METTLER TOLEDO IND221 / IND226 Weighing terminal Wägeterminal IND221 / IND226 Terminal de pesage IND221 / IND226 Terminal de pesada IND221 / IND226 Terminale di pesata IND221 / IND226 www.mt.com/support...
- Seite 2 METTLER TOLEDO products stand for highest quality and precision. Careful handling in accordance with this user manual as well as regular maintenance and inspection by our professional customer service ensure the long and reliable function and maintenance of value of your measuring instruments. Our experienced service team will be pleased to inform you about corresponding service agreements or calibration services.
-
Seite 3: Inhaltsverzeichnis
Contents Page Introduction .............. 5 English Putting into operation ..........8 Basic functions ............11 Applications ............13 Operator menu ............18 Supervisor menu ............. 25 Error messages ............31 Technical data ............32 Einführung ............. 35 Deutsch Inbetriebnahme ............38 Grundfunktionen ............. - Seite 4 Introducción ............96 Español Poner en funcionamiento ......... 99 Funciones básicas ..........102 Aplicaciones ............104 Menú de operador ..........109 Menú supervisor ........... 116 Mensajes de error ..........122 Datos técnicos ............123 Introduzione ............126 Italiano Messa in funzione ..........129 Funzioni base ............
-
Seite 5: Introduction
Do not use IND221 / IND226 in hazardous areas! Our product range includes special devices for hazardous areas. CAUTION! Use the IND226 weighing terminal with Protection Class IP65 if: • the weighing terminal is used in wet areas • wet cleaning is necessary •... - Seite 6 The battery contains heavy metals. ➜ Observe the local regulations on the disposal of environmentally hazardous materials. 1.2 Description The IND221 and IND226 weighing terminals have different degrees of protection: IND221 IP54, for general purpose use in dry environment IND226...
- Seite 7 Display 1 6-digit weight display METTLER TOLEDO 2 Status indicators 3 Keypad Under Over >|1|< >|2|< Status indicators Meaning Indicators for checkweighing Under / OK / Over alternatively Indicators for counting, overlay sticker included Count / PCS / APW Motion indicator...
-
Seite 8: Putting Into Operation
➜ Plug in the 9-pin D-sub cable on the connector at the weighing terminal. IND226 With IND226, the serial interface must be connected inside the weighing terminal. 1. Insert the interface cable through the cable gland into the weighing terminal. -
Seite 9: Connecting The Power Supply
WARNING! Risk of explosion due to wrong battery type or improper connection! ▲ Only use original METTLER TOLEDO batteries. ▲ Make sure that the battery is connected to the terminal properly. 1. Open the battery case on the bottom of the terminal. - Seite 10 2.7 Notes on certified weighing systems On certified weighing systems, the weighing platform connection at the weighing terminal must be sealed with a sealing wire or a sealing sticker. Please contact METTLER TOLEDO Service or your local weights and measures authorities. IND221 Paper seal...
-
Seite 11: Basic Functions
3 Basic functions 3.1 Switching on and off Switching on ➜ Press The display lights up and then shows the software number. When the weight display appears, the weighing terminal is ready for operation. Switching off ➜ Press and hold until –OFF–... - Seite 12 Clearing the tare ➜ Press The Net indicator goes out, the gross weight appears in the display. • If automatic clearing of the tare weight is set in the supervisor menu (F1.5.2=On), the tare weight is cleared automatically as soon as the weighing platform is unloaded to zero. •...
-
Seite 13: Applications
• Follow all the relevant instructions regarding cleaning intervals and permissible cleaning agents. IND226 • Do not clean the weighing terminal using high-pressure or high-temperature water. 4 Applications Depending on the setting of F2.1 parameter in the operator menu, different applications can be activated using the key. -
Seite 14: Check Weighing
4.2 Switching weight unit For this purpose, F2.1=Unit must be set in the operator menu. ➜ Press The weight value is displayed in the second weight unit. Note The displayed weight unit remains until it is switched again. 4.3 Check weighing For this purpose, F2.1=OVEr and F2.2.1=CHECh (factory setting) must be set in the op- erator menu. - Seite 15 Check weighing Example: Target weight = 1.000 kg • Weight is less than the target weight and below the lower tolerance value. The Under indicator lights. • Weight is within the tolerance values. The OK indicator lights. • Weight is more than the target weight and above the upper tolerance value.
- Seite 16 Classifying Example: Target weight = 1,000 kg, tol. 1 = 100 kg, tol. 2 = 200 kg, tol. 3 = 300 kg • Weight is less than the target weight and below tolerance 3, e.g. below 700 kg. The Under indicator lights. •...
- Seite 17 4.5 Counting For this purpose, F2.1=Count must be set in the operator menu. When the weighing terminal is used predominantly for counting operations, METTLER TOLEDO recommends applying the supplied label (Count, APW, PCS) over the left 3 indicators (Under, OK, Over).
-
Seite 18: Operator Menu
5 Operator menu The operator menu consists of the following blocks: F2 – F key menu settings F3 – Terminal menu settings F4 – Communication menu settings F6 – Exit menu 5.1 Entering the operator menu ➜ In gross mode, press and hold until MAStEr appears. - Seite 19 Numeric entry 1. Press for editing the displayed value. The (last) digit will blink. 2. Increase the displayed digit using the key. – or – Decrease the displayed digit using the key. 3. When entering multi-digit numbers, use the key to move the cursor one place to the left.
- Seite 20 F2.2.2 – Setting the target weight WEIGHt By weighing in an actual sample weight MAnUAL By numeric entry F2.2.3 – Upper tolerances After selecting the parameter, the currently set tolerance value is displayed. If F2.2.1 = Chech is set: Upper tolerance = target value + displayed tolerance value If F2.2.1 = CLASS is set: Internally the terminal calculates 3 tolerances.
- Seite 21 F2.3 – Reference optimization This parameter only appears if F2.1=Count is set. No reference optimization Reference optimization enabled. The weighing terminal automatically determines the piece weight again when the number of parts has increased. F2.10 – Reset F key settings Reset all parameters F2.x(.x) to factory setting.
- Seite 22 , the current display is printed. Print APrint Stable weight values are printed automatically Additional settings: F4.2.5 and F4.2.6 Communication via the METTLER TOLEDO Standard Interface Command Set SICS Contin Toledo continuous Mode F4.2 – Format F4.2.1 – Line format...
- Seite 23 F4.2.6 – Auto print reset threshold This menu item is only available if F4.1=APrint is set. The scale must be unloaded below the set value before a new weight value can be printed automatically. Factory setting 10 (d) Possible settings 0 ...
- Seite 24 5.6 F6 – ending menu 1. Press F6 appears. 2. To save changes: Press SAVE ? appears. Then press again. – or – To reject changes: Press AbOrt appears. Press...
-
Seite 25: Supervisor Menu
6 Supervisor menu The supervisor menu consists of the following blocks: F1 – Scale settings F5 – Terminal settings F6 – Exit menu 6.1 Entering Supervisor menu ➜ In gross mode, press and hold until MAStEr appears in the display. ➜... - Seite 26 F1.2.1 – Weight units weight unit: kg weight unit: lb 1 lb ≈ 0.454 kg F1.2.2 – Weighing ranges for single range weighing platforms for double range weighing platforms F1.2.3 – Capacity of the first weighing range (coarse range) Possible capacities and the factory settings depend on the weighing platform connected. ➜...
- Seite 27 F1.3.3 – Adjustment The steps with grey background only appear if parameter F1.3.2=LinOn is set. Display Description Unload weighing platform E SCL Confirm empty weighing platform The weighing terminal counts down from 10 to 0. 10 CAL Zero is determined 0 CAL Load half of the maximum load Add Ld...
- Seite 28 F1.4.1 – Automatic zero setting Automatic zero setting disabled (not available in NTEP mode) Automatic zero setting within +/–0.5 d 0.5 d Automatic zero setting within +/–1.0 d (not available in OIML mode) Automatic zero setting within +/–3 d (not available in OIML mode) F1.4.2 –...
- Seite 29 F1.5.4 – Auto tare threshold This menu item is only available if F1.5.1=On is set. The weighing platform must be loaded to the set value before the weight value is automatically tared. Factoriy setting 10 d Possible settings 0 ... maximum load F1.5.5 –...
- Seite 30 6.4 Block F5 – Maintenance Factory settings are printed in bold letters. F5.1 – Calibration values F5.1.1 – Show zero-counts F5.1.2 – Show half load weight value F5.1.3 – Show half load counts F5.1.4 – Show full load weight value F5.1.5 –...
-
Seite 31: Error Messages
➜ Put on additional reference Err 4 Number of reference parts too small parts ➜ Call METTLER TOLEDO Service Err 6 EEPROM read/write error ➜ Ensure that the weighing plat- Err 35 Weighing platform in motion when calibrating form is stable ➜... -
Seite 32: General Technical Data
Storage temperature • –20 ... +60 °C Relative humidity • 10 ... 85 %, non condensing Weight (incl. packing) • IND221: approx. 1.3 kg / 2.9 lb • IND226: approx. 2.9 kg / 6.4 lb Dimensions IND221 129.1 90° 45°... - Seite 33 Terminal Assignment +EXC +SEN +SIG Shield –SIG –SEN –EXC 8.4 Serial interface data Assignment of the serial interface connection (IND221) 1 2 3 4 5 Assignment – – – – For IND226, refer to page 8. 6 7 8 9...
- Seite 34 SICS interface commands The weighing terminal supports the MT-SICS (METTLER TOLEDO Standard Interface Command Set) command set. With SICS commands, it is possible to configure, query and operate the terminal from a PC. SICS commands are divided up into various levels.
-
Seite 35: Einführung
1 Einführung 1.1 Sicherheitshinweise VORSICHT! IND221 / IND226 nicht in explosionsgefährdeter Umgebung einsetzen! Für explosionsgefährdete Umgebungen gibt es spezielle Geräte in unserem Sortiment. VORSICHT! In folgenden Fällen ausschließlich Wägeterminals IND226 mit Schutzgrad IP65 verwenden: • Einsatz im Nassbereich • Nassreinigung ist erforderlich •... -
Seite 36: Beschreibung
Der Akku enthält Schwermetalle und darf deshalb nicht mit dem normalen Müll entsorgt wer- den. ➜ Die lokalen Vorschriften für die Entsorgung umweltgefährdender Stoffe beachten. 1.2 Beschreibung Die Wägeterminals IND221 und IND226 unterscheiden sich in der Schutzart: IND221 IP54, für normalen Gebrauch in trockener Umgebung IND226 IP65, für den Einsatz in nasser und rauer Umgebung... - Seite 37 Anzeige 1 6-stellige Gewichtsanzeige METTLER TOLEDO 2 Status-Indikatoren 3 Tastenfeld Under Over >|1|< >|2|< Status-Indikatoren Bedeutung Indikatoren für Kontrollwägen Under / OK / Over alternativ Indikatoren für Zählen, entsprechender Aufkleber mitgeliefert Count / PCS / APW Bewegungsindikator Der angezeigte Gewichtswert ist ein Netto-Gewichtswert Anzeige des aktuellen Wägebereichs der angeschlossenen Wäge-...
-
Seite 38: Inbetriebnahme
Beim IND221 ist der Schnittstellenanschluss als 9-poliger D-Sub-Stecker ausgeführt. ➜ 9-poliges D-Sub-Kabel am Stecker am Wägeterminal einstecken. IND226 Beim IND226 muss die serielle Schnittstelle im Wägeterminal angeklemmt werden. 1. Schnittstellenkabel durch die Kabelverschraubung ins Wägeterminal einziehen. 2. Schnittstellenkabel nach folgender Tabelle an der 3-poligen Klemmleiste J3 anklemmen. -
Seite 39: Wägeterminal Schließen
WARNUNG! Explosionsgefahr bei falschem Batterietyp oder unsachgemäßem An- schluss! ▲ Nur Original METTLER TOLEDO Batterien verwenden. ▲ Sicherstellen, dass die Batterie richtig am Terminal angeschlossen ist. 1. Batteriefach auf der Unterseite des Terminals öffnen. 2. Ggf. alten Akku vom Klettband abnehmen und Stecker ziehen. - Seite 40 2.7 Hinweise zu geeichten Wägesystemen Bei geeichten Wägesystemen muss der Wägebrückenanschluss am Wägeterminal mit einem Eichfaden oder einer Eichmarke plombiert werden. Setzen Sie sich dazu mit dem METTLER TOLEDO Service oder Ihrer nationalen Eichbehörde in Verbindung. IND221 Eichmarke Eichdraht IND226...
-
Seite 41: Grundfunktionen
3 Grundfunktionen 3.1 Ein-/Ausschalten Einschalten ➜ drücken. Die Anzeige leuchtet auf und zeigt anschließend die Softwarenummer an. Wenn die Gewichtsanzeige erscheint, ist das Wägeterminal betriebsbereit. Ausschalten ➜ drücken und gedrückt halten bis –OFF– in der Anzeige erscheint. 3.2 Nullstellen Nullstellen korrigiert den Einfluss leichter Verschmutzungen auf der Lastplatte. Manuelles Nullstellen 1. - Seite 42 Tara löschen ➜ drücken. Der Indikator Net erlischt, das Bruttogewicht erscheint in der Anzeige. • Wenn im Technikermode automatische Taralöschung gewählt ist (F1.5.2=On), wird das Taragewicht automatisch gelöscht, sobald die Wägebrücke entlastet ist. • Wenn im Technikermode die Tarasperre gewählt ist (F1.5.3=On), kann das Taragewicht nur gelöscht werden, wenn die Wägebrücke entlastet ist.
-
Seite 43: Reinigung
• Nicht mit Hochdruckreinigungsgerät oder unter fließendem Wasser reinigen. • Alle bestehenden Vorschriften betreffend Reinigungsintervalle und zulässige Reinigungs- mittel beachten. IND226 • Nicht mit Hochdruck oder Heißwasser reinigen. 4 Anwendungen Je nach Einstellung des Parameters F2.1 im Anwendermenü können über die Taste terschiedliche Anwendungen aktiviert werden. -
Seite 44: Gewichtseinheit Umschalten
4.2 Gewichtseinheit umschalten Dazu muss im Anwendermenü der Parameter F2.1=Unit gewählt sein. ➜ drücken. Der Gewichtswert wird in der anderen Gewichtseinheit angezeigt. Hinweis Die angezeigte Gewichtseinheit bleibt so lange erhalten, bis sie wieder umgeschaltet wird. 4.3 Kontrollwägen Dazu müssen im Anwendermenü die Parameter F2.1=OVEr und F2.2.1=CHECh (Werkseinstellung) gewählt sein. -
Seite 45: Klassieren
Kontrollwägen Beispiel: Sollgewicht = 1.000 kg • Gewicht kleiner als das Sollgewicht und unterhalb der unteren Toleranz. Der Indikator Under leuchtet. • Gewicht innerhalb der Toleranzen. Der Indikator OK leuchtet. • Gewicht größer als das Sollgewicht und oberhalb der oberen Toleranz. Der Indikator Over leuchtet. - Seite 46 Klassieren Beispiel: Sollgewicht = 1.000 kg, Tol. 1 = 100 kg, Tol. 2 = 200 kg, Tol. 3 = 300 kg • Gewicht kleiner als Sollgewicht und unterhalb Tol. 3, im Beispiel < 700 kg. Der Indikator Under leuchtet. • Gewicht kleiner als Sollgewicht und unterhalb Tol.
- Seite 47 4.5 Zählen Dazu muss im Anwendermenü F2.1=Count gewählt sein. Wenn das Wägeterminal überwiegend zum Zählen eingesetzt wird, empfiehlt METTLER TOLEDO die Beschriftung der drei linken Indikatoren (Under, OK, Over) mit dem mitgelieferten Aufkleber (Count, APW, PCS) zu überkleben. Stückgewicht bestimmen und zählen drücken, um die Zählfunktion zu aktivieren.
-
Seite 48: Einstieg In Das Anwendermenü
5 Anwendermenü Das Anwendermenü besteht aus den folgenden Blöcken: F2 – Einstellungen Funktionstastenmenü F3 – Einstellungen Terminalmenü F4 – Einstellungen Datenübertragungsmenü F6 – Menü beenden 5.1 Einstieg in das Anwendermenü ➜ Im Bruttomodus drücken und gedrückt halten, bis MAStEr erscheint. ➜... - Seite 49 3. Bei Eingabe von mehrstelligen Zahlen mit den Cursor um eine Stelle nach links bewegen. 4. Ziffer wie in Schritt 2 beschrieben verändern. 5. Schritte 3 und 4 ggf. wiederholen. 6. Wenn alle Stellen eingegeben sind, mit die Eingabe bestätigen. Hinweis kann die Eingabe gelöscht werden.
- Seite 50 F2.2.3 – Obere Toleranzen Nach Auswählen des Parameters erscheint die aktuell eingestellte Toleranz. Wenn F2.2.1 = Chech gewählt ist: Obere Toleranz = Sollgewicht + angezeigter Toleranzwert Wenn F2.2.1 = CLASS gewählt ist: Intern bestimmt das Wägeterminal 3 Toleranzen. Obere Toleranz 1 = Sollgewicht + angezeigter Toleranzwert Obere Toleranz 2 = Sollgewicht + 2 x angezeigter Toleranzwert Obere Toleranz 3 = Sollgewicht + 3 x angezeigter Toleranzwert 1.
- Seite 51 F2.10 – Rücksetzen der Funktionstasten-Einstellungen Rücksetzen aller Parameter F2.x(.x) auf Werkseinstellung. 5.4 F3 – Terminalmenü Werkseinstellungen sind fett gedruckt. F3.1 – Anzeigeneinstellungen F3.1.1 – Sleep-Mode Das Wägeterminal wechselt in den Sleep-Mode, wenn in der eingestellten Zeit keine Bedie- nung am Wägeterminal oder keine Gewichtsänderung auftritt. Werkseinstellung 60 (Sekunden) Funktion gesperrt...
- Seite 52 Beim Drücken von wird die aktuelle Anzeige gedruckt. Print APrint Stabile Gewichtswerte werden automatisch gedruckt. Zusätzliche Einstellungen: F4.2.5 und F4.2.6 Datenübertragung über den Befehlssatz MT-SICS (METTLER TOLEDO Standard SICS Interface Command Set) Contin Toledo Continuous-Mode F4.2 – Format F4.2.1 – Zeilenformat...
- Seite 53 F4.2.6 – Mindestentlastung für automatischen Druck Dieser Menüpunkt kann nur gewählt werden, wenn F4.1=APrint eingestellt ist. Das Gewicht auf der Waage muss den eingestellten Wert unterschreiten, bevor ein neuer Gewichtswert automatisch gedruckt werden kann. Werkseinstellung 10 (d) Mögliche Werte 0 ... Volllast F4.3 –...
- Seite 54 5.6 F6 – Menü beenden drücken. In der Anzeige erscheint F6. 2. Änderungen speichern: drücken. In der Anzeige erscheint SAVE ?. erneut drücken. – oder– Änderungen verwerfen: drücken. In der Anzeige erscheint AbOrt. drücken.
-
Seite 55: Einstieg In Das Technikermenü
6 Technikermenü Das Technikermenü besteht aus den folgenden Blöcken: F1 – Waageneinstellungen F5 – Terminaleinstellungen F6 – Menü verlassen 6.1 Einstieg in das Technikermenü ➜ Im Bruttomodus drücken und gedrückt halten, bis MAStEr in der Anzeige erscheint. ➜ Passwort eingeben und mit bestätigen. - Seite 56 F1.2.1 – Gewichtseinheiten Gewichtseinheit: kg Gewichtseinheit: lb 1 lb ≈ 0,454 kg F1.2.2 – Wägebereiche für Einbereichswägebrücken für Zweibereichswägebrücken F1.2.3 – Kapazität des ersten Wägebereichs (Grobbereich) Die möglichen Kapazitäten und die Werkseinstellungen hängen von der angeschlossenen Wägebrücke ab. ➜ Ggf. den angezeigten Wert anpassen. F1.2.4 –...
- Seite 57 F1.3.3 – Justierung Die grau hinterlegten Schritte erscheinen nur, wenn der Parameter F1.3.2=LinOn gewählt ist. Anzeige Taste Beschreibung Wägebrücke entlasten E SCL Leere Wägebrücke bestätigen Das Wägeterminal zählt rückwärts von 10 bis 0 10 CAL Null wird justiert 0 CAL Halbe Volllast laden Add Ld Halbe Volllast bestätigen...
- Seite 58 F1.4.1 – Automatisches Nullsetzen Kein automatisches Nullsetzen (nicht verfügbar im NTEP-Mode) Automatisches Nullsetzen innerhalb von +/–0,5 d 0.5 d Automatisches Nullsetzen innerhalb von +/–1,0 d (nicht verfügbar im OIML-Mode) Automatisches Nullsetzen innerhalb von +/–3 d (nicht verfügbar im OIML-Mode) F1.4.2 – Nullsetzen beim Einschalten Kein Nullsetzen beim Einschalten Nullsetzen beim Einschalten innerhalb von +/–2 % Nullsetzen beim Einschalten innerhalb von +/–10 %...
-
Seite 59: Schwellenwert Für Das Automatische Löschen Des Tarawerts
F1.5.4 – Schwellenwert für automatisches Tarieren Dazu muss der Parameter F1.5.1=On gesetzt sein. Die Wägebrücke muss mindestens mit dem vorgegebenen Wert belastet werden, damit der Gewichtswert automatisch tariert wird. Werkseinstellung 10 d Mögliche Werte 0 ... Volllast 1.5.5 – Schwellenwert für das automatische Löschen des Tarawerts Dazu muss der Parameter F1.5.1=On gesetzt sein. -
Seite 60: Block F5 - Wartung
6.4 Block F5 – Wartung Werkseinstellungen sind fett gedruckt. F5.1 – Kalibrierwerte F5.1.1 – Internen Nullpunktswert zeigen F5.1.2 – Gewichtswert für halbe Volllast zeigen F5.1.3 – Internen Halblastwert zeigen F5.1.4 – Gewichtswert für Volllast zeigen F5.1.5 – Internen Volllastwert zeigen F5.2–... -
Seite 61: Fehlermeldungen
➜ Wägeterminal aus- und wieder Err 3 EEPROM-Fehler einschalten Anzahl der Referenzteile zu klein ➜ Weitere Referenzteile auflegen Err 4 ➜ METTLER TOLEDO Service rufen Err 6 EEPROM-Schreib-/Lesefehler ➜ Sicherstellen, dass die Wäge- Err 35 Wägebrücke in Bewegung beim Justieren brücke ruhig ist... -
Seite 62: Allgemeine Technische Daten
• –10 ... +40 °C Lagertemperatur • –20 ... +60 °C Relative Feuchtigkeit • 10 ... 85 %, nicht kondensierend Gewicht (inkl. Verpackung) • IND221: ca. 1,3 kg / 2,9 lb • IND226: ca. 2,9 kg / 6,4 lb Abmessungen IND221 129.1 90° 45°... -
Seite 63: Daten Der Seriellen Schnittstelle
Belegung der Klemmen für den Lastzellenanschluss Klemme Belegung +EXC +SEN +SIG Schirm –SIG –SEN –EXC 8.4 Daten der seriellen Schnittstelle Belegung des seriellen Schnittstellenanschlusses (IND221) 1 2 3 4 5 Belegung – – – – Für IND226, siehe Seite 38. 6 7 8 9... - Seite 64 Command Set). Mit SICS-Befehlen lässt sich das Terminal von einem PC aus konfigurieren, abfragen und bedienen. SICS-Befehle sind in verschiedene Levels unterteilt. Für weitere Informationen zum MT-SICS Befehlssatz siehe MT-SICS Manual (Bestellnummer 22 011 459) oder wenden Sie sich an den METTLER TOLEDO Kundendienst. Befehl Bedeutung LEVEL 0 Waage zurücksetzen...
-
Seite 65: Introduction
Notre gamme de produits comprend des appareils spéciaux pour les zones dangereuses. ATTENTION! Utilisez uniquement des terminaux de pesage IND226 de la catégorie au degré de protection IP65 si: • les terminaux de pesage sont utilisés dans des zones humides •... - Seite 66 L'accu contient des métaux lourds. ➜ Respectez les réglementations locales concernant l'élimination des matériaux dangereux pour l'environnement. 1.2 Description Les terminaux de pesage IND221 et IND226 diffèrent par le degré de protection: IND221 IP54, pour usage normal en environnement sec IND226 IP65, pour l'utilisation dans un environnement humide et rude Les possibilités suivantes existent pour l'alimentation électrique du terminal de pesage:...
- Seite 67 Ecran 1 Affichage de poids à 6 chiffres METTLER TOLEDO 2 Indicateurs d'état 3 Clavier Under Over >|1|< >|2|< Indicateurs d'état Signification Indicateurs de pesée de contrôle Under / OK / Over Indicateurs pour le comptage, autocollant correspondant fourni Count / PCS / APW Indicateur de mouvement La valeur de poids affichée est une valeur de poids nette...
-
Seite 68: Mise En Service
➜ Insérez la douille D-sub à 9 broches dans la fiche du terminal de pesage. IND226 Pour l'IND226, l'interface série doit être connectée à l'intérieur du terminal de pesage. 1. Insérez le câble d'interface à travers la traversée de câble dans le terminal de pesage. -
Seite 69: Connexion De L'alimentation Électrique
Risque d’explosion en cas d’utilisation d’un type de pile incorrect ou de branchement incorrect! ▲ Utiliser seulement des piles originales de METTLER TOLEDO. ▲ Vérifier que la pile est branchée correctement au terminal. 1. Ouvrez le compartiment de l'accu dans le bas du terminal. - Seite 70 Sur des systèmes de pesage vérifiés, la connexion de la plate-forme de pesage au terminal de pesage doit être plombée à l'aide d'un fil de plombage ou d'un adhésif de plombage. Veuillez contacter le service après-vente METTLER TOLEDO ou le bureau local de vérification des poids et mesures.
-
Seite 71: Fonctions De Base
3 Fonctions de base 3.1 Mise en service et hors service Mise en service ➜ Appuyez sur L'afficheur s'allume et affiche ensuite la version de logiciel. Lorsque l'affichage de poids apparaît, le terminal de pesage est prêt à fonctionner. Mise hors service ➜... - Seite 72 Effacement de la tare ➜ Appuyez sur L'indicateur Net s'éteint, le poids brut apparaît sur l'afficheur. • Si l'effacement automatique du poids de la tare est réglé dans le menu superviseur (F1.5.2=On), le poids de la tare est effacé automatiquement dès que la plate-forme de pesage est déchargée.
- Seite 73 • Ne nettoyez pas le terminal de pesage avec un nettoyeur à haute pression ni à l'eau courante. • Suivez toutes les instructions pertinentes concernant les intervalles de nettoyage et les produits de nettoyage autorisés. IND226 • Ne pas nettoyer à haute pression ni avec de l'eau chaude.
-
Seite 74: Applications
4 Applications Selon le réglage du paramètre F2.1 dans le menu opérateur, différentes applications peuvent être activées à l'aide de la touche 4.1 Afficher des valeurs de poids avec une résolution plus élevée (x10) Dans ce but, F2.1=MULt doit être réglé dans le menu opérateur (réglage d'usine). ➜... - Seite 75 Définition du poids à atteindre 1. Appuyez sur pour activer la fonction de pesée de contrôle. 2. Appuyez sur la touche et maintenez-la enfoncée jusqu'à ce que tArGEt et les 3 indicateurs Under, OK et Over apparaissent. Si F2.2.2=WEIGHt (réglage d'usine) est réglé dans le menu opérateur, l'affichage de poids apparaît.
- Seite 76 4.4 Classification Dans ce but, F2.1=OVEr et F2.2.1=CLASS doivent être réglés dans le menu opérateur. Avec le réglage d'usine, la fonction de classification fonctionne avec des tolérances supérieure et inférieure de 10 d. Ces tolérances peuvent être personnalisées avec les paramètres F2.2.3 et F2.2.4.
- Seite 77 Classification Exemple: Poids de consigne = 1.000 kg, Tol. 1 = 100 kg, Tol. 2 = 200 kg, Tol. 3 = 300 kg • Poids inférieur au poids de consigne et inférieur à la Tol. 3, dans l'exemple < 700 kg. L'indicateur Under s'allume.
- Seite 78 Dans ce but, F2.1=Count doit être réglé dans le menu opérateur. Lorsque le terminal de pesage est utilisé majoritairement pour des opérations de comptage, METTLER TOLEDO recommande de coller l'étiquette fournie (Count, APW, PCS) sur les 3 indicateurs de gauche (Under, OK, Over).
-
Seite 79: Menu Opérateur
5 Menu opérateur Le menu opérateur comprend les blocs suivants: F2 – Réglages du menu de la touche F F3 – Réglages du menu du terminal F4 – Réglages du menu de communication F6 – Menu de sortie 5.1 Entrée dans le menu opérateur ➜... - Seite 80 3. Lors de l'introduction de nombres à plusieurs chiffres, utilisez la touche pour déplacer le curseur d'une position vers la gauche. 4. Changez le chiffre comme décrit à l'étape 2. 5. Répétez les étapes 3 et 4 si nécessaire. 6. Lorsque tous les chiffres sont entrés, utilisez la touche pour confirmer l'entrée.
- Seite 81 F2.2.3 – Tolérances supérieures Après sélection du paramètre, la tolérance actuellement réglée apparaît. Si F2.2.1 = Chech est sélectionné: Tolérance supérieure = poids de consigne + valeur de tolérance affichée Si F2.2.1 = CLASS est sélectionné: Le terminal de pesage détermine 3 tolérances en interne. Tolérance supérieure 1 = poids de consigne + valeur de tolérance affichée Tolérance supérieure 2 = poids de consigne + 2 x la valeur de tolérance affichée Tolérance supérieure 3 = poids de consigne + 3 x la valeur de tolérance affichée...
- Seite 82 F2.3 – Référence pour optimisation Ce paramètre apparaît uniquement si F2.1=Count est réglé. Pas de référence d'optimisation La référence d'optimisation est activée. Le terminal de pesage détermine automatiquement à nouveau le poids à la pièce si le nombre de pièces a augmenté.
- Seite 83 , l'affichage en cours est imprimé Print APrint Les valeurs de poids stables sont imprimées automatiquement Réglages supplémentaires: F4.2.5 et F4.2.6 Communication via METTLER TOLEDO Standard Interface Command Set SICS Contin Mode Toledo Continuous F4.2 – Format F4.2.1 – Format ligne...
- Seite 84 F4.2.4 – Ajouter une ligne Réglage d'usine 3 (lignes) Réglages possibles 0 ... 9 (lignes) F4.2.5 – Seuil d'impression auto Cet élément de menu est uniquement disponible si F4.1=APrint est réglé. Une valeur de poids stable qui est supérieure à la valeur réglée est automatiquement imprimée.
- Seite 85 F4.3.4 – Total de contrôle Total de contrôle activé Total de contrôle désactivé F4.10 – Réinitialisation des réglages de communication Remet tous les paramètres F4.x(.x) au réglage d'usine. 5.6 F6 – Menu de sortie 1. Appuyez sur F6 apparaît. 2. Pour sauvegarder les changements: Appuyez sur SAVE ? apparaît.
-
Seite 86: Menu Superviseur
6 Menu superviseur Le menu superviseur comprend les blocs suivants: F1 – Réglages de la balance F5 – Réglages du terminal F6 – Menu de sortie 6.1 Entrée dans le menu superviseur ➜ En mode poids brut, appuyez sur la touche et maintenez-la enfoncée jusqu'à... - Seite 87 F1.2.1 – Unités de poids Unité de poids: kg Unité de poids: lb 1 lb ≈ 0,454 kg F1.2.2 – Plages de pesée Pour plates-formes de pesage à échelle unique Pour plates-formes de pesage à échelle double F1.2.3 – Capacité de la première échelle de pesée (échelle grossière) Les capacités possibles et les réglages d'usine dépendent de la plate-forme de pesage connectée.
- Seite 88 F1.3.3 – Ajustement Les étapes avec fond gris apparaissent uniquement si le paramètre F1.3.2=LinOn est réglé. Ecran Touche Description Déchargez la plate-forme de pesage E SCL Confirmez que la plate-forme de pesage est vide Le terminal de pesage décompte de 10 à 0 10 CAL Le zéro est déterminé...
- Seite 89 F1.4.1 – Réglage du zéro automatique Réglage automatique du zéro désactivé (non disponible en mode NTEP) Réglage automatique du zéro à +/–0,5 d 0,5 d Réglage automatique du zéro à +/–1,0 d (non disponible en mode OIML) Réglage automatique du zéro à +/–3 d (non disponible en mode OIML) F1.4.2 –...
- Seite 90 F1.5.4 – Seuil de tare auto Cet élément de menu est uniquement disponible si F1.5.1=On est réglé. La plate-forme de pesage doit être chargée à la valeur définie avant que la valeur de poids soit automatiquement tarée. Réglage d'usine 10 d Réglages possibles 0 ...
- Seite 91 6.4 Bloc F5 – Maintenance Les réglages d'usine sont imprimés en caractères gras. F5.1 – Valeurs de calibrage F5.1.1 – Affiche les comptes de zéro F5.1.2 – Affiche la valeur de poids de demi-charge F5.1.3 – Affiche les comptes de demi-charge F5.1.4 –...
-
Seite 92: Messages D'erreur
Nombre de pièces de référence trop petit supplémentaires ➜ Appelez le service après-vente Err 6 Erreur lecture/écriture EEPROM METTLER TOLEDO ➜ Veillez à ce que la plate-forme Err 35 Plate-forme de pesage en mouvement pendant le calibrage de pesage soit au repos ➜... -
Seite 93: Caractéristiques Techniques
30 mm • Indicateur d'état: 10 indicateurs Boîtier • IND221: plastique, classe de protection IP54 • IND226: acier inoxydable, classe de protection IP65 Alimentation électrique • 87 ... 264 VAC, 0,1 A • En option: accu rechargeable NiMH • En option: piles sèches taille C Interface de données... - Seite 94 + SIG Blindage – SIG – SEN – EXC 8.4 Données de l'interface série Affectation de la connexion d'interface série (IND221) 1 2 3 4 5 Broche Affectation – – – – Pour IND226, voir page 68. 6 7 8 9...
- Seite 95 Commandes d'interface SICS Le terminal de pesage supporte le jeu de commandes MT-SICS (METTLER TOLEDO Standard Interface Command Set). Avec les commandes SICS, il est possible de configurer, interroger et faire fonctionner le terminal depuis un PC. Les commandes SICS sont divisées en différents niveaux.
-
Seite 96: Introducción
Nuestra gama de productos incluye dispositivos especiales para las zonas peligrosas. ¡ATENCIÓN! Utilice terminales de pesada IND226 con clase de protección IP65 única- mente si: • el terminal de pesada se emplea en zonas húmedas • es necesario una limpieza en húmedo •... - Seite 97 La batería contiene metales pesados. ➜ Observe las disposiciones locales respecto al desecho de materiales peligrosos para el medio ambiente. 1.2 Descripción Los terminales de pesada IND221 e IND226 difieren en la clase de protección: IND221 IP54, para uso normal en entornos secos IND226 IP65, para la aplicación en entornos húmedos y no favorables...
- Seite 98 Display 1 Display de peso 6 dígitos METTLER TOLEDO 2 Indicadores de estado 3 Teclado Under Over >|1|< >|2|< Indicadores de estado Significado Indicadores para control de peso Under / OK / Over alternativa Indicadores para recuento, pegatina correspondiente incl. en el envío...
-
Seite 99: Poner En Funcionamiento
➜ Enchufe la toma D-sub de 9 patillas en el conector del terminal de pesada. IND226 Con IND226, la interfase serie debe conectarse dentro del terminal de pesada. 1. Pase el cable de interfase al terminal de pesada a través del prensaestopas. - Seite 100 Peligro de explosión si se utiliza un tipo de batería incorrecto o si la batería no se conecta debidamente. ▲ Utilizar únicamente baterías originales METTLER TOLEDO. ▲ Asegurarse de que la batería se ha conectado correctamente al terminal. 1. Abra el cajetín de batería en la parte inferior del terminal.
- Seite 101 En los sistemas de pesada certificados, la conexión de la plataforma de pesada al terminal de pesada debe estar sellada con un alambre o una pegatina de precintado. Póngase por favor en contacto con el servicio METTLER TOLEDO o con las autoridades en- cargadas con asuntos de pesos y medidas de su localidad...
-
Seite 102: Funciones Básicas
3 Funciones básicas 3.1 Encendido y apagado Encendido ➜ Pulse El display se ilumina y muestra la versión del software. Si el display muestra el peso, el terminal de pesada está listo para funcionar. Apagado ➜ Pulse y mantenga pulsado hasta que se muestre –OFF–. - Seite 103 Borrado de la tara ➜ Pulse El indicador Neto se apaga, y el peso bruto aparece en el display. • Si el menú supervisor se ha configurado para borrado de tara automático (F1.5,2=On), la tara se borra automáticamente tan pronto como la plataforma de pesada está descargada.
-
Seite 104: Aplicaciones
• Para la limpieza del terminal de pesada no utilice equipos para limpiar a alta presión o con agua corriente. • Siga todas las instrucciones pertinentes respecto a los intervalos y los agentes de limpieza. IND226 • No realice la limpieza a alta presión o con agua caliente. 4 Aplicaciones Dependiendo del ajuste del parámetro F2.1 en el menú... - Seite 105 4.2 Conmutación de la unidad de medida Para este fin F2.1=Unit debe estar asignado en el menú de operador. ➜ Pulse El valor de pesada se visualiza en la segunda unidad de medida. Nota La unidad de medida permanece visualizada hasta que se conmuta de nuevo. 4.3 Control del peso Para este fin, F2.1=OVEr y F2.2,1=CHECh (ajuste de fábrica) deben estar asignados en el menú...
- Seite 106 Control del peso Ejemplo: Peso teórico = 1.000 kg • Menos peso que el peso teórico y por debajo de la tolerancia inferior. El indicador Under se ilumina. • Peso dentro de tolerancia. El indicador OK se ilumina. • Más peso que el peso teórico y por encima de la tolerancia superior.
- Seite 107 Clasificación Ejemplo: Peso teórico = 1.000 kg, Tol. 1 = 100 kg, Tol. 2 = 200 kg, Tol. 3 = 300 kg • Peso más pequeño que el peso teórico y por debajo de Tol. 3, en el ejemplo < 700 kg. El indicador Under se ilumina.
- Seite 108 4.5 Cómputo Para este fin F2.1=Count debe estar asignado en el menú de operador. Si el terminal de pesada se utiliza de mayormente para operaciones de cómputo, METTLER TOLEDO recomienda pegar la etiqueta suministrada (Count, APW, PCS) encima de los 3 indicadores a izquierda (Under, OK, Over).
-
Seite 109: Menú De Operador
5 Menú de operador El menú de operador consta de los siguientes bloques: F2 – Ajustes menú de tecla F F3 – Ajustes menú de terminal F4 – Ajustes menú de comunicación F6 – Exit menú 5.1 Entrada al menú de operador ➜... - Seite 110 3. Cuando entre números multi dígitos, emplee la tecla para mover el cursor una posición a la izquierda. 4. Modifique el dígito como se describe en el paso 2. 5. Repita los pasos 3 y 4 si es necesario. 6. Una vez que ha entrado todos los dígitos, emplee la tecla para confirmar la entrada.
- Seite 111 F2.2.3 – Tolerancia superior Después de seleccionar el parámetro aparece la tolerancia actualmente ajustada. Si se ha elegido F2.2.1 = Chech: Tolerancia superior = peso teórico + valor de tolerancia indicado Si se ha elegido F2.2.1 = CLASS: El terminal de pesada determina internamente 3 tolerancias. Tolerancia superior 1 = peso teórico + valor de tolerancia indicado Tolerancia superior 2 = peso teórico + 2 x valor de tolerancia indicado Tolerancia superior 3 = peso teórico + 3 x valor de tolerancia indicado...
- Seite 112 F2.3 – Optimización referencia Este parámetro aparece sólo si F2.1=Count está asignado. Sin optimización referencia Optimización referencia activada. terminal pesada determina automáticamente el peso de piezas de nuevo, si se ha incrementado el número de componentes. F2.10 – Reset ajustes tecla F Restaure todos los parámetros F2.x(.x) al ajuste de fábrica.
- Seite 113 , el display actual se imprime Print APrint Los valores de pesada estabilizados se imprimen automáticamente Ajustes adicionales: F4.2.5 y F4.2.6 Vía de comunicación METTLER TOLEDO Standard Interface Command Set SICS Contin Modo Toledo Continuous F4.2 – Formato F4.2.1 – Formato línea Multi línea...
- Seite 114 F4.2.4 – Añadir avance línea Ajuste de fábrica 3 (líneas) Ajustes posibles 0 ... 9 (líneas) F4.2.5 – Auto tolerancia imprimir Esta opción de menú está sólo disponible si F4.1=APrint está asignado. Un valor de pesada estabilizado que está por encima del valor asignado, se imprime automáticamente.
- Seite 115 F4.3.4 – Suma de control Suma de control activada Suma de control desactivada F4.10 – Reset ajustes de comunicación Restaura todos los parámetros F4.x(.x) al ajuste de fábrica. 5.6 F6 – Menú finalizar 1. Pulse F6 aparece. 2. Para guardar las modificaciones: Pulse SAVE ? aparece.
-
Seite 116: Menú Supervisor
6 Menú supervisor El menú supervisor consta de los siguientes bloques: F1 – Ajustes de balanza F5 – Ajustes de terminal F6 – Exit menú 6.1 Introducción del menú supervisor ➜ En modo Bruto, pulse y mantenga pulsada hasta que MAStEr aparezca en el display. - Seite 117 F1.2.1 – Unidades de medida Unidad de medida: kg Unidad de medida: lb 1 lb ≈ 0,454 kg F1.2.2 – Gamas de pesada Para plataformas de pesada gama simple Para plataformas de pesada gama doble F1.2.3 – Capacidad de la primera gama de pesada (gama aproximada) Las capacidades posibles y los ajustes de fábrica dependen de la plataforma de pesada conectada.
- Seite 118 F1.3.3 – Ajuste Estos pasos sobre fondo gris aparecen solamente si el parámetro F1.3.2=LinOn está asignado. Display Tecla Descripción Retirar la carga de la plataforma de pesada E SCL Confirmar plataforma de pesada vacía El terminal de pesada cuenta atrás de 10 a 0 10 CAL Cero está...
- Seite 119 F1.4.1 – Ajuste de cero automático Ajuste de cero automático desactivado (no disponible en modo NTEP) Ajuste de cero automático dentro de +/–0,5 d 0.5 d Ajuste de cero automático dentro de +/–1,0 d (no disponible en modo OIML) Ajuste de cero automático dentro de +/–3 d (no disponible en modo OIML) F1.4.2 –...
- Seite 120 F1.5.4 – Auto tolerancia tara Esta opción de menú está sólo disponible si F1.5.1=On está asignado. La plataforma de pesada debe cargarse al valor de ajuste, antes de tarar automáticamente el valor de pesada. Ajustes de fábrica 10 d Ajustes posibles 0 ...
- Seite 121 6.4 Bloque F5 – Mantenimiento Los ajustes de fábrica están escritos en letra negrita. F5.1 – Valores de calibración F5.1.1 – Muestra contador cero F5.1.2 – Muestra valor de pesada media carga F5.1.3 – Muestra contador media carga F5.1.4 – Muestra valor de pesada plena carga F5.1.5 –...
-
Seite 122: Mensajes De Error
➜ Póngase en contacto con el Err 6 Error de lectura/escritura de EEPROM servicio METTLER TOLEDO ➜ Asegúrese que la plataforma Err 35 Plataforma de pesada en movimiento durante la de pesada esté quieta calibración ➜... -
Seite 123: Datos Técnicos
Temp. de almacenam. • –20 ... +60 °C Humedad relativa • 10 ... 85 %, sin condensación Peso (incl. embalaje) • IND221: aprox. 1,3 kg / 2,9 lb • IND226: aprox. 2,9 kg / 6,4 lb Dimensiones IND221 129.1 90°... - Seite 124 +SEN +SIG Blindaje –SIG –SEN –EXC 8.4 Interfase serie de datos Asignación de la conexión de interfase serie (IND221) 1 2 3 4 5 Patilla Asignación – – – – Para IND226, consulte la página 99. 6 7 8 9...
- Seite 125 Los comandos SICS están divididos en varios niveles. Mayor información sobre el conjunto de comandos MT-SICS, véase Manual MT-SICS (Pedido No. 22 011 459) o póngase en contacto con el servicio posventa METTLER TOLEDO. Comando...
-
Seite 126: Introduzione
1 Introduzione 1.1 Precauzioni di sicurezza ATTENZIONE! Non utilizzare IND221 / IND226 in aree a rischio di esplosione! La nostra gamma di prodotti comprende dispositivi appositamente studiati per l'uso in aree a rischio di esplosione. ATTENZIONE! Nei seguenti casi utilizzare esclusivamente terminali di pesata IND226 con classe di protezione IP65: •... - Seite 127 ➜ Attenersi ai regolamenti locali sullo smaltimento di materiali dannosi per l'ambiente. 1.2 Descrizione I terminali di pesata IND221 e IND226 hanno classi di protezione differenti: IND221 IP54, per utilizzo normale in ambienti asciutti IND226 IP65, per impiego in ambienti umidi e ostili Per l’alimentazione del terminale di pesata vi sono le seguenti possibilità:...
- Seite 128 Indicatore 1 Indicatore di peso a 6 cifre METTLER TOLEDO 2 Indicatori di stato 3 Tastiera Under Over >|1|< >|2|< Indicatori di stato Significato Indicatori per la pesata di controllo Under / OK / Over o in alternativa Indicatori per conteggio, apposito adesivo fornito Count / PCS / APW Indicatore d'instabilità...
-
Seite 129: Messa In Funzione
➜ Svitare 4 viti e sollevare il coperchio. Apertura del terminale IND226 Il coperchio del terminale IND226 è bloccato da 4 fermi a molla. 1. Inserire la punta di un cacciavite piatto in una delle due cave situate sul fondo del coperchio e spingere delicatamente in direzione dello chassis fino a quando si sente un "pop". - Seite 130 ➜ Inserire il connettore femmina D-sub a 9 poli nell'apposito connettore del terminale di pesata. IND226 Con IND226, l'interfaccia seriale deve essere collegata all’interno del terminale di pesata. 1. Inserire il cavo d'interfaccia nel terminale di pesata facendolo passare attraverso il passacavo filettato.
-
Seite 131: Collegamento Dell'alimentatore
Pericolo d’esplosione a causa del tipo scorretto della batteria o a causa dell’allacciamento scorretto della batteria. ▲ Utilizzare soltanto batterie originali METTLER TOLEDO. ▲ Accertarsi che la batteria sia collegata correttamente al terminale. 1. Aprire lo scomparto portabatterie sul fondo del terminale. - Seite 132 Sui sistemi di pesata certificati, il collegamento della piattaforma di pesata al terminale di pesata deve essere munito di sigillo di piombatura con filo metallico o etichetta adesiva di piombatura. Si prega di contattare il Servizio Assistenza Tecnica METTLER TOLEDO o il locale ufficio pesi e misure. IND221...
-
Seite 133: Funzioni Base
3 Funzioni base 3.1 Accensione e spegnimento Accensione ➜ Premere il tasto L'indicatore si accende, quindi visualizza il numero di software. Quando sullo schermo compare l’indicatore di peso, il terminale di pesata è pronto per essere utilizzato. Spegnimento ➜ Premere il tasto e tenerlo premuto fino a che l'indicatore visualizza –OFF–. - Seite 134 Cancellazione della tara ➜ Premere il tasto L’indicatore Net scompare, e nell’indicatore viene visualizzato il peso lordo. • Se nel menu Supervisore è impostata la cancellazione automatica del peso di tara (F1.5.2=On), il peso di tara viene automaticamente cancellato non appena la piattaforma di pesata viene scaricata.
-
Seite 135: Applicazioni
• Non pulire il terminale di pesata con dispositivi di pulitura ad alta pressione né sotto acqua corrente. • Seguire le istruzioni relative agli intervalli di pulitura e agli agenti detergenti ammessi. IND226 • Non lavare con acqua pressurizzata né con acqua calda. 4 Applicazioni A seconda dell'impostazione del parametro F2.1 nel menu Operatore, usando il tasto... -
Seite 136: Commutazione Dell'unità Di Peso
4.2 Commutazione dell'unità di peso A tale scopo, nel menu Operatore deve essere impostato il parametro F2.1=Unit. ➜ Premere il tasto Il valore di peso viene visualizzato nella seconda unità di peso. Nota L'unità di peso visualizzata rimane attiva fino a che essa non viene nuovamente commutata. 4.3 Pesata di controllo A tale scopo, nel menu Operatore devono essere impostati i parametri F2.1=OVEr e F2.2.1=CHECh (preimpostazione di fabbrica). - Seite 137 Pesata di controllo Esempio: peso nominale = 1.000 kg • Peso inferiore al peso nominale e al disotto del limite di tolleranza inferiore. L’indicatore Under si accende. • Peso entro i limiti di tolleranza. L’indicatore OK si accende. • Peso superiore al peso nominale e al disopra del limite di tolleranza superiore.
- Seite 138 Classificazione Esempio: Peso nominale = 1.000 kg, Tol. 1 = 100 kg, Tol. 2 = 200 kg, Tol. 3 = 300 kg • Peso inferiore al peso nominale e a Tol. 3, nell'esempio è < 700 kg. L'indicatore Under si illumina. •...
- Seite 139 4.5 Conteggio A tale scopo, nel menu Operatore deve essere impostato il parametro F2.1=Count. Se il terminale di pesata viene utilizzato principalmente per operazioni di conteggio, METTLER TOLEDO raccomanda di applicare l'etichetta adesiva fornita (Count, APW, PCS) sui 3 indicatori di sinistra (Under, OK, Over). Determinazione del peso unitario e conteggio pezzi 1.
-
Seite 140: Menu Operatore
5 Menu Operatore Il menu Operatore è costituito dai seguenti blocchi: F2 – Impostazioni menu tasto F F3 – Impostazioni menu terminale F4 – Impostazioni menu comunicazione F6 – Uscita menu 5.1 Accesso al menu Operatore ➜ In modalità peso lordo, premere il tasto e tenerlo premuto fino a che sullo schermo compare MAStEr. - Seite 141 3. Quando si introducono numeri a più cifre, premere il tasto per spostare il cursore di uno spazio verso sinistra. 4. Modificare la cifra come descritto al punto 2. 5. Se necessario ripetere i punti 3 e 4. 6. Una volta introdotte tutte le cifre, premere il tasto per confermare l'introduzione.
- Seite 142 F2.2.3 – Limite di tolleranza superiore Dopo la selezione del parametro, il display indica la tolleranza impostata corrente. Se è selezionato il parametro F2.2.1 = Chech: Limite di tolleranza superiore = peso nominale + valore di tolleranza indicato Se è selezionato F2.2.1 = CLASS: Internamente, il terminale di pesata determina 3 valori di tolleranza.
- Seite 143 F2.10 – Ripristino impostazioni tasto F Ripristino di tutti i parametri F2.x(.x) alla preimpostazione di fabbrica. 5.4 F3 – Menu terminale Le preimpostazioni di fabbrica vengono stampate con caratteri in grassetto. F3.1 – Impostazioni indicatore F3.1.1 – Modo Sleep Il terminale di pesata passa nel Modo Sleep, se durante l'intervallo di tempo impostato non viene lanciato nessun comando dal terminale di pesata o non si verifica alcuna variazione di peso.
- Seite 144 , viene stampato il contenuto dell’indicatore Print APrint I valori di peso stabili vengono stampati automaticamente Impostazioni addizionali: F4.2.5 e F4.2.6 Comunicazione tramite Standard Interface Command Set METTLER TOLEDO SICS Contin Modalità Toledo Continuous F4.2 – Formato F4.2.1 – Formato riga...
- Seite 145 F4.2.6 – Soglia ripristino stampa automatica Questa opzione di menu è disponibile soltanto se è impostato il parametro F4.1=APrint. Perché possa essere stampato automaticamente un nuovo valore di peso, è necessario scaricare la bilancia fino ad un peso inferiore al valore preimpostato. Preimpostazione di fabbrica 10 (d) Impostazioni possibili...
- Seite 146 5.6 F6 – Fine menu 1. Premere il tasto Sullo schermo compare F6. 2. Per memorizzare le modifiche: Premere il tasto Sullo schermo compare il messaggio SAVE ?. Quindi premere nuovamente il tasto – oppure – Per scartare le modifiche: Premere il tasto Sullo schermo compare AbOrt.
-
Seite 147: Menu Supervisore
6 Menu Supervisore Il menu Supervisore è costituito dai seguenti blocchi: F1 – Impostazioni bilancia F5 – Impostazioni terminale F6 – Uscita menu 6.1 Accesso al menu Supervisore ➜ In modalità peso lordo, premere il tasto e tenerlo premuto fino a che sullo schermo compare MAStEr. - Seite 148 F1.2.1 – Unità di peso Unità di peso: kg Unità di peso: lb 1 lb ≈ 0,454 kg F1.2.2 – Campi di pesata Per piattaforme di pesata a campo unico Per piattaforme di pesata a campo doppio F1.2.3 – Capacità del primo campo di pesata (campo normale) I valori di capacità...
- Seite 149 F1.3.3 – Regolazione Gli indicatori riportati su sfondo grigio compaiono soltanto se è impostato il parametro F1.3.2=LinOn. Indicatore Tasto Descrizione Scarico piattaforma di pesata E SCL Conferma piattaforma di pesata scarica Il terminale di pesata effettua un conto alla rovescia da 10 CAL 10 a 0.
- Seite 150 F1.4.1 – Impostazione automatica zero Impost. automatica zero disabilitata (non disponibile nella modalità NTEP) Impost. automatica zero entro +/–0,5 d 0.5 d Impost. automatica zero entro +/–1,0 d (non disponibile nella modalità OIML) Impost. automatica zero entro +/–3 d (non disponibile nella modalità OIML) F1.4.2 –...
- Seite 151 F1.5.4 – Soglia tara automatica Questa opzione di menu è disponibile soltanto se è impostato il parametro F1.5.1=On. Perché un certo valore di peso venga automaticamente impostato come valore di tara, è necessario caricare la piattaforma di pesata fino al valore preimpostato. Preimpostazione di fabbrica 10 d Impostazioni possibili...
- Seite 152 6.4 Blocco F5 – Manutenzione Le preimpostazioni di fabbrica vengono stampate con caratteri in grassetto. F5.1 – Valori calibrazione F5.1.1 – Visualizzazione numeri zero F5.1.2 – Visualizzazione valore peso metà carico F5.1.3 – Visualizzazione numeri metà carico F5.1.4 – Visualizzazione valore peso carico massimo F5.1.5 –...
-
Seite 153: Messaggi D'errore
Numero parti riferimento troppo piccolo addizionali ➜ Contattare il Servizio Assistenza Err 6 Errore lettura/scrittura EEPROM Tecnica METTLER TOLEDO ➜ Accertarsi che la piattaforma di Err 35 Piattaforma di pesata in movimento durante la pesata sia stabile calibrazione ➜ Contattare il Servizio Assistenza... -
Seite 154: Caratteristiche Tecniche
30 mm • Indicatore di stato: 10 indicatori Chassis • IND221: plastica, classe di protezione IP54 • IND226: acciaio inossidabile, classe di protezione IP65 Alimentazione • 87 ... 264 VC.A., 0,1 A • Opzionalmente: batteria ricaricabile NiMH • Opzionalmente: batterie a secco tipo C Interfaccia dati •... -
Seite 155: Caratteristiche Tecniche Convertitori A/D
Assegnazione terminale per connessione cella di carico Terminale Assegnazione +EXC +SEN +SIG Schermo –SIG –SEN –EXC 8.4 Dati interfaccia seriale Assegnazione connessione interfaccia seriale (IND221) 1 2 3 4 5 Polo Assegnazione – – – – Per IND226, vedere pagina 130. 6 7 8 9... - Seite 156 Istruzioni interfaccia SICS Il terminale di pesata supporta il set di istruzioni MT-SICS (METTLER TOLEDO Standard Interface Command Set). Con le istruzioni SICS, è possibile configurare, interrogare e comandare il terminale da un PC. Le istruzioni SICS sono suddivise in vari livelli.
-
Seite 157: Output Format In Toledo Continuous Mode
1 Output format in TOLEDO Continuous Mode Weight values are always transmitted in the following format: ASCII characters 02 hex/2 deci, character for "start of text" SB... For status bytes, see below Data field with 6 digits for the weight value transmitted without a decimal point and unit Data field with 6 digits for the tare weight Carriage return (ASCII character 0D hex/13 deci) - Seite 158 Status byte SB2 Bit 6 Bit 5 Bit 4 Bit 3 Bit 2 Bit 1 Bit 0 0 Normal 0 lb 0 Stabiliza- 0 Normal 0 Positive 0 Gross status tion status sign value 1 Power up 1 kg 1 Movement 1 Underload/ 1 Negative 1 Net...
-
Seite 159: Accessories
2 Accessories Sales region Accessories Americas Europe IND226 RS cable 71 210 304 71 210 304 Signal assignment Brown Black Blue Column adapter for mounting the terminal onto METTLER TOLEDO standard columns IND221 column adapter – 72 200 038 IND226 column adapter –... -
Seite 160: Declaration Of Conformity
Model/Type: IND221 IND226 weighing Terminal (EC test certificate:TC6862) To which this declaration relates , is in conformity with the following standard(s) or other normative document(s), auf das sich diese Erklärung bezieht, mitder/den folgenden Norm(en) oder Richtlinie(n) übereinstimmt. -
Seite 161: Fcc Notice
4 FCC notice This equipment has been tested and found to comply with the limits for a Class A dig- ital device, pursuant to both Part 15 of the FCC Rules and the radio interference reg- ulations ot the Canadian Department of Communications. These limits are designed to provide a reasonable protection against harmful interference when the equipment is operated in a commercial environment. - Seite 164 *72182839E* 72182839E © Mettler-Toledo AG 06/08 72182839E Subject to technical changes Mettler-Toledo AG Im Langacher CH-8606 Greifensee, Switzerland Tel. +41-44-944 22 11 Fax. +41-44-944 45 10 www.mt.com...