PELI 7060 LED Betriebsanleitung
Handtaschenlampe
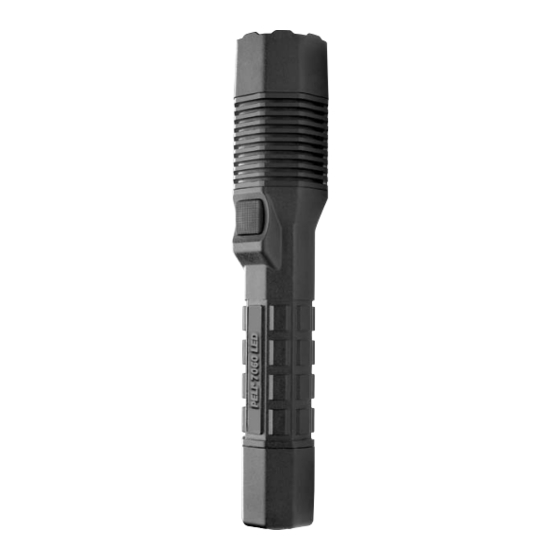
CAT. #7060
ERSATZTEILE
REF. Nr.
BESCHREIBUNG
6058F
220V-NETZGERÄT FÜR LADEGERÄT
6061F
DIREKTVERKABELUNG FÜR LADEGERÄT
7070
INTELLIGENTE LADESTATION FÜR TISCH/FAHRZEUG
8056F
12V-LADEKABEL FÜR LADEGERÄT
7069
ERSATZ-LI-ION-BATTERIEPACK
7052 YW
VERKEHRSWARNKEGEL (Gelb)
7052 OR
VERKEHRSWARNKEGEL (Orange)
Mounting Template
Use template below to mount to wall or any flat surface, using #10
screws.
Plantilla de montaje
Utiliza la plantilla de más abajo para montar el producto en una
pared u otra superficie plana, con tornillos del nº 10.
Gabarit de montage
Utiliser le gabarit fourni ci-contre pour monter le produit sur un mur
ou sur une surface plane quelconque en utilisant les vis nº 10.
Montageschablone
Verwenden Sie untenstehende Schablone für die Wandmontage
oder Montage auf einer flachen Unterlage mit #10-Schrauben.
1.74"
PELI
PRODUCTS, S.L.U.
TM
c/ Casp, 33-B Pral. • 08010 • Barcelona, Spain
Tel (+34) 93.467.4999 • FAX (+34) 93.487.7393 www.peli.com
PELI
PRODUCTS USA
TM
23215 Early Ave. • Torrance, CA 90505
(310) 326-4700 • FAX (310) 326-3311
7063-311-500
5-0762 Rev A © 2010 PELI PRODUCTS OC/10
All trademarks and logos displayed herein are registered and
unregistered trademarks of Peli Products, S.L.U. or
Pelican Products, Inc. and others
.
PELI
Owner's Manual
7060
LED
WARNING: Before disassembling any part
of the 7060 LED torch, ensure that
the torch has not been operating for
five (5) minutes. During operation, the
LED module can become extremely hot and
may cause injury if touched.
Torch Operation
The 7060 LED is a high performance torch
for use by professionals. This torch comes
equipped with a high output LED pre-focused
lamp that emits a strong tight beam of white
light. There is no need to focus the 7060 LED.
DO NOT SHINE THIS TORCH
DIRECTLY INTO ANY PERSON'S EYES:
THIS MAY RESULT IN INJURY.
Your 7060 LED battery pack comes to you partially
charged and needs to be fully charged prior to use.
To Attach the Power Cord to the Charger Base
1. Rotate the charger so that the base is facing towards you.
2. Take the right angled plug from the power transformer and
push the metal end into the socket (the transformer socket is
located in a pocket in the base).
3. Feed the cord into the channel leading from the pocket.
4. Attach the Power Cord to the electrical supply.
NOTE: The Charger LED will turn red when the power is supplied.
Charging To charge the 7060 LED:
CHARGER
The charger is capable of charging the battery pack in under 5 hours.
The LED Charge Lights will indicate where the battery is in the charge
cycle as follows:
Solid Red
= 7060 Not Connected
Flashing Red Light
= 7060 Charging
Solid Green Light
= 7060 Fully Charged
There is no need to fully discharge the 7060 LED before
charging the battery. Charging can occur whenever required
and the 7060 LED can be left indefinitely in the charger hous-
ing without fear of over-charging.
To Charge:
1. Turn off the 7060 LED.
2. Snap the 7060 LED into the arms of the charger with the
switch facing towards you and the round charger contacts
engage with the 7060 LED contacts. The LED will turn from
a SOLID RED to a FLASHING RED to indicate the charging
cycle.
3. When the LED turns SOLID GREEN the battery pack is fully
charged.
NOTE: A flashing green LED indicates a charging problem. Remove the
torch from the charger and clean the charging contacts. If the problem
persists, please return the torch for warranty related repair.
TM
Battery Replacement
After approximately 500 charge/discharge cycles, the LI-ION
battery stick will no longer hold a charge and must be replaced.
The battery stick is available wherever Peli torches are sold
or directly from Peli Products Customer Service.
To replace the battery stick:
1. Unscrew the tail switch located at the rear of the 7060 LED.
2. Remove the battery stick.
3. Insert the new battery stick following the direction
on the battery decal.
4. Replace the tail switch & tighten it all the way down.
NOTE: Please act responsibly when disposing of the LI-ION Battery Stick. This part is
recyclable and should not be disposed of in the municipal waste system. Please check
with your local waste disposal authority for information.
Battery Care
• Do not over discharge your torch in an attempt to reduce a
"memory" condition. This practice is unnecessary as modern
LI-ION batteries, when used in torches such as the 7060
LED are highly unlikely to develop this condition. In addition,
deep discharging of the batteries may cause the batteries to vent
potentially dangerous gases and electrolytes.
O-ring Maintenance
Check closely for cuts, scratches, or otherwise damaged O-ring or
mating lens lip surface. Remove any dirt or foreign matter from
O-ring sealing surfaces. Keep threads, O-ring groove and inside
lip of lens lubricated with silicone grease. See Warranty information
for replacement of O-ring.
To turn on the light momentarily:
Gently press down on the switch cover and the 7060 LED will
operate until pressure is released.
To turn on the 7060 LED for continual use:
Firmly press down on the switch cover until a "click" is heard and
the 7060 LED will operate. Press down on the switch again to turn
off the 7060 LED.
Charger Mounting
The 7060 LED Charger Base can be permanently mounted in
most positions (except upside-down) in vehicles. Two mounting
holes are provided to enable attachment using #10 screws.
The right angle plug must be connected before the
charger can be mounted (see above).
Vehicle Installation
The 7060 LED charger can be permanently installed in most
vehicles and this operation should be performed by a professional
auto technician. The charger should not be installed upside-down
since certain conditions may cause the 7060 LED to be ejected
from the charger. When installing the charger, ensure that the
Direct Wiring Rig is connected to an ignition key-switched line.
The high amperage draw of this charger may drain the vehicle's
battery if connected directly to the battery.
REPLACEMENT PARTS
CAT. #
DESCRIPTION
6058F
220V TRANSFORMER FOR CHARGER
6061F
DIRECT WIRING RIG FOR CHARGER
7070
DESK/DASH SMART CHARGER BASE UNIT
8056F
12V PLUG-IN CHARGER CORD FOR CHARGER
7069
REPLACEMENT LI-ION BATTERY PACK
7052 YW
TRAFFIC WAND (Yellow)
7052 OR
TRAFFIC WAND (Orange)
PELI 7060 LED
MANUAL DE INSTRUCCIONES
ADVERTENCIA: Antes de desmontar cualquier pieza de la linterna
7060 LED, asegúrese de que ésta no se haya usado durante por
lo menos cinco (5) minutos. Durante su uso, el módulo LED puede
calentarse mucho y causar lesiones por contacto.
Uso de la linterna
El modelo 7060 LED es una linterna de alto rendimiento para
uso profesional. Viene equipada con una lámpara preenfocada
LED de gran potencia que emite un intenso haz de luz blanca.
No es necesario enfocar la linterna 7060 LED.
NO APUNTE LA LINTERNA DIRECTAMENTE A LOS OJOS DE
OTRA PERSONA, YA QUE PODRÍA PROVOCARLE LESIONES.
La batería de la linterna 7060 LED se entrega parcialmente
cargada y debe cargarse por completo antes de su uso.
Para conectar el cable de alimentación
a la base de cargador:
1. Haga girar el cargador de modo que la base apunte hacia usted.
2. Tome el conector en ángulo recto del transformador de
corriente y conecte el extremo metálico en el enchufe situado en un
pequeño compartimento de la base.
3. Haga pasar el cable por el canal que llega hasta el compartimento.
4. Enchufe el cable de alimentación a una toma de corriente.
NOTA: El LED rojo del cargador se encenderá al recibir corriente.
Carga: Para cargar la linterna 7060 LED:
CARGADOR
El cargador puede cargar la batería en menos de 5 horas.
Las luces de carga indican en qué ciclo de carga se
encuentra la batería:
Luz roja fija =
la linterna 7060 no está conectada
Luz roja parpadeante = la linterna 7060 está en proceso de carga
Luz verde fija =
la linterna 7060 está completamente cargada
No es necesario que la batería de la linterna 7060 LED se haya
descargado por completo antes de volver a cargarla. El proceso
de carga puede realizarse siempre que sea necesario y la linterna
7060 LED puede dejarse de forma indefinida en el cargador sin
miedo a que se sobrecargue.
Para cargar la linterna:
1. Apague la linterna 7060 LED.
2. Coloque la linterna 7060 LED en el soporte del cargador con el
interruptor mirando hacia usted, de modo que los contactos del
cargador encajen con los contactos de la linterna 7060 LED.
El indicador LED pasará de ROJO FIJO a ROJO PARPADEANTE,
lo cual indica que el proceso de carga ha comenzado.
3. Cuando el indicador LED se ilumine de color VERDE FIJO, la
batería ya estará cargada.
NOTA: Si el indicador LED emite una luz verde parpadeante, quiere decir que se ha
producido un error de carga. Retire la linterna del cargador y limpie los contactos de
carga. Si el problema persiste, envíe a reparar la linterna de acuerdo con la garantía.
Cambio de la batería
Al cabo de unos 500 ciclos de carga y descarga, la batería de ión
litio dejará de funcionar correctamente y deberá cambiarse. Puede
adquirir otra batería en cualquier establecimiento donde se vendan
linternas Peli o directamente a través del Servicio de Atención al
Cliente de Peli Products.
Para sustituir la batería, haga lo siguiente:
1. Desenrosque el interruptor trasero de la linterna 7060 LED.
2. Retire la batería.
3. Introduzca la nueva batería en el sentido indicado.
4. Vuelva a colocar el interruptor trasero y enrósquelo bien.
NOTA: Deseche la batería de ión litio de forma responsable, ya que es una pieza reci-
clable y no debe arrojarse a la basura. Si desea más información, consulte a las autori-
dades locales competentes.

Verwandte Anleitungen für PELI 7060 LED


Inhaltszusammenfassung für PELI 7060 LED
- Seite 1 To replace the battery stick: 6061F DIREKTVERKABELUNG FÜR LADEGERÄT calentarse mucho y causar lesiones por contacto. 1. Unscrew the tail switch located at the rear of the 7060 LED. 7070 INTELLIGENTE LADESTATION FÜR TISCH/FAHRZEUG Uso de la linterna 2. Remove the battery stick.
- Seite 2 1. Tournez le chargeur de manière à ce que la base soit face à permanente dans la plupart des positions (excepté à l’envers) dans 2. Die 7060 LED mit dem Schalter nach oben in die Halterung evitar el llamado “efecto memoria”. Esta práctica resulta innecesaria, vous.