Inhaltsverzeichnis
Werbung
Verfügbare Sprachen
Verfügbare Sprachen
Quicklinks
AKG.WIRELESS
Bedienungshinweise . . . . . . . . . . . . . . . . . . S. 2
Bitte vor Inbetriebnahme des Gerätes lesen!
User Instructions . . . . . . . . . . . . . . . . . . . . p. 10
Please read the manual before using the equipment!
Mode d'emploi . . . . . . . . . . . . . . . . . . . . . . p. 18
Veuillez lire cette notice avant d'utiliser le système!
Istruzioni per l'uso . . . . . . . . . . . . . . . . . . . p. 26
Prima di utilizzare l'apparecchio, leggere il manuale!
Modo de empleo . . . . . . . . . . . . . . . . . . . . p. 34
Antes de utilizar el equipo, sírvase leer el manual!
Instruções de uso . . . . . . . . . . . . . . . . . . . p. 42
S.f.f. leia este manual antes de usar o equipamento!
WIRELESS
MICROPHONE
SYSTEM
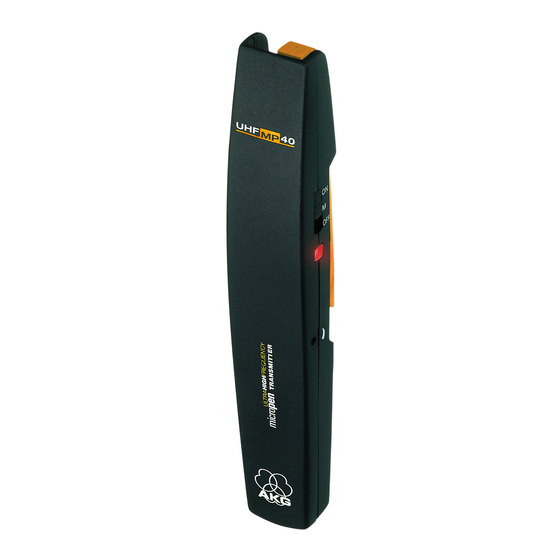
WMS40
MP40
microtools
micropen
Werbung
Inhaltsverzeichnis

Verwandte Anleitungen für AKG WMS40 microtools MP40 micropen


Inhaltszusammenfassung für AKG WMS40 microtools MP40 micropen
- Seite 1 AKG.WIRELESS WIRELESS MICROPHONE SYSTEM WMS40 MP40 microtools micropen Bedienungshinweise ....S. 2 Bitte vor Inbetriebnahme des Gerätes lesen! User Instructions ....p. 10 Please read the manual before using the equipment! Mode d’emploi .
-
Seite 2: Sicherheit Und Umwelt
2.1 Einleitung bitte an Ihren AKG-Händler. 1.1 Sicherheit Vielen Dank, dass Sie sich für ein 2.3 Empfohlenes Zubehör 1. Setzen Sie das Gerät nicht direkter Produkt aus dem Hause AKG entschie- Sonneneinstrahlung, starker Staub- Ladestation CU 40 haben. Bitte lesen... - Seite 3 In einem Fach am oberen Ende des M: Das vom Mikrofon kommende Senders ist das Mikrofon untergebracht. Audiosignal ist stummgeschaltet, Das Mikrofon ist mit einer Befestigungs- Spannungsversorgung klammer ausgestattet und über ein ca. Trägerfrequenz bleiben jedoch einge- 20 cm langes Kabel mit dem Sender schaltet.
- Seite 4 Akkus im Batteriefach mit Hilfe der 3 Inbetriebnahme optionalen Ladestation CU 40. 3.1 Batterie einlegen/ 6 Halteclip Befestigung austauschen und testen Senders in der Hemdtasche oder Siehe Abb. 2: Brusttasche eines Sakkos. 1. Drücken Sie den Schnapphaken am Die Farbe des Halteclips zeigt die Batteriefachdeckel (1) nach unten.
- Seite 5 5. Stellen Sie den ON/MUTE/OFF- (650 mAh) oder Panasonic Rechargeable 4 Anwendung Schalter (3) auf ON. PRO+ (550 mAh). 4.1 Sender befestigen Die Kontroll-LED (4) blitzt kurz auf. Wenn (Siehe Abb. 4) die Batterie in gutem Zustand ist, erlischt die Kontroll-LED (4) wieder. Wenn die Kontroll-LED (4) zu leuchten beginnt, ist die Batterie in ca.
- Seite 6 Sakkos, dass das Mikrofon (3) nach oben 6. Sollte Ihre Stimme in den Laut- zeigt. sprechern verzerrt klingen, drehen Wenn keine geeignete Tasche zur Ver- Sie den Eingangspegelregler (3) soweit fügung steht, hängen Sie die mitgelieferte gegen den Uhrzeigersinn zurück, bis Kordel (4) in den Halteclip (2) ein und legen Sie keine Verzerrung mehr hören.
- Seite 7 1. Entriegeln und nehmen Sie den 4.4 Mikofon am Sender montieren Kabelfachdeckel (1) ab. Siehe Abb. 6: 2. Setzen Sie den Fingernagel am 1. Entriegeln und nehmen Sie den Mikrofonkörper an und ziehen Sie Kabelfachdeckel (1) ab. das Mikrofon (3) aus dem Mikrofon- 2.
- Seite 8 Sprechen Sie aus einem Abstand von 1. Hebeln Sie den Halteclip (1) mit 5 Reinigung ca. 30 cm in das Mikrofon. einem Schraubenzieher vorne vom Reinigen Sie das Gehäuse des Sender (2) ab. Senders mit einem mit Wasser 4.6 Halteclip austauschen (Abb. 7) 2.
-
Seite 9: Technische Daten
6 Technische Daten Trägerfrequenz 710 - 865 MHz Modulation Audioübertragungsbandbreite 40 - 20.000 Hz Frequenzstabilität (-10°C bis +50°C) ±15 kHz Nennhub 15 kHz (SP1, SP2: 13,5 kHz) Klirrfaktor bei 1 kHz typ. 0,8% Kompander integriert Signal/Rauschabstand typ. 103 dB(A) HF-Ausgangsleistung typ. -
Seite 10: Safety And Environment
Changes or modifications not expressly as required by local waste disposal communications. However, there is no approved in writing by AKG Acoustics rules. Never throw batteries into a fire guarantee that interference will not occur may void the user’s authority to operate (risk of explosion) or garbage bin. - Seite 11 Dear Customer: 2.3 Optional Accessories by a cable approx. 8 inches (20 cm) long. Thank you for purchasing an AKG You can detach the microphone from the CU 40 charger product. This Manual contains important...
- Seite 12 M: The signal delivered by the micro- inside a shirt pocket or in an outside phone is muted while power and the breast pocket of a jacket. RF carrier frequency remain on. This The color of the clip indicates the car- prevents the receiver from respond- rier frequency of your transmitter: ing to interference from other trans-...
- Seite 13 3 Setting Up The status LED (4) will flash momentar- ily. If the battery is in good condition, 3.1 Inserting/Replacing and the status LED (4) will extinguish. Testing the Battery If the status LED (4) lights constantly Refer to fig. 2: the battery will be dead within about 1.
-
Seite 14: Operating Notes
4 Operating Notes the talker's jacket, making sure the clip (2) will be on the outside of the pocket 4.1 Attaching the and the microphone (3) will point Transmitter upward. Refer to fig. 4: If no suitable pocket is available, slip the supplied necklace cord (4) under the clip (2) and place the necklace cord (4) around the talker's neck. - Seite 15 6. If your voice sounds distorted on the microphone body and pull the micro- loudspeakers turn the input gain con- phone (3) out of the microphone trol (3) down CCW to the point that compartment. you will hear no more distortion. 3.
- Seite 16 2. Use the cable compartment lid (1) to 4.6 Replacing the Clip (Fig. 7) pull the microphone cable (2) down to the point that the microphone (3) will rest against the microphone com- partment (4). 3. Set the microphone clamp (5) parallel to the microphone (3).
-
Seite 17: Specifications
2. Press down on the clip (1) and pull 6 Specifications the clip (1) away from the transmitter Carrier frequency range 710 to 865 MHz (2) in the direction of the arrow. Modulation 3. Nest the hook (3) on the black Audio bandwidth 40 to 20,000 Hz replacement clip into the matching... -
Seite 18: Sécurité Et Écologie
Ne mettez jamais des la transmission de la parole en liaison piles ni au feu (risque d’explosion) ni avec les récepteurs AKG de la gamme aux ordures ménagères. WMS 40. 2. Si vous mettez l'appareil à la ferraille,... - Seite 19 Le micro est encastré dans un logement Ceci permet de couper le micro sans sur le haut de l’émetteur. Il est doté que le récepteur ne soit perturbé par d’une agrafe et est relié à l’émetteur par d’autres émetteurs. un câble de 20 cm environ. On peut OFF : L’émetteur n’est pas sous ten- donc sortir le micro de l’émetteur et le sion.
-
Seite 20: Mise En Service
La couleur du clip correspond à la 3 Mise en service porteuse de l’émetteur : 3.1 Mise en place/remplace- ment et essai de la pile Fréquence Couleur Voir Fig. 2 : US54: 710.400 MHz brun rouge US58: 734.600 MHz pourpre 1. -
Seite 21: Mode Opératoire
pile (2) dans le compartiment comme type SANYO HR-4U (650 mAh) ou 4 Mode opératoire indiqué à la Fig. 2. Panasonic Rechargeable PRO+ 4.1 Fixation de l’émetteur 5. Faites occuper curseur (550 mAh). Fixez l’émetteur (1) dans la ON/MUTE/OFF (3) la position ON. poche de chemise ou dans la poche de La LED témoin (4) lance un éclair. - Seite 22 En l’absence de poche appropriée, Si votre voix arrive sous un niveau accrochez la cordelière (4) au clip (2) et trop faible aux haut-parleurs, faites passez-la autour du cou (Fig. 4). tourner le potentiomètre d’entrée (3) dans le sens des aiguilles de la mon- 4.2 Réglage de niveau (Cf.
- Seite 23 3. Eloignez le micro (3) de l’émetteur. allèlement au micro (3). 4. Remettez le couvercle du logement 4. Enfoncez le micro (3) dans le moula- du câble (1) en place en le faisant ge (4) jusqu’à ce qu’il s’enclenche. glisser jusqu’à enclenchement. 5.
- Seite 24 dans l’encoche (4) de l’émetteur (2). 5 Nettoyage 4. Appuyez sur l’extrémité recourbée du Le boîtier de l’émetteur se net- clip jusqu’à ce que celui-ci s’enclen- toie avec un chiffon humecté che dans l’émetteur (2). d’eau. 4.7 Dépannage Vous trouverez les instructions relatives au dépannage dans le mode d’emploi de votre récepteur.
-
Seite 25: Caractéristiques Techniques
6 Caractéristiques techniques Fréquence porteuse 710 - 865 MHz Modulation Bande passante audio 40 - 20.000 Hz Stabilité de fréquence (entre -10°C et +50°C) ±15 kHz Excursion nominale 15 kHz (SP1, SP2 : 13,5 kHz) Distorsion typ. (par harmonique) pour 1 kHz 0,8 % Compresseur-expanseur intégré... -
Seite 26: Sicurezza Ed Ambiente
2.1 Introduzione Vi ringraziamo di aver scelto un 1.1 Sicurezza 2.3 Accessori raccomandati prodotto dell‘AKG. Leggete per favore 1. Non esponete l’apparecchio diretta- Stazione di carica CU 40 attentamente le istruzioni per l’uso mente al sole, alla polvere e all'umidità, prima di usare l’apparecchio e conser-... - Seite 27 Il microfono si trova in uno scomparto d’alimentazione e la frequenza por- disposto all’estremità superiore del tras- tante RF rimangono inseriti. In questo mettitore. Il microfono è dotato di un clip modo il trasmettitore non viene di fissaggio ed è collegato al trasmettito- disturbato da altri trasmettitori anche re attraverso un cavo lungo 20 cm circa.
-
Seite 28: Messa In Funzione
6 Clip di fissaggio: Per fissare il tras- 3 Messa in funzione mettitore nella tasca della camicia o 3.1 Inserire/sostituire e della giacca. testare la batteria Il colore del clip indica la frequenza Vedi fig. 2: portante del trasmettitore: 1. Premete verso il basso il gancio ad Frequenza Colore innesto disposto sul coperchio dello... - Seite 29 nuova (2) nello scomparto batteria 3.2 Esercizio con accumulatori Per caricare l’accumulatore, basta pia- come indicato nella fig. 2. zzare il trasmettitore (1) nell’opzionale Vedi fig. 3: 5. Portate l’interruttore ON/MUTE/OFF stazione di carica CU 40 (2) come indi- (3) in posizione ON. cato nella fig.
- Seite 30 4 Impiego tasca della camicia o nella tasca esterna abituale. della giacca in modo che il microfono (3) 6. Se la vostra voce viene riprodotta 4.1 Come fissare il punti verso l’alto. distorta dagli altoparlanti, portate trasmettitore Se non c’è una tasca dove piazzare il indietro il regolatore del livello d’in- Vedi fig.
- Seite 31 1. Sbloccate il coperchio dello scom- 4.4 Come montare il microfono sul parto del cavo (1) e sfilatelo. trasmettitore 2. Estraete il microfono (3) dallo scom- Vedi fig. 6: parto microfonico mettendo l’unghia 1. Sbloccate il coperchio dello scom- di un dito nell’apposita sede sul parto del cavo (1) e sfilatelo.
- Seite 32 4.5 Uso del trasmettitore come microfono a mano Potete tenere il trasmettitore anche in mano, come un microfono normale, p.e. durante le interviste. Parlate nel microfono da una distanza di 30 cm circa. 4.6 Come sostituire il clip di fissaggio (vedi fig. 7) Se il clip a colore è...
-
Seite 33: Dati Tecnici
5 Pulizia 6 Dati tecnici Pulite la scatola del tras- Frequenza portante 710 - 865 MHz mettitore con un panno inumi- Modulazione dito d’acqua. Gamma di trasmissione audio 40 - 20.000 Hz Stabilità della frequenza (da -10°C a +50°C) ±15 kHz Deviazione nominale 15 kHz (SP1, SP2: 13,5 kHz) Fattore di distorsione ad 1 kHz... -
Seite 34: Seguridad Y Medio Ambiente
2. Para desguazar el aparato hay que receptores del sistema WMS 40 de AKG. sacar las pilas o los acumuladores, micropen El MP 40 funciona con una separar la caja, la electrónica y el... - Seite 35 El micrófono está alojado en un compar- mentación de corriente y la frecuen- timiento en la parte superior del emisor. cia portadora de AF siguen conecta- Dispone de una grapa de sujeción y está das. Esto hace que el receptor no se conectado al emisor con un cable de 20 vea perturbado por otros emisores a cm de largo.
-
Seite 36: Puesta En Funcionamiento
6 Clip de sujeción: para sujetar el emi- 3 Puesta en sor en el bolsillo de la camisa o en el funcionamiento bolsillo superior de la americana. 3.1 Colocar/cambiar y El color del clip de sujeción indica la ensayar la pila (véase Fig. 2) frecuencia portadora del emisor: 1. - Seite 37 5. Coloque el conmutador ON/MUTE/ HR-4U (650 mAh) o Panasonic Recharge- 4 Aplicaciones OFF (3) en ON. able PRO+ (550 mAh). 4.1 Sujetar el emisor El LED de control (4) relampaguea Véase Fig. 4: brevemente. Si la pila está en buen Coloque el emisor (1), con el clip de estado, el LED de control (4) se vuel- sujeción (2) hacia afuera, de tal forma en...
- Seite 38 Si no hay bolsillo disponible, ponga el Si su voz suena muy baja en los alta- cordón (4) suministrado en el clip de voces, gire el control de nivel de ent- sujeción (2) y cuélgueselo al cuello. rada (3) en sentido de las agujas del reloj.
- Seite 39 4. Vuelva a colocar la tapa de la caja del 4. Empuje el micrófono (3) hacia aden- cable (1) sobre la caja y apriete hasta tro en la caja del micrófono (4) hasta que se enclave la tapa. que se enclave. 5.
- Seite 40 en la parte delantera del emisor (2) del emisor (2). 5 Limpieza para sacar el clip de sujeción (1). 4. Apriete el extremo curvo del clip de Limpie la caja del emisor con un sujeción de reserva contra el emisor paño humedecido en agua.
-
Seite 41: Datos Técnicos
6 Datos técnicos Frecuencia portadora 710 – 865 MHz Modulación Ancho de banda de transmisión audio 40 – 20.000 Hz Estabilidad de frecuencia (-10°C hasta +50°C) ±15 kHz Desviación nominal 15 kHz (SP1, SP2: 13,5 kHz) Factor de distorsión no lineal con 1 kHz típ. 0,8% Compansor integrado... -
Seite 42: Segurança E Meio Ambiente
AKG. ambiente 2.1 Introdução 1.1 Segurança Agradecemos a sua preferência 2.3 Acessórios recomendados por um produto da AKG. Por favor reser- 1. Não exponha dispositivo à Carregador CU 40 ve alguns minutos para ler este manual radiação solar, poeira ou umidade,... - Seite 43 mento na parte superior do emissor. O de corrente e a freqüência portadora microfone possui uma presilha e um RF, porém, permanecem ligadas. cabo de ca. 20 cm que o conecta com o Desta forma o emissor não é pertur- emissor, o que lhe permite retirar o bado por outros emissores embora o microfone do emissor e fixá-lo na roupa.
- Seite 44 6 Presilha para fixar o emissor no 3 Acionamento bolso duma camisa ou dum paletó. 3.1 Colocar/trocar a pilha e A cor da presilha indica a freqüência testá-la portadora do emissor: Veja fig. 2: Freqüência 1. Empurre o gancho de engate na US54: 710.400 MHz vermelho-marrom...
- Seite 45 cida na embalagem (2) no comparti- muladores NiMH do tipo SANYO HR-4U 4 Operação mento como é mostrado na fig. 2. (650 mAh) ou Panasonic Rechargeable 4.1 Fixar o emissor 5. Posicione o comutador ON/MUTE/ PRO+ (550 mAh). Veja fig. 4: OFF (3) em ON.
- Seite 46 Se não dispor de um bolso onde possa Se sua voz soar demasiadamente fixar o emissor, enfie a corda fornecida baixo, gire o ajuste do nível de entra- na embalagem na presilha (2) e pendure da (3) no sentido horário. Se os alto- a corda no pescoço (veja fig.
- Seite 47 4. Recoloque a tampa do compartimen- microfone (3). to do cabo (1) no compartimento e 4. Pressione o microfone (3) para dentro pressione-a até engatar. do compartimento do microfone (4), 5. Fixe o emissor no bolso da camisa até o microfone (3) engatar. ou no bolso externo do paletó...
- Seite 48 reposição preta na cavidade (4) do 5 Limpeza emissor (2) até engatar na mesma. Limpe a carcaça do emissor 3. Empurre o fim curvado da presilha de com um pano molhado em reposição contra o emissor (2) até a água. presilha engatar.
-
Seite 49: Dados Técnicos
6 Dados técnicos Freqüência portadora 710 - 865 MHz Modulação Largura de banda áudio 40 - 20.000 Hz Estabilidade de freqüência (-10°C a +50°C) ±15 kHz Desvio nominal 15 kHz (SP1, SP2: 13,5 kHz) Distorção não-linear em 1 kHz typ. 0,8% Compressor/Expansor integrado Relação sinal/ruído... - Seite 50 Zur Verwendung in: Per l'uso in: Voor het gebruik in: Må anvendes i: For use in: Para el uso en: Må anvendes i: Käyttöön seuraavissa Pour l'usage en: Para o uso em: Får användas i: maissa: R&TTEd Countries AT BE CH DE DK ES FR LI GB GR IE IS IT LU NO NL PT SE SF US54 710.4 US58...
- Seite 51 MP 40 cumple los requisitos 1999/5/EC. esenciales y otras disposiciones aplica- AKG Acoustics GmbH vakuuttaa, että bles de la Directiva 1999/5/CE. tuotteemme MP 40 täyttää tarvittavat A AKG Acoustics GmbH declara que o 1999/5/EC direktiivin mukaiset vaati- produto MP 40 cumpre os requisitos mukset.
- Seite 52 Bodenseestraße 228, D-81243 München/GERMANY, Tel: (089) 87 16-0, Fax: (089) 87 16-200, http://www.akg-acoustics.de, e-mail: info@akg-acoustics.de AKG ACOUSTICS, U.S. 914 Airpark Center Drive, Nashville, TN 37217, U.S.A., Tel: (615) 620-3800, Fax: (615) 620-3875, http://www.akgusa.com, e-mail: akgusa@harman.com For other products and distributors worldwide see our website: http://www.akg.com 09/01...