Inhaltsverzeichnis
Werbung
Verfügbare Sprachen
Verfügbare Sprachen
Quicklinks
SALVIS
ProfiLine
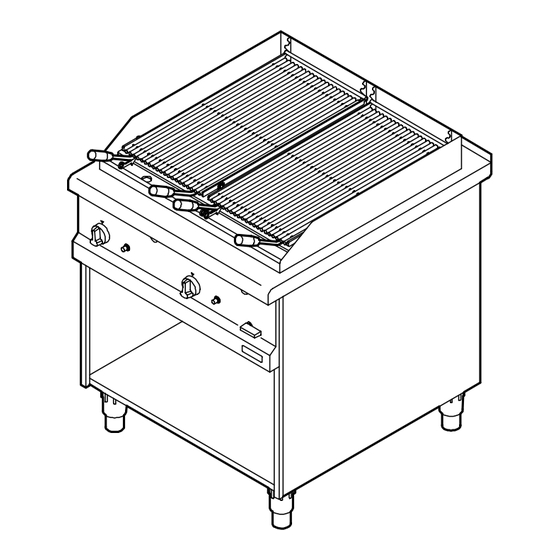
Gas-Char Grill 400 / 800 / 1200
Gas-char grill 400 / 800 / 1200
Betriebsanleitung
de: Original-Betriebsanleitung
Bitte lesen Sie die Betriebsanleitung, bevor Sie das Gerät aufstellen und in Betrieb nehmen!
Operating Instructions
gb: Übersetzung der Original-Betriebsanleitung
Bitte lesen Sie die Betriebsanleitung, bevor Sie das Gerät aufstellen und in Betrieb nehmen!
Mode d`Emploi
fr: Übersetzung der Original-Betriebsanleitung
Bitte lesen Sie die Betriebsanleitung, bevor Sie das Gerät aufstellen und in Betrieb nehmen!
Werbung
Inhaltsverzeichnis

Verwandte Anleitungen für Salvis Gas-Char Grill 400


Inhaltszusammenfassung für Salvis Gas-Char Grill 400
- Seite 1 SALVIS ProfiLine Gas-Char Grill 400 / 800 / 1200 Gas-char grill 400 / 800 / 1200 Betriebsanleitung de: Original-Betriebsanleitung Bitte lesen Sie die Betriebsanleitung, bevor Sie das Gerät aufstellen und in Betrieb nehmen! Operating Instructions gb: Übersetzung der Original-Betriebsanleitung Bitte lesen Sie die Betriebsanleitung, bevor Sie das Gerät aufstellen und in Betrieb nehmen! Mode d`Emploi fr: Übersetzung der Original-Betriebsanleitung...
-
Seite 2: Inhaltsverzeichnis
Inhaltsverzeichnis / Table of contents / Table des matières Seite / Page / Page de - Originalbetriebsanleitung ....... Benutzerhinweise . - Seite 3 Inhaltsverzeichnis / Table of contents / Table des matières Seite / Page / Page en - Translation of the original operating instructions ... User information ............Notes about the operating instructions .
-
Seite 4: De - Originalbetriebsanleitung
- Originalbetriebsanleitung Benutzerhinweise Danke, dass Sie sich für ein Produkt der Firma SALVIS entschieden haben. Es ist uns ein großes Anliegen, dass Sie viel Freude, Arbeitserleichterung und einen hohen Nutzen mit den Produkten der Firma SALVIS haben. Hinweise zur Betriebsanleitung Lesen Sie die Betriebsanleitung sorgfältig durch, bevor Sie das Gerät in Betrieb nehmen. -
Seite 5: Bestimmungsgemäßer Gebrauch
Bestimmungsgemäßer Gebrauch ● Das Gerät darf nur für die Zubereitung von Speisen verwendet werden! Z. B. zum Braten und Grillen von Bratwürsten, Steaks, Fisch, Gemüse. Insbesondere für Bratgut, welches wenig oder kein Fett abgibt. ● Grillen und Braten mit optimalem Grillmuster, kurzgebratenes Fleisch, Fisch, Gemüse. ●... -
Seite 6: Sicherheitshinweise
Sicherheitshinweise GEFAHR! Ermittlung und Beurteilung von Gefährdungen nach dem Arbeitsschutz gesetz ● Nach dem Arbeitsschutzgesetz hat der Arbeitgeber zu beurteilen, welche Gefährdungen für die Beschäftigten mit der Arbeit verbunden sind und welche Maßnahmen des Arbeitsschutzes er forderlich sind. Beachten Sie hierzu die Hinweise der Berufsgenossenschaft für gewerbliche Kü chen! ●... - Seite 7 GEFAHR! Feuergefahr, Explosionsgefahr, Fehlfunktion, bei fehlerhaftem An schluss oder fehlerhafter Umstellung auf andere Gasarten. ● Unsachgemäße Installation, Wartung und Änderungen am Gerät können zu schweren Verletzungen oder Tod führen! ● Der Anschluss des Gerätes darf nur durch einen zugelassenen Gasinstallateur erfolgen. ●...
-
Seite 8: Gerätebeschreibung
Gerätebeschreibung Funktionsweise ‒ Der Gas-Char Grill verfügt je Grillfläche über eine Zündflamme und einen Gasregler. Die Leistung ist stufenlos manuell regelbar. Die Zündflamme wird mit dem eingebauten Piezozünder entfacht. Über die Zündflamme wird mittels Gasregler der Gas-Brenner gezündet. ‒ Über die Brennerflamme werden die Lavasteine/Glühsteine erhitzt. Die Lavasteine/Glühsteine übertragen die Hitze an den Grillrost und das Bratgut. -
Seite 9: In Betrieb Nehmen
In Betrieb nehmen Erstmalig in Betrieb nehmen . Das Gerät vor der Erstinbetriebnahme mit fettlösendem Reinigungsmittel säubern. ● Reinigung siehe Seite 12 Kapitel 6. Betriebsbereitschaft herstellen ● Achtung! Kein Wasser über den Grillrost in die Grillrost Auffangberhälter leeren! . Auffangbehälter (Gastronorm-Behälter) mit Wasser ca. -
Seite 10: Zündflamme Und Brenner Anzünden
Zündflamme und Brenner anzünden GEFAHR! Bei Gasgeruch im Aufstellaum, Gasflamme nicht zünden! Explosionsgefahr! . Bauseitigen Gashahn sofort schließen! . Keine elektrischen Geräte ein- oder ausschalten! . Fenster und Türen öffnen! Aufstellraum gründlich per Durchzug entlüften! . Nach ausreichender Entlüftung Gasaustrittsstelle ermitteln! . -
Seite 11: Hinweise Zum Betrieb
Hinweise zum Betrieb VORSICHT! Heiße Oberflächen, heiße Gegenstände! Verbrennungsgefahr! . Schutzhandschuhe tragen! . Topflappen verwenden! . Mit entsprechender Vorsicht vorgehen! ● Verschiedene Grillroste für verschiedene Grillmuster (optional): − Z-Rost − Rund-Rost − Steg-Rost − V-Rost ● Um verschiedene Temperaturen zu erreichen, haben Sie verschiedene Einstellmöglichkeiten: −... -
Seite 12: Betriebsschluss
Betriebsschluss . Gasregler eindrücken und auf ”Aus‐Stellung” drehen (Symbol ●). . Gashahn schließen. . Bauseitigen Gashahn (Hauptabsperreinrichtung) schließen. . Das Gerät reinigen, siehe nachfolgendes Kapitel 6. ”Reinigung und Pflege”. Reinigung und Pflege ACHTUNG! ● Das Gerät nicht mit brennbaren Reinigungsmitteln reinigen! ●... -
Seite 13: Täglich Reinigen
Täglich reinigen ● Gerät abkühlen lassen. . Grillroste und Lavastein-Rost in der Geschirr Grillrost spülmaschine oder im Spülbecken mit fettlö sendem Reinigungsmittel reinigen. . Grillrost gründlich abtrocknen. ● Achtung! Während der Reinigung des Brenn erraumes darauf achten, dass kein Schmutz Lavasteine Lavastein- oder Wasser in Brenner und Zündbrenner ge... -
Seite 14: Zündbrenner Wöchentlich Reinigen
Zündbrenner wöchentlich reinigen ● Gerät abkühlen lassen. Thermoelement . Rückstände vom Zündbrenner und Thermoele ment mit feiner Drahtbürste entfernen. ● Achtung! Zur Reinigung keine nassen oder feuchten Lappen verwenden! Während der Reinigung darauf achten, dass der Zündbrenner und die Düse nicht verschmutzt/verstopft werden! Zündbrenner Störungen und Abhilfe... -
Seite 15: Technische Daten
Technische Daten Technische Daten Gas-Char Grill 400 Gas-Char Grill 800 Gas-Char Grill 1200 Artikel‐Nr. PLGCG - PL881062 PLGCG - PL881063 PLGCG - PL881064 Kategorie Siehe Seite 17 Kapi Siehe Seite 17 Kapi Siehe Seite 17 Kapi tel 9.1.1 tel 9.1.1 tel 9.1.1... -
Seite 16: Umstellen Auf Eine Andere Gasart
Umstellen auf eine andere Gasart Beachten Sie die Sicherheitshinweise Seite 6 Kapitel 2. GEFAHR! Explosionsgefahr! . Vor Montage- und Umbauarbeiten den Gashahn am Gerät und bauseitigen Gashahn schließen! . Bauseitigen Gashahn gegen unbeabsichtigtes Öffnen verriegeln! . Am bauseitigen Gashahn einem Hinweis anbringen, dass Arbeiten am Gassystem vorgenommen werden! ●... -
Seite 17: Düsen Auswählen
Düsen auswählen 9.1.1 Zuordnung Länder, Kategorie, Gasarten, Gasdrücke Düsen auswählen, siehe nachfolgendes Kapitel 9.1.2. Die eingestellte Gasart ist auf dem Typenschild gekennzeichnet: Eingestellt für Gasdruck mbar Ländercode Kategorie Gasart Nenn Minimal Maximal druck druck druck II 2ELL 3B/P G30/G31 3B/P 42,5 57,5 AT, CH... -
Seite 18: Düsentabelle Gas-Char Grill
9.1.2 Düsentabelle Gas-Char Grill Ermitteln der Kategorien/Gasarten siehe Seite 17 Kapitel 9.1.1! Gasart Außendüse Kleinstelldüse Zündbrenner düse Austausch Seite 19 Kapi Austausch Gasdruck tel 9.2 Seite 19 Kapi Austausch tel 9.3 Seite 19 Kapi tel 9.4 Erdgas Ø 2,50 mm 20 mbar Ø... -
Seite 19: Außendüse Austauschen, Primärluft Einstellen
Außendüse austauschen, Primärluft einstellen Frontblenden entfernen, siehe Seite 24 Kapitel 10.5! Außendüse Schraube Fixierung Hülse Düsenaufnahme Hitzebeständiger Sicherungslack Hülse Primärluft Einstellen Primärluft = Maß in mm . Außendüse ermitteln, siehe Angaben in der Tabelle Seite 18 Kapitel 9.1.2 . Primärluft einstellen, siehe Angaben in der Tabelle Seite 18 Kapitel 9.1.2 . -
Seite 20: Typenschild Austauschen/Ersetzen
Typenschild austauschen/ersetzen ● Nach Änderung/Umstellung der Gasart muss die geänderte Gasart auf dem Gerät doku mentiert werden. ● Bei Lieferung von Düsensätzen ist ein neutra les Schild zur Kennzeichnung von Gasarten enthalten. Schild Gasarten . Verwendete Gasart auf dem Schild kennzeich ‒... -
Seite 21: Gerät Aufstellen
10.2 Gerät aufstellen Aufstellen ‒ waagerecht und erschütterungsfrei, ‒ unter einer Absaughaube mit Flammschutzfiltern, ‒ nicht auf brennbare Flächen und nicht an brennbare Wände. ● Im Umfeld des Gerätes dürfen sich keine explosiven oder feuergefährliche Stoffe befinden, wie z. B. Benzin, Fett usw. ●... -
Seite 22: Geräte Mit U-Rinne Verbinden
10.4 Geräte mit U-Rinne verbinden Blenden entfernen Schraube . „Frontblende oben“ öffnen. . Abhängig vom Gerätetyp: „Frontblende unten“ demontieren. . Schrauben entfernen. U-Scheibe . Blenden abnehmen. Blende U-Scheibe Schraube 22 / 52... - Seite 23 U-Rinne einsetzen (z. B. bei Wandaufstel lung) Zum Halten der U-Rinne während der Montage ist U-Rinne eine zweite Person erforderlich. VORSICHT! Verletzungsgefahr, Quetschgefahr! Quetschgefahr von Körperteilen während der Montage! . Mit entsprechender Vorsicht vorgehen! . Schutzhandschuhe tragen! ( 5.) . Geräte mit 20 mm Abstand zur Wand aufstel len.
-
Seite 24: Gaszuleitung Anschließen, Gas-Anschlussdruck Prüfen
10.5 Gaszuleitung anschließen, Gas-Anschlussdruck prüfen Frontblende entfernen Knebel (Gasregler) Frontblenden dürfen nur vom autorisierten Gewindestift Kundendienst oder Gasinstallateur entfernt Beilagscheibe werden! . Gewindestift lösen und Hebel abziehen. . Knebel abziehen. . Schrauben unterhalb der Frontblende lösen. Hebel ● Die Anzahl der Schrauben ist abhängig von der Gerätelänge. -
Seite 25: Wartung
Gas-Anschlussdruck prüfen Schraubendreher . Gashahn schließen. Anschlussnippel . Verschluss-Schraube im Anschlussnippel mit Schraubendreher lösen. . Manometer am Anschlussnippel anschließen. . Bauseitigen Gashahn und Gashahn am Gerät Schlauch öffnen. Manometer . Gasbrenner zünden. . Prüfen, ob die Hauptflamme brennt. Gashahn . Gas-Anschlussdruck ablesen. . -
Seite 26: Ersatzteile Und Zubehör
11.1 Ersatzteile und Zubehör Ausführliche Ersatzteillisten erhält der autorisierte Kundendienst. Artikel-Nr. Bezeichnung Description 880480 Allgashahn 21S Gas cock 880520 Doppelkegelring D 10 Double cone ring d 10 881243 Doppelkegelring D 6 Double cone ring d 6 880866 Gasbrenner Burner for Char-Grill 881123 Lava-Steine für 1 Rost Lava stone for 1 grid... -
Seite 27: En - Translation Of The Original Operating Instructions
- Translation of the original operating instructions User information Thank you for deciding on a product from the company SALVIS . It is our wish that you have much pleasure, easier work with and high utilization of the products from the company SALVIS . -
Seite 28: Intended Use
Intended use ● The appliance must only be used for the preparation of foodstuffs. For example, frying and grilling sausages, steaks, fish, vegetables. In particular for fried food to be cooked that dispenses little or no fat. ● Grilling and frying with optimum grill pattern, quick-cooking meat, fish, vegetables. ●... -
Seite 29: Safety Instructions
Safety instructions DANGER! Determination and assessment of hazards in accordance with the Ger man Health and Safety at Work Act ● According to the German Health and Safety at Work Act, the employer must assess what hazards are present for those occupied in the work and what health and safety measures are necessary. - Seite 30 DANGER! Risk of fire, explosion, malfunction, if incorrectly connected or incorrect changing to other types of gas. ● Incorrect installation, maintenance and modifications to the appliance can result in serious in juries or death! ● The appliance should only be connected by a qualified gas fitter. ●...
-
Seite 31: Description Of The Appliance
Description of the appliance Operating principle ‒ The gas-char grill has a grill surface above a pilot light and a gas control. The power can be vari ably regulated manually. The pilot light is ignited by a piezo spark ignition. The gas burner is ig nited by a pilot light using the gas control. -
Seite 32: Commissioning
Commissioning Initial commissioning . Before using the appliance for the first time, clean with a cleaning product that dissolves grease. ● Cleaning, refer to page 35, Chapter 6. Getting ready for use ● Attention! Do not empty water over the cooking Cooking grate grate or into the collecting tray! . -
Seite 33: Ignite The Pilot Light And Burner
Ignite the pilot light and burner DANGER! If there is a smell of gas in the room where installed, do not ignite the gas flame! Risk of explosion! . Shut off the gas tap on site! . Do not switch on or off electrical appliances! . -
Seite 34: Information For Operation
Information for operation CAUTION! Hot surfaces, hot objects! Risk of burning! . Wear protective gloves. . Use pot holders! . Exercise appropriate caution! ● Different cooking grates for different grills (option): − Z-grate − Round grate − Bar grate − V-grate ●... -
Seite 35: Completion Of Operation
Completion of operation . Press the gas control and turn to "Off" (Symbol ●). Open . Close the gas tap. Closed . switch off customer gas tap (main shut-off device). . Clean the appliance - see the following 6. "Cleaning and Care" chapter. Cleaning and Care CAUTION! ●... -
Seite 36: Clean Daily
Clean daily ● Allow the appliance to cool. . Clean the cooking grates and lava rock grate Cooking grate in the dishwasher or by hand using a grease- dissolving detergent. . Thoroughly dry the cooking grate. ● Attention! Whilst cleaning the burner area, make sure that no contamination or water in... -
Seite 37: Clean The Pilot Burner Weekly
Clean the pilot burner weekly ● Allow the appliance to cool. Thermal element . Use fine wire brush to remove residues from pilot burner and thermocouple. ● Attention! Do not use any wet or damp cloths for cleaning! During cleaning, make sure that the pilot burner and the nozzle are not contaminated/ blocked! Pilot burner... -
Seite 38: Technical Specifications
Technical specifications Technical specifi Gas-char grill 400 Gas-char grill 800 Gas-char grill 1200 cations Item No. PLGCG - PL881062 PLGCG - PL881063 PLGCG - PL881064 Category Refer to page 40 Refer to page 40 Refer to page 40 Chapter 9.1.1 Chapter 9.1.1... -
Seite 39: Switching To Another Type Of Gas
Switching to another type of gas Observe the notes regarding safe operation, refer to page 29 Chapter 2. DANGER! Risk of explosion! . Before assembly and conversion tasks, close the gas tap on the appliance and on site! . Lock the on-site gas tap against unintentional opening! . -
Seite 40: Select Nozzles
Select nozzles 9.1.1 Attribution of countries, categories, types of gas, gas pressures Select nozzles, refer to the following chapter 9.1.2 The type of gas set is indicated on the type plate: Set for Gas pressure - mbar Country code Category Type of gas Nominal Minimal... -
Seite 41: Nozzle Table Gas-Char Grill
9.1.2 Nozzle table gas-char grill Determine the categories/types of gas, refer to page 40 Chapter 9.1.1! Type of gas External nozzle Fine-adjustment Pilot burner nozzle / Restric nozzle Replace page 42 Chap Gas pressure ting nozzle ter 9.2 Replace Replace page 42 page 42 Chap... -
Seite 42: Replace External Nozzle, Set Primary Air
Replace external nozzle, set primary air Remove front panels, refer to page 47 Chapter 10.5! External nozzle Screw to attach sleeve Nozzle holder Heat-resistant securing lacquer Primary air sleeve Set primary air = dimensions in mm . Determine external nozzle, refer to information in the table, page 41 Chapter 9.1.2 . -
Seite 43: Replace Nameplate
Replace nameplate ● After changing the type of gas, the changed type of gas must be documented on the device. ● When the nozzle sets are delivered, a blank label is included to identify the types of gas. . Indicate the type of gas used on the label. Label, types of gas ‒... -
Seite 44: Set Up Appliance
10.2 Set up appliance Setup ‒ horizontally and vibration free, ‒ under an extraction hood with flame-retardant filters, ‒ not on flammable surfaces and walls. ● There must be no potentially explosive or flammable material in the vicinity of the appliance, e. g. fuel, grease etc. -
Seite 45: Connect The Appliance To The U-Channel
10.4 Connect the appliance to the U-channel Remove the covers Screw . Open the "top front cover" . Depending on the type of appliance: Remove "bottom front cover". . Remove the screws. U-washer . Remove the covers. Panel U-washer Screw 45 / 52... - Seite 46 Insert the U-channel (e.g. for wall setup) A second person is required to hold the U-channel during assembly. U-channel CAUTION! Risk of injury, risk of crushing! Risk of crushing limbs during as semble! . Exercise appropriate caution! . Wear protective gloves! .
-
Seite 47: Connect Gas Supply, Check The Gas Connection Pressure
10.5 Connect gas supply , check the gas connection pressure Remove front panel Clamping cam (gas regulator) Front panels must only be removed by authorized Threaded pin customer service or gas fitter! Washer . Undo threaded pin and pull off lever. . -
Seite 48: Service
Check the gas connection pressure Screwdriver . Close the gas tap. Connection nipple . Loosen the screw plug in the connection nipple with a screwdriver. . Connect the gauge to the connection nipple. . Open the gas tap at the building and on the Hose device. -
Seite 49: Spare Parts And Accessories
11.1 Spare parts and accessories The authorized customer service receives comprehensive spare parts lists. Artikel-Nr. Bezeichnung Description 880480 Allgashahn 21S Gas cock 880520 Doppelkegelring D 10 Double cone ring d 10 881243 Doppelkegelring D 6 Double cone ring d 6 880866 Gasbrenner Burner for Char-Grill... - Seite 50 50 / 52...
- Seite 51 51 / 52...
- Seite 52 PL881121 / 10.13 / 17.6.14 smart cooking SALVIS AG Nordstrasse 15, CH‐4665 Oftringen www.salvis.ch...