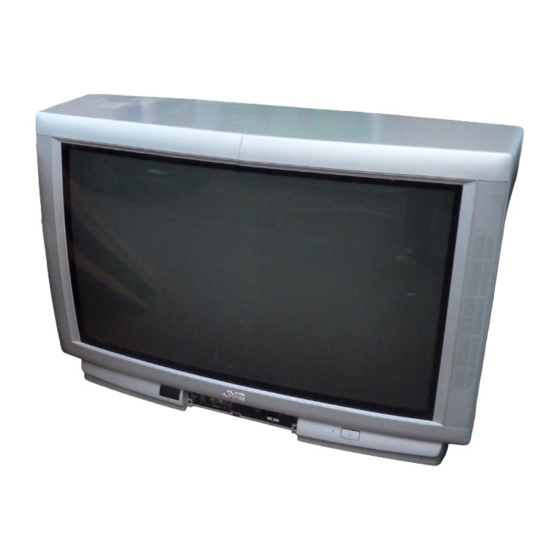
Herunterladen Inhalt Inhalt Diese Seite drucken
Inhaltsverzeichnis

Werbung

Verfügbare Sprachen
  • DE

Verfügbare Sprachen

  • DEUTSCH, seite 38
AV28WT5EP
AV24WT5EP
COLOUR TELEVISION
FARBFERNSEHGERÄT
TELEVISEUR COULEUR
KLEURENTELEVISIE
TELEVISOR A COLOR
TELEVISORE A COLORI
TELEVISOR A CORES
ENGLISH
DEUTSCH
FRANÇAIS
NEDERLANDS
CASTELLANO
ITALIANO
PORTUGUÊS
INSTRUCTIONS
BEDIENUNGSANLEITUNG
MANUEL D'INSTRUCTIONS
GEBRUIKSAANWIJZING
MANUAL DE INSTRUCCIONES
ISTRUZIONI
INSTRUÇÕES

Werbung

Inhaltsverzeichnis
loading

Inhaltszusammenfassung für JVC AV28WT5EP

  • Seite 1 ENGLISH DEUTSCH FRANÇAIS NEDERLANDS CASTELLANO ITALIANO PORTUGUÊS AV28WT5EP AV24WT5EP COLOUR TELEVISION INSTRUCTIONS FARBFERNSEHGERÄT BEDIENUNGSANLEITUNG TELEVISEUR COULEUR MANUEL D’INSTRUCTIONS KLEURENTELEVISIE GEBRUIKSAANWIJZING TELEVISOR A COLOR MANUAL DE INSTRUCCIONES TELEVISORE A COLORI ISTRUZIONI TELEVISOR A CORES INSTRUÇÕES...
  • Seite 2: Inhaltsverzeichnis

    Thank you for buying this JVC colour television. To make sure you understand how to use your new TV, please read this manual thoroughly be- fore you begin. WARNING: TO PREVENT FIRE OR SHOCK HAZARD, DO NOT EXPOSE THIS APPLIANCE TO RAIN OR MOISTURE.
  • Seite 3 35(3$5$7,21 35(3$5$7,21 35(3$5$7,21 35(3$5$7,21 &RQQHFWLQJ#WKH#$HULDO#DQG#9&5 &RQQHFWLQJ#WKH#$HULDO#DQG#9&5 &RQQHFWLQJ#WKH#$HULDO#DQG#9&5 &RQQHFWLQJ#WKH#$HULDO#DQG#9&5 If connecting a VCR, follow A → B → C → D. VHF/UHF If not connecting a VCR, follow 1 → 2. Aerial *1: To operate T-V LINK functions, a T-V LINK compatible VCR must be connected to the EXT-2 terminal on the TV.
  • Seite 4: Preparation

    Main power button TV on. Power lamp • The JVC logo does not appear when your TV has been turned on once. In this case, use the “LANGUAGE” and “AUTO PRO- GRAM” functions to make the initial settings. For de- tails, see “INSTALL”...
  • Seite 5 PREPARATION Press the blue button to start the Note: AUTO PROGRAM function. • When your TV can detect the TV channel name from the TV channel broadcast signal, it automatically The AUTO PROGRAM menu appears and received TV registers the TV channel name (ID) to the Pro- channels are automatically registered in the Programme gramme number (PR) in which the TV channel has numbers (PR).
  • Seite 6: T-V Link Functions

    Note: tuner. For details, refer to your VCR instruction manual. • A “T-V LINK compatible VCR” means a JVC VCR with the T-V LINK logo or a VCR with one of the following logos. However, these VCRs may support some or all of the fea- 79#$XWR#3RZHU#2Q29&5#...
  • Seite 7 %$6,&#23(5$7,21 %$6,&#23(5$7,21 %$6,&#23(5$7,21 %$6,&#23(5$7,21 7XUQ#WKH#0DLQ#SRZHU#RQ 7XUQ#WKH#0DLQ#SRZHU#RQ 7XUQ#WKH#0DLQ#SRZHU#RQ 7XUQ#WKH#0DLQ#SRZHU#RQ Press the Main power button on the TV. The Power lamp lights red and your TV is in the standby mode. Note: • If the Power lamp lights green, the TV is already on. To turn the Main power off: Press the Main power button again.
  • Seite 8: Basic Operation

    BASIC OPERATION Press the ì ì ì and ë ì ë ë ë buttons to choose a ë ë ë ë Use the buttons: ë ë ë ë Press the buttons to choose an EXT terminal. Programme number (PR). Then press the é...
  • Seite 9 BASIC OPERATION 2SHUDWLQJ#ZLWK#WKH#EXWWRQV#RQ#WKH#79 2SHUDWLQJ#ZLWK#WKH#EXWWRQV#RQ#WKH#79 2SHUDWLQJ#ZLWK#WKH#EXWWRQV#RQ#WKH#79 2SHUDWLQJ#ZLWK#WKH#EXWWRQV#RQ#WKH#79 Press the P B B buttons to turn the TV on from standby mode. Press the P B B buttons to choose a Programme number (PR) or an EXT terminal. (Behind the front cover) Press the (Volume) button and the C...
  • Seite 10 5(027(#&21752/#%877216#$1'#)81&7,216 5(027(#&21752/#%877216#$1'#)81&7,216 5(027(#&21752/#%877216#$1'#)81&7,216 5(027(#&21752/#%877216#$1'#)81&7,216 0XWLQJ#%XWWRQ 0XWLQJ#%XWWRQ 0XWLQJ#%XWWRQ 0XWLQJ#%XWWRQ You can turn the volume off instantly. ã ã ã ã Press the (Muting) button to turn off the Vol- ã ã ã ã ume. Pressing the (Muting) button again resumes the previous Volume level. 1XPEHU#%XWWRQV 1XPEHU#%XWWRQV 1XPEHU#%XWWRQV...
  • Seite 11: Remote Control Buttons And Functions

    REMOTE CONTROL BUTTONS AND FUNCTIONS ë ë ë ë PANORAMIC: Press the buttons to choose a ZOOM mode. Then press the é é button. é é This mode stretches the left and right sides of a normal pic- ture (4:3 Aspect Ratio) to fill the screen, without making the The picture expands and the chosen ZOOM mode is dis- picture appear unnatural.
  • Seite 12: Menu Operation

    The time will still be displayed as long as you do not turn off the TV, even if you choose oth- These buttons can be used to operate a JVC brand VCR or er TV channels. DVD player. Pressing the button having the same appear- •...
  • Seite 13 REMOTE CONTROL BUTTONS AND FUNCTIONS # # # # 7HOHWH[W#&RQWURO#%XWWRQV#DQG#9&5# 7HOHWH[W#&RQWURO#%XWWRQV#DQG#9&5# 7HOHWH[W#&RQWURO#%XWWRQV#DQG#9&5# 7HOHWH[W#&RQWURO#%XWWRQV#DQG#9&5#( ( #'9' #'9' #'9' #'9'#6ZLWFK #6ZLWFK #6ZLWFK #6ZLWFK Note: • If you have trouble receiving teletext broadcasts, consult your local dealer or the teletext station, • In the Text mode, the ZOOM mode is fixed to the FULL mode.
  • Seite 14 REMOTE CONTROL BUTTONS AND FUNCTIONS 6XE0SDJH 6XE0SDJH 6XE0SDJH 6XE0SDJH &DQFHO &DQFHO &DQFHO &DQFHO Some teletext pages include sub-pages that are automatically You can search for a teletext page while watching TV. displayed. You can hold any sub-page, or view it at any time. Press the Number button to enter a page number, or press a Colour button.
  • Seite 15 0(18#23(5$7,21 0(18#23(5$7,21 0(18#23(5$7,21 0(18#23(5$7,21 This TV has a number of functions you can operate using menus. To fully utilize all your TV’s functions, you need to un- derstand the basic menu operating techniques fully. Press the é é é button to display the é...
  • Seite 16 3,&785(#6(77,1* 3,&785(#6(77,1* 3,&785(#6(77,1* 3,&785(#6(77,1* Note: • You can change the HUE setting (picture hue) only when the colour system is NTSC 3.58 or NTSC 4.43. To return to the default settings in each TINT mode: Press the blue button. Returns the picture settings in the currently chosen TINT mode to the default settings, and stores them in the TINT To display the PICTURE SETTING menu: mode again.
  • Seite 17 3,&785(#)($785(6 3,&785(#)($785(6 3,&785(#)($785(6 3,&785(#)($785(6 &2/285#6<67(0 &2/285#6<67(0 &2/285#6<67(0 &2/285#6<67(0 The colour system is chosen automatically. However, if the picture is not clear or no colour appears, choose the colour system manually. ë Press the buttons to choose COLOUR SYSTEM. Then press the é é...
  • Seite 18: Picture Features

    PICTURE FEATURES 7=6#$872#$63(&7 7=6#$872#$63(&7 7=6#$872#$63(&7 7=6#$872#$63(&7 This function only works when the ZOOM mode is set to AUTO (WSS) mode. It sets the ZOOM mode you want to use for when a WSS signal is not included in the broadcast signal or the signal from an external device.
  • Seite 19 6281'#6(77,1* 6281'#6(77,1* 6281'#6(77,1* 6281'#6(77,1* +<3(5#6281' +<3(5#6281' +<3(5#6281' +<3(5#6281' You can enjoy sounds with a wider ambience. ë Press buttons to choose HYPER SOUND. ì Press buttons to choose ON. To cancel the HYPER SOUND function: To display the SOUND SETTING menu: Press the ì...
  • Seite 20 (;7#6(77,1* (;7#6(77,1* (;7#6(77,1* (;7#6(77,1* Press the é é é é button to complete the set- ting. The menu disappears. Note: • The EXT-1 terminal does not support S-VIDEO signal (Y/C signal) and you cannot set K K (S-VIDEO input) in the EXT-1 terminal. •...
  • Seite 21: Ext Setting

    EXT SETTING ë Press the buttons to choose a name. Then press the é é é button. é The LIST disappears and the name is assigned to the EXT terminal. To erase a name assigned to the EXT terminal: Choose a blank space. Press the é...
  • Seite 22 )($785(6 )($785(6 )($785(6 )($785(6 %/8(#%$&. %/8(#%$&. %/8(#%$&. %/8(#%$&. You can set the TV to automatically change to a blue screen and mute the sound if the signal is weak or absent, or when there is no input from an external device. ë...
  • Seite 23: Features

    FEATURES '(&2'(5#+(;705, '(&2'(5#+(;705, '(&2'(5#+(;705, '(&2'(5#+(;705, Press the blue button and set the CHILD LOCK function. Only when connecting a Decoder with a T-V LINK compatible (CHILD LOCK) appears and the TV channel is locked. VCR connected to the EXT-2 terminal, you can use this func- tion.
  • Seite 24 ,167$// ,167$// ,167$// ,167$// Press the blue button to start the AUTO PROGRAM function. The AUTO PROGRAM menu appears and received TV channels are automatically registered in the Programme numbers (PR). To display the INSTALL menu: Press the é button to display MENU (main menu).
  • Seite 25: Install

    INSTALL (',720$18$/ (',720$18$/ (',720$18$/ (',720$18$/ Follow the operation description of a func- tion you want to use and operate the func- The EDIT/MANUAL functions are divided into two types: ed- tion. iting of the current Programme numbers (PR) (EDIT func- tions) and manual registration of a TV channel you want to Press the é...
  • Seite 26 INSTALL Note: Press the ë ë buttons to choose a TV • You can register your unique Channel name (ID) to ë ë the TV channel. When step 3 is completed, do not channel. ì ì ì ì go to step 4, but press the buttons to move the Every time you press the ë...
  • Seite 27 INSTALL '(/(7( '(/(7( '(/(7( '(/(7( Other TV channels: If you do not know the correct broadcasting system, set Press the ë ë ë buttons to choose a TV ë the SYSTEM to “B/G”. If “B/G” is not correct, it results in channel.
  • Seite 28: Demo

    '(02 '(02 '(02 '(02 To display the DEMO menu: Press the é é é button to display MENU é (main menu). Press the ë ë ë ë button to choose DEMO. Then press the é é é é button. The DEMO function automatically demonstrates some of the TV functions.
  • Seite 29 $'',7,21$/#0(18#23(5$7,216 $'',7,21$/#0(18#23(5$7,216 $'',7,21$/#0(18#23(5$7,216 $'',7,21$/#0(18#23(5$7,216 'RZQORDGLQJ#WKH#GDWD#WR#9&5 'RZQORDGLQJ#WKH#GDWD#WR#9&5 'RZQORDGLQJ#WKH#GDWD#WR#9&5 'RZQORDGLQJ#WKH#GDWD#WR#9&5 ë ë ë ë Press the buttons to choose AUTO PROGRAM. Then press the é é é é button. You can transmit to the latest Programme numbers (PR) data A COUNTRY menu appears as a sub-menu of the to the VCR with the T-V LINK function.
  • Seite 30: Additional Menu Operations

    ADDITIONAL MENU OPERATIONS Press the é é é é button to complete the set- ting. The T-V LINK menu appears. Follow the operating procedure “Down- loading the data to VCR” on page 28 to transmit the Programme number (PR) data to the VCR.
  • Seite 31 $'',7,21$/#35(3$5$7,21 $'',7,21$/#35(3$5$7,21 $'',7,21$/#35(3$5$7,21 $'',7,21$/#35(3$5$7,21 &RQQHFWLQJ#WKH#H[WHUQDO#GHYLFHV &RQQHFWLQJ#WKH#H[WHUQDO#GHYLFHV &RQQHFWLQJ#WKH#H[WHUQDO#GHYLFHV &RQQHFWLQJ#WKH#H[WHUQDO#GHYLFHV Connect the devices to the TV, paying attention to the Rear panel connections and the Front panel connections. Before connecting anything: • Read the manuals provided with the devices. Depending on the devices, the connection method may differ from the figure.
  • Seite 32: Additional Preparation

    ADDITIONAL PREPARATION 'HYLFHV#ZKLFK#FDQ#RXWSXW#WKH# 'HYLFHV#ZKLFK#FDQ#RXWSXW#WKH# 'HYLFHV#ZKLFK#FDQ#RXWSXW#WKH# 'HYLFHV#ZKLFK#FDQ#RXWSXW#WKH# 609,'(2#VLJQDO#+<2&#VLJQDO,#VXFK#DV 609,'(2#VLJQDO#+<2&#VLJQDO,#VXFK#DV 609,'(2#VLJQDO#+<2&#VLJQDO,#VXFK#DV 609,'(2#VLJQDO#+<2&#VLJQDO,#VXFK#DV D#609+6#9&5 D#609+6#9&5 D#609+6#9&5 D#609+6#9&5 Connect the device to an EXT terminal other than the EXT-1 terminal. You can choose a video input signal from the S-VIDEO signal (Y/C signal) and regular video signal (composite signal). For details of how to operate the device, see “K(S-VIDEO in- put)”...
  • Seite 33 &+2&&#180%(5 &+2&&#180%(5 &+2&&#180%(5 &+2&&#180%(5 When you want to use the INSERT function on page 25, find the CH/CC number corresponding to the Channel number of the TV channel from this table. Channel Channel Channel Channel CH 02 / CH 202 CH 40 / CH 240 CC 01 / CC 201 CC 31 / CC 231...
  • Seite 34 79#%877216#$1'#3$576 79#%877216#$1'#3$576 79#%877216#$1'#3$576 79#%877216#$1'#3$576 )URQW#3DQHO )URQW#3DQHO )URQW#3DQHO )URQW#3DQHO Push to open (Behind the cover) ∨ ∨ ∨ ∨ ∧ ∧ ∧ ∧ 1 Remote control sensor and ECO sensor buttons / C C buttons page 8 2 Headphone jack (mini jack) 6 Power lamp page 30 pages 3 and 6...
  • Seite 35 7528%/(6+227,1* 7528%/(6+227,1* 7528%/(6+227,1* 7528%/(6+227,1* If a problem arises while you are using the TV, please read this “Troubleshooting” well before you request having the TV repaired. You may be able to fix it easily by yourself. For example, if the AC plug is disconnected from the AC outlet, or the TV aerial has problems, you may think there is a problem with the TV itself.
  • Seite 36: Troubleshooting

    TROUBLESHOOTING 2WKHU#FRQFHUQV 2WKHU#FRQFHUQV 2WKHU#FRQFHUQV 2WKHU#FRQFHUQV • When the SLEEP TIMER function operates, the TV is auto- matically turned off. If the TV is turned off suddenly, try to ü press the (Standby) button to turn on the TV once again. At this time, if the TV resumes a normal state, there is no problem.
  • Seite 37 63(&,),&$7,216 63(&,),&$7,216 63(&,),&$7,216 63(&,),&$7,216 Model AV28WT5EP AV24WT5EP Item Broadcasting systems CCIR B/G, I, L Colour systems PAL, SECAM • The EXT terminals also support the NTSC 3.58/4.43 MHz system. • E2-E12, E21-E69, S1-S41, X, Y, Z, Z+1, Z+2, A-H, H+1, H+2, F2-F10, F21-F69 Channels and frequencies •...
  • Seite 38 Vielen Dank für den Kauf dieses JVC Farbfernsehgerätes. Damit Sie verstehen, wie dieser Fernseher funktioniert, lesen Sie diese Anleitung bitte sorgfältig durch, bevor Sie das Gerät in Betrieb nehmen. WARNUNG: UM FEUER ODER ELEKTRISCHEN SCHLAG ZU VERMEIDEN, SOLLTEN SIE DIESES GE- RÄT KEINEM REGEN ODER FEUCHTIGKEIT AUSSETZEN.
  • Seite 39 925%(5(,781* 925%(5(,781* 925%(5(,781* 925%(5(,781* $QVFKOLH‰HQ#GHU#$QWHQQH#XQG#GHV#9LGHRUHNRUGHUV $QVFKOLH‰HQ#GHU#$QWHQQH#XQG#GHV#9LGHRUHNRUGHUV $QVFKOLH‰HQ#GHU#$QWHQQH#XQG#GHV#9LGHRUHNRUGHUV $QVFKOLH‰HQ#GHU#$QWHQQH#XQG#GHV#9LGHRUHNRUGHUV Wenn Sie einen Videorekorder anschließen möchten, folgen Sie A → B → C → D. VHF/UHF Antenne Wenn Sie keinen Videorekorder anschließen möchten, folgen Sie 1 → 2. Netzausgang (220-240 V Wech- *1: Um die T-V LINK-Funktionen zu bedienen, muß...
  • Seite 40: Vorbereitung

    (”Standby”). Schalten Sie das Gerät mit der Taste ü (Standby) auf der Fernbedienung ein. • Das JVC-Logo erscheint nicht mehr, wenn das Ge- rät bereits einmal eingeschaltet wurde. Benutzen Sie in diesem Fall die Funktionen “SPRA- CHE” und “AUTO”, um die Grundeinstellungen vor- zunehmen.
  • Seite 41 VORBEREITUNG Starten Sie die Funktion AUTO mit der Hinweis: blauen Taste. • Wenn Ihr Fernseher aus dem Sendesignal den Na- Das Menü AUTO erscheint, und die empfangenen Fern- men des Fernsehsenders lesen kann, speichert er sehkanäle werden automatisch auf die Programmnum- diesen automatisch (ID) unter der Programmnum- mern verteilt und gespeichert (PR).
  • Seite 42: T-V Link Funktionen

    Fernseher ausgeschaltet Hinweis: wird, wenn das Programm oder der Eingang umge- • “T-V LINK-kompatible Videorekorder ” sind z. B. JVC-Vi- schaltet werden, oder, wenn das Menü auf dem Bild- deorekorder mit dem Logo T-V LINK, oder ein Rekorder schirm angezeigt wird: mit einem der folgenden Logos.
  • Seite 43 $//*(0(,1(#%(',(181* $//*(0(,1(#%(',(181* $//*(0(,1(#%(',(181* $//*(0(,1(#%(',(181* (LQVFKDOWHQ#GHV#*HUlWHV (LQVFKDOWHQ#GHV#*HUlWHV (LQVFKDOWHQ#GHV#*HUlWHV (LQVFKDOWHQ#GHV#*HUlWHV Drücken Sie den Netzschalter am Fern- sehgerät. Die Netz-LED leuchtet rot, und Ihr Fernseher ist betriebsbereit (Standby). Hinweis: • Wenn die Netz-LED grün leuchtet, ist das Gerät bereits eingeschaltet. Ausschalten des Geräts: Drücken Sie nochmals den Netzschalter am Fernsehgerät.
  • Seite 44: Allgemeine Bedienung

    ALLGEMEINE BEDIENUNG Drücken Sie die Tasten ì ì ì und ë ì ë ë , um die ë ë ë ë ë Mit den Tasten ë ë ë ë Drücken Sie die Tasten , um eine der EXT-Buchsen zu gewünschte Programmnummer (PR) zu wählen.
  • Seite 45: Drücken Sie Die Taste

    ALLGEMEINE BEDIENUNG %HGLHQXQJ#PLW#GHQ#7DVWHQ#DP#)HUQVHKHU %HGLHQXQJ#PLW#GHQ#7DVWHQ#DP#)HUQVHKHU %HGLHQXQJ#PLW#GHQ#7DVWHQ#DP#)HUQVHKHU %HGLHQXQJ#PLW#GHQ#7DVWHQ#DP#)HUQVHKHU Drücken Sie die Tasten P B B , um den Fernseher aus der Bereitschaft einzuschalten. Drücken Sie die Tasten P , um eine Programmnummer (PR) oder einen Ein- gang EXT zu wählen. (Hinter der vorderen Abdeckung) Drücken Sie die Taste (Lautstärke) und die Tasten...
  • Seite 46 7$67(1#81'#)81.7,21(1#'(5#)(51%(',(181* 7$67(1#81'#)81.7,21(1#'(5#)(51%(',(181* 7$67(1#81'#)81.7,21(1#'(5#)(51%(',(181* 7$67(1#81'#)81.7,21(1#'(5#)(51%(',(181* 6WXPPVFKDOWHWDVWH#+0XWLQJ, 6WXPPVFKDOWHWDVWH#+0XWLQJ, 6WXPPVFKDOWHWDVWH#+0XWLQJ, 6WXPPVFKDOWHWDVWH#+0XWLQJ, Hiermit können Sie die Tonausgabe vorübergehend stumm- schalten. ã ã ã ã Drücken Sie die Taste (Muting), um den Ton ã ã ã ã auszuschalten. Wenn Sie die Taste (Muting) nochmals drücken, wird wieder die vorherige Lautstärke eingestellt.
  • Seite 47: Tasten Und Funktionen Der Fernbedienung

    TASTEN UND FUNKTIONEN DER FERNBEDIENUNG ë ë ë ë PANORAMIC: Drücken Sie die Tasten , um einen ZOOM-Modus zu wählen. Drücken Sie Dieser Modus erweitert die linken und rechten Ränder des dann die Taste é é é é . Normalbildes (4:3) so, daß der Bildschirm ausgefüllt wird, ohne daß...
  • Seite 48 Stellen Sie mit den Tasten die Lautstärke Funktion nicht benutzt werden. ein. • Auch dann, wenn Ihr Gerät von JVC hergestellt wur- de, kann es je nach Gerät sein, daß einige oder gar Hinweis: keine der Tasten funktionieren. • Die Tasten ì...
  • Seite 49 TASTEN UND FUNKTIONEN DER FERNBEDIENUNG # # # # 7DVWHQ#I•U#GLH#9LGHRWH[W06WHXHUXQJ#XQG#9&52 7DVWHQ#I•U#GLH#9LGHRWH[W06WHXHUXQJ#XQG#9&52 7DVWHQ#I•U#GLH#9LGHRWH[W06WHXHUXQJ#XQG#9&52( 7DVWHQ#I•U#GLH#9LGHRWH[W06WHXHUXQJ#XQG#9&52 ( 2'9' 2'9' 2'9' 2'9'06FKDOWHU 06FKDOWHU 06FKDOWHU 06FKDOWHU Hinweis: • Wenn Sie beim Empfang von Videotext auf Proble- me stoßen, wenden Sie sich an Ihren Händler oder an den betreffenden Sender.
  • Seite 50 TASTEN UND FUNKTIONEN DER FERNBEDIENUNG 8QWHU06HLWHQ 8QWHU06HLWHQ 8QWHU06HLWHQ 8QWHU06HLWHQ $EEUHFKHQ $EEUHFKHQ $EEUHFKHQ $EEUHFKHQ Einige Videotext-Seiten haben Unter-Seiten, die automatisch Sie können nach einer Videotext-Seite suchen lassen, wäh- angezeigt werden. rend Sie fernsehen. Sie können Unter-Seiten beliebig halten bzw. jederzeit be- trachten.
  • Seite 51: Drücken Sie Die Taste É, So Daß

    0(1h%(',(181* 0(1h%(',(181* 0(1h%(',(181* 0(1h%(',(181* Dieses Gerät hat viele Funktionen, die per Menü bedient wer- den. Um alle Funktionen Ihres Fernsehers nutzen zu können, sollten Sie die grundsätzliche Menübedienung sicher be- herrschen. Drücken Sie die Taste é, so daß das Menü MENUE (Hauptmenü) an- gezeigt wird.
  • Seite 52 %,/'#(,167(//81* %,/'#(,167(//81* %,/'#(,167(//81* %,/'#(,167(//81* Hinweis: • Sie können die Einstellung FARBTON (Bildfarbinten- sität) nur ändern, wenn die Bildnorm auf NTSC 3.58 oder NTSC 4.43 eingestellt ist. Aufrufen der Voreinstellungen jedes der FARB- TEMP.-Modi: Drücken Sie die blaue Taste. Die Bildeinstellungen des momentan gewählten FARB- Anzeigen des BILD EINSTELLUNG-Menüs: TEMP.-Modus werden auf deren Vorgabe eingestellt Drücken Sie die Taste é...
  • Seite 53 %,/'#9$5,$17(1 %,/'#9$5,$17(1 %,/'#9$5,$17(1 %,/'#9$5,$17(1 (03)$1*66<67(0 (03)$1*66<67(0 (03)$1*66<67(0 (03)$1*66<67(0 Die Fernsehnorm (bzw. das Farbsystem) wird automatisch gewählt. Wenn das Bild jedoch nicht klar ist, oder keine Farbe erscheint, wählen Sie die Fernsehnorm von Hand. ë Drücken Sie die Tasten , um EMP- FANGSSYSTEM zu wählen.
  • Seite 54: Bild Varianten

    BILD VARIANTEN BILD VARIANTEN BILD VARIANTEN BILD VARIANTEN 7=6#$872#=220 7=6#$872#=220 7=6#$872#=220 7=6#$872#=220 Diese Funktion arbeitet nur, wenn der ZOOM-Modus auf AU- TO(WSS) (Breitbild) gestellt ist. Sie stellt den ZOOM-Modus ein, der gewünscht wird, wenn ein WSS-Signal nicht im Sen- designal oder dem Signal von einem externen Gerät enthal- ten ist.
  • Seite 55: Sound Einstellung

    6281'#(,167(//81* 6281'#(,167(//81* 6281'#(,167(//81* 6281'#(,167(//81* +<3(5#6281' +<3(5#6281' +<3(5#6281' +<3(5#6281' Hier können Sie den Klang akustisch “verbreitern”. ë Drücken Sie die Tasten , um HYPER SOUND zu wählen. Für Abbruch der HYPER SOUND Function: Dücken Sie die Tasten ì ì , um AUS zu wählen. ì...
  • Seite 56 (;7#(,167(//81* (;7#(,167(//81* (;7#(,167(//81* (;7#(,167(//81* Schließen Sie die Einstellung mit der Taste é ab. Das Menü verschwindet. Hinweis: • Der Eingang EXT-1 unterstützt kein S-VIDEO-Signal (Y/C-Signal), und Sie können nicht K K (S-VIDEO- Eingang) für EXT-1 einstellen. • Wenn Sie den K K (S-VIDEO-Eingang) umschalten, schaltet der Anfangsbuchstabe von “E”...
  • Seite 57: Ext Einstellung

    EXT EINSTELLUNG EXT EINSTELLUNG EXT EINSTELLUNG EXT EINSTELLUNG ë Drücken Sie die Tasten , um einen Na- men auszuwählen. Drücken Sie dann die Taste é . Die LISTE verschwindet, und der Name wird dem EXT- Eingang zugeordnet. Löschen eines gespeicherten EXT-Eingangs- namens: Wählen Sie ein Leerzeichen.
  • Seite 58 )81.7,21(1 )81.7,21(1 )81.7,21(1 )81.7,21(1 %/$80%,/' %/$80%,/' %/$80%,/' %/$80%,/' Sie können das Gerät so einstellen, daß es automatisch auf einen blauen Hintergrund umschaltet und den Ton stumm- schaltet, wenn nur ein schwaches oder überhaupt kein Signal vorhanden ist, oder wenn kein Signal vom externen Gerät ausgegeben wird.
  • Seite 59: Funktionen

    FUNKTIONEN FUNKTIONEN FUNKTIONEN FUNKTIONEN ë Wählen Sie mit den Tasten einen Fern- Hinweis: sehkanal. • Wenn Sie die Sperrung vorübergehend aufheben, ë Mit jedem Druck auf die Tasten ändert sich die Pro- bedeutet das nicht, daß die KINDERSICHERUNG- grammnummer (PR), und das Bild des Senders mit die- Funktion ausgeschaltet wird.
  • Seite 60 352*5$00,(581* 352*5$00,(581* 352*5$00,(581* 352*5$00,(581* Starten Sie die Funktion AUTO mit der blauen Taste. Das Menü AUTO erscheint, und die empfangenen Fern- sehkanäle werden automatisch auf die Programmnum- mern verteilt und gespeichert (PR). Anzeigen des PROGRAMMIERUNG-Menüs: Drücken Sie die Taste é é...
  • Seite 61: Programmierung

    PROGRAMMIERUNG PROGRAMMIERUNG PROGRAMMIERUNG PROGRAMMIERUNG 6(1'(5#25'1(120$11 6(1'(5#25'1(120$11 6(1'(5#25'1(120$11 6(1'(5#25'1(120$11 Folgen Sie den Bedienungsschritten für die Funktion, die Sie bedienen möchten, Die Funktionen SENDER ORDNEN/MAN. sind in zwei Grup- und führen Sie die Schritte aus. pen eingeteilt: Bearbeitung der aktuellen Programmnummern (PR) (SENDER ORDNEN-Funktionen) und manuelle Spei- Schließen Sie die Einstellung mit der Taste cherung von Fernsehkanälen unter einer Programmnummer é...
  • Seite 62 PROGRAMMIERUNG PROGRAMMIERUNG PROGRAMMIERUNG PROGRAMMIERUNG Hinweis: Wählen Sie mit den Tasten ë ë einen Fern- • Sie können Ihren eigenen Sendernamen (ID) für ei- ë ë nen Fernsehkanal speichern. Wenn 3 abgeschlos- sehkanal. sen ist, fahren Sie nicht mit Schritt 4 fort, sondern Mit jedem Druck auf die Tasten ë...
  • Seite 63 PROGRAMMIERUNG PROGRAMMIERUNG PROGRAMMIERUNG PROGRAMMIERUNG /g6&+(1 /g6&+(1 /g6&+(1 /g6&+(1 Andere Fernsehkanäle: Wenn Sie die Fernsehnorm eines Kanals nicht genau Wählen Sie mit den Tasten ë ë ë ë einen Fern- kennen, stellen Sie SYSTEM auf “B/G”. Wenn “B/G” sehkanal. nicht richtig ist, führt dies zu unnormaler Tonwiederga- be, wenn das Gerät einen Fernsehkanal erkennt.
  • Seite 64 '(02 '(02 '(02 '(02 Anzeigen des DEMO-Menüs: Drücken Sie die Taste é é , um das ME- é é NUE-Menü (Hauptmenü) aufzurufen. Drücken Sie die Taste ë ë ,um DEMO zu ë ë wählen. Drücken Sie dann die Taste é é...
  • Seite 65 =86b7=/,&+(#0(1h)81.7,21(1 =86b7=/,&+(#0(1h)81.7,21(1 =86b7=/,&+(#0(1h)81.7,21(1 =86b7=/,&+(#0(1h)81.7,21(1 +HUXQWHUODGHQ#+'RZQORDG,# +HUXQWHUODGHQ#+'RZQORDG,# +HUXQWHUODGHQ#+'RZQORDG,# +HUXQWHUODGHQ#+'RZQORDG,# ë ë ë ë Drücken Sie die Tasten , um AUTO zu wählen. Drücken Sie dann die Taste é é é é . GHU#'DWHQ#]XP#9LGHRUHNRUGHU GHU#'DWHQ#]XP#9LGHRUHNRUGHU GHU#'DWHQ#]XP#9LGHRUHNRUGHU GHU#'DWHQ#]XP#9LGHRUHNRUGHU Das Menü LAND erscheint als Untermenü der Funktion Sie können die aktuellen Daten aller Programmnummern (PR) AUTO.
  • Seite 66: Zusätzliche Menüfunktionen

    ZUSÄTZLICHE MENÜFUNKTIONEN ZUSÄTZLICHE MENÜFUNKTIONEN ZUSÄTZLICHE MENÜFUNKTIONEN ZUSÄTZLICHE MENÜFUNKTIONEN Schließen Sie die Einstellung mit der Taste é é ab. é é Das Menü T-V LINK erscheint. Befolgen Sie die Bedienungsschritte unter “Herunterladen (Download) der Daten zum Videorekorder” auf Seite 28, um die Pro- grammnummer-Daten an den Videorekor- der zu übertragen (PR).
  • Seite 67 =86b7=/,&+(#925%(5(,781*(1 =86b7=/,&+(#925%(5(,781*(1 =86b7=/,&+(#925%(5(,781*(1 =86b7=/,&+(#925%(5(,781*(1 $QVFKOX‰#H[WHUQHU#*HUlWH $QVFKOX‰#H[WHUQHU#*HUlWH $QVFKOX‰#H[WHUQHU#*HUlWH $QVFKOX‰#H[WHUQHU#*HUlWH Schließen Sie die Geräte an Ihrem Fernseher an, und beach- ten Sie, welche Sie an der Rückseite und welche an der Vor- derseite angeschlossen werden. Bevor Sie Verbindungen herstellen: • Lesen Sie die Anleitungen aller beteiligten Geräte. Ab- hängig von den Geräten unterscheidet sich die An- schlußmethode von den gezeigten Lösungen.
  • Seite 68: Zusätzliche Vorbereitungen

    ZUSÄTZLICHE VORBEREITUNGEN ZUSÄTZLICHE VORBEREITUNGEN ZUSÄTZLICHE VORBEREITUNGEN ZUSÄTZLICHE VORBEREITUNGEN *HUlWH/#GLH#GDV#609,'(206LJQDO#+<2 *HUlWH/#GLH#GDV#609,'(206LJQDO#+<2 *HUlWH/#GLH#GDV#609,'(206LJQDO#+<2 *HUlWH/#GLH#GDV#609,'(206LJQDO#+<2 &06LJQDO,#]1#%1#YRQ#HLQHP#9LGHRUH0 &06LJQDO,#]1#%1#YRQ#HLQHP#9LGHRUH0 &06LJQDO,#]1#%1#YRQ#HLQHP#9LGHRUH0 &06LJQDO,#]1#%1#YRQ#HLQHP#9LGHRUH0 NRUGHU#609+6#DXVJHEHQ#N|QQHQ NRUGHU#609+6#DXVJHEHQ#N|QQHQ NRUGHU#609+6#DXVJHEHQ#N|QQHQ NRUGHU#609+6#DXVJHEHQ#N|QQHQ Schließen Sie das Gerät an einen EXT-Anschluß (mit Aus- nahme des EXT-1-Anschlusses) an. Sie können ein Video-Eingangssignal aus dem S-VIDEO-Sig- nal (Y/C-Signal) und dem normalen Videosignal (Composite Video) auswählen.
  • Seite 69 &+2&&01800(5 &+2&&01800(5 &+2&&01800(5 &+2&&01800(5 Wenn Sie die EINFÜGEN-Funktion, beschrieben unter Seite 25 benutzen möchten, finden Sie mit Hilfe dieser Tabelle die CH/ CC-Nummer heraus, die der Kanalnummer des Fernsehkanals entspricht. Kanal Kanal Kanal Kanal Kan. 02 / Kan. 202 E2 Kan.
  • Seite 70 79#%(',(181*6(/(0(17(#81'#7(,/( 79#%(',(181*6(/(0(17(#81'#7(,/( 79#%(',(181*6(/(0(17(#81'#7(,/( 79#%(',(181*6(/(0(17(#81'#7(,/( 9RUGHUVHLWH 9RUGHUVHLWH 9RUGHUVHLWH 9RUGHUVHLWH Zum Öffnen drücken (Hinter der Abdeckung) ∨ ∨ ∨ ∨ ∧ ∧ ∧ ∧ 1 Fernbedienungssensor und ECO-Sensor -Tasten / –/+-Tasten Seite 8 2 Kopfhörerbuchse (Miniklinke) 6 Netz-LED Seite 30 Seiten 3 und 6 3 EXT-4-Anschluß...
  • Seite 71 352%/(0/g681*(1 352%/(0/g681*(1 352%/(0/g681*(1 352%/(0/g681*(1 Wenn bei der Benutzung Ihres Fernsehgerätes ein Problem auftreten sollte, lesen Sie bitte sorgfältig diese “Problemlösungen” durch, bevor Sie das Gerät in Reparatur geben. Eventuell können Sie das Problem leicht selbst beheben. Wenn z. B. der Netz- stecker nicht in der Steckdose steckt, oder, wenn es Probleme mit der Empfangsantenne gibt, könnten Sie irrtümlicherweise an- nehmen, daß...
  • Seite 72: Problemlösungen

    PROBLEMLÖSUNGEN PROBLEMLÖSUNGEN PROBLEMLÖSUNGEN PROBLEMLÖSUNGEN 9HUVFKLHGHQHV 9HUVFKLHGHQHV 9HUVFKLHGHQHV 9HUVFKLHGHQHV • Wenn die Funktion SLEEP TIMER aktiv ist, schaltet sich das Gerät automatisch aus. Wenn dies passiert, drücken Sie die ü Taste (Standby), um den Fernseher wieder einzuschal- ten. Wenn sich das Gerät nun wieder normal verhält, liegt keine Fehlfunktion vor.
  • Seite 73 7(&+1,6&+(#'$7(1 7(&+1,6&+(#'$7(1 7(&+1,6&+(#'$7(1 7(&+1,6&+(#'$7(1 Modell AV28WT5EP* AV24WT5EP* Eintrag Sendesysteme CCIR B/G, I, L Fernsehnormen PAL, SECAM • Die Anschlüsse EXT unterstützen auch das NTSC 3.58/4.43 MHz-System. • E2-E12, E21-E69, S1-S41, X, Y, Z, Z+1, Z+2, A-H, H+1, H+2, F2-F10, F21-F69 Kanäle und Frequenzen...
  • Seite 74 Merci d’avoir fait l’acquisition de ce téléviseur couleurs JVC. Pour être certain que vous comprenez comment utiliser votre nouveau téléviseur, nous vous conseillons de lire attentivement le présent manuel avant de commencer. AVERTISSEMENT: POUR EVITER TOUT RISQUE D’INCENDIE OU D’ELECTROCUTION, NE JAMAIS EXPOSER CET APPAREIL A LA PLUIE OU A L’HUMIDITE.
  • Seite 75 35(3$5$7,21 35(3$5$7,21 35(3$5$7,21 35(3$5$7,21 5DFFRUGHPHQW#GH#O·DQWHQQH#HW#GX#PDJQpWRVFRSH 5DFFRUGHPHQW#GH#O·DQWHQQH#HW#GX#PDJQpWRVFRSH 5DFFRUGHPHQW#GH#O·DQWHQQH#HW#GX#PDJQpWRVFRSH 5DFFRUGHPHQW#GH#O·DQWHQQH#HW#GX#PDJQpWRVFRSH En cas de raccordement d’un magnétoscope (VCR) suivre Antenne les points A → B → C → D. VHF/UHF Si vous ne raccordez pas de magnétoscope, suivre les points 1 → 2. Sortie secteur (CA) (CA 220 –...
  • Seite 76: Preparation

    5pJODJHV#LQLWLDX[ 5pJODJHV#LQLWLDX[ A la première mise sous tension du téléviseur, il se met en mode de réglages initiaux et le logo JVC s’affiche. Suivre les instructions qui apparaissent à l’écran pour configurer les ré- glages initiaux. Appuyer sur la touche d’alimenta- tion principale du téléviseur.
  • Seite 77 PREPARATION Appuyer sur la touche bleue pour dé- Remarque: marrer la fonction AUTO. • Lorsque votre téléviseur parvient à détecter le nom Le menu AUTO s’affiche et les chaînes TV reçues sont de la chaîne à partir du signal d’émission de la chaî- automatiquement enregistrées sous les numéros de ne TV, il enregistre automatiquement ce nom (ID) programmes (PR).
  • Seite 78: Fonctions T-V Link

    • Un magnétoscope compatible “T-V LINK ” signifie un ma- fiche sur le téléviseur: gnétoscope JVC possédant le logo T-V LINK ou un ma- • Lors de l’enregistrement d’images provenant d’un appareil gnétoscope muni d’un des logos suivants. Ces magnétoscopes peuvent supporter certaines ou toutes...
  • Seite 79 )21&7,211(0(17#'(#%$6( )21&7,211(0(17#'(#%$6( )21&7,211(0(17#'(#%$6( )21&7,211(0(17#'(#%$6( 0HWWUH#O·DSSDUHLO#VRXV#WHQVLRQ 0HWWUH#O·DSSDUHLO#VRXV#WHQVLRQ 0HWWUH#O·DSSDUHLO#VRXV#WHQVLRQ 0HWWUH#O·DSSDUHLO#VRXV#WHQVLRQ Appuyer sur la touche d’alimentation principale du téléviseur. Le témoin d’alimentation rouge s’allume et le téléviseur est alors en mode de veille. Remarque: • Si le témoin d’alimentation vert s’allume, le téléviseur est déjà...
  • Seite 80: Fonctionnement De Base

    FONCTIONNEMENT DE BASE et ë ë ë pour ë ì ì ì ì ë ë ë ë Appuyer sur les touches Utilisation des touches ë ë ë ë Appuyer sur les touches pour sélectionner une borne sélectionner un numéro de programme (PR).
  • Seite 81 FONCTIONNEMENT DE BASE 0LVH#HQ#IRQFWLRQQHPHQW#j#O·DLGH#GHV#WRXFKHV#GX#WpOpYLVHXU 0LVH#HQ#IRQFWLRQQHPHQW#j#O·DLGH#GHV#WRXFKHV#GX#WpOpYLVHXU 0LVH#HQ#IRQFWLRQQHPHQW#j#O·DLGH#GHV#WRXFKHV#GX#WpOpYLVHXU 0LVH#HQ#IRQFWLRQQHPHQW#j#O·DLGH#GHV#WRXFKHV#GX#WpOpYLVHXU Appuyer sur les touches P B B pour mettre le téléviseur sous tension à partir du mode de veille. Appuyer sur les touches P pour sélectionner un numéro de programme (PR) ou une borne EXT. (Derrière le couvercle avant) Appuyer sur la touche (Volume) et...
  • Seite 82 728&+(6#'(#/$#7(/(&200$1'(#(7#/(856#)21&7,216# 728&+(6#'(#/$#7(/(&200$1'(#(7#/(856#)21&7,216# 728&+(6#'(#/$#7(/(&200$1'(#(7#/(856#)21&7,216# 728&+(6#'(#/$#7(/(&200$1'(#(7#/(856#)21&7,216# 7RXFKH#G·DVVRXUGLVVHPHQW 7RXFKH#G·DVVRXUGLVVHPHQW 7RXFKH#G·DVVRXUGLVVHPHQW 7RXFKH#G·DVVRXUGLVVHPHQW Vous pouvez couper le volume instantanément. Appuyer sur la touche ã ã ã ã (d’assourdissement) pour couper le volume. Réappuyer sur cette ã ã ã ã touche (d’assourdissement) pour rétablir le niveau de volume précédent. 7RXFKHV#QXPpULTXHV 7RXFKHV#QXPpULTXHV 7RXFKHV#QXPpULTXHV...
  • Seite 83: Touches De La Telecommande Et Leurs Fonctions

    TOUCHES DE LA TELECOMMANDE ET LEURS FONCTIONS ë ë PANORAMIC: Appuyer sur les touches ë ë pour sélec- tionner un mode ZOOM. Appuyer ensuite Ce mode étend les côtés gauche et droit d’une image norma- sur la touche é é . é...
  • Seite 84: Fonctionnement Des Menus

    Ces touches peuvent servir à faire fonctionner un magnétos- • Lorsque vous regardez des cassettes vidéos, il se peut cope de la marque JVC ou un lecteur DVD Appuyer sur une touche correspondant à celle de la télécommande pour obte- qu’une heure erronée s’affiche.
  • Seite 85 TOUCHES DE LA TELECOMMANDE ET LEURS FONCTIONS # # # # # # # # # # # # 7RXFKHV#GH#FRPPDQGH#GX#WpOpWH[WH# 7RXFKHV#GH#FRPPDQGH#GX#WpOpWH[WH# 7RXFKHV#GH#FRPPDQGH#GX#WpOpWH[WH#HW#VpOHFWHXU##9&5# 7RXFKHV#GH#FRPPDQGH#GX#WpOpWH[WH# HW#VpOHFWHXU##9&5# HW#VpOHFWHXU##9&5#( HW#VpOHFWHXU##9&5# ( #'9' #'9' #'9' #'9' Remarque: • Si vous avez des problèmes pour recevoir les émis- sions de télétexte, consulter votre revendeur local ou l’émetteur du télétexte.
  • Seite 86: Touches De La Telecommande Et Leurs Fonctions

    TOUCHES DE LA TELECOMMANDE ET LEURS FONCTIONS 3DJH#VHFRQGDLUH 3DJH#VHFRQGDLUH 3DJH#VHFRQGDLUH 3DJH#VHFRQGDLUH $QQXOHU $QQXOHU $QQXOHU $QQXOHU Certaines pages de télétexte comprennent des pages secon- Vous pouvez rechercher une page de télétexte tout en regar- daires qui s’affichent automatiquement. dant la télévision. Vous pouvez conserver l’affichage de toute page secondaire ou la regarder à...
  • Seite 87 )21&7,211(0(17#'(6#0(186 )21&7,211(0(17#'(6#0(186 )21&7,211(0(17#'(6#0(186 )21&7,211(0(17#'(6#0(186 Ce téléviseur est équipé d’un certain nombre de fonctions que vous pouvez activer ou désactiver à l’aide de menus. Pour tirer le meilleur parti de toutes ses fonctions, il vous faut comprendre complètement le fonctionnement de base des menus.
  • Seite 88: Reglage Image

    5(*/$*(#,0$*( 5(*/$*(#,0$*( 5(*/$*(#,0$*( 5(*/$*(#,0$*( ì Appuyer sur les touches pour modifier le réglage. ï î Elément Inférieur Supérieur CONTRASTE (contraste de l’image) Plus sombre Plus lumineuse LUMIERE (luminosité de l’image) Plus douce Plus nette NETTETE (netteté de l’image) Pour afficher le menu REGLAGE IMAGE: Plus claire Plus intense COULEUR...
  • Seite 89 237,216#,0$*(# 237,216#,0$*(# 237,216#,0$*(# 237,216#,0$*(# 6<67(0(#&28/(85 6<67(0(#&28/(85 6<67(0(#&28/(85 6<67(0(#&28/(85 Le système couleurs est sélectionné automatiquement. Ce- pendant, si l’image n’est pas nette ou si aucune couleur n’ap- paraît, il convient de sélectionner le système couleurs manuellement. ë Appuyer sur les touches pour sélec- tionner SYSTEME COULEUR.
  • Seite 90: Options Image

    OPTIONS IMAGE =220#$872#7=6 =220#$872#7=6 =220#$872#7=6 =220#$872#7=6 Cette fonction n'est opérationnelle que si le mode ZOOM est réglé sur AUTO(WSS). Elle règle le mode ZOOM que vous voudrez utiliser au cas où il n'y aurait pas de signal WSS dans le signal de diffusion d'un appareil externe. Vous avez le choix entre trois modes ZOOM.
  • Seite 91: Reglage Audio

    5(*/$*(#$8',2# 5(*/$*(#$8',2# 5(*/$*(#$8',2# 5(*/$*(#$8',2# +<3(5#6281' +<3(5#6281' +<3(5#6281' +<3(5#6281' Vous pouvez profiter de sons dans un environnement plus étendu. ë Appuyer sur les touches pour sélec- tionner HYPER SOUND. ì Appuyer sur les touches pour sélec- Pour afficher le menu REGLAGE AUDIO: tionner OUI.
  • Seite 92 (;7#5(*/$*(6 (;7#5(*/$*(6 (;7#5(*/$*(6 (;7#5(*/$*(6 Appuyer sur la touche é pour valider le réglage. Le menu disparaît. Remarque: • La borne EXT-1 n’accepte pas le signal S-VIDEO (signal Y/C) et vous ne pouvez pas régler K K (en- trée S-VIDEO) sur la borne EXT-1. •...
  • Seite 93: Ext Reglages

    EXT REGLAGES ë Appuyer sur les touches pour sélec- tionner un nom. Appuyer ensuite sur la touche é . La LISTE disparaît et le nom est assigné à la borne EXT. Pour effacer un nom assigné à une borne EXT: Sélectionner un espace vierge.
  • Seite 94 237,216 237,216 237,216 237,216 )21'#%/(8 )21'#%/(8 )21'#%/(8 )21'#%/(8 Vous pouvez programmer le téléviseur pour que l’écran de- vienne automatiquement bleu et pour assourdir le son lors de la réception d’un signal trop faible, lorsqu’aucun signal n’est reçu ou lorsqu’il n’y a aucune entrée provenant d’un appareil extérieur.
  • Seite 95: Options

    OPTIONS ë Appuyer sur les touches pour sélec- Remarque: tionner une chaîne TV. • La suppression provisoire du verrouillage ne signifie ë Chaque fois que vous appuyez sur les touches , le pas que la fonction VERROUILLAGE est annulée numéro de programme (PR) change et l’image de la pour la chaîne TV.
  • Seite 96 ,167$//$7,21 ,167$//$7,21 ,167$//$7,21 ,167$//$7,21 Appuyer sur la touche bleue pour démar- rer la fonction AUTO. Le menu AUTO s’affiche et les chaînes TV reçues sont automatiquement enregistrées sous les numéros de programmes (PR). Pour afficher le menu INSTALLATION: Appuyer sur la touche é é...
  • Seite 97: Installation

    INSTALLATION (',7(520$18(/ (',7(520$18(/ (',7(520$18(/ (',7(520$18(/ Suivre les explications concernant la fonc- tion que vous souhaitez utiliser. Les fonctions EDITER/MANUEL sont divisées en deux types: Appuyer sur la touche é é é é pour valider les l’édition des numéros de programme sélectionnés (PR) (fonc- tions EDITER) et l’enregistrement manuel d’une chaîne TV réglages.
  • Seite 98 INSTALLATION 1206 1206 1206 1206 Remarque: Appuyer sur les touches ë ë pour sélec- • Vous pouvez attribuer un nom de chaîne unique (ID) ë ë à cet émetteur TV. Lorsque l’opération 3 est termi- tionner une chaîne TV. née, ne pas passer directement à l’étape suivante; Chaque fois que vous appuyez sur les touches ë...
  • Seite 99 INSTALLATION ())$&(5 ())$&(5 ())$&(5 ())$&(5 Autres chaînes TV: Si vous ne connaissez pas le système d’émission cor- Appuyer sur les touches ë ë ë pour sélec- ë rect, régler le sélecteur SYSTEME sur “B/G”. Si ce choix tionner une chaîne TV. de “B/G”...
  • Seite 100 '(021675$7,21 '(021675$7,21 '(021675$7,21 '(021675$7,21 Pour afficher le menu DEMONSTRATION: Appuyer sur la touche é é é é pour afficher le MENU (menu principal). Appuyer sur la touche ë ë ë pour sélection- ë ner DEMONSTRATION. Appuyer ensuite sur la touche é é...
  • Seite 101 #23(5$7,216#6833/(0(17$,5(6#'(6#0(186# #23(5$7,216#6833/(0(17$,5(6#'(6#0(186# #23(5$7,216#6833/(0(17$,5(6#'(6#0(186# #23(5$7,216#6833/(0(17$,5(6#'(6#0(186# 7pOpFKDUJHPHQW#GH#GRQQpHV# 7pOpFKDUJHPHQW#GH#GRQQpHV# 7pOpFKDUJHPHQW#GH#GRQQpHV# 7pOpFKDUJHPHQW#GH#GRQQpHV# ë ë ë ë Appuyer sur les touches pour sélec- # # # # tionner AUTO. Appuyer ensuite sur la tou- YHUV#XQ#PDJQpWRVFRSH# YHUV#XQ#PDJQpWRVFRSH# YHUV#XQ#PDJQpWRVFRSH# YHUV#XQ#PDJQpWRVFRSH# che é é é é Vous pouvez transmettre les dernières informations de nu- Le menu PAYS apparaît en tant que sous-menu de la méros de programmes (PR) au magnétoscope à...
  • Seite 102: Operations Supplementaires Des Menus

    OPERATIONS SUPPLEMENTAIRES DES MENUS Appuyer sur la touche é é é é pour valider le réglage. Le menu T-V LINK apparaît. Suivre les instructions de fonctionnement “Téléchargement de données vers un ma- gnétoscope” à la page 28 pour transmettre les données de numéro de programme (PR) au magnétoscope.
  • Seite 103 35(3$5$7,)6#6833/(0(17$,5(6 35(3$5$7,)6#6833/(0(17$,5(6 35(3$5$7,)6#6833/(0(17$,5(6 35(3$5$7,)6#6833/(0(17$,5(6 5DFFRUGHPHQW#GHV#DSSDUHLOV#H[WHUQHV# 5DFFRUGHPHQW#GHV#DSSDUHLOV#H[WHUQHV# 5DFFRUGHPHQW#GHV#DSSDUHLOV#H[WHUQHV# 5DFFRUGHPHQW#GHV#DSSDUHLOV#H[WHUQHV# Raccorder les appareils au téléviseur en vérifiant bien les connexions du panneau arrière et de la face avant. Avant de raccorder tout appareil: • Lire les manuels fournis avec les appareils. En fonction des appareils raccordés, la méthode de raccordement peut différer de l’illustration.
  • Seite 104: Preparatifs Supplementaires

    PREPARATIFS SUPPLEMENTAIRES $SSDUHLOV#SRXYDQW#pPHWWUH#OH#VLJQDO# $SSDUHLOV#SRXYDQW#pPHWWUH#OH#VLJQDO# $SSDUHLOV#SRXYDQW#pPHWWUH#OH#VLJQDO# $SSDUHLOV#SRXYDQW#pPHWWUH#OH#VLJQDO# 609,'(2# +VLJQDO# <2&,# FRPPH# XQ 609,'(2# +VLJQDO# <2&,# FRPPH# XQ 609,'(2# +VLJQDO# <2&,# FRPPH# XQ 609,'(2# +VLJQDO# <2&,# FRPPH# XQ PDJQpWRVFRSH#609+6# PDJQpWRVFRSH#609+6# PDJQpWRVFRSH#609+6# PDJQpWRVFRSH#609+6# Raccorder l’appareil à une borne EXT autre que la borne EXT-1.
  • Seite 105 #180(52#&+2&& #180(52#&+2&& #180(52#&+2&& #180(52#&+2&& Pour utiliser la fonction INSERER dans page 25, localiser le numéro CH/CC correspondant au numéro de chaîne de l’émetteur TV dans ce tableau. Chaîne Chaîne Chaîne Chaîne CH 02 / CH 202 CH 40 / CH 240 CC 01 / CC 201 CC 31 / CC 231 CH 03 / CH 203...
  • Seite 106 728&+(6#(7#(/(0(176#'8#7(/(9,6(85# 728&+(6#(7#(/(0(176#'8#7(/(9,6(85# 728&+(6#(7#(/(0(176#'8#7(/(9,6(85# 728&+(6#(7#(/(0(176#'8#7(/(9,6(85# )DFH#DYDQW )DFH#DYDQW )DFH#DYDQW )DFH#DYDQW Pousser pour ouvrir (Derrière le couvercle) ∨ ∨ ∨ ∨ ∧ ∧ ∧ ∧ 1 Capteur de la télécommande et ECO Capteur 5 Touches P / Touches C page 8 2 Prise pour casque d’écoute (mini prise) 6 Témoin d’alimentation page 30 pages 3 et 6...
  • Seite 107 *8,'(#'(#'(3$11$*( *8,'(#'(#'(3$11$*( *8,'(#'(#'(3$11$*( *8,'(#'(#'(3$11$*( En cas de problème survenant pendant l’utilisation du téléviseur, veuillez lire ce “Guide de dépannage” attentivement avant de contacter le service technique. Vous pourrez probablement résoudre le problème par vous-même. Exemple: Si la fiche est dé- branchée de la prise secteur ou si l’antenne TV présente des problèmes, vous pourriez croire que l’anomalie provient du télévi- seur.
  • Seite 108: Guide De Depannage

    GUIDE DE DEPANNAGE $XWUHV#SUREOqPHV $XWUHV#SUREOqPHV $XWUHV#SUREOqPHV $XWUHV#SUREOqPHV • Lorsque la fonction SLEEP TIMER est utilisée, le téléviseur se met automatiquement hors tension. Si le téléviseur se met tout à coup hors tension, essayer d’appuyer sur la tou- ü (Standby) pour le remettre sous tension.Si le télé- viseur reprend son état normal, il ne s’agit pas d’une anomalie.
  • Seite 109 # # # # 63(&,),&$7,216#7(&+1,48(6 63(&,),&$7,216#7(&+1,48(6 63(&,),&$7,216#7(&+1,48(6 63(&,),&$7,216#7(&+1,48(6 Modèle AV28WT5EP* AV24WT5EP* Elément Systèmes d’émissions CCIR B/G, I, L Systèmes couleurs PAL, SECAM • Les bornes EXT acceptent également le système NTSC 3.58/4.43 MHz. • E2-E12, E21-E69, S1-S41, X, Y, Z, Z+1, Z+2, A-H, H+1, H+2, F2-F10, F21-F69 Chaînes et fréquences...
  • Seite 110 Onze hartelijke dank voor het aanschaffen van deze JVC-kleurentelevisie. Lees deze gebruiksaanwijzing aandachtig door voordat u de TV in gebruik neemt, zodat u zeker weet dat u de TV goed bedient. WAARSCHUWING: OM GEVAAR VOOR BRAND OF ELEKTRISCHE SCHOKKEN TE VOORKOMEN, DIENT U ERVOOR TE ZORGEN DAT DIT APPARAAT NOOIT AAN REGEN OF VOCHTIGHEID WORDT BLOOTGESTELD.
  • Seite 111 9225%(5(,',1*(1 9225%(5(,',1*(1 9225%(5(,',1*(1 9225%(5(,',1*(1 $DQVOXLWHQ#YDQ#GH#DQWHQQH#HQ#GH#YLGHRUHFRUGHU $DQVOXLWHQ#YDQ#GH#DQWHQQH#HQ#GH#YLGHRUHFRUGHU $DQVOXLWHQ#YDQ#GH#DQWHQQH#HQ#GH#YLGHRUHFRUGHU $DQVOXLWHQ#YDQ#GH#DQWHQQH#HQ#GH#YLGHRUHFRUGHU Als u een videorecorder aansluit, volg dan A → B → C → D. VHF/UHF Als u geen videorecorder aansluit, volg dan 1 → 2. Antenne *1:Om de functies T-V LINK te bedienen, moet er een video- recorder compatibel met T-V LINK worden aangesloten Stopcontact op de EXT-2-aansluiting van de TV.
  • Seite 112: Voorbereidingen

    Als de TV voor de eerste keer wordt aangezet, komt deze in de stand voor het maken van de basisinstellingen te staan en het JVC-logo verschijnt in beeld. Volg de aanwijzingen op het scherm om de basisinstellingen te maken. Druk de hoofdschakelaar op de TV in.
  • Seite 113 VOORBEREIDINGEN Druk op de blauwe toets om de functie Opmerking: AUTOMATISCH te starten. • Als uw TV de zendernaam van het TV-signaal kan Het menu AUTOMATISCH verschijnt in beeld en de ont- herkennen, wordt deze zendernaam automatisch vangen TV-kanalen worden automatisch vastgelegd vastgelegd (ID) onder het programmanummer (PR) onder de programmanummers (PR).
  • Seite 114 • Een videorecorder die compatibel is met “T-V LINK ” namen maken van een zender die niet goed wordt ont- betekent een JVC-videorecorder met het logo T-V LINK of vangen door de videorecorder, zelfs als u die zender wel een videorecorder met een van de volgende logo’s. Deze kunt bekijken op de TV.
  • Seite 115 #%$6,6%(',(1,1* #%$6,6%(',(1,1* #%$6,6%(',(1,1* #%$6,6%(',(1,1* =HW#GH#79#DDQ#PHW#GH#KRRIGVFKDNHODDU1 =HW#GH#79#DDQ#PHW#GH#KRRIGVFKDNHODDU1 =HW#GH#79#DDQ#PHW#GH#KRRIGVFKDNHODDU1 =HW#GH#79#DDQ#PHW#GH#KRRIGVFKDNHODDU1 Druk de hoofdschakelaar op de TV in. De aan/uit-indicator licht rood op en de TV staat stand-by. Opmerking: • Als de aan/uit-indicator groen oplicht, staat de TV al aan. Uitzetten van de TV: Druk de hoofdschakelaar op de TV nogmaals in.
  • Seite 116: Basisbediening

    BASISBEDIENING Druk op de ì ì ì ì en ë ë ë -toetsen om een pro- ë ë ë ë ë Gebruik de -toetsen: ë ë ë ë Druk op de -toetsen om een EXT-aansluiting te kiezen. grammanummer te kiezen (PR). Druk hierna op de toets é...
  • Seite 117 BASISBEDIENING %HGLHQLQJ#PHW#GH#WRHWVHQ#YDQ#GH#791# %HGLHQLQJ#PHW#GH#WRHWVHQ#YDQ#GH#791# %HGLHQLQJ#PHW#GH#WRHWVHQ#YDQ#GH#791# %HGLHQLQJ#PHW#GH#WRHWVHQ#YDQ#GH#791# Druk op de P B B -toetsen om de TV vanuit de stand-by-stand in te schakelen. Gebruik de P -toetsen om een pro- grammanummer (PR) of een EXT- aansluiting te kiezen. (Achter het klepje op het voorpaneel) Gebruik de toets (Volume) en de C -toetsen om het volume te regelen.
  • Seite 118 # # # # #$)67$1'6%(',(1,1*672(76(1#(1#0)81&7,(6 #$)67$1'6%(',(1,1*672(76(1#(1#0)81&7,(6 #$)67$1'6%(',(1,1*672(76(1#(1#0)81&7,(6 #$)67$1'6%(',(1,1*672(76(1#(1#0)81&7,(6 #'HPSLQJVWRHWV# #'HPSLQJVWRHWV# #'HPSLQJVWRHWV# #'HPSLQJVWRHWV# U kunt het geluid met één druk op de knop uitschakelen. ã ã ã ã Druk op de toets (Demping) om het geluid ã ã ã ã uit te zetten. Als u de toets (Demping) nog- maals indrukt, wordt het geluid weer terugge- bracht naar het oorspronkelijke niveau.
  • Seite 119: Afstandsbedieningstoetsen En -Functies

    AFSTANDSBEDIENINGSTOETSEN EN -FUNCTIES ë ë ë ë PANORAMIC: Gebruik de -toetsen om een ZOOM-in- stelling te kiezen. Druk hierna op de toets In deze stand wordt het normale beeld (4:3 beeldverhouding) é . é é é uniform naar rechts en links opgerekt totdat het gehele scherm is opgevuld, zonder dat het beeld onnatuurlijk overkomt.
  • Seite 120: Werken Met Menu's

    ì ì Opmerking: • Als uw apparaat gaan JVC-apparaat is, kunt u deze U kunt het volume naar wens instellen. toetsen niet gebruiken. • Zelfs als uw apparaat door JVC is gemaakt, kan het ì ì ì ì Gebruik de...
  • Seite 121 AFSTANDSBEDIENINGSTOETSEN EN -FUNCTIES # # # # # # # # 7HOHWHNVW0EHGLHQLQJVWRHWVHQ#HQ#9&5# 7HOHWHNVW0EHGLHQLQJVWRHWVHQ#HQ#9&5# 7HOHWHNVW0EHGLHQLQJVWRHWVHQ#HQ#9&5#( 7HOHWHNVW0EHGLHQLQJVWRHWVHQ#HQ#9&5# ( #'9' #'9' #'9'0VFKDNHODDU #'9' 0VFKDNHODDU 0VFKDNHODDU 0VFKDNHODDU Opmerking: • Als u problemen heeft met de ontvangst van Teletekst-uitzendingen, neem dan contact op met uw dealer of met de kabelexploitant, MENU •...
  • Seite 122 AFSTANDSBEDIENINGSTOETSEN EN -FUNCTIES 6XESDJLQD 6XESDJLQD 6XESDJLQD 6XESDJLQD $QQXOHUHQ $QQXOHUHQ $QQXOHUHQ $QQXOHUHQ Sommige Teletekst-pagina’s bevatten subpagina’s die au- U kunt zoeken naar een Teletekst-pagina terwijl u TV kijkt. tomatisch in beeld worden gebracht. U kunt iedere gewenste subpagina, op ieder gewenst mo- Druk op de nummertoets om een pagi- ment in beeld houden of weer in beeld brengen.
  • Seite 123 :(5.(1#0(7#0(18·6 :(5.(1#0(7#0(18·6 :(5.(1#0(7#0(18·6 :(5.(1#0(7#0(18·6 Deze TV beschikt over enkele functies die via menu’s bedi- end kunnen worden. Om ten volle gebruik te kunnen maken van alle functies van uw TV, dient u de manier waarop de menu’s werken goed te begrijpen. Druk op de toets é...
  • Seite 124 #%((/'#,167(//,1*# #%((/'#,167(//,1*# #%((/'#,167(//,1*# #%((/'#,167(//,1*# Opmerking: • De instelling TINT NTSC (kleurtoon) kan alleen worden gewijzigd als het kleursysteem NTSC 3.58 of NTSC 4.43 is. De standaardinstellingen voor TINT hertellen. Druk op de blauwe toets. Ga terug naar de standaardinstellingen voor de gekozen TINT-instelling en sla deze weer op in de TINT-instelling.
  • Seite 125 #%((/'#02*(/,-.+('(1# #%((/'#02*(/,-.+('(1# #%((/'#02*(/,-.+('(1# #%((/'#02*(/,-.+('(1# ./(856<67((0 ./(856<67((0 ./(856<67((0 ./(856<67((0 Het kleursysteem wordt automatisch gekozen. Als het beeld echter niet helder is of er is geen kleur, stel het kleursysteem dan handmatig in. ë Gebruik de -toetsen om KLEURSYSTEEM te kiezen. Druk hierna op de toets é. Het submenu van de functie KLEURSYSTEEM ver- schijnt in beeld.
  • Seite 126: Beeld Mogelijkheden

    BEELD MOGELIJKHEDEN 7=6#$872#=220 7=6#$872#=220 7=6#$872#=220 7=6#$872#=220 Deze functie werkt alleen wanneer de ZOOM-functie is in- gesteld op AUTO(WSS). De functie bepaalt de ZOOM-instell- ing die u wilt gebruiken wanneer het zendsignaal of het signaal van een extern apparaat geen WSS-signaal bevat. U kunt kiezen uit drie ZOOM-instellingen.
  • Seite 127 #*(/8,'#,167(//,1*# #*(/8,'#,167(//,1*# #*(/8,'#,167(//,1*# #*(/8,'#,167(//,1*# +<3(5#6281' +<3(5#6281' +<3(5#6281' +<3(5#6281' U kunt genieten van een veel fraaiere geluidsweergave. ë Gebruik de -toetsen om HYPER SOUND te kiezen. ì Gebruik de -toetsen om AAN te kiezen. Om de functie HYPER SOUND uit te schakelen: Om het menu GELUID INSTELLING in beeld te brengen: Gebruik de ì-toetsen om UIT te kiezen.
  • Seite 128 (;71#,167(//,1* (;71#,167(//,1* (;71#,167(//,1* (;71#,167(//,1* Druk op de toets é om de instelling te voltooien. Het menu verdwijnt. Opmerking: • De EXT-1-aansluiting ondersteunt geen S-VIDEO- signaal (Y/C-signaal) en u kunt voor de EXT-aanslu- iting geen K K (S-VIDEO-invoer) instellen. • Door de instelling K K (S-VIDEO-invoer) wordt de letter veranderd “E”...
  • Seite 129: Ext. Instelling

    EXT. INSTELLING ë Gebruik de -toetsen om een naam te kiezen. Druk hierna op de toets é. De LIJST verdwijnt en de naam is toegewezen aan de EXT-aansluiting. Om een naam die aan een EXT-aansluiting is toegewezen te wissen: Kies een blanco ruimte. Druk op de toets é...
  • Seite 130 02*(/,-.+('(1 02*(/,-.+('(1 02*(/,-.+('(1 02*(/,-.+('(1 %/$8:#%((/' %/$8:#%((/' %/$8:#%((/' %/$8:#%((/' U kunt de TV zo instellen dat het scherm blauw en het geluid gedempt wordt, als er geen signaal is of als het signaal heel zwak is of als er geen invoer van een extern apparaat is. ë...
  • Seite 131: Mogelijkheden

    MOGELIJKHEDEN ë Gebruik de -toetsen om een TV-kanaal Opmerking: te kiezen. • Zelfs als u het kinderslot tijdelijk opheft, betekent dit ë Iedere keer dat u een toets indrukt, verandert het niet dat de functie KINDERSLOT voor dat kanaal is programmanummer (PR) en het beeld van de zender die opgeheven.
  • Seite 132 ,167(//(1 ,167(//(1 ,167(//(1 ,167(//(1 Druk op de blauwe toets om de functie AU- TOMATISCH in te schakelen. Het menu AUTOMATISCH verschijnt en de ontvangen TV-kanalen worden automatisch vastgelegd onder de programmanummers (PR). Om het menu INSTELLEN in beeld te brengen: Druk op de toets é...
  • Seite 133: Instellen

    INSTELLEN 6257(5(120$18((/ 6257(5(120$18((/ 6257(5(120$18((/ 6257(5(120$18((/ Volg de aanwijzingen voor de functie die u wilt gebruiken en bedien de functie. De functies SORTEREN/MANUEEL zijn verdeeld in twee types: bewerken van de programmanummers (PR) (SORT- Druk op de toets é é om de instelling te é...
  • Seite 134 INSTELLEN Opmerking: Gebruik de ë ë -toetsen om op een TV-ka- • U kunt een zelf gekozen zendernaam (ID) toewijzen ë ë aan ieder gewenst TV-kanaal. Als u klaar bent met naal af te stemmen. stap 3, ga dan niet naar stap 4, maar gebruik de Iedere keer dat u op een van de ë...
  • Seite 135 INSTELLEN :,66(1 :,66(1 :,66(1 :,66(1 Overige TV-kanalen: Als u het kleursysteem van een zender niet kent, stel Gebruik de ë ë ë ë -toetsen om op een zender SYSTEEM dan in op “B/G”. Als “B/G” niet juist is, zult u af te stemmen.
  • Seite 136 '(02 '(02 '(02 '(02 Om het menu DEMO in beeld te brengen: Druk op de toets é é é om het MENU (hoofd- é menu) in beeld te brengen. Druk op de toets ë ë ë om in te stellen op ë...
  • Seite 137 #12*#0((5#0(18·6# #12*#0((5#0(18·6# #12*#0((5#0(18·6# #12*#0((5#0(18·6# # # # # 9HUVWXUHQ#YDQ#GH#JHJHYHQV# 9HUVWXUHQ#YDQ#GH#JHJHYHQV# 9HUVWXUHQ#YDQ#GH#JHJHYHQV# 9HUVWXUHQ#YDQ#GH#JHJHYHQV# ë ë ë ë Gebruik de -toetsen om in te stellen op AUTOMATISCH. Druk hierna op de toets é é é é . QDDU#HHQ#YLGHRUHFRUGHU# QDDU#HHQ#YLGHRUHFRUGHU# QDDU#HHQ#YLGHRUHFRUGHU# QDDU#HHQ#YLGHRUHFRUGHU# Het menu LAND verschijnt als submenu van de functie AUTOMATISCH.
  • Seite 138: Nog Meer Menu's

    NOG MEER MENU’S Druk op de toets é é om de instelling te é é voltooien. Het menu T-V LINK verschijnt in beeld. Volg de bedieningsprocedure “Versturen van de gegevens naar een videorecorder” op pagina 28 om de gegevens van de pro- grammanummers (PR) naar de videore- corder te versturen.
  • Seite 139 #9(5'(5(#9225%(5(,',1*(1# #9(5'(5(#9225%(5(,',1*(1# #9(5'(5(#9225%(5(,',1*(1# #9(5'(5(#9225%(5(,',1*(1# #$DQVOXLWHQ#YDQ#SHULIHUH#DSSDUDWXXU1# #$DQVOXLWHQ#YDQ#SHULIHUH#DSSDUDWXXU1# #$DQVOXLWHQ#YDQ#SHULIHUH#DSSDUDWXXU1# #$DQVOXLWHQ#YDQ#SHULIHUH#DSSDUDWXXU1# Sluit de apparatuur aan op de TV, en let hierbij goed op dat de aansluitingen op het voorpaneel en het achterpaneel op de juiste wijze worden gemaakt. Alvorens een aansluiting te maken: •...
  • Seite 140: Verdere Voorbereidingen

    VERDERE VOORBEREIDINGEN $SSDUDWHQ#GLH#HHQ#609,'(20VLJQDDO $SSDUDWHQ#GLH#HHQ#609,'(20VLJQDDO $SSDUDWHQ#GLH#HHQ#609,'(20VLJQDDO $SSDUDWHQ#GLH#HHQ#609,'(20VLJQDDO +<2&0VLJQDDO,# NXQQHQ# XLWVWXUHQ/ +<2&0VLJQDDO,# NXQQHQ# XLWVWXUHQ/ +<2&0VLJQDDO,# NXQQHQ# XLWVWXUHQ/ +<2&0VLJQDDO,# NXQQHQ# XLWVWXUHQ/ ]RDOV#HHQ#609+60YLGHRUHFRUGHU ]RDOV#HHQ#609+60YLGHRUHFRUGHU ]RDOV#HHQ#609+60YLGHRUHFRUGHU ]RDOV#HHQ#609+60YLGHRUHFRUGHU Sluit het apparaat aan op een EXT-aansluiting, maar niet op de EXT-1-aansluiting. U kunt het gewenste video-ingangssignaal kiezen uit het S- VIDEO-signaal (Y/C-signaal) en het normale videosignaal (samengesteld signaal).
  • Seite 141 #&+2&&#1800(5 #&+2&&#1800(5 #&+2&&#1800(5 #&+2&&#1800(5 Als u de functie INVOEGEN op pagina 25,wilt gebruiken, zoek dan het CH/CC-nummer dat correspondeert met het TV-kanaal in deze tabel op. Kanaal Kanaal Kanaal Kanaal CH 02 / CH 202 CH 40 / CH 240 CC 01 / CC 201 CC 31 / CC 231 CH 03 / CH 203...
  • Seite 142 6&+$.(/$$56#(1#21'(5'(/(1#9$1#'(#79# 6&+$.(/$$56#(1#21'(5'(/(1#9$1#'(#79# 6&+$.(/$$56#(1#21'(5'(/(1#9$1#'(#79# 6&+$.(/$$56#(1#21'(5'(/(1#9$1#'(#79# # # # # 9RRUSDQHHO 9RRUSDQHHO 9RRUSDQHHO 9RRUSDQHHO Duwen om te openen (Achter het klepje) ∨ ∨ ∨ ∨ ∧ ∧ ∧ ∧ 1 Afstandsbedieningssensor en ECO -sensor toetsen / C C toetsen pagina 8 2 Hoofdtelefoonaansluiting (ministekker) 6 Aan/uit-indicator pagina 30 pagina’s 3 en 6...
  • Seite 143 #9(5+(/3(1#9$1#6725,1*(1 #9(5+(/3(1#9$1#6725,1*(1 #9(5+(/3(1#9$1#6725,1*(1 #9(5+(/3(1#9$1#6725,1*(1 Als er zich een probleem voordoet met de TV, lees deze paragraaf “Verhelpen van storingen” dan aandachtig door, alvorens de hulp van een vakman in te roepen. U kunt het probleem wellicht heel makkelijk zelf oplossen. Als de netstekker bijvoorbeeld niet in het stopcontact zit, of er is een probleem met de antenne, kunt u snel denken dat de TV zelf kapot is.
  • Seite 144: Verhelpen Van Storingen

    VERHELPEN VAN STORINGEN 2YHULJH#SUREOHPHQ 2YHULJH#SUREOHPHQ 2YHULJH#SUREOHPHQ 2YHULJH#SUREOHPHQ • Als de functie SLEEP TIMER is ingeschakeld, wordt de TV automatisch uitgeschakeld. Als de TV plotseling wordt uit- ü geschakeld, druk dan op de toets (Stand-by) om te pro- beren de TV weer in te schakelen. Als de TV nu weer gewoon ingeschakeld kan worden, is er geen sprake van een storing.
  • Seite 145 7(&+1,6&+(#*(*(9(16 7(&+1,6&+(#*(*(9(16 7(&+1,6&+(#*(*(9(16 7(&+1,6&+(#*(*(9(16 Model AV28WT5EP* AV24WT5EP* Item TV RF-systemen CCIR B/G, I, L Kleursystemen PAL, SECAM • De EXT-aansluitingen ondersteunen ook het NTSC 3.58/4.43 MHz-systeem. • E2-E12, E21-E69, S1-S41, X, Y, Z, Z+1, Z+2, A-H, H+1, H+2, F2-F10, F21-F69 Kanalen en frequenties •...
  • Seite 146 Gracias por comprar este televisor en color JVC. Lea atentamente este manual antes de empezar a utilizar el televisor para asegurarse de que lo utiliza correctamente. ADVERTENCIA: NO EXPONGA ESTE APARATO A LA LLUVIA O LA HUMEDAD, YA QUE PODRÍA PROVO- CAR UN INCENDIO O SUFRIR UNA DESCARGA ELÉCTRICA.
  • Seite 147 #3$626#35(9,26 #3$626#35(9,26 #3$626#35(9,26 #3$626#35(9,26 &yPR#FRQHFWDU#OD#DQWHQD#\#HO#YtGHR &yPR#FRQHFWDU#OD#DQWHQD#\#HO#YtGHR &yPR#FRQHFWDU#OD#DQWHQD#\#HO#YtGHR &yPR#FRQHFWDU#OD#DQWHQD#\#HO#YtGHR Si va a conectar un vídeo, siga los pasos A → B → C → D. VHF/UHF Antena Si no va a conectar un vídeo, siga los pasos 1 → 2. *1: Para poder utilizar T-V LINK, es necesario conectar un ví- Toma de CA deo compatible con T-V LINK al terminal EXT-2 del tele- (220 - 240 V de...
  • Seite 148: Pasos Previos

    $MXVWH#LQLFLDO La primera vez que se pone en marcha el televisor, se activa el modo de ajuste inicial y aparece el logotipo de JVC. Para proceder al ajuste inicial, siga las instrucciones de pantalla. Pulse el interruptor principal de encen- dido del televisor.
  • Seite 149 PASOS PREVIOS Pulse el botón azul para activar la fun- Nota: ción AUTO PROGRAMACION. • Cuando el televisor capta el nombre del canal (ID) a En pantalla aparecerá el menú AUTO PROGRAMA- través de la señal de recepción, lo registra automá- CION y los canales de televisión se memorizarán auto- ticamente en el número de canal (PR) en el que está...
  • Seite 150: Funciones De T-V Link

    • Son vídeos compatibles con T-V LINK los aparatos de ví- aparato de vídeo. deo JVC que incorporan el logotipo T-V LINK o cualquier aparato de vídeo de otra marca que incorpore alguno de los logotipos de la lista. Sin embargo, es posible que es-...
  • Seite 151 )81&,21$0,(172#%É6,&2 )81&,21$0,(172#%É6,&2 )81&,21$0,(172#%É6,&2 )81&,21$0,(172#%É6,&2 &yPR#HQFHQGHU#HO#WHOHYLVRU &yPR#HQFHQGHU#HO#WHOHYLVRU &yPR#HQFHQGHU#HO#WHOHYLVRU &yPR#HQFHQGHU#HO#WHOHYLVRU Pulse el botón principal de encendido del televisor. El indicador de encendido se ilumina en rojo si el televisor está en modo de espera. Nota: • Si el televisor está en marcha, el indicador se ilumina en verde.
  • Seite 152: Funcionamiento Básico

    FUNCIONAMIENTO BÁSICO Pulse los botones ì ì ì y ë ì ë ë para seleccio- ë ë ë ë ë Utilice los botones ë ë ë ë Pulse los botones para seleccionar un terminal EXT. nar un número de canal (PR). A continua- ción, pulse é...
  • Seite 153 FUNCIONAMIENTO BÁSICO &yPR#XWLOL]DU#ORV#ERWRQHV#GHO#WHOHYLVRU &yPR#XWLOL]DU#ORV#ERWRQHV#GHO#WHOHYLVRU &yPR#XWLOL]DU#ORV#ERWRQHV#GHO#WHOHYLVRU &yPR#XWLOL]DU#ORV#ERWRQHV#GHO#WHOHYLVRU Pulse los botones P B B para encen- der el televisor cuando esté en modo de espera. Pulse los botones P para seleccio- nar un número de canal (PR) o un termi- nal EXT. (Detrás de la tapa frontal) Pulse el botón (Volumen) y, a con-...
  • Seite 154 # # # # %2721(6#<#)81&,21(6#'(/#0$1'2#$#',67$1&,$ %2721(6#<#)81&,21(6#'(/#0$1'2#$#',67$1&,$ %2721(6#<#)81&,21(6#'(/#0$1'2#$#',67$1&,$ %2721(6#<#)81&,21(6#'(/#0$1'2#$#',67$1&,$ %RWyQ#VLOHQFLDGRU %RWyQ#VLOHQFLDGRU %RWyQ#VLOHQFLDGRU %RWyQ#VLOHQFLDGRU Si lo desea, puede interrumpir el sonido instantáneamente. ã ã ã ã Pulse el botón silenciador para desconectar el volumen. Pulse de nuevo el botón silencia- ã ã ã ã para volver a conectar el volumen al mismo nivel de antes.
  • Seite 155: Botones Y Funciones Del Mando A Distancia

    BOTONES Y FUNCIONES DEL MANDO A DISTANCIA ë ë ë ë PANORAMIC: Pulse los botones para seleccionar un modo de ZOOM. A continuación, pulse é é . é é Se alarga la imagen normal (formato 4:3) por los lados hasta llenar toda la pantalla y sin que se pierda naturalidad.
  • Seite 156: Cómo Utilizar El Menú

    Estos botones permiten controlar aparatos de vídeo o repro- • El botón å (Información) también se utiliza en operacio- ductores de DVD de la marca JVC. Utilice los que tengan cor- respondencia en el mando a distancia suministrado con el nes de menú.
  • Seite 157 BOTONES Y FUNCIONES DEL MANDO A DISTANCIA # # # # # # # # %RWRQHV#GH#FRQWURO#GHO#WHOHWH[WR#\#VHOHFWRU# %RWRQHV#GH#FRQWURO#GHO#WHOHWH[WR#\#VHOHFWRU# %RWRQHV#GH#FRQWURO#GHO#WHOHWH[WR#\#VHOHFWRU# 9&5# %RWRQHV#GH#FRQWURO#GHO#WHOHWH[WR#\#VHOHFWRU# ( #'9' #'9' #'9' #'9' 9&5#( 9&5# 9&5# Nota: • Si tiene algún problema para recibir el teletexto, póngase en contacto con su distribuidor local o la cadena que emite el teletexto.
  • Seite 158 BOTONES Y FUNCIONES DEL MANDO A DISTANCIA 3iJLQD#VHFXQGDULD 3iJLQD#VHFXQGDULD 3iJLQD#VHFXQGDULD 3iJLQD#VHFXQGDULD 6DOLU 6DOLU 6DOLU 6DOLU Algunas páginas de teletexto arrastran páginas secundarias Puede buscar una página de teletexto y, al mismo tiempo, ver que aparecen en pantalla automáticamente. la televisión. Las páginas secundarias se pueden bloquear o visualizar en cualquier momento.
  • Seite 159 &Ð02#87,/,=$5#(/#0(1Ô &Ð02#87,/,=$5#(/#0(1Ô &Ð02#87,/,=$5#(/#0(1Ô &Ð02#87,/,=$5#(/#0(1Ô Este televisor incorpora varias funciones controlables desde menús. Para sacarle el máximo partido al televisor debe lle- gar a dominar el funcionamiento de los menús. Pulse el botón é para acceder al menú principal. Aparece en pantalla el menú principal, en el que apare- cen los títulos de los diferentes menús.
  • Seite 160: Ajuste De Imagen

    $-867(#'(#,0$*(1 $-867(#'(#,0$*(1 $-867(#'(#,0$*(1 $-867(#'(#,0$*(1 Nota: • Sólo puede ajustar la tonalidad de la imagen (MATIZ NTSC) cuando el sistema de color empleado es el NTSC 3.58 o NTSC 4.43. Para volver a los ajustes predeterminados en los diferentes modos de MATIZ: Pulse el botón azul.
  • Seite 161 )81&,21(6#'(#,0$*(1 )81&,21(6#'(#,0$*(1 )81&,21(6#'(#,0$*(1 )81&,21(6#'(#,0$*(1 6,67(0$#'(#&2/25 6,67(0$#'(#&2/25 6,67(0$#'(#&2/25 6,67(0$#'(#&2/25 El televisor selecciona automáticamente un sistema de color, pero si la imagen no sale nítida o fallan los colores, puede cambiar el sistema de color manualmente. ë Pulse los botones para seleccionar SISTEMA DE COLOR.
  • Seite 162: Funciones De Imagen

    FUNCIONES DE IMAGEN )250$72#$872017=6 )250$72#$872017=6 )250$72#$872017=6 )250$72#$872017=6 Esta función solamente es válida cuando el modo de ZOOM está ajustado en el modo AUTO(WSS). Con ella se establece el modo de ZOOM que usted quiera utilizar cuando la señal de transmisión o la señal procedente de un dispositivo exter- no no incluya una señal WSS.
  • Seite 163: Ajuste De Sonido

    $-867(#'(#621,'2 $-867(#'(#621,'2 $-867(#'(#621,'2 $-867(#'(#621,'2 +,3(5#621,'2 +,3(5#621,'2 +,3(5#621,'2 +,3(5#621,'2 Esta función permite crear un sonido más envolvente. ë Pulse los botones para seleccionar HYPER SONIDO. ì Pulse los botones para seleccionar Para ver en pantalla el menú AJUSTE DE SONIDO: Para cancelar la función HYPER SONIDO: Pulse el botón é...
  • Seite 164 $-867(#(;71 $-867(#(;71 $-867(#(;71 $-867(#(;71 Pulse el botón é para confirmar la selec- ción. El menú desaparece. Nota: • El terminal EXT-1 no es compatible con la señal S- VIDEO (señal Y/C); no active la función K K (entra- da S-VIDEO) en este terminal. •...
  • Seite 165: Ajuste Ext

    AJUSTE EXT. ë Pulse los botones para seleccionar un nombre. A continuación, pulse é . La LISTA desaparece y el nombre queda asignado al terminal EXT. Para borrar el nombre asignado al terminal EXT: Seleccione un espacio en blanco. Pulse el botón é para confirmar la selec- ción.
  • Seite 166 275$6#)81&,21(6 275$6#)81&,21(6 275$6#)81&,21(6 275$6#)81&,21(6 )21'2#$=8/ )21'2#$=8/ )21'2#$=8/ )21'2#$=8/ Esta función permite al televisor cambiar automáticamente a una pantalla de fondo azul e interrumpir el sonido cuando la señal recibida es demasiado débil o inexistente, o cuando no se recibe señal de un aparato externo. ë...
  • Seite 167: Otras Funciones

    OTRAS FUNCIONES #'(&2'(5#+(;705, #'(&2'(5#+(;705, #'(&2'(5#+(;705, #'(&2'(5#+(;705, Pulse el botón azul y ajuste PROTECCION INFANTIL. Para utilizar esta función, es necesario conectar un descodi- En pantalla aparece el símbolo (PROTECCION IN- ficador a un vídeo compatible con T-V LINK conectado al ter- FANTIL) y se bloquea el canal.
  • Seite 168 ,167$/$&,21 ,167$/$&,21 ,167$/$&,21 ,167$/$&,21 Pulse el botón azul para activar la función AUTO PROGRAMACION. En pantalla aparecerá el menú AUTO PROGRAMACION y los canales de televisión se memorizarán automática- mente en los diferentes números de canal (PR). Para ver en pantalla el menú INSTALACION: Pulse el botón é...
  • Seite 169: Instalacion

    INSTALACION (',&,2120$18$/ (',&,2120$18$/ (',&,2120$18$/ (',&,2120$18$/ Siga los pasos necesarios para activar la función y selecciónela. La función EDICION/MANUAL se divide en dos tipos: edición de los números de canal (PR) existentes (EDICION) y mem- Pulse el botón é é é é...
  • Seite 170 INSTALACION Nota: Pulse los botones ë ë para seleccionar un • Si lo desea, puede asignar a un canal de televisión ë ë un nombre de canal (ID) especial. Una vez finaliza- canal de televisión. do el paso 3, en lugar de seguir con el paso 4, pulse Cada vez que pulse ë...
  • Seite 171 INSTALACION %255$5 %255$5 %255$5 %255$5 Para otros canales de televisión: Si no sabe cuál es el sistema de transmisión que corres- Pulse los botones ë ë ë para seleccionar un ë ponde a un canal, seleccione el sistema “B/G”. En caso canal de televisión.
  • Seite 172: Demostracion

    '(02675$&,21 '(02675$&,21 '(02675$&,21 '(02675$&,21 Para ver en pantalla el menú DEMOSTRACION: Pulse el botón é é é é para acceder a MENU (menú principal). ë ë ë ë Pulse el botón para seleccionar el menú DEMOSTRACION. A continuación, pulse é é...
  • Seite 173 275$6#)81&,21(6#'(/#0(1Ô 275$6#)81&,21(6#'(/#0(1Ô 275$6#)81&,21(6#'(/#0(1Ô 275$6#)81&,21(6#'(/#0(1Ô &yPR#DFWXDOL]DU#OD#LQIRUPD0 &yPR#DFWXDOL]DU#OD#LQIRUPD0 &yPR#DFWXDOL]DU#OD#LQIRUPD0 &yPR#DFWXDOL]DU#OD#LQIRUPD0 ë ë ë ë Pulse los botones para seleccionar AUTO PROGRAMACION. A continuación, FLyQ#HQ#HO#YtGHR FLyQ#HQ#HO#YtGHR FLyQ#HQ#HO#YtGHR FLyQ#HQ#HO#YtGHR pulse é é . é é La función T-V LINK le permite enviar al aparato de vídeo la En pantalla aparecerá...
  • Seite 174: Otras Funciones Del Menú

    OTRAS FUNCIONES DEL MENÚ Pulse el botón é é para confirmar la selec- é é ción. Aparece el menú de T-V LINK. Siga el procedimiento explicado en “Cómo actualizar la información en el vídeo” en la página 28 para enviar la información mem- orizada en los números de canal (PR) al aparato de vídeo.
  • Seite 175 27526#3$626#35(9,26 27526#3$626#35(9,26 27526#3$626#35(9,26 27526#3$626#35(9,26 &yPR#FRQHFWDU#HTXLSRV#H[WHUQRV &yPR#FRQHFWDU#HTXLSRV#H[WHUQRV &yPR#FRQHFWDU#HTXLSRV#H[WHUQRV &yPR#FRQHFWDU#HTXLSRV#H[WHUQRV Cuando conecte equipos externos al televisor, preste especial atención a las conexiones de los paneles frontal y posterior. Antes de realizar cualquier conexión: • Lea los manuales de instrucciones suministrados con cada equipo. Es posible que con algún equipo el método de conexión sea diferente al de la ilustración.
  • Seite 176: Otros Pasos Previos

    OTROS PASOS PREVIOS (TXLSRV#TXH#SXHGHQ#HQYLDU#OD#VHxDO (TXLSRV#TXH#SXHGHQ#HQYLDU#OD#VHxDO (TXLSRV#TXH#SXHGHQ#HQYLDU#OD#VHxDO (TXLSRV#TXH#SXHGHQ#HQYLDU#OD#VHxDO 609,'(2#+VHxDO#<2&,#FRPR#XQ#YtGHR 609,'(2#+VHxDO#<2&,#FRPR#XQ#YtGHR 609,'(2#+VHxDO#<2&,#FRPR#XQ#YtGHR 609,'(2#+VHxDO#<2&,#FRPR#XQ#YtGHR 609+6 609+6 609+6 609+6 Conecte el equipo a un terminal EXT, excepto al terminal EXT-1. Al seleccionar la señal de entrada de vídeo puede elegir entre señal de S-VIDEO (señal Y/C) y una señal de vídeo normal (señal compuesta).
  • Seite 177 1Ô0(52#&+2&& 1Ô0(52#&+2&& 1Ô0(52#&+2&& 1Ô0(52#&+2&& Para utilizar la función INSERTAR descrita en la página página 25, busque el número CH/CC que corresponda al número de canal del televisor de esta tabla. Canal Canal Canal Canal CH 02 / CH 202 CH 40 / CH 240 CC 01 / CC 201 CC 31 / CC 231 CH 03 / CH 203...
  • Seite 178 %2721(6#<#3,(=$6#'(/#7(/(9,625 %2721(6#<#3,(=$6#'(/#7(/(9,625 %2721(6#<#3,(=$6#'(/#7(/(9,625 %2721(6#<#3,(=$6#'(/#7(/(9,625 3DQHO#IURQWDO 3DQHO#IURQWDO 3DQHO#IURQWDO 3DQHO#IURQWDO Presione para abrir (Detrás de la tapa) ∨ ∨ ∨ ∨ ∧ ∧ ∧ ∧ 1 Sensor del mando a distancia y Sensor ECO 5 Botones P / botones C página 8 2 Toma de auriculares (mini clavija) 6 Indicador de encendido página 30...
  • Seite 179 62/8&,Ð1#'(#352%/(0$6 62/8&,Ð1#'(#352%/(0$6 62/8&,Ð1#'(#352%/(0$6 62/8&,Ð1#'(#352%/(0$6 Si se le presenta algún problema al utilizar el televisor, lea este apartado antes de llevar a reparar el aparato. Es posible que pueda arreglarlo usted mismo. A veces, por ejemplo, el televisor está desenchufado de la toma de corriente o la antena está dañada y uno cree que el televisor no funciona.
  • Seite 180: Solución De Problemas

    SOLUCIÓN DE PROBLEMAS 2WUDV#FXHVWLRQHV#TXH#VH#GHEHQ#WHQHU 2WUDV#FXHVWLRQHV#TXH#VH#GHEHQ#WHQHU 2WUDV#FXHVWLRQHV#TXH#VH#GHEHQ#WHQHU 2WUDV#FXHVWLRQHV#TXH#VH#GHEHQ#WHQHU HQ#FXHQWD HQ#FXHQWD HQ#FXHQWD HQ#FXHQWD • Si el TEMPORIZADOR está activado, el televisor se apaga ü automáticamente. Si lo hace, pulse el botón (modo en espera) para volverlo a encender. Si el televisor se encien- de y empieza a funcionar con normalidad, no hay riesgo de avería.
  • Seite 181 &$5$&7(5Ì67,&$6#7e&1,&$6 &$5$&7(5Ì67,&$6#7e&1,&$6 &$5$&7(5Ì67,&$6#7e&1,&$6 &$5$&7(5Ì67,&$6#7e&1,&$6 Modelo Parámetro AV28WT5EP* AV24WT5EP* de ajuste Sistemas de transmisión CCIR B/G, I, L Sistemas de color PAL, SECAM • Los terminales EXT también son compatibles con el sistema NTSC 3.58/4.43 MHz. • E2-E12, E21-E69, S1-S41, X, Y, Z, Z+1, Z+2, A-H, H+1, H+2, F2-F10, F21-F69 Canales y frecuencias •...
  • Seite 182 Ringraziamo la gentile clientela per l’acquisto di u’n televisore a colori JVC. Per comprendere a fondo le funzionalità del televisore acquistato, si invita a leggere attentamen- te il presente manuale prima dell’uso. AVVERTENZA: PER EVITARE RISCHI DI INCENDIO O SCOSSA ELETTRICA, NON ESPORRE L’APPARECCHIATURA A LIQUIDI O UMIDITÀ.
  • Seite 183 35(3$5$=,21( 35(3$5$=,21( 35(3$5$=,21( 35(3$5$=,21( &ROOHJDPHQWR#GHOO·DQWHQQD#H#GHO#YLGHRUHJLVWUDWRUH &ROOHJDPHQWR#GHOO·DQWHQQD#H#GHO#YLGHRUHJLVWUDWRUH &ROOHJDPHQWR#GHOO·DQWHQQD#H#GHO#YLGHRUHJLVWUDWRUH &ROOHJDPHQWR#GHOO·DQWHQQD#H#GHO#YLGHRUHJLVWUDWRUH Se si collega un videoregistratore, seguire la procedura A → Antenna VHF/ B → C → D. Se non si collega un videoregistratore, seguire la procedura 1 → 2. Presa corrente CA *1:Perché...
  • Seite 184: Preparazione

    Quando il televisore viene acceso per la prima volta, verrà at- tivata la modalità di impostazione iniziale e verrà visualizzato il logo della JVC. Seguire le istruzioni su schermo per effettu- are le impostazioni iniziali. Premere il tasto di alimentazione prin- cipale sul televisore.
  • Seite 185 PREPARAZIONE PREPARAZIONE PREPARAZIONE PREPARAZIONE Premere il tasto blu per avviare la fun- Nota: zione SINTONIA AUTOMATICA. • Quando il televisore rileva il nome del canale TV dal Il menu SINTONIA AUTOMATICA viene visualizzato e i segnale di trasmissione TV, registrerà automatica- canali TV ricevuti vengono automaticamente registrati mente il nome del canale TV (ID) sul numero Pro- nei numeri Programma (PR).
  • Seite 186: Funzioni T-V Link

    Per ulteriori informazioni, fare riferimento al Nota: manuale di istruzioni del videoregistratore in uso. • Un “videoregistratore compatibile T-V LINK” è un video- registratore JVC con il logo T-V LINK o un videoregistra- tore con uno dei seguenti simboli. Tuttavia, i $FFHQVLRQH#DXWRPDWLFD#GHO# $FFHQVLRQH#DXWRPDWLFD#GHO#...
  • Seite 187 )81=,21$0(172#*(1(5$/( )81=,21$0(172#*(1(5$/( )81=,21$0(172#*(1(5$/( )81=,21$0(172#*(1(5$/( 3UHPHUH#LO#WDVWR#GL#DOLPHQWD]LRQH1 3UHPHUH#LO#WDVWR#GL#DOLPHQWD]LRQH1 3UHPHUH#LO#WDVWR#GL#DOLPHQWD]LRQH1 3UHPHUH#LO#WDVWR#GL#DOLPHQWD]LRQH1 Premere il tasto di alimentazione princi- pale sul televisore. La spia di alimentazione si illuminerà di colore rosso e il televi- sore entrerà nella modalità di riposo (standby mode). Nota: • Se la spia di alimentazione si illumina di colore verde, il televisore è...
  • Seite 188: Funzionamento Generale

    FUNZIONAMENTO GENERALE FUNZIONAMENTO GENERALE FUNZIONAMENTO GENERALE FUNZIONAMENTO GENERALE Premere i tasti ì ì ì e ë ì ë ë per scegliere il nu- ë ë ë ë ë Utilizzare i tasti ë ë ë ë Premere i tasti per scegliere un terminale EXT mero Programma (PR).
  • Seite 189 FUNZIONAMENTO GENERALE FUNZIONAMENTO GENERALE FUNZIONAMENTO GENERALE FUNZIONAMENTO GENERALE )XQ]LRQDPHQWR#FRQ#L#WDVWL#VXO#WHOHYLVRUH )XQ]LRQDPHQWR#FRQ#L#WDVWL#VXO#WHOHYLVRUH )XQ]LRQDPHQWR#FRQ#L#WDVWL#VXO#WHOHYLVRUH )XQ]LRQDPHQWR#FRQ#L#WDVWL#VXO#WHOHYLVRUH Premere i tasti P B B per accendere la televisione dalla modalità di ri- poso. Premere i tasti P per scegliere un numero Programma (PR) o un terminale EXT.
  • Seite 190 # # # # 7$67,#(#)81=,21,#'(/#7(/(&20$1'2 7$67,#(#)81=,21,#'(/#7(/(&20$1'2 7$67,#(#)81=,21,#'(/#7(/(&20$1'2 7$67,#(#)81=,21,#'(/#7(/(&20$1'2 1 1 1 1 7DVWR#GL#VLOHQ]LDPHQWR 7DVWR#GL#VLOHQ]LDPHQWR 7DVWR#GL#VLOHQ]LDPHQWR 7DVWR#GL#VLOHQ]LDPHQWR Consente di togliere l’audio istantaneamente. ã ã ã ã Premere il tasto (Silenziamento) per togliere ã ã ã ã il volume. Se si preme nuovamente il tasto (Silenziamento), verrà...
  • Seite 191: Tasti E Funzioni Del Telecomando

    TASTI E FUNZIONI DEL TELECOMANDO TASTI E FUNZIONI DEL TELECOMANDO TASTI E FUNZIONI DEL TELECOMANDO TASTI E FUNZIONI DEL TELECOMANDO ë ë ë ë PANORAMIC: Premere i tasti per scegliere una mo- dalità ZOOM. Quindi, premere il tasto é é . é...
  • Seite 192 Questi tasti possono essere utilizzati per azionare un video- altri canali TV. registratore o un lettore DVD della JVC. La pressione di un • Quando si guardano delle videocassette, è possibile tasto con lo stesso aspetto del tasto del telecomando di un dispositivo consente di attivare la funzione corrispondente es- che, a volte, venga visualizzata l’ora corrente errata.
  • Seite 193 TASTI E FUNZIONI DEL TELECOMANDO TASTI E FUNZIONI DEL TELECOMANDO TASTI E FUNZIONI DEL TELECOMANDO TASTI E FUNZIONI DEL TELECOMANDO # # # # # # # # 7DVWL#GL#FRPDQGR#GHO#WHOHYLGHR#H#LQWHUUXWWRUH#9&5# 7DVWL#GL#FRPDQGR#GHO#WHOHYLGHR#H#LQWHUUXWWRUH#9&5# 7DVWL#GL#FRPDQGR#GHO#WHOHYLGHR#H#LQWHUUXWWRUH#9&5#( 7DVWL#GL#FRPDQGR#GHO#WHOHYLGHR#H#LQWHUUXWWRUH#9&5# ( #'9' #'9' #'9' #'9' ~ ~ ~ ~ Nota: •...
  • Seite 194 TASTI E FUNZIONI DEL TELECOMANDO TASTI E FUNZIONI DEL TELECOMANDO TASTI E FUNZIONI DEL TELECOMANDO TASTI E FUNZIONI DEL TELECOMANDO 3DJLQD#VHFRQGDULD 3DJLQD#VHFRQGDULD 3DJLQD#VHFRQGDULD 3DJLQD#VHFRQGDULD $QQXOOD $QQXOOD $QQXOOD $QQXOOD Alcune pagine del televideo includono ulteriori pagine che È possibile cercare una pagina del televideo mentre si guarda vengono visualizzate automaticamente.
  • Seite 195: Funzionamento Dei Menu

    )81=,21$0(172#'(,#0(18 )81=,21$0(172#'(,#0(18 )81=,21$0(172#'(,#0(18 )81=,21$0(172#'(,#0(18 Questo televisore dispone di una gamma di funzioni attivabile tramite dei menu. Per utilizzare in modo completo tutte le fun- zioni del televisore, è necessario conoscere approfondita- mente le tecniche di funzionamento generale dei menu. Premere il tasto é per visualizzare MENU (menu principale).
  • Seite 196 ,00$*,1( ,00$*,1( ,00$*,1( ,00$*,1( Nota: • È possibile modificare l’impostazione TINTA (tinta immagine) soltanto quando il sistema del colore è NTSC 3.58 o NTSC 4.43. Per tornare alle impostazioni predefinite in ciascuna modalità TEMP.COLORE: Premere il tasto blu. Ripristinare ai valori predefiniti le impostazioni dell’im- Per visualizzare il menu IMMAGINE: magine nella modalità...
  • Seite 197 9$5,(2,00$*,1( 9$5,(2,00$*,1( 9$5,(2,00$*,1( 9$5,(2,00$*,1( 6,67(0$ 6,67(0$ 6,67(0$ 6,67(0$ Il sistema del colore viene scelto automaticamente. Tuttavia, se l’immagine non è nitida o non appare il colore, scegliere manualmente il sistema del colore. ë Premere i tasti per scegliere SISTEMA. Quindi, premere il tasto é . Verrà...
  • Seite 198: Varie/Immagine

    VARIE/IMMAGINE VARIE/IMMAGINE VARIE/IMMAGINE VARIE/IMMAGINE 7=6#$87201 7=6#$87201 7=6#$87201 7=6#$87201 Questa funzione agisce solo quando la modalità ZOOM è im- postata sulla modalità AUTO (WSS). Imposta la modalità ZOOM da usare quando un segnale WSS non è incluso nel segnale di trasmissione o nel segnale da un dispositivo ester- no.
  • Seite 199 68212 68212 68212 68212 +<3(5#6281' +<3(5#6281' +<3(5#6281' +<3(5#6281' Consente di ascoltare i suoni con un’atmosfera più ampia. ë Premere i tasti per scegliere HYPER SOUND. ì Premere i tasti per scegliere SI. Per annullare la funzione HYPER SOUND: Per visualizzare il menu SUONO: Premere i tasti ì...
  • Seite 200 35(6(/(=,21(#(;7 35(6(/(=,21(#(;7 35(6(/(=,21(#(;7 35(6(/(=,21(#(;7 Premere il tasto é per completare l’im- postazione. Il menu scomparirà dallo schermo. Nota: • Il terminale EXT-1 non supporta il segnale S-VIDEO (segnale Y/C) e non è possibile impostare K K (in- gresso S-VIDEO) nel terminale EXT-1. •...
  • Seite 201: Preselezione Ext

    PRESELEZIONE EXT PRESELEZIONE EXT PRESELEZIONE EXT PRESELEZIONE EXT ë Premere i tasti per scegliere un nome. Quindi, premere il tasto é . La LISTA scompare e il nome viene assegnato al termi- nale EXT. Per cancellare un nome assegnato al terminale EXT: Scegliere uno spazio vuoto.
  • Seite 202 23=,21, 23=,21, 23=,21, 23=,21, )21'2#%/8 )21'2#%/8 )21'2#%/8 )21'2#%/8 È possibile impostare il televisore per la visualizzazione auto- matica di un fondo blu e il silenziamento dell’audio quando si riceve un segnale debole o non si riceve alcun segnale, op- pure quando non è presente alcun segnale in ingresso da dis- positivi esterni.
  • Seite 203: Opzioni

    OPZIONI OPZIONI OPZIONI OPZIONI #'(&2'(5#+(;705, #'(&2'(5#+(;705, #'(&2'(5#+(;705, #'(&2'(5#+(;705, Premere il tasto blu e impostare la funzi- one BLOCCO CANALI. È possibile utilizzare questa funzione soltanto quando si col- Verrà visualizzato (BLOCCO CANALI) e il canale TV lega un decoder a un videoregistratore compatibile T-V LINK verrà...
  • Seite 204 ,167$//$=,21( ,167$//$=,21( ,167$//$=,21( ,167$//$=,21( Premere il tasto blu per avviare la funzione SINTONIA AUTOMATICA. Il menu SINTONIA AUTOMATICA viene visualizzato e i canali TV ricevuti vengono automaticamente registrati nei numeri Programma (PR). Per visualizzare il menu INSTALLAZIONE: Premere il tasto é é...
  • Seite 205: Installazione

    INSTALLAZIONE INSTALLAZIONE INSTALLAZIONE INSTALLAZIONE 02',),&$#3520$18$/( 02',),&$#3520$18$/( 02',),&$#3520$18$/( 02',),&$#3520$18$/( Seguire la descrizione operativa della fun- zione da utilizzare ed eseguire la funzione. Le funzioni MODIFICA PR/MANUALE sono di due tipi: modi- fica dei numeri Programma correnti (PR) (funzioni MODIFICA Premere il tasto é é...
  • Seite 206 INSTALLAZIONE INSTALLAZIONE INSTALLAZIONE INSTALLAZIONE Nota: Premere i tasti ë ë per scegliere un canale • È possibile registrare il nome di canale univoco (ID) ë ë sul canale TV. Quando il passaggio 3 è completato, ì ì ì ì non passare al passaggio 4 e premere i tasti Ogni volta che si premono i tasti ë...
  • Seite 207 INSTALLAZIONE INSTALLAZIONE INSTALLAZIONE INSTALLAZIONE (/,0,1$ (/,0,1$ (/,0,1$ (/,0,1$ Altri canali TV: Se non si conosce con esattezza il sistema di trasmis- Premere i tasti ë ë ë per scegliere un canale ë sione corretto, impostare SISTEMA su “B/G”. Se “B/G” non è...
  • Seite 208 ',02675$=,21( ',02675$=,21( ',02675$=,21( ',02675$=,21( Per visualizzare il menu DIMOSTRAZIONE: Premere il tasto é é é per visualizzare MENU é (menu principale). Premere il tasto ë ë ë ë per scegliere DIMOS- TRAZIONE. Quindi, premere il tasto é é é é . La funzione DIMOSTRAZIONE dimostra automaticamente alcune delle funzioni del televisore.
  • Seite 209 23(5$=,21,#$**,817,9(#&21#,#0(18 23(5$=,21,#$**,817,9(#&21#,#0(18 23(5$=,21,#$**,817,9(#&21#,#0(18 23(5$=,21,#$**,817,9(#&21#,#0(18 #6FDULFDPHQWR#GHL#GDWL#VXO#YL0 #6FDULFDPHQWR#GHL#GDWL#VXO#YL0 #6FDULFDPHQWR#GHL#GDWL#VXO#YL0 #6FDULFDPHQWR#GHL#GDWL#VXO#YL0 ë ë ë ë Premere i tasti per scegliere SINTONIA AUTOMATICA. Quindi, premere il tasto é é é é . GHRUHJLVWUDWRUH GHRUHJLVWUDWRUH GHRUHJLVWUDWRUH GHRUHJLVWUDWRUH Il menu NAZIONE viene visualizzato come sottomenu della funzione SINTONIA AUTOMATICA. È...
  • Seite 210: Operazioni Aggiuntive Con I Menu

    OPERAZIONI AGGIUNTIVE CON I MENU OPERAZIONI AGGIUNTIVE CON I MENU OPERAZIONI AGGIUNTIVE CON I MENU OPERAZIONI AGGIUNTIVE CON I MENU Premere il tasto é é per completare l’impo- é é stazione. Verrà visualizzato il menu T-V LINK. Seguire la procedura di funzionamento “Scaricamento dei dati sul videoregistra- tore”...
  • Seite 211 35(3$5$=,21,#$**,817,9( 35(3$5$=,21,#$**,817,9( 35(3$5$=,21,#$**,817,9( 35(3$5$=,21,#$**,817,9( &ROOHJDPHQWR#GL#GLVSRVLWLYL#HVWHUQL &ROOHJDPHQWR#GL#GLVSRVLWLYL#HVWHUQL &ROOHJDPHQWR#GL#GLVSRVLWLYL#HVWHUQL &ROOHJDPHQWR#GL#GLVSRVLWLYL#HVWHUQL Collegare i dispositivi al televisore, facendo attenzione ai col- legamenti del pannello posteriore e del pannello anteriore. Prima di iniziare i collegamenti: • Leggere i manuali forniti con i dispositivi. A seconda dei dispositivi, il metodo di collegamento potrebbe risultare diverso da quanto riportato in figura.
  • Seite 212: Preparazioni Aggiuntive

    PREPARAZIONI AGGIUNTIVE PREPARAZIONI AGGIUNTIVE PREPARAZIONI AGGIUNTIVE PREPARAZIONI AGGIUNTIVE 'LVSRVLWLYL# FKH# SRVVRQR# LQYLDUH# LQ 'LVSRVLWLYL# FKH# SRVVRQR# LQYLDUH# LQ 'LVSRVLWLYL# FKH# SRVVRQR# LQYLDUH# LQ 'LVSRVLWLYL# FKH# SRVVRQR# LQYLDUH# LQ XVFLWD#LO# XVFLWD#LO# XVFLWD#LO# XVFLWD#LO# VHJQDOH#609,'(2#+VHJQDOH#<2&,/#DG VHJQDOH#609,'(2#+VHJQDOH#<2&,/#DG VHJQDOH#609,'(2#+VHJQDOH#<2&,/#DG VHJQDOH#609,'(2#+VHJQDOH#<2&,/#DG HVHPSLR#XQ#YLGHRUHJLVWUDWRUH#609+6 HVHPSLR#XQ#YLGHRUHJLVWUDWRUH#609+6 HVHPSLR#XQ#YLGHRUHJLVWUDWRUH#609+6 HVHPSLR#XQ#YLGHRUHJLVWUDWRUH#609+6 Collegare il dispositivo a un terminale EXT diverso dal termi- nale EXT-1.
  • Seite 213 7$%(//$#'(,#180(5,##&+2&& 7$%(//$#'(,#180(5,##&+2&& 7$%(//$#'(,#180(5,##&+2&& 7$%(//$#'(,#180(5,##&+2&& Quando si desidera utilizzare la funzione INSER. a pagina 25, individuare il numero CH/CC corrispondente al numero di canale del canale TV nella tabella che segue. Canale Canale Canale Canale CH 02 / CH 202 CH 40 / CH 240 CC 01 / CC 201 CC 31 / CC 231 CH 03 / CH 203...
  • Seite 214 7$67,#(#3$57,#'(/#7(/(9,625( 7$67,#(#3$57,#'(/#7(/(9,625( 7$67,#(#3$57,#'(/#7(/(9,625( 7$67,#(#3$57,#'(/#7(/(9,625( 3DQQHOOR#DQWHULRUH 3DQQHOOR#DQWHULRUH 3DQQHOOR#DQWHULRUH 3DQQHOOR#DQWHULRUH Premere per aprire (Dietro lo sportello) ∨ ∨ ∨ ∨ ∧ ∧ ∧ ∧ 1 Sensore del telecomando e Sensore ECO 5 Tasti P / Tasti C pagina 8 2 Presa per cuffie (mini spinotto) 6 Spia di alimentazione pagina 30 pagine 3 e 6...
  • Seite 215 5,62/8=,21(#'(,#352%/(0, 5,62/8=,21(#'(,#352%/(0, 5,62/8=,21(#'(,#352%/(0, 5,62/8=,21(#'(,#352%/(0, Se si verifica un problema durante l’uso del televisore, leggere attentamente la presente sezione sulla “Risoluzione dei problemi” prima di far riparare il televisore. È possibile che si sia in grado di risolvere agevolmente il problema autonomamente. Ad esem- pio, se la spina CA è...
  • Seite 216: Risoluzione Dei Problemi

    RISOLUZIONE DEI PROBLEMI RISOLUZIONE DEI PROBLEMI RISOLUZIONE DEI PROBLEMI RISOLUZIONE DEI PROBLEMI $OWUH#FRQVLGHUD]LRQL $OWUH#FRQVLGHUD]LRQL $OWUH#FRQVLGHUD]LRQL $OWUH#FRQVLGHUD]LRQL • Quando la funzione TIMER è attiva, il televisore viene auto- maticamente spento. Se il televisore si spegne improvvisa- ü mente, provare a premere il tasto (Riposo) per accendere nuovamente il televisore.
  • Seite 217 # # # # 63(&,),&+(#7(&1,&+( 63(&,),&+(#7(&1,&+( 63(&,),&+(#7(&1,&+( 63(&,),&+(#7(&1,&+( Modello AV28WT5EP* AV24WT5EP* Elemento Sistemi di trasmissione CCIR B/G, I, L Sistemi del colore PAL, SECAM • I terminali EXT supportano anche il sistema NTSC 3.58/4.43 MHz. • E2-E12, E21-E69, S1-S41, X, Y, Z, Z+1, Z+2, A-H, H+1, H+2, F2-F10, F21-F69 Canali e frequenze •...
  • Seite 218 Obrigado por ter comprado este televisor a cores JVC. Para se certificar de que utiliza adequadamente o seu novo televisor, leia atentamente este ma- nual antes de começar. AVISO: PARA EVITAR O PERIGO DE INCÊNDIO OU CHOQUE ELÉCTRICO, NÃO EXPONHA ESTE APARELHO À...
  • Seite 219 35(3$5$d®2 35(3$5$d®2 35(3$5$d®2 35(3$5$d®2 /LJDomR#GD#DQWHQD#H#GR#YLGHRJUDYDGRU /LJDomR#GD#DQWHQD#H#GR#YLGHRJUDYDGRU /LJDomR#GD#DQWHQD#H#GR#YLGHRJUDYDGRU /LJDomR#GD#DQWHQD#H#GR#YLGHRJUDYDGRU Se desejar ligar um videogravador, siga A → B → C → D. Antena VHF/UHF Se não desejar ligar um videogravador, siga 1 → 2. *1: Para utilizar as funções do T-V LINK, deverá ser ligado um videogravador compatível com T-V LINK ao terminal Tomada CA (CA 220 - 240 V,...
  • Seite 220: Preparação

    &RQILJXUDo}HV#LQLFLDLV &RQILJXUDo}HV#LQLFLDLV Quando o televisor é ligado pela primeira vez, entra no modo de configuração inicial e é exibido o logotipo da JVC. Siga as instruções que surgem no ecrã para efectuar as config- urações iniciais. Prima o botão de activação principal do televisor.
  • Seite 221 PREPARAÇÃO Prima o botão azua para iniciar a Nota: função AUTO PROGRAM (progra- • Quando o seu televisor pode detectar o nome do mação automática). canal de TV a partir do sinal de emissão do canal, ele regista automaticamente o nome do canal (ID) Surge o menu AUTO PROGRAM (programação au- no número de Programa (PR) em que o canal foi tomática) e os canais de TV são registados automatica-...
  • Seite 222 Para obter mais pormeno- • Um videogravador compatível com “T-V LINK ” significa res, consulte o manual de instruções do seu um videogravador da JVC com o logotipo do T-V LINK ou videogravador. um videogravador com um dos seguintes logotipos. No entanto, estes videogravadores poderão comportar al-...
  • Seite 223 23(5$d¯(6#%É6,&$6 23(5$d¯(6#%É6,&$6 23(5$d¯(6#%É6,&$6 23(5$d¯(6#%É6,&$6 /LJDU#R#ERWmR#GH#DFWLYDomR#SULQFLSDO /LJDU#R#ERWmR#GH#DFWLYDomR#SULQFLSDO /LJDU#R#ERWmR#GH#DFWLYDomR#SULQFLSDO /LJDU#R#ERWmR#GH#DFWLYDomR#SULQFLSDO Prima o botão de activação principal do televisor. A lâmpada indicadora de activação acende-se a vermelho e o televisor está no modo de espera. Nota: • Se a lâmpada indicadora de activação se acender a ver- de, o televisor já...
  • Seite 224: Operações Básicas

    OPERAÇÕES BÁSICAS Prima os botões ì ì ì e ë ì ë ë para seleccionar ë ë ë ë ë Utilize os botões ë ë ë ë Prima os botões para seleccionar um terminal EXT. um número de Programa (PR). De seguida, prima o botão é...
  • Seite 225 OPERAÇÕES BÁSICAS 8WLOL]DomR#GRV#ERW}HV#QR#WHOHYLVRU 8WLOL]DomR#GRV#ERW}HV#QR#WHOHYLVRU 8WLOL]DomR#GRV#ERW}HV#QR#WHOHYLVRU 8WLOL]DomR#GRV#ERW}HV#QR#WHOHYLVRU Prima os botões P B B para ligar o televisor a partir do modo de espe- Prima os botões P para seleccionar um número de Programa (PR) ou um terminal EXT. (Atrás da tampa da frente) Prima o botão (Volume) e os botões C...
  • Seite 226 # # # # %27¯(6#(#)81d¯(6#'2#&21752/2#5(0272 %27¯(6#(#)81d¯(6#'2#&21752/2#5(0272 %27¯(6#(#)81d¯(6#'2#&21752/2#5(0272 %27¯(6#(#)81d¯(6#'2#&21752/2#5(0272 %RWmR#GH#VLOrQFLR %RWmR#GH#VLOrQFLR %RWmR#GH#VLOrQFLR %RWmR#GH#VLOrQFLR É possível desligar o volume imediatamente. ã ã ã ã Prima o botão (Silêncio) para tirar o som. ã ã ã ã Ao premir novamente o botão (Silêncio) re- toma o nível de volume anterior.
  • Seite 227: Botões E Funções Do Controlo Remoto

    BOTÕES E FUNÇÕES DO CONTROLO REMOTO ë ë ë ë PANORAMIC (panorâmica): Prima os botões para seleccionar um modo de ZOOM. De seguida, prima o botão Este modo estica os lados direito e esquerdo de uma imagem é . é é...
  • Seite 228: Utilização Do Menu

    Estes botões podem ser utilizados para trabalhar com um • O botão å (Informação) é também utilizado para trabal- videogravador ou leitor de DVD da marca JVC. Ao premir o har com os menus. Para obter pormenores, consulte botão com o mesmo aspecto que o botão original do controlo “UTILIZAÇÃO DO MENU”...
  • Seite 229 BOTÕES E FUNÇÕES DO CONTROLO REMOTO # # # # # # # # %RW}HV#GH#FRQWUROR#GR#WHOHWH[WR#H#&RPXWDGRU#9&5# %RW}HV#GH#FRQWUROR#GR#WHOHWH[WR#H#&RPXWDGRU#9&5# %RW}HV#GH#FRQWUROR#GR#WHOHWH[WR#H#&RPXWDGRU#9&5#( %RW}HV#GH#FRQWUROR#GR#WHOHWH[WR#H#&RPXWDGRU#9&5# ( #'9' #'9' #'9' #'9' Nota: • Se tiver dificuldades na recepção de emissões de teletexto, consulte o seu representante local ou a estação que transmite o teletexto.
  • Seite 230 BOTÕES E FUNÇÕES DO CONTROLO REMOTO 6XE0SiJLQD 6XE0SiJLQD 6XE0SiJLQD 6XE0SiJLQD &DQFHODU &DQFHODU &DQFHODU &DQFHODU Algumas páginas do teletexto incluem sub-páginas que são É possível procurar uma página do teletexto enquanto vê automaticamente exibidas. televisão. Pode reter qualquer sub-página ou vizualizá-la em qualquer Prima o botão de número para introduzir o altura.
  • Seite 231 87,/,=$d®2#'2#0(18 87,/,=$d®2#'2#0(18 87,/,=$d®2#'2#0(18 87,/,=$d®2#'2#0(18 Este televisor possui várias funções que pode utilizar através dos menus. Para utilizar todas as funções do seu televisor na totalidade, tem de compreender bem as técnicas básicas de utilização dos menus. Prima o botão é para exibir o MENU (menu principal).
  • Seite 232: Picture Setting (Definição Da Imagem)

    3,&785(#6(77,1*#+'(),1,d®2#'$#,0$*(0, 3,&785(#6(77,1*#+'(),1,d®2#'$#,0$*(0, 3,&785(#6(77,1*#+'(),1,d®2#'$#,0$*(0, 3,&785(#6(77,1*#+'(),1,d®2#'$#,0$*(0, Nota: • Apenas poderá alterar a opção HUE (tonalidade da imagem) quando o sistema de cores for NTSC 3.58 ou NTSC 4.43. Para voltar às definições predefinidas em cada modo TINT (cor): Prima o botão azul. Para exibir o menu PICTURE SETTING (definição da ima- Faça as definições da imagem do modo TINT (cor) pre- gem):...
  • Seite 233 3,&785(# )($785(6# +&$5$&7(5Ì67,&$6 3,&785(# )($785(6# +&$5$&7(5Ì67,&$6 3,&785(# )($785(6# +&$5$&7(5Ì67,&$6 3,&785(# )($785(6# +&$5$&7(5Ì67,&$6 '$#,0$*(0, '$#,0$*(0, '$#,0$*(0, '$#,0$*(0, &2/285#6<67(0#+VLVWHPD#GH# &2/285#6<67(0#+VLVWHPD#GH# &2/285#6<67(0#+VLVWHPD#GH# &2/285#6<67(0#+VLVWHPD#GH# FRU, FRU, FRU, FRU, O sistema de cor é escolhido automaticamente. Contudo, caso a imagem não seja nítida ou a cor não apareça, selec- cione manualmente o sistema de cor.
  • Seite 234: Picture Features (Características Da Imagem)

    PICTURE FEATURES (CARACTERÍSTICAS DA IMAGEM) 7=6#$872#$63(&7 7=6#$872#$63(&7 7=6#$872#$63(&7 7=6#$872#$63(&7 Esta função actua somente quando o modo de ZOOM estiver definido para o modo AUTO (WSS), e define o modo de ZOOM que deseja utilizar quando um sinal WSS não estiver incluído no sinal de transmissão ou no sinal de um dispositivo externo.
  • Seite 235: Sound Setting (Definição Do Som)

    6281'#6(77,1*#+'(),1,d®2#'2#620, 6281'#6(77,1*#+'(),1,d®2#'2#620, 6281'#6(77,1*#+'(),1,d®2#'2#620, 6281'#6(77,1*#+'(),1,d®2#'2#620, +<3(5#6281'#+KLSHU#VRP, +<3(5#6281'#+KLSHU#VRP, +<3(5#6281'#+KLSHU#VRP, +<3(5#6281'#+KLSHU#VRP, Pode agora usufruir de um som de maior alcance. ë Prima os botões para seleccionar HY- PER SOUND (hiper som). ì Prima os botões para seleccionar ON (activado). Para exibir o menu SOUND SETTING (definição do som): Para cancelar a função HYPER SOUND (hiper som): Prima o botão é...
  • Seite 236 (;7#6(77,1*#+&21),*85$d®2#(;7, (;7#6(77,1*#+&21),*85$d®2#(;7, (;7#6(77,1*#+&21),*85$d®2#(;7, (;7#6(77,1*#+&21),*85$d®2#(;7, Prima o botão é para concluir a config- uração. O menu desaparece. Nota: • O terminal EXT-1 não comporta sinal S-VIDEO (sinal Y/C) e o K K (entrada S-VIDEO) não pode ser con- figurado no terminal EXT-1. •...
  • Seite 237: Ext Setting (Configuração Ext)

    EXT SETTING (CONFIGURAÇÃO EXT) ë Prima os botões para seleccionar um nome. De seguida, prima o botão é. LIST (lista) desaparece e o nome é atribuído ao terminal EXT. Para apagar um nome atribuído ao terminal EXT: Escolha um espaço em branco. Prima o botão é...
  • Seite 238 )($785(6#+&$5$&7(5Ì67,&$6, )($785(6#+&$5$&7(5Ì67,&$6, )($785(6#+&$5$&7(5Ì67,&$6, )($785(6#+&$5$&7(5Ì67,&$6, %/8(#%$&.#+IXQGR#D]XO, %/8(#%$&.#+IXQGR#D]XO, %/8(#%$&.#+IXQGR#D]XO, %/8(#%$&.#+IXQGR#D]XO, É possível configurar o televisor para mudar automatica- mente para um ecrã azul e cortar o som se o sinal for fraco ou nulo, ou quando não existe nenhuma entrada de um aparelho externo.
  • Seite 239: Features (Características)

    FEATURES (CARACTERÍSTICAS) '(&2'(5#+GHVFRGLILFDGRU,# '(&2'(5#+GHVFRGLILFDGRU,# '(&2'(5#+GHVFRGLILFDGRU,# '(&2'(5#+GHVFRGLILFDGRU,# Prima o botão azul e active a função CHILD LOCK (interdição de acesso a programas). +(;705, +(;705, +(;705, +(;705, Aparece (CHILD LOCK (interdição de acesso a pro- gramas)) e o canal de TV fica bloqueado. Só...
  • Seite 240 ,167$//#+,167$/$d®2, ,167$//#+,167$/$d®2, ,167$//#+,167$/$d®2, ,167$//#+,167$/$d®2, Prima o botão azul para iniciar a função AUTO PROGRAM (programação automática). O menu AUTO PROGRAM (programação automática) aparece e os canais de TV recebidos são automatica- mente registados nos números de Programa (PR). Para exibir o menu INSTALL (instalação): Prima o botão é...
  • Seite 241: Install (Instalação)

    INSTALL (INSTALAÇÃO) (',720$18$/#+(GLomR20DQXDO, (',720$18$/#+(GLomR20DQXDO, (',720$18$/#+(GLomR20DQXDO, (',720$18$/#+(GLomR20DQXDO, Siga a descrição da utilização de uma função que deseja utilizar e utilize-a. As funções EDIT/MANUAL (Edição/Manual) estão divididas em dois tipos: edição dos números de Programa actuais (PR) Prima o botão é é é...
  • Seite 242 INSTALL (INSTALAÇÃO) Nota: Prima os botões ë ë para seleccionar um • Pode registar o seu nome de Canal (ID) único no ca- ë ë nal de TV. Quando o passo 3 estiver concluído, não canal de TV. ì ì ì...
  • Seite 243 INSTALL (INSTALAÇÃO) '(/(7(#+DSDJDU, '(/(7(#+DSDJDU, '(/(7(#+DSDJDU, '(/(7(#+DSDJDU, Outros canais de TV: Caso não saiba qual o sistema de emissão correcto, de- Prima os botões ë ë ë ë para seleccionar um fina SYSTEM (sistema) para “B/G”. Se “B/G” não estiver canal TV. correcto, o resultado será...
  • Seite 244: Demo

    '(02 '(02 '(02 '(02 Para exibir o menu DEMO: Prima o botão é é é para exibir MENU (menu é principal). Prima o botão ë ë ë ë para seleccionar DEMO. De seguida, prima o botão é é é é . A função DEMO demonstra automaticamente algumas das funções do televisor.
  • Seite 245 87,/,=$d¯(6#$',&,21$,6#'2#0(18 87,/,=$d¯(6#$',&,21$,6#'2#0(18 87,/,=$d¯(6#$',&,21$,6#'2#0(18 87,/,=$d¯(6#$',&,21$,6#'2#0(18 7UDQVIHUrQFLD#GRV#GDGRV# 7UDQVIHUrQFLD#GRV#GDGRV# 7UDQVIHUrQFLD#GRV#GDGRV# 7UDQVIHUrQFLD#GRV#GDGRV# ë ë ë ë Prima os botões para seleccionar AUTO PROGRAM (programação automáti- SDUD#R#YLGHRJUDYDGRU SDUD#R#YLGHRJUDYDGRU SDUD#R#YLGHRJUDYDGRU SDUD#R#YLGHRJUDYDGRU ca). De seguida, prima o botão é é . é é Pode transmitir os dados dos números de Programa (PR) Aparece um menu COUNTRY (país) como um sub- mais recentes para o videogravador com a função T-V LINK.
  • Seite 246: Utilizações Adicionais Do Menu

    UTILIZAÇÕES ADICIONAIS DO MENU Prima o botão é é para concluir a definição. é é Aparece o menu T-V LINK. Siga o procedimento para “Transferência dos dados para o videogravador” na página 28 para transmitir os dados do número de Programa (PR) para o videogra- vador.
  • Seite 247 35(3$5$d®2#$',&,21$/ 35(3$5$d®2#$',&,21$/ 35(3$5$d®2#$',&,21$/ 35(3$5$d®2#$',&,21$/ /LJDomR#GH#DSDUHOKRV#H[WHUQRV /LJDomR#GH#DSDUHOKRV#H[WHUQRV /LJDomR#GH#DSDUHOKRV#H[WHUQRV /LJDomR#GH#DSDUHOKRV#H[WHUQRV Ligue os aparelhos ao televisor, prestando atenção às ligações do painel traseiro e às ligações do painel da frente. Antes de ligar qualquer aparelho: • Leia os manuais fornecidos com os aparelhos. Depen- dendo dos aparelhos, o método de ligação pode diferir da figura.
  • Seite 248: Preparação Adicional

    PREPARAÇÃO ADICIONAL $SDUHOKRV#TXH#SRGHP#SURGX]LU#R# $SDUHOKRV#TXH#SRGHP#SURGX]LU#R# $SDUHOKRV#TXH#SRGHP#SURGX]LU#R# $SDUHOKRV#TXH#SRGHP#SURGX]LU#R# VLQDO#609,'(2#+VLQDO#<2&,#WDO#FRPR VLQDO#609,'(2#+VLQDO#<2&,#WDO#FRPR VLQDO#609,'(2#+VLQDO#<2&,#WDO#FRPR VLQDO#609,'(2#+VLQDO#<2&,#WDO#FRPR GH#XP#YLGHRJUDYDGRU#609+6 GH#XP#YLGHRJUDYDGRU#609+6 GH#XP#YLGHRJUDYDGRU#609+6 GH#XP#YLGHRJUDYDGRU#609+6 Ligue o aparelho a um terminal EXT excepto ao terminal EXT-1. Pode seleccionar um sinal de entrada de vídeo a partir do si- nal S-VIDEO (sinal Y/C) e do sinal normal de vídeo (sinal composto).
  • Seite 249 1Ô0(52#&+2&& 1Ô0(52#&+2&& 1Ô0(52#&+2&& 1Ô0(52#&+2&& Quando deseja utilizar a função INSERT (inserir) na página 25, descubra o número CH/CC que corresponde ao número do canal de TV a partir desta tabela. Canal Canal Canal Canal CH 02 / CH 202 CH 40 / CH 240 CC 01 / CC 201 CC 31 / CC 231 CH 03 / CH 203...
  • Seite 250 3(d$6#(#%27¯(6#'2#7(/(9,625 3(d$6#(#%27¯(6#'2#7(/(9,625 3(d$6#(#%27¯(6#'2#7(/(9,625 3(d$6#(#%27¯(6#'2#7(/(9,625 3DLQHO#GLDQWHLUR 3DLQHO#GLDQWHLUR 3DLQHO#GLDQWHLUR 3DLQHO#GLDQWHLUR Premir para abrir (Atrás da tampa) 1821 ∨ ∨ ∨ ∨ ∧ ∧ ∧ ∧ 1 Sensor do controlo remoto e Sensor ECO 5 Botões P / Botões C página 8 2 Tomada para auscultadores (mini jack) 6 Lâmpada indicadora de activação página 30 páginas 3 e 6...
  • Seite 251 '(7(&d®2#(#5(62/8d®2#'(#352%/(0$6 '(7(&d®2#(#5(62/8d®2#'(#352%/(0$6 '(7(&d®2#(#5(62/8d®2#'(#352%/(0$6 '(7(&d®2#(#5(62/8d®2#'(#352%/(0$6 Se surgir um problema enquanto estiver a utilizar o televisor, queira ler com atenção esta secção de “Detecção e Resolução de Problemas” antes de solicitar a reparação do televisor. Poderá conseguir resolver o problema facilmente por si próprio. Por ex- emplo, se a ficha CA estiver desligada da tomada CA, ou se a antena apresentar problemas, poderá...
  • Seite 252: Detecção E Resolução De Problemas

    DETECÇÃO E RESOLUÇÃO DE PROBLEMAS 2XWUDV#SUHRFXSDo}HV 2XWUDV#SUHRFXSDo}HV 2XWUDV#SUHRFXSDo}HV 2XWUDV#SUHRFXSDo}HV • Quando a função SLEEP TIMER (temporizador "sleep") funcionar, o televisor é desligado automaticamente. Se o televisor se desligar repentinamente, tente premir o botão ü (em espera) para voltar a ligar o televisor. Nesta altura, se o televisor retomar um estado normal, não existe nen- hum problema.
  • Seite 253 # # # # (63(&,),&$d¯(6 (63(&,),&$d¯(6 (63(&,),&$d¯(6 (63(&,),&$d¯(6 Modelo AV28WTE5EP* AV24WT5EP* Característica Sistemas de emissão CCIR B/G, I, L Sistemas de cor PAL, SECAM • Os terminais EXT também suportam o sistema NTSC 3.58/4.43 MHz. • E2-E12, E21-E69, S1-S41, X, Y, Z, Z+1, Z+2, A-H, H+1, H+2, F2-F10, F21-F69 Canais e frequências •...
  • Seite 254 VICTOR COMPANY OF JAPAN, LIMITED LCT0897-001A-U ©2000 VICTOR COMPANY OF JAPAN, LIMITED 1200-T-CR-JMUK...

Diese Anleitung auch für:

Av24wt5ep

Inhaltsverzeichnis