Herunterladen Inhalt Inhalt Diese Seite drucken

Werbung

Verfügbare Sprachen
  • DE

Verfügbare Sprachen

  • DEUTSCH, seite 1
BEDIENUNGSANLEITUNG
USER'S MANUAL
MODE D'EMPLOI
MANUALE D'USO
MANUAL DE USO
CAR AUDIO SYSTEMS
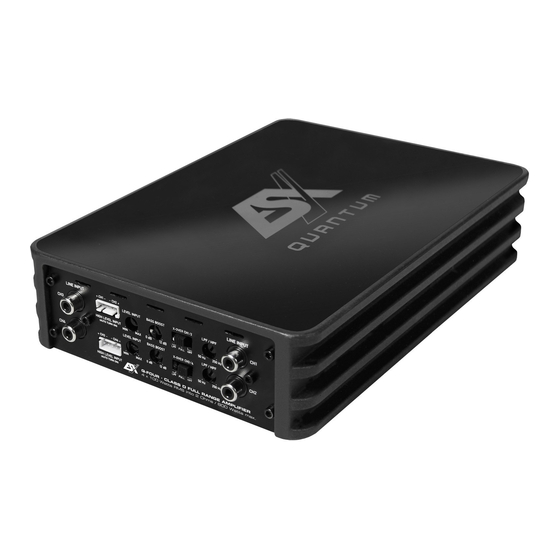
Q-FOUR
4-CHANNEL CLASS D AMPLIFIER
VERS.1.0

Werbung

Inhaltsverzeichnis
loading

Inhaltszusammenfassung für ESX Q-FOUR

  • Seite 1 BEDIENUNGSANLEITUNG USER’S MANUAL MODE D’EMPLOI MANUALE D’USO MANUAL DE USO CAR AUDIO SYSTEMS Q-FOUR 4-CHANNEL CLASS D AMPLIFIER VERS.1.0...
  • Seite 2: Inhaltsverzeichnis

    INHALTSVERZEICHNIS TABLE OF CONTENT TABLE DES MATIÈRES SOMMARIO INDICE BEDIENUNGSANLEITUNG USER’S MANUAL MODE D’EMPLOI MANUALE D´USO MANUAL DE USO ABBILDUNGEN / FIGURES / FIGURES / FIGURE / FIGURES...
  • Seite 3: Deu

    Bitte lesen Sie die Bedienungsanleitung vollständig durch, bevor Sie mit der Installation beginnen und den Verstärker in Betrieb nehmen. TECHNISCHE DATEN Q-FOUR Ausgangsleistung RMS 4 x 60 W an 4 Ohm 4 x 100 W an 2 Ohm Ausgangsleistung Max.
  • Seite 4: Anschlüsse

    HINWEISE VOR DER INSTALLATION - Dieser Verstärker ist nur zum Betrieb in einem Fahrzeug geeignet. - Dieser Verstärker ist nur zum Anschluss an ein 12-Volt-System mit negativer Masse geeignet. - Die während des Betriebs abgestrahlte Wärme erfordert einen Montageort mit ausreichender Luftzirkulation.
  • Seite 5: Bedienelemente

    HOCHPEGELEINGÄNGE Die Hochpegeleingänge (HIGH LEVEL INPUT, Abb. 1, 1) dienen zur Ansteuerung des Verstärkers mittels Lautsprecherkabel, falls Ihr Steuergerät (Autoradio) nicht über Vorverstärker-Ausgänge (Cinch- Ausgänge) verfügt. Verlängern Sie dazu die entsprechenden Lautsprecherkabel, die aus Ihrem Steuergerät führen mit geeigneten hochwertigen Lautsprecherkabeln bis zum Einbauort des Verstärkers. Verbinden Sie dann jeweils die passenden Lautsprecherkabel mit den Kabeln der beiliegenden HIGH LEVEL-Stecker wie unten beschrieben.
  • Seite 6: Schutzschaltung

    REGELBARER HOCHPASSFILTER Sollte der Verstärker zum Betreiben von Satellitenlautsprechern (Mittel-/ Hochton-Lautsprecher) benutzt werden, stellen Sie den Schalter (X-OVER, Abb.1, 5) pro Kanalpaar auf „HPF“ oder bei großen Lautsprechern ab 20 cm auf ”FULL”. Stellen Sie am Regler (LPF/HPF, Abb.1, 6) die gewünschte Trennfrequenz ein.
  • Seite 7: Kanal-Betrieb Stereo (Abb. 3)

    4-KANAL-BETRIEB STEREO (ABB. 3) Wenn der Verstärker von einem Steuergerät mit 4 Ausgangskanälen angesteuert wird, um damit 4 Lautsprecher (2 Kanalpaare) in stereo zubetreiben, sind die Anschlüsse folgendermaßen vorzunehmen: (1) Zum Steuergerät, Audiosignal-Ausgang CH1 / FRONT LINKS (2) Zum Steuergerät, Audiosignal-Ausgang CH2 / FRONT RECHTS (3) Zum Steuergerät, Audiosignal-Ausgang CH3 / REAR LINKS (4) Zum Steuergerät, Audiosignal-Ausgang CH4 / REAR RECHTS (5) Stereo-Hochpegeleingänge für die Lautsprecherausgänge vom Steuergerät FRONT L / R...
  • Seite 8 FEHLERBEHEBUNG Falls Sie nach dem Einbau Probleme haben, befolgen Sie die nachfolgenden Verfahren zur Fehlerbeseitigung: Verfahren 1: Den Verstärker auf ordnungsgemäße Anschlüsse überprüfen. Prüfen Sie, ob die POWER-LED aufleuchtet. Leuchtet die POWER-LED auf, bei Schritt 3 weitermachen, falls nicht, hier weitermachen. 1.
  • Seite 9: Eng

    Please read the user's manual carefully before the installation and the first operation of the amplifier. SPECIFICATIONS Q-FOUR Output Power RMS 4 x 60 W @ 4 Ohms 4 x 100 W @ 2 Ohms Output Power Max. 4 x 120 W @ 4 Ohms...
  • Seite 10 IMPORTANT NOTES PRIOR TO INSTALLATION - This device is only suited for the operation in a vehicle. - This device is only suited for a 12 volt system with negative ground. - The radiated heat while operation requires sufficient air circulation at the place of installation. It is very important that the heatsink fins do not have contact with any metal parts or any surfaces which could impair air circulation.
  • Seite 11: Operating Elements

    HIGH LEVEL INPUTS The HIGH LEVEL INPUTS (Fig. 1, 1) are suitable to connect the amplifier inputs with speaker wires, if your headunit is not equipped with pre-amplifier RCA outputs. Extend therefore every regarding speaker cable from your headunit with appropriate speaker cables from your car audio retailer to the mounting location of the amplifier.
  • Seite 12: Protection Circuit

    VARIABLE HIGHPASS FILTER If the amplifier is to be used for satellite loudspeakers (mid-range/tweeter loudspeakers), set the switch (X-OVER, Fig. 1, 5) to "HPF" or for bigger loudspeakers (>20 cm) to ”FULL”. Set the desired cross- over frequency on controller (LPF/HPF, Fig.1, 6). Hence, only the frequencies above the chosen cross- over frequency will be amplified.
  • Seite 13 4-CHANNEL OPERATION STEREO (FIG. 3) If you want to run the amplifier with 4 line output channels from the headunit to drive 4 loudspeakers, in stereo connect the following setup: (1) RCA audio signal input from the headunit, CH1 / FRONT LEFT (2) RCA audio signal input from the headunit, CH2 / FRONT RIGHT (3) RCA audio signal input from the headunit, CH3 / REAR LEFT (4) RCA audio signal input from the headunit, CH4 / REAR RIGHT...
  • Seite 14 TROUBLESHOOTING If you are having problems after installation follow the Troubleshooting procedures below. Procedure 1: Check Amplifier for proper connections. Verify that POWER LED is on. If POWER LED is on skip to Step 3, if not continue. 1. Check external in-line fuse on battery positive cable. Replace if necessary. 2.
  • Seite 15: Fra

    Veuillez s’il vous plait lire attentivement toutes les instructions d’installation avant que vous installiez l’amplificateur et le fassiez fonctionner. CARACTERISTIQUES Q-FOUR Puissance de sortie RMS 4 x 60 W @ 4 Ohm 4 x 100 W @ 2 Ohm Puissance de sortie Max.
  • Seite 16 RECOMMANDATIONS AVANT L’INSTALLATION - Cette appareil est conçu uniquement pour un fonctionnement dans un véhicule. - Cet appareil convient exclusivement au branchement à un système de 12 volt à masse négative. - La chaleur provenant de l’utilisation nécessite un espace de montage avec une circulation de l’air suffisante.
  • Seite 17 ENTRÉES HAUT NIVEAU L´entrées haut niveau (HIGH LEVEL INPUT, Fig. 1, 1) est appropriée pour connecter les entrées de l´amplificateur avec les fils des hauts-parleurs dans le cas où votre autoradio (source) ne serait pas équipé(e) de sorties RCA. Grâce aux câbles appropriés fournit par votre revendeur car audio pour les hauts-parleurs, prolonger les sorties de votre autoradio jusqu`à...
  • Seite 18: Circuit De Protection

    FILTRE PASSE-HAUT RÉGABLE Dans le cas où l´amplificateur est utilisé comme amplificateur pour haut-parleurs satellites (haut-parleurs médium/aigu), positionnez le selecteur (X-OVER, Fig. 1, 5) sur "HPF"ou sur "FULL" pour les haut- paleurs >20cm par paire de canaux. Ajustez le régulateur (LPF/HPF, Fig. 1, 6) sur la fréquence de recouvrement souhaitée.
  • Seite 19 FONCTIONNEMENT 4 CANAUX STEREO (FIG. 3) Si l’amplificateur est commandé par un autoradio avec 4 canaux de sortie et connecté à 2 x 2 haut- parleurs, dans ce cas là, les branchements et les réglages sont à faire comme décrits la figure 3: (1) Vers l’autoradio CH1, sortie de RCA gauche/avant (2) Vers l’autoradio CH2, sortie de RCA droite/avant (3) Vers l’autoradio CH3, sortie de RCA gauche/arrière...
  • Seite 20 DÉPANNAGE Si vous éprouvez des difficultés après l’installation, appliquez les procédures de dépannage ci-dessous. Procédure 1: Vérifiez que les connexions de l’ampli sont bien mises. Vérifiez que le voyant POWER est allumé. Si c'est le cas, passez à l'étape 3, sinon poursuivez. 1.
  • Seite 21: Ita

    Per favore leggere le istruzioni per il montaggio integralmente, prima di montare l’amplificatore e di metterlo in funzione. DATI TECNICI Q-FOUR Potenza di uscita RMS 4 x 60 W @ 4 Ohm 4 x 100 W @ 2 Ohm Potenza di uscita Max.
  • Seite 22 INDICAZIONI IMPORTANTI PRIMA DEL MONTAGGIO - Questo dispositivo é adatto solo per il funzionamento su autovettura - Questo apparecchio é adatto unicamente ad essere collegato con un sistema elettrico a 12 Volt con negativo a massa. - Il calore irradiato durante l’erogazione di potenza richiede un posizionamento con una sufficiente circolazione d’aria.
  • Seite 23: Elementi Di Comando

    INGRESSI ALTO LIVELLO L´ingressi alto livello (HIGH LEVEL INPUT, Fig. 1, 1) è indicato per connettere l´ingresso dell´amplificatore con I cavi degli altoparlanti nel caso la vostra sorgente non sia equipaggiata di uscite RCA. Attraverso cavi adeguati forniti dal vostro rivenditore car audio, prolungate le uscite della sorgente fino a dove volete posizionare il vostro amplificatore.
  • Seite 24: Circuiti Die Protezione

    FILTRO PASSA ALTO REGOLABILE Se l´amplificatore è impiegato per pilotare altoparlanti satelliti (Midrange / tweeter) posizionare lo selettore (X-OVER, Fig. 1, 5) per ogni coppia di canali in posizione "HPF" o, per altoparlanti più grandi (>20 cm) in posizione ”FULL”. Impostate la frequenza di crossover desirata impiegando il regolatore apposito (LPF/HPF, Fig.1, 6).
  • Seite 25 FUNZIONAMENTO A 4 CANALI STEREO (FIG. 3) Se l’amplificatore è impiegato con un´autoradio con 4 canali d´uscita e pilota 2 x 2 altoparlanti, impiegare lo schema di collegamento e regolazione di figura 3 : (1) Dall´autoradio, CH1, uscita RCA anteriore sinistra (2) Dall´autoradio, CH2, uscita RCA anteriore destra (3) Dall´autoradio, CH3, uscita RCA posteriore sinistra (4) Dall’autoradio, CH4, uscita RCA posteriore destra...
  • Seite 26 RISOLUZIONE DEI PROBLEMI Se incontraste dei problemi dopo l’installazione,seguite le procedure per la localizzazione e la riparazione dei guasti elencate di sotto. Procedura 1: Controllate che l’amplificatore abbia i collegamenti adeguati. Controllate che la spia dell’ACCENSIONE sia accesa.Se la spia di ACCENSIONE è accesa,passare al numero 3, altrimenti continuare 1.
  • Seite 27: Esp

    Lea completamente las instrucciones de montaje antes de proceder a montar el amplificador y ponerlo en funcionamiento. DATOS TÉCNICOS Q-FOUR Potencia de salida RMS 4 x 60 W @ 4 Ohmios 4 x 100 W @ 2 Ohmios Potencia de salida Max.
  • Seite 28 INDICACIONES IMPORTANTES PREVIAS AL MONTAJE - Este aparato solamente es apto para su funcionamiento en un vehículo. - Este equipo es adecuado sólo para la conexión a un sistema de 12 voltios con tierra negativa. - El calor irradiado hace que sea importante que instale el aparato en un lugar con suficiente circulación de aire.
  • Seite 29: Elementos De Mando

    ENTRADAS DE ALTA La entradaw de alta (HIGH LEVEL INPUT, Fig. 1, 1) es adecuada para conectar la entrada de amplificador con cable de altavoz si su unidad radio-CD no esta dotada de salidas de previo. Amplíe los cables de salida de la unidad radio-CD hasta la ubicaciòn del amplificador con cable de altavoz adecuado que puede proporcionarle su instalador autorizado.
  • Seite 30 FILTRO DE PASO ALTO REGULABLE Si el amplificador se usará para altavoces stélite (medios/tweeter etc) colocar el selector por cada par de canales en posición "HPF" (X-OVER, Fig.1, 5). Para altavoces más grandes (medios-graves, mas de 10") colocar el selector en Full. Seleccionar el corte de frecuencia deseado en el regulador (LPF/HPF, Fig.1, 6).
  • Seite 31 FUNCIONAMIENTO DE 4 CANALES STEREO (FIG. 3) Si el amplificador de la radio del coche funciona con 4 canales y está conectado a 4 altavoces, deberá realizar las conexiones y los ajustes como se indica en la figura 3: (1) A la radio del coche CH1, salida RCA izquierda delantera (2) A la radio del coche CH2, salida RCA derecha delantera (3) A la radio del coche CH3, salida RCA izquierda trasera (4) A la radio del coche CH4, salida RCA derecha trasera...
  • Seite 32 SOLUCIÓN DE PROBLEMAS Si tiene problemas después de la instalación,siga los procedimientos de solución de problemas descritos a continuación. Procedimiento 1: Verifique que el amplificador esté bien conectado. Compruebe que esté encendida la luz de ALIMENTACIÓN (POWER). Si la luz de ALIMENTACIÓN (POWER) está encendida vaya al Paso 3, de otra manera,continúe. 1.
  • Seite 33 –...
  • Seite 34 FULL FULL 2 - 8 Ohms 2 - 8 Ohms 2 - 8 Ohms 2 - 8 Ohms...
  • Seite 35 FULL 4 - 8 Ohms 2 - 8 Ohms 2 - 8 Ohms...
  • Seite 36 4 - 8 Ohms 4 - 8 Ohms...
  • Seite 40 CAR AUDIO SYSTEMS Audio Design GmbH · www.audiodesign.de Am Breilingsweg 3 · D-76709 Kronau (Germany) Tel. +49 (0)7253 - 9465-0 · Fax +49 (0)7253 - 946510 Designed and engineered by Audio Design in Germany. All Rights Reserved.

Inhaltsverzeichnis