Inhaltsverzeichnis
Werbung
Verfügbare Sprachen
Verfügbare Sprachen
Quicklinks
INSTALLATIEHANDLEIDING NL/BE
INSTRUCTIONS FOR INSTALLATION GB/IE
INSTALLATIONSVORSCHRIFT DE/AT/BE/LU/CH
INSTRUCTIONS D' INSTALLATION FR/BE/LU/CH
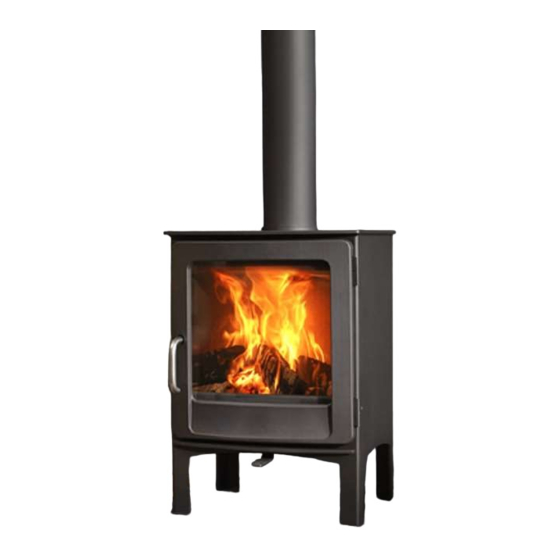
Jannik Medium Low
EA
Keld 5 Low
EA
Keld 5 High
EA
Ivar 5 Low
EA
Ivar 5 High
EA
Ivar 5 Store
Lees en beaar dit document zorgvuldig
Please read and retain this document carefully
Dieses Dokument sorgfältig durchlesen und gut aufbewahren
Lisez et conservez soigneusement cette notice
EA
Werbung
Kapitel
Inhaltsverzeichnis

Verwandte Anleitungen für Dik Geurts Jannik Medium LowEA


Inhaltszusammenfassung für Dik Geurts Jannik Medium LowEA
- Seite 1 INSTALLATIEHANDLEIDING NL/BE INSTRUCTIONS FOR INSTALLATION GB/IE INSTALLATIONSVORSCHRIFT DE/AT/BE/LU/CH INSTRUCTIONS D’ INSTALLATION FR/BE/LU/CH Jannik Medium Low Keld 5 Low Keld 5 High Ivar 5 Low Ivar 5 High Ivar 5 Store Lees en beaar dit document zorgvuldig Please read and retain this document carefully Dieses Dokument sorgfältig durchlesen und gut aufbewahren Lisez et conservez soigneusement cette notice...
- Seite 2 Plak hier uw typeplaatje. Adhere your data plate here. Hier das Typenschild einfügen. Collez ici votre plaque signalétique.
-
Seite 3: Inhaltsverzeichnis
I NS T AL L AT I E H A N DL E I D I N G INHOUD 1. Inleiding 2. EC Conformiteitsverklaring 3. VEILIGHEID 3.1 Algemeen 3.2 Voorschriften 3.3 Voorzorgsmaatregelen / veiligheidsinstructies bij installatie 4. Uitpakken 5. Installatie 5.1 Voorschriften 5.2 Rookgaskanaal 5.3 Landspecifieke installatie-eisen... -
Seite 4: Inleiding
Als fabrikant van haarden ontwikkelt en produceert DRU Verwarming producten volgens de hoogst mogelijke kwaliteits-, prestatie- en veiligheidseisen. Deze houtgestookte Dik Geurts haarden zijn voorzien van een CE-merk, dat alleen gevoerd mag worden voor haarden, die voldoen aan de essentiële eisen uit de Europese Bouwproductenrichtlijn, waaronder eisen voor veiligheid, milieu en energiegebruik. -
Seite 5: Ec Conformiteitsverklaring
I NS T AL L AT I E H A N DL E I D I N G 2. EC Conformiteitsverklaring De ondergetekende, vertegenwoordiger van: Fabrikant: DRU Verwarming BV Postbus 1021 NL-6920 BA Duiven Ratio 8, NL-6921 RW Duiven verklaart hiermee dat het door DRU uitgebrachte houtgestookte verwarmingstoestel door zijn ontwerp en bouwwijze voldoet aan de essentiële eisen van de Bouwproductenrichtlijn en dat ze geproduceerd en verdeeld wordt volgens de eisen van het Belgisch koninklijk besluit van 12 oktober 2010 tot regeling van de minimale eisen van rendement en emissieniveaus van verontreinigende stoffen voor verwarmingsapparaten voor vaste... -
Seite 6: Veiligheid
I NS T AL L A TIE H AN DL E I DI N G 3. VEILIGHEID 3.1 Algemeen • Leest u dit hoofdstuk over veiligheid zorgvuldig door voordat u begint met installatie of onderhoud. !LET OP • Houdt u zich aan de algemeen geldende voorschriften en de voorzorgsmaatregelen/veiligheidsinstructies in deze handleiding. -
Seite 7: Uitpakken
I NS T AL L AT I E H A N DL E I D I N G 4. Uitpakken Schenk aandacht aan de onderstaande punten bij het uitpakken: Ø Controleer het toestel met toebehoren op (transport)schade. Ø Installeer nóóit een beschadigde haard! Ø... -
Seite 8: Installatie
I NS T AL L A TIE H AN DL E I DI N G 5. Installatie Lees de handleiding zorgvuldig door voor een goede en veilige installatie van het toestel. 5.1 Voorschriften Ø Installeer de haard volgens de geldende Europese, nationale, lokale en bouwkundige (installatie)voorschriften. Ø... -
Seite 9: Plaatsen Haard
I NS T AL L AT I E H A N DL E I D I N G 5.6 Buitenluchtaansluiting (indien van toepassing) Sommige haarden kunnen worden voorzien van een buitenluchtaansluiting. Voor een optimale werking van het toestel dient in geval van een buitenluchtaansluiting met de volgende punten rekening te worden gehouden: •... - Seite 10 I NS T AL L A TIE H AN DL E I DI N G 5.7.1 Vrijstaande / Designhaarden 5.7.1.1 Ombouwen bovenaansluiting naar achteraansluiting haard (indien van toepassing) De haard wordt geleverd met een bovenaansluiting voor het aansluiten op het rookgaskanaal. De bovenaansluiting kan, indien van toepassing, omgebouwd worden naar een achteraansluiting.
-
Seite 11: Inzethaarden (Bestaande En Nieuwe Situatie)
I NS T AL L AT I E H A N DL E I D I N G 5.7.2 Inzethaarden (bestaande en nieuwe situatie) 5.7.2.1 In bestaande schouw of boezem Ga voor het plaatsen van een inzethaard in een bestaande schouw of boezem als volgt te werk: Ø... - Seite 12 I NS T AL L A TIE H AN DL E I DI N G 5.7.2.2 Bij een nieuwe situatie Ga voor het plaatsen van een inzethaard in een nieuw te bouwen boezem als volgt te werk: Ø Bepaal de plaats van de haard. De afmetingen zijn weergegeven in Bijlage 2, afb. 1. Ø...
- Seite 13 I NS T AL L AT I E H A N DL E I D I N G Plaatsen met inmetselcassette (indien van toepassing): Ø Plaats de haard met inmetselcassette op een vloer met voldoende draagkracht. Ø Plaats de inmetselcassette voor een brandveilige muur. Ø...
- Seite 14 5.7.3 Inbouwhaarden Ø Bepaal de plaats van de kachel. Ø Schuif het inbouwframe (1) in de gewenste positie. Ø Gebruik onbrandbaar en hittebestendig materiaal volgens Eurobrandklasse A1 EN 13501-1 voor de plaat op de vloer, de boezem (inclusief de bovenkant van de boezem), het materiaal ín de boezem en de achterwand waartegen het toestel wordt geplaatst.
-
Seite 15: Afronden Installatie
5.8 Afronden installatie Ø Controleer of er geen gruis, stof of andere materialen in de boezem achterblijven (i.v.m. stank). Ø Gebruik schone stoffen handschoenen en vermijd vingerafdrukken op de haard en kachelpijpen. Ø Controleer of de binnenbekleding en de keerplaten goed geplaatst zijn in de haard (zie, indien van toepassing, hoofdstuk 9 'Toestelspecifieke informatie'). -
Seite 16: Oplevering
I NS T AL L A TIE H AN DL E I DI N G 6. Oplevering Ø U dient de gebruiker vertrouwd te maken met de haard. U dient haar/hem onder meer te instrueren over de ingebruikname, het stoken en het onderhoud van de haard. Ø... -
Seite 17: Toestelspecifieke Informatie
I NS T AL L AT I E H A N DL E I D I N G 9 Toestelspecifieke informatie • De toestelspecifieke instructies, zoals beschreven in dit hoofdstuk, gaan boven de instructies in de overige !LET OP hoofdstukken! Houd bij twijfel de instructies in hoofdstuk 9 aan of neem contact op met uw leverancier. •... -
Seite 18: Vlamkeerplaat
I NS T AL L A TIE H AN DL E I DI N G 9.2.2 Vlamkeerplaat Bij levering ligt de vlamkeerplaat (zie Bijlage 2, afb. 5) bovenin het toestel. Bij onderhoud aan het toestel dient de vlamkeerplaat te worden uitgenomen. Ga hierbij als volgt te werk: Ø... -
Seite 19: Aanvullende Installatie-Instructies Per Toestel
I NS T AL L AT I E H A N DL E I D I N G 9.4 Aanvullende installatie-instructies per toestel 9.4.1 Jannik Medium Low 9.4.1.1 Buitenluchtaansluiting De haard is uitgevoerd met een buitenluchtaansluiting. Deze buitenluchtaansluiting wordt los meegeleverd. Montage geschiedt altijd aan de onderzijde van het toestel. -
Seite 20: Keld 5 Low Ea / Ivar 5 Low Ea
9.4.2 Keld 5 Low en Ivar 5 Low 9.4.2.1 Buitenluchtaansluiting Voor deze toestellen is als accessoire een buitenluchtaansluiting verkrijgbaar. Montage geschiedt altijd aan de onderzijde van het toestel. Afvoer is bij deze toestellen alleen via de achterzijde mogelijk. Ga bij het aansluiten van de buitenluchtaansluiting als volgt te werk (zie Bijlage 2, afb. 9a + 9b): Ø... -
Seite 21: Keld 5 High Ea / Ivar 5 High Ea
9.4.3 Keld 5 High en Ivar 5 High 9.4.3.1 Buitenluchtaansluiting Voor deze toestellen is als accessoire een buitenluchtaansluiting verkrijgbaar. Montage geschiedt altijd aan de onderzijde van het toestel. De aansluiting is zowel via de achter- als onderzijde mogelijk. Ga bij het aansluiten van de buitenluchtaansluiting als volgt te werk (zie Bijlage 2, afb. 9a/9b en 11a/11b): Ø... -
Seite 22: Ivar 5 Store Ea
I NS T AL L A TIE H AN DL E I DI N G 9.4.4 Ivar 5 Store 9.4.4.1 Buitenluchtaansluiting Voor deze toestellen is als accessoire een buitenluchtaansluiting verkrijgbaar. Montage geschiedt altijd aan de onderzijde van het toestel. Afvoer is bij deze toestellen alleen via de achterzijde mogelijk. Ga bij het aansluiten van de buitenluchtaansluiting als volgt te werk (zie Bijlage 2, afb. - Seite 23 I NS T AL L AT I ON M A N U A L Contents 1. Introduction 2. EC Declaration of Conformity 3. SAFETY 3.1 General 3.2 Regulations 3.3 Precautions/safety instructions during installation 4. Unpacking 5. Installation 5.1 Regulations 5.2 Flue duct 5.3 Country-specific installation requirements 5.3.1 HETAS amendments 5.3.2 The Clean Air Act 1993 and Smoke Control Areas...
-
Seite 24: Introduction
As a manufacturer of fires, DRU Verwarming develops and produces products according to the highest possible English quality, performance and safety requirements. These woodburning Dik Geurts fires are provided with a CE mark that is only awarded for fires complying with the essential requirements of the European Construction Products Regulation, including requirements made of safety, the environment and energy consumption. - Seite 25 I NS T AL L AT I ON M A N U A L 2. EC DECLARATION OF The undersigned, representative of: Manufacturer: DRU Verwarming BV Postbus 1021 NL-6920 BA Duiven Ratio 8, NL-6921 RW Duiven hereby declares that the design and construction of the woodburning heating appliance supplied by DRU satisfies the essential requirements of the Construction Products Regulation and is produced and distributed according to the requirements of the Belgian Royal Decree of 12 October 2010 for the regulation of the minimum requirements of efficiency and emission levels of pollutants for solid fuel heating equipment.
-
Seite 26: Safety
IN S TA L L A TI O N M A N U A L 3. SAFETY 3.1 General • Carefully read this section about safety before you start installation or maintenance. !CAUTION • Comply with the generally applicable conditions and the precautionary measures/safety instructions in this manual. -
Seite 27: Unpacking
I NS T AL L AT I ON M A N U A L 4. Unpacking Follow the below points below when unpacking: Ø Check the appliance with accessories for (transport) damage. Ø Never install a damaged fire! Ø If necessary contact your supplier. Keep plastic bags away from children. -
Seite 28: Country-Specific Installation Requirements
IN S TA L L A TI O N M A N U A L 5.4 Appliances with fan(s) Appliances that are made with one or more fans will heat a room more quickly and increase comfort. As soon as the fan is switched on you will be able to sense a pleasant, warm air flow. - Seite 29 I NS T AL L AT I ON M A N U A L Any bend in the chimney or connecting fluepipe should not exceed 45°. 90° bends should not be used. Combustible material should not be located where the heat dissipating through the walls of fireplaces or flues could ignite it.
-
Seite 30: The Clean Air Act 1993 And Smoke Control Areas
IN S TA L L A TI O N M A N U A L Use of operating tools Always use the operating tools provided when handling parts likely to be hot when the stove is in use. Aerosol sprays Do not use an aerosol spray on or near the stove when it is alight. -
Seite 31: Installing The Fire
I NS T AL L AT I ON M A N U A L 5.7 Installing the fire, general • Do not make any changes to the fire yourself. !Caution • Use clean fabric gloves and avoid fingerprints on the fire and flue pipes. •... -
Seite 32: Insert Fires (Existing And New Situation)
IN S TA L L A TI O N M A N U A L 5.7.1.3 Design fire installation To install a design fire we refer to Section 9 'Appliance-specific information'. 5.7.2 Insert fires (existing and new situation) 5.7.2.1 With an existing chimney or chimney breast To install an insert fire with an existing chimney or chimney breast proceed as follows: Ø... -
Seite 33: In A New Situation
I NS T AL L AT I ON M A N U A L 5.7.2.2 In a new situation To install an insert fire with a newly built chimney breast proceed as follows: Ø Determine the fire location. The dimensions are given in Annex 2, Fig. 1. Ø... -
Seite 34: Built-In Fires
Ø If there is a flammable ceiling, place a fire-resistant plate with a 10 cm thick heat-insulating layer on top 30 cm below the ceiling in the chimney breast. Ø Place the fire before the build-in cassette. Ø Turn in the adjustable legs and check whether they are properly adjustable. There may still be some blasting grit present. -
Seite 35: Completing Installation
5.8 Completing installation Ø Check if grit, dust or other materials are left behind in the chimney breast (odours). Ø Use clean fabric gloves and avoid fingerprints on the fire and flue pipes. Ø Check whether the interior lining and the baffle plates are fitted properly in the fire (if applicable see section 9 'Appliance-specific information'). -
Seite 36: Delivery
IN S TA L L A TI O N M A N U A L 6. Delivery Ø You must make the user familiar with the fire. Among other things you must instruct her/him about bringing the fire into use and its burning and maintenance. Ø... -
Seite 37: Appliance-Specific Information
I NS T AL L AT I ON M A N U A L 9. Appliance-specific information • The appliance-specific instructions as described in this section prevail over the instructions in the other !CAUTION sections! If in doubt follow the instructions in section 9 or contact your supplier. •... -
Seite 38: Flame Baffle Plate
IN S TA L L A TI O N M A N U A L 9.3.2 Flame baffle plate On delivery the flame baffle plate (see Appendix 2, fig. 5) is located in the top section of the appliance. In case of maintenance to the appliance, the flame baffle plate has to be removed. To do this proceed as follows: Ø... -
Seite 39: Disassembly Of Glass Pane In Door
I NS T AL L AT I ON M A N U A L 9.5.1.3 Disassembly of glass pane in door • Avoid damage when removing/fitting the glass pane. !Caution • Avoid/remove fingerprints on the glass pane(s) as they will burn into the glass. Use the supplied glass pane cleaner to remove fingerprints from the glass pane(s). -
Seite 40: Keld 5 Low Ea And Ivar 5 Low Ea
9.5.2 Keld 5 Low and Ivar 5 Low 9.5.2.1 Outside air connection Outside air connections are available for these appliances as accessories. Assembly always takes place at the bottom of the appliance. In case of these appliances, exhaust is only possible via the rear. When mounting the outside air connection, please proceed as follows (see Appendix 2, fig. -
Seite 41: Keld 5 High Ea And Ivar 5 High Ea
9.5.3 Keld 5 High and Ivar 5 High 9.5.3.1 Outside air connection Outside air connections are available for these appliances as accessories. Assembly always takes place at the bottom of the appliance. Connection is possible via both the rear and bottom side. When mounting the outside air connection, please proceed as follows (see Appendix 2, fig. -
Seite 42: Ivar 5 Store Ea
IN S TA L L A TI O N M A N U A L 9.5.4 Ivar 5 Store 9.5.4.1 Outside air connection Outside air connections are available for these appliances as accessories. Assembly always takes place at the bottom of the appliance. In case of these appliances, exhaust is only possible via the rear. When mounting the outside air connection, please proceed as follows (see Appendix 2, fig. - Seite 43 I NS T AL L AT I ON S AN L E I T U N G INHALT 1. Einleitung 2. EG-Konformitätserklärung 3. SICHERHEIT 3.1 Allgemein 3.2 Vorschriften 3.3 Schutzmaßnahmen/Sicherheitsanweisungen im Zusammenhang mit der Installation 4. Auspacken 5. Installation 5,1 Vorschriften 5.2 Rauchgasabzug 5.3 Landespezifische Installationsanforderungen 5.4 Aufstellen des Kamins...
-
Seite 44: Einleitung
Als Hersteller von Kaminöfen entwickelt und produziert DRU Verwarming Produkte konform den höchstmöglichen Deutsch Qualitäts-, Leistungs- und Sicherheitsanforderungen. Diese mit Holz gefeuerten Dik Geurts-Kaminöfen sind mit einem CE-Zeichen versehen, das nur von Kaminöfen geführt werden darf, die die wesentlichen Anforderungen aus der europäischen Bauprodukterichtlinie erfüllen, unter anderem die Anforderungen in Bezug auf Sicherheit, Umwelt und Energieverbrauch. -
Seite 45: Eg-Konformitätserklärung
I NS T AL L AT I ON S AN L E I T U N G 2. EG-Konformitätserklärung Der Unterzeichner im Auftrag des: Herstellers DRU Verwarming BV Postbus 1021 NL-6920 BA Duiven Ratio 8, NL-6921 RW Duiven erklärt hiermit, dass das von DRU auf den Markt gebrachte, mit Holz gefeuerte Heizgerät durch seinen Entwurf und seine Bauweise den wesentlichen Bestimmungen der Bauprodukterichtlinie entspricht und dass dieses Gerät in Übereinstimmung mit den Anforderungen aus der belgischen königlichen Verordnung (Belgisch koninklijk besluit) vom 12. -
Seite 46: Sicherheit
I N ST AL L A TI O N S A N L E I TU N G 3. SICHERHEIT 3.1 Allgemein • Lesen Sie dieses Kapitel über Sicherheit unbedingt sorgfältig durch, bevor Sie mit der Installation oder !ACHTUNG Wartung beginnen. •... -
Seite 47: Auspacken
I NS T AL L AT I ON S AN L E I T U N G 4. Auspacken Beachten Sie beim Auspacken die folgenden Punkte: Ø Kontrollieren Sie das Gerät mit dem Zubehör auf (Transport-) Schäden. Ø Installieren Sie niemals einen beschädigten Kamin! Ø... -
Seite 48: Installation
I N ST AL L A TI O N S A N L E I TU N G 5. Installation Lesen Sie die Anleitung sorgfältig durch, um eine gute und sichere Installation des Geräts zu gewährleisten. 5.1 Vorschriften Ø Der Kamin muss in Übereinstimmung mit den geltenden europäischen, nationalen, lokalen und baulichen (Installations-) Vorschriften installiert werden. -
Seite 49: Außenluftanschluss (Wenn Zutreffend)
I NS T AL L AT I ON S AN L E I T U N G 5.6 Außenluftanschluss (wenn zutreffend) Einige Kamine können mit einem Außenluftanschluss ausgerüstet werden. Für eine optimale Funktion des Geräts sind folgende Punkte zu berücksichtigen, wenn ein Außenluftanschluss vorhanden ist: •... -
Seite 50: Freistehende Kamine / Designkamine
I N ST AL L A TI O N S A N L E I TU N G 5.7.1 Freistehende Kamine / Designkamine 5.7.1.1 Umbauen von einem Anschluss an der Oberseite zu einem Anschluss auf der Rückseite des Kamins (wenn zutreffend) Der Kamin wird mit einem Anschluss für den Rauchgasabzug an der Oberseite geliefert. - Seite 51 I NS T AL L AT I ON S AN L E I T U N G Ø Entfernen Sie die Vermiculitplatten (kennzeichnen Sie diese), die Leitwand und wenn vorhanden den Zugbegrenzer vorsichtig aus dem Kamin (wenn zutreffend siehe Kapitel 9 „Gerätespezifische Informationen“). Ø...
-
Seite 52: Bei Einer Neuen Situation
I N ST AL L A TI O N S A N L E I TU N G 5.7.2.2 Bei einer neuen Situation Beim Einbauen eines Einsatzkamins in einen neu zu bauenden Kaminumbau gehen Sie wie folgt vor: Ø Bestimmen Sie den Aufstellort des Kamins. Die Abmessungen finden Sie in Anlage 2, Abb. 1. Ø... - Seite 53 I NS T AL L AT I ON S AN L E I T U N G Einbauen mit einmauerbarer Kaminkassette (wenn zutreffend): Ø Stellen Sie den Kamin mit der einmauerbaren Kaminkassette auf einen Fußboden mit einer ausreichenden Tragfähigkeit. Ø Stellen Sie die einmauerbare Kaminkassette vor eine feuerhemmende Wand.
-
Seite 54: Einbaukamine
5.7.3 Einbaukamine Ø Bestimmen Sie den Aufstellort des Kamins. Ø Schieben Sie den Einbaurahmen in die gewünschte Position. Ø Verwenden Sie feuerfestes und hitzebeständiges Material konform Eurobrandklasse A1 EN 13501-1 für die Platte auf dem Boden, für den Kaminumbau (inklusive der Oberseite des Kaminumbaus), für das Material im Kaminumbau und für die Rückwand, gegen welche das Gerät gestellt wird. -
Seite 55: Vollenden Der Installation
5.8 Vollenden der Installation Ø Kontrollieren Sie, dass kein Schutt, Staub oder anderes Material im Kaminumbau zurückbleibt (wegen des Gestanks). Ø Ziehen Sie saubere Stoffhandschuhe an und vermeiden Sie Fingerabdrücke auf dem Kamin und den Ofenrohren. Ø Kontrollieren Sie, ob die Innenauskleidung und die Leitwände richtig in den Kamin eingelegt wurden (wenn zutreffend siehe Kapitel 9 „Gerätespezifische Informationen“). -
Seite 56: Übergabe
I N ST AL L A TI O N S A N L E I TU N G 6. Übergabe Ø Sie müssen den Benutzer mit dem Kamin vertraut machen. Sie müssen ihn/sie unter anderem in die Inbetriebnahme, das Heizen und die Wartung des Kamins einweisen. Ø... -
Seite 57: Gerätespezifische Informationen
I NS T AL L AT I ON S AN L E I T U N G 9. Gerätespezifische Informationen • Die gerätespezifischen Anweisungen aus diesem Kapitel haben Vorrang vor den Anweisungen in den !ACHTUNG übrigen Kapiteln! Halten Sie sich bei Zweifel an die Anweisungen in Kapitel 9 oder nehmen Sie Kontakt mit Ihrem Lieferanten auf. -
Seite 58: Flammenleitwand
I N ST AL L A TI O N S A N L E I TU N G 9.2.2 Flammenleitwand Bei Lieferung liegt die Flammenleitwand (siehe Anlage 2, Abb. 5) oben im Gerät. Bei Wartungsarbeiten am Gerät muss die Flammenleitwand herausgenommen werden. Gehen Sie dabei wie folgt vor: Ø... -
Seite 59: Ausbauen Der Scheibe In Der Tür
I NS T AL L AT I ON S AN L E I T U N G 9.4.1.3 Ausbauen der Scheibe in der Tür • Achten Sie beim Ausbauen/Einbauen der Scheibe darauf, dass Sie diese nicht beschädigen. !Achtung • Fingerabdrücke auf der/den Scheibe(n) sind zu vermeiden/zu entfernen, da diese andernfalls einbrennen. Entfernen Sie Fingerabdrücke auf der/den Scheibe(n) mit dem im Lieferumfang enthaltenen Scheibenreiniger. -
Seite 60: Keld 5 Low Ea Und Ivar 5 Low Ea
9.4.2 Keld 5 Low und Ivar 5 Low 9.4.2.1 Außenluftanschluss Für diese Geräte ist als Zubehör ein Außenluftanschluss erhältlich. Die Montage erfolgt immer an der Unterseite des Geräts. Der Rauchabzug ist bei diesen Geräten nur über die Rückseite möglich. Gehen Sie beim Anschließen des Außenluftanschlusses wie folgt vor (siehe Anlage 2, Abb. 9a + 9b): Ø... -
Seite 61: Keld 5 High Ea Und Ivar 5 High Ea
9.4.3 Keld 5 High und Ivar 5 High 9.4.3.1 Außenluftanschluss Für diese Geräte ist als Zubehör ein Außenluftanschluss erhältlich. Die Montage erfolgt immer an der Unterseite des Geräts. Der Anschluss ist sowohl über die Rückseite als über die Unterseite möglich. Gehen Sie beim Anschließen des Außenluftanschlusses wie folgt vor (siehe Anlage 2, Abb. -
Seite 62: Außenluftanschluss
I N ST AL L A TI O N S A N L E I TU N G 9.4.4 Ivar 5 Store 9.4.4.1 Außenluftanschluss Für diese Geräte ist als Zubehör ein Außenluftanschluss erhältlich. Die Montage erfolgt immer an der Unterseite des Geräts. - Seite 63 M A NU E L D ' I N S T A L L A T I O N Table des matières 1. Introduction 2. Déclaration de conformité CE 3. SÉCURITÉ 3.1 Généralités 3.2 Prescriptions 3.3 Mesures de précaution / consignes de sécurité lors de l'installation 4.
-
Seite 64: Introduction
En tant que fabricant de poêles, DRU Verwarming développe et fabrique des produits suivant les plus hautes exigences possibles en matière de sécurité, de qualité et de performances. Ces poêles à bois Dik Geurts sont pourvus d'une marque CE, qui peut uniquement être apposée sur des poêles qui satisfont aux exigences essentielles émanant de la directive européenne relative aux produits de construction, dont des exigences en... -
Seite 65: Déclaration De Conformité Ce
M A NU E L D ' I N S T A L L A T I O N 2. Déclaration de conformité Le soussigné, représentant de : Fabricant : DRU Verwarming BV Boîte postale 1021 NL-6920 BA Duiven Ratio 8, NL-6921 RW Duiven déclare par la présente que l'appareil de chauffage au bois commercialisé... -
Seite 66: Sécurité
MA NU E L D ' IN S T A L L A T I O N 3. SÉCURITÉ 3.1 Généralités • Veuillez lire attentivement le présent chapitre relatif à la sécurité avant de commencer l'installation ou !ATTENTION l'entretien de l'appareil. •... -
Seite 67: Déballage
M A NU E L D ' I N S T A L L A T I O N 4. Déballage Soyez attentif aux points suivants durant le déballage : Ø Contrôlez que l'appareil et ses accessoires n’ont pas été endommagés (durant le transport). Ø... -
Seite 68: Installation
MA NU E L D ' IN S T A L L A T I O N 5. Installation Veuillez lire attentivement le présent manuel pour une installation sûre et exacte de l’appareil. 5.1 Prescriptions Ø Installez le poêle suivant les prescriptions (d'installation) européennes, nationales, locales et architectoniques. Ø... -
Seite 69: Conditions D'installation Propres Au Pays
M A NU E L D ' I N S T A L L A T I O N 5.5 Conditions d'installation propres au pays Ø Installez l'appareil suivant les prescriptions (d'installation) locales, nationales, européennes et architectoniques en vigueur. Pour les Pays-Bas, le décret sur la construction est notamment d'application. 5.6 Raccordement à... -
Seite 70: Poêles Design / Isolés
MA NU E L D ' IN S T A L L A T I O N 5.7.1 Poêles design / isolés 5.7.1.1 Transformation d'un poêle à raccordement supérieur en un poêle à raccordement arrière (le cas échéant) Le poêle est livré avec un raccordement supérieur à raccorder sur le conduit de cheminée. Le cas échéant, ce raccordement supérieur peut être transformé... - Seite 71 M A NU E L D ' I N S T A L L A T I O N Ø Ôtez la porte du poêle et démontez le cadre si celui-ci est fourni séparément (voir le chapitre 9, 'Informations propres à l'appareil'). Ø...
- Seite 72 MA NU E L D ' IN S T A L L A T I O N 5.7.2.2 Pour une nouvelle situation Pour la mise en place d'un insert dans un nouveau manteau de cheminée à construire, procédez comme suit : Ø...
- Seite 73 M A NU E L D ' I N S T A L L A T I O N Mise en place d'une cassette d'emmurage (le cas échéant) : Ø Placez le poêle avec la cassette d'emmurage sur un sol présentant une portance suffisante. Ø...
-
Seite 74: Foyers À Encastrer
5.7.3 Foyers à encastrer Ø Déterminez l'emplacement du foyer. Ø Faites glisser la structure d'encastrement à l'endroit souhaité. Ø Utilisez un matériau ininflammable et résistant à la chaleur suivant la classe de combustibilité A1 EN 13501-1 pour la plaque sur le sol, le manteau de cheminée (y compris la face avant de celui-ci), le matériau dans le manteau et le mur arrière contre lequel l’appareil est placé. -
Seite 75: Terminer L'installation
5.8 Terminer l'installation Ø Contrôlez qu’il ne subsiste pas de débris, poussières ou autres matériaux dans le manteau de cheminée (pour éviter les mauvaises odeurs). Ø Utilisez des gants en tissu propres et évitez les empreintes de doigts sur le poêle et les conduits du poêle. Ø... -
Seite 76: Livraison
MA NU E L D ' IN S T A L L A T I O N 6. Livraison Ø Vous devez familiariser l'utilisateur avec le poêle. Vous devez notamment l'instruire sur la mise en service, la combustion et l'entretien du poêle. Ø... -
Seite 77: Informations Propres À L'appareil
M A NU E L D ' I N S T A L L A T I O N 9. Informations propres à l'appareil • Les instructions propres à l'appareil, telles que décrites dans le présent chapitre, prévalent sur les !ATTENTION instructions données dans les autres chapitres ! En cas de doute, conservez les instructions dans le chapitre 9 ou prenez contact avec votre fournisseur. -
Seite 78: Déflecteur De Flamme
MA NU E L D ' IN S T A L L A T I O N 9.2.2 Déflecteur de flamme Lors de la livraison, le déflecteur de flamme (voir l'Annexe 2, fig. 5) se trouve sur le dessus de l'appareil. En cas d'entretien sur l'appareil, le déflecteur de flamme doit être enlevé. -
Seite 79: Démontage De La Vitre Dans La Porte
M A NU E L D ' I N S T A L L A T I O N 9.4.1.3 Démontage de la vitre dans la porte • Évitez tout endommagement lorsque vous enlevez /placez la vitre. !Attention • Évitez/ôtez les traces de doigts sur la(les) vitre(s) car elles vont se marquer davantage avec le feu. En cas de traces de doigts sur la(les) vitre(s), utilisez le nettoyant pour vitres également fourni. -
Seite 80: Keld 5 Low Ea Et Ivar 5 Low Ea
9.4.2 Keld 5 Low et Ivar 5 Low 9.4.2.1 Raccordement à l'air extérieur Pour ces appareils, un raccordement à l'air extérieur est disponible comme accessoire. Le montage se fait toujours sur la face inférieure de l'appareil. L'évacuation est uniquement possible via la face arrière sur ces appareils. -
Seite 81: Keld 5 High Ea Et Ivar 5 High Ea
9.4.3 Keld 5 High et Ivar 5 High 9.4.3.1 Raccordement à l'air extérieur Pour ces appareils, un raccordement à l'air extérieur est disponible comme accessoire. Le montage se fait toujours sur la face inférieure de l'appareil. Le raccordement est possible tant via la face arrière que la face inférieure. -
Seite 82: Raccordement À L'air Extérieur
MA NU E L D ' IN S T A L L A T I O N 9.4.4 Keld 5 Store 9.4.4.1 Raccordement à l'air extérieur Pour ces appareils, un raccordement à l'air extérieur est disponible comme accessoire. Le montage se fait toujours sur la face inférieure de l'appareil. - Seite 83 Bijlage/Appendix/Anlage/Annexe 1: Tabellen/Tables /Tabellen/Tableaux Tabel/Table/Tabelle/Tableau 1: Meegeleverde onderdelen/Parts included/Lieferumfang/Pièces fournies Onderdeel / Part / Teil / Pièce Aantal / Quantity / Anzahl / Nombre Installatiehandleiding / Installation manual / Installationsanleitung / Manuel d’installation Gebruikershandleiding / User manual / Bedienungsanleitung / Manuel de l’utilisateur Handschoen / Glove / Handschuh / Gant Asschep / Ash scoop /...
- Seite 86 Bijlage/Appendix/Anlage/Annexe 2: Afbeeldingen/Figures/Abbildungen/Figures Width x Height ( mm ) 550 x 680 Jannik Medium Low EA Depth ( mm ) Width x Height ( mm ) 450 x 550 Keld/Ivar 5 Low EA Depth ( mm ) Width x Height ( mm ) 450 x 660 Keld/Ivar 5 High EA Depth ( mm )
- Seite 87 52c-0059 52c-0064...
- Seite 88 52c-0050 52c-0052...
- Seite 89 52c-0057 52c-0058 52c-0060-1...
- Seite 90 52c-0056 52c-0055 52C-0087 52C-0088 (13x)
- Seite 92 DRU Verwarming B.V. Ratio 8, 6921 RW Duiven Postbus 1021, 6920 BA Duiven Nederland DRU Belgium Kontichsesteenweg 60 2630 Aartselaar Belgium Drugasar Ltd. Deans Road, Swinton Manchester M27 0JH United Kingdom...