Inhaltsverzeichnis
Werbung
Verfügbare Sprachen
Verfügbare Sprachen
Werbung
Kapitel
Inhaltsverzeichnis

Verwandte Anleitungen für Wamsler 10965 RH6F


Inhaltszusammenfassung für Wamsler 10965 RH6F
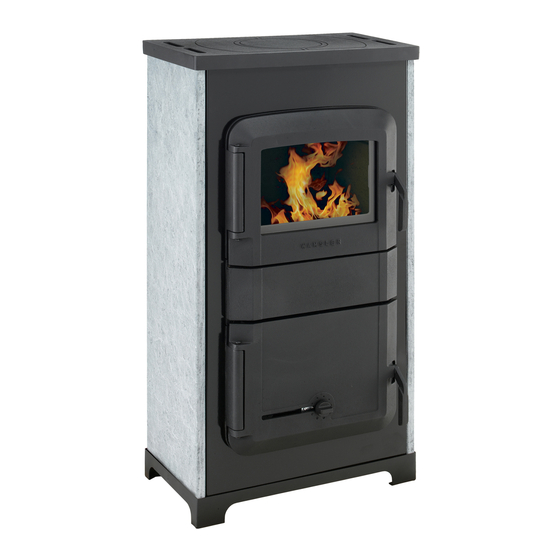
- Seite 1 Kaminofen Bedienungs- und Aufstellanleitung Fireplace user instruction Cheminée mode d’emploi Istruzioni per uso e installazione Kandalló használati útmutató TYP 10965 RH6F / KAMINO TRENDY 6kW TYP 10985 RH8F / KAMINO TRENDY 8kW...
-
Seite 2: Inhaltsverzeichnis
Vorwort Sehr verehrter Kunde, wir beglückwünschen Sie zum Erwerb unseres Kaminofens. Sie haben die richtige Wahl getroffen. Mit dem Kauf dieses Produktes haben Sie die Garantie für Hohe Qualität durch Verwendung bester und bewährter Materialien Funktionssicherheit durch ausgereifte Technik, die streng nach der europäischen Norm EN 13240 geprüft ist (Geräte sind für die Mehrfachbelegung geeignet) ... -
Seite 3: Bedienung
1. Bedienung 1.1 SICHERHEITSHINWEISE Die Geräte sind nach DIN EN 13240 geprüft (Typenschild). Bei der Aufstellung und dem abgasseitigen Anschluss sind die anwendbaren nationalen und europäischen Normen, örtliche und baurechtliche Vorschriften/Normen (z.B. DIN 18896, DIN 4705, DIN EN 13384, DIN 18160, DIN EN 1856-2, DIN EN 15287 u.a.) sowie feuerpolizeiliche Bestimmungen (z.B. - Seite 4 Ebenfalls sollte eine gründliche Reinigung der Abgaswege und der Abgasrohre erfolgen. 19. Wenn Ausbesserungen oder Erneuerungen vorgenommen werden müssen, wenden sie sich bitte rechzeitig unter Angabe der genauen Art.Nr. und Fert.Nr. an Ihren Fachhändler. Es sind nur Original Wamsler - Ersatzteile zu verwenden. 20. Arbeiten, insbesondere Installation,...
-
Seite 5: Inbetriebnahme
1.2 Inbetriebnahme Brennstoffe Das Gerät ist ausschließlich für den Betrieb mit nachfolgend aufgeführten Brennstoffen geeignet. Nur damit ist ein raucharmer und störungsfreier Betrieb gewährleistet. Verwenden Sie nur naturbelassenes, trockenes Holz mit einer Restfeuchte von max. 20% und Braunkohlenbriketts. Bei den Geräten ist der Sekundärluftschieber / Brennstoffwähler an der Rückseite montiert. Bei Holz Schieber auf Stellung „H“, bei Kohle auf Stellung „K“... -
Seite 6: Erstes Anheizen
Kochen: Das Gerät erfüllt die Kochprüfung der Herdnorm EN 12815. Der Primärluftregler sollte zum Kochen nach Tabelle 1 „Kochen“ eingestellt werden und mit den unten angegebenen max. Brennstoffmengen betrieben werden. Der Topf muss auf die vorgegebene Stelle der Kochplatte gestellt werden (Bild). Überkochen und Fettspritzer vermeiden. -
Seite 7: Außerbetriebnahme
Achtung! Beim Öffnen der Heiztür kann es bei Fehlbedienung oder bei nicht ausreichendem Schornsteinzug zu Rauchaustritt kommen. Es ist unbedingt zu beachten, dass die Heiztür nur langsam, zuerst einen Spalt und nach ein paar Sekunden ganz geöffnet werden darf. Außerdem soll vor dem Öffnen der Tür zum Nachlegen von Brennstoff nur noch das Glutbett im Brennraum vorhanden sein, das heißt, es dürfen keine Flammen mehr sichtbar sein. -
Seite 8: Reinigung Und Pflege
1.5 Reinigung und Pflege Mit richtigem Betrieb/Bedienung und guter Pflege/Wartung erhöhen Sie die Wertstabilität und Lebensdauer Ihrer Geräte. Sie sparen wertvollen Ressourcen und schonen unsere Umwelt und Ihren Geldbeutel. Achtung: Nach jeder Heizperiode ist es angebracht, den Ofen gründlich zu kontrollieren und zu reinigen. -
Seite 9: Störungsursachen, Behebung
1.6 Störungsursachen, Behebung Art der Störung mögliche Ursache Behebung Geruchbildung: Austrocknung der Den Ofen entsprechend der angewendeten Schutzfarbe. Bedienungsanleitung mehrere Verdampfung von Ölresten Stunden in Kleinstellung betreiben. Danach für mehrere Stunden auf maximale Leistung heizen. Zu geringe Wärmeab- Geräteleistung zu klein Lassen Sie Ihren Wärmebe- gabe:... -
Seite 10: Aufstellung
Belag aus nicht brennbaren Baustoffen, z.B. Keramik, Stein, Glas oder einer Bodenplatte aus Stahl, ersetzt oder geschützt werden. hinten seitlich vor dem Gerät Typ 10965 RH6F 6kW 25 cm 45 cm 100 cm Typ 10985 RH8F 8kW 30 cm... -
Seite 11: Schornsteinanschluss
2.4 Schornsteinanschluss ACHTUNG: Vor dem Anschluss des Gerätes ist in jedem Fall der zuständige Bezirks- Schornsteinfegermeister zu Rate zu ziehen! Verbindungsstücke müssen am Gerät und untereinander fest und dicht verbunden sein. Sie dürfen nicht in den freien Schornsteinquerschnitt hineinragen. Das Verbindungsstück zwischen Kaminofen und Schornstein soll den gleichen Querschnitt haben wie der Rohrstutzen am Ofen. - Seite 12 Richtig Falsch mind. 50 cm Querschnittverengung im Kamin durch zu weit eingeschobene Abgasrohre Stau durch sich ge- mind. 30 cm genseitig behin- dernde Abgasströ- Falschluft durch offene Türen an nicht benutzten Feuerstätten Falschluft durch of- fenen Rohranschluß Falschluft durch undichten Rohr- anschluß...
-
Seite 13: Technische Daten
3. Technische Daten 3.1 Daten, Maßzeichnungen, Bilder Typen: 109 65 RH6F 109 85 RH8F Nennwärmeleistung Ø Abgasanschluss hinten Raumheizvermögen bei günstigen/weniger günstigen/ungünstigen Heizbedienungen nach DIN m³ 115/68/45 182/105/71 18893/Tab2 bei Dauerheizung Zeitheizung min. Förderdruck bei Nennwärmeleistung Scheitholz und BB 7“ (Braunkohlebriketts) Abgasmassenstrom 5,4 / 6,2 6,6 / 7,2... - Seite 14 LEGENDE ZU DEN BILDERN Gusskochplatte Heiztür mit Sichtfenster Aschentür Abgasstutzen hinten Brennstoffwähler / Sekundärluftregler (Bild 9) Primärluftregler (Bild 10) Korpus emailliert Schamotteverkleidung im Feuerraum Rüttelrost (innen) (Bild 13) 10. Aschekasten 11. Heiztür- und Aschetür Griff 12. Rosttür (nur 8kW) 13. Sockel...
- Seite 15 Bild 1: RH6F 6kW Bild 2: RH8F 8kW Bild 1 Bild 2...
- Seite 16 Bild 10 Bild 9 Bild 11...
- Seite 17 Bild 12 Bild 13 Bild 15 Bild 14 Die angeführten Abmessungsangaben sind nur zur Information! Wir behalten uns das Recht von Konstruktionsänderungen vor, falls diese das technische Niveau erhöhen, oder die Qualität verbessern! Änderungen, die dem technischen Fortschritt dienen und / oder einer Qualitätsverbesserung bewirken, behalten wir uns vor.
-
Seite 22: Foreword
Foreword Dear Customer! Thank you for choosing our product! By purchasing this product you receive guarantee for good quality originating from the usage of the finest and proven materials, operating security which is controlled according to German and European norms (Corresponds to the standards EN 13240) ... -
Seite 23: Safety Instructions
1. Usage 1.1 SAFETY INSTRUCTIONS The stoves are tested to EN 13240 (see identification plate). For installation and for flue gas connections, the requirements of the Fire Regulations (FeuVO in Germany) apply, as well as local building regulations such as the following technical standards DIN 18896, DIN 4705, EN 13384, DIN 18160, EN 1856-2 and EN 15287. - Seite 24 18. If repairs or replacements are necessary, please contact your supplier with the necessary article numbers and serial numbers in good time. Only original WAMSLER replacement parts may be used. 19. Work such as installation, setup, commissioning and services, as well as repairs, must only be carried out by qualified personnel (heating system or space heating technicians).
-
Seite 25: Installation
1.2 Installation Fuels The equipment can be used with fuels detailed in the followings. This way the “low- smoke” and trouble-free operation can be secured. Use only dry wood with moisture of maximum 20% and lignite briquette. Heating value Types of fuels appr. -
Seite 26: Putting Out Of Operation
The first kindling At the first fire set-up could be a little smoke, but is not dangerous, normal! In this time, please ventilate the room carefully! Warning! Upon the first kindling, smoke and unpleasant smell may be generated. Always ensure the proper ventilation of the room (by opening windows and doors), and heat the fireplace at maximum rated heating performance. -
Seite 27: Cleaning And Maintenance
a burning match in the slightly opened feeding door. If the flame is not drawn significantly by the draught, then a so-called starting fire is to be set first. Towards this end, burn wood chips/wool in the fireplace or the cleaning hole of the chimney. The fire grate is to be cleaned before every kindling to ensure the proper inflow of air for burning. -
Seite 28: Potential Problems And How To Tackle Them
1.6 Potential problems and how to tackle them Kind of operating Possible reasons Solution problem Odour formation Curing of the applied Operate the fire-place on a preventive lacquer. low heating level according to Steaming oil remains. the instructions manual for a few hours. -
Seite 29: Placing
2. Placing 2.1 Prescriptions For installation and for connection of flue, the requirements of the Fire Regulations (FeuVO in Germany) apply, as well as local building regulations such as the following technical standards DIN 18896, DIN 4705, EN 13384, DIN 18160, EN 1856-2 and EN 15287. -
Seite 30: Connection Of The Fireplace
2.4 Connection of the fireplace The connection for attaching to the chimney must be able to withstand at least 400°C. PLEASE NOTE: Before connecting the stove the local authority responsible for approving heating systems must be consulted! Connection pieces must be firmly connected to the stove and to each other and must not leak. - Seite 31 Incorrect Correct min.50cm Tightening cross section of the chimney because the smoke tube is pushed into the chimney too much Obstruction , because the min.30cm smoke tubes are led as facing each other Faulty draught, because a fire-place’s door (not in use) is open False air because of an open tube joint...
-
Seite 32: Technical Specification
3. Technical specification 3.1 data, dimensional drawings, pictures Type 109 65 RH6F 109 85 RH8F Nominal performance Flue gas connection backside Heating capacity (m -under favourable -less favourable -not favourable heating circumstances according to 18893 / m³ 115/68/45 182/105/71 TAB2 DIN standard Min. - Seite 33 Description to the pictures 1. Iron coast plate 2. Furnace chamber door with glass 3. Ash door 4. Flue gas connection 5. Fuel selector („2” = wood, „1” = coal) (pic. 9) 6. Primary air regulator (pic. 10) 7. Secondary air selector 8.
- Seite 34 pic. 1: RH6F 6KW pic. 2: RH8F 8KW pic. 1 pic. 2...
- Seite 35 pic. 10 pic. 9 pic. 11...
- Seite 36 pic. 13 pic. 12 pic. 15 pic. 14 The specified dimensions and weights are approximate values, and thus have only informative purposes. We reserve the right to modify the designs as required in terms of technology or quality! We reserve the right to make changes which relate to technical advances and / or to an improvement in quality.
-
Seite 37: Préambule
Préambule Cher Client, Nous vous félicitons d’avoir acheté un poêle Wamsler. Vous avez fait le bon choix car ce produit est pour vous une garantie de grande qualité, grâce à l’emploi de matériaux excellents et éprouvés de sécurité de fonctionnement, grâce à une technique parfaitement au point et sévèrement contrôlée selon la norme européenne EN 13240. -
Seite 38: Sommaire
Pour les préserver il faut veiller à respecter les quantités maximum de bois (indiquées dans cette notice) et éviter les chocs lors de l'introduction des bûches. Ainsi vous pourrez profiter de votre poêle plusieurs saisons sans les remplacer. La pierre ollaire est un produit naturel avec des nuances de couleur et des veines, en aucun cas l'aspect de la pierre est un motif de réclamation. -
Seite 39: Utilisation
1. Utilisation 1.1 CONSIGNES DE SECURITE 1. Les appareils ont été contrôlés selon les normes EN 13240 (Plaque signalétique). 2. Pour la mise en place des appareils et le raccordement aux cheminées d’évacuation des gaz, on devra observer les exigences énoncées par les directives concernant les appareils de chauffage (FeuFO en Allemagne) ainsi que les normes DIN 18896, DIN 4705, EN 13384, DIN 18160, EN 1856-2 et EN 15287. - Seite 40 à temps à votre commerçant spécialisé en lui indiquant exactement le numéro de référence et le numéro de fabrication. On ne peut utiliser que des pièces originales WAMSLER. 19. Les travaux, tels que, en particulier, l’installation, le montage, la première mise en service, les travaux de maintenance ainsi que les réparations ne pourront être effectués que par...
-
Seite 41: Mise En Service
1.2 Mise en service Combustible Ce poêle à bois convient aux combustibles suivants : Bois bûches de longueur au maximum 33cm TOUT COMBUSTIBLE AUTRE QUE LE BOIS EN BUCHEs EST INTERDIT. Les feuillus durs (chêne, hêtre, frêne, châtaignier, charme, noyer, fruitiers, etc.) fournissent un bois de chauffage de meilleure qualité, qui dégage plus de chaleur en brûlant plus longtemps que les résineux. -
Seite 42: Extinction
Réglage d’air: Sélecteur Réglage air primaire combustible, air secondaire Utilisation foyère en bas panneau arrière Allumage Bois Puissance nominale Lignite Puissance nominale Mise hors service Bois Cuisant Lignite Avant le premier allumage: Avant le premier allumage retirez les éléments de protection pour le transport. Le premier allumage : ATTENTION : Il est normal que lors des premières utilisations de votre appareil, il y ait un dégagement d'odeurs et de fumées dues à... -
Seite 43: Le Poêle Ne Peut Fonctionner Qu'avec La Porte Fermée
1.4 Le poêle ne peut fonctionner qu’avec la porte fermée La porte ne doit être ouverte que pour l'allumage, l'alimentation en combustible ou le nettoyage. 1.5 Nettoyage et entretien Une diminution des performances de chauffage est presque toujours la conséquence d'un mauvais entretient du poêle et du conduit d'évacuation des fumées. -
Seite 44: Anomalies
1.6 Anomalies Probleme Cause Solution Dégagement Durcissement de la peinture et Chauffez le poêle comme décrit d’odeur évaporation des résidus d’ pendant quelques heures sur la huile. position minimum. Ensuite le faire chauffer maximum pendant quelques heures. Dégagement Capacité chauffage Faites contrôler le dégagement de chaleur insuffisant. -
Seite 45: Installation
2. Installation 2.1 Prescriptions d’installation Le bon fonctionnement de votre poêle est fortement lié à la qualité de son installation. L'installation doit être effectuée par un professionnel ou une personne qualifiée. Cette notice comprend des recommandations propres à votre poêle. Il est impératif de suivre ces recommandations pour bénéficier des meilleures performances mais aussi de la garantie sur cet appareil. -
Seite 46: Raccordement Au Conduit De Cheminée
Distance de sécurité hors de la zone de rayonnement Une distance minimum de « Table 1 » doit être respectée entre les matériaux combustibles, et la paroi arrière du poêle. Une distance minimum de « Table 1 » doit être respectée entre les matériaux combustibles, et les parois latérales du poêle. -
Seite 47: Données Technipues
Si les éléments de conduit de raccordement mènent vers des éléments inflammables, il doivent impérativement être à une distance minimum de 3 fois le diamètre du conduit. Cette distance peut être réduite de moitié si une protection contre le rayonnement (ininflammable) créant un vide d'air est installée entre le conduit et les matériaux inflammables. - Seite 48 Légende des images Acier fondu plaque Porte foyère par fenêtre Cendre porte Buse d’évacuation des fumée Sélecteur de combustible („2” = Bois, „1” = Lignite) (Fig. 9) Réglage d’air primaire (Fig. 10) Réglage d'air secondaire Tôle d'habillage émailler Garniture intérieure 10.
- Seite 49 Fig. 1: Kamino 6kW Fig. 2: Kamino 8kw Fig. 1 Fig. 2...
- Seite 50 Fig. 9 Fig. 10 Fig. 12 Fig. 11 Fig. 13 Fig. 14...
- Seite 51 Fig. 15 La taille apparaitre et les donnée informer de caractères! Notre frimée la structure modification entretenir doit, en tant qu’ils lèvent technique niveau ou ils améliorent la qualité! Nous réservons le droit d’apporter des modifications qui contribuent aux progrès techniques et / ou apportent une amélioration de la qualité.
-
Seite 52: Gentilissimo Cliente
Gentilissimo Cliente, ci complimentiamo con Lei per aver acquistato questa stufa da riscaldamento e per l’ottima scelta effettuata! Questo prodotto Le garantisce qualità elevata grazie all’utilizzo di ottimi materiali testati funzionamento sicuro grazie alle avanzate tecnologie verificate in modo rigoroso in base alla norma europea EN 13240 ... -
Seite 53: Istruzioni Per L'uso
1. Istruzioni per l’uso 1.1 AVVERTENZE DI SICUREZZA L’ apparecchio e i suoi dispositivi sono stati testati sulla base della norma EN 13240 o secondo EN 12815 (vedi targa di identificazione). Per un funzionamento ottimale della Sua stufa è fondamentale che la canna fumaria alla quale volete effettuare il collegamento sia in condizioni perfette. - Seite 54 Tutti i componenti dovranno essere sostituiti esclusivamente con pezzi originali Wamsler. Eventuali lavori, in particolare l’installazione, il montaggio, la prima accensione, nonché i servizi di assistenza e di riparazione possono essere eseguiti solo da una ditta specializzata (in impianti di riscaldamento o riscaldamento ad aria).
-
Seite 55: Accensione
In caso di vetro del portello focolare rotto e/o incrinato, così come in caso di anomalie di funzionamento, l’apparecchio non può essere messo in funzione, se non dopo aver rimosso l’anomalia. Non ostruire le aperture o feritoie di aspirazione o di smaltimento del calore. Tutti i regolamenti locali, inclusi quelli riferiti alle Norme Nazionali ed Europee devono essere rispettate nell’istallazione dell’apparecchio. -
Seite 56: Prima Accensione
mpostazione aria di combustione: Le leve devono sempre trovarsi al centro dei simboli. Posizione Posizione scelta leva aria combustibile, primaria, Combustibile aria seconda Sportello Parete disotto posteriore Può essere programmato per Ceppi di legna Potenza termica nominale Mattonelle di lignite Potenza termica nominale Spegnimento Ceppi di legna Cucinare... -
Seite 57: Spegnimento
aggiungere un’ulteriore carica di combustibile. In seguito impostare l’aria primaria/seconda secondo quanto indicato dalla tabella 1. Per la prima accensione è opportuno procedere in modo “lieve” con piccole quantità di combustibile, per consentire ai componenti di abituarsi al calore. Durante questa fase la stufa potrebbe emanare fumi e odori sgradevoli. -
Seite 58: Pulizia E Manutenzione
Attenzione! Per garantire aria pulita e una buona resa dell’apparecchio, il carico del combustibile non deve superare le quantità max indicate nelle istruzioni per l’uso per evitare un surriscaldamento che danneggerebbe la stufa. Eventuali danni come quello appena descritto non sono coperti dalla garanzia. Una minore resa termica si ottiene soltanto riducendo le quantità... -
Seite 59: Cause E Risoluzione Anomalie
Importante: non utilizzare in nessun caso spugne, abrasivi e detergenti aggressivi o che potrebbero graffiare le superfici! Eventuali lavori, in particolare l’installazione, il montaggio, la prima accensione, nonché i servizi di assistenza e di riparazione possono essere eseguiti solo da una ditta specializzata (in impianti di riscaldamento o riscaldamento ad aria). -
Seite 60: Installazione
2. Installazione 2.1 Prescrizioni e norme Leggere attentamente il contenuto del presente manuale, in quanto fornisce importanti indicazioni istruzioni riguardanti l’installazione, l’uso, manutenzione e soprattutto la sicurezza del prodotto. L’installazione e l’uso delle apparecchiature, deve avvenire esclusivamente in ambiente giudicato idoneo dagli enti preposti e soprattutto in conformità... -
Seite 61: Distanze Di Sicurezza
2.2 Distanze di sicurezza Proteggere dall’effetto del calore tutti gli elementi costruttivi, mobili o tessuti di arredamento infiammabili situati nelle vicinanze della stufa. Oggetti all’interno della zona di irraggiamento Per gli elementi costruttivi, i mobili e i tessuti di arredamento infiammabili situati nella zona di irraggiamento della stufa è... - Seite 62 La Misura X (distanza da elementi costruttivi/materiali infiammabili) da rispettare è quella indicata dal produttore dell’apparecchio. ATTENZIONE! Per il dimensionamento della canna fumaria consultare i dati relativi all’apparecchio nella sezione 3. Generalmente la stufa può essere collegata direttamente alla canna fumaria mediante impiego di curve.
- Seite 63 In caso di incendio della canna fumaria munirsi di adeguati sistemi per soffocare le fiamme (es. utilizzare un estintore a polvere o ad anidride carbonica) e richiedere l'intervento dei Vigili del Fuoco. COLLEGAMENTO DELL’APPARECCHIO ALLA CANNA FUMARIA ED EVACUAZIONE DEI PRODOTTI DELLA COMBUSTIONE (vedi anche normativa UNI 10683) ...
- Seite 64 Inclinazione del tetto Altezza della zona di reflusso Z (m) C (°) 1,85 1,00 0,50 1,50 1,30 0,80 1,30 2,00 1,50 1,20 2,50 2,10 REALIZZAZIONE DELL’ALLACCIAMENTO ALLA CANNA FUMARIA...
- Seite 65 Eseguire il collegamento dell’apparecchio alla canna fumaria del camino esistente, assicurandosi che il tubo di uscita fumi non occupi la sezione libera della canna fumaria. Utilizzare esclusivamente tubi adatti allo smaltimento dei fumi della combustione. Limitare i tratti orizzontali del condotto di raccordo alla canna fumaria (max 1 metro) e l’uso di curve.
-
Seite 66: Schede Tecniche
3. Schede tecniche 3.1 Disegno dimensionale e dati Typ 109 65 Typ 109 85 Type RH6F RH8F Potenza termica nominale Uscita fumi paroi arrière Volume riscaldabile in m³ per utilizzo non continuo secondo DIN 18893/TAB. 2 in condizioni - favorevoli m³... - Seite 67 Leggenda da cui figura Ghisa piastra Sportello Sportello cenere Uscita fumi Scelta combustibile („2” = legna, „1” = lignite) (Fig. 9) Leva aria primaria (Fig. 10) Leva aria seconda (Fig. 9) Calandra smaltato Muratura Vibratore (Fig. 13) Cassetto cenere Maniglia Accensione sportello...
- Seite 68 Fig. 1: RH6F 6KW Fig. 2: RH8F 8KW Fig. 1 Fig. 2...
- Seite 69 Fig. 10 Fig. 9 Fig. 12 Fig. 11 Fig. 13 Fig. 14...
- Seite 70 Fig 15 Queste dimensioni sono indicate a solo scopo informativo! Ci riserviamo il diritto di apportare eventuali modifiche strutturali a vantaggio del progresso tecnologico o del miglioramento qualitativo! Ci riserviamo il diritto di apportare modifiche a vantaggio del progresso tecnologico e/o del miglioramento qualitativo.
-
Seite 71: Előszó
Előszó Tisztelt Vásárló! Köszönjük megtisztelő bizalmát, hogy a mi készülékünket választotta! Helyesen döntött. Ezen termék megvásárlásával Ön garanciát kap: a legjobb és már bevált anyagok felhasználásával a jó minőségre a működési biztonságra, amelyet a német és európai normák szerint ellenőriznek (valamint EN 13240 szabványoknak.) ... -
Seite 72: Használat
1. Használat 1.1 BIZTONSÁGI ELŐÍRÁSOK 1. A készülékek a EN 13240 vagy a EN 12815 norma alapján bevizsgálásra kerültek (készülék típusát meghatározó tábla). 2. A beállításhoz és a kéménycsatlakoztatáshoz az adott ország tűzvédelmi rendelkezéseit kell betartani. A készülék tökéletes működéséhez a kéménynek, amelyre a készüléket akarja csatlakoztatni, tökéletes állapotban kell lennie. - Seite 73 17. Ha javításokat vagy felújításokat kell végezni, kérjük időben forduljon szakszervizhez, a pontos cikkszám és gyártási szám megadásával. Csak eredeti Wamsler alkatrészeket szabad használni. 18. A szilárd tüzelésű készülék, amely az égéshez szükséges levegőt, az azt körülvevő helyiségből vonja el. Ez abban az esetben biztosított, ha 1kW névleges fűtőértékre 4 légköbméter térfogat esik.
-
Seite 74: Üzembe Helyezés
1.2 Üzembe helyezés Tüzelőanyagok: A készülék az alábbiakban felsorolt tüzelőanyagokkal használható. Csak ez által biztosítható a „füstszegény” és zavarmentes üzemeltetés. Csak száraz fát használjon max. 20 % nedvességtartalommal. Tüzelőanyag-fajták Fűtőérték kb. kJ/kg Keményfa 19.500 Puhafa 14.600 Barnaszén - brikett 11.500 1. -
Seite 75: Üzemen Kívül-Helyezés
A készülék az EN 12815 szabvány szerinti főzővizsgálatnak megfelel. A primer levegőszabályzót főzéskor a 2. táblázatnak megfelelően állítsa be és helyezze az edényt a fedlapon kijelölt helyre. (lásd a mellékelt ábrán) TILOS környezetszennyező anyagok elégetése a készülékben! A begyújtáshoz vékony száraz gyújtóst, faforgácsot vagy grillbegyújtót kell felhasználni, de semmi esetben sem szabad folyékony segédanyagot! ELSŐ... -
Seite 76: Tisztítás És Gondozás
csak a parázságy lehet a tűztérben, azaz nem szabad, hogy lángok legyenek láthatók benne. A szekunder levegő gondoskodik a füstgázban található éghető összetevők utólagos elégetéséről. Ez a környezetet kímélő, füst és koromszegény égést jelenti. Amennyiben a kandallóját az átmeneti időben üzembe helyezné, akkor ellenőrizze előzetesen a kéményhuzatot, mivel ez magas külső... -
Seite 77: Üzemzavar-Okok,Elhárításuk
1.6 Üzemzavar-okok,elhárításuk Üzemzavar fajtája Lehetőséges okai: Elhárítás: A kandallót a használati utasítás szerint A felhasznált védőfesték több órán át kis fokozaton üzemeltetni. Szagképződés: kikeményedése Ezek után több órára maximális Olajmaradékok kigőzölgése teljesítményre felfűteni. Túl kis készülékteljesítményt Szakemberrel vizsgáltassuk meg az Ön választottuk hősszükségletét. -
Seite 78: Elhelyezési Helység
2.2 Elhelyezési helység Mivel a kandalló az égéshez szükséges levegőt az elhelyezési helységből veszi, ezért gondoskodni kell állandóan elég levegő-utánpótlásról. Biztosítani kell, hogy 4 m³ légtérfogat jusson minden kW névleges teljesítményre. Erre a kandallóra ez azt jelenti, hogy az elhelyezési helységnek min. 24 / 32 m³ -nek kell lennie. Amennyiben a méret csekélyebb lenne, úgy más helységek összenyitásával kell létrehozni a szellőzőnyílásokat. -
Seite 79: Kéménycsatlakozás
2.4 Kéménycsatlakozás Figyelem! A készülék csatlakoztatása előtt minden esetben az illetékes kéményseprő-mester hozzájárulását kell kérni. Az összekötő- és bekötési elemeknek mind a készülékhez, mind pedig egymáshoz jól tömítve és tartósan kell csatlakozniuk. A füstcső nem nyúlhat be a kémény szabad keresztmetszetébe. A kémény és a kandalló közötti összekötőelemnek ugyanolyan keresztmetszetűnek kell lennie, mint a kandalló... - Seite 80 Helyes Helytelen min.50cm Kémény keresztmetszet szűkítésa túlzottan betolt füstcső miatt. Torlódás az egymással szembe bevezetett füstcsövek miatt. min.30cm Hibás huzat a nem használt tűzhely nyitott ajtaja miatt. Fals levegő nyitott csőcsatlakozó miatt. Fals levegő tö- mítetlen csőcsat- lakozás miatt. Hamis levegő beáram- lása nyitott vagy tömítetlen kémény- tisztító...
-
Seite 81: Műszaki Adatok
3. Műszaki adatok 3.1 Méretrajz, Műszaki jellemzők 109 65 109 85 Kamino Kamino Típus megnevezése Trendy 6 Trendy 8 R-247495 R-400610 KERMI engedély száma R-387578-1 R-387582-1 R-387582-2 Névleges teljesítmény Füstcső csatlakozás Ø 120 Fűtésre ajánlott lég m³ 115/68/45 185/105/71 Huzatigény minimum Névleges teljesítménynél Füstgáz Mennyiség... - Seite 82 Magyarázat Öntött vas lap Tüzelőajtó üveggel Hamuajtó Füstcsőcsonk Tüzelőanyag választó („2” = Fa, „1” = Szen) (5.kép) Primer levegőszabályzó (6.kép) Szekunderlevegő szabályzó (11.kép) Zománcozott lemezburkolat Falazat Rostélymozgató kar (9.kép) Hamuláda Tüzelő- és hamuajtó fogantyú Parázsajtó (csak 8kW-os kivitelnél) Lábazat...
- Seite 83 1. kép: Kamino Trendy 6kW 2. kép: Kamino Trendy 8kW . kép . kép...
- Seite 84 5.kép 6.kép 7.kép 8. kép 9.kép 10.kép...
- Seite 85 .kép A feltüntetett súly- és méretadatok tájékoztató jellegűek! Cégünk a konstrukció módosításának jogát fenntartja, amennyiben ezek a műszaki színvonalat emelik vagy a minőséget javítják. Pótalkatrész rendelésnél kérjük, hogy adja meg a készülék típusát, gyártási számát (a jótállási jegyről vagy a készülékre ragasztott adattábláról), az alkatrész nevét és kódszámát:...
- Seite 88 D – 85748 Garching bei München Telefon +49 (0)89 32084-0 Telefax +49 (0)89 32084-294 www.wamsler.eu Änderungen, die dem technischen Fortschritt dienen und / oder einer Qualitätsverbesserung bewirken, behalten wir uns vor. Für Druckfehler und Änderungen nach Drucklegung können wir keine Haftung übernehmen.