Inhaltsverzeichnis
Werbung
Verfügbare Sprachen
Verfügbare Sprachen
Quicklinks
Werbung
Kapitel
Inhaltsverzeichnis

Verwandte Anleitungen für Pioneer XW-BTS5-K


Inhaltszusammenfassung für Pioneer XW-BTS5-K
- Seite 1 XW-BTS5 -K/-W WIRELESS SPEAKER SYSTEM Enceinte sans fil Sistema de Altavoces Inalámbrico Wireless speaker system Diffusore Wireless Draadloos speaker systeem Operating Instructions Mode d’emploi Manual de instrucciones Bedienungsanleitung Istruzioni per l’uso Handleiding...
- Seite 2 IMPORTANT CAUTION RISK OF ELECTRIC SHOCK DO NOT OPEN CAUTION: The lightning flash with arrowhead symbol, The exclamation point within an equilateral within an equilateral triangle, is intended to TO PREVENT THE RISK OF ELECTRIC triangle is intended to alert the user to the alert the user to the presence of uninsulated SHOCK, DO NOT REMOVE COVER (OR presence of important operating and...
- Seite 3 (including products supported by this unit). • Make sure to grasp the body of the AC adapter when • Pioneer is not responsible for any malfunction of the removing it from the power outlet. If you pull the...
-
Seite 4: Inhaltsverzeichnis
* There will not be additional notification in this booklet if there is/ or will be any design change to the product itself. * Thank you for the purchase of Pioneer product, please read Operating Instructions before use for the 1st time for correct operation. Keep this Operating Instructions for your future reference. -
Seite 5: Before Start
Before Start 1. Accessory Check Up Check the following items when opening the package: • AC adapter × 1 (include Power Plug × 1) • Speaker cable × 1 • Rubber foot × 8 • Warranty card × 1 • Operating Instructions (This Document) 2. -
Seite 6: Connect Dc Power
Before Start CAUTION • These speaker terminals carry HAZARDOUS LIVE voltage. To prevent the risk of electric shock when connecting or disconnecting the speaker cables, disconnect the power cord before touching any uninsulated parts. • Do not connect the supplied speakers with any other amplifier. This may result in malfunction or fire. -
Seite 7: Part Names And Functions
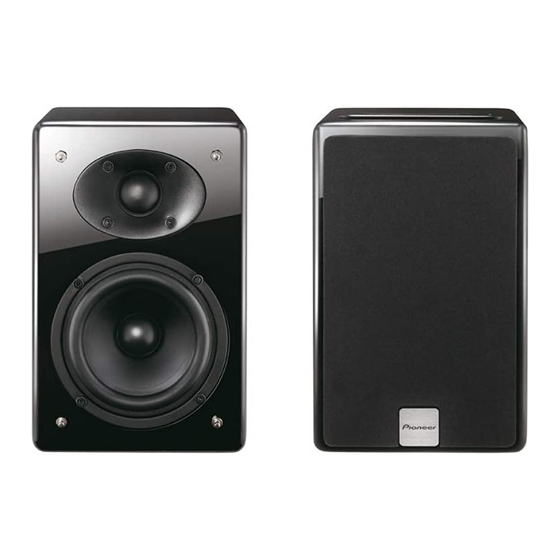
Part names and functions Main view Attaching Rubber feet Top panel Apply the accessory rubber feet to (page 8) the bottom surface of the unit. Left Speaker Right Speaker Rear view Right Speaker Left Speaker Back Panel 1. DC IN Jack Connect the AC adapter. -
Seite 8: Top Panel
Part names and functions Top Panel 1. MODE Indicator 4. Mute • Light up Indicate green when the unit is • Silence the unit or restore the sound. in Bluetooth mode. ※ Blink MODE Indicator during Mute. • Light up Indicate orange when the unit •... -
Seite 9: Getting Started
Getting started Turning on STANDBY/ON] Press button. The indicator would light. This unit switches to the last select mode. APS mode • After this unit is kept inactive for 20 minutes, it automatically switches to the standby mode. • When 5 minutes before switching to the standby mode automatically, the indicator starts to blink. -
Seite 10: Bluetooth Audio Playback
For details, refer to the user manual for the Bluetooth wireless technology enabled device. Note • The Bluetooth wireless technology enabled device must support A2DP profiles. • Pioneer does not guarantee proper connection and operation of this unit with all Bluetooth wireless technology enabled devices. ® • The Bluetooth word mark and logos are registered trademarks owned by Bluetooth SIG, Inc. - Seite 11 Bluetooth Audio playback 1. Press [INPUT] button to select Bluetooth mode. (Mode Indicator: green). 2. Press and hold [PAIRING] button until you hear 2 consecutive “beep” sounds. Then, the blue indicator on the top panel blinks quickly and the unit will enter the pairing mode. 3.
- Seite 12 Bluetooth Audio playback Radio wave caution This unit uses a 2.4 GHz radio wave frequency, which is a band used by other wireless systems (see list below). To prevent noise or interrupted communication, do not use this unit nearby such devices, or make sure these devices are switched off during use. •...
- Seite 13 Bluetooth Audio playback Scope of operation Use of this unit is limited to home use. (Transmission distances may be reduced depending on communication environment). In the following locations, poor condition or inability to receive radio waves may cause the audio to be interrupted or stopped: •...
-
Seite 14: Other Connections
Other Connections • Before making or changing the connections, switch off the power and disconnect the power plug from the power outlet. • When playing music through AUX mode, the music volume will vary depending on the volume of the music player. If there is distortion when the volume is set at max, lower the music player’s volume and to avoid distortion. -
Seite 15: Additional Information
If the trouble cannot be rectified even after checking the points below, ask your nearest Pioneer authorized service center or your dealer to carry out repair work. • If the unit does not operate normally due to external effects such as static electricity, disconnect the power plug from the outlet and insert it again to return to normal operating conditions. - Seite 16 Additional Information Problem Remedy The Bluetooth wireless • Check that no object that emits electromagnetic technology device cannot be waves in the 2.4 GHz band (microwave oven, connected or operated. Sound wireless LAN device or Bluetooth wireless from the Bluetooth wireless technology apparatus) is near the unit.
-
Seite 17: Cautions On Use
Additional Information Do not expose to heat. Cautions on use Do not place this unit on top of an amplifier When moving this unit or other components that generate heat. When moving this unit, press When rack mounting it, to avoid the heat button, and then STANDBY/ON] given off by the amplifier or other audio... -
Seite 18: Specifications
Additional Information Specifications • Amplifier section RMS Power Output: Front Left/Right ... 25 W + 25 W (RMS, 1 kHz, 10 %, T.H.D., 6 Ω) • Speaker section System ....2-way system Speakers: Tweeter. - Seite 20 IMPORTANT ATTENTION DANGER D´ELECTROCUTION NE PAS OUVRIR ATTENTION: Ce symbole de l’éclair, placé dans un Ce point d’exclamation, placé dans un triangle équilatéral, a pour but d’attirer POUR ÉVITER TOUT RISQUE triangle équilatéral, a pour but d’attirer l’attention de l’utilisateur sur la présence, à D’ÉLECTROCUTION, NE PAS ENLEVER LE l’attention de l’utilisateur sur la présence, COUVERCLE (NI LE PANNEAU ARRIÈRE).
- Seite 21 (y compris les Vérifier le câble d’alimentation de temps en temps. produits pris en charge par cet appareil). Contacter le service après-vente PIONEER le plus proche • Pioneer n’est pas responsable d’un mauvais ou le revendeur pour un remplacement.
- Seite 22 * Il n’y aura pas de notifications supplémentaires dans ce livret s’il a ou aura des modification de conception du produit lui-même. * Merci d’avoir acheté un produit Pioneer, veuillez lire le mode d’emploi avant d’utiliser l’appareil pour la première fois. Conservez ce mode d’emploi pour une référence ultérieure.
-
Seite 23: Avant De Commencer
Avant de commencer 1. Vérification des accessoires Vérifiez les articles suivants lors de l’ouverture de l’emballage: • Adaptateur secteur × 1 (connecteur d’adaptateur secteur × 1) • Câble d’enceinte × 1 • Pied en caoutchouc × 8 • Carte de garantie × 1 •... -
Seite 24: Connexion De L'alimentation Cc
Avant de commencer ATTENTION • Les bornes des haut-parleurs sont sous une tension ACTIVE DANGEREUSE. Pour éviter tout risque de décharge électrique lors du branchement et du débranchement des câbles de haut-parleur, débranchez le cordon d’alimentation avant de toucher des parties non isolées. -
Seite 25: Nom Et Fonctions Des Composants
Nom et fonctions des composants Vue principale Fixation des pieds en caoutchouc Panneau supérieur Fixez les pieds en caoutchouc (page 8) fournis sur la surface inférieure de l’appareil. Enceinte gauche Enceinte droite Vue arrière Enceinte droite Enceinte gauche Panneau arrière 1. -
Seite 26: Panneau Supérieur
Nom et fonctions des composants Panneau supérieur 1. Indicateur MODE 4. Sourdine • S’allume en vert quand l’appareil est • Coupe le son de l’appareil ou rétablit en mode Bluetooth. le son. • S’allume en orange quand l’appareil ※ L’indicateur MODE clignote est en mode AUX. -
Seite 27: Pour Commencer
Pour commencer Mise sous tension Appuyez sur la touche [ STANDBY/ON]. L’indicateur s’allume. L’appareil commute sur le dernier mode sélectionné. Mode APS • Si l’appareil est laissé inactif pendant 20 minutes, il commute automatiquement en mode de veille. • L’indicateur comment à clignoter 5 minutes avant la mise automatique en mode de veille. Comment mettre hors service le mode APS •... -
Seite 28: Lecture Audio Bluetooth
• Le périphérique utilisant la technologie sans fil Bluetooth doit être compatible avec les profile A2DP. • Pioneer ne garantie pas la connexion correcte ni le fonctionnement de cet appareil avec tous les périphérique utilisant la technologie sans fil Bluetooth. - Seite 29 Lecture audio Bluetooth • Le pairage est nécessaire quand vous utilisez pour la première fois un appareil muni de la technologie sans fil Bluetooth et cet appareil. • Pour autoriser la communication Bluetooth, le pairage doit être réalisé à la fois avec votre système et le périphérique muni de la technologie sans fil Bluetooth.
- Seite 30 Lecture audio Bluetooth 2. Mettez sous tension l’autre appareil apparié et sélectionnez cet appareil à partir de la liste des périphériques Bluetooth. 3. La connexion avec les autres périphériques a réussi et l’indicateur bleu arrête de clignoter et reste allumé. •...
- Seite 31 Lecture audio Bluetooth • S’il y a quelque chose qui bloque le chemin entre cet appareil (y compris les périphériques pris en charge par cet appareil) et le périphérique muni de la technologie sans fil Bluetooth (comme une porte en métal, mur en béton ou isolation contenant du papier d’aluminium), vous devrez peut-être modifier l’emplacement de votre système pour empêcher le bruit et les interruptions.
-
Seite 32: Autres Connexions
Autres connexions • Avant de faire ou de changer les connexions, mettez l’appareil hors tension et débranchez la fiche d’alimentation de la prise secteur. • Lors de la lecture d’une musique avec le mode AUX, le volume de la musique varie en fonction du volume du lecteur musical. -
Seite 33: Informations Additionnelles
électriques utilisées. Si le problème ne peut pas être corrigé même après la vérification des points ci-dessous, consultez votre centre de service autorisé Pioneer le plus proche ou votre revendeur pour une réparation. • Si l’appareil ne fonctionne pas normalement à cause d’effets extérieurs tels que de l’électricité... - Seite 34 Informations additionnelles Problème Remède Un appareil muni d’e la • Vérifiez qu’aucun objet émettant des ondes technologie sans fil Bluetooth électromagnétique dans la bande 2,4 GHz (four à ne peut pas être connecté ni micro-ondes, appareil réseau sans fil ou appareil commandé.
-
Seite 35: Précautions D'utilisation
Informations additionnelles Ne déposez aucun objet sur l’appareil Précautions d’utilisation Ne posez rien sur le dessus de cet appareil. Lors du déplacement de cet appareil Ne bouchez pas les orifices de ventilation. Lors du déplacement de cet appareil, puis N’utilisez pas cet appareil sur une appuyez sur la touche STANDBY/ON] couverture, un lit, un canapé,etc. - Seite 36 Informations additionnelles Nettoyage de cet appareil Spécifications • Débranchez le cordon d’alimentation • Section de l’amplificateur de la prise secteur murale lors du Puissance de sortie (RMS) nettoyage de cet appareil. Avant gauche/droite ..25 W + 25 W •...
- Seite 38 IMPORTANTE CAUTION RISK OF ELECTRIC SHOCK DO NOT OPEN ATENCIÓN: La luz intermitente con el símbolo de punta El punto exclamativo dentro un triángulo de flecha dentro un triángulo equilátero. PARA PREVENIR EL PELIGRO DE CHOQUE equilátero convenido para avisar el usuário Está...
- Seite 39 (y los productos compatibles con ella). Revise el cable de alimentación está dañado, solicite el • Pioneer no es responsable del mal funcionamiento de reemplazo del mismo al centro de servicio autorizado los productos compatibles con Pioneer por motivos PIONEER más cercano, o a su distribuidor.
- Seite 40 * No se incluirán notificaciones adicionales en este manual en caso de que se produzcan modificaciones en el diseño del producto. * Gracias por adquirir un producto Pioneer. Lea las instrucciones de funcionamiento antes de utilizarlo por primera vez para hacerlo de forma correcta. Guarde estas instrucciones de funcionamiento para usarlas como referencia en el futuro.
-
Seite 41: Antes De Comenzar
Antes de comenzar 1. Contenido de la caja Asegúrese de que la caja contiene los siguientes elementos al abrirla: • Adaptador de CA × 1 (incluye Enchufe × 1) • Cable para altavoz × 1 • Pies de goma × 8 •... -
Seite 42: Conexión De La Alimentación De Cc
Antes de comenzar PRECAUCIÓN • Por estos terminales de altavoz circula tensión ACTIVA que es PELIGROSA. Para evitar el peligro de descargas eléctricas al conectar o desconectar los cables de altavoz, desenchufe el cable de alimentación antes de tocar las partes de los cables que no están aisladas. -
Seite 43: Funciones Y Nombres De Los Componentes
Funciones y nombres de los componentes Vista principal Colocación de las patas de goma Panel superior Coloque las patas de goma en la (página 8) superficie inferior de la unidad. Altavoz izquierdo Altavoz derecho Vista trasera Altavoz derecho Altavoz izquierdo Panel posterior 1. -
Seite 44: Panel Superior
Funciones y nombres de los componentes Panel superior 1. Indicador de MODO 4. Silencio • Se ilumina en color verde cuando la • Silencia la unidad o restablece el unidad está en modo Bluetooth. sonido. • Se ilumina en color naranja cuando la ※... -
Seite 45: Primeros Pasos
Primeros pasos Encendido Pulse el botón [ STANDBY/ON]. El indicador se encenderá. La unidad cambia al último modo seleccionado. Modo APS • Tras 20 minutos de inactividad, esta unidad cambia automáticamente al modo de espera. • 5 minutos antes de cambiar automáticamente al modo de espera, el indicador empieza a parpadear. -
Seite 46: Reproducción De Audio Mediante Bluetooth
Nota • El dispositivo equipado con tecnología inalámbrica Bluetooth debe ser compatible con perfiles A2DP. • Pioneer no garantiza que la conexión se realice correctamente ni que esta unidad funcione con cualquier dispositivo equipado con tecnología inalámbrica Bluetooth. ® • La marca literal y los logotipos Bluetooth son marcas registradas propiedad de Bluetooth SIG, Inc., y cualquier uso de dichas marcas por PIONEER CORPORATION... - Seite 47 Reproducción de audio mediante Bluetooth • La sincronización es indispensable cuando utiliza por primera vez un dispositivo con tecnología inalámbrica Bluetooth y esta unidad. • Para habilitar las comunicaciones mediante Bluetooth, debe llevar a cabo la sincronización tanto con el sistema como con el dispositivo con tecnología inalámbrica Bluetooth. 1.
- Seite 48 Reproducción de audio mediante Bluetooth 2. Encienda otro dispositivo sincronizado y seleccione esta unidad en la lista de conexiones Bluetooth del dispositivo. 3. La conexión con otros dispositivos se ha realizado con éxito. El indicador azul dejará de parpadear y se quedará fijo. •...
- Seite 49 Reproducción de audio mediante Bluetooth • Si algún objeto está obstaculizando la línea de visión entre esta unidad (o los dispositivos compatibles con la misma) y el dispositivo equipado con tecnología inalámbrica Bluetooth (como por ejemplo una puerta de metal, un muro de hormigón o un sistema de aislamiento con papel de aluminio), tendrá...
-
Seite 50: Otras Conexiones
Otras conexiones • Antes de realizar o cambiar conexiones, apague la unidad y desenchufe el cable de alimentación de la toma de corriente. • Al reproducir música en modo AUX, el volumen de la música puede variar en función del volumen del reproductor de música. -
Seite 51: Información Adicional
Si el problema persiste tras haber comprobado todos los puntos que aparecen a continuación, póngase en contacto con su centro de servicio autorizado por Pioneer más cercano o con su proveedor para que lleve a cabo los trabajos de reparación pertinentes. - Seite 52 Información adicional Problema Solución El dispositivo con tecnología • Compruebe que no haya ningún objeto que emita inalámbrica Bluetooth no ondas electromagnéticas en la banda de 2,4 GHz funciona o no se puede (microondas, dispositivo de LAN inalámbrica o conectar. El dispositivo aparatos con tecnología inalámbrica Bluetooth) con tecnología inalámbrica cerca de la unidad.
-
Seite 53: Precauciones De Uso
Información adicional No la exponga al calor. Precauciones de uso No coloque esta unidad encima de un Cambio de ubicación de la unidad amplificador ni de otros componentes que Antes de mover esta unidad, pulse el botón generen calor. y desenchufe el cable STANDBY/ON] Si desea montarla en bastidor, colóquela en de alimentación. - Seite 54 Información adicional Especificaciones Nota • Características del amplificador • Las especificaciones y el diseño están Potencia de salida RMS: sujetos a posibles modificaciones sin Delantero izquierdo/derecho previo aviso, con el fin de mejorar el ......25 W + 25 W producto.
- Seite 56 WICHTIG CAUTION RISK OF ELECTRIC SHOCK DO NOT OPEN ACHTUNG: Das Blitzsymbol in einem Dreieck weist den Ein Ausrufezeichen in einem Dreieck weist UM SICH NICHT DER GEFAHR EINES Benutzer darauf hin, dass eine den Benutzer auf wichtige Bedienungs- und ELEKTRISCHEN SCHLAGES Berührungsgefahr mit nicht isolierten Teilen Wartungsanweisungen in den Dokumenten...
- Seite 57 Gerät (einschließlich der von diesem Gerät Sollte es beschädigt sein, wenden Sie sich an Ihre nächste unterstützten Produkte). autorisierte PIONEER-Kundendienststelle oder Ihren • Pioneer ist nicht verantwortlich für irgendwelche Händler, um es zu ersetzen. Störungen der kompatiblen Pioneer-Produkte infolge von Kommunikationsfehlern/-störungen, die auf...
- Seite 58 * Sollten Änderungen am Design des Produktes vorgenommen werden, erfolgt keine zusätzliche Benachrichtigung in dieser Bedienungsanleitung. * Wir danken Ihnen dafür, dass Sie sich für dieses Produkt von Pioneer entscheiden haben. Bitte lesen Sie diese Bedienungsanleitung vor der Erstinbetriebnahme aufmerksam durch, um das Produkt korrekt zu bedienen. Bitte bewahren Sie diese Bedienungsanleitung für spätere Bezugnahme griffbereit auf.
-
Seite 59: Vor Der Inbetriebnahme
Vor der Inbetriebnahme 1. Überprüfen des mitgelieferten Zubehörs Bitte vergewissern Sie sich, dass die folgenden Artikel im Verpackungskarton enthalten sind: • Netzadapter × 1 (einschließlich Netzstecker × 1) • Lautsprecherkabel × 1 • Gummifüße × 8 • Garantiekarte × 1 •... -
Seite 60: Anschließen Der Gleichstromversorgung
Vor der Inbetriebnahme ACHTUNG • An den Lautsprecherklemmen dieses Gerätes liegt eine potentiell GEFÄHRLICHE Spannung an. Zur Vermeidung von Stromschlaggefahr ist unbedingt darauf zu achten, den Netzstecker beim Anschließen und Abtrennen der Lautsprecherkabel von der Netzsteckdose zu trennen, bevor irgendwelche nicht isolierten Teile berührt werden. •... -
Seite 61: Bezeichnungen Und Funktionen Der Teile
Bezeichnungen und Funktionen der Teile Hauptansicht Befestigen der Gummifüße Oberseite Befestigen Sie die mitgelieferten (Seite 8) Gummifüße an der Unterseite des Geräts. Linker Lautsprecher Rechter Lautsprecher Rückansicht Rechter Lautsprecher Linker Lautsprecher 1. Buchse DC IN Rückwand Diese Buchse dient zum Anschließen des Netzadapters. -
Seite 62: Oberseite
Bezeichnungen und Funktionen der Teile Oberseite 1. MODUS-Anzeige 4. Stummschaltung • Diese Anzeige leuchtet grün, wenn • Diese Taste dient zum Stummschalten das Gerät auf den Bluetooth-Modus bzw. Wiederherstellen der geschaltet ist. Tonwiedergabe. • Diese Anzeige leuchtet orangefarben, ※ Wenn die Tonwiedergabe wenn die Anzeige auf den AUX-Modus stummgeschaltet ist, blinkt die geschaltet ist. -
Seite 63: Erste Schritte
Erste Schritte Einschalten Drücken Sie die Taste [ STANDBY/ON]. Die Anzeige leuchtet. Dieses Gerät schaltet auf den zuletzt gewählten Modus um. APS-Modus • Wenn dieses Gerät 20 Minuten lang nicht verwendet wird, schaltet es automatisch in den Bereitschaftsmodus um. • Fünf Minuten, bevor das Gerät automatisch in den Bereitschaftsmodus umschaltet, beginnt die Anzeige zu blinken. -
Seite 64: Bluetooth-Audiowiedergabe
Sie in der Bedienungsanleitung des Geräts mit Bluetooth-Technologie. Hinweis • Das Gerät mit drahtloser Bluetooth-Technologie muss A2DP-Profile unterstützen. • Pioneer bietet keine Gewähr für einen einwandfreien Anschluss und Betrieb dieses Geräts mit allen Arten von Geräten, die mit drahtloser Bluetooth-Technologie ausgestattet sind. - Seite 65 Bluetooth-Audiowiedergabe • Die Ausführung der Paarung ist erforderlich, wenn Sie ein mit Gerät mit drahtloser Technologie zum ersten Mal mit diesem Gerät verwenden. • Um die Bluetooth-Kommunikation zu ermöglichen, sollte die Paarung sowohl mit Ihrem Gerät und mit dem Gerät mit drahtloser Bluetooth-Technologie ausgeführt werden. 1.
- Seite 66 Bluetooth-Audiowiedergabe 2. Schalten Sie das andere gepaarte Gerät ein, und wählen Sie dieses Gerät aus der Bluetooth-Liste des genannten Geräts aus. 3. Ist die Verbindung mit anderen Geräten erfolgreich, so wechselt die blaue Anzeige von einem Blinken auf ein durchgehendes Leuchten. •...
- Seite 67 Bluetooth-Audiowiedergabe • Wenn irgendein Gegenstand den Weg zwischen diesem Gerät (einschließlich der von diesem Gerät unterstützten Produkte) und dem Gerät mit drahtloser Bluetooth- Technologie behindert (z. B. eine Metalltür, eine Betonwand oder eine Isolierung mit Aluminiumfolie), kann eine Veränderung des Aufstellortes dieses Geräts erforderlich sein, um Rauschen und Signalunterbrechungen zu verhindern.
-
Seite 68: Weitere Anschlüsse
Weitere Anschlüsse • Bevor Sie irgendwelche Anschlüsse durchführen oder verändern, schalten Sie das Gerät aus und trennen Sie den Netzstecker von der Netzsteckdose. • Bei der Musikwiedergabe im AUX-Modus hängt Lautstärkepegel vom Lautstärkepegel ab, der am Musikplayer eingestellt wurde. Sollte eine Klangverzerrung auftreten, wenn der Lautstärkepegel auf den Höchstwert eingestellt ist, verringern Sie den Lautstärkepegel des Musikplayers, um die Verzerrung aufzuheben. -
Seite 69: Zusätzliche Informationen
Betrieb befindliche Elektrogeräte. Wenn sich eine Störung anhand der unten angegebenen Abhilfemaßnahmen nicht beseitigen lässt, wenden Sie sich bitte zwecks Reparatur des Geräts an Ihren Fachhändler oder eine Pioneer-Kundendienststelle. • Wenn das Gerät aufgrund externer Einwirkungen wie statischer Elektrizität nicht richtig funktioniert, trennen Sie den Netzstecker von den Netzsteckdose, und schließen Sie ihn... - Seite 70 Zusätzliche Informationen Problem Abhilfemaßnahme Ein Gerät mit drahtloser • Vergewissern Sie sich, dass sich kein Gerät, das Bluetooth-Technologie kann elektromagnetische Wellen auf dem 2.4 GHz-Band nicht angeschlossen oder abgibt, in der Nähe dieses Geräts befindet (z. B. ein bedient werden. Das Gerät Mikrowellenherd, ein drahtloses LAN-Gerät oder mit drahtloser Bluetooth- ein Gerät mit drahtloser Bluetooth-Technologie).
-
Seite 71: Vorsichtshinweise Zum Gebrauch
Zusätzliche Informationen Stellen Sie keine Gegenstände auf Vorsichtshinweise zum Gebrauch dieses Gerät Bewegen dieses Geräts Stellen Sie keine Gegenstände auf dieses Bevor Sie dieses Gerät bewegen, Gerät. vergewissern Sie sich bitte, drücken Sie Blockieren Sie die Lüftungsöffnungen dann die Taste , und STANDBY/ON] nicht. -
Seite 72: Technische Daten
Zusätzliche Informationen • Verwenden Sie ein weiches Tuch, Frequenzgang ... . 50 Hz bis 20 kHz um dieses Gerät zu reinigen. Bei starker Verschmutzung tauchen • Sonstiges Sie ein weiches Tuch in ein mit 5 Stromversorgung oder 6 Teilen Wasser verdünntes . - Seite 74 IMPORTANTE ATTENTION DANGER D´ELECTROCUTION NE PAS OUVRIR ATTENZIONE: Il simbolo del lampo con terminale a forma Il punto esclamativo in un triangolo PER EVITARE IL RISCHIO DI SCOSSE di freccia situato all’interno di un triangolo equilatero serve ad avvisare l’utilizzatore ELETTRICHE, NON RIMUOVERE IL equilatero serve ad avvisare l’utilizzatore della presenza di importanti istruzioni di...
- Seite 75 Un filo di alimentazione danneggiato aumentare la distanza tra l’apparecchio e tali connettori. potrebbe causare incendi o scosse elettriche. Controllate il • Pioneer rifiuta ogni responsabilità per qualsiasi tipo filo di alimentazione regolarmente. Quando localizzate un di malfunzionamento causato da errori e/o problemi eventuale danno, rivolgetevi al più...
- Seite 76 * Questo manuale non fornisce notifiche aggiuntive sulle eventuali differenze nell’aspetto dell’apparecchio effettivamente venduto. * Grazie per avere acquistato questo apparecchio Pioneer. Prima d’iniziare a usarlo si raccomanda di leggere con attenzione le istruzioni per l’uso qui fornite. È inoltre consigliabile mantenere il manuale a portata di mano per ogni necessità di consultazione.
-
Seite 77: Prima Di Usare L'apparecchio
Prima di usare l’apparecchio 1. Controllo degli accessori All’apertura della confezione verificare l’avvenuta fornitura delle seguenti parti: • N. 1 adattatore CA (compresa spina di corrente n. 1) • N. 1 cavo diffusore • N. 8 piedini di gomma • N. 1 scheda di garanzia •... -
Seite 78: Collegamento Dell'adattatore Ca
Prima di usare l’apparecchio AVVERTENZA • I terminali degli altoparlanti sono sotto tensione, alla stessa PERICOLOSA tensione della corrente di rete. Per prevenire rischi di folgorazioni nel corso delle operazioni di collegamento o di distacco dei cavi degli altoparlanti, staccare il cavo di alimentazione principale prima di toccare qualsiasi parte non isolata. -
Seite 79: Nome E Funzione Delle Parti
Nome e funzione delle parti Vista principale Fissaggio dei piedini di gomma Pannello superiore Fissare sul fondo dell’apparecchio i (pagina 8) piedini di gomma accessori. Diffusore sinistro Diffusore destro Vista posteriore Diffusore destro Diffusore sinistro Pannello posteriore 1. Presa DC IN Vi si collega l’adattatore CA. -
Seite 80: Pannello Superiore
Nome e funzione delle parti Pannello superiore 1. Indicatore del modo 4. Silenziamento • Quando l’apparecchio è impostato nel • Azzera o ripristina il volume al livello modo Bluetooth si accende di colore precedente. verde. ※ Durante il silenziamento il relativo •... -
Seite 81: Per Iniziare
Per iniziare Accensione Premere il tasto [ STANDBY/ON]. Il corrispondente indicatore si accende. L’apparecchio attiva l’ultimo modo selezionato in ordine di tempo. Modo APS • Dopo 20 minuti d’inattività l’apparecchio si porta automaticamente in standby. • 5 minuti prima del passaggio automatico in standby l’indicatore inizia a lampeggiare. Come disattivare il modo APS •... -
Seite 82: Riproduzione Di Un Lettore Bluetooth
Nota • La periferica Bluetooth usata deve essere compatibile con il profilo A2DP. • Pioneer non garantisce la correttezza di connessione e d’uso con questo apparecchio di tutte le periferiche Bluetooth esistenti. ® • Il marchio nominale e il logo Bluetooth sono marchi registrati di proprietà... - Seite 83 Riproduzione di un lettore Bluetooth • Per eseguire l’accoppiamento, cioè l’abilitazione della comunicazione wireless, sono necessari sia la periferica Bluetooth sia questo apparecchio. 1. Premere il tasto [INPUT] selezionare il modo Bluetooth. (L’indicatore del modo si accende di colore verde .) 2.
- Seite 84 Riproduzione di un lettore Bluetooth • La portata efficace della funzione Bluetooth audio è 10 metri (misurata in uno spazio libero; può tuttavia essere influenzata negativamente dalla presenza di pareti e/o altre strutture). Avvertenza sulle onde radio Questo apparecchio fa uso di onde radio nella banda da 2,4 GHz normalmente usata in numerosi altri apparecchi wireless (vedere l’elenco che segue).
- Seite 85 Riproduzione di un lettore Bluetooth Ambito d’uso dell’apparecchio Questo apparecchio è destinato all’uso domestico. (La distanza di trasmissione potrebbe ridursi secondo l’ambiente di comunicazione.) A causa di ostacoli che potrebbero ridurre la capacità di ricezione delle onde radio, l’audio potrebbe subire interruzioni o cessare del tutto nei seguenti ambienti d’uso dell’apparecchio: •...
-
Seite 86: Altri Collegamenti
Altri collegamenti • Prima di eseguire o cambiare un collegamento si raccomanda di spegnere l’apparecchio e di scollegarne il cavo di alimentazione dalla presa di rete. • Durante la riproduzione di musica nel modo AUX il volume potrebbe variare secondo quello del lettore esterno collegato. -
Seite 87: Informazioni Aggiuntive
Qualora il problema riscontrato persista anche dopo avere eseguito i controlli di seguito suggeriti si raccomanda di rivolgersi al più vicino rivenditore Pioneer per gli interventi del caso. - Seite 88 Informazioni aggiuntive Problema Rimedio La periferica Bluetooth non • Verificare che nelle vicinanze dell’apparecchio si connette, oppure non è non vi siano altri apparecchi, ad esempio un forno utilizzabile. Oppure la periferica a microonde, un dispositivo LAN wireless o una Bluetooth connessa non periferica Bluetooth, operanti in trasmissione nella emette alcun suono o questo...
-
Seite 89: Avvertenze Per L'uso
Informazioni aggiuntive Non riscaldare in alcun modo Avvertenze per l’uso l’apparecchio. Prima di spostare l’apparecchio Non collocare l’apparecchio su un Prima di spostare l’apparecchio, si deve amplificatore o un altro componente che quindi spegnere con il tasto STANDBY/ genera calore. e se ne deve scollegare il cavo di In caso di montaggio a rack, per evitare che alimentazione. -
Seite 90: Dati Tecnici
Informazioni aggiuntive Evitare altresì di lasciare oggetti • Accessori di gomma o vinile a contatto con Cavo diffusore ......1 l’apparecchio per lungo tempo, pena il Adattatore CA . - Seite 92 BELANGRIJK CAUTION RISK OF ELECTRIC SHOCK DO NOT OPEN WAARSCHUWING: De lichtflash met pijlpuntsymbool in een Het uitroepteken in een gelijkzijdige gelijkzijdige driehoek is bedoeld om de OM HET GEVAAR VOOR EEN ELEKTRISCHE driehoek is bedoeld om de aandacht van de aandacht van de gebruikers te trekken op SHOCK TE VOORKOMEN, DEKSEL (OF gebruiker te trekken op de aanwezigheid van...
- Seite 93 Zodoende zorgt u ervoor dat het verwijderde product op de juiste wijze wordt behandeld, opnieuw bruikbaar wordt gemaakt, t gerecycleerd en het niet schadelijk is voor de gezondheid en het milieu. K058b_A1_Nl Ontdek nu de voordelen van online registratie! Registreer uw Pioneer product via http://www.pioneer.nl - http://www.pioneer.be http://www.pioneer.eu)
- Seite 94 * Er zal geen aanvullende kennisgeving worden gegeven op dit document als er een verandering wordt/is doorgevoerd in het product zelf. * Hartelijk dank voor het aanschaffen van dit Pioneer product; leest u alstublieft de bedieningshandleiding goed door voor gebruik zodat u er zeker van kunt zijn dat u het product correct bedient.
-
Seite 95: Voor U Begint
Voor u begint 1. Controleren van de accessoires Controleer na het openen van de verpakking of de volgende items aanwezig zijn: • Netstroomadapter × 1 (inclusief netstekker × 1) • Luidsprekerkabel × 1 • Rubber voetje × 8 • Garantiekaart × 1 •... -
Seite 96: Gelijkstroom Aansluiten
Voor u begint LET OP • Op deze luidsprekeraansluitingen staat een GEVAARLIJKE spanning. Om een elektrische schok te voorkomen bij het aansluiten en losmaken van de luidsprekerkabels, moet u de stekker uit het stopcontact halen voordat u niet geïsoleerde onderdelen aanraakt. -
Seite 97: Functies En Namen Van De Onderdelen
Functies en namen van de onderdelen Vooraanzicht Bevestigen van de rubber voetjes Bovenpaneel Bevestig de als accessoire (bladzijde 8) meegeleverde rubber voetjes aan de onderkant van het toestel. Linker luidspreker Rechter luidspreker Achteraanzicht Rechter luidspreker Linker luidspreker Achterpaneel 1. DC IN aansluiting Sluit hierop de netstroomadapter aan. -
Seite 98: Bovenpaneel
Functies en namen van de onderdelen Bovenpaneel 1. Standindicator 4. Geluid uit • Licht groen op wanneer het toestel in • Hiermee kunt u de geluidsweergave de Bluetooth stand staat. uitschakelen of weer inschakelen. • Licht oranje op wanneer het toestel in ※... -
Seite 99: Van Start
Van start Aan zetten Druk op de [ STANDBY/ON] toets. De indicator zal gaan branden. Het toestel schakelt over naar laatst gebruikte stand. APS-stand (spaarstand) • Wanneer het toestel 20 minuten lang aan staat maar niet wordt gebruikt, zal het zichzelf automatisch uit (standby) zetten. -
Seite 100: Bluetooth Audioweergave
Bluetooth draadloze technologie te raadplegen. Opmerking • De apparatuur voorzien van Bluetooth draadloze technologie moet A2DP-profielen ondersteunen. • Pioneer kan geen juiste verbinding en bediening garanderen van dit toestel met alle apparatuur die voorzien is van Bluetooth draadloze technologie. ® • Het merk Bluetooth en de logo’s daarvan zijn gedeponeerde handelsmerken van... - Seite 101 Bluetooth audioweergave • Om Bluetooth communicatie mogelijk te maken, moet het koppelen worden uitgevoerd op zowel uw systeem als op de apparatuur met Bluetooth draadloze technologie worden. 1. Druk op de [INPUT] toets om over te schakelen naar de Bluetooth stand.
- Seite 102 Bluetooth audioweergave 2. Zet het andere apparaat waarmee u verbinding wilt maken aan en selecteer dit toestel van de Bluetooth lijst van het apparaat. 3. Wanneer er met succes verbinding is gemaakt met de andere apparatuur, zal de blauwe indicator stoppen met knipperen en blauw blijven branden.
- Seite 103 Bluetooth audioweergave • Als er iets is dat de baan blokkeert tussen dit toestel (met inbegrip van apparaten die door dit toestel worden ondersteund) en de apparatuur met Bluetooth draadloze technologie (zoals een metalen deur, een betonwand of isolatie waarin aluminiumfolie is verwerkt), kan het zijn dat u de plaats van uw systeem moet veranderen om signaalruis en onderbrekingen te voorkomen.
-
Seite 104: Overige Aansluitingen
Overige aansluitingen • Voordat u aansluitingen maakt of wijzigt, moet u het toestel uit zetten en de stekker uit het stopcontact halen. • Bij weergave via de AUX stand hangt het volume tevens af van het ingestelde volume op de aangesloten muziekspeler. -
Seite 105: Aanvullende Informatie
Als u het probleem ook na controle van de onderstaande punten niet kunt verhelpen, dient u contact op te nemen met uw dichtstbijzijnde officiële Pioneer servicecentrum of met uw vakhandelaar om het toestel te laten repareren. - Seite 106 Aanvullende informatie Probleem Oplossing De apparatuur met Bluetooth • Controleer of er geen apparaat in de buurt van dit draadloze technologie kan toestel is dat elektromagnetische golven in de 2,4 niet verbonden of bediend GHz band uitzendt (magnetron, draadloos LAN- worden.
-
Seite 107: Waarschuwingen In Het Gebruik
Aanvullende informatie Stel het apparaat niet bloot aan hitte. Waarschuwingen in het gebruik Plaats dit toestel niet bovenop een Wanneer dit toestel verplaatst wordt versterker of ander apparaat dat warmte Wanneer dit toestel verplaatst wordt, druk afgeeft. vervolgens op de toets STANDBY/ON] Bij opstelling in een audiorek moet u dit... -
Seite 108: Technische Gegevens
Aanvullende informatie • Bij gebruik van een chemisch Opmerking reinigingsdoekje dient u • De technische gegevens en het de waarschuwingen in de ontwerp kunnen met het oog op gebruiksaanwijzing daarvan zorgvuldig verbeteringen zonder voorafgaande te lezen. kennisgeving worden gewijzigd. Technische gegevens •... - Seite 110 9120 Melsele, Belgium/Belgique 212-0031, Japan http://www.pioneer.eu [*] XW-BTS5-K, XW-BTS5-W English: Dansk: Hereby, Pioneer, declares that this [*] is Undertegnede Pioneer erklærer herved, in compliance with the essential at følgende udstyr [*] overholder de requirements and other relevant væsentlige krav og øvrige relevante provisions of Directive 1999/5/EC.
- Seite 111 1999/5/EF. noteikumiem. Íslenska: Šiuo Pioneer deklaruoja, kad šis [*] Hér með lýsir Pioneer yfir því að [*] er í atitinka esminius reikalavimus ir kitas samræmi við grunnkröfur og aðrar 1999/5/EB Direktyvos nuostatas. kröfur, sem gerðar eru í tilskipun...
- Seite 112 253 Alexandra Road, #04-01, Singapore 159936 TEL: 65-6472-7555 PIONEER ELECTRONICS AUSTRALIA PTY. LTD. 5 Arco Lane, Heatherton, Victoria, 3202, Australia, TEL: (03) 9586-6300 PIONEER ELECTRONICS DE MEXICO S.A. DE C.V. Blvd.Manuel Avila Camacho 138 10 piso Col.Lomas de Chapultepec, Mexico, D.F. 11000 TEL: 55-9178-4270 K002_B3_En Printed in China / Imprimé...