JVC TH-LB2-W Bedienungsanleitung
Inhaltsverzeichnis
Verfügbare Sprachen
Verfügbare Sprachen
Quicklinks
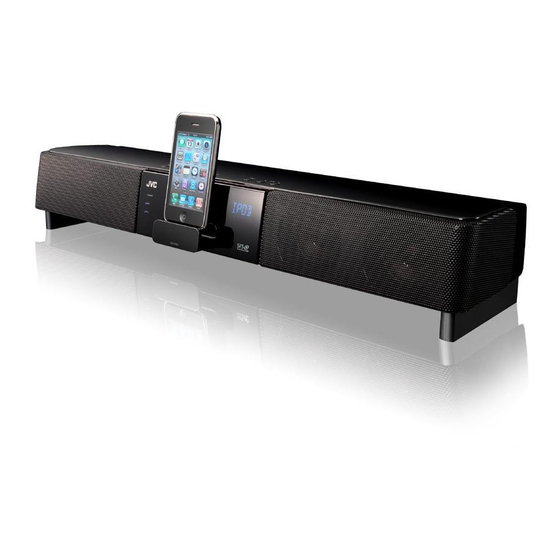
HOME THEATER SOUND SYSTEM
HEIMTHEATER-SOUNDSYSTEM
SYSTÈME HOME CINÉMA
HOME THEATER GELUIDSSYSTEEM
SISTEMA DE SONIDO DE CINE EN CASA
ZVUKOVÝ SYSTÉM DOMÁCÍHO KINA
TH-LB2-B/TH-LB2-W
INSTRUCTIONS
BEDIENUNGSANLEITUNG
MANUEL D'INSTRUCTIONS
GEBRUIKSAANWIJZING
MANUAL DE INSTRUCCIONES
GVT0343-001A
P¤ÍRUâKA K OBSLUZE
[E]
Kapitel
Inhaltsverzeichnis
Fehlerbehebung

Verwandte Anleitungen für JVC TH-LB2-W


Inhaltszusammenfassung für JVC TH-LB2-W
- Seite 1 HOME THEATER SOUND SYSTEM HEIMTHEATER-SOUNDSYSTEM SYSTÈME HOME CINÉMA HOME THEATER GELUIDSSYSTEEM SISTEMA DE SONIDO DE CINE EN CASA ZVUKOVÝ SYSTÉM DOMÁCÍHO KINA TH-LB2-B/TH-LB2-W INSTRUCTIONS BEDIENUNGSANLEITUNG MANUEL D’INSTRUCTIONS GEBRUIKSAANWIJZING MANUAL DE INSTRUCCIONES GVT0343-001A P¤ÍRUâKA K OBSLUZE...
- Seite 2 Warnings, Cautions and Others / Warnung, Achtung und sonstige Hinweise / Mises en grade, précautions et indications diverses / Waarschuwingen, voorzorgen en overige / Avisos, precauciones y otras notas / Varování, upozornění atd CAUTION VOORZICHTIG button in any position does not disconnect the mains line. In beide standen van de toets is de speler niet volledig Disconnect the mains plug to shut the power off completely (the...
-
Seite 3: Achtung: Ausreichende Belüftung
CAUTION: Proper Ventilation To avoid risk of electric shock and fire, and to prevent damage, locate the apparatus as follows: Front: No obstructions and open spacing. Sides/Top/Back: No obstructions should be placed in the areas shown by the dimensions below. Bottom: Place on the level surface. - Seite 4 CAUTION VOORZICHTIG To reduce the risk of electrical shocks, fire, etc.: Ter vermindering van gevaar voor brand, elektrische schokken, Do not remove screws, covers or cabinet. enz.: Do not expose this appliance to rain or moisture. Verwijder geen schroeven, panelen of de behuizing. Stel dit toestel niet bloot aan regen of vocht.
- Seite 5 CAUTION WAARSCHUWING Battery shall not be exposed to excessive heat such as sunshine, Batterij mag niet worden blootgesteld aan extreme hitte, zoals fire or the like. zonnestraling vuur of dergelijke. ACHTUNG PRECAUCIÓN Die Batterie sollte keiner übermäßigen Hitze wie direktem No debe exponer la batería a una fuente de calor intensa como, Sonnenlicht, Feuer o.Ä.
- Seite 7 Für die nicht fachgerechte Entsorgung dieses Abfalls können gemäß der Landesgesetzgebung Strafen ausgesprochen werden. [Geschäftskunden] Wenn Sie dieses Produkt entsorgen möchten, besuchen Sie bitte unsere Webseite http://www.jvc.eu/, auf der Sie Informationen zur Rücknahme des Produkts finden. [Andere Länder außerhalb der Europäischen Union] Diese Symbole sind nur in der Europäischen Union gültig.
-
Seite 24: Einleitung
Einleitung Hinweise zur Handhabung Automatische Energiesparfunktion Wenn 29 Minuten lang in bestimmten Situationen keine Wichtige Vorsichtshinweise Bedienung erfolgt, schaltet das Gerät automatisch aus. Diese Funktion ist bei der Anfangseinstellung aktiviert. Einzelheiten Aufstellung der Anlage siehe „Funktionalität“. • Wählen Sie einen Ort, der eben, trocken und nicht zu heiß oder kalt ist, also zwischen 5°C und 35°C. -
Seite 25: Mitgeliefertes Zubehör
Fußdistanzstück (× 2)* – Schraube für Ständer und Ständerbasis (M2,6 × 10 mm) (× 8) Diese sind werkseitig zusammengebunden. Das Band vor dem Einbau abnehmen. Herzlichen Glückwunsch zum Kauf eines JVC-Produkts. Vor der Inbetriebnahme lesen Sie bitte die Bedienungsanleitung gründlich durch. -
Seite 26: Erste Schritte
Erste Schritte Schließen Sie das Netzkabel erst an, nachdem alle anderen Anschlüsse hergestellt worden sind. Vorbereiten der Anbringen des Geräts Fernbedienung Stellen Sie das Gerät auf einer ebenen, waagerechten Unterlage auf, um beste Klangqualität sicherzustellen. Bei der ersten Verwendung der Fernbedienung ziehen Sie die •... -
Seite 27: Anschließen Des Fernsehfernbedienung-Direktkabels
Anbringen des Ständersystems Anschließen des Fernsehfernbedienung- Sie können die Höhe des Geräts mit dem Ständersystem Direktkabels (mitgeliefert) anpassen. Wenn Sie das Gerät in der Nähe des Fernsehgeräts installieren, kann es das Fernbedienungssignal des Fernsehers blockieren, und Sie können zwei Weisen wählen: dieses gelangt dann nicht zum Fernsehgerät. -
Seite 28: Verwendung Des Kernfilters
Erste Schritte (Fortsetzung) Verwendung des Kernfilters Anschließen des Fernsehgeräts — Betrachten Um Störungen zu reduzieren, bringen Sie die mitgelieferten Kernfilter am Netzkabel und am Kabel für externe Komponenten des Videos/Bildes auf Ihrem Fernsehgerät Sie können ein Video/Bild von dem am Gerät angeschlossenen Führen Sie das Kabel durch den Kernfilter und wickeln Sie iPod auf Ihrem Fernsehgerät betrachten. -
Seite 29: Anschluss Von Externen Komponenten
Funktionalität Anschluss von externen Komponenten Sie können eine analoge Komponente an den ANALOG IN-Anschluss und digitale Komponenten an die Anschlüsse (OPTICAL) DIGITAL IN 1 und (COAXIAL) DIGITAL IN 2 anschließen. Sie können auch einen Subwoofer an den Anschluss SUBWOOFER PRE-OUT anschließen. Subwoofer Cinchkabel (nicht mitgeliefert) -
Seite 30: Verwendung Des Surroundmodus
Funktionalität (Fortsetzung) Wählen der Eingangsquelle Einstellen des Klangpegels Drücken Sie eine der Eingangstasten zum Auswählen Sie können die Pegel der Tiefen und Höhen innerhalb des Bereichs der Eingangsquelle. von –3 bis +3 einstellen. DIGITAL 1: Drücken BASS/TREBLE wiederholt zum Wählen DIGITAL 1 (für die Optoverbindung) des Klangs, den Sie einstellen möchten. -
Seite 31: Tasten Und Lämpchen Auf Der Vorderseite
Wiedergabe Den iPod auf Schlafmodus setzen Drücken Sie iPod 6. Halten Sie iPod 6 gedrückt. • In ausgeschaltetem Zustand wird durch einfaches Drücken Aufrufen des Menüs/Zurückgehen zum von iPod 6 die Stromversorgung eingeschaltet und die zuletzt gezeigten Menü Wiedergabe vom iPod gestartet. Drücken Sie MENU. -
Seite 32: Störungssuche
Störungssuche Wenn Sie ein Problem mit dieser Anlage haben, gehen Sie zunächst diese Liste durch, um hier eine mögliche Lösung zu finden, bevor Sie das Gerät zum Kundendienst einreichen. Netzspannung Die Anlage kann nicht eingeschaltet werden. Das Netzkabel ist nicht richtig angeschlossen. Schließen Sie es ordnungsgemäß... -
Seite 33: Technische Daten
Technische Daten 60 W (30 W + 30 W) bei 4 Ω (10% Klirrfaktor) Ausgangsleistung: Audioteil Analogeingang: ANALOG IN: 1 Vrms/50 kΩ Digitaleingang* : DIGITAL IN 1 (OPTICAL) : –21 dBm bis –15 dBm (660 nm ±30 nm) DIGITAL IN 2 (COAXIAL) : 0,5 Vs-s/75 Ω... - Seite 74 MEMO...
- Seite 75 MEMO...
- Seite 76 EN, GE, FR, NL, SP, CZ © 2012 JVC KENWOOD Corporation 0112WMKMDWJMM...