Herunterladen Inhalt Inhalt Diese Seite drucken
Sharp LL-S201A Installationsanleitung
Vorschau ausblenden Andere Handbücher für LL-S201A:

Werbung

Verfügbare Sprachen

Verfügbare Sprachen

LL-S201A
LCD MONITOR
MONITEUR LCD
MONITOR LCD
LCD FARBMONITOR
SETUP MANUAL
MANUEL D'INSTALLATION
MANUAL DE INSTALACIÓN
INSTALLATIONSANLEITUNG
ENGLISH ...... E1
FRANÇAIS ..... F1
ESPAÑOL .... S1
DEUTSCH ..... D1

Werbung

Inhaltsverzeichnis
loading

Inhaltszusammenfassung für Sharp LL-S201A

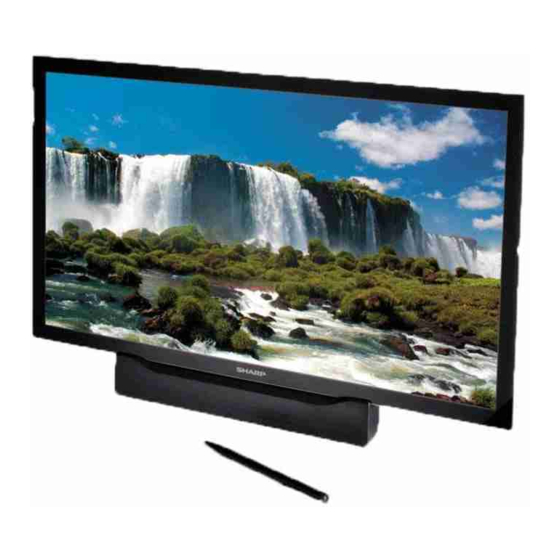
  • Seite 1 LL-S201A LCD MONITOR MONITEUR LCD MONITOR LCD LCD FARBMONITOR SETUP MANUAL MANUEL D’INSTALLATION MANUAL DE INSTALACIÓN INSTALLATIONSANLEITUNG ENGLISH ..E1 FRANÇAIS ..F1 ESPAÑOL ..S1 DEUTSCH ..D1...
  • Seite 2 NOTE FOR USERS IN U.K. IMPORTANT The wires in this mains lead are coloured in accordance with the following code: BLUE: “NEUTRAL” BROWN: “LIVE” CONNECTING PLUG TO MAINS LEAD: As the colours of the wires in the mains lead of this apparatus may not correspond with the coloured markings identifying the terminals in your plugs, proceed as follows: •...
  • Seite 3: Inhaltsverzeichnis

    REFER SERVICING TO QUALIFIED SERVICE PERSONNEL. DEAR SHARP CUSTOMER Thank you for your purchase of a SHARP LCD product. To ensure safety and many years of trouble-free operation of your product, please read the Safety Precautions carefully before using this product.
  • Seite 4: Safety Precautions

    This product is designed for commercial application only and as such it falls outside the scope of Regulation (EC) 1275/2008 implementing EU Directive 2005/32/EC on eco-design requirements for standby and off mode electric power consumption. SHARP do not recommend the product for domestic application and will not accept any liability for such use.
  • Seite 5: Safety Instruction

    - Do not stay in contact with the parts of the product and the sharp pencil. AC adapter that become hot for long periods of time. Doing so may result in low-temperature burns.
  • Seite 6: Supplied Components

     Stand (front, back, bottom cover, Fixing screws: 2): 1  Setup Manual (this manual): 1  Touch pen: 1 * SHARP Corporation holds authorship rights to the Utility Disk program. Do not reproduce it without permission. * Keep packaging for use when transporting monitor, etc. Binding Cables Secure the HDMI cable, DisplayPort cable, and USB cable using the cable clamp.
  • Seite 7: Connecting Peripheral Equipment

    Connecting Peripheral Equipment Caution TIPS • Be sure to turn off the power and disconnect the plug from • The length of the signal cables or surrounding environment the power outlet before connecting/disconnecting cables. may affect the image quality. Also, read the manual of the equipment to be connected. •...
  • Seite 8: Connecting The Monitor To A Power Source

    Connecting the monitor to a power source Caution • Use only the AC adapter and power cord supplied with the monitor. 1. Connect the monitor to the power outlet using the supplied AC adapter and power cord. Back of monitor For power outlet AC adapter...
  • Seite 9: Horizontal Position

    nMounting the monitor on the stand Pen writing position 1. Place the stand on a level surface. Place the monitor at an angle on a table or other level surface. 1. Hold the flap by the depression on the back of the monitor and pull the flap up. 2. Set the monitor on the stand. Set the monitor so that the logo in the center is aligned with the circle mark on the stand.
  • Seite 10: Turning Power On/Off

    Approx. 6.39 (2.9) (including the stand) As a part of our policy of continuous improvement, SHARP reserves the right to make design and specification changes for product improvement without prior notice. The performance specification figures indicated are nominal values of production units. There may be some deviations from...
  • Seite 11: Information Importante

    PROCÉDURE D’ENTRETIEN. CHER CLIENT Nous vous remercions d’avoir acheté cet appareil SHARP à écran LCD. Afin de garantir le bon fonctionnement de ce moniteur, nous vous conseillons de lire attentivement cette brochure et de la conserver pour toute référence ultérieure.
  • Seite 12: Précautions De Sécurité

    PRÉCAUTIONS DE SÉCURITÉ L’électricité remplit de nombreuses fonctions utiles, mais elle peut provoquer des blessures et des dégâts matériels si elle n’est pas utilisée correctement. Cet appareil a été conçu et fabriqué en attachant la plus grande importance à la sécurité. Cependant, une utilisation inadéquate peut entraîner une décharge électrique et/ou un incendie.
  • Seite 13: Mesures De Sécurité

    (CE) 1275/2008 mettant en œuvre la Directive européenne 2005/32/CE sur les exigences d’écoconception en termes de consommation électrique en mode veille ou éteint. SHARP ne recommande pas l’usage domestique de ce produit et n’acceptera aucune responsabilité pour un tel usage.
  • Seite 14: Composants Fournis

     Manuel d’Installation (ce manuel) : 1  Stylet : 1 * SHARP Corporation détient les droits d’auteur du programme de l’Utility Disk. Veuillez ne pas le reproduire sans autorisation de la société. * Conservez l’emballage pour transporter le moniteur, etc.
  • Seite 15: Connexion De Périphériques

    Connexion de périphériques Attention CONSEILS • Veillez à bien mettre hors tension l’interrupteur principal • La longueur des câbles de signal ou l’environnement puis débranchez la prise de l’alimentation secteur avant de ambiant sont susceptibles d’affecter la qualité de l’image. connecter ou de déconnecter les câbles.
  • Seite 16: Raccordement Du Moniteur À Une Source D'alimentation

    Raccordement du moniteur à une source d’alimentation Attention • Utilisez uniquement l’adaptateur secteur et le cordon d’alimentation fournis avec le moniteur. 1. Raccordez le moniteur à la prise d’alimentation à l’aide de l’adaptateur secteur et du cordon d’alimentation fournis. Arrière du moniteur Vers la prise d’alimentation secteur...
  • Seite 17 nFixation du moniteur sur le support Positionnement pour écriture 1. Placez le support sur une surface plane. Placez le moniteur sur le coin d’une table ou d’une autre surface plane. 1. Tenez le volet par la partie creuse située à l’arrière du moniteur et tirez-le vers le haut.
  • Seite 18: Mise Sous / Hors Tension

    Environ 2,9 (sur support) SHARP se réserve le droit d’apporter sans préavis des modifications à la présentation et aux caractéristiques des appareils afin d’amélioration. Les valeurs indiquées dans ce document sont les valeurs nominales des appareils de série mais de légères différences peuvent être constatées...
  • Seite 19: Información Importante

    CUALQUIER REPARACIÓN A UN TÉCNICO DE SERVICIO CALIFICADO. ESTIMADO CLIENTE DE SHARP Gracias por adquirir un producto LCD de SHARP. Para garantizar la seguridad y muchos años de funcionamiento sin problemas, lea atentamente las Precauciones de seguridad antes de utilizar este producto.
  • Seite 20: Precauciones De Seguridad

    PRECAUCIONES DE SEGURIDAD La electricidad se emplea para muchas funciones útiles pero también puede causar lesiones personales y daños en la propiedad si se manipula de forma inadecuada. Este producto se ha diseñado y fabricado poniendo el máximo énfasis en la seguridad.
  • Seite 21: Instrucciones De Seguridad

    (EC) 1275/2008 que implementa la directiva de la UE 2005/32/EC sobre requisitos de diseño ecológico para el consumo energético en los modos en espera y apagado. SHARP no recomienda usar el producto en aplicaciones domésticas y no asumirá responsabilidad alguna por tal uso.
  • Seite 22: Componentes Suministrados

     Manual de Instalación (este manual): 1  Lápiz táctil: 1 * SHARP Corporation posee los derechos de autor del programa Disco de utilidades. No lo reproduzca sin permiso. * Conservar el embalaje para su uso durante el transporte del monitor, etc.
  • Seite 23: Conexión De Equipos Periféricos

    Conexión de equipos periféricos Precaución CONSEJOS • Asegúrese de desconectar el equipo y desenchufarlo de la • La longitud de los cables de señal o el entorno pueden toma de corriente antes de conectar o desconectar los cables. afectar a la calidad de la imagen. Asimismo, lea el manual del equipo que desea conectar.
  • Seite 24: Conexión Del Monitor A Una Fuente De Energía

    Conexión del monitor a una fuente de energía Precaución • Utilice solo el adaptador CA y el cable de alimentación suministrado con el monitor. 1. Conecte el monitor a la toma de corriente con el adaptador CA y el cable de alimentación suministrados. Parte trasera del monitor Para toma de alimentación...
  • Seite 25 nMontaje del monitor sobre el pedestal Posición para escritura con lápiz 1. Coloque el pedestal en una superficie horizontal. Coloque el monitor en ángulo sobre una mesa u otra superficie horizontal. 1. Sujete la solapa por el rebaje situado en la parte posterior del monitor y tire de la sola hacia arriba. 2.
  • Seite 26: Encendido/Apagado

    Aprox. 2,9 (excluyendo el pedestal temporal) Como parte de la política de mejoras continuas, SHARP se reserva el derecho de realizar cambios en el diseño y especificaciones para la mejora del producto sin previo aviso. Las figuras indicadas que especifican el rendimiento son valores nominales de los aparatos de producción.
  • Seite 27 QUALIFIZIERTEM FACHPERSONAL DURCHFÜHREN LASSEN. VEREHRTE KUNDIN, VEREHRTER KUNDE Wir danken Ihnen für den Kauf eines SHARP LCD-Gerätes. Um Ihre Sicherheit sowie einen jahrelangen, störungsfreien Betrieb dieses Produkts zu gewährleisten, lesen Sie bitte den Abschnitt “Sicherheitsvorkehrungen” vor der Verwendung des Produkts durch.
  • Seite 28: Sicherheitsvorkehrungen

    SICHERHEITSVORKEHRUNGEN Elektrizität erfüllt viele nützliche Aufgaben, kann aber auch Personen- und Sachschäden verursachen, wenn sie unsachgemäß gehandhabt wird. Dieses Produkt wurde mit Sicherheit als oberster Priorität konstruiert und hergestellt. Dennoch besteht bei unsachgemäßer Handhabung u.U. Stromschlag- und Brandgefahr. Um mögliche Gefahren zu vermeiden, befolgen Sie beim Aufstellen, Betreiben und Reinigen des Produkts bitte die nachstehenden Anleitungen.
  • Seite 29: Sicherheitsanleitung

    Verordnung (EG) 1275/2008 in Umsetzung der EU-Richtlinie 2005/32/EG hinsichtlich Ökodesign-Anforderungen an den Stromverbrauch elektrischer und elektronischer Haushalts- und Bürogeräte im Bereitschafts- und im Aus-Zustand. SHARP empfiehlt das Produkt nicht für die Anwendung im Haushalt und übernimmt keinerlei Haftung für eine solche Anwendung.
  • Seite 30: Mitgelieferte Komponenten

     Installationsanleitung (diese Anleitung): 1  Touch-Pen: 1 * Die SHARP Corporation besitzt die Autorenrechte am Utility Disk Programm. Eine Vervielfältigung dieses Programms ohne schriftliche Genehmigung ist daher nicht gestattet. * Bewahren Sie die Verpackung auf, für den Fall, dass Sie den Monitor einmal transportieren oder sicher verstauen möchten.
  • Seite 31: Anschließen Von Zusatzgeräten

    Anschließen von Zusatzgeräten Achtung TIPPS • Schalten Sie unbedingt den Hauptschalter aus und ziehen • Die Länge der Signal-Kabel sowie die Umgebungseinflüsse können die Bildqualität beeinträchtigen. Sie den Netzstecker, bevor Sie Kabel anschließen oder • Der Monitor zeigt das Bild von dem Eingang an, an dem abziehen.
  • Seite 32: Anschließen Des Monitors An Eine Stromquelle

    Anschließen des Monitors an eine Stromquelle Achtung • Verwenden Sie nur das mit dem Monitor mitgelieferte Netzkabel und den mit dem Monitor mitgelieferten Netzadapter. 1. Stecken Sie den Monitor unter Verwendung des mitgelieferten Netzadapters und des mitgelieferten Netzkabels an der Netzsteckdose an.
  • Seite 33 nBefestigung des Monitors auf dem Fuß Position zum Schreiben mit dem Touch-Pen 1. Stellen Sie den Fuß auf eine ebene Fläche. Sie können den Monitor leicht angewinkelt auf einen Tisch oder eine andere ebene Oberfläche legen. 1. Greifen Sie die Klappe an der Aussparung an der Rückseite des Monitors und ziehen Sie die Klappe nach oben.
  • Seite 34: Ein- Und Ausschalten

    Ca. 2,9 (auf dem Fuß befestigt) Bedingt durch fortlaufende technische Verbesserungen behält sich SHARP das Recht vor, das Design und die Spezifikationen ohne vorherige Ankündigung ändern zu können. Die angegebenen Leistungswerte stellen die Nennwerte einer in Serienherstellung produzierten Einheit dar.
  • Seite 36 Printed in China Imprimé en China Impreso en Chine Gedruckt in China TINSM1309MPZZ(1)
  • Seite 37 Auch nach erfolgter Einstellung können Änderungen mittels [Operation Mode] <Betriebs Modus> im Menü des Monitors vorgenommen mode] <BETRIEBSMODUS> im Menü des Monitors vorgenommen werden.(Siehe BEDIENUNGSANLEITUNG.) werden. (Siehe BEDIENUNGSANLEITUNG.) Printed in China Imprimé en Chine Impreso en China (LL-S201A) Gedruckt in China...

Inhaltsverzeichnis