Herunterladen Inhalt Inhalt Diese Seite drucken
Inhaltsverzeichnis

Werbung

Verfügbare Sprachen
  • DE

Verfügbare Sprachen

  • DEUTSCH, seite 31
LCD Monitor
LCD Farbmonitor
Moniteur LCD
Monitor LCD
Monitor LCD
LL-191A
OPERATION MANUAL
BEDIENUNGSANLEITUNG
MODE D'EMPLOI
MANUALE D'USO
MANUAL DE FUNCIONAMIENTO

Werbung

Inhaltsverzeichnis
loading

Inhaltszusammenfassung für Sharp LL-191A

  • Seite 1 LCD Monitor LCD Farbmonitor Moniteur LCD Monitor LCD Monitor LCD LL-191A OPERATION MANUAL BEDIENUNGSANLEITUNG MODE D'EMPLOI MANUALE D'USO MANUAL DE FUNCIONAMIENTO...
  • Seite 2: Inhaltsverzeichnis

    TCO'03 (LL-191A-W) ........
  • Seite 3: Notice For Users In The Usa

    Sharp Plaza, Mahwah, New Jersey 07430 TEL: 1-800-BE-SHARP ® * As an NERGY Partner, SHARP has determined that this product meets the NERGY ® guidelines for energy efficiency. This product utilizes tin-lead solder, and fluorescent lamp containing a small amount of mercury.
  • Seite 4: Notice For Users In Europe

    Notice for Users in Europe This equipment complies with the requirements of Directives 89/336/EEC and 73/23/EEC as amended by 93/68/EEC. Dieses Gerät entspricht den Anforderungen der EG-Richtlinien 89/336/EWG und 73/23/EWG mit Änderung 93/68/EWG. Ce matériel répond aux exigences contenues dans les directives 89/336/CEE et 73/23/CEE modifiées par la directive 93/68/CEE.
  • Seite 5: Notice For Users In The Uk

    "WARNING: THIS APPARATUS MUST BE EARTHED." Notice for Users in Australia Service Inquiries Please contact your dealer for service if required or contact Sharp Corporation of Australia on 1 300 13 50 22 for referral to your nearest Sharp authorized Service Center.
  • Seite 6: Tco'03 (Ll-191A-W)

    This makes for a high performance product, designed with the user in focus that also minimizes the impact on our natural environment. LL-191A-W Some of the features of the TCO'03 Display requirements: Ergonomics • Good visual ergonomics and image quality in order to improve the working environment for the user and to reduce sight and strain problems.
  • Seite 7: Tco'99 (Ll-191A-B)

    LL-191A-B Congratulations! You have just purchased a TCO'99 approved and labelled product! Your choice has provided you with a product developed for professional use. Your purchase has also contributed to reducing the burden on the environment and also to the further development of environmentally adapted electronics products.
  • Seite 8 Environmental requirements Flame retardants Flame retardants are present in printed circuit boards, cables, wires, casings and housings. Their purpose is to prevent, or at least to delay the spread of fire. Up to 30% of the plastic in a computer casing can consist of flame retardant substances.
  • Seite 9: English

    Troubleshooting ..............22 Information for customers on environmentally friendly disposal of this SHARP product ..23 Specifications .
  • Seite 10: Tips And Safety Precautions

    - You are advised to retain the carton in case the upgraded without advance notice. monitor needs to be transported. - Sharp Corporation holds authorship rights to the Location Utility Disk program. Do not reproduce it without - Do not use the monitor where ventilation is poor, permission.
  • Seite 11: Product Description

    Product description 1. AUTO button ......This button is used to perform automatic adjustment of the screen (CLOCK, PHASE, H-POS and V-POS). (p.18) 2. MENU button ......This button is used to pop-up, select and close the OSD (On Screen Display) Menu.
  • Seite 12: Angle Adjustment

    Angle adjustment CAUTION! - Be sure to hold both sides of the monitor when adjusting the viewing angle. The LCD panel used in this monitor is made of glass. Pressure from hands on the LCD panel could cause damage. approx. 25° approx.
  • Seite 13: Connecting The Monitor And Turning The Monitor On And Off

    Connecting the monitor and turning the monitor on and off Connect the accessory audio cable CAUTION! When the accessory audio cable is connected to - When connecting, ensure that both the monitor the audio output terminal of the computer, the and computer are switched off.
  • Seite 14: Connection Of Headphones (Commercially Available)

    Connecting the monitor and turning the monitor on and off Connection of headphones Turning the power on (commercially available) 1. Turn on the main power of the monitor. Headphones (commercially available) can be connected. Main power switch Headphone terminal Headphones - When switching the main power switch on and off, always wait for an interval of at least 5 Notes:...
  • Seite 15: Turning The Power Off

    Connecting the monitor and turning the monitor on and off Turning the power off 1. Turn the computer off. 2. Press the monitor's power button. The power LED will disappear. Turn the computer Press power button. off. If the monitor will not be used for a long time, turn off the main power switch of the monitor, and remove the power plug from the outlet.
  • Seite 16: Adjusting The Screen Display And Speaker Volume

    Adjusting the screen display and speaker volume Adjustment lock function Note: - All adjustments will be saved even after turning By disabling the control buttons (i.e. setting the the power off. lock) any attempted changes to adjusted values will be voided. Resetting all adjustment values 1.
  • Seite 17: Adjusting The Speaker Volume

    Adjusting the screen display and speaker volume Adjusting the speaker volume Setting display mode 1. Without the OSD Menu being displayed, press Color tone or brightness can be changed with one command. or the button. 2. Check that [VOLUME] is selected. If it is not selected, press the / MODE button Displays image with the color tone results from...
  • Seite 18: Adjusting The Screen Display

    Adjusting the screen display Adjusting the screen automatically Automatic screen adjustment Automatic adjustment can be performed using either the AUTO button or the MENU button. Options in the ADJUSTMENT Menu can be adjusted automatically (CLOCK, PHASE, H-POS, AUTO button V-POS). 1.
  • Seite 19: Manual Screen Adjustment

    Adjusting the screen display ADJUSTMENT Menu Manual screen adjustment AUTO 1. Display an image that makes the entire screen When [AUTO] is selected with the button, the light. (p.18) [CLOCK], [PHASE], [H-POS] and [V-POS] settings 2. Display the OSD Menu by pressing the MENU are automatically adjusted.
  • Seite 20 Adjusting the screen display GAIN CONTROL Menu COLOR CONTROL Menu AUTO WHITE BALANCE When [AUTO] is selected with the button, the 1. After selecting [WHITE BALANCE], press the [BLACK LEVEL] and [CONTRAST] settings are button. automatically adjusted. After the automatic The WHITE BALANCE menu will be displayed.
  • Seite 21 Adjusting the screen display MODE SELECT-1 Menu MODE SELECT-2 Menu Note: INFORMATION - Depending on the resolution of the input signal, A model name (MODEL), a serial no. (S/N), and even if menu options can be selected, the usage time (USAGE TIME) of the monitor can be display may not change.
  • Seite 22: Monitor Care

    LCD panel. (A soft Please inquire at the shop where you cloth such as gauze or that used for lens cleaning purchased the monitor or your nearest Sharp is suitable.) authorized Service Center. - In the initial period of use, due to the...
  • Seite 23: Information For Customers On Environmentally Friendly Disposal Of This Sharp Product

    YOUR HOUSEHOLD WASTE OR MIXED WITH OTHER WASTES ! YOU MIGHT ENDANGER THE ENVIRONMENT ! Sharp Corporation is committed to protecting the environment and conserving energy. Our goal is to minimize the environmental impact of our products by continually implementing and improving product technologies, designs, and customer information aimed at environmental conservation.
  • Seite 24: Specifications

    Note: 1 W + 1 W - As a part of our policy of continuous Input signal terminal improvement, SHARP reserves the right to make Mini D-sub15 pin (3 row) design and specification changes for product Audio input terminal improvement without prior notice. The...
  • Seite 25 Specifications Relevant signal timings The analog RGB input connector pin (Mini D-sub connector with 15 pins) Display mode Hsync Vsync frequency VESA Function Red video signal input Green video signal input Blue video signal input For red video signal GND For green video signal GND US text For blue video signal GND...
  • Seite 26: Installing Set-Up Information And The Icc Profile (For Windows)

    Installing set-up information and the ICC profile (For Windows) Depending on the type of computer or OS, you For Windows 98 may need to install the monitor set-up information Installing monitor set-up information into on your system. If so, follow the steps below to Windows 98, and setting the monitor's ICC profile install the monitor set-up information.
  • Seite 27 Installing set-up information and the ICC profile (For Windows) For Windows 2000 For Windows Me Installing monitor set-up information into Installing monitor set-up information into Windows Windows 2000, and setting the monitor's ICC Me, and setting the monitor's ICC profile as a profile as a predetermined value.
  • Seite 28 Installing set-up information and the ICC profile (For Windows) Installing the ICC profile For Windows XP Installing the monitor's ICC profile. (If the set-up Installing monitor set-up information into Windows information has already been installed, so too has XP, and setting the monitor's ICC profile as a the profile, and there is no need to install it.) predetermined value.
  • Seite 29: Information About The Colorsync Profile (For Macos)

    Information about the ColorSync profile (For MacOS) About the ColorSync profile ColorSync is Apple Computer's color management system and enables color reproduction characteristics to be realized when used with a compatible application. A ColorSync profile describes the color characteristics of the LCD monitor.
  • Seite 30: Instructions For Attaching A Vesa-Compliant Arm

    Instructions for attaching a VESA-compliant arm The following stand or arm can be attached to the 5. Attach the arm to the monitor with the four screws. monitor. - Stand (sold separately) Model name: NL-S02-H (Ivory) NL-S02-B (Black) - VESA-compatible arm (commercially available) Compatible commercially available arms Attachments must satisfy the following.
  • Seite 31: Deutsch

    Fehlersuche ..............44 Informationen für Kunden über umweltfreundliche Entsorgung dieses SHARP-Produkts ..45 Technische Daten .
  • Seite 32: Tipp Und Sicherheitsvorkehrungen

    - Der Monitor darf niemals mit harten - LCD-Monitor (1) Gegenständen abgerieben oder berührt werden. - Analogsignalkabel (1) - Wir bitten um Ihr Verständnis, dass Sharp (Modellbezeichnung: 0NIT15G4-0015) Corporation über die gesetzlich anerkannte - Audiokabel (1) Leistungshaftung hinaus keine Haftung für Fehler (Modellbezeichnung: 0NIT17A3-U006) übernimmt, die sich aus der Verwendung durch...
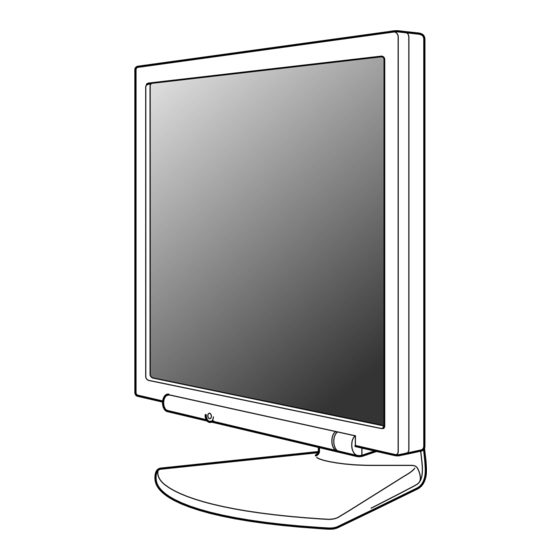
  • Seite 33: Produktbeschreibung

    Produktbeschreibung 1. Taste AUTO ......Diese Taste dient zum Ausführen automatischer Einstellung des Bildschirms (CLOCK, PHASE, H-POS und V-POS). (S.40) 2. Taste MENU ......Mit dieser Taste öffnen, wählen und schließen Sie das OSD (On Screen Display) -Menü. 3. Taste / MODE .......
  • Seite 34: Winkeleinstellung

    Winkeleinstellung ACHTUNG! - Achten Sie darauf, den Monitor beim Einstellen des Sichtwinkels immer an beiden Seiten zu halten. Das in diesem Monitor verwendete LCD- Panel besteht aus Glas. Durch Druck mit der Hand auf das LCD-Panel können Schäden hervorgerufen werden. Ca.
  • Seite 35: Anschließen Des Monitors Und Ein- Und Ausschalten Des Monitors

    Anschließen des Monitors und Ein- und Ausschalten des Monitors ACHTUNG! Hinweis: - Beim Anschluss an die Sun Ultra-Serie ist - Bevor Sie den Monitor anschließen, müssen Sie eventuell ein Wandleradapter (im Handel den Monitor und den Computer ausschalten. erhältlich) erforderlich. - Achten Sie darauf, dass Sie das Kabel nicht überdehnen, und schließen Sie kein Schließen Sie das zusätzliche Audiokabel an...
  • Seite 36: Anschluss Von Kopfhörern (Im Handel Erhältlich)

    Anschließen des Monitors und Ein- und Ausschalten des Monitors Anschluss von Kopfhörern Einschalten des Monitors (im Handel erhältlich) 1. Den Monitor mit dem Hauptnetzschalter einschalten. Kopfhörer (im Handel erhältlich) können angeschlossen werden. Hauptnetzschalter Kopfhöreranschluss Kopfhörer Hinweise: - Beim Aus- und Einschalten des Monitors mit - Wenn Kopfhörer angeschlossen sind, ertönt aus dem Hauptnetzschalter sollten Sie mindestens den Lautsprechern des Monitors kein Klang.
  • Seite 37: Ausschalten Des Monitors

    Anschließen des Monitors und Ein- und Ausschalten des Monitors Ausschalten des Monitors 1. Schalten Sie den Computer aus. 2. Drücken Sie den Netzschalter am Monitor. Die Betriebs-LED erlischt. Schalten Sie den Netzschalter betätigen. Computer aus. Wenn der Monitor längere Zeit nicht verwendet wird, sollten Sie den Monitor mit dem Hauptnetzschalter ausschalten und den Netzstecker von der Netzsteckdose abtrennen.
  • Seite 38: Einstellen Der Bildschirmanzeige Und Der Einstellen Der Bildschirmanzeige Lautsprecher-Lautstärke

    Einstellen der Bildschirmanzeige und der Einstellen der Bildschirmanzeige Lautsprecher-Lautstärke Hinweis: Einstellungssperrfunktion - Alle Einstellungen bleiben auch nach dem Wenn Sie die Steuertasten deaktivieren (d. h. die Abschalten des Monitors gespeichert. Sperre setzen), können keine Werte eingestellt werden. Zurücksetzen aller Einstellwerte 1.
  • Seite 39: Einstellen Der Bildschirmanzeige Und Der Lautsprecher-Lautstärke

    Einstellen der Bildschirmanzeige und der Lautsprecher-Lautstärke Einstellen der Lautsprecher-Lautstärke Überprüfen der Geräteinformationen 1. Wenn das OSD-Menü nicht angezeigt wird, Die Modellbezeichnung (MODEL), die Seriennummer (S/N) und die Verwendungszeit drücken Sie die Taste oder die Taste (USAGE TIME) des Monitors kann überprüft 2.
  • Seite 40: Einstellen Der Bildschirmanzeige

    Einstellen der Bildschirmanzeige Automatisches Einstellen des Bildschirms Automatische Bildschirmeinstellung Automatische Einstellung kann entweder mit der Taste AUTO oder der Taste MENU ausgeführt werden. Die Optionen im Menü ADJUSTMENT können Taste AUTO automatisch eingestellt werden (CLOCK, PHASE, 1. Drücken Sie die Taste AUTO. H-POS, V-POS).
  • Seite 41: Manuelle Bildschirmeinstellung

    Einstellen der Bildschirmanzeige Menü ADJUSTMENT Manuelle Bildschirmeinstellung AUTO 1. Zeigen Sie zunächst ein Bild an, das den Wenn [AUTO] mit der Taste gewählt ist, werden gesamten Bildschirm sehr hell erscheinen lässt. die Einstellungen von [CLOCK], [PHASE], [H-POS] (S.40) und [V-POS] automatisch vorgenommen. 2.
  • Seite 42 Einstellen der Bildschirmanzeige Menü GAIN CONTROL Menü COLOR CONTROL WHITE BALANCE AUTO 1.Nach der Wahl von [WHITE BALANCE] drücken Wenn [AUTO] mit der Taste gewählt ist, werden Sie die Taste die Einstellungen von [BLACK LEVEL] und Das Menü WHITE BALANCE erscheint. [CONTRAST] automatisch vorgenommen.
  • Seite 43 Einstellen der Bildschirmanzeige Menü MODE SELECT-1 Menü MODE SELECT-2 Hinweis: INFORMATION - Abhängig von der Auflösung des Die Modellbezeichnung (MODEL), die Eingangssignals ändert sich die Anzeige Seriennummer (S/N) und die Verwendungszeit eventuell selbst dann nicht, wenn die (USAGE TIME) des Monitors kann überprüft Menüoptionen ausgewählt werden können.
  • Seite 44: Pflege Des Monitors

    Punkte, bevor Sie sich an den Betriebs-LED leuchtet orangefarben auf). Kundendienst wenden. Falls sich die Störung hiermit nicht beheben lässt, wenden Sie sich an das Geschäft, in dem Sie den Monitor gekauft haben, oder an die nächstgelegene autorisierte Sharp- Kundendienstzentrale.
  • Seite 45: Informationen Für Kunden Über Umweltfreundliche Entsorgung Dieses Sharp-Produkts

    ANDEREM MÜLL! DABEI BESTEHT GEFAHR werden. FÜR DIE UMWELT! (3) Für unsere Kunden in den USA Sharp Corporation ist zum Umweltschutz und zur In diesem Produkt ist Zinn-Blei-Lötmaterial und Einsparung von Energie entschlossen. Unser Ziel eine Fluoreszenzlampe mit einer geringen ist, die Umweltbelastung durch unsere Produkte Menge Quecksilber verwendet.
  • Seite 46: Technische Daten

    Power Management Hinweis: VESA: basiert auf DPMS - Bedingt durch fortlaufende technische Lautsprecherausgang Verbesserungen behält sich SHARP das Recht 1 W + 1 W vor, das Design und die Spezifikationen ohne Eingangssignalanschluss vorherige Ankündigung ändern zu können. Die 15poliger Mini-D-Sub-Anschluss (3 Reihen)
  • Seite 47 Technische Daten Relevante Signaltakte Pinbelegung des Analogsignal- Eingangsstecker Anzeigemodus Hsync Vsync Punktfrequenz (15-poliger Mini-D-Sub-Stecker) VESA Funktion Roter Videosignaleingang Grüner Videosignaleingang Blauer Videosignaleingang Für rotes Videosignal GND US-Text Für grünes Videosignal GND Power Für blaues Videosignal GND Macintosh- Serie DDC-Daten Sun Ultra- Für Hsync-Signaleingang Serie Für Vsync-Signaleingang...
  • Seite 48: Installieren Der Setup-Informationen Und Des Icc-Profils (Für Windows)

    Installieren der Setup-Informationen und des ICC-Profils (Für Windows) Je nach dem verwendeten Computer oder Für Windows 98 Betriebssystem muss die Installation der Monitor- Installieren der Monitor-Setup-Informationen unter Setup-Informationen usw. eventuell über den Windows 98 und Festlegen des Monitor-ICC- Computer erfolgen. Führen Sie in diesem Fall die Profils als vorbestimmter Wert.
  • Seite 49 Installieren der Setup-Informationen und des ICC-Profils (Für Windows) Für Windows 2000 Für Windows Me Installieren der Monitor-Setup-Informationen unter Installieren der Monitor-Setup-Informationen unter Windows 2000 und Festlegen des Monitor-ICC- Windows Me und Festlegen des Monitor-ICC- Profils als vorbestimmter Wert. Die in den Profils als vorbestimmter Wert.
  • Seite 50 Installieren der Setup-Informationen und des ICC-Profils (Für Windows) Installieren des ICC-Profils Für Windows XP Installieren des Monitor-ICC-Profils. (Wenn die Installieren der Monitor-Setup-Informationen unter Setup-Informationen bereits installiert wurden, ist Windows XP und Festlegen des Monitor-ICC- auch das Profil bereits installiert. Es braucht dann Profils als vorbestimmter Wert.
  • Seite 51: Informationen Zum Profil Colorsync (Für Macos)

    Informationen zum Profil ColorSync (Für MacOS) Informationen zum Profil ColorSync ColorSync ist das Farbverwaltungssystem von Apple Computers. Mit dieser Funktion erkennt das System die Farbwiedergabeeigenschaften bei Verwendung mit einer kompatiblen Anwendung. Ein ColorSync-Profil beschreibt die Farbeigenschaften des LCD-Monitors. Hinweise: - Das ColorSync-Profil dieses Monitors kann zusammen mit MacOS 8.5 oder höher eingesetzt werden.
  • Seite 52: Anweisungen Zum Anbringen Eines Vesa-Kompatiblen Monitorarms

    Anweisungen zum Anbringen eines VESA-kompatiblen Monitorarms Der folgende Fuß oder Arm kann am Monitor Hinweise: angebracht werden. - Der Fuß ist nur für diesen Monitor bestimmt, - Fuß (getrennt erhältlich) verwenden Sie ihn für keine anderen Geräte Modellbezeichnung: NL-S02-H (Hellgrau) oder nutzen Sie ihn auf keine andere Weise.
  • Seite 53: Français

    Dépannage ..............66 Informations pour les clients à propos de l'environnement pour ce produit SHARP ....67 Caractéristiques techniques .
  • Seite 54: Conseils Et Mesures De Sécurité

    - Ne jamais heurter ou taper sur le moniteur avec - Câble de signal analogique (1) des objets durs. (nom du modèle : 0NIT15G4-0015) - Il faut savoir que la société Sharp décline toute - Câble audio (1) responsabilité en cas d'erreur survenue durant (nom du modèle : 0NIT17A3-U006)
  • Seite 55: Description Du Produit

    Description du produit 1. Bouton AUTO ......Ce bouton est utilisé pour effectuer le réglage automatique sur l'écran (CLOCK, PHASE, H-POS et V-POS). (p.62) 2. Bouton MENU ......Ce bouton est utilisé pour faire apparaître, sélectionner et refermer le menu OSD (On Screen Display). 3.
  • Seite 56: Réglage De L'inclinaison

    Réglage de l'inclinaison ATTENTION ! - Assurez vous de bien saisir les deux bords du moniteur lorsque vous réglez l'angle de vue. Le panneau LCD de cet appareil est en verre. Appuyer les mains sur le panneau LCD peut provoquer son endommagement. approx.
  • Seite 57: Raccordement, Activation Et Désactivation Du Moniteur

    Raccordement, activation et désactivation du moniteur ATTENTION ! Remarque : - Si la connexion se fait sur la série Sun Ultra, il - Lors du raccordement, s'assurer que se peut qu'un adaptateur de conversion (en l'alimentation tant du moniteur que de vente dans le commerce) soit indispensable.
  • Seite 58: Raccordement D'un Casque Audio (En Vente Dans Le Commerce)

    Raccordement, activation et désactivation du moniteur Raccordement d'un casque audio Activation de l'alimentation (en vente dans le commerce) 1. Activer la source d'alimentation principale du moniteur. Un casque audio (en vente dans le commerce) peut être raccordé. Borne pour casque audio Interrupteur principal Casque audio - Pour allumer et éteindre avec l'interrupteur...
  • Seite 59: Désactivation De L'alimentation

    Raccordement, activation et désactivation du moniteur Désactivation de l'alimentation 1. Mettre l'ordinateur hors tension. 2. Appuyer sur le bouton d'alimentation du moniteur. La diode d'alimentation s'éteind. Appuyer sur le bouton Mettre l'ordinateur d'alimentation. hors tension. Si le moniteur devait ne pas être utilisé pendant une période de temps prolongée, arrêter l'alimentation principale du moniteur, puis débrancher la prise d'alimentation de la prise de...
  • Seite 60: Réglage De L'affichage Du Moniteur Et Du Volume Des Haut-Parleurs

    Réglage de l'affichage du moniteur et du volume des haut-parleurs Fonction de verrouillage des réglages Remarque : - Tous les réglages seront sauvegardés, même En désactivant les boutons de commande (c'est-à- après la mise hors tension du moniteur. dire en les verrouillant), toute tentative de modification des valeurs sera vaine.
  • Seite 61: Réglage Du Volume Des Haut-Parleurs

    Réglage de l'affichage du moniteur et du volume des haut-parleurs Réglage du volume des haut-parleurs Confirmation des informations sur l'appareil 1. Sans que le menu OSD ne soit affiché, appuyer sur le bouton ou le bouton Le nom du modèle (MODEL), le numéro de série 2.
  • Seite 62: Réglage De L'affichage Du Moniteur

    Réglage de l'affichage du moniteur Réglage automatique de l'écran Réglage automatique de l'écran Le réglage automatique peut être effectué en utilisant soit le bouton AUTO ou le bouton MENU. Les options CLOCK, PHASE, H-POS, V-POS du menu ADJUSTMENT peuvent être ajustées Bouton AUTO automatiquement.
  • Seite 63: Réglage Manuel De L'écran

    Réglage de l'affichage du moniteur Menu ADJUSTMENT (AJUST) Réglage manuel de l'écran AUTO 1. D'abord afficher une image qui rend la totalité Quand [AUTO] est sélectionné avec le bouton de l'écran du moniteur très lumineuse. (p.62) les réglages de [CLOCK], [PHASE], [H-POS] et 2.
  • Seite 64 Réglage de l'affichage du moniteur Menu GAIN CONTROL (CTRL. LUMINOSIT) Menu COLOR CONTROL (CTRL. DES COULEURS) AUTO WHITE BALANCE 1. Après avoir sélectionné [WHITE BALANCE], Quand [AUTO] est sélectionné avec le bouton les réglages de [BLACK LEVEL] et de appuyer sur le bouton [CONTRAST] sont effectués automatiquement.
  • Seite 65 Réglage de l'affichage du moniteur Menu MODE SELECT-1 Menu MODE SELECT-2 (MODE SÉLECTION-1) (MODE SÉLECTION-2) INFORMATION Remarque : Le nom du modèle (MODEL), le numéro de série - En fonction de la résolution du signal d'entrée, (S/N) et la durée d'utilisation (USAGE TIME) du même si les options peuvent être sélectionnées, moniteur peuvent être vérifiés.
  • Seite 66: Entretien Du Moniteur

    - Aucun son ne sort des haut-parleurs quand le Si après cela, il ne fonctionne toujours pas moniteur est en mode d'économie d'énergie (la correctement, contacter le magasin où il a été diode d'alimentation est éclairée en orange). acheté ou votre réparateur agréé Sharp le plus proche.
  • Seite 67: Informations Pour Les Clients À Propos De L'environnement Pour Ce Produit Sharp

    DECHETS. VOUS RISQUEZ DE DEGRADER propriétaire de l'équipement électronique L'ENVIRONNEMENT. concerné. La société Sharp s'implique dans la protection de (3) Pour notre clientèle aux Etats Unis l'environnement et la sauvegarde de l'énergie. d'Amérique Notre but est de minimiser l'impact sur...
  • Seite 68: Caractéristiques Techniques

    VESA : DDC2B compatible Gestion de l'alimentation Remarque : VESA : basé sur le DPMS - SHARP se réserve le droit d'apporter des Sortie des haut-parleurs modifications à la présentation et aux 1 W + 1 W caractéristiques des appareils à fin Borne d'entrée signal...
  • Seite 69 Caractéristiques techniques Fréquences des signaux (analogique) La broche du connecteur d'entrée analogique RVB Bande Hsync Vsync (Mini connecteur de type D-sub 15 broches) Mode affichage passante VESA N° Fonction Entrée du signal vidéo rouge Entrée du signal vidéo vert Entrée du signal vidéo bleu Pour mise à...
  • Seite 70: Installation Des Fichiers Relatifs Au Paramétrage Du Moniteur Et Au Profil Icc (Pour Windows)

    Installation des fichiers relatifs au paramétrage du moniteur et au profil ICC (Pour Windows) En fonction du type d'ordinateur ou du système 7. S'assurer que le moniteur affiche une image, d'exploitation, il peut parfois s'avérer nécessaire ensuite cliquer sur [Apply]. d'installer des fichiers relatifs au paramétrage du 8.
  • Seite 71 Installation des fichiers relatifs au paramétrage du moniteur et au profil ICC (Pour Windows) Pour Windows 2000 Pour Windows Me Installation des fichiers relatifs au paramétrage du Installation des fichiers relatifs au paramétrage du moniteur sous Windows 2000, et au réglage du moniteur sous Windows Me, et au réglage du profil ICC du moniteur en tant que valeur par profil ICC du moniteur en tant que valeur par...
  • Seite 72 Installation des fichiers relatifs au paramétrage du moniteur et au profil ICC (Pour Windows) Pour Windows XP Installation du profil ICC Installation du profil ICC du moniteur. (Si Installation des fichiers relatifs au paramétrage du l'information relative au paramétrage a déjà été moniteur sous Windows XP, et au réglage du profil installée, alors le profil l'a été...
  • Seite 73: Informations Sur Le Profil Colorsync (Pour Macos)

    Informations sur le profil ColorSync (Pour MacOS) A propos du profil ColorSync ColorSync est le système de gestion des couleurs de Apple Computer et il permet de réaliser les caractéristiques de l'affichage de couleurs lors d'une utilisation avec une application compatible. Un profil ColorSync décrit les caractéristiques de couleur du moniteur LCD.
  • Seite 74: Instructions Relatives À L'installation D'un Bras Conforme Vesa

    Instructions relatives à l'installation d'un bras conforme VESA Le support ou le bras suivant peut être fixé au Remarques : moniteur. - Le support est conçu spécifiquement pour ce - Support (vendu séparement) moniteur, ne pas l'utiliser pour un autre Nom du modèle : NL-S02-H (Ivoire) équipement ou à...
  • Seite 75: Italiano

    Ricerca ed eliminazione di inconvenienti ..........88 Le informazioni per i clienti sull'eliminazione di questo prodotto SHARP in condizioni di protezione ambientale ..89 Specifiche .
  • Seite 76: Suggerimenti E Precauzioni Per La Sicurezza

    - La Sharp Corporation è proprietaria dei diritti Collocazione d'autore per i programmi del dischetto delle utilità. - Non utilizzate il monitor in luoghi nei quali la Non riproducetelo senza averne il permesso.
  • Seite 77: Descrizione Del Prodotto

    Descrizione del prodotto 1. Tasto AUTO ......Questo tasto si usa per eseguire la regolazione automatica dello schermo (CLOCK, PHASE, H-POS e V-POS). (p.84) 2. Tasto MENU ......Questo tasto si usa per visualizzare, selezionare e chiudere il menu OSD (On Screen Display). 3.
  • Seite 78: Regolazione Dell'angolazione

    Regolazione dell'angolazione ATTENZIONE! - Assicurarsi di tenere entrambi i lati del monitor quando si regola l'angolo di visione. Il schermo LCD usato in questo monitor è fatto di vetro. Una pressione con le mani sullo schermo LCD può causare danni. circa 25°...
  • Seite 79: Collegamento Del Monitor Ed Accensione E Spegnimento Del Monitor

    Collegamento del monitor ed accensione e spegnimento del monitor ATTENZIONE! Collegare il cavo audio, accessorio Quando il cavo audio, accessorio, è collegato al - Quando eseguite i collegamenti, assicuratevi terminale di uscita audio del computer, il suono che sia il monitor che il computer siano spenti. del computer collegato viene ascoltato dagli - Fate attenzione a non piegare eccessivamente il altoparlante dello schermo.
  • Seite 80: Collegamento Delle Cuffie (Da Acquistare In Commercio)

    Collegamento del monitor ed accensione e spegnimento del monitor Collegamento delle cuffie Accensione (da acquistare in commercio) 1. Posizionate su acceso l'interruttore principale rete del monitor. Le cuffie (da acquistare in commercio) possono essere collegate. Terminale per le cuffie Interruttore principale rete Cuffie - Per accendere e spegnere l'interruttore Note:...
  • Seite 81: Spegnimento

    Collegamento del monitor ed accensione e spegnimento del monitor Spegnimento 1. Spegnete il computer. 2. Premete il tasto di alimentazione del monitor. Il LED di alimentazione si spegnerà. Spegnete il Premete il tasto di computer. alimentazione. Se si prevede di non usare il monitor per un periodo di tempo piuttosto lungo, spegnere lInterruttore principale rete del monitor, e rimuovere la spina dell'alimentazione principale...
  • Seite 82: Regolazione Della Visualizzazione Sullo Schermo E Volume Dell'altoparlante

    Regolazione della visualizzazione sullo schermo e volume dell'altoparlante Nota: Funzione del blocco di regolazioni - Tutte le regolazioni verranno conservate anche Disattivando i tasti di controllo (cioè settando il dopo che si è spenta l'alimentazione. blocco) si impedirà ogni tentativo di cambiare i valori regolati.
  • Seite 83: Regolazione Del Volume Dell'altoparlante

    Regolazione della visualizzazione sullo schermo e volume dell'altoparlante Predisposizione Regolazione del volume dell'altoparlante A menu OSD non visualizzato agire sul tasto / MODE . 1. Senza che il menu OSD sia visualizzato premete Ad ogni successiva pressione del tasto compare il tasto oppure il tasto la voce successiva del menù...
  • Seite 84: Regolazione Della Visualizzazione Sullo Schermo

    Regolazione della visualizzazione sullo schermo Regolazione automatica dello schermo Regolazione automatica dello schermo La regolazione automatica può essere effettuata usando il tasto AUTO o il tasto MENU. Le opzioni nel menu ADJUSTMENT si possono regolare automaticamente (CLOCK, PHASE Tasto AUTO (FASE), H-POS, V-POS).
  • Seite 85: Regolazione Manuale Dello Schermo

    Regolazione della visualizzazione sullo schermo Menu ADJUSTMENT (REGOL) Regolazione manuale dello schermo AUTO 1. Prima di tutto visualizzate un'immagine che Quando [AUTO] è selezionato con il tasto , le rende chiaro l'intero schermo. (p.84) impostazioni [CLOCK], [PHASE], [H-POS] e 2. Visualizzare il menu OSD premendo il tasto [V-POS] sono eseguite automaticamente.
  • Seite 86 Regolazione della visualizzazione sullo schermo Menu GAIN CONTROL (CTRL. GUADAGNO) Menu COLOR CONTROL (CONTROLLO COLORE) AUTO WHITE BALANCE Quando [AUTO] viene selezionato con il tasto , le 1. Dopo aver selezionato [WHITE BALANCE], impostazioni [BLACK LEVEL] e [CONTRAST] sono premere il tasto eseguite automaticamente.
  • Seite 87 Regolazione della visualizzazione sullo schermo Menu MODE SELECT-1 (SELEZ. MODO-1) Menu MODE SELECT-2 (SELEZ. MODO-2) Nota: INFORMATION (INFORMAZIONE) - A seconda della risoluzione del segnale di Sullo schermo si possono verificare il nome del input, anche se si possono selezionare delle modello (voce MODEL), il numero di serie (voce S/ opzioni di menu, il display potrebbe non N), e la durata di uso (voce USAGE TIME).
  • Seite 88: Cura Del Monitor

    Centro del Servizio Tecnico Assistenza Clienti controllo. della Sharp più vicino a voi. Se sono molto sporchi, applicate del detersivo - Nel periodo iniziale del loro uso, a causa delle neutro ad un panno morbido inumidito, strizzatelo caratteristiche dei tubi fluorescenti, lo schermo bene, e portate via la sporcizia, detergendo.
  • Seite 89: Le Informazioni Per I Clienti Sull'eliminazione Di Questo Prodotto Sharp In Condizioni Di Protezione Ambientale

    Se questo prodotto non può più essere usato, La SHARP suggerisce i servizi di riciclaggio dovrebbe essere dato via ed essere eliminato in della MIREC, e le informazioni generali della modo legalmente corretto ed in condizioni MIREC possono essere ottenute facendo clic ambientali sane.
  • Seite 90: Specifiche

    Plug & Play Nota: VESA Compatibile DDC2B - Per facilitare una politica di miglioramenti Gestione dell'energia continui, la SHARP si riseva il diritto di cambiare VESA: basata su DPMS il disegno e le caratteristische per Uscita altoparlanti perfezionamenti senza preavviso. Le...
  • Seite 91 Specifiche Sincronizzazioni rilevanti del segnale Pin del connettore di ingresso del segnale analogico Modalità di Sincronismo Sincronismo Frequenza (Connettore D sub mini a 15 pin) visualizzazione orizzontale verticale punti VESA N° Funzione Segnale video rosso in ingresso Segnale video verde in ingresso Segnale video blu in ingresso GND (massa) GND (massa)
  • Seite 92: Installazione Delle Informazioni Di Setup E Del Profilo Icc (Per Windows)

    Installazione delle informazioni di setup e del profilo ICC (Per Windows) A seconda del computer oppure del sistema Per Windows 98 operativo può essere necessario usare il Installazione delle informazioni di setup del computer per eseguire l'installazione delle monitor in Windows 98, e impostazione del profilo informazioni di setup del monitor, ecc.
  • Seite 93 Installazione delle informazioni di setup e del profilo ICC (Per Windows) Per Windows 2000 Per Windows Me Installazione delle informazioni di setup del Installazione delle informazioni di setup del monitor in Windows 2000, e impostazione del monitor in Windows Me, e impostazione del profilo profilo ICC del monitor come valore ICC del monitor come valore predeterminato.
  • Seite 94 Installazione delle informazioni di setup e del profilo ICC (Per Windows) Installazione del profilo ICC Per Windows XP Installazione del profilo ICC del monitor. (Se le Installazione delle informazioni di setup del informazioni di setup sono già installate, lo è monitor in Windows XP, e impostazione del profile anche il profilo e non occorre installarlo.) ICC del monitor come valore predeterminato.
  • Seite 95: Informazioni Sul Profilo Colorsync (Per Macos)

    Informazioni sul profilo ColorSync (Per MacOS) Il profilo ColorSync ColorSync è il sistema di gestione dei colori della Apple Computer e consente di realizzare la riproduzione dei colori, quando lo si usa con un'applicazione compatibile. Un profilo ColorSync descrive le caratteristiche cromatiche del monitor LCD.
  • Seite 96: Istruzioni Per Collegare Un Braccio Compatibile Vesa

    Istruzioni per collegare un braccio compatibile VESA Il supporto o braccio seguente può essere fissato 5. Attaccate il braccio al monitor con le quattro viti. al monitor. - Supporto (venduto separatamente) Nome del modello: NL-S02-H (Avorio) NL-S02-B (Nero) - Braccio compatibile VESA (da acquistare in commercio) Bracci compatibili da acquistare in commercio I collegamenti devono soddisfare le seguenti condizioni.
  • Seite 97: Español

    Solución de problemas ............110 Información para clientes acerca del desecho de este producto SHARP de forma de proteger el medio ambiente ..111 Especificaciones .
  • Seite 98: Sugerencias Y Precauciones De Seguridad

    - Guarde la caja de cartón por si necesita - El presente monitor y sus accesorios pueden transportar el monitor. actualizarse sin previo aviso. - Sharp Corporation es titular de los derechos de autor del programa del Disquete de utilidades. Ubicación No lo reproduzca sin previa autorización.
  • Seite 99: Descripción Del Producto

    Descripción del producto 1. Botón AUTO ......Este botón se utiliza para hacer un ajuste automático de la pantalla (CLOCK, PHASE, H-POS y V-POS). (p.106) 2. Botón MENU ......Este botón se utiliza para ampliar, seleccionar y cerrar el menú OSD (On Screen Display).
  • Seite 100: Ajuste De Ángulo

    Ajuste de ángulo ¡PRECAUCIÓN! - Asegúrese de sostener ambos lados del monitor al ajustar el ángulo de visión. El panel LCD que se utiliza en este monitor es de vidrio. Si presiona el panel LCD con las manos podría dañarlo. aprox.
  • Seite 101: Conexión Del Monitor Y Encendido/Apagado Del Mismo

    Conexión del monitor y encendido/ apagado del mismo ¡PRECAUCIÓN! Conecte el cable de audio suministrado Cuando el cable de audio suministrado se - Antes de realizar la conexión, asegúrese de que conecte al borne de salida de audio del tanto el monitor como el ordenador están ordenador, el sonido del ordenador conectado apagados.
  • Seite 102: Conexión De Auriculares (De Venta En El Comercio)

    Conexión del monitor y encendido/apagado del mismo Conexión de auriculares Encendido (de venta en el comercio) 1. Conmute el interruptor primario del monitor. Se pueden conectar auriculares (de venta en el comercio). Interruptor primario Borne de auriculares Auriculares - Cuando conecte y desconecte la Interruptor primario, espere siempre durante un intervalo de 5 segundos.
  • Seite 103: Apagado

    Conexión del monitor y encendido/apagado del mismo Apagado 1. Apague el ordenador. 2. Pulse el botón de encendido/apagado del monitor. El LED indicador de conexión se apagará. Pulse el botón de Apague el encendido/apagado. ordenador. Si no se va a utilizar el monitor durante mucho tiempo, desconecte la interruptor primario del monitor y desenchufe la clavija de alimentación de la toma de corriente.
  • Seite 104: Ajuste De La Pantalla Y Volumen Del Altavoz

    Ajuste de la pantalla y volumen del altavoz Función de bloqueo de ajustes Nota: - Todos los ajustes quedarán guardados incluso Si deshabilita los botones de control (es decir, después de apagar. activa el bloqueo) no podrá cambiar los valores configurados.
  • Seite 105: Ajuste Del Volumen Del Altavoz

    Ajuste de la pantalla y volumen del altavoz Ajuste del volumen del altavoz Comprobación de la información del producto 1. Sin el menú OSD a la vista, pulse el botón 2. Compruebe que esté seleccionado [VOLUME]. Se puede comprobar el nombre del modelo Si no está...
  • Seite 106: Ajuste De La Pantalla

    Ajuste de la pantalla Ajuste automático de la pantalla Ajuste de pantalla automático (cuando se utiliza una señal analógica) Botón AUTO 1. Pulse el botón AUTO. Las opciones del Menú ADJUSTMENT (RELOJ, 2. Vuelva a pulsar el botón AUTO. FASE, H-POS, V-POS) se pueden ajustar Aparecerá...
  • Seite 107: Ajuste De Pantalla Manual

    Ajuste de la pantalla Menú ADJUSTMENT Ajuste de pantalla manual AUTO 1. En primer lugar aparece una imagen que pone Cuando se selecciona [AUTO] con el botón , se toda la pantalla muy clara. (p.106) ajustan automáticamente las selecciones 2. Haga que aparezca el menú OSD pulsando el [CLOCK], [PHASE], [H-POS] y [V-POS].
  • Seite 108 Ajuste de la pantalla Menú GAIN CONTROL Menú COLOR CONTROL AUTO WHITE BALANCE Cuando se selecciona [AUTO] con el botón , se 1. Después de seleccionar [WHITE BALANCE], ajustan automáticamente las selecciones [BLACK pulse el botón LEVEL] y [CONTRAST]. Después del ajuste Aparecerá...
  • Seite 109 Ajuste de la pantalla Menú MODE SELECT-1 Menú MODE SELECT-2 Nota: INFORMATION (INFORMACIÓN) - Según sea la resolución de la señal de entrada, Se puede comprobar el nombre de modelo la pantalla puede no cambiar incluso si pueden (MODEL), el número de serie (S/N) y tiempo de seleccionarse las opciones del menú.
  • Seite 110: Conservación Del Monitor

    útil. Consulte a su proveedor o al servicio autorizado Caja y sector del panel de control de asistencia técnica de Sharp más cercano. Utilice un paño suave y seco para limpiar, sin - Debido a las características de los tubos apretar demasiado, la caja y el panel de control.
  • Seite 111: Información Para Clientes Acerca Del Desecho De Este Producto Sharp De Forma De Proteger El Medio Ambiente

    (2) Para nuestros clientes en el Reino Unido, Información para clientes acerca del Alemania, Francia e Italia desecho de este producto SHARP de Llame al gobierno local acerca de la recolección e instalaciones de recicladoo forma de proteger el medio ambiente...
  • Seite 112: Especificaciones

    Salida de altavoces - Como parte de la política de mejoras continuas, 1 W + 1 W SHARP se reserva el derecho de realizar Borne de señales de entrada cambios en el diseño y especificaciones para la Mini D-sub de 15 vías (3 hileras) mejora del producto sin previo aviso.
  • Seite 113 Especificaciones Sincronizaciones de las señales Vías del conector de entrada RGB analógica (Conector Mini D-sub de 15 vías) correspondientes Modo display Hsync Vsync Frecuencia VESA Nº Función Señal de entrada vídeo rojo Señal de entrada vídeo verde Señal de entrada vídeo azul GND para señal de vídeo rojo GND para señal de vídeo verde GND para señal de vídeo azul...
  • Seite 114: Instalación De La Información De Configuración Y Del Perfil Icc (Para Windows)

    Instalación de la información de configuración y del perfil ICC (Para Windows) Según sea el tipo de ordenador o de sistema 7. Compruebe que el monitor está funcionando y operativo, puede que sea necesario utilizar el a continuación haga clic en [Apply]. ordenador para llevar a cabo la instalación de la 8.
  • Seite 115 Instalación de la información de configuración y del perfil ICC (Para Windows) Para Windows 2000 Para Windows Me Instalación de la información de configuración del Instalación de la información de configuración del monitor en Windows 2000 y configuración del monitor en Windows Me y configuración del perfil perfil ICC del monitor como valor predeterminado.
  • Seite 116 Instalación de la información de configuración y del perfil ICC (Para Windows) Instalación del perfil ICC Para Windows XP Instalación del perfil ICC del monitor. (Si ya ha Instalación de la información de configuración del instalado la información de configuración, se monitor en Windows XP y configuración del perfil habrá...
  • Seite 117: Información Acerca Del Perfil Colorsync (Para Macos)

    Información acerca del perfil ColorSync (Para MacOS) Acerca del perfil ColorSync ColorSync es el sistema de gestión del color de Apple Computer y permite obtener características de reproducción cromática cuando se utiliza con una aplicación compatible. Un perfil ColorSync describe las características cromáticas del monitor LCD.
  • Seite 118: Instrucciones Para Acoplar Un Brazo De Compatibilidad Vesa

    Instrucciones para acoplar un brazo de compatibilidad VESA El siguiente pedestal o brazo puede instalarse en 5. Acople el brazo al monitor apretando los cuatro el monitor. tornillos. - Pedestal (vendido separadamente) Nombre del modelo: NL-S02-H (Gris Plomizo) NL-S02-B (Negro) - Brazo compatible con VESA (de venta en el comercio) Brazos compatibles de venta en el comercio...
  • Seite 119 目录 技巧提示和安全注意事项 ............. 120 产品说明...
  • Seite 120: 技巧提示和安全注意事项

    技巧提示和安全注意事项 - 本显示器所使用的TFT彩色液晶显示屏是用高精度 显示器与附件的检查清单 技术制造的。但是,在屏幕上可能会有微小的斑 - 请检查本包装内包括下列物品。 点。在这些斑点之处,像素或者从来不亮,或者总 - 液晶显示器(1) 是点亮。另外,如果从一个倾斜的锐角来观看屏 - 模拟信号线(1) 幕,可能会看到彩色或亮度并不均匀。请注意,这 (型号名称: 0NIT15G4-0015 ) 并不是故障,而是液晶显示屏的共同现象。这不会 - 音频线(1) 影响显示器的性能。 (型号名称: 0NIT17A3-U006 ) - 不要让屏幕长时间显示静止不变的画面,否则会在 - 电源线(1) 屏幕上留下“残留影像” 。 - 光盘(1) - 如果把亮度调节到最小,那么有可能不容易看见所 - 使用说明书(1) 显示的画面。 注: - 电脑信号的质量高低会影响到所显示的图像的质 量。建议采用能够输出高质量视频信号的电脑。...
  • Seite 121: 产品说明

    产品说明 9 10 11 12 1.“AUTO”(自动)按钮 ..... 此按钮用于进行画面的自动调节( “ CLOCK” (时钟)、 “PHASE” (相位)、 “H-POS” (水平位置)和“V-POS” (垂直位置))。(128页) 2.“MENU” (菜单) 按钮 ....该按钮用于弹出、选择、以及关闭 “OSD” ( “On Screen Display” (屏 幕显示) ) 菜单。 / “MODE” (模式) 按钮 ..当 “OSD” (屏幕显示) 菜单显示出来时: 该按钮用于选择菜单上的选项。 当...
  • Seite 122: 角度调节

    角度调节 要小心! - 调节观看角度时,请务必抓住显示器的边上。此显 示器的液晶显示屏是用玻璃制作的。如果用手对液 晶显示屏施力,可能会损坏液晶显示屏。 约25度 1 2 3 4 5 6 7 1 2 3 4 5 6 7 约5度 1 2 3 4 5 6 7 1 2 3 4 5 6 7...
  • Seite 123: 连接显示器、开关显示器的电源

    连接显示器、开关显示器的电源 连接附送的音频线 要小心! - 在进行连接时,请务必确认显示器和电脑的电源都 当附送的音频线连接到电脑的音频输出端子上时,所 已经关闭。 连接的电脑的声音就从显示器的扬声器中播放出来。 - 注意不要过度弯曲连接线,也不要增加延长的电 也可以使用显示器的耳机插孔。 线,因为这样可能会引起故障。 连接显示器与电脑 音频输入端子 音频输出端子 将附送的模拟信号线连接到电脑的模拟“RGB”(红 绿蓝)输出端子上。 模拟“RGB” (红绿蓝) 端子 (15芯小型D-sub,3排) 音频线 模拟信号线 模拟“RGB” (红绿蓝) 端子 (15芯小型D-sub,3排) - 注意连接器的方向,将信号线紧紧地垂直插入连 接器,然后拧紧两边的螺钉。 如果连接到两排D-sub 15芯 “Apple Power Macintosh” (强力苹果电脑) ,那么请在模拟信号线 上添加一个 “Macintosh” 转接头 (市售) 。 “Macintosh”...
  • Seite 124: 连接耳机 (市售

    连接显示器、开关显示器的电源 连接耳机 (市售) 打开电源 耳机 (市售) 也可以连接。 1. 打开显示器的主电源。 耳机端子 主电源开关 耳机 注: - 在打开电源和关闭电源之间切换时,要等待至少 - 当连接耳机时,显示器的扬声器中就不再发出声音。 5秒的间隔。过快的切换会引起故障。 - 请使用接线短于3米的耳机。 2. 按下显示器的电源按钮。 电源指示灯显示橙色。 连接显示器的电源 3. 打开电脑的电源。 按下电源按钮 打开电脑 交流电源 当有信号从电脑输入时,电源指示灯显示绿色,屏 电源端子 插座 幕就会显示(电源打开后到屏幕有显示会有一小段 时间。 ) 注: 电源线 - 如果是首次使用本显示器,或者在使用过程中已经 更改了系统设置,那么请执行自动画面调节。 (128页)...
  • Seite 125: 关闭电源

    连接显示器、开关显示器的电源 关闭电源 1. 关闭电脑的电源。 2. 按下显示器的电源按钮。 电源指示灯就会熄灭。 关闭电脑的电源 按下电源按钮 如果显示器长时间搁置不使用,请务必关闭显示器的 主电源开关,并将电源插头从插座上拔出来。...
  • Seite 126: 调节画面显示和扬声器音量

    调节画面显示和扬声器音量 调节锁定功能 注: - 即使关闭了电源,所有的调节内容也都会被保存起 通过使控制按钮无效 (也就是设置锁定功能) ,就可 来。 以防止更改任何已经调节好了的设置内容。 1. 关闭显示器的电源。 使所有的调节内容复原 2. 一边按住“MENU” (菜单) 按钮,一边同时按下电 只要用一个命令,就可以把所有的调节内容都恢复到 源按钮(也就是打开显示器的电源) 。 本显示器出厂时所设置的默认值。 一直按下按钮直到 [ADJUSTMENT LOCKED] (调 1. 关闭显示器的电源。 节锁定)显示在屏幕上。当此信息显示时,锁定功 能设置操作就完成。 2. 同时按下 “MENU” (菜单) 按钮和 / “MODE” (模式) 按钮,与此同时按下电源按钮 (也就是打 注: 开显示器的电源)...
  • Seite 127: 调节扬声器音量

    调节画面显示和扬声器音量 调节扬声器音量 设置 “DISPLAY MODE” (显示模式) 1. 在 “OSD” (屏幕显示) 菜单没有显示的情况下, 色度和亮度可以用同一个指令进行调节。 按下 按钮或 按钮。 “STD” (标准) 2. 检查 [VOLUME] (音量) 是否被选择。 它用由液晶面板的最初的配置产生的色度来显示图 如果没有选择,按下 / “MODE” (模式) 按钮, 像。 选择 [VOLUME] (音量) 选项。 “OFFICE” (省电) 显示屏的亮度较低。 (此模式省电。 ) 3. 通过按 按钮...
  • Seite 128: 调节画面显示

    调节画面显示 自动调节画面 自动画面调节 可以用“AUTO” (自动)按钮或“MENU” (菜单)按钮 进行自动调节。 能自动调节 “ADJUSTMENT” (调节) 菜单上的选项 ( “CLOCK” (时钟) 、 “PHASE” (相位) 、 “H- “AUTO” (自动) 按钮 POS” (水平位置) 、 “V-POS” (垂直位置) ) 。 1. 按下“AUTO” (自动)按钮。 2. 再次按下“AUTO” (自动)按钮。 注: 会在画面上显示[ADJUSITNG](正在调节),过了几 - 当首次设置本显示器时,或在更改了当前系统的显 秒钟后,[ADJUSTING] (正在调节)消失。(自动调 示之后,要在使用显示器之前执行自动画面调节功...
  • Seite 129: 手动画面调节

    调节画面显示 “ADJUSTMENT” (调节) 菜单 手动画面调节 “AUTO” (自动) 1. 显示使整个屏幕发亮的图像。(128页) 2. 按下“MENU”(菜单)按钮,显示“OSD”(屏幕显 用 按钮选择[AUTO](自动)后,将自动调节 示)菜单。 [CLOCK](时钟)、[PHASE](相位)、[H-POS] (水平位 “ADJUSTMENT” (调节) 菜单 置)和[V-POS](垂直位置)的设定。 按下 / “MODE” “CLOCK” (时钟) (模式) 按钮, 下图表示消除垂直颤动杂波的调节方法。 ( 按钮) 选择选项。 MENU “GAIN CONTROL” (增益控制) 菜单 按下 / 垂直颤动杂波 “MODE” (模式)...
  • Seite 130 调节画面显示 “GAIN CONTROL” (增益控制) 菜单 “COLOR CONTROL” (色彩控制) 菜单 “WHITE BALANCE” (白色平衡) “AUTO” (自动) 1. 选择[WHITE BALANCE](白色平衡)后,按下 按 用 按钮选择[AUTO](自动)后,将自动调节[BLACK 钮。 LEVEL](黑色电平)和[CONTRAST](对比度)设定。自 会显示WHITEBALANCE(白色平衡)菜单。 动调节后如有必要,请进行手动调节。 “BLACK LEVEL” (黑色电平) 在观看彩色图案时,可以调节整个画面的亮度。 ( 按钮) 彩色图案 2. 用 按钮,来选择 [COOL] (冷) 、 [·] 、 [STD] (标准) 、 [·] 、 [WARM] (暖) 、或 [USER]...
  • Seite 131 调节画面显示 “MODE SELECT-1” (模式选择-1) 菜单 “MODE SELECT-2” (模式选择-2) 菜单 注: “INFORMATION” (信息) - 由于输入信号的解像度有所不同,即使菜单选项可 可检查显示器的机型名(MODEL)(机型)、系列号(S/ 以选择,显示的画面也可能不改变。 N)(系列号)和使用时间(USAGE TIME)(使用时间)。 1. 选择[INFORMATION](信息)后按下 按钮。 “OSD H-POSITION” (屏幕显示水平位置) 会显示本机的信息。 “OSD” (屏幕显示) 菜单的位置可以向左或向右移 2. 按下“MENU”(菜单)按钮。 动。 ( 按钮) “OFF TIMER” (关闭定时器) 到达设定时间后,自动关闭电源。 “OSD V-POSITION” (屏幕显示垂直位置) 1.
  • Seite 132: 显示器的维护

    显示器的维护 显示器的维护 故障诊断 在清扫显示器时,请务必先把电源插头从交流电源插 如果您感到显示器可能有了故障,那么在请人修理之 座中拔出。 前请先检查如下各项。 如果问题仍然不能消除,那么请与您购买本显示器的 外壳和控制面板部分 商店或就近的日本夏普株式会社授权的服务中心接 洽。 用柔软的干布轻轻擦掉外壳和控制面板上的尘垢。 如果非常脏,那么可以用中性洗涤剂沾湿软布,充分 本显示器的荧光灯管是有一定时间寿命的。 拧干后将尘垢擦掉。 - 如果屏幕变暗、持续不停地颤动或者不能点亮, 则荧光灯可能已至使用寿命。请与您购买本显示 液晶显示屏部分 器的商店或就近的日本夏普株式会社授权的服务 用柔软的干布轻轻擦掉液晶显示屏上的污垢和灰尘。 中心接洽。 (像医用纱布或擦镜头布那样的软布就很适用。 ) - 在使用的最初阶段,由于荧光灯管的特性,画 面可能会有颤动。 (这不是故障。 ) 如果发生这种 要小心! 现象,请先把电源关闭,然后再把电源打开试 一试。 - 决不可使用稀释剂、汽油、酒精、玻璃清洁剂等, 否则可能导致颜色改变或变形。 - 决不可用任何硬物刮擦显示器,也不可对显示器施 显示器上不显示图像(电源指示灯不点亮) 加强力,否则可能会使显示器留下划痕或导致故 障。...
  • Seite 133: 有关用户爱护环境地丢弃本夏普产品的信息

    显示器的维护 有关用户爱护环境地丢弃本夏普产品的 信息 如果本机已不能使用,则应合法地并爱护环境地将其 丢弃。 丢弃时请勿将本机与一般垃圾一起丢弃或与其它垃圾 混在一起!否则会破坏环境! 夏普公司已作出保证,要保护环境并节省能源。我们 的目标是通过不断改进生产技术、产品设计和向用户 提供环保信息,最大限度地减少我公司产品对环境的 影响。 (1) 对于比利时、荷兰、瑞典和瑞士的用户 夏普公司参加各国的电器产品的再生利用系统, 这些系统是这些国家的环境保护法所规定的。 下面是各国的详细说明。 国家 该国的再生利用信息 请利用瑞典的电子设备再生利用系统 瑞典 “ELRETUR”,访问网站 http://www.el-kretsen.se 请利用荷兰的电子设备再生利用系统 荷兰 “ICT-Milieu”,访问网站 http://www.nederlandict.nl/index.php 请利用比利时的电子设备再生利用系 比利时 统“Recupel”,访问网站 http://www.recupel.be 请利用瑞士的电子设备再生利用系统 瑞士 “SWICO”,访问网站 http://www.swico.ch (2) 对于英国、德国、法国和意大利的用户 请向当地特许再生利用电子设备的回收和再生利 用机构或再生利用服务公司洽询。夏普公司推荐 MIREC的再生利用服务,可从网页 http://www.mirec.com/获得MIREC的综合信息。 必须由电子设备的最终持有者支付MIREC服务...
  • Seite 134 规格 产品规格 外形尺寸 (单位:毫米) 型号名称 LL-191A-W(白色) /LL-191A-B (黑色) 液晶显示器 48厘米对角线长 TFT液晶显示模块 解像度 (最大) SXGA 1280×1024像素 可显示的色彩种数 (最大) 约16,190,000种颜色 (6位+FRC) 亮度 (最大) 220烛光/米 像素间距 0.294 (水平) × 0.294 (垂直) 毫米 对比度 500:1 可视角度 左-右160度;上-下160度 (对比度 5) > 屏幕显示尺寸 水平376.3毫米×垂直301.1毫米 视频信号 模拟 “RGB” (红绿蓝) ( 0.7伏峰峰值) [75Ω] 同步信号...
  • Seite 135 规格 相关的信号时序 模拟 “RGB” (红绿蓝) 输入连接器的插脚 15芯小型D-sub连接器 水平同步 垂直同步 像素频率 显示模式 (千赫兹) (赫兹) (兆赫兹) VESA 序号 功能 红色视频信号输入 绿色视频信号输入 蓝色视频信号输入 GND (地线) GND (地线) 用于红色视频信号 “GND” (地线) 用于绿色视频信号 “GND” (地线) 用于蓝色视频信号 “GND” (地线) US文本 + 5伏 “Power GND (地线) Macintosh” GND (地线)...
  • Seite 136: 安装设置信息和Icc文档(用于"Windows

    安装设置信息和ICC文档(用于“Windows” ) 根据电脑或电脑操作系统的不同型号规格,有可能需 对于“Windows 98” 要在电脑内安装设置信息。如果属于这种情况,那么 把显示器设置信息安装到 “Windows 98” ,把显示器 请按照如下步骤来安装显示器设置信息。 (由于电脑 的ICC文档设置为预先确定的值。 或电脑操作系统的型号规格不同,操作命令的名称和 在下述安装说明中,所用的菜单名称指的是英文版的 方法也可能有所不同。在阅读本操作说明时,请参照 “Windows” 中的菜单名称。请把这些名称作为安装 电脑本身的使用说明书。 ) 时的参考指南。 在本说明中,假定光盘驱动器是 “D” 驱动器。 关于ICC文档 ICC (国际色彩协会) 文档是一个描述液晶显示器色彩 如果已经显示出了 “Add New Hardware Wizard” 再生特性的文件。使用适合ICC文档的显示器可以获 (添加新硬件向导) : 得高精度的色彩再生。 - “Windows 98” 、 “Windows Me” 、 “Windows 1.
  • Seite 137 安装设置信息和ICC文档(用于“Windows” ) 对于“Windows 2000” 对于“Windows Me” 把显示器设置信息安装到 “Windows 2000” , 把显示器设置信息安装到 “Windows Me” ,把显示器 把显示器的ICC文档设置为预先确定的值。 的ICC文档设置为预先确定的值。 在下述安装说明中,所用的菜单名称指的是英文版的 在下述安装说明中,所用的菜单名称指的是英文版的 “Windows”中的菜单名称。请把这些名称作为安装 “Windows” 中的菜单名称。请把这些名称作为安装 时的参考指南。 时的参考指南。 在本说明中,假定光盘驱动器是 “D” 驱动器。 在本说明中,假定光盘驱动器是 “D” 驱动器。 1. 将附送的光盘装入电脑的 “D” 驱动器。 如果已经显示出了 “Add New Hardware Wizard” 2. 单击 [Start] (开始) 按钮。从 [Settings] (设置) (添加新硬件向导)...
  • Seite 138 安装设置信息和ICC文档(用于“Windows” ) 安装ICC文档 对于“Windows XP” 把显示器设置信息安装到 “Windows XP” ,把显示器 安装显示器的ICC文档。 (如果已经安装了设置信息, 的ICC文档设置为预先确定的值。 那么也就已经安装了ICC文档,不需要再行安装 在下述安装说明中,所用的菜单名称指的是英文版的 了。 ) “Windows” 中的菜单名称。请把这些名称作为安装 在下述安装说明中,所用的菜单名称指的是英文版的 时的参考指南。 “Windows” 中的菜单名称。请把这些名称作为安装 在本说明中,假定光盘驱动器是 “D” 驱动器。 时的参考指南。 在本说明中,假定光盘驱动器是 “D” 驱动器。 1. 将附送的光盘装入电脑的 “D” 驱动器。 2. 单击 [Start] (开始) 按钮。选择 [Control Panel] 1.
  • Seite 139: 关于 "Colorsync" (彩色同步) 文档的信息 (用于苹果机的Macos

    关于 “ColorSync” ( 彩色同步) 文档的信息 (用于苹果机的MacOS) 关于“ColorSync” (彩色同步)文档 “ColorSync” (色彩同步) 是 “Apple Computer” (苹 果电脑) 的色彩管理系统。与兼容的显示器一起使用 时,能实现色彩再生特性。 “ColorSync” (彩色同步) 文档描述了液晶显示器的色彩特性。 注: - 本显示器的 “ColorSync” (彩色同步) 文档要用 MacOS8.5或更高的版本。 - 使用ColorSync(彩色同步)文档时,请如下设置∶ - [DISPLAY MODE](显示模式)∶[STD](标准)或 [OFFICE](省电) - [WHITE BALANCE](白色平衡)∶[STD](标准) - [GAMMA](灰度)∶[0] 设置“ColorSync” (彩色同步)文档 注:...
  • Seite 140: 关于安装Vesa规格支架的说明

    关于安装VESA规格支架的说明 下列底座或支架可以装配到显示器上。 5. 用四个螺钉把支架安装到显示器上。 - 底座 (另外销售) 型号名称∶NL-S02-H (灰白色) NL-S02-B (黑色) - 可用于VESA的支架 (市售) 可以使用的市售支架 装配必须满足: - 和VESA规格兼容 - 在将要安装的地方的螺钉孔间距必须为100毫米× 100毫米。 - 在把支架或底座安装到显示器上之后,支架或底座 不得跌落或折断。 底座 如何装配支架或者 注: - 用于安装支架的螺钉应该是长度为从安装表面突出 - 注意不要过度弯曲连接线或者增加延长线,否则会 6毫米到8毫米的M4螺钉。使用其它的螺钉可能导 引起故障。 致显示器脱落或设备内部的损坏。 - 按照这些指令进行操作时,请参考支架或者底座附 带的使用说明书里的安装指令。 6 - 8毫米 要小心! 用于安装支架的螺钉...
  • Seite 141 M E M O...
  • Seite 142 M E M O...
  • Seite 143 M E M O...
  • Seite 144 M E M O...
  • Seite 145 M E M O...
  • Seite 146 M E M O...
  • Seite 148 SHARP CORPORATION Printed in China Gedruckt in China Imprimé en Chine Stampato in Cina Impreso en China P/N: 0NI-191A-E001 1925-1300-5520...

Inhaltsverzeichnis