Pioneer FS-W40 Bedienungsanleitung

Verwandte Anleitungen für Pioneer FS-W40


Inhaltszusammenfassung für Pioneer FS-W40
- Seite 238 > Teilenamen > Installation > Setup > Wiedergabe Ergänzende Informationen | Firmware-Update | Andere Freestyle Sound System Vor dem Start Lieferumfang ................2 FS-W40 Teilenamen Bedienfeld ................3 Rückseite ................4 Fernbedienung ............... 5 Display ..................6 Satelliten-Funklautsprecher ............ 7 Bedienungs Installation 1.
-
Seite 239: Vor Dem Start
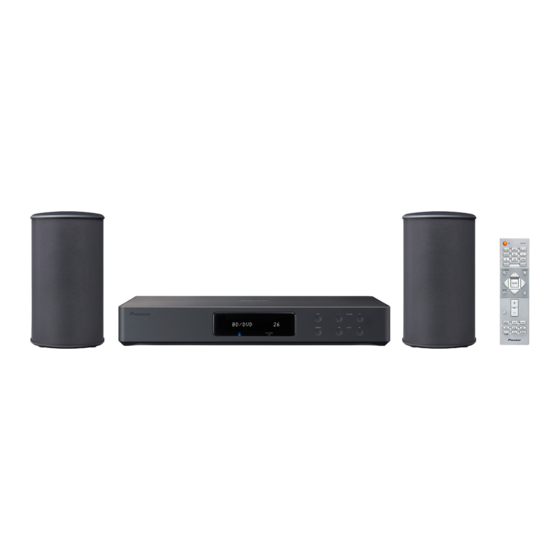
> Vor dem Start > Teilenamen > Installation > Setup > Wiedergabe Ergänzende Informationen | Firmware-Update | Andere Lieferumfang Vor dem Start Sound-System-Controller AC-400 (1) Netzkabel (2) 0 Das Netzkabel von Sound-System-Controller darf erst dann angeschlossen werden, wenn alle anderen Kabelanschlüsse vollständig sind. 0 Wir übernehmen keine Haftung für Schäden, die beim Anschließen von W-LAN Satellitenlautsprecher FS-400 (2) Drittanbietergeräten entstehen. -
Seite 240: Bedienfeld
> Vor dem Start > Teilenamen > Installation > Setup > Wiedergabe Ergänzende Informationen | Firmware-Update | Andere Bedienfeld Teilenamen 1. Fernbedienungssensor 2. Display ( 3. Í/l Taste: Hiermit wird das Gerät eingeschaltet bzw. in den Standby-Modus geschaltet. 4. -
Seite 241: Rückseite
> Vor dem Start > Teilenamen > Installation > Setup > Wiedergabe Ergänzende Informationen | Firmware-Update | Andere Rückseite 90° 180° 1. ANTENNA FM 75Ω-Buchse: Hier kann die mitgelieferte Antenne angeschlossen werden. 2. -
Seite 242: Fernbedienung
> Vor dem Start > Teilenamen > Installation > Setup > Wiedergabe Ergänzende Informationen | Firmware-Update | Andere Fernbedienung 1. Í Taste: Hiermit wird das Gerät eingeschaltet bzw. in den Standby-Modus geschaltet. 2. Eingangsauswahltasten: Wechselt den Eingang, der wiedergegeben werden soll. ... -
Seite 243: Display
> Vor dem Start > Teilenamen > Installation > Setup > Wiedergabe Ergänzende Informationen | Firmware-Update | Andere Display Neo:6 1. Leuchtet unter den folgenden Bedingungen. wiedergegeben oder pausiert werden. HDMI: HDMI-Signale werden eingegeben und ausgewählt. 4. -
Seite 244: Satelliten-Funklautsprecher
> Vor dem Start > Teilenamen > Installation > Setup > Wiedergabe Ergänzende Informationen | Firmware-Update | Andere Satelliten-Funklautsprecher 1. Lautsprechergitter 2. CONNECT LED: Blinkt rot, wenn keine Kopplung zu Sound System Controller hergestellt ist, und leuchtet blau, wenn eine Kopplung hergestellt ist. Darüber hinaus leuchtet es rot, CO NN EC T wenn "Wireless Speaker Standby"... -
Seite 245: Installation
> Vor dem Start > Teilenamen > Installation > Setup > Wiedergabe Ergänzende Informationen | Firmware-Update | Andere 1. Installieren der Satelliten-Funklautsprecher Installation Installieren Sie zunächst die Lautsprecher und schließen Sie deren Netzkabel an. Auf der Lautsprecherrückseite befindet sich ein Etikett mit "L"... -
Seite 246: Anschließen Des Fernsehers
> Vor dem Start > Teilenamen > Installation > Setup > Wiedergabe Ergänzende Informationen | Firmware-Update | Andere 2. Anschließen des Fernsehers An ARC-Fernseher Verwenden Sie bei ARC-fähigen Fernsehern (Audio Return Channel) ein HDMI-Kabel und nehmen Sie den Anschluss entsprechend Abbildung "a" vor. Wählen Sie beim Anschließen eine HDMI IN-Buchse am Fernseher aus, von der ARC unterstützt wird. -
Seite 247: Anschließen Der Av-Komponenten
> Vor dem Start > Teilenamen > Installation > Setup > Wiedergabe Ergänzende Informationen | Firmware-Update | Andere 3. Anschließen der AV-Komponenten Verwenden Sie HDMI-Kabel, um AV-Komponenten anzuschließen. Wenn eine AV-Komponente angeschlossen ist, die dem CEC-Standard (Consumer Electronics Control) entspricht, können Funktionen wie die HDMI CEC-Funktion, die mit dem Eingangsselektor verknüpft ist, sowie die HDMI Standby Through-Funktion verwendet werden, mit der Video und Audio von AV-Komponenten auch dann über den... -
Seite 248: Anschließen Weiterer Kabel
> Vor dem Start > Teilenamen > Installation > Setup > Wiedergabe Ergänzende Informationen | Firmware-Update | Andere 4. Anschließen weiterer Kabel Antennenanschluss Verbinden Sie die mitgelieferte FM-Zimmerantenne mit dem ANTENNA FM 75Ω-Anschluss. Während das Radio eingeschaltet ist, bewegen Sie die Zimmerantenne im Raum herum, um die Position mit dem besten Empfang zu ermitteln. -
Seite 249: Setup
> Vor dem Start > Teilenamen > Installation > Setup > Wiedergabe Ergänzende Informationen | Firmware-Update | Andere Erste Einrichtung mit dem automatischen Startup-Assistenten Setup Initial Setup startet automatisch 1. Schalten Sie den Eingang des Fernsehers auf denjenigen, der mit dem Gerät belegt ist. 2. -
Seite 250: Netzwerkverbindung
> Vor dem Start > Teilenamen > Installation > Setup > Wiedergabe Ergänzende Informationen | Firmware-Update | Andere 1. Registrieren von Funklautsprechern Lautsprecher vornehmen. ( P15) Koppeln Sie die Lautsprecher und Sound-System- Controller. Es dauert ca. 30 Sekunden, bis die Lautsprecher 3. -
Seite 251: System Setup
> Vor dem Start > Teilenamen > Installation > Setup > Wiedergabe Ergänzende Informationen | Firmware-Update | Andere System Setup 0 Um zum vorigen Bildschirm zurückzukehren, drücken Sie 4. Um die Einstellungen zu verlassen, drücken Sie TV Out ■ TV Out / OSD 1080p ->... -
Seite 252: Wireless Speaker
> Vor dem Start > Teilenamen > Installation > Setup > Wiedergabe Ergänzende Informationen | Firmware-Update | Andere Wireless Speaker gewechselt werden. Wenn Meter als Einheit festgelegt sind, können Sie in Schritten von 0,03 m zwischen 0,03 m und 9,00 m wählen. Wenn Fuß als Einheit festgelegt sind, können Sie in Schritten von 0,1 ft. - Seite 253 > Vor dem Start > Teilenamen > Installation > Setup > Wiedergabe Ergänzende Informationen | Firmware-Update | Andere ■ Information Audio Adjust Transmission Status Hier wird der Sound-System-Controller-Kommunikationsstatus ■ Dual Mono/Mono angezeigt. Dual Mono Stellen Sie den Audiokanal oder die Sprache, die ausgegeben Front Left Der Verbindungsstatus des linken Frontlautsprechers wird werden soll, ein, wenn Multiplex-Audio oder mehrsprachige TV-...
- Seite 254 > Vor dem Start > Teilenamen > Installation > Setup > Wiedergabe Ergänzende Informationen | Firmware-Update | Andere Source Hardware ■ Input Volume Absorber ■ HDMI Passen Sie den Lautstärkeunterschied zwischen den an das Gerät angeschlossenen HDMI CEC Wenn die Einstellung den Wert "On" aufweist, sind die Geräten an.
- Seite 255 > Vor dem Start > Teilenamen > Installation > Setup > Wiedergabe Ergänzende Informationen | Firmware-Update | Andere HDMI Standby Wenn diese Einstellung nicht den Wert "Off" aufweist, können Audio TV Out Sie können Audiosignale über die Lautsprecher des Fernsehers Through Sie Video- und Audiosignale eines über HDMI angeschlossenen wiedergeben, wenn dieses Gerät eingeschaltet ist.
- Seite 256 Namen. IP-Adressen zugewiesen werden können, muss "DHCP" den Wert "Disable" aufweisen, Zum Kaufzeitpunkt auf Pioneer AC-400 ****** diesem Gerät muss in "IP Address" eine Adresse zugewiesen werden, und es müssen eingestellt. (" * " steht für alphanummerische Zeichen zur LAN-Informationen wie Subnetzmaske und Gateway eingegeben werden.
- Seite 257 > Vor dem Start > Teilenamen > Installation > Setup > Wiedergabe Ergänzende Informationen | Firmware-Update | Andere Network Check Sie können die Netzwerkverbindung überprüfen. Pairing Information Sie können die auf diesem Gerät gespeicherten Drücken Sie ENTER, wenn "Start" angezeigt wird. Kopplungsinformationen initialisieren.
-
Seite 258: Power Management
> Vor dem Start > Teilenamen > Installation > Setup > Wiedergabe Ergänzende Informationen | Firmware-Update | Andere ■ Power Management Network Standby Wenn diese Funktion den Wert "On" aufweist, können Sie dieses Gerät mit einer Anwendung zum Steuern des Geräts über das Sleep Timer Mit dieser Funktion kann das Gerät nach Ablauf der Netzwerk einschalten. -
Seite 259: Firmware Update
> Vor dem Start > Teilenamen > Installation > Setup > Wiedergabe Ergänzende Informationen | Firmware-Update | Andere 0 Warten Sie eine Weile ab, wenn "Network Standby" und "Bluetooth Wakeup" nicht ■ Lock ausgewählt werden können. Die Option wird angezeigt, wenn die Netzwerk-Funktion Setup Parameter Sperren Sie das Setup-Menü, um die Einstellungen zu schützen. -
Seite 260: Av Adjust
> Vor dem Start > Teilenamen > Installation > Setup > Wiedergabe Ergänzende Informationen | Firmware-Update | Andere AV Adjust ■ Tone Bass: Verstärken oder verändern Sie den Bassbereich des Lautsprechers. Treble: Verstärken oder verändern Sie den Höhenbereich des Lautsprechers. 0 Kann nicht eingestellt werden, wenn der Wiedergabemodus Pure Direct lautet. - Seite 261 > Vor dem Start > Teilenamen > Installation > Setup > Wiedergabe Ergänzende Informationen | Firmware-Update | Andere Dimension: Passen Sie im Dolby Pro Logic Ⅱ Music-Wiedergabemodus die räumliche Tiefe des Klangfelds an. Bei kleinen Zahlen wird der Klang nach vorne verschoben. Bei großen Zahlen wird der Klang nach hinten verschoben.
-
Seite 262: Wiedergabe Von Av-Komponenten
> Vor dem Start > Teilenamen > Installation > Setup > Wiedergabe Ergänzende Informationen | Firmware-Update | Andere Wiedergabe von AV-Komponenten Wiedergabe Grundlegende Funktionen 4. Passen Sie die Lautstärke mit VOL+/– (b) an. Führen Sie die Wiedergabe einer AV-Komponente oder eines TV-Geräts aus, die/das über ein HDMI-Kabel oder ein anderes Kabel mit diesem Gerät verbunden ist. -
Seite 263: Internetradio
> Vor dem Start > Teilenamen > Installation > Setup > Wiedergabe Ergänzende Informationen | Firmware-Update | Andere Internetradio Wenn dieses Gerät mit einem Netzwerk verbunden ist, Programm in "My Presets". Nach erfolgter Registrierung können Sie TuneIn und weitere voreingestellte wird "My Presets"... -
Seite 264: Spotify
(b) Mit dieser Taste wird der vorige Track wiedergegeben. (c) Mit dieser Taste können Sie Wiederholung/zufällige Wiedergabe starten. Durch mehrmaliges Drücken dieser Pioneer AC-400 XXXXXX Taste wird zwischen den Wiederholungsmodi umgeschaltet. (d) Mit dieser Taste wird die Wiedergabe pausiert. Wird die Taste bei pausierter Wiedergabe gedrückt, so wird die... -
Seite 265: Music Server
> Vor dem Start > Teilenamen > Installation > Setup > Wiedergabe Ergänzende Informationen | Firmware-Update | Andere Music Server Das Streaming von Musikdateien, die auf PCs oder NAS-Geräten und überprüfen Sie, dass es auf "Allow" eingestellt ist. gespeichert sind, welche mit demselben Netzwerk wie dieses 5. -
Seite 266: Ferngesteuerte Wiedergabe Von Einem Pc
> Vor dem Start > Teilenamen > Installation > Setup > Wiedergabe Ergänzende Informationen | Firmware-Update | Andere 0 Je nach Server und Freigabe-Einstellungen kann das auf einem anderen Server öffnen Sie in "Other Libraries" den 0 Die Formate WMA Pro/Voice/WMA Lossless werden Gerät ihn möglicherweise nicht erkennen oder es können Zielserver und wählen die wiederzugebende Musikdatei aus. -
Seite 267: Usb-Speichergerät
> Vor dem Start > Teilenamen > Installation > Setup > Wiedergabe Ergänzende Informationen | Firmware-Update | Andere USB-Speichergerät Grundlegende Wiedergabe Sie können Musikdateien wiedergeben, die sich auf einem USB-Speichergerät befinden. 1. Schalten Sie den Eingang des Fernsehers auf denjenigen, der mit dem Gerät belegt ist. 2. - Seite 268 > Vor dem Start > Teilenamen > Installation > Setup > Wiedergabe Ergänzende Informationen | Firmware-Update | Andere (c) Mit dieser Taste werden die angezeigten Verfügung. Außerdem ist es je nach USB-Speichergerät kHz; 88,2 kHz; 96 kHz; 176,4 kHz; 192 kHz Titelinformationen während der Wiedergabe gewechselt.
-
Seite 269: Bluetooth ® -Wiedergabe
Kopplungsmodus wird aktiviert. 2. Aktivieren Sie die BLUETOOTH Funktion des BLUETOOTH fähigen Geräts und wählen Sie aus der Pioneer AC-400 XXXXXX angezeigten Liste dieses Gerät aus. Wenn Sie zur Eingabe eines Passworts aufgefordert werden, geben Sie "0000" ein. -
Seite 270: Wiedergabe Von Fm-Radio
> Vor dem Start > Teilenamen > Installation > Setup > Wiedergabe Ergänzende Informationen | Firmware-Update | Andere Wiedergabe von FM-Radio Einstellung eines Radiosenders Voreinstellung eines Radiosenders Automatische Sendersuche Hiermit können Sie bis zu 40 bevorzugte Radiosender registrieren. Die Registrierung von Radiosendern im Voraus ermöglicht es 1. -
Seite 271: Verwenden Von Rds
> Vor dem Start > Teilenamen > Installation > Setup > Wiedergabe Ergänzende Informationen | Firmware-Update | Andere Verwenden von RDS Drama Culture Science (Wissenschaft und Technik) RDS steht für das Radio Data System und ist ein Verfahren Varied zur Übertragung von Daten in FM-Radiosignalen. In Pop M (Popmusik) Regionen mit RDS wird der Name des Radiosenders Rock M (Rockmusik) -
Seite 272: Wiedergabemodi
> Vor dem Start > Teilenamen > Installation > Setup > Wiedergabe Ergänzende Informationen | Firmware-Update | Andere Wiedergabemodi Auswahl von Wiedergabemodi SURR-Taste (c) Drücken Sie mehrfach, um das Audioformat der Eingangssignale und einen von zahlreichen Sie können den Wiedergabemodus während der Wiedergabemodi auszuwählen. - Seite 273 > Vor dem Start > Teilenamen > Installation > Setup > Wiedergabe Ergänzende Informationen | Firmware-Update | Andere Der für eine Quelle zuletzt ausgewählte Wiedergabemodus Wiedergabemodus-Effekte Surround-Back-Kanal bis zu maximal 7.1-Kanal. wird für die Tasten AUTO/DIRECT, SURR und STEREO 0 Zur Übertragung dieses Audioformats verwenden Sie ein gespeichert.
-
Seite 274: Kanälen Unter Verwendung Verlustfreier
> Vor dem Start > Teilenamen > Installation > Setup > Wiedergabe Ergänzende Informationen | Firmware-Update | Andere HDMI IN eingehen. Je nach angeschlossenem Player kann 0 Zur Übertragung dieses Audioformats verwenden Sie ein Ext.Mono (Extended Mono) jedoch ein besserer Klang erzielt werden, wenn die Ausgabe HDMI-Kabel und wählen den Bitstream-Audioausgang In diesem Modus geben alle Lautsprecher den gleichen Sound in über den PCM-Ausgang des Players erfolgt. -
Seite 275: Auswählbare Wiedergabemodi
> Vor dem Start > Teilenamen > Installation > Setup > Wiedergabe Ergänzende Informationen | Firmware-Update | Andere Auswählbare Wiedergabemodi Auswählbare Wiedergabemodi Eingangsformat Wiedergabemodus Sie können aus einer Vielzahl von Wiedergabemodi je nach Audioformat des Eingangssignals auswählen. Analog Stereo 0 Der Stereo-Modus können für alle Audioformate ausgewählt werden. Mono PL Ⅱ... -
Seite 276: Eingangsformat
> Vor dem Start > Teilenamen > Installation > Setup > Wiedergabe Ergänzende Informationen | Firmware-Update | Andere Eingangsformat Wiedergabemodus Eingangsformat Wiedergabemodus Stereo Multich PCM Stereo Musikdateien (außer DSD/Dolby Mono Multich PCM * 1 TrueHD) Classical PL Ⅱ Movie * 1 *... - Seite 277 > Vor dem Start > Teilenamen > Installation > Setup > Wiedergabe Ergänzende Informationen | Firmware-Update | Andere Eingangsformat Wiedergabemodus Eingangsformat Wiedergabemodus Stereo Dolby D Stereo Dolby D * 1 * 2 * 1 * 2 PL Ⅱ Movie PL Ⅱ Movie *...
- Seite 278 > Vor dem Start > Teilenamen > Installation > Setup > Wiedergabe Ergänzende Informationen | Firmware-Update | Andere Eingangsformat Wiedergabemodus Eingangsformat Wiedergabemodus Dolby D+ Stereo Dolby TrueHD Stereo Dolby D+ Dolby TrueHD * 1 * 2 * 3 * 1 * 2 PL Ⅱ...
- Seite 279 > Vor dem Start > Teilenamen > Installation > Setup > Wiedergabe Ergänzende Informationen | Firmware-Update | Andere Eingangsformat Wiedergabemodus Eingangsformat Wiedergabemodus Stereo DTS 96/24 Stereo DTS 96/24 * 1 * 2 * 1 * 2 PL Ⅱ Movie PL Ⅱ Movie *...
- Seite 280 > Vor dem Start > Teilenamen > Installation > Setup > Wiedergabe Ergänzende Informationen | Firmware-Update | Andere Eingangsformat Wiedergabemodus Eingangsformat Wiedergabemodus DTS Express Stereo DTS-HD HR Stereo DTS Express DTS-HD HR * 1 * 2 * 1 * 2 PL Ⅱ...
- Seite 281 > Vor dem Start > Teilenamen > Installation > Setup > Wiedergabe Ergänzende Informationen | Firmware-Update | Andere Eingangsformat Wiedergabemodus DTS-HD MSTR Stereo DTS-HD MSTR * 1 * 2 PL Ⅱ Movie * 3 PL Ⅱ Music * 3 PL Ⅱ Game *...
-
Seite 282: Ergänzende Informationen Zu Den Funktionen Des Players
> Vor dem Start > Teilenamen > Installation > Setup > Wiedergabe Ergänzende Informationen | Firmware-Update | Andere Ergänzende Informationen zu den Funktionen des Players Ergänzende Informationen Ergänzende Aufgrund von Updates an der Firmware (System-Software) nach dem Kauf oder Änderungen an der Firmware während der Herstellung kann es zu Abweichungen zwischen verfügbaren Funktionen und Bedienungsanleitung kommen. -
Seite 283: Firmware-Update
> Vor dem Start > Teilenamen > Installation > Setup > Wiedergabe Ergänzende Informationen | Firmware-Update | Andere Update-Funktionen Firmware-Update Dieses Gerät kann die Firmware des Sound-System- Controller (System-Software) über ein Netzwerk oder den USB-Port aktualisieren. Dadurch können wir Verbesserungen an einer Vielzahl von Operationen ausführen und Funktionen hinzufügen. -
Seite 284: Aktualisierung Der Firmware
> Vor dem Start > Teilenamen > Installation > Setup > Wiedergabe Ergänzende Informationen | Firmware-Update | Andere Aktualisierung der Firmware Dieses Gerät kann die Firmware des Sound-System- Rechtstheorie und unabhängig davon, ob die Forderungen Controller (System-Software) über ein Netzwerk oder den aus unerlaubter oder vertragsgemäßer Handlung System Setup USB-Port aktualisieren. -
Seite 285: Update Über Usb
> Vor dem Start > Teilenamen > Installation > Setup > Wiedergabe Ergänzende Informationen | Firmware-Update | Andere 0 Während der Aktualisierung wird der TV-Bildschirm Update über USB 3. Kopieren Sie alle entpackten Dateien und Ordner ins möglicherweise schwarz, abhängig vom aktualisierten Stammverzeichnis des USB-Speichergerätes. - Seite 286 > Vor dem Start > Teilenamen > Installation > Setup > Wiedergabe Ergänzende Informationen | Firmware-Update | Andere 0 Wenn "Firmware Update" ausgegraut ist und nicht Firmwaredatei. ausgewählt werden kann, warten Sie eine Weile, bis es 0 Sonstiges: Entfernen Sie das Netzkabel, schließen Sie verfügbar ist.
-
Seite 287: Fehlerbehebung
> Vor dem Start > Teilenamen > Installation > Setup > Wiedergabe Ergänzende Informationen | Firmware-Update | Andere Fehlerbehebung Andere Bevor Sie den Vorgang starten den Standby-Modus und halten Sie Í/l am Sound-System- Sorgen Sie für ausreichenden Belüftungsraum um das Controller mindestens 5 Sekunden lang gedrückt, um das Gerät herum. - Seite 288 > Vor dem Start > Teilenamen > Installation > Setup > Wiedergabe Ergänzende Informationen | Firmware-Update | Andere Vom Fernseher werden keine Audiosignale wiedergegeben. erzeugen. Wählen Sie einen anderen Wiedergabemodus aus, 0 Ein Audiokabel nimmt möglicherweise eine Störung auf. 0 Stellen Sie den Eingangsselektor an diesem Gerät auf um die Audiowiedergabe zu überprüfen.
-
Seite 289: Gekoppelter Betrieb
> Vor dem Start > Teilenamen > Installation > Setup > Wiedergabe Ergänzende Informationen | Firmware-Update | Andere Gerät muss auf "Bitstream output" eingestellt sein. Video der Auflösung des Fernsehers kompatibel. Wenn Sie den 0 Drücken Sie mehrfach auf der Fernbedienung, um Player über ein HDMI-Kabel an dieses Gerät das Sound-System-Controller-Display zu wechseln und angeschlossen haben, ändern Sie die... -
Seite 290: Bluetooth-Funktion
> Vor dem Start > Teilenamen > Installation > Setup > Wiedergabe Ergänzende Informationen | Firmware-Update | Andere 0 Betonwände schwächen die Radiosignale ab. BLUETOOTH fähigen Geräts ist eine Wiedergabe auf 0 Stellen Sie sicher, dass Ihr Modem und Router 0 Hören Sie den Sender in Mono. - Seite 291 > Vor dem Start > Teilenamen > Installation > Setup > Wiedergabe Ergänzende Informationen | Firmware-Update | Andere USB-Speichergerät und Verschlüsselung (WEP usw.) korrekt sind. Stellen Fernbedienung Sie sicher, dass Sie die Netzwerkeinstellungen des Geräts korrekt eingestellt haben. Das USB-Speichergerät wird nicht angezeigt 0 Stellen Sie sicher, dass die Batterien mit der richtigen 0 Eine Verbindung mit einer SSID, die Multi-Byte-Zeichen 0 Überprüfen Sie, ob das USB-Speichergerät bzw.
-
Seite 292: Lizenzen Und Warenzeichen
> Vor dem Start > Teilenamen > Installation > Setup > Wiedergabe Ergänzende Informationen | Firmware-Update | Andere Lizenzen und Warenzeichen Manufactured under license from Dolby Laboratories. Dolby, Dolby Audio, Pro Logic, and the double-D symbol are trademarks of Dolby Laboratories. FireConnect is technology powered by BlackFire Research. -
Seite 293: Allgemeine Technische Daten
> Vor dem Start > Teilenamen > Installation > Setup > Wiedergabe Ergänzende Informationen | Firmware-Update | Andere Allgemeine technische Daten Sound System Controller Maximale Videoauflösung Übertragungsbereich (A2DP) 4k 60 Hz (YCbCr 4:4:4) 20 Hz - 20 kHz (Samplingfrequenz 44,1 kHz) Verstärkerteil Audioeingänge Maximale Übertragungsreichweite... - Seite 294 > Vor dem Start > Teilenamen > Installation > Setup > Wiedergabe Ergänzende Informationen | Firmware-Update | Andere Satelliten-Funklautsprecher Geschlossenes 2-Wege-Gehäuse Ausgangsnennleistung (IEC) 2 Kanäle 40 W bei 4 Ohm, 1 kHz, 1 Kanal angetrieben von 10 % THD (Gesamtverzerrung) Frequenzgang (2,1-Kanal): 85 Hz–20 kHz (2-Kanal): 65 Hz–20 kHz...
-
Seite 295: Über Hdmi
> Vor dem Start > Teilenamen > Installation > Setup > Wiedergabe Ergänzende Informationen | Firmware-Update | Andere Über HDMI Kompatible Funktionen wiedergegeben werden. 1280 720p 24/25/30/50/60Hz, 1680 720p 24/25/30/50/ 60Hz, 1920 1080p 24/25/30/50/60Hz, 2560 1080p 24/ HDMI (High Definition Multimedia Interface) ist ein digitaler x.v.Color ™...