Philips SBCVL1400 Bedienungsanleitung
Vorschau ausblenden
Andere Handbücher für SBCVL1400:
- Bedienungsanleitung (43 Seiten) ,
- Bedienungsanleitung (43 Seiten)
Inhaltsverzeichnis
Verfügbare Sprachen
Verfügbare Sprachen
Quicklinks
2
2
ENGLISH
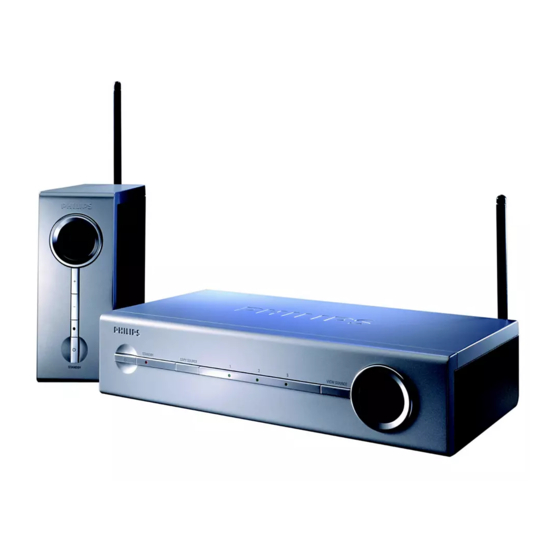
Wireless TV Link
SBC VL1400
The Philips Wireless TV Link allows you to distribute any kind of video signal (digital
or analogue set-top boxes, DVDs, satellite receivers, VCRs etc.) or cable
programmes throughout your house without the need for extra wiring, running
cables or drilling holes. This means that you can enjoy the freedom of watching Pay-
TV on your bedroom TV. You can also enjoy a film playing on your living-room
video recorder while others independently watch their favourite programmes on
the main TV.
Besides distributing video signals wirelessly , the Wireless TV Link also functions as a
switch box for your main TV. It is equipped with four SCART input connectors.
These allow you to connect up to four video devices at the same time, so cable
swapping or re-configuring your audio/video set-up is no longer necessary. In
addition, three of the SCART inputs can be linked to the fourth one, which makes
copying your video content very simple.
The universal remote control allows you to control the Wireless TV Link, your
second TV and up to four video sources, regardless of brand. You don't have to
carry around the other remote control units!
The Wireless TV Link is based on wireless RF technology that offers you in-home
convenience. To enable you to enjoy the best possible performance, four
transmission channels are provided so you can select the channel that provides
optimum viewing with the minimum of interference.
Pure wireless home con
Pure wireless home con
Pure wireless home con
Pure wireless home con
Pure wireless home conv v v v v enience!
Safety precautions
Please read this guide carefully and keep it for future reference.
•
Do not use this product in moist places or close to water.
•
Do not expose this product to extreme heat.
•
Do not open this product; in case of technical difficulties bring it to your Philips
retailer.
•
Do not cover this product.
•
Only connect the AC power adapters to a power supply of 220-240 VAC / 50Hz.
•
Only use the AC power adapters included or a type that complies with safety
standard EN60950 and that has the following specification: 12 Volt DC / 500mA.
•
Inadequately protected or sensitive electronic equipment may be affected by the
use of this product. This interference can lead to damage to either equipment.
Please check whether or not surrounding equipment can be affected by this
product before you start using it.
enience!
enience!
enience!
enience!
Keys and functions
Product illustration
A
Transmitter Unit
1
on inside flap:
Power button
switches the transmitter between stand-by and on.
2
Power light
red in stand-by mode, green when power is on, flashes when receiving remote
control commands
3
COPY SOURCE button
links SCART input 1,2,3 or SCART OUT to SCART in/output 4.
4
Copy source indication lights
indicate which SCART input (1,2 or 3) is linked to SCART in/output 4. When
there is no light indication the SCART OUT is linked to SCART in/output 4.
5
VIEW SOURCE button
selects which SCART input (1-4) is viewed on the transmitter SCART output
6
View source indication display
indicates the SCART input number that is viewed on the transmitter output.
7
AUTO light
indicates if automatic SCART switching is enabled (on) or disabled (off).
8
Infra-red remote control blaster lights
transmit infra-red remote control signals from the receiver to the video
source devices below.
9
Transmission channel switch
switches the frequency channel of the audio/video signal to minimize
interference.
10
SCART input (1-4) connectors
connect SCART-enabled video source devices to these connectors
11
SCART output connector
connect to the main TV
12
RCA sound output connector
connect to an audio amplifier
13
DC power input
14
Remote control blaster cord connector
15
Remote control blaster cord
four infra-red lights used instead of the infra-red remote control blaster lights
(A-8) for a more precise control of the video sources.
16
SCART cable
17
Power adapter
18
Remote control antenna
ENGLISH
3
Inhaltsverzeichnis

Verwandte Anleitungen für Philips SBCVL1400


Inhaltszusammenfassung für Philips SBCVL1400
-
Seite 19: Kabelloser Tv-Link
DEUTSCH Kabelloser TV-Link Tasten und Funktionen SBC VL1400 Produktabbildung Sendestation Der kabellose TV-Link von Philips ermöglicht Ihnen, jedes beliebige Videosignal auf der Innenseite: Netzschalter (digitale oder analoge Set-Top-Boxen, DVDs, Satelliten-Receiver, Videorekorder schaltet die Sendestation zwischen Bereitschaft und EIN um. Kontrollleuchte usw.) oder Kabelprogramme im Haus weiterzuleiten, ohne dass zusätzliche Kabel... -
Seite 20: Tasten Und Funktionen
DEUTSCH DEUTSCH Tasten und Funktionen Einstellung der Sendestation Produktabbildung Empfangsstation AUDIO auf der Innenseite: Netzschalter Stellen Sie den Kanalwahlschalter auf Kanal 1. DC 9V schaltet die Empfangsstation zwischen Bereitschaft und EIN um. Wenn die Stellen Sie die Sende- und Empfangsstation immer auf denselben Kanal ein. Channel 1 2 3 4 Empfangsstation ein- oder ausgeschaltet wird, wird die Sendestation automatisch... -
Seite 21: Prüfen Der Funktion Der Fernbedienung
DEUTSCH DEUTSCH Prüfen der Funktion der Fernbedienung Verwenden des kabellosen TV-Link an TV2 Schalten Sie TV2 und die Empfangsstation ein. Wiedergabe und Steuerung von Videoquellen an TV2 Stellen Sie sicher, dass auch die Sendestation eingeschaltet ist TV2 einschalten. Halten Sie die Fernbedienung der Videoquelle auf die Empfangsstation und schalten Es ist nicht notwendig, TV1 einzuschalten, um Videoprogramme auf TV2 sehen zu STANDBY zwischen Wiedergabe und Stop hin und her. - Seite 22 DEUTSCH DEUTSCH Verwenden des kabellosen TV-Link an TV1 Nutzung zusätzlicher Funktionen Automatische Wahl der Videoquelle Verbinden von Videoquellen Betätigen Sie den Netzschalter (A-1), um die Sendestation in Bereitschaft zu Schließen Sie einen VCR (oder DVD+RW) an SCART-Ein-/Ausgang 4 an STANDBY schalten.
-
Seite 23: Problembehebung
DEUTSCH DEUTSCH Problembehebung Problembehebung Bitte prüfen Sie zuerst, ob alle Kabel richtig angeschlossen sind. Keine Fernbedienung Zielen Sie mit der Fernbedienung direkt auf die Empfangsstation und stellen der Videoquellen von sicher, dass sich keine Hindernisse dazwischen befinden (B-19 muss blinken). Problem Lösung TV2 aus möglich. -
Seite 24: Allgemeine Anmerkungen
Geräte seiner Gattung vorgeschriebenen Richtlinien. Übertragungsleistung: <10mW Empfangsbereich für • Der Philips kabellose TV-Link hat einen Übertragungsbereich von bis zu 100 IR-Signale: Bis zu 6 m Metern im Freien. Wände, Decken und andere große Gegenstände können den Trägerfrequenz: 32kHz – 57 kHz wirksamen Übertragungsbereich unter Umständen auf bis zu 30 Meter im Haus...