AIPTEK 3D-i2 Bedienungsanleitung
Inhaltsverzeichnis
Quicklinks
Kapitel
Inhaltsverzeichnis
Fehlerbehebung

Verwandte Anleitungen für AIPTEK 3D-i2


Inhaltszusammenfassung für AIPTEK 3D-i2
- Seite 2 Welcome: Dear user, thank you for purchasing this product. Much investment in time and effort has gone into its development, and it is our hope that it will give you many years of trouble-free service. FCC Compliance Statement: This device complies with Part 15 of the FCC Rules. Operation is subjected to the following two conditions: (1) this device may not cause harmful interference, and (2) this device must accept any interference received, including interference that may cause undesired operation.
-
Seite 3: Safety Notice
Safety Notice: 1. Do not drop, puncture or disassemble the camcorder; otherwise the warranty will be voided. 2. Avoid all contact with water, and dry hands before using. 3. Do not expose the camcorder to high temperature or leave it in direct sunlight. Doing so may damage the camcorder. -
Seite 4: Inhaltsverzeichnis
Table of Contents Getting Started..............1 Product overview .................. 1 Loading the battery................2 Charging the battery ................2 Powering on or off / Using a memory card ........... 3 Setting language................... 3 Reading screen icons ................3 Basic Operations ............4 Recording a video clip ................ -
Seite 5: Getting Started
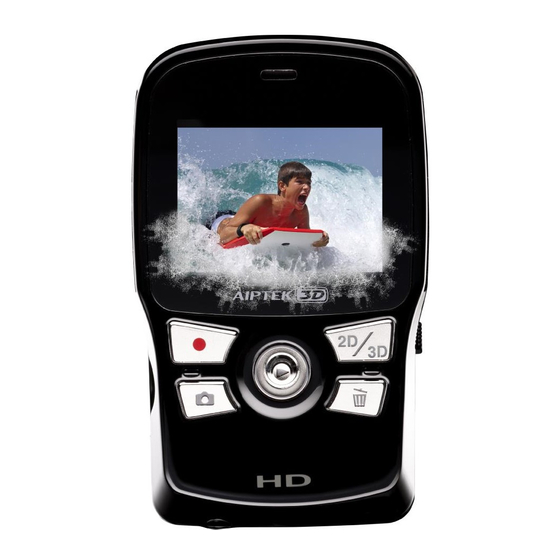
Getting Started Product overview Power button - Press to turn on; long-press to turn off HDMI port SD/SDHC card slot 2D/3D display Record button Shutter button Speaker 2D/3D button - Switch between 2D/3D mode 5-way joystick - 5-way: up/down/left/right/ enter Enter: OK or Playback Delete button Battery charge LED... -
Seite 6: Loading The Battery
Loading the battery Place the battery into the compartment. Align the + and - metallic ends carefully. Press the “3D” mark and then, while pressing, pull the battery cover to remove it. Replace the battery cover. Note that the + and - metallic contacts must be aligned with the corresponding contacts in the compartment. -
Seite 7: Powering On Or Off / Using A Memory Card
Powering on or off / Using a memory card Press the power button to power on the unit. Press and hold down for 2 seconds to turn off the unit. Insert a SD/SDHC card (sold separately) into the slot until it clicks into place. To remove the card, push the card to release it and then pull it out gently. -
Seite 8: Basic Operations
Basic Operations Press this button to shift between 2D/3D mode. Pressing this 2D or 3D. Pressing this button in playback will let you see the and vice versa. When recording or shooting in 2D mode, only the right lens is used for capturing image. This product utilizes the “Parallax Barrier”... -
Seite 9: Playback
Playback File type 2: : video : picture File type 1: 0001/0010 Battery life Storage: Highlight frame : internal : memory card Press OK to display in full screen Press Shutter to return to previous screen Press the OK button ( ) to enter Playback preview mode. -
Seite 10: Menu Operations
Press the OK button ( ) to enter Playback mode and use the Joystick ( Press the Delete button ( ) and 3 options will be available: Option Description folder (3D or 2D) Menu operations Push the Joystick to the right ( ) to bring up menu. -
Seite 11: File Management On Pc
* Flicker table: England Germany France Italy Spain Netherlands Russia Setting Portugal America Taiwan China Japan Korea Thailand Setting File management on PC Connect the USB connector of the camcorder to your PC. Power on the camcorder and the LED will turn green. - Seite 12 port Turn on the camcorder.
-
Seite 13: Appendix
Appendix Battery life / Capacity table Still picture Video clip Battery Life Number of shots Recording time (minute) Table 1000 * The unit is set to 3D mode. Note: This table is for your reference only. The actual battery life depends on your battery quality and recharge level. - Seite 14 Item Image Sensor 5 Mega-pixels CMOS (2592 x 1944) x 2 Camcorder: HD 720p 30f (1280 x 720) Resolution Camera: 5M File Format MP4 (H.264), JPEG Video Frame Rate 30 frames per second Internal Memory External Memory SD card slot (supports 256MB up to 32GB SDHC) LCD Display 2.4”...
- Seite 15 Herzlich willkommen! Lieber Benutzer, vielen Dank für den Kauf dieses Produktes. In die Entwicklung dieses Gerätes wurde viel Zeit und Mühe investiert, und wir hoffen, es wird Ihnen viele Jahre störungsfreien Betrieb und Freude schenken. FCC-Erklärung: Dieses Gerät erfüllt Teil 15 der FCC-Regularien. Der Betrieb unterliegt den folgenden beiden Voraussetzungen: (1) Dieses Gerät darf keine Störungen verursachen, und (2) dieses Gerät muss jegliche empfangenen Störungen hinnehmen, einschließlich Störungen, die zu unbeabsichtigtem...
-
Seite 16: Sicherheitshinweise
Sicherheitshinweise: 1. Lassen Sie den Camcorder nicht fallen, und beschädigen sowie zerlegen Sie das Produkt bevor Sie es verwenden. nicht in direkter Sonneneinstrahlung liegen. Andernfalls können Schäden am Camcorder auftreten. Gehäuse des Gerätes auszuüben. 5. Verwenden Sie den Camcorder zu Ihrer eigenen Sicherheit nicht bei Gewitter oder Blitzschlag. - Seite 17 Inhalt Erste Schritte ..............1 Produktübersicht................... 1 Einlegen des Akkus ................2 Akku laden .................... 2 Ein-/Ausschalten / Verwendung einer Speicherkarte ......Einstellen der Sprache................Ablesen der Bildschirmsymbole............Bedienung ............... 4 Aufnehmen eines Videoclips ..............4 Fotoaufnahme..................4 Wiedergabe ..................5 Dateien löschen ..................
-
Seite 18: Erste Schritte
Erste Schritte Produktübersicht Ein-/Austaste - zum Ausschalten gedrückt halten HDMI-Port SD-/SDHC-Kartensteckplatz Aufnahmetaste Auslöser Lautsprecher 5-Wege-Joystick - 5-Wege: Aufwärts/Abwärts/ Links/Rechts/Enter Enter: OK oder Wiedergabe Löschentaste LED-Akkulade-Anzeige USB-Schalter - Anschlusses nach unten schieben Rechte Linse - Linke Linse - Mikrofon Abdeckung des Akkufachs USB-Anschluss Stativgewinde Handschlaufenhalterung... -
Seite 19: Einlegen Des Akkus
Einlegen des Akkus Legen Sie den Akku in das Fach ein. Richten Sie die Metallkontakte + und - wie angegeben aus. dabei die Abdeckung des Akkufachs vom Gerät ab. Verschließen Sie die Abdeckung des Akkufach wieder. Achten Sie darauf, die Metallkontakte + und - des Akkus an den entsprechenden Kontakten im das Akkufach auszurichten. -
Seite 20: Ein-/Ausschalten / Verwendung Einer Speicherkarte
Ein-/Ausschalten / Verwendung einer Speicherkarte Drücken Sie zum Einschalten des Gerätes die Ein-/Austaste. Halten Sie die Taste zum Ausschalten des Gerätes zwei Sekunden lang gedrückt. Stecken Sie eine SD-/SDHC-Karte (separat zu erwerben) in den Kartensteckplatz, bis diese einrastet. Drücken Sie zum Entfernen der Karte sanft auf deren Sollte sich das Gerät nicht einschalten lassen, prüfen Sie bitte Folgendes: 1) Ist der Akku geladen? Einstellen der Sprache... -
Seite 21: Bedienung
Bedienung Drücken Sie diese Taste zum Umschalten zwischen 2D- und 3D-Modus. Durch Betätigung dieser Taste in der Vorschau zeigt sich, ob sich die aufgenommene Datei im 2D- oder 3D-Format sehen Sie die auf Ihrem Camcorder oder der Speicherkarte abgelegten 2D- oder 3D-Dateien. Beachten Sie, dass 3D-Dateien im 2D-Modus nicht aufgenommen/angezeigt/gelöscht werden können und umgekehrt. -
Seite 22: Wiedergabe
Wiedergabe Dateityp 2: : Video Aktuelle Datei/Anzahl : Bild aller Dateien Dateityp 1: : 2D-Datei 0001/0010 Battrieanzeige : 3D-Datei Speicher: Markierungsrahmen : intern : Speicherkarte Drücken Sie zur Anzeige die OK- Taste Mit dem Auslöser kehren Sie zum vorherigen Bildschirm zurück Drücken Sie zum Aufrufen des Wiedergabe-Modus die OK-Taste ( Drücken Sie zum Umschalten zwischen 2D- und 3D-Dateien die 2D-/3D-Taste ( Navigieren Sie mit dem Joystick (... -
Seite 23: Dateien Löschen
Dateien löschen Drücken Sie zum Aufrufen des Wiedergabemodus die OK-Taste ( ) eine Datei. Drücken Sie die Löschen-Taste ( sind verfügbar: Option Beschreibung Die ausgewählte Datei löschen Nein Menü verlassen, ohne die Datei zu löschen Alles oder 2D) löschen Menübedienung Drücken Sie den Joystick zum Aufrufen des Menüs nach 5-Wege- Joystick... -
Seite 24: Dateiverwaltung Am Pc
Menüelemente Beschreibung Frequenz Einzelheiten entnehmen Sie bitte der nachstehenden “Frequenzeinstellungen”-Tabelle. * Tabelle mit Frequenzeinstellungen: Region Großbritannien Deutschland Frankreich Italien Spanien Niederlande Russland Einstellung Region Portugal Amerika Taiwan China Japan Korea Thailand Einstellung Hinweis: Die Frequenzeinstellung basiert auf dem Frequenzstandard Ihrer örtlichen Stromversorgung. -
Seite 25: Anschließen An Einen Hdtv
Anschließen an einen HDTV HDMI- Port Schalten Sie den HDTV ein. Verbinden Sie den HDMI-Eingangsstecker (das größere Ende) des HDMI-Kabels mit dem HDTV. Verbinden Sie das andere Ende des HDMI-Kabels mit Ihrem Camcorder. Schalten Sie den Camcorder ein. Wählen Sie an Ihrem HDTV den HDMI-Eingang, an dem das HDMI-Kabel angeschlossen ist. -
Seite 26: Anhang
Anhang Tabelle zur Akkulebenszeit / Kapazität Foto Video Anzahl Aufnahmen Aufnahmezeit (Minuten) Tabelle der Akkulebenszeit Hinweis: Diese Tabelle dient lediglich als Orientierungshilfe. Die tatsächliche Akkuqualität hängt vom jeweiligen Akkutyp und vom Ladestand ab. Speicher (SD/SDHC) Videoclip (Min.) Foto Tabelle der Kapazität 16GB Hinweis: Die tatsächliche Kapazität kann je nach Farbsättigung und Komplexität Ihres... - Seite 27 Element Bildsensor 5 Megapixel-CMOS (2592 x 1944) x 2 Kamera: 5 M Dateiformat MP4 (H.264), JPEG Bildfrequenz (Video) Interner Speicher SD-Kartensteckplatz (unterstützt 256 MB bis SDHC mit max. Externer Speicher LCD-Bildschirm Ja, umschaltbar Objektiv Fixobjektiv x 2 Fokusbereich Blendenbereich Verschlussgeschwindigkeit 4-fach Nachtaufnahmemodus Auto...
- Seite 28 Bienvenue : Cher utilisateur, nous vous remercions pour l'achat de ce produit. Beaucoup d'investissements en temps et en efforts ont été réalisés pour son développement, et nous espérons qu'il vous procurera des années de bons et loyaux services. Déclaration de conformité à la FCC : Cet équipement est conforme à...
- Seite 29 Avis relatif à la sécurité : garantie serait annulée. 2. Évitez tout contact avec l'eau, et séchez-vous les mains avant de l'utiliser. lumière directe du soleil. Ceci pourrait endommager le caméscope. 4. Utilisez le caméscope avec soin. Évitez d'exercer de trop fortes pressions sur le boîtier du caméscope.
- Seite 30 Table des matières Guide de mise en route..........1 Vue d'ensemble du produit ..............1 Installer la batterie ................2 Charger la batterie ................2 Mise sous tension ou hors tension / Utilisation d'une carte mémoire ... Régler la langue..................Lecture des icônes écran..............
-
Seite 31: Guide De Mise En Route
Guide de mise en route Vue d'ensemble du produit Bouton d'alimentation - appuyez plus longtemps pour éteindre Bouton d'enregistrement Haut-parleur Basculement entre les Joystick 5 directions - 5 directions : haut/bas/ gauche/droit/entrée Entrée : OK ou Lecture Bouton Supprimer batterie Commutateur USB - Faites coulisser vers le bas pour utiliser le... -
Seite 32: Installer La Batterie
Installer la batterie Placez la batterie dans le logement. Alignez les extrémités métalliques + et - avec précaution. Appuyez sur le repère appuyant, tirez sur le Remettez en place capot de la batterie la capot de la batterie. pour l'enlever. Notez que les contacts métalliques + et - doivent être alignés les contacts correspondants dans le logement. -
Seite 33: Mise Sous Tension Ou Hors Tension / Utilisation D'une Carte Mémoire
Mise sous tension ou hors tension / Utilisation d'une carte mémoire Appuyez sur le bouton d'alimentation sur l'appareil. Maintenez-le enfoncé pendant 2 secondes pour éteindre l'appareil. dans le fente jusqu'à ce qu'elle s'encliquète en place. Pour retirer la carte, poussez-la pour la libérer, puis tirez-la doucement hors de la fente. -
Seite 34: Utilisation De Base
Utilisation de base Appuyez sur ce bouton pour basculer entre les modes 2D / 3D. Appuyez sur ce bouton en mode prévisualisation pour dnas votre caméscope ou votre carte mémoire. Notez que suppriimés en mode 2D, et vice versa. Lors de l'enregistrement ou de la prise de vue en mode 2D, seul l'objectif de droite est utilisé... -
Seite 35: Lecture
Lecture : vidéo : image 0001/0010 Autonomie batterie Stockage : Trame en surbrillance : interne : carte mémoire Appuyez sur OK plein écran Appuyez sur le déclencheur pour revenir à l'écran précédent Appuyez sur le bouton OK ( ) pour entrer en mode de prévisualisation Lecture. -
Seite 36: Fonctionnement Du Menu
Appuyez sur le bouton OK ( ) pour entrer en mode Lecture et utilisez le joystick ( Appuyez sur le bouton Supprimer ( disponibles : Option Description Fonctionnement du menu Poussez le joystick vers la droite ( ) pour amener le Joystick 5 menu. - Seite 37 Règle la fréquence de scintillement sur 50Hz ou 60Hz. Voir le « tableau Fréquence de fréquences » ci-dessous pour plus de détails. * Tableau de fréquence: Angleterre Allemagne France Italie Espagne Hollande Russie 50Hz 50Hz 50Hz 50Hz 50Hz 50Hz 50Hz Portugal États-Unis Taiwan...
- Seite 38 Mettez votre téléviseur HD sous tension. Branchez le connecteur d'entrée HDMI (l'extrémité la plus grosse) du câble HDMI sur le téléviseur HD. Branchez l'autre extrémité du câble HDMI sur votre caméscope. Mettez le caméscope sous tension. Sur votre HDTV, choisissez le port d'entrée HDMI où le câble HDMI est connecté. plus de détails sur le fonctionnement, consultez la section «...
-
Seite 39: Appendice
Appendice Autonomie batterie / tableau de capacité Photo Clip vidéo Tableau d'autonomie de la batterie * L'appareil est réglé sur le mode 3D. Remarque : Ce tableau n'est donné qu'à titre indicatif. La véritable autonomie de la batterie dépend de la qualité de votre batterie et de son niveau de charge. Mémoire (SD/SDHC) Clip vidéo (min.) Photo... - Seite 40 Élément Capteur d’image CMOS 5 Mégapixels (2592 x 1944) x 2 Résolution Caméra : 5M MP4 (H.264), JPEG Mémoire interne Mémoire externe Oui, commutable Objectif Profondeur de foyer Ouverture Vitesse de l’obturateur Zoom num. Mode Photos nuit Auto Balance des blancs Auto Contrôle de l'exposition Auto...
- Seite 41 Benvenuto: Caro utente, ti ringraziano per avere acquistato questo prodotto. Abbiamo investito molto tempo ed energie in questo progetto e speriamo che vi procuri molti anni di servizio senza problemi. Dichiarazione di conformità FCC: Questo prodotto è conforme alla Parte 15 delle Norme FCC. Il funzionamento è...
- Seite 42 Avviso per la sicurezza: 1. Non far cadere, forare o smontare la videocamera, diversamente si annullerà la garanzia. 2. Evitare il contatto con l’acqua ed asciugarsi le mani prima dell’uso. 3. Non esporre la videocamera ad alte temperature o lasciarla alla luce diretta del sole. Diversamente si può...
- Seite 43 Contenuti Preparazione ..............1 Descrizione del prodotto ............... 1 Inserimento della batteria ..............2 Caricamento della batteria..............2 Accensione o spegnimento / Uso della scheda di memoria ....3 Impostazione della lingua ..............3 Letture delle icone dello schermo............3 Funzionamento di base..........
-
Seite 44: Preparazione
Preparazione Descrizione del prodotto Tasto d’alimentazione - Premere per accendere; premere a lungo per spegnere Porta HDMI Alloggio scheda SD/SDHC Display 2D/3D Tasto di registrazione Tasto otturatore Altoparlante Tasto 2D/3D - Cambio alla modalità 2D/3D Tasto di navigazione a 5 vie - 5 vie: su / giù... -
Seite 45: Inserimento Della Batteria
Inserimento della batteria Inserire la batteria nello scomparto. Allineare accuratamente le estremità metalliche con le stampigliature + e -. Premere il tasto con la stampigliatura “3D” e poi, mentre si tiene premuto il tasto, tirare il coperchio Rimettere il dello scomparto batterie coperchio dello per rimuoverlo. -
Seite 46: Accensione O Spegnimento / Uso Della Scheda Di Memoria
Accensione o spegnimento / Uso della scheda di memoria Tenere premuto tasto d’alimentazione per accendere l'unità. Tenerlo premuto per 2 secondi per spegnere l’unità. Inserire una scheda SD/SDHC (venduta Per rimuovere la scheda, premerla per farla uscire e poi estrarla con delicatezza. Controllare quanto segue se non si riesce ad accendere l’unità: 1) La batteria è... -
Seite 47: Funzionamento Di Base
Funzionamento di base Premere questo tasto per passare tra le modalità 2D/3D. Premendo questo tasto in modalità d’anteprima si determinerà 3D archiviati nella videocamera o nella scheda di memoria. eliminati in modalità 2D e viceversa. Quando si registra o fotografa in modalità 2D è usato solo l’obiettivo di destra per l’acquisizione delle immagini. -
Seite 48: Riproduzione
Riproduzione : video : immagine 0001/0010 Durata della batteria Memoria: Cornice : interna : scheda di memoria Premere il tasto OK per visualizzare a Premere il tasto otturatore schermo intero per tornare alla schermata precedente Premere il tasto OK ( ) per accedere alla modalità... -
Seite 49: Operazioni Del Menu
Premere il tasto OK ( ) per accedere alla modalità di riproduzione ed usare il joystick ( ) per selezionare Premere il tasto Elimina ( ) e saranno disponibili 3 opzioni: Opzione Descrizione Sì Tutto stessa cartella (3D o 2D) Operazioni del menu Spingere il joystick verso destra ( ) per aprire il menu. - Seite 50 Imposta la frequenza su 50 Hz o 60 Hz. Fare riferimento alla seguente Frequenza “Tabella della frequenza” per altri dettagli. * Tabella delle frequenze: Inghilterra Germania Francia Italia Spagna Olanda Russia 50Hz 50Hz 50Hz 50Hz 50Hz 50Hz 50Hz Portogallo America Taiwan Cina Giappone...
- Seite 51 Accendere il televisore HD. Collegare il connettore HDMI-In (l’estremità di dimensioni maggiori) del cavo HDMI al televisore HD. Collegare l’altra estremità del cavo HDMI alla videocamera. Accendere la videocamera. Sul televisore HD, selezionare la porta d’ingresso HDMI alla quale è collegato il cavo HDMI.
-
Seite 52: Appendice
Appendice Durata della batteria / Tabella della capacità Sequenza video Tabella della Numero di scatti Tempo di ripresa (minuti) durata della 1000 batteria * L’unità è impostata in modalità 3D. Nota: Questa tabella è solo per riferimento. La durata effettiva della batteria dipende dalla qualità delle batterie usate e dal livello di carica. - Seite 53 Elemento Sensore immagine 5 Megapixel CMOS (2592 x 1944) x 2 Videocamera: HD 720p 30f (1280 x 720) Risoluzione Fotocamera: 5M MP4 (H.264), JPEG Velocità fotogrammi video 30 fps Memoria interna Sì Memoria esterna Alloggio scheda SD (supporta SDHC da 256MB a 32GB) Schermo LCD 2.4”...
- Seite 54 Bienvenido: Estimado usuario, gracias por adquirir este producto. Se ha invertido una gran cantidad de tiempo y esfuerzo en desarrollar este producto, por lo que esperamos que lo pueda disfrutar durante muchos años sin problemas. Declaración de cumplimiento FCC: Este dispositivo cumple con la Parte 15 de las Reglas de la FCC. Su uso está...
- Seite 55 Aviso de seguridad: 1. No deje caer, perfore ni desmonte la videocámara; si lo hace, la garantía quedará invalidada. 2. Evite que entre en contacto con el agua y séquese las manos antes de utilizar el producto. 3. No exponga la videocámara a altas temperaturas ni la deje donde incida sobre ella la luz directa del sol.
- Seite 56 Tabla de contenido Procedimientos iniciales ..........1 Información general del producto ............1 Insertar la batería.................. 2 Carga de la batería ................2 Encender o apagar / Utilizar una tarjeta de memoria ......3 Establecer el idioma ................3 Leer los iconos de la pantalla ............... 3 Operaciones Básicas .............
-
Seite 57: Procedimientos Iniciales
Procedimientos iniciales Información general del producto Botón de alimentación - Presiónelo para encender; presiónelo durante unos segundos para apagar Puerto HDMI Ranura para tarjetas SD/SDHC Display 2D/3D Botón Grabar Botón Disparador Altavoz Botón 2D/3D - Permite cambiar entre el modo 2D y 3D Joystick de 5 direcciones - 5 direcciones: arriba/abajo/ izquierda/derecha/entrar... -
Seite 58: Insertar La Batería
Insertar la batería Inserte la batería en el compartimento. Preste atención para alinear los terminales metálicos + y -. Presione la marca “3D” y, mientras sigue presionándola, tire de la tapa de la batería para Vuelva a extraerla. colocar la tapa de la batería. -
Seite 59: Encender O Apagar / Utilizar Una Tarjeta De Memoria
Encender o apagar / Utilizar una tarjeta de memoria Presione el botón de alimentación para encender la unidad. Presiónelo durante 2 segundos sin soltarlo para apagar la unidad. Inserte una tarjeta SD/SDHC (se vende por separado) en la ranura hasta que quede encajada en su lugar. Para quitar la tarjeta, empújela para liberarla y, a continuación, tire de ella suavemente para extraerla. -
Seite 60: Operaciones Básicas
Operaciones Básicas Presione este botón para cambiar entre el modo 2D y 3D. Presione este botón en el modo de vista previa para determinar si el archivo grabado tiene un formato 2D o 3D. Presione este botón en el modo de reproducción para ver los archivos 2D o 3D almacenados en la videocámara o en la tarjeta de memoria. -
Seite 61: Reproducción
Reproducción Tipo de archivo 2: : vídeo : imagen Archivo actual / Archivos totales Tipo de archivo 1: : archivo 2D 0001/0010 Carga de la batería : archivo 3D Almacenamiento: Marco de resalte : interno : tarjeta de memoria Presione el botón Aceptar para mostrar la información a Presione el botón Disparador para... -
Seite 62: Eliminar Archivos
Eliminar archivos Presione el botón Aceptar ( ) para entrar en el modo de reproducción y utilice el joystick ( ) para seleccionar un archivo. Presione el botón Eliminar ( ) para disponer de 3 opciones: Opción Descripción Sí Permite eliminar el archivo seleccionado. Permite salir del menú... -
Seite 63: Administración De Archivos En Su Pc
Elementos de menú Descripción Establece la frecuencia en 50 Hz o 60 Hz. Consulte la “Tabla de Parpadeo * Tabla de frecuencias: Región Inglaterra Alemania Francia Italia España Países Bajos Rusia 50Hz 50Hz 50Hz 50Hz 50Hz 50Hz 50Hz Región Portugal América Taiwán China... -
Seite 64: Conectar Su Hdtv
Conectar su HDTV Puerto HDMI Inserte el conector Entrada HDMI (el extremo más grande) del cable HDMI al Conecte el otro extremo del cable HDMI a la videocámara. Encienda la videocámara. en el que está conectado el cable HDMI. Cambie la videocámara al modo de reproducción y comience a reproducir un archivo. -
Seite 65: Apéndice
Apéndice Tabla del período de vida de la batería y de capacidades Imagen estática Clip de vídeo Tabla de Tiempo de grabación Número de disparos (minutos) autonomía 1000 de la batería * La unidad está establecida en el modo 3D. Nota: esta tabla solamente debe utilizarse como referencia El período de vida real de la batería depende de la calidad y del nivel de recarga de la misma. - Seite 66 Elemento Sensor de imagen CMOS de 5 megapíxeles (2592 x 1944) x 2 Videocámara: HD 720p 30f (1280 x 720) Resolución Cámara: 5 M Formato de Archivo MP4 (H.264) y JPEG Tasa de fotogramas de vídeo 30 fps Memoria Interna Sí...
- Seite 67 Welkom: Beste gebruiker, hartelijk dank voor uw aankoop van dit product. We hebben heel wat tijd en moeite gestopt in de ontwikkeling ervan en we hopen dat u jarenlang zorgeloos zult kunnen genieten van uw nieuwe aankoop. Verklaring FCC-naleving: Dit apparaat voldoet aan Deel 15 van de FCC-regels. Gebruik is onderhevig aan de volgende twee voorwaarden: (1) dit apparaat mag geen schadelijke ruis veroorzaken en (2) dit apparaat dient ontvangen ruis te accepteren, inclusief ruis die ongewenste werking kan veroorzaken.
- Seite 68 Veiligheidsrichtlijnen: 1. Laat de camcorder niet vallen, prik er geen gaten in of demonteer het toestel niet, anders vervalt de garantie. 2. Vermijd elk contact met water en droog uw handen voordat u de camera gebruikt. 3. Stel de camcorder niet bloot aan hoge temperaturen of direct zonlicht. Dit kan schade veroorzaken aan de camcorder.
- Seite 69 Inhoudsopgave Aan de slag ..............1 Productoverzicht ................... 1 De batterij plaatsen................2 De batterij opladen................2 In- of uitschakelen / Een geheugenkaart gebruiken ......3 De taal instellen ..................3 Schermpictogrammen lezen ..............3 Basisbewerkingen ............4 Een videoclip opnemen ................ 4 Een foto maken..................
-
Seite 70: Aan De Slag
Aan de slag Productoverzicht Voedingsknop - Indrukken om in te schakelen; lang ingedrukt houden om uit te schakelen HDMI-poort SD/SDHC-kaartsleuf 2D/3D-scherm Videoopnameknoop Fatoopnameknop Luidspreker 2D/3D-knop - schakelen tussen 2D/3D- modus 5-weg joystick - 5-weg: omhoog/omlaag/ links/rechts/enter Enter: OK of afspelen Knop Verwijderen LED-indicator batterijlading... -
Seite 71: De Batterij Plaatsen
De batterij plaatsen Plaats de batterij in het batterijvak. Zorg dat de polen + en - nauwkeurig zijn uitgelijnd. Druk op de “3D”- markering en trek vervolgens, terwijl u drukt, de batterijklep los Plaats de om deze te verwijderen. batterijklep terug. -
Seite 72: In- Of Uitschakelen / Een Geheugenkaart Gebruiken
In- of uitschakelen / Een geheugenkaart gebruiken Druk op de voedingsknop om het apparaat in te schakelen. Houd de knop gedurende 2 seconden ingedrukt om de camera uit te schakelen. Plaats een SD/SDHC-kaart (afzonderlijk verkrijgbaar) in de sleuf tot deze op zijn plaats klikt. Om de kaart te verwijderen, duwt u op de kaart om deze vrij te geven en trekt u de kaart vervolgens voorzichtig uit de sleuf. -
Seite 73: Basisbewerkingen
Basisbewerkingen Druk op deze knop om te schakelen tussen de 2D-/3D-modus. Wanneer u in de voorbeeldweergave op deze knop drukt, wordt bepaald of het opgenomen bestand in 2D of 3D is. Wanneer u tijdens het afspelen op deze knop hebt gedrukt, kunt u de 2D- of 3D-bestanden zien die op uw camcorder of geheugenkaart zijn opgeslagen. -
Seite 74: Afspelen
Afspelen Bestandstype 2: : video : foto Huidig bestand / Totaal aantal bestanden Bestandstype 1: : 2D-bestand 0001/0010 Levensduur van de batterij : 3D-bestand Opslag: Markeervenster : intern : geheugenkaart Druk op OK om op volledige schermgrootte Druk op de Fatoopnameknop om terug weer te geven te keren naar het vorige scherm Druk op de knop OK (... -
Seite 75: Bestanden Verwijderen
Bestanden verwijderen Druk op de knop OK ( ) om de weergavemodus te openen en gebruik de joystick ( ) om een bestand te selecteren. Druk op de knop Verwijderen ( ) en er worden 3 opties beschikbaar: Optie Beschrijving Het geselecteerde bestand verwijderen Het menu afsluiten zonder het bestand te verwijderen... -
Seite 76: Bestandsbeheer Op De Pc
Menu-items Beschrijving Schitteren Regio Engeland Duitsland Frankrijk Italië Spanje Nederland Rusland Instelling 50Hz 50Hz 50Hz 50Hz 50Hz 50Hz 50Hz Regio Portugal Amerika Taiwan China Japan Korea Thailand Instelling 50Hz 60Hz 60Hz 50Hz 50/60Hz 60Hz 50Hz Opmerking: de Flikkerinstelling is gebaseerd op de frequentiestandaard van uw lokale voeding. Bestandsbeheer op de pc Sluit de USB-aansluiting van de camcorder aan op uw pc. -
Seite 77: Aansluiten Op Hdtv
Aansluiten op HDTV HDMI- poort Schakel uw HDTV in. Sluit de HDMI-ingang (het grootste uiteinde) van de HDMI-kabel aan op de HDTV. Sluit het andere uiteinde van de HDMI-kabel aan op uw camcorder. Schakel de camcorder in. Selecteer op uw HDTV de HDMI-ingangspoort waarop de HDMI-kabel is aangesloten. -
Seite 78: Bijlage
Bijlage Tabel levensduur/capaciteit batterijlevensduur batterij Foto Videoclip Tabel Aantal foto's Opnameduur (minuten) levensduur 1000 batterij * Het apparaat is ingesteld op de 3D-modus. Opmerking: Deze tabel is uitsluitend bedoeld voor uw referentie. De werkelijke levensduur van de batterij is afhankelijk van uw batterijkwaliteit en het laadniveau. Geheugen Videoclip (min.) Foto... - Seite 79 Item Beeldsensor 5 megapixels CMOS (2592 x 1944) x 2 Camcorder: HD 720p 30f (1280 x 720) Resolutie Camera: 5M Bestandsformaat MP4 (H.264), JPEG Videobeeldsnelheid 30 frames per seconde Intern geheugen Extern geheugen SD-kaartsleuf (ondersteunt 256Mb tot 32GB SDHC) LCD-scherm 2,4”...
- Seite 80 Bem-vindo: Caro utilizador, obrigado por ter adquirido este produto. Investimos muito tempo e esforço no seu desenvolvimento e esperamos que o mesmo o sirva durante muitos anos sem problemas. Declaração de conformidade com as normas da FCC: Este dispositivo está em conformidade com o Artigo 15 das Normas da FCC.
-
Seite 81: Avisos De Segurança
Avisos de segurança: 1. Não deixe a câmara cair e não a fure ou desmonte; caso contrário a garantia perde a validade. 2. Evite todo o contacto com a água e seque as mãos antes de utilizar o dispositivo. 3. Não exponha a câmara a temperaturas elevadas e não a deixe exposta à luz solar directa. 4. - Seite 82 Índice Introdução ............... 1 Visão geral do produto................1 Introduzir a bateria................2 Carregar a bateria................. 2 Ligar ou desligar a câmara / Utilizar um cartão de memória ....3 ................3 Leitura dos ícones apresentados no ecrã ..........3 Operações básicas............
-
Seite 83: Introdução
Introdução Visão geral do produto Botão de energia - Premir para ligar; manter premido para desligar Porta HDMI Ranhura para cartões de memória SD/SDHC Ecrã 2D/3D Botão de gravação Botão do obturador Altifalante Botão 2D/3D - Mudar entre o modo 2D/3D Joystick de 5 direcções - 5 direcções: cima/... -
Seite 84: Introduzir A Bateria
Introduzir a bateria Coloque a bateria no compartimento. Alinhe cuidadosamente os contactos metálicos + e -. Mantenha pressionado o símbolo “3D” e depois puxe a tampa da bateria para a remover. Volte a colocar a tampa da bateria. contactos correspondentes do compartimento. Carregar a bateria Antes de carregar: que a bateria de iões de lítio está... -
Seite 85: Ligar Ou Desligar A Câmara / Utilizar Um Cartão De Memória
Ligar ou desligar a câmara / Utilizar um cartão de memória Prima o botão de energia para ligar a unidade. Mantenha o botão premido durante 2 segundos para desligar a unidade. Insira um cartão SD/SDHC (vendido separadamente) na ranhura até que este encaixe correctamente. Para remover o cartão, pressione-o para o libertar e depois retire-o com cuidado. -
Seite 86: Operações Básicas
Operações básicas Prima este botão para alternar entre os modos 2D/3D. Prima na sua câmara de vídeo ou no cartão de memória. Tenha visualizados/eliminados no modo 2D e vice-versa. Quando efectuar a gravação ou captura em modo 2D, apenas será utilizada a lente direita para capturar a imagem. -
Seite 87: Reprodução
Reprodução : vídeo : imagem Ficheiro actual/ Ficheiros Totais 0001/0010 Duração da bateria Armazenamento: Imagem seleccionada : interno : cartão de memória Prima OK para exibir em ecrã inteiro Prima o botão do Obturador para voltar ao ecrã anterior ) para entrar no modo de Pré-visualização. Prima o botão 2D/3D ( Utilize o Joystick ( ) para navegar pelas suas... -
Seite 88: Funcionamento Dos Menus
) para entrar no modo de Reprodução e utilize o Joystick ( ) para seleccionar Prima o botão Eliminar ( ) para exibir 3 opções: Opção Descrição Não All (Tud) imagem na mesma pasta (3D ou 2D) Funcionamento dos menus Pressione o Joystick para a direita ( ) para aceder ao Joystick de 5... - Seite 89 Cintilação "Tabela de cintilação" abaixo para obter mais detalhes. * Tabela de cintilação: Países Inglaterra Alemanha França Itália Espanha Rússia Baixos Portugal América Taiwan China Japão Coreia Tailândia Ligue o conector USB da câmara de vídeo ao seu PC. Ligue a câmara de vídeo e o LED acenderá em cor verde.
- Seite 90 Ligue a câmara. ligado.
-
Seite 91: Anexo
Anexo Tabela de duração da bateria / Capacidade Clips de vídeo Tabela de Duração da gravação Número de fotos (minutos) duração da 1000 bateria Nota: Esta tabela serve apenas como referência. A duração real da bateria depende da qualidade da bateria e do nível de carregamento. Memória (SD/SDHC) Clip de vídeo (min.) 1400... - Seite 92 Item Sensor de imagem 5 Megapíxeis CMOS (2592 x 1944) x 2 Câmara de vídeo: HD 720p 30f (1280 x 720) Resolução MP4 (H.264), JPEG Velocidade de fotogramas do 30 fotogramas por segundo vídeo Memória interna Ranhura para cartões de memória SD Memória externa (suporta cartões SDHC de 256 MB até...
- Seite 93 Class B 良...
- Seite 94 Parallax Barrier 3D...
- Seite 96 HDMI SD SDHC 2D 3D 2D 3D 2D 3D...
- Seite 98 SD SDHC 03 27 50...
- Seite 99 2D 3D Parallax Barrier 3D...
- Seite 100 0001 0010 2D 3D 0001 0010 00 00 10...
- Seite 102 50Hz 50Hz 50Hz 50Hz 50Hz 50Hz 50Hz 50Hz 60Hz 60Hz 50Hz 60Hz 50Hz 50 60 2D DCIM 101DIR2D DCIM 100DIR3D...
- Seite 103 HDTV HDMI HDTV HDMI HDMI in HDTV HDMI HDTV HDMI HDMI HDTV HDTV side by side 2D HDTV TotalMedia HD DCIM 101DIR2D HDTV...
- Seite 104 1000 SD SDHC 1400 2800 5600 16GB 11200 HDTV 2D HDTV 3D HDTV HDTV Nvidia 3D TotalMedia HDCam Nvidia 3D Nvidia 3D Nvidia Stereoscopic Player 3D HDTV 50Hz 60Hz...
- Seite 105 CMOS 2592 x 1944 HD 720p 30f 1280 x 720 MP4 H 264 JPEG 256MB 32GB SDHC 3D TFT 3D 2D F3 0 1 2000 4X 4 HDTV HDMI USB 2 0 NP60 0 45 °C 20 RH 118 x 72 x 23 mm...
- Seite 107 30 cm Parallax Barrier...
- Seite 109 HDMI SD SDHC 2D 3D 2D 3D 2D 3D 2D 3D...
- Seite 110 PC USB...
- Seite 111 SD SDHC 03 27 50...
- Seite 112 2D 3D 2D 3D Parallax Barrier...
- Seite 113 0001 0010 2D 3D 2D 3D 0001 0010 00 00 10...
- Seite 114 3D 2D...
- Seite 115 50Hz 60Hz 50Hz 50Hz 50Hz 50Hz 50Hz 50Hz 50Hz 50Hz 60Hz 60Hz 50Hz 50 60Hz 60Hz 50Hz 2D DCIM 101DIR2D 3D DCIM 100DIR3D...
- Seite 116 HDTV HDMI HDTV HDMI HDMI HDTV HDMI HDTV HDMI HDMI HDTV 2D HDTV side-by-side 2D HDTV TotalMedia HD Cam DCIM 101DIR2D HDTV...
- Seite 117 1000 SD SDHC 1400 2800 5600 16GB 11200 HDTV 2D HDTV 3D HDTV HDTV 3D PC Nvidia TotalMedia HDCam Nvidia 3D Nvidia 3D Nvidia 3D kit Stereoscopic Player 50Hz 3D HDTV 60Hz...
- Seite 118 CMOS 2592 x 1944 HD 720p 30f 1280 x 720 Camera MP4 H 264 JPEG 256MB 32GB SDHC 2 4 3D TFT 3D 2D 3D 2D 1 m ~ F3 0 1 ~ 1 2000 HDTV HDMI USB 2 0 NP60 0 ~ 45 °C 20% RH...
- Seite 119 ようこそ: 本製品をお買い上げいただきまして誠にありがとうございます。 本製品は多くの時間と努力を費やして開発されており、長年に渡ってトラブルなくお使い頂け る製品となっています。 FCC(連邦通信委員会)適合宣言: 本装置は FCC 規則のパート 15 に準拠しています。操作は次の 2 つの条 件に基づきます: (1) 本装置は有害な電波障害の原因とはならない。(2) 本 装置は、誤動作の原因となる電波障害を含む、あらゆる干渉を許容する ものである。 本装置は、FCC 規則のパート 15 に定められたクラス B デジタル装置の 制限に準拠することが試験によって証明されています。これらの制限 は、家庭での設置における有害な障害に対し、適正な保護が提供されるように定められたも のです。本装置は、無線周波数エネルギーを生成、使用、または放射することがあります。 製造元の指示に従って設置および使用しない場合は、無線通信に有害な電波障害を及ぼすこ とがあります。 しかしながら、特定の設置方法によって電波障害が発生しないという保証はありません。こ の装置により、ラジオまたはテレビの受信との有害な干渉が発生する場合、次の基準に従っ て、干渉を補正することをお勧めします。干渉は、装置の電源を投入および切断することに よって判断できます: -受信アンテナの方向または位置を変える。 -装置と受信機の距離を離す。 -受信機が接続されているものとは異なる回路のコンセントに装置を接続する。 -販売代理店または経験のあるラジオ/テレビ技師に相談する。 準拠に関する責任のある当事者が明示的に認可していない装置の変更や改造を行なった場合 は、装置を操作する権限が無効になることがありますのでご注意ください。 本製品を廃棄する場合は、できるだけ、すべてのコ ンポーネントをリサイクルしてください。...
- Seite 120 安全にお使いいただくために: 1. カムコーダを落としたり、穴を開けたり、分解したりしないでください。保証が無効にな ります。 2. 水がかからないように注意してください。ご使用の前には手を乾かしてください。 3. カムコーダを高温の場所や直射日光の当たる場所に置かないでください。ビデオカメラが 故障することがあります。 4. カムコーダは丁寧にお取り扱いください。カムコーダ本体を強く押さないでください。 5. 安全のために、嵐や雷のときはカムコーダを使用しないでください。 6. 異なる仕様のバッテリは使用しないでください。異なる仕様のバッテリを使用すると、重 大な破損を招く恐れがあります。 7. 長期間使用しない場合はバッテリを取り外してください。バッテリが劣化すると、ビデオ カメラの機能に影響を与えることがあります。 8. バッテリから液漏れしたり、バッテリが変形している場合は、取り外してください。 9. メーカーにより付属されたアクセサリのみを使用してください。 10. カムコーダは幼児の手の届かない場所に保管してください。 11. 不適切な種類のバッテリと交換すると、爆発の危険があります。 12. 使用済みのバッテリは指示に従って廃棄してください。 3D表示における補足注記 1. 適切な3D効果と共に3Dディスプレイを閲覧するには、閲覧者は画面の中央に正面から面 し、約30cmの距離から見るようにしてください。 2. 3Dモードでの閲覧は、めまいや知覚への後作用、方向感覚の混乱、眼精疲労を招くこと があります。このような症状を避けるため、閲覧者は休憩を頻繁に取ることが推奨されま す。上記のような症状が表れた場合は、この機器による3D表示の使用を直ちに取りやめ、 症状が治まるまで再使用しないでください。 3. 赤/シアン3Dファイルの閲覧以外の目的に赤/シアンめがねを使用することはおやめくださ い。本来の目的以外での赤/シアンめがねの使用(通常のめがね、サングラス、保護ゴーグル...
- Seite 121 目次 はじめに ................1 製品の概要 ........................1 電池の取り付け ......................2 バッテリを充電する ....................2 電源オンあるいはオフ/メモリーカードの使用 ..........3 言語を設定する ......................3 画面上のアイコンの説明 ..................3 基本操作 ................4 ビデオクリップを録画する ..................4 写真の撮影 ........................4 再生 ........................... 5 ファイルを削除する ....................6 メニュー操作 ......................... 6 メニュー項目 ......................... 6 PCでのファイル管理...
-
Seite 122: はじめに
はじめに 製品の概要 電源ボタン - 押すとオン; 長押しでオフ HDMI ポート SD/SDHC カードスロット 2D/3D ディスプレイ 録音ボタン シャッターボタン スピーカー 2D/3D ボタン - 2D/3D モードの切り替え 5方向ジョイスティック - 5方向: 上/下/左/右/入力 入力: OKまたは再生 削除ボタン 電池残量LEDインジケータ USB スイッチ - USBコネクタ使用の際は下 に向けてスライド 右レンズ - 2Dおよび3Dキャプチャ 左レンズ - 3Dキャプチャ マイク バッテリケースカバー... -
Seite 123: 電池の取り付け
電池の取り付け バッテリを、バッテリ収 納部に入れます。金属極 の+と−を揃えるよう注 意してください。 3D マークを押しな がら、バッテリ・カバ ーを引いて取り外しま す。 カバーを元に戻 します。 金属接触部分と収納部の接触部分の+と−を正しく揃えるようご注意ください。 バッテリを充電する 充電の前に: はじめに本体の電源を切り、リチウムイオンバッテ リが挿入されていることを確認してください。 充電中はご使用のPCの電源がオンであることを確認 してください。 初めてお使いになる場合は、バッテリを 8 時間以上 充電してください。 USB スイッチを下に向けてスライドすると、 LEDライト USBコネクタにアクセスできます。 USBコネクタを電源の入れたPCのUSBポー トに接続します。充電が開始されます。必要 に応じて延長ケーブルをご使用ください。 LEDライトは、充電中はオレンジ色に点灯し ます。充電が完了すると、LEDは緑に点灯 します。... -
Seite 124: 電源オンあるいはオフ/メモリーカードの使用
電源オンあるいはオフ/メモリーカードの使用 電源ボタンを押して本体の電源を入れます。 本体の電源をオフにするには、ボタンを2秒間 押し続けます。 SD/SDHカード(別売)を、カチッという音がするまで スロットに差し込みます。カードを取り出すには、カ ードを押し込むと飛び出しますので、ゆっくりと引き 出してください。 本体の電源がオンにならない場合は、以下の項目を確認してください: 1) バッテリが正しく挿入されているかどうか 2) 挿入されたバッテリは十分に充電されているか 言語を設定する ジョイスティックを右に動かし ( ) メニューを表示し 5方向ジョイスティック ます。 "言語"項目を選択し、OK ( )を押します。 ジョイスティックを上/下 ( ) に動かし、ご希望の言語 を選択します。OKボタン ( ) を押して確定します。 画面上のアイコンの説明 ストレージ: : 内蔵ストレージ : メモリーカード プレビューモードアイコン 録音モード: バッテリ残量: : 2D : フル... -
Seite 125: 基本操作
基本操作 2D/3Dモードを切り替えるにはこのボタンを押します。プレビュ ー時にこのボタンを押すと、録音ファイルが2Dか3Dかを確認する ことができます。最盛時にこのボタンを押すと、この2Dあるいは 3Dファイルが保存されているのはビデオカメラか、あるいはメモ リーカードかを表示することができます。3Dファイルは、2Dモー ドでの録音/再生/削除はできません。その逆も同様です。 2Dモードでの録音および撮影時は、右側のレンズのみが画像のキャプチャに使用されます。 本製品は Parallax Barrier(パララックス・バリア) 3D 技術を使用しています。パララックス ・バリアとは、LCD画面上に特別なフィルタを設けるものです。3Dモードの際に、左右の目に 異なるピクセルのセットを見せることで3D効果を生み出し、またその結果、画面の輝度も半 減して見えるというものです。 ビデオクリップを録画する 録音ボタン ( ) を押して録音を開始します。 録音中、ジョイスティックを上/下 ( )に動かし、画 像をズーム・イン/アウトすることができます。OK ボ タン( )を押して録音を一時停止あるいは再開する こともできます。 録音 ボタン ( ) をもう一度押して録音を停止しま す。 薄暗い環境での撮影では、対象を照らすよう照明を補足して下さい。 写真の撮影 ジョイスティックを上/下 ( ) に動かし、適切な画面 が設定されるまでズーム・イン/アウトします。... - Seite 126 再生 ファイルタイプ 2: : ビデオ : 写真 現在のファイル/ファイルの合計 ファイルタイプ 1: : 2Dファイル バッテリ残量 0001/0010 : 3Dファイル ストレージ: ハイライトフレーム : 内蔵ストレージ : メモリーカード 全画面表示にする には、OKを押し ます。 シャッターボタンを押すと、 プレビュー画面に戻ります。 再生プレビューモードを開くには、OKボタン ( ) を押します。 2D/3D ボタン ( ) を押して2D/3D ファイルを切り替えます。 ジョイスティック ( ) を使用して録音ファイルを移動 し、選択します。OK( ) を押してファイルを全画面表...
-
Seite 127: ファイルを削除する
ファイルを削除する 再生モードを開くには、OKボタン ( ) を押し、ジョイ スティック ( ) を使用してファイルを選択します。 削除ボタン ( ) を押すと3つのオプションが表示され ます: オプション 説明 はい 選択したファイルを削除する いいえ ファイルを削除せずにメニューを終了する 同一フォルダ内のすべてのビデオおよび画 すべて 像ファイル(3Dあるいは2D)を削除する メニュー操作 ジョイスティックを右に動かし ( ) メニューを表示し 5方向ジョイ ます。 スティック ジョイスティックを上下 ( ) に動かしてメニュー項目を 選択し、OK ( ) を押してメニューを開きます。 ジョイスティックを上下 ( ) に動かして希望のオプショ... -
Seite 128: Pcでのファイル管理
メニュー項目 説明 フリッカ周波数を 50Hz または 60Hz に設定します。詳細については下 フリッカ 記の「フリッカ一覧表」を参照してください。 * フリッカ一覧表: 地域 英国 ドイツ フランス イタリア スペイン オランダ ロシア 設定 50Hz 50Hz 50Hz 50Hz 50Hz 50Hz 50Hz 地域 ポルトガル 米国 台湾 中国 日本 韓国 タイ 設定 50Hz 60Hz 60Hz 50Hz 50/60Hz 60Hz 50Hz... -
Seite 129: Hdtvへの接続
HDTVへの接続 HDMI ポート HDTV(高精細テレビ)の電源を入れます。 HDMIケーブルの HDMI入力コネクタ(大きい方の端)をHDTVに接続します。 HDMIケーブルのもう一方の端をカムコーダに接続します。 カムコーダの電源を入れます。 ご使用のHDTVにて、HDMIケーブルが接続されているHDMI入力ポートを選択し ます。 ビデオカメラを再生モードにし、ファイルの再生を開始します。操作の詳細につ いては、"再生"のセクションをご覧ください。 ご使用のHDTVが2Dタイプの場合、ご使用のHDTVでの3Dファイル出力は2D"side-by-side(隣 り合わせ)"のみとなります。 2D HDTVにて3D効果を体験したい場合は、3Dファイルを赤/シアン形式ファイルに変換する 必要があります。バンドルされたソフトウェア(TotalMedia HD Cam)をインストールし、ご使 用ください。その後、変換したファイルをメモリーカードの DCIM\101DIR2D フォルダにコ ピーします。続いて、ご使用のHDTVへ再生を出力し、赤/シアンめがねを着用してご覧くだ さい。詳細については、付属の"ソフトウェア追加条項"を参照してください。... -
Seite 130: バッテリ寿命/容量一覧表
付録 バッテリ寿命/容量一覧表 静止画像 ビデオクリップ バッテリ寿命 撮影枚数 録画/録音時間(分) 一覧表 1000 *本体は3Dモードに設定されています。 注記: この一覧は参考用です。実際のバッテリ残量は、バッテリの質や充電レベルによって異な ります。 ビデオクリップ メモリ (SD/SDHC) 静止画像 (単位:分) 1400 容量一覧表 2800 5600 16GB 11200 注記: 容量の実際の値は、彩度および被写体や環境の複雑さによって異なります(最大± 30%)。 トラブルシューティング 問題 よくある原因 解決方法 3Dビデオ/写真を赤/シアン形式に変換して ご使用のTV/ディスプレ 3Dビデオ/写真再生を ください。その後、変換したファイルを2D 自宅のHDTVに出力し イが2Dのため、3Dファ HDTV/ディスプレイに再生出力してくださ ましたが、 3D効果が イル形式に対応してい... - Seite 131 仕様 項目 仕様 画像センサー 5メガピクセルCMOS (2592 x 1944) x2 ビデオカメラ: HD 720p 30f (1280 x 720) 解像度 カメラ: 5M ファイル形式 MP4 (H.264), JPEG ビデオフレームレート 30フレーム/秒 内蔵メモリ はい 外部メモリ SDカードスロット(256MB以上、最大32GB SDHCをサポート) 液晶ディスプレイ 2.4 3D TFT 、3Dおよび2Dモードディスプレイをサポート 3D/2D キャプチャ はい(切り替え可能) レンズ 固定フォーカスレンズx2 フォーカス幅...
- Seite 133 1 3D 30 cm 2 3D Parallax Barrier Parallax Barrier...
- Seite 135 HDMI SD SDHC 2D 3D 2D 3D 2D 3D...
- Seite 137 SD SDHC Language 03 27 50...
- Seite 138 2D 3D Parallax Barrier 3D...
- Seite 139 0001 0010 2D 3D 0001 0010 00 00 10...
- Seite 141 50Hz 60Hz 50Hz 50Hz 50Hz 50Hz 50Hz 50Hz 50Hz 50Hz 60Hz 60Hz 50Hz 50 60Hz 60Hz 50Hz 2D DCIM 101DIR2D 3D DCIM 100DIR3D...
- Seite 142 HDTV HDMI HDTV HDMI HDMI HDTV HDMI HDTV HDMI HDMI HDTV HDTV 2D side by side 2D HDTV TotalMedia HD Cam DCIM 101DIR2D HDTV...
- Seite 143 1000 SD SDHC 1400 2800 5600 16GB 11200 ± 30 HDTV 2D HDTV 3D TV 3D HDTV 3D HDTV side by side 1 3D PC Nvidia 3D Nvidia 3D TotalMedia HDCam side by side 2 PC Nvidia 3D Nvidia 3D 3 3D Stereoscopic Player side by side...
- Seite 144 CMOS 2592 x 1944 HD 720p 30f 1280 x 720 MP4 H 264 JPEG 30 fps 256MB 32GB SDHC 2 4 3D TFT 3D 2D F3 0 1 2000 HDTV HDMI USB 2 0 NP60 0 45 C LxWxH 118 x 72 x 23 mm...
- Seite 145 Bem-vindo: Prezado usuário, obrigado por comprar este produto. Foi aplicado um grande investimento e esforço no seu desenvolvimento e esperamos que ele ofereça por muitos anos de funcionamento livre de problemas. Declaração de Conformidade da FCC: Este dispositivo está em conformidade com a Parte 15 das Regras da FCC.
-
Seite 146: Observações De Segurança
Observações de segurança: 2. Evite todos os contatos com água e mãos secas antes de usar. potencial. 7. Remova a bateria durante longos períodos entre uso, uma vez que uma bateria deteriorada 8. Remova a bateria se houver outros sinais de vazamento ou distorção. 9. - Seite 147 Índice Primeiros passos............1 Visão geral do produto................1 Instalação da bateria ................2 Como carregar a bateria............... 2 Ligar e desligar / Usar um cartão de memória........3 ................3 Lendo ícones na tela ................3 Operações Básicas ............4 Gravação de vídeo clipe...............
-
Seite 148: Primeiros Passos
Primeiros passos Visão geral do produto Botão de energia - pressione e segure para desligar Porta HDMI Slot do cartão SD/MMC Monitor 2D/3D Botão Record (Gravar) Botão Disparador Alto-falante Botão 2D/3D - Alterna entre modo 2D/3D Joystick 5 vias - 5 vias: cima/baixo/ esquerda/direita/enter Enter: OK ou Reproduzir... -
Seite 149: Instalação Da Bateria
Instalação da bateria Coloque a bateria no compartimento. Alinhe as extremidades metálicas + e - cuidadosamente. Pressione a marca “3D” e então, ao pressionar, puxe a tampa da bateria para removê-la. Reinstale a tampa da bateria. correspondentes no compartimento. Como carregar a bateria Antes da carga: bateria Li-ion está... -
Seite 150: Ligar E Desligar / Usar Um Cartão De Memória
Ligar e desligar / Usar um cartão de memória Pressione o botão de energia para ligar a unidade. Pressione e segure por 2 segundos para desligar a unidade. Insira um cartão SD/SDHC (vendido separadamente) na unidade de slot atpe que esteja no lugar. Para remover o cartão, empurre o cartão para liberá-lo e puxe-o para fora com cuidado. -
Seite 151: Operações Básicas
Operações Básicas Pressionar este botão em visualização determinará se o Ao gravar ou tirar fotos em modo 2D, apenas a lente direita é usada para capturar imagem. Gravação de vídeo clipe Pressione o botão Record (Gravar) ( ) para iniciar a gravação. -
Seite 152: Reprodução
Reprodução Tipo de arquivo 2: : vídeo : imagem Arquivo atual/Total de arquivos Tipo de arquivo 1: : arquivo 2D 0001/0010 Duração da bateria Armazenamento: Destacar quadro : interno : cartão de memória Pressione OK tela cheia Pressione o Obturador para voltar à... -
Seite 153: Operação Do Menu
Pressione o botão OK ( ) para entrar em modo Reprodução e use o Joystick ( ) para selecionar um arquivo. Pressione o botão Excluir ( ) e as 3 opções estarão disponíveis: Opção Descrição Exclua o arquivo selecionado Não Saia do menu sem excluir o arquivo Exclua todos os arquivos de vídeo e imagem Tudo... -
Seite 154: Gerenciamento De Arquivo No Pc
Gerenciamento de arquivo no PC... - Seite 155 Porta...
-
Seite 156: Duração Da Bateria / Tabela De Capacidade
Anexo Duração da bateria / Tabela de capacidade Imagem estática Videoclipe Tablea de Número de fotos Tempo de gravação (minutos) Duração da 1000 Bateria Observação: Esta tabela é somente para referência. A duração da bateria atual depende da qualidade de bateria e nível de recarga. Memória (SD/SDHC) Clipe de vídeo (min) Imagem estática... - Seite 157 Item Sensor de imagem 5 Mega-pixels CMOS (2592 x 1944) x 2 Filmadora: HD 720p 30f (1280 x 720) Resolução Câmera: 5M Formato de arquivo MP4 (H.264), JPEG Taxa de quadros do vídeo 30 frames por segundo Memória interna Memória externa Solt do cartão SD (suporta 256MB até...
- Seite 159 LCD)
- Seite 160 ..............................................................................................................................................................................................................................................................................................................................................
- Seite 161 HDMI SD/SDHC - 2D/3D - USB...
- Seite 162 .USB...
- Seite 163 ) SD/SDHC ) OK ) OK...
- Seite 165 0001/0010 ) OK 2D/3D 0001/0010 00:00:10 ) OK ) OK...
- Seite 167 60Hz 50Hz DCIM\101DIR2D DCIM\100DIR3D)
- Seite 168 HDMI HDMI HDMI .HDMI HDMI...
- Seite 169 “ ) side-by-side Nvidia 3D “ Nvidia 3D TotalMedia HDCam Nvidia 3D “ ) side-by-side” Nvidia 3D kit” Stereoscopic Player” “ ) side-by-side 50Hz 60Hz...
- Seite 170 × ) CMOS × (H.264) SDHC (HDMI × ×...
- Seite 171 82-723-90010v1.0...