Sony PSZ-RA Series Kurzanleitung
Quicklinks
4-576-782-02 (1)
各部の名称 (イラスト
プロフェッショナル
RAID
/Professional
RAID/RAID professionnel/
電源ボタン
電源ランプ
Professionelle RAID/RAID Profesional/
アクセスランプ
Професійний RAID/ 专业RAID /
ハンドル
/ 프로페셔널 RAID
專業版RAID
吸排気口
ゴムダンパー
クイックスタートガイド
/Quick Start Guide/Guide de démarrage
セキュリティースロット
rapide/Kurzanleitung/Guía de inicio rápido/Guida di avvio
rapido/Краткое руководство/
/
/
端子
快速开始指南
快速入門指南
DC IN
간편 시작 가이드
端子
Thunderbolt™
USB
端子
RAID 0
ランプ
RAID 1
ランプ
ランプ
JBOD
SELECT
ボタン
PSZ-RA
シリーズ
CONFIRM
ボタン
PSZ-RA Series
本機を電源に接続する
PSZ-RA系列
イラスト
のように接続します。
© 2015 Sony Corporation Printed in Thailand
RAID
モードについて
本機は
台の
を搭載しており、
2
HDD
の
タイプから選ぶことができます。工場出荷時は、 「
3
」 に設定されています。
A
0
RAID
容量 (
4 TB/6 TB
モデル) 安全性 速度
モード
RAID 0
4 TB/6 TB
RAID 1
2 TB/3 TB
JBOD
2 TB x 2 / 3 TB x 2
RAID 0
で使用する
1
本機をコンピューターに接続する。
イラスト
のように接続します。
a
:
USB
ケーブル接続例
b
:
ケーブル接続例
Thunderbolt
ご注意
USB
ケーブルと
Thunderbolt
フェース) を同時に接続しないでください。 インター
フェースを切り替える場合は、 いったん本機をコン
ピューターから取り外してから行ってください。
2
電源ボタン (
) を押す。
アクセスランプが点灯するまでお待ちください。
ご注意
数十秒かかることがあります。
3
コンピューターから本機にアクセスする。
アクセス中はアクセスランプ () が点滅します。
B
ご注意
Windows
で
Thunderbolt
接続して使用する場合、
本機の接続を許可するまでエクスプローラーに
ドライブが表示されません。
ウェア
上で接続を許可してください。
なお、 本機は工場出荷時に
でフォーマットされてい
exFAT
ます。
別のフォーマットに変更したい場合は 「本機をフォーマッ
トする」 をご覧ください。
RAID
モードを変更して使用する
C
RAID
モードを変更する際は、 本機の電源が切れていて、
a
USB
ケーブルおよび
Thunderbolt
ことを確認してください。
ご注意
モードを変更すると
の内容がすべて削除されます。
RAID
HDD
モードを変更したあとはフォーマットが必要です。
RAID
1
SELECT
ボタン (
) を押したまま電源ボタン
() を押す (イラスト) 。
設定している
RAID
モードに対応したランプとア
クセスランプ () が点滅します。
例:
モードが 「
」 に設定されているとき
RAID
RAID 0
は、
RAID 0
ランプ () とアクセスランプ () が点滅
2
b
SELECT
ボタン (
) を押して
更する (イラスト) 。
ボタンを押すごとに、
SELECT
「
RAID 0
」 「
RAID 1
」 「
」 の順に切り替わります。また、 点滅するラン
0
プも
RAID 0
ランプ ()
RAID 1
JBOD
ランプ ()
RAID 0
変わります。
3
CONFIRM
ボタン (
) を押す (イラスト) 。
モードの変更が確定し、 本機がシャットダウ
RAID
ンします。
4
の手順を行い、 フォーマットを行う。
D
RAID
モード変更のキャンセル
RAID
モードの変更を確定させずにキャンセルするには、 以
下の方法があります。
この場合、 本機は
RAID
モードを変更せずにシャットダウン
します。
どのボタンも押さずに
10
秒待つ。
ˎ
電源ボタン (
) を
2
秒以上押す。
ˎ
本機をフォーマットする
E
F
本機のフォーマットは、 アプリケーション "
" をコンピューターにインストールして行います。
Utility
以下の
からダウンロードし、 インストールしてくださ
URL
い。
http://www.sony.net/mmu
◆
フォーマットのしかたについて詳しくは、 "
Utility
" のヘルプをご覧ください。
1
シャットダウンする
1
)
コンピューターでハードウェアの安全な取り
外し操作を行う。
◆
操作方法について詳しくは、 お使いのコンピューター
や
OS
の取扱説明書をご覧ください。
2
本機の電源ボタンを
2
秒押し続け、 電源ランプ
2
が点滅してから消灯するのを確認したら、 すべ
てのケーブルを外す。
サポートサイトと取扱説明書
http://www.sony.net/promemory
商標について
3
Microsoft
、
Windows
は米国
Microsoft Corporation
の
ˎ
米国およびその他の国における登録商標または商標です。
Thunderbolt
と
Thunderbolt
ロゴはインテルの米国お
ˎ
よびその他の国における登録商標です。
4
Canceling the changing of the RAID mode
You can use one of the following methods to cancel
without changing the RAID mode.
のモードを以下
RAID
The unit will shut down with the RAID mode
RAID
unchanged in such cases.
ˎ
ˎ
ˎ
ˎ
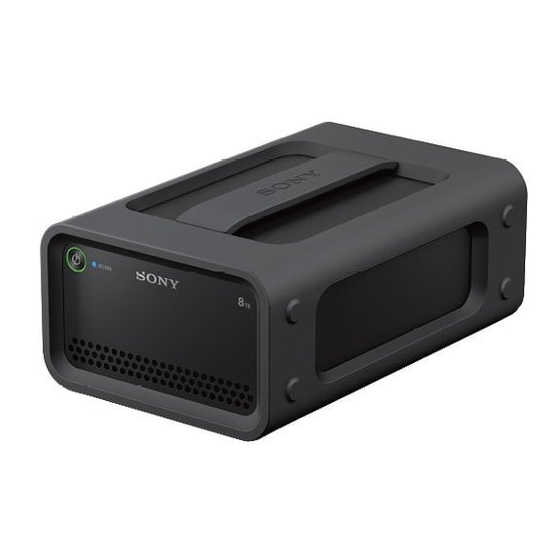
Parts Identification (Fig. )
普通
速い →へ
Formatting the Unit
Power button
高い
普通 →へ
Power indicator
Formatting of the unit is performed by the Memory
普通
普通 →へ
ACCESS indicator
Media Utility application.
Handle
Download and install Memory Media Utility, which is
Ventilation holes
available at the following URL.
http://www.sony.net/mmu
Rubber damper
For details on formatting, refer to the Memory Media Utility Help.
Security slot
DC IN port
™
Thunderbolt
port
Shutdown
USB port
1
RAID 0 indicator
RAID 1 indicator
JBOD indicator
ケーブル (インター
SELECT button
2
CONFIRM button
Connecting the Unit to a Power
Supply
Make connections as shown in Fig. .
Support Site and Operating
RAID Modes
Instructions
The unit is equipped with two HDDs, and you can select
http://www.sony.net/promemory
from the following three configurations. The factory
default setting is [RAID 0].
Trademarks
RAID
Capacity (for
Safety
Speed
mode
4 TB / 6 TB
ˎ
ˎ
ソフト
Thunderbolt
models)
RAID 0
4 TB / 6 TB
Normal
Fast
See
RAID 1
2 TB / 3 TB
High
Normal
See
ˎ
ˎ
JBOD
2 TB
x
2 /
Normal
Normal
See
3 TB
x
2
Using RAID 0
ケーブルが外れている
1
Connect the unit to a computer.
Make connections as shown in Fig. .
a: Example of USB cable connection
Identification des éléments (Fig.
b: Example of Thunderbolt cable connection
)
Note
Touche d'alimentation
Do not connect USB cable and Thunderbolt
Témoin d'alimentation
cable (interfaces) at the same time. When
Témoin ACCESS
changing interface, disconnect this unit from the
Poignée
computer first.
Orifices de ventilation
2
Press the power button (
).
Amortisseur en caoutchouc
RAID
モードを変
Wait until the ACCESS indicator lights up.
Logement de sécurité
Port DC IN
Note
モードが
RAID
Port Thunderbolt
JBOD
」 「
RAID
This may take several tens of seconds.
Port USB
3
Access the unit from the computer.
Témoin RAID 0
ランプ ()
ランプ () の順に
Témoin RAID 1
The ACCESS indicators () blink during access.
Témoin JBOD
Note
Touche SELECT
When using the unit from Windows through
Touche CONFIRM
a Thunderbolt connection, it is necessary to
permit the connection to the computer on the
Raccordement de l'appareil à
Thunderbolt software
. Otherwise, the drive
une source d'alimentation
will not appear on the Explorer.
Réalisez le raccordement comme indiqué dans Fig. .
The unit is formatted in the exFAT file system under the
factory default settings.
Modes RAID
For details on changing the file system, see "Formatting the Unit. "
L'appareil est équipé de deux HDD que vous pouvez
sélectionner à partir des trois configurations suivantes.
Changing the RAID Mode
Le réglage d'usine par défaut est [RAID 0].
Make sure the unit is turned off and the USB or
Mode
Thunderbolt cable is removed from the unit before
RAID
changing the RAID mode.
Memory Media
Note
RAID 0
Changing the RAID mode will delete all the data stored
RAID 1
on the HDDs.
Formatting is required after changing the RAID mode.
JBOD
Memory Media
) while holding
Press the power button (
Utilisation de RAID 0
down the SELECT button () (Fig. ).
1
The indicator of the currently selected RAID
Raccordez l'appareil à un ordinateur.
mode and the ACCESS indicators () blink.
Réalisez le raccordement comme indiqué dans
Example: When the current RAID mode is
Fig. .
[RAID 0], the RAID 0 indicator () and
a: Exemple de raccordement avec un câble USB
ACCESS indicators () blink.
b: Exemple de raccordement avec un câble
) to change the
Press the SELECT button (
Thunderbolt
RAID mode (Fig. ).
Remarque
The RAID mode changes as follows with each
Ne raccordez pas des câbles USB et Thunderbolt
press of the SELECT button: [RAID 0]
(interfaces) en même temps. Avant de changer
[RAID 1] [JBOD] [RAID 0]. The blinking
d'interface, débranchez cet appareil de l' o rdinateur.
indicator also changes accordingly (RAID 0
2
Appuyez sur la touche d'alimentation (
indicator () RAID 1 indicator ()
JBOD indicator () RAID 0 indicator ()).
Attendez que le témoin ACCESS s'allume.
) (Fig. ).
Remarque
Press the CONFIRM button (
Cela peut prendre plusieurs dizaines de
The RAID mode change is confirmed, and the
secondes.
unit shuts down.
3
Accédez à l'appareil à partir de l'ordinateur.
and then do
Perform the steps of
formatting.
Les témoins ACCESS () clignotent pendant
l'accès.
Remarque
Lorsque vous utilisez l'appareil depuis Windows
grâce à une connexion Thunderbolt, il est
nécessaire d'autoriser la connexion à l' o rdinateur
Wait 10 seconds without pressing any button.
grâce au logiciel Thunderbolt
Hold down the power button (
) for at least 2 seconds.
lecteur n'apparaitra pas sur l' e xplorateur.
L'appareil est formaté au système de fichiers exFAT
conformément aux réglages d'usine par défaut.
Pour plus de détails sur le changement du système de fichiers,
reportez-vous à « Formatage de l' a ppareil ».
Modification du mode RAID
Assurez-vous que l'appareil est éteint et que les câbles
USB ou Thunderbolt ont été retirés de l'appareil avant
de modifier le mode RAID.
Remarque
Safely remove hardware from the computer.
Modifier le mode RAID effacera toutes les données
stockées sur les HDD.
For details on operations, refer to the operating
instructions of your computer and OS.
Le formatage est requis après la modification du mode
RAID.
Hold down the power button on the unit
1
Appuyez sur la touche d'alimentation (
for at least 2 seconds, wait for the blinking
tout en maintenant enfoncée la touche
power indicator to turn off, and then
SELECT () (Fig. ).
disconnect all cables.
Le témoin du mode RAID actuellement
sélectionné et les témoins ACCESS ()
clignotent.
Exemple : Lorsque le mode RAID actuel est
[RAID 0], le témoin RAID 0 () et les témoins
ACCESS () clignotent.
2
Appuyez sur la touche SELECT (
modifier le mode RAID (Fig. ).
Microsoft and Windows are either registered
Le mode RAID est modifié comme suit à
trademarks or trademarks of the United States
chaque pression de la touche SELECT : [RAID
Microsoft Corporation in the United States and/or
0] [RAID 1] [JBOD] [RAID 0]. Le
other countries.
Thunderbolt and the Thunderbolt logo are trademarks
témoin clignotant est lui aussi modifié par
of Intel Corporation in the U.S. and/or other countries.
conséquent (témoin RAID 0 () témoin
RAID 1 () témoin JBOD () témoin
RAID 0 ()).
3
Appuyez sur la touche CONFIRM (
).
La modification du mode RAID est confirmée
et l'appareil s'arrête.
4
Réalisez les étapes de
puis effectuez le
formatage.
Annulation de la modification du mode RAID
Vous pouvez utiliser l'une des méthodes suivantes pour
annuler sans modifier le mode RAID.
L'appareil s' é teint sans que le mode RAID soit modifié
dans ce cas.
Attendez 10 secondes sans appuyer sur aucune touche.
ˎ
ˎ
ˎ
ˎ
Maintenez enfoncée la touche d'alimentation (
pendant au moins 2 secondes.
Formatage de l'appareil
™
Le formatage de l'appareil est effectué par l'application
Memory Media Utility .
Téléchargez et installez Memory Media Utility, qui est
disponible à l'URL suivante.
http://www.sony.net/mmu
Pour plus de détails sur le formatage, reportez-vous à l' a ide
de Memory Media Utility.
Arrêt
1
Retirez en toute sécurité le matériel de
l'ordinateur.
Pour plus de détails sur le fonctionnement, reportez-vous
au mode d' e mploi de votre ordinateur et de votre système
d' e xploitation.
2
Maintenez enfoncée la touche d'alimentation
Capacité (pour
Sécurité Vitesse
sur l'appareil pendant au moins 2 secondes,
les modèles
attendez que le témoin clignotant s'éteigne
4 TB / 6 TB)
puis débranchez tous les câbles.
4 TB / 6 TB
Normal
Rapide
Voir
2 TB / 3 TB
Élevé
Normal
Voir
Site d'assistance et mode d'emploi
2 TB
x
2 /
Normal
Normal
Voir
3 TB
x
2
http://www.sony.net/promemory
2
Drücken Sie die SELECT-Taste (
Marques commerciales
RAID-Modus zu ändern (Abb. ).
ˎ ˎ
Microsoft et Windows sont soit des marques déposées
Der RAID-Modus ändert sich wie folgt mit
soit des marques commerciales de Microsoft Corporation
jedem Drücken der SELECT-Taste: [RAID 0]
des États-Unis aux États-Unis et/ou dans d'autres pays.
[RAID 1] [JBOD] [RAID 0]. Die
ˎ
ˎ
Thunderbolt et le logo Thunderbolt sont des marques
blinkende LED ändert sich auch entsprechend
de commerce d'Intel Corporation aux États-Unis et/ou
(RAID 0-LED () RAID 1-LED ()
dans d'autres pays.
JBOD-LED () RAID 0-LED ()).
3
Drücken Sie die CONFIRM-Taste (
).
Die Änderung des RAID-Modus wird bestätigt
und das Gerät schaltet sich aus.
4
).
Führen Sie die Schritte unter
formatieren Sie das Gerät dann.
Bezeichnung der Teile (Abb. )
Abbrechen der Änderung des RAID-Modus
Netzschalter
Sie können eine der folgenden Methoden anwenden, um
Betriebs-LED
ohne Änderung des RAID-Modus abzubrechen.
ACCESS-LED
Das Gerät schaltet sich aus und der RAID-Modus bleibt
in diesen Fällen unverändert.
Griff
ˎ
Warten Sie 10 Sekunden lang ohne eine Taste zu
ˎ
Lüftungsöffnungen
drücken.
Gummidämpfer
Halten Sie den Netzschalter (
ˎ
ˎ
Sicherheits-Schlitz
Sekunden gedrückt.
Gleichstrom Eingangs-Anschluss
™
Thunderbolt
-Anschluss
Formatieren des Geräts
USB-Anschluss
Das Formatieren des Geräts wird durch die Memory
RAID 0-LED
. Sinon, le
Media Utility-Anwendung durchgeführt.
RAID 1-LED
Laden Sie die Memory Media Utility von der folgenden
JBOD-LED
URL herunter und installieren Sie sie.
SELECT-Taste
http://www.sony.net/mmu
CONFIRM-Taste
Ausführliche Informationen zum Formatieren finden Sie in
der Hilfe der Memory Media Utility.
Anschließen des Geräts an ein
Netzteil
Ausschalten
Stellen Sie die Verbindungen her wie in Abb. gezeigt.
1
Hardware sicher vom Computer entfernen.
RAID-Modi
Ausführliche Informationen zur Bedienung finden
Sie in der Bedienungsanleitung Ihres Computers und
Das Gerät ist mit zwei HDDs ausgestattet, und Sie
Betriebssystems.
können zwischen den folgenden drei Konfigurationen
2
wählen. Die Werkseinstellung ist [RAID 0].
Halten Sie den Netzschalter am Gerät für
RAID-
Kapazität (für
Sicherheit Geschwin-
mindestens 2 Sekunden gedrückt. Warten
Modus
4 TB- / 6 TB-
digkeit
Sie, bis die Betriebs-LED nicht mehr blinkt,
Modelle)
und trennen Sie dann alle Kabel.
)
RAID 0
4 TB / 6 TB
Normal
Schnell
Siehe
RAID 1
2 TB / 3 TB
Hoch
Normal
Siehe
Support-Webseite und
JBOD
2 TB
x
2 /
Normal
Normal
Siehe
Bedienungsanleitung
3 TB
x
2
http://www.sony.net/promemory
Verwendung von RAID 0
Markenzeichen
1
ˎ
ˎ
Microsoft und Windows sind eingetragene
Schließen Sie das Gerät an einen Computer an.
Markenzeichen oder Markenzeichen der United States
) pour
Stellen Sie die Verbindungen her wie in Abb.
Microsoft Corporation in den USA und/oder anderen
gezeigt.
Landern.
a: Beispiel für Anschluss über USB-Kabel
Thunderbolt und das Thunderbolt-Logo sind
ˎ
ˎ
b: Beispiel für Anschluss über Thunderbolt-Kabel
Markenzeichen der Intel Corporation in den USA
und/oder anderen Landern.
Hinweis
Schließen Sie nicht das USB-Kabel und das
Thunderbolt-Kabel (Schnittstellen) gleichzeitig
an. Vor dem Wechseln der Schnittstelle trennen
Sie dieses Gerät von dem Computer.
2
) (Fig.
).
Drücken Sie den Netzschalter (
Warten Sie, bis die ACCESS-LED aufleuchtet.
Hinweis
Identificación de las piezas
Dies kann mehrere zehn Sekunden dauern.
(Fig. )
3
Greifen Sie vom Computer aus auf das
Botón de alimentación
Gerät zu.
Indicador de alimentación
Indicador ACCESS
Die ACCESS-LEDs () blinken während des
Zugriffs.
Asa
Orificios de ventilación
Hinweis
Amortiguador de caucho
Wenn Sie das Windows-Gerät durch eine
Ranura de seguridad
Thunderbolt-Verbindung verwenden, ist es
)
Puerto DC IN
notwendig, die Verbindung zum Computer in der
Puerto Thunderbolt
Thunderbolt-Software
zuzulassen. Anderenfalls
Puerto USB
wird das Laufwerk im Explorer nicht angezeigt.
Indicador RAID 0
Indicador RAID 1
Das Gerät ist im exFAT-Dateisystem unter den
Indicador JBOD
Werkseinstellungen formatiert.
Botón SELECT
Ausführliche Informationen zum Ändern des Dateisystems
finden Sie unter „Formatieren des Geräts".
Botón CONFIRM
Conexión de la unidad al
Ändern des RAID-Modus
suministro de alimentación
Stellen Sie sicher, dass das Gerät ausgeschaltet und das
USB- oder Thunderbolt-Kabel vom Gerät getrennt ist,
Realice las conexiones como se muestra en la Fig. .
bevor Sie den RAID-Modus ändern.
Hinweis
Modos de RAID
Das Ändern des RAID-Modus wird alle Daten löschen,
La unidad está equipada con dos discos duros y puede
die auf den HDDs gespeichert sind.
elegir entre las siguientes tres configuraciones. La
Nach dem Ändern des RAID-Modus ist eine
configuración predeterminada de fábrica es [RAID 0].
Formatierung erforderlich.
Modo
1
) während
Drücken Sie den Netzschalter (
de
RAID
Sie die SELECT-Taste () gedrückt halten
(Abb. ).
RAID 0
Die LED des aktuell ausgewählten RAID-Modus
und die ACCESS-LEDs () blinken.
RAID 1
Beispiel: Wenn der aktuelle RAID-Modus [RAID
0] ist, blinken die RAID 0-LED () und die
JBOD
ACCESS-LEDs ().
), um den
Uso de RAID 0
1
Conecte la unidad a un ordenador.
Realice las conexiones como se muestra en la
Fig. .
a: Ejemplo de conexión con un cable USB
b: Ejemplo de conexión con un cable
Thunderbolt
) (Abb.
Nota
No conecte el cable USB y el cable Thunderbolt
(interfaces) al mismo tiempo. Para cambiar de
interfaz, desconecte en primer lugar esta unidad
del ordenador.
aus und
2
).
Pulse el botón de alimentación (
Espere a que se ilumine el indicador ACCESS.
Nota
Esto podría tardar algunas decenas de segundos.
3
Acceda a la unidad desde el ordenador.
Los indicadores ACCESS () parpadean
durante el acceso.
) für mindestens 2
Nota
Si utiliza la unidad desde Windows a través
de una conexión Thunderbolt, es necesario
permitir la conexión al ordenador en el software
Thunderbolt
. De lo contrario la unidad no
aparecerá en el explorador.
Esta unidad se ha formateado con el sistema de archivos
exFAT bajo los ajustes predeterminados de fábrica.
Para más información sobre el cambio de sistema de archivos,
consulte "Formateo de la unidad".
Cambio de modo de RAID
Asegúrese de que la unidad está apagada y de que se ha
extraído el cable USB o Thunderbolt de la misma antes
de cambiar al modo de RAID.
Nota
Cambiar el modo de RAID eliminará todos los datos
almacenados en los discos duros.
Es necesario el formateo después de cambiar el modo
de RAID.
1
)
Pulse el botón de alimentación (
mientras mantiene pulsado el botón
SELECT () (Fig. ).
El indicador del modo de RAID que tiene
seleccionado actualmente y los indicadores
ACCESS () parpadean.
Ejemplo: Cuando el modo de RAID es [RAID
0], el indicador RAID 0 () y los indicadores
ACCESS () parpadean.
2
Pulse el botón SELECT (
) para cambiar el
modo de RAID (Fig. ).
El modo de RAID cambia como se describe
a continuación cada vez que pulsa el botón
SELECT: [RAID 0] [RAID 1] [JBOD]
[RAID 0]. El indicador que parpadea también
cambia en ese orden (indicador RAID 0 ()
indicador RAID 1 () indicador JBOD ()
indicador RAID 0 ()).
3
Pulse el botón CONFIRM (
) (Fig. ).
El cambio de modo de RAID se confirma y la
unidad se apaga.
4
Realice los pasos de
y, a continuación,
lleve a cabo el formateo.
Cancelación de cambio de modo de RAID
Puede utilizar uno de los siguientes métodos para
cancelar sin cambiar el modo de RAID.
En tales casos la unidad se apagará sin cambiar el modo
de RAID.
Espere 10 segundos sin apretar ningún botón.
ˎ
ˎ
ˎ
ˎ
Mantenga pulsado el botón de alimentación (
durante al menos 2 segundos.
™
Formateo de la unidad
El formateo de la unidad se lleva a cabo con la aplicación
"Memory Media Utility".
Descargue e instale "Memory Media Utility", disponible
en la siguiente URL.
http://www.sony.net/mmu
Para más información sobre el formateo, consulte la ayuda de
"Memory Media Utility".
Apagado
1
Extraiga el hardware del ordenador de
forma segura.
Para más información sobre las operaciones, consulte el
manual de instrucciones de su ordenador y SO.
2
Mantenga pulsado el botón de
Capacidad
Seguridad Velocidad
(para
alimentación de la unidad durante al menos
modelos de
2 segundos, espere a que el indicador de
4 TB/6 TB)
alimentación deje de parpadear y, a
4 TB / 6 TB
Normal
Rápida
continuación, desconecte todos los cables.
Véase
2 TB / 3 TB
Alta
Normal
Véase
Sitio de soporte y manual de
2 TB
x
2 /
Normal
Normal
Véase
instrucciones
3 TB
x
2
http://www.sony.net/promemory
)

Verwandte Anleitungen für Sony PSZ-RA Series


Inhaltszusammenfassung für Sony PSZ-RA Series
- Seite 1 イラスト のように接続します。 Gummidämpfer l’accès. durante el acceso. Halten Sie den Netzschalter ( ) für mindestens 2 © 2015 Sony Corporation Printed in Thailand ˎ ˎ Canceling the changing of the RAID mode Sicherheits-Schlitz Sekunden gedrückt. Remarque Nota RAID モードについて...
- Seite 2 RAID 0 4 TB / 6 TB 보통 빠름 備註 참조 indicatore RAID 1 () indicatore JBOD () y/o otros paises. http://www.sony.net/promemory indicatore RAID 0 ()). Примечание 每次按下SELECT按钮,RAID模式都会按 這可能會花費數十秒。 RAID 1 2 TB / 3 TB 높음...