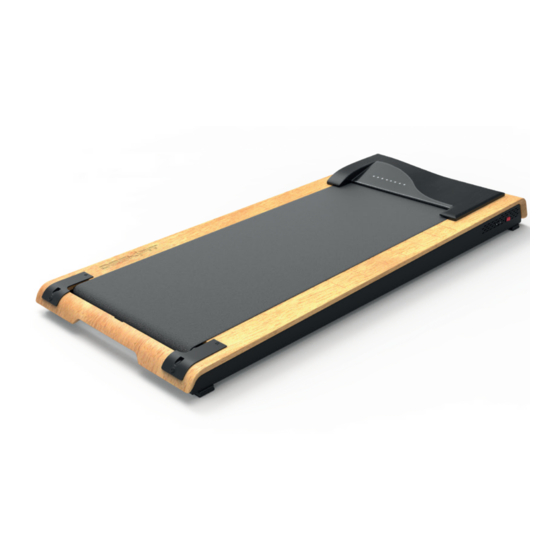
Herunterladen Inhalt Inhalt Diese Seite drucken
Inhaltsverzeichnis

Werbung

Verfügbare Sprachen
  • DE

Verfügbare Sprachen

  • DEUTSCH, seite 1
DeskFit200
DE
EN
ES
FR
IT

Werbung

Inhaltsverzeichnis
loading

Inhaltszusammenfassung für SPORTSTECH DeskFit200

  • Seite 1 DeskFit200...
  • Seite 3: Video Tutorials

    Video Tutorials Unsere für dich! Aufbau Benutzung Abbau In 3 einfachen Schritten zum schnellen und sicheren Start: 1. QR-Code scannen 2. Videos anschauen 3. schnell und sicher starten Link zu den Videos: www.sportstech.de/qr/deskfit200.html...
  • Seite 4 Sehr geehrter Kunde wir freuen uns, dass Sie sich für ein Gerät aus der DeskFit Produktpalette entschieden haben. Deskfit Sportgeräte bieten Ihnen höchste Qualität und neueste Technologie. Um die Leistungsfähigkeit des Gerätes voll nutzen zu können und viele Jahre Freude an Ihrem Gerät zu haben, lesen Sie bitte vor der Inbetriebnahme und dem Beginn des Trainings dieses Benutzerhandbuch sorgfältig durch und verwenden Sie das Gerät den Anweisungen entsprechend.
  • Seite 5: Inhaltsverzeichnis

    INHALTVERZEICHNISS 1. Wichtige Sicherheitshinweise ..................6 2. GebrauchsHinweise ......................7 3. Teileliste ........................8 4. Lieferumfang .......................10 5. Installation der Fernbedienung ..................11 6. Verwendung der Fernbedienung ..................11 7. Installation Der Zusatzteile (optional) ................12 8. Speed ........................16 9. Applikation Software (App) ....................17 10. Wartung ........................19 11.
  • Seite 6: Wichtige Sicherheitshinweise

    1. WICHTIGE SICHERHEITSHINWEISE Diese allgemeinen Sicherheitsinformationen müssen unbedingt für die Benutzung dieses Produkt beachtet werden. Lesen Sie alle Hinweise, bevor Sie das Produkt in Benutzung nehmen. Bitte bewahren Sie diese Anleitung zum späteren Nachschlagen auf. Bevor Sie mit der Montage und Nutzung Ihres neuen Fitness-Laufbands beginnen, sollten Sie die Bedienungsanleitung sorgfältig durchlesen, damit Sie die Informationen verstehen.
  • Seite 7: Gebrauchshinweise

    Es empfielt sich nicht auf dem Gerät herum zu springen, schon garnicht wärend es in betrieb 2. GEBRAUCHSHINWEISE Sie sollten die dazugehörige Fernbedienung in Ihrer Hand halten, wenn Sie Ihren DeskFit200 benut- zen, um sicherzustellen, dass Sie Ihr Gerät im Notfall stoppen können.
  • Seite 8: Teileliste

    3. TEILELISTE...
  • Seite 9 Beschreibung Anzahl Hauptrahmen Befestigungsgestell Motor Regler Stromschalter Überlastschutz Steckdose Untersatz Feder Gummi-Flachstecker Lauffläche Riemen vordere Rolle hintere Rolle Trittbrett Holzrahmen linker Schutzwinkel rechter Schutzwinkel  Deckel für Motor  Stecker Standfüße...
  • Seite 10: Lieferumfang

    4. LIEFERUMFANG Beschreibung Anzahl Fernbedienung Laufband Werkzeug Stromkabel Tablethalter/Halterung Doppelseitiger Klebestreifen Handbuch Unterlegscheibe Spreng Schmieröl M8 Schraube M6 Expansionsschraube Griff (Optional) Standfüße M6*15 Schraube...
  • Seite 11: Installation Der Fernbedienung

    5. INSTALLATION DER FERNBEDIENUNG Sie sollten die dazugehörige Fernbedienung in Ihrer Hand halten, wenn Sie Ihren DeskFit200 benut- zen, um sicherzustellen, dass Sie Ihr Gerät im Notfall stoppen können. Wie in den folgenden bildern zu sehen, setzen Sie zwei Micro AAA Batterien (1,5V) in die Fernbedienung ein.
  • Seite 12: Installation Der Zusatzteile (Optional)

    Startfunktion: Drücken Sie im Standby-Modus die START/STOPP-Taste, um das Laufband zu starten. Stoppfunktion: Drücken Sie die START / STOP-Taste für ca. 3 Sekunden, um das Laufband direkt zu stoppen. Pausenfunktion: Drücken Sie einmal kurz die START / STOP-Taste, um das Laufband zu pausieren. Das Gerät zeichnet die Daten weiterhin auf.
  • Seite 13 Schritt 2 . Danach befestigen Sie den Griff, die Kreisdichtung, die Federdichtung, die M8-Schraube an dem Gerät wie auf der Abbildung zu sehen ist. Schritt 3 . Anschließend ziehen Sie die vorher entfernten Schrauben wieder fest.
  • Seite 14: Wandhalterung-Installaton

    7.2 Wandhalterung-Installaton Die Wandhalterung kann auf zwei verschiedene Arten angebracht werden. Einmal fest an der Wand verschraubt und einmal mithilfe eines Klebestreifens. Für die feste Installation an der Wand folgen Sie bitte diesen Schritten: Schritt 1: Finden Sie die geeignete Stelle und Höhe für Ihre Installation, dies sollte bei ungefähr 1285mm vom Boden aus sein.
  • Seite 15: Installation Der Standfüße

    Um die Halterung mithilfe des Klebestreifens zu befestigen, befolgen Sie die zuvor genannten Schritte, nur lassen Sie die Expansionsschauben weg und benutzen Sie zur Befestigung den Klebe- streifen. Zum Schluss hängen Sie Ihr Gerät in die Halterung ein. Sie können die Halterung aber auch als Tablethalterung benutzen.
  • Seite 16: Speed

    2. Schritt: Bringen Sie die Standfüße mithilfe M6*15 Schrauben an. 8. Speed Gang Geschwindigkeit (Km/h) Diese Werte beziehen sich auf eine Testperson mit 65 Kg. Daher kann eine Abweichung von ca.10% auftreten.
  • Seite 17: Applikation Software (App)

    Bitte schalten Sie zuerst Ihre Bluetoothfunktion auf Ihrem Gerät an, starten Sie dann die App und gehen auf connect. Android Android: www.sportstech.de/uploads/vanfit.apk iOS: Sie können im App Store nach VAN Fit suchen, oder über den QR Code herunterladen. Hinweise zur Nutzung der App: Als Android-Nutzer stellen Sie bitte sicher, dass unter dem Punkt "Einstellungen ->...
  • Seite 18: Applikation Verbindung Mit Dem Gerät

    Applikation Verbindung mit dem Gerät: Bluetooth muss eingeschaltet sein dann Connect Button betätigen öffnen Sie die "VAN App" Verschiedene Einstellungen: Laufgeschwindigkeit, Timer, Schrittzähler, Distanzmesser und Kalorienverbrauch...
  • Seite 19: Wartung

    10. WARTUNG Warnung: Vor der Wartung ist darauf zu achten, dass der Netzstecker des Laufbands herausgezogen wird. Reinigung: Entfernen Sie Staub regelmässig, um die Teile sauber und somit die Langlebigkeit zu erhalten. Achten Sie darauf, saubere athletische Schuhe zu tragen, um zu vermeiden, dass Schmutz in das Laufband gerät.
  • Seite 20 Wenn die Oberfläche des Laufbandes beschädigt ist, wenden Sie sich bitte an unseren Kundendienst. Wir empfehlen, Schmiermittel zwischen Laufband und Trittbrett mit folgendem Zeitplan zu verwenden: Bei folgender Benutzung: Selten (weniger als 3 Stunden pro Woche) einmal im Jahr; Regelmässig (verwenden Sie 3 bis 5 Stunden pro Woche) einmal alle halbe Jahre.
  • Seite 21: Multi-Keil-Riemenverstellung

    Wenn der laufende Gürtel zu locker ist und rutscht: Drehen Sie die 2 Seiten der Einstellschraube um eine viertel Drehung im Uhrzeigersinn als Einheit, passen Sie gegebenfalls Abweichungen an, wie in den oben genannten Methoden. Multi-Keil-Riemenverstellung: Wenn Sie das Laufband lange benutzen, wird der Multi-Keil-Gürtel wegen des Abriebs locker. Um den sicheren Gebrauch weiter zu gewerleisten, müssen Sie eine Anpassung durchführen.
  • Seite 22: Allgemeine Fehlerbehebung

    11. ALLGEMEINE FEHLERBEHEBUNG Problem Grund Lösung Das Gerät startet nicht Keine Stromversorgung oder Schalter Stromversorgung herstellen und auf "off". schalten Sie das Gerät ein. Der Laufband-Überstromschutz ist Schliessen Sie den Überstromschutz nicht angeschlossen. Die Lauffläche rutscht Die Lauffläche ist locker. Justieren Sie die Lauffläche wie im der oben genannten Abschnitt 8.Wartung.
  • Seite 23 ZEHEN BERÜHREN Langsam von der Hüfte aus nach vorn beugen, Rücken und Schultern locker halten, während Sis sich strecken bis die Hände den Boden erreichen. So weit wie möglich strecken und 15 Sekunden lang halten. ACHILLESSEHNEN-DEHNUNG Strecken Sie Ihr rechtes Bein aus Die Sohle des linken Fusses gegen die Innenseite des rechten Oberschenkels stützen.
  • Seite 24: Ec-Declaration Of Conformity / Eg-Konformitätserklärung

    Verantwortung, dass das weiter unten genannte Produkt type of product / Geräteart trade : Motorized Treadmills name / Handelsbezeichnung Treadmill DeskFit200 trade mark / Handelsmarke Sportstech model / Modell DeskFit200 meets the essentials requirements of the following EC Directives: die grundlegenden Anforderungen der aufgeführten EG Richtlinien erfüllt:...
  • Seite 25 Europäische Entsorgungsrichtlinie 2002/96/EG Entsorgen Sie Ihr Trainingsgerät in keinem Fall über den normalen Hausmüll. Entsorgen Sie das Gerät ausschließlich über einen kommunalen oder zugelassenen Entsorgungsbetrieb.Beachten Sie hierbei die aktuell geltenden Vorschriften.Erkundigen Sie sich im Zweifelsfall bei Ihrer Stadt- bzw. Gemeindeverwal- tung nach einer sach- und umweltgerechten Entsorgungsmöglichkeit.
  • Seite 27 3 simple steps for a fast and safe start: 1. scan the QR code 2. watch videos 3. start fast and safely Link to the videos: www.sportstech.de/qr/deskfit200.html...
  • Seite 28 Dear customer, We are pleased you chose a device from the SPORTSTECH product range. With sports equipment from SPORTSTECH you get the highest quality and latest technology. In order to fully use the potential of your device and be able to enjoy it for many years, please read this manual carefully before starting up and beginning of training, and use the device according to the instructions.
  • Seite 29 INDEX 1. Important Safety Information ..................30 2. Instructions for use ....................31 3. Parts list ........................32 4. Scope of delivery ......................34 5. Installation of the remote control ..................35 6. Use of the remote control...................35 7. Installation of the accessories (optional) ................36 8.
  • Seite 30: Important Safety Information

    1. IMPORTANT SAFETY INFORMATION This general safety information must be observed when using this product. Read all instructions before using the product. Please keep this manual for future reference. Before commencing assembly and use of your new treadmill, carefully read the instruction manual to understand the information provided.
  • Seite 31: Instructions For Use

    It is recommended not to gambol on the device, namely not while it is in operation. 2. INSTRUCTIONS FOR USE You should hold the remote control in your hand when using your DeskFit200 in order to ensure that you can stop your device at any time in an emergency situation.
  • Seite 32: Parts List

    3. PARTS LIST...
  • Seite 33 Description Quantity Main frame Mounting frame Motor Controller Wheel Power switch Overload protection Socket Support Spring Rubberised flat plug Running surface Belt front roller rear roller Footboard Wooden frame left protective corner bracket right protective corner bracket  Cover for motor  Plug Stand...
  • Seite 34: Scope Of Delivery

    4. SCOPE OF DELIVERY Description Quantity Remote control Running belt Tools Power cable Tablet holder Double-sided adhesive tape Manual Washer Feder Grease M8 Screw M6 expansion screw Handle (optional) Stand M6*15 Screw...
  • Seite 35: Installation Of The Remote Control

    5. INSTALLATION OF THE REMOTE CONTROL You should hold the remote control in your hand when using your DeskFit200 in order to ensure that you can stop your device at any time in an emergency situation. As shown in the following pictures, insert two Micro AAA batteries (1.5V) into the remote control.
  • Seite 36: Installation Of The Accessories (Optional)

    Starting function: In standby mode, press the START / STOP button to start the treadmill. Stop function: Press the START / STOP button for approx. 3 seconds to stop the treadmill directly. Pause function: Briefly press the START / STOP button once to pause the treadmill. The device continues to record the data.
  • Seite 37 Step 2. Then fix the handle, the circular seal, the spring seal and the M8 screw on the device as shown in the picture. Step 3. Then tighten the screws that were just removed.
  • Seite 38 7.2 Wall mount installation The wall holder can be mounted in two different ways. Either fixed firmly to the wall, or using an adhesive strip.For fixed installation on the wall, please follow these steps: Step 1: Find the appropriate location and height for your installation, this should be about 1,285mm from the ground.
  • Seite 39 To attach the wall holder using the adhesive strip, follow the steps above and just leave out the ex- pansion screws and rather use the adhesive strip to fix it. Finally, hook your device to the holder. You can also use the bracket to place your tablet PC. 7.3 Installation of the Stand 1.
  • Seite 40: Speed

    Please turn on your Bluetooth function on your device first, then start the App and go to Connect. Android Android: www.sportstech.de/uploads/vanfit.apk iOS: You can search for VAN Fit in the App Store, or download via the QR Code. Notes on using the app: As an Android user, please make sure that under "Settings ->...
  • Seite 41 Application connection with the device: Bluetooth must be switched on, then open Use the Connect button the 'VAN'-App. Various settings: Running speed, timer, step counter, distance meter and calorie consumption...
  • Seite 42: Maintenance

    10. MAINTENANCE Caution: Prior to maintenance, make sure that the power plug of the treadmill is pulled out. Cleaning: Remove dust regularly to keep the parts clean and for sustained durability. Be sure to wear clean athletic shoes to avoid dirt getting into the treadmill. Treadmills are cleaned with a damp cloth, and with a little soap.
  • Seite 43 If the surface of the running belt is damaged, please contact our customer service. We recommend using lubricant between running belt and footboard as per the following schedule: At the following use intensity: Rare (less than 3 hours per week): once a year;...
  • Seite 44 If the running belt is too loose and slipping: Turn on both sides the adjusting screws by a quarter of a turn clockwise, if necessary, adjust deviations as in the above methods. Multi-V-belt adjustment: If you use the treadmill for a long time, the multi-V-belt becomes loose due to abrasion, To ensure safe use, you must make an adjustment.
  • Seite 45: General Troubleshooting

    11. GENERAL TROUBLESHOOTING Problem Reason Solution The device does not start No power supply, or switch is on 'off'. Connect power supply and switch The treadmill's excess current protec- on the device. tion is not connected. Connect the excess current protection.
  • Seite 46 TOE TOUCHES Slowly bend forward from your waist, letting your back and shoulders relax as you stretch toward your toes. Reach as far as you can and hold for 15 counts. HAMSTRING STRETCHES Extend your right leg. Rest the sole of your left foot against your right inner thigh.
  • Seite 47 European Disposal Directive 2002/96/EG Never dispose your training device in your regular household waste. Dispose the device only at a local or approved disposal. Take care of the currently applicable regulations. If you have doubts contact your local authorities for information about a correct and environment friendly disposal option.
  • Seite 48: Ec-Declaration Of Conformity / Eg-Konformitätserklärung

    Verantwortung, dass das weiter unten genannte Produkt type of product / Geräteart trade : Motorized Treadmills name / Handelsbezeichnung Treadmill DeskFit200 trade mark / Handelsmarke Sportstech model / Modell DeskFit200 meets the essentials requirements of the following EC Directives: die grundlegenden Anforderungen der aufgeführten EG Richtlinien erfüllt:...
  • Seite 50 Nuestros para usted! Construcción Utilizar Reducción En 3 sencillos pasos para un arranque rápido y seguro: 1. Escanear el código QR 2. Ver vídeos 3. Comienza rápido y seguro Enlace a los videos: www.sportstech.de/qr/deskfit200.html...
  • Seite 51 Estimado cliente, Nos complace que haya elegido un dispositivo de la línea de productos SPORTSTECH. Con el equipo deportivo de SPORTSTECH usted obtiene la más alta calidad y la mejor tecnología. Con el fin de usar todo el potencial de su dispositivo y para que pueda disfrutarlo durante muchos años, por favor lea este manual cuidadosamente antes de comenzar a ejercitarse, y use el dispositivo...
  • Seite 52 CONTENIDOS 1. Información importante de seguridad ................53 2. Instrucciones de uso ....................54 3. Lista de piezas ......................55 4. Alcance de suministro ....................57 5. Instalación del control remoto ..................58 6. Uso del control remoto ....................58 7. Instalación de los accesorios(opcional) ................59 9.
  • Seite 53: Información Importante De Seguridad

    1. INFORMACIÓN IMPORTANTE DE SEGURIDAD Esta información general de seguridad debe observarse al usar este producto. Lea todas las instrucciones antes de usar el producto. Por favor guarde este manual para consultas futuras. Antes de comenzar el ensamblaje y usar su nueva caminadora, lea cuidadosamente el manual de instrucciones para entender la información suministrada.
  • Seite 54: Instrucciones De Uso

    2. INSTRUCCIONES DE USO Debe mantener el control remoto en su mano cuando esté usando su DeskFit200 para estar seguro de poder detener su dispositivo en cualquier momento en caso de emergencia. Cuando se ejercite sobre la caminadora, concéntrese en mirar hacia adelante y no hacia sus pies para evitar riesgos de tropiezos o caídas.
  • Seite 55: Lista De Piezas

    3. LISTA DE PIEZAS...
  • Seite 56 Descripción Cantidad Estructura principal Marco de montaje Motor Controlador Rueda Interruptor de encendido Protección contra sobrecarga Enchufe Soporte Resorte Enchufe plano de caucho Cinta de correr Correa Rodillo frontal Rodillo posterior Plataforma Marco en madera Soporte esquinero protector izquierdo Soporte esquinero protector derecho Cubierta del motor Conector Estar de pie...
  • Seite 57: Alcance De Suministro

    4. ALCANCE DE SUMINISTRO Beschreibung Anzahl Control remoto Cinta de correr Herramientas Cable eléctrico Soporte de tablet Cinta adhesiva de dos caras Manual Arandela Spring Aceite lubricante Tornillo M8 Tornillo expansor M6 Mango (opcional) Estar de pie M6*15 Tornillo...
  • Seite 58: Instalación Del Control Remoto

    5. INSTALACIÓN DEL CONTROL REMOTO Debe mantener el control remoto en su mano cuando esté usando su DeskFit200 para estar seguro de poder detener su dispositivo en cualquier momento en caso de emergencia. Como se muestra en las siguientes imágenes, inserte dos baterías AAA (1.5V) en el control remoto.
  • Seite 59: Solución De Problemas

    Función de inicio: En modo espera, presione el botón START / STOP para iniciar la caminadora. Función de parada: Presione el botón START / STOP durante aprox. 3 segundos para detener la caminadora directamente. Función de pausa: Presione brevemente el botón START / STOP una vez para pausar la ca- minadora.
  • Seite 60 Paso 2. Después asegure el mango, la junta circular, la junta elástica y el tornillo M8 en el dispositivo tal como lo muestra la imagen. Paso 3. Después apriete los tornillos que fueron retirados.
  • Seite 61 7.2 Wandhalterung-Installaton El soporte de pared puede montarse de dos maneras diferentes. Ya sea fijado firmemente a la pared o usando una cinta adhesiva. Para una instalación fija en la pared, por favor siga estos pasos: Paso 1: Encuentre la ubicación y altura adecuadas para la instalación, esto debe ser aprox.
  • Seite 62 Para agregar el soporte de pared usando la cinta adhesiva, siga los pasos anteriores sin usar los tornillos expansores y en cambio use sólo la cinta adhesiva para fijarlo. Por último, enganche su dispositivo al soporte. También puede usar el soporte para poner su tablet. 7.3 Installation of the Stand 1.
  • Seite 63 2do paso: coloque el soporte con los tornillos M6 * 15. 8. Speed curso velocidad (Km/h) Estos valores se refieren a una persona de prueba con 65 Kg. Por lo tanto, una desviación de aprox. 10% puede ocurrir.
  • Seite 64: Software De Aplicación (App)

    Por favor primero encienda la función Bluetooth de su dispositivo, después abra la aplicación y vaya a Connect. Android Android: www.sportstech.de/uploads/vanfit.apk iOS: Puede buscar VAN Fit en App Store o descargarlo a través del Código QR. Notas sobre el uso de la aplicación: Como usuario de Android, asegúrese de que en "Configuración ->...
  • Seite 65 Conexión con el dispositivo: Puede encender el Bluetooth, después abra Use el botón Connect la aplicación 'VAN'. Varias configuraciones: Velocidad de carrea, cronómetro, podómetro, distancia y consumo de calorías.
  • Seite 66: Mantenimiento

    10. MANTENIMIENTO Precaución: Antes del mantenimiento, asegúrese de que el en chufe de la caminadora esté desconectado. Limpieza: Quite el polvo con regularidad para mantener las piezas limpias y más durables. Asegúrese de usar zapatos atléticos para evitar que la suciedad ingrese a la caminadora. Las caminadoras se limpian con un paño húmedo, y con un poco de jabón.
  • Seite 67 Si la superficie de la cinta de correr está dañada, por favor contacte nuestro servicio al cliente. Recomendamos usar lubricante entre la cinta de correr y la plataforma con la siguiente regularidad: Bei folgender Benutzung: Poco frecuente (menos de 3 horas por semana): una vez al año;...
  • Seite 68 Si la cinta de correr está demasiado suelta y se desliza: Gire los tornillos de ajuste de ambos lados un cuarto de giro hacia la derecha, de ser necesario, ajustando las desviaciones como en los métodos anteriores. Ajuste de la correa: Si usa la caminadora durante mucho tiempo, la correa se soltará...
  • Seite 69: Solución De Problemas Generales

    11. SOLUCIÓN DE PROBLEMAS GENERALES Problema Motivo Solución El dispositivo no se activa No hay suministro de energía, o el Conecte el suministro eléctrico y interruptor está apagado. encienda el dispositivo. La protección contra sobrecorriente Conecte la protección contra sobre- de la caminadora no está...
  • Seite 70 DEDOS DE LOS PIES Inclínese lentamente hacia su cintura , dejando su espalda y brazos relajados a medida que se estira hacia los dedos de sus pies. Llegue los más lejos que pueda y aguante durante 15 segundos. ESTIRAMIENTO DE TENDONES Extienda su pierna derecha.
  • Seite 71 Directiva Europea de Residuos 2002/96/EG Nunca elimine su dispositivo de entrenamiento en su basura doméstica ordinaria. Elimine el dispositivo únicamente en un sitio de eliminación aprobado. Tenga en cuenta las normativas aplicables actualmen- te. Si tiene dudas contacte a las autoridades locales para conseguir información sobre una opción de eliminación adecuada y ecológica.
  • Seite 72: Ec-Declaration Of Conformity / Eg-Konformitätserklärung

    Verantwortung, dass das weiter unten genannte Produkt type of product / Geräteart trade : Motorized Treadmills name / Handelsbezeichnung Treadmill DeskFit200 trade mark / Handelsmarke Sportstech model / Modell DeskFit200 meets the essentials requirements of the following EC Directives: die grundlegenden Anforderungen der aufgeführten EG Richtlinien erfüllt:...
  • Seite 73 MANUEL FRANÇAIS...
  • Seite 74 3 étapes simples pour un démarrage ra- pide et sécurisé: 1. Scannez le code QR 2. Regarder les vidéos 3. Démarrez rapidement et en toute sécurité. Lien vers les vidéos: www.sportstech.de/qr/deskfit200.html...
  • Seite 75 Cher client, Nous sommes ravis que vous ayez choisi un appareil de la gamme de produits SPORTSTECH. Avec les équipements sportifs de SPORTSTECH, vous obtenez la plus haute qualité et la meilleure technologie. Afin d'utiliser pleinement le potentiel de votre appareil et de pouvoir l'apprécier pendant de nombreuses années, lisez attentivement ce manuel avant l'utilisation et le début de votre entraînement et utilisez...
  • Seite 76 CONTENU 1. Informations de sécurité importantes ................77 2. Instructions d'utilisation ....................78 3. Liste des pièces ......................79 4.Contenu de la livraison ....................81 5. Installation de la télécommande ..................82 6. Installation des accessoires (Optionnel) ................83 7. Logiciel d'application (App) ....................88 8. Entretien ........................90 9.
  • Seite 77: Informations De Sécurité Importantes

    1. INFORMATIONS DE SÉCURITÉ IMPORTANTES Cette information générale sur la sécurité doit être respectée lors de l'utilisation de ce produit. Lisez toutes les instructions avant d'utiliser le produit. Veuillez garder ce manuel pour toute future référence. Avant de commencer l'assemblage et l'utilisation de votre nouveau tapis roulant, lisez attentivement le mode d'emploi pour comprendre les informations fournies.
  • Seite 78: Instructions D'utilisation

    Il est recommandé de ne pas ??? Sur l'appareil, pendant son fonctionnement 2. INSTRUCTIONS D'UTILISATION Vous devez garder la télécommande dans votre main lorsque vous utilisez votre DeskFit200 afin de vous assurer que vous pouvez arrêter votre appareil à tout moment en cas d'une situation d'urgence.
  • Seite 79: Liste Des Pièces

    3. LISTE DES PIÈCES...
  • Seite 80 N° Description Quantité Cadre principal Cadre de montage Moteur Contrôleur Roue Interrupteur d'alimentation Protection de surcharge Prise Support Bague Bouchon plat en caoutchouc Surface de course Courroie rouleau avant rouleau arrière repose pied Cadre en bois support de protection d'angle gauche support de protection d'angle droit Couvercle pour le moteur Fiche...
  • Seite 81: Contenu De La Livraison

    4.CONTENU DE LA LIVRAISON N°. Description Quantité Télécommande Courroie de course Pièces Câble d'alimentation Support de tablette Ruban adhésif double face Manuel Rondelle Spreng Graisse Vis M6 Vis d'expansion M6 Poignée (optionnel) Peuplements M6*15 Vis...
  • Seite 82: Installation De La Télécommande

    5. INSTALLATION DE LA TÉLÉCOMMANDE Vous devez garder la télécommande dans votre main lorsque vous utilisez votre DeskFit200 afin de vous assurer que vous pouvez arrêter votre appareil à tout moment en cas de situation d'urgence. Comme indiqué sur les images suivantes, insérez deux piles Micro AAA (1.5V) dans la télécomman- + Accélérer le tapis de course...
  • Seite 83: Installation Des Accessoires (Optionnel)

    Fonction de démarrage: Drücken Sie im Standby-Modus die START/STOPP-Taste, um das Lauf- band zu starten. Fonction d'arrêt: Drücken Sie die START / STOP-Taste für ca. 3 Sekunden, um das Laufband direkt zu stoppen. Fonction de pause: Drücken Sie einmal kurz die START / STOP-Taste, um das Laufband zu pau- sieren.
  • Seite 84 Étape 2. Ensuite, fixez la poignée, le joint circulaire, le joint à ressort et la vis M8 sur l'appareil comme indiqué sur l'image. Étape 3. Ensuite, serrez les vis qui ont été retirées.
  • Seite 85 7.2 Installation de montage mural Le support mural peut être monté de deux manières différentes. Soit fixé fermement au mur, soit en utilisant une bande adhésive.Pour une installation fixe sur le mur, procédez comme suit: Étape 1: Trouvez l'emplacement et la hauteur approp riés pour votre installation, cela devrait être d'environ 1 285 mm par rapport au sol.
  • Seite 86 Pour fixer le support mural à l'aide de la bande adhésive, suivez les étapes ci-dessus et laissez sim- plement les vis d'expansion et utilisez plutôt la bande adhésive pour la fixer. Enfin, raccordez votre appareil au support. Vous pouvez également utiliser le support pour placer votre tablette PC.
  • Seite 87 Étape 2: Fixez les pieds de support à l'aide des vis M6 * 7. LA VITESSE Cours Vitesse (Km / h) Ces valeurs se rapportent à un sujet de 65 kg, ce qui peut entraîner un écart d'environ 10%.
  • Seite 88: Logiciel D'application (App)

    Activez la fonction Bluetooth sur votre appareil d'abord, puis lancez l'application et allez à Connect. Android Android: www.sportstech.de/uploads/vanfit.apk iOS: Vous pouvez rechercher VAN Fit dans l'App Store, ou télécharger via le QR Code. Remarques sur l'utilisation de l'application: En tant qu'utilisateur Android, assurez-vous que sous "Paramètres -> Sécurité du périphérique", cochez la case "Sources inconnues".
  • Seite 89 Connexion de l'application avec l'appareil: Le Bluetooth doit être activé, puis ouvrez Utilisez le bouton Connexion l'application 'VAN'. Divers paramètres: Vitesse de course, minuterie, compteur de pas, mesure de distance et consommation de calories...
  • Seite 90: Entretien

    9. ENTRETIEN Avertissement: Avant l'entretien, assurez-vous que la fiche d'alimentation du tapis de course est retirée. Nettoyage: Nettoyez la poussière régulièrement pour garder les pièces propres et pour une durabilité prolongée. Portez des chaussures de sport propres pour éviter que la saleté ne pénètre dans le tapis de course. Les tapis de course sont nettoyés avec un chiffon humide et avec un peu de savon.
  • Seite 91 Si la surface de la courroie de course est endommagée, contactez notre service à la clientèle. Nous recommandons d'utiliser du lubrifiant entre la courroie de repose ped de repos selon le calendrier suivant: À l'intensité d'utilisation suivante: Rare (moins de 3 heures par semaine): une fois par an;...
  • Seite 92 Si la courroie de course est trop lâche et glisse: Tournez sur les deux côtés les vis de réglage d'un quart de tour dans le sens des aiguilles d'une montre, si nécessaire, ajustez les écarts comme dans les méthodes ci-dessus. Réglage de la courroie multi V: WSi vous utilisez le tapis roulant pendant une longue période, la courroie multi-V devient lâche en raison de l'abrasion.
  • Seite 93: Dépannage Général

    10. DÉPANNAGE GÉNÉRAL Problème Raison Solution L'appareil ne démarre pas Pas d'alimentation électrique, ou le Branchez l'alimentation et allumez commutateur est sur "off". l'appareil. La protection contre le surintensité du Connectez la protection contre le tapis de course n'est pas connectée. surintensité.
  • Seite 94 TOUCHEZ VOS ORTEILS Penchez-vous lentement vers l'avant de votre taille, laissez votre dos et vos épaules se détendre pendant que vous vous étirez vers vos orteils. Essayez d'atteindre votre orteil et comptez 15 fois. ETIREMENT DU TENDON Etendez votre jambe droite. Reposez la plante de votre pied gauche contre votre cuisse droite.
  • Seite 95 Directive européenne n° 2002/96/EG relative aux déchets Ne jeter en aucun cas l‘appareil avec les ordures ménagères. Ne disposez de l‘appareil que dans les décharges publiques (Gestion des déchets communaux de la ville). Pour leur élimination respectez les réglementations en vigueur locales. Renseignez-vous à la mairie ou à la commune de votre ville sur les possibilités offertes pour éliminer votre appareil correctement et en respectant l‘environnement.
  • Seite 96: Ec-Declaration Of Conformity / Eg-Konformitätserklärung

    Verantwortung, dass das weiter unten genannte Produkt type of product / Geräteart trade : Motorized Treadmills Treadmill DeskFit200 name / Handelsbezeichnung trade mark / Handelsmarke Sportstech model / Modell...
  • Seite 97 MANUALE D’USO ITALIANO...
  • Seite 98 Video Tutorial Il nostro per te! Montaggio Utilizzo Smontaggio 3 semplici passaggi per un inizio veloce e sicuro: 1. Scannerizza il QR-Code 2. Guarda il Video 3. Inizia ad allenarti! Link per il Video: www.sportstech.de/qr/deskfit200.html...
  • Seite 99 Gentile cliente Siamo lieti che abbiate scelto un dispositivo della gamma SPORTSTECH. Con le attrezzature sportive di SPORSTECH potrete usufruire della più alta qualità e della più recente tecnologia. Per sfruttare a pieno il potenziale del dispositivo e poterlo utilizzare per molti anni, raccomandiamo di leggere attentamente questo manuale prima di iniziare l’allenamento e di utilizzare il dispositivo...
  • Seite 100 INDICE 1. Informazioni importanti sulla sicurezza ................101 2. Istruzioni per l'uso .....................102 3. Elenco delle parti ......................103 4. Dotazione di fornitura ....................105 5. Installazione del telecomando ..................106 6. Installazione degli accessori (opzionale) ................107 7. Software applicativo (App) ..................112 8. Manutenzione ......................114 9.
  • Seite 101: Informazioni Importanti Sulla Sicurezza

    1. INFORMAZIONI IMPORTANTI SULLA SICUREZZA Queste informazioni generali sulla sicurezza devono essere sempre rispettate quando si utilizza questo prodotto. Leggere tutte le istruzioni prima di utilizzare il prodotto. Conservare questo manuale per un futuro riferimento. Prima di iniziare l'assemblaggio e l'utilizzo del nuovo tapis roulant, leggere attentamente il manuale di istruzioni per comprendere le informazioni fornite.
  • Seite 102: Istruzioni Per L'uso

    Si raccomanda di non saltellare sul dispositivo, soprattutto mentre è in funzione. 2. ISTRUZIONI PER L'USO È importante tenere il telecomando in mano quando si utilizza il DeskFit200 per assicurarsi di poter arrestare in qualsiasi momento il dispositivo in caso di emergenza.
  • Seite 103: Elenco Delle Parti

    3. ELENCO DELLE PARTI...
  • Seite 104 Num. Descrizione Quantità Telaio principale Telaio di montaggio Motore Regolatore Ruota Interruttore d’accensione Protezione da sovraccarico Presa di corrente Supporto Molla Spinotto gommato Superficie scorrevole Cintura Rullo anteriore Rullo posteriore Pedana Telaio in legno Staffa angolare protettiva sinistra Staffa angolare protettiva destra Copertura per motore Presa Piedi di appoggio...
  • Seite 105: Dotazione Di Fornitura

    4. DOTAZIONE DI FORNITURA Num. Descrizione Quantità Telecomando Nastro Utensili Cavo di alimentazione Supporto per tablet Nastro adesivo fronte-retro Manuale Rondella Spreng Olio lubrificante Vite M8 Vite ad espansione M6 Impugnatura (opzionale) Piedi di appoggio M6*15 Vite...
  • Seite 106: Installazione Del Telecomando

    5. INSTALLAZIONE DEL TELECOMANDO È importante tenere il telecomando in mano quando si utilizza il DeskFit200 per assicurarsi di poter arrestare in qualsiasi momento il dispositivo in caso di emergenza. Come mostrato nelle seguenti immagini, inserire due batterie Micro AAA (1.5V) nel telecomando.
  • Seite 107: Risoluzione Dei Problemi

    Funzione start: In modalità standby, premere il pulsante START/STOP per avviare il tapis roulant. Funzione stop: Premere il pulsante START/STOP per circa 3 secondi per fermare direttamente il tapis roulant. Funzione pausa: Premere brevemente il pulsante START/STOP una volta per mettere in pausa il tapis roulant.
  • Seite 108 Fase 2. Fissare quindi l'impugnatura, la guarnizione circolare, la guarnizione a molla e la vite M8 sul dispositi- vo, come mostrato nell'immagine. Fase 3. Serrare quindi le viti appena rimosse.
  • Seite 109 7.2 Installazione di montaggio a parete Il supporto a parete può essere montato in due modi diversi. Fissandolo saldamente alla parete op- pure utilizzando una striscia adesiva. Per l'installazione fissa sulla parete, seguire la seguente proce- dura: Fase 1: Trovare la posizione e l'altezza consone per l'installazione, dovrebbe trovarsi a circa 1.285 mm dal suolo.
  • Seite 110 Per fissare il supporto a parete utilizzando la striscia adesiva, seguire le istruzioni riportate sopra e mettere da parte le viti ad espansione, utilizzando la striscia adesiva per risolvere il problema. 7.3 Installazione dei piedi Step 1: Rimuovere il rivestimento di plastica delle viti.
  • Seite 111 Step 2: Attaccare i supporti utilizzando viti M6*15. 8. VELOCITÀ Corso Velocità (Km / h) Questi valori si riferiscono a un soggetto di prova con 65 kg. Pertanto, può verificarsi una deviazione di circa il 10%.
  • Seite 112: Software Applicativo (App)

    Innanzitutto attivare il Bluetooth sul dispositivo, quindi avviare l'applicazione e cliccare su Connetti. Android Android: www.sportstech.de/uploads/vanfit.apk iOS: Puoi cercare VAN Fit nell'App Store o scaricare tramite il codice QR. Note sull'utilizzo dell'app: Come utente Android, assicurati che in "Impostazioni -> Sicurezza dispositivo" sia impostato un segno di spunta sotto "Origini sconosciute".
  • Seite 113 Connessione dell'app con il dispositivo: Il Bluetooth deve essere attivo, quindi avvia- Utilizzare il pulsante Connetti re l'applicazione 'VAN'-App. Diverse impostazioni: Velocità di corsa, timer, contapassi, distanziometro e consumo calorico...
  • Seite 114: Manutenzione

    10. MANUTENZIONE Avvertenza: prima della manutenzione, assicurarsi che la spina di alimentazione del tapis roulant sia stata rimossa. Pulizia: Rimuovere regolarmente la polvere per mantenere le parti pulite e per assicurare una lunga durata del prodotto. Assicurarsi di indossare scarpe da ginnastica pulite per evitare che la sporcizia finisca nel tapis roulant.
  • Seite 115 Se la superficie del nastro è danneggiata, si prega di contattare il nostro servizio clienti. Si consiglia di utilizzare il lubrificante tra il nastro e la pedana in base al seguente programma: A seconda dell’intensità d'uso: Raro (meno di 3 ore alla settimana): una volta all'anno;...
  • Seite 116 Se il nastro è troppo allentato e scivoloso: ruotare le viti di regolazione su entrambi i lati di un quarto di giro in senso orario, se necessario, regolare le divergenze seguendo i metodi di cui sopra. Regolazione della cinghia a V: Se si utilizza il tapis roulant per molto tempo, la cinghia a V si allenta a causa dell'abrasione.
  • Seite 117: Risoluzione Dei Problemi Generali

    11. RISOLUZIONE DEI PROBLEMI GENERALI Problema Motivo Soluzione Il dispositivo non si avvia Non c’è alimentazione o l’interruttore Collegare l'alimentazione elettrica e è su " OFF ". accendere il dispositivo. La protezione contro i sovraccarichi Collegare la protezione contro di corrente del tapis roulant non è sovraccarichi.
  • Seite 118 TOCCARE LE PUNTE Lentamente, piegarsi in avanti dalla vita, rilassare le spalle e la schiena mentre ci si allunga verso le dita dei piedi. Allungarsi quanto più possibile e trattenere la posizione per 15 conteggi. STRETCHING DEI TENDINI Stendere la gamba destra. Riposare la suola del piede sinistro contro la coscia interna destra.
  • Seite 119 Direttive Europee 2002/96/EG per lo smaltimento Non gettare mai il tuo attrezzo sportivo nell’immondizia normale. Smaltisci l’attrezzo solo tramite un siste- ma locale o approvato. Tieni in conto le regole applicabili correntemente. Se hai dubbi contatta le autorità locali per informazioni circa le opzioni per uno smaltimento corretto ed ecosostenibile. Batterie / Batterie ricaricabili In accordo con il regolamento per le batterie, sei obbligato legalmente a ritornare tutte le batterie usate ed esaurite.
  • Seite 120 Verantwortung, dass das weiter unten genannte Produkt type of product / Geräteart trade : Motorized Treadmills name / Handelsbezeichnung Treadmill DeskFit200 trade mark / Handelsmarke Sportstech model / Modell DeskFit200 meets the essentials requirements of the following EC Directives: die grundlegenden Anforderungen der aufgeführten EG Richtlinien erfüllt:...
  • Seite 121 Verkauf durch / Distributed by / Distribuido por / Distribué / Distribuito da InnovaMaxx GmbH Potsdamer Platz 11 10785 Berlin +49 30 220 663 569 service@innovamaxx.de http://www.sportstech.de...

Inhaltsverzeichnis