Beurer HT 55 Gebrauchsanweisung
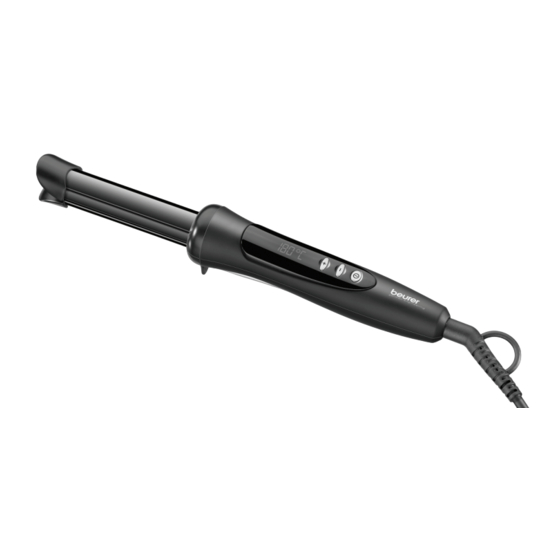
Lockenstyler
Vorschau ausblenden
Andere Handbücher für HT 55:
- Bedienungsanleitung (20 Seiten) ,
- Gebrauchsanweisung (104 Seiten)
Inhaltsverzeichnis
Werbung
Verfügbare Sprachen
Verfügbare Sprachen
Quicklinks
D
Lockenstyler
Gebrauchsanweisung ..................... 2
G
Curl styler
Instructions for use....................... 15
F
Fer à friser
Mode d'emploi .............................. 27
E
Rizador
Instrucciones de uso .................... 39
I
Arricciacapelli
Istruzioni per l'uso ........................ 51
T
Bukle maşası
Kullanım kılavuzu .......................... 63
r
Прибор для завивки волос
Инструкция по применению ...... 75
P
Lokówka
Instrukcja obsługi ......................... 88
HT 55
Werbung
Kapitel
Inhaltsverzeichnis

Verwandte Anleitungen für Beurer HT 55


Inhaltszusammenfassung für Beurer HT 55
- Seite 1 HT 55 Lockenstyler Arricciacapelli Gebrauchsanweisung ..... 2 Istruzioni per l’uso ......51 Bukle maşası Curl styler Kullanım kılavuzu ......63 Instructions for use....... 15 Прибор для завивки волос Fer à friser Инструкция по применению ..75 Mode d’emploi ......27 Lokówka...
-
Seite 2: Inhaltsverzeichnis
DEUTSCH Lieferumfang Lockenstyler / Diese Gebrauchsanweisung Inhaltsverzeichnis 1. Verwendungszweck ........ 3 7. Lockenstyles .......... 11 2. Zeichenerklärung........4 7.1 Klassische Locken ......11 3. Bestimmungsgemäßer Gebrauch ..5 7.2 Weiche Locken ........11 4. Gerätebeschreibung ........ 5 7.3 Voluminöse Locken ......12 5. -
Seite 3: Verwendungszweck
• Wenn das Gerät in einem Badezimmer verwendet wird, ist nach Gebrauch der Netzstecker zu ziehen, da die Nähe von Wasser eine Gefahr darstellt, auch wenn das Gerät ausge- schaltet ist. • Benutzen Sie das Gerät niemals in der Nähe von Badewannen, Waschbecken, Duschen oder anderen Gefäßen die Wasser oder andere Flüssigkeiten beinhalten - Gefahr eines Strom- schlags! -
Seite 4: Zeichenerklärung
2. Zeichenerklärung Folgende Symbole werden in der Gebrauchsanweisung bzw. auf dem Gerät verwendet. Das Gerät darf nicht in der Nähe von Wasser oder im Wasser (z. B. Waschbecken, Dusche, Badewanne) verwendet werden – Gefahr eines Stromschlags! Gefahr Warnhinweis auf Verletzungsgefahren oder Gefahren für Ihre Gesundheit. Warnung Sicherheitshinweis auf mögliche Schäden am Gerät/Zubehör. -
Seite 5: Bestimmungsgemäßer Gebrauch
3. Bestimmungsgemäßer Gebrauch Der Lockenstyler darf ausschließlich zum Formen und Stylen in Eigenanwendung für den Privatgebrauch verwendet werden! Verwenden Sie den Lockenstyler nicht an Kunsthaa- ren. Verwenden Sie den Lockenstyler nicht an Tieren. Warnung Verwenden Sie das Gerät ausschließlich: • zur äußerlichen Anwendung. •... -
Seite 6: Sicherheitshinweise
5. Sicherheitshinweise Gefahr Um gesundheitlichen Schäden vorzubeugen wird in folgenden Fällen vor dem Gebrauch des Gerätes dringend abgeraten: • Tauchen Sie das Gerät niemals in Wasser oder eine andere Flüssigkeit! Stromschlaggefahr! • Sollte das Gerät trotz aller Vorsichtsmaßnahmen in das Wasser fallen, dann zie- hen Sie sofort den Netzstecker aus der Steckdose! Greifen Sie nicht in das Wasser! Stromschlaggefahr! •... -
Seite 7: Anwendung
• Das Gerät während des Gebrauchs nie unbeaufsichtigt lassen. • Benutzen Sie das Gerät nicht im Freien. • Wenn Sie das Gerät an Dritte weitergeben, müssen Sie diese Gebrauchsanweisung mitgeben. 6. Anwendung 6.1 Vor der Anwendung Warnung Um gesundheitlichen Schäden vorzubeugen, folgende Punkte vor der Anwendung beachten: •... -
Seite 8: Anwendung Starten
6.2 Anwendung starten 1. Trocknen Sie Ihr Haar vollständig, bevor Sie den Lockenstyler verwenden. 2. Vergewissern Sie sich, dass Ihr Haar sauber und frei von Stylingprodukten ist. Ausgenommen sind hiervon Produkte, die das Haar vor Hitze schützen. 3. Kämmen Sie Ihr Haar, um es zu entwirren. 4. - Seite 9 5. Stellen Sie mit der (+)Taste [4] bzw. (-)Taste [5] Ih- Temperatur- Haartyp re gewünschte Temperaturstufe ein. In der LCD- stufe Temperaturanzeige [3] wird die aktuell eingestell- Feines, brüchiges, te Temperaturstufe angezeigt. Durch zweimaliges 100°C bis 140°C gefärbtes oder Drücken der EIN/AUS-Taste [6] kann die Tempe- blondiertes Haar ratur fest eingestellt werden.
-
Seite 10: Nach Der Anwendung
8. Fahren Sie mit dem Lockenstyler entlang der Strähne fast bis zur Haarwurzel. Halten Sie die Position des Lockenstylers. Achten Sie darauf, dass die Heizstäbe [2] nicht die Kopfhaut oder die Hände berühren. 9. Drehen Sie den Lockenstyler um 360° und führen Sie ihn langsam nach unten, entlang der gesamten Strähne. -
Seite 11: Lockenstyles
7. Lockenstyles Mit dem Lockenstyler können Sie mühelos verschiedene Lockenstyles ausprobieren. 7.1 Klassische Locken Das Endergebnis ist eine klassische Locke. Hinweis Um der Locke mehr Festigkeit zu geben, ziehen Sie Legen Sie eine Strähne Drehen Sie den Lockensty- den Lockenstyler zwischen die Heizstäbe ler um 360°... -
Seite 12: Voluminöse Locken
7.3 Voluminöse Locken Öffnen Sie die Locke mit der Hand von innen nach außen. Das Endergebnis ist eine voluminö- se Locke. Legen Sie eine Strähne Drehen Sie den Lockensty- zwischen die Heizstäbe ler um 360° und führen Sie und führen Sie diese bis ihn entlang der gesamten fast zum Haaransatz. -
Seite 13: Gerät Reinigen Und Pflegen
8. Gerät reinigen und pflegen Warnung • Ziehen Sie vor dem Reinigen stets den Netzstecker aus der Steckdose. Stromschlaggefahr! • Achten Sie darauf, dass kein Wasser in das Geräteinnere gelangt! Stromschlaggefahr! • Reinigen Sie es nicht mit leicht entzündbaren Flüssigkeiten! Brandgefahr! Hinweise •... -
Seite 14: Entsorgen
Für Geltendmachung eines Garantiefalles innerhalb der Garantiezeit ist durch den Kunden der Nachweis des Kaufes zu führen. Die Garantie ist innerhalb eines Zeitraumes von 3 Jahren ab Kaufdatum gegenüber der Beurer GmbH, Ulm (Germany) geltend zu machen. Bitte wenden Sie sich im Falle von Reklamationen an unseren Service unter folgen-... -
Seite 15: Included In Delivery
ENGLISH Included in delivery Curl styler/these instructions for use Table of contents 1. Intended purpose ........16 7. Curl styles ..........24 2. Signs and symbols ........ 17 7.1 Classic curls ........24 3. Intended use .......... 18 7.2 Gentle curls ........24 4. -
Seite 16: Intended Purpose
• When using the device in the bathroom, unplug the mains plug after use as water in the vicinity constitutes a danger, even when the device is switched off. • Never use the device near baths, wash basins, showers or other objects containing water or other liquids –... -
Seite 17: Signs And Symbols
2. Signs and symbols The following symbols appear in the instructions for use and on the device. Do not use the device near or in water (e.g. wash basins, showers or baths) – risk of electric shock! Danger Warning notice indicating a risk of injury or damage to health. Warning Safety note indicating possible damage to the unit/accessory. -
Seite 18: Intended Use
3. Intended use The curl styler must only be used by individuals for shaping and styling and is for per- sonal use only! Do not use the curl styler on synthetic hair. Do not use the curl styler on animals. Warning The device is suitable only: •... -
Seite 19: Safety Notes
5. Safety notes Danger To avoid damage to health, we strongly advise against using the device in the following situations: • Never submerge the device in water or other liquids! Risk of electric shock! • If the device should fall into water despite following all safety precautions, im- mediately pull the mains plug from the socket! Do not reach into the water! Risk of electric shock! •... -
Seite 20: Use
6. Use 6.1 Before application Warning To avoid damage to health, please note the following before use: • Position yourself on a dry, non-conductive surface. Risk of electric shock! • Make sure that your hands are dry! Risk of electric shock! •... -
Seite 21: Starting The Application
6.2 Starting the application 1. Dry your hair thoroughly before using the curl styler. 2. Make sure that your hair is clean and free from styling products. This does not apply to products which protect the hair against heat. 3. Comb your hair to get rid of any tangles. 4. -
Seite 22: Temperature Setting
5. Set your desired temperature setting using the (+) Temperature Hair type button [4] or the (-) button [5]. The current temper- setting ature setting is shown on the LCD temperature Fine, brittle, display [3]. The temperature can be permanently 100°C to 140°C coloured or set by pressing the ON/OFF button [6] twice. -
Seite 23: After Application
8. Move the curl styler along the hair, stopping just before you reach the roots. Hold the curl styler in this position. Make sure that you do not touch your scalp or hands with the heating rods [2]. 9. Rotate the curl styler 360° and slowly pull it down along the entire section of hair. -
Seite 24: Curl Styles
7. Curl styles The curl styler makes it easy for you to try out different curl styles. 7.1 Classic curls This creates a classic curl. Note To give the curl more hold, pull the curl styler more slowly along Place a section of hair Rotate the curl styler 360°... -
Seite 25: Voluminous Curls
7.3 Voluminous curls Tease the curl open with your fingers, moving from the inside to the outside. This creates a voluminous curl. Place a section of hair Rotate the curl styler 360° between the heating rods and pull it up along the and move the styler along entire section of hair. -
Seite 26: Technical Data
Notes • The curl styler requires no maintenance. • Protect the curl styler from dust, dirt and humidity. • Do not clean the curl styler in the dishwasher! • Do not use any aggressive, caustic, abrasive, or corrosive cleaning products or hard brushes. - Seite 27 FRANÇAIS Contenu Fer à friser/Ce mode d’emploi Table des matières 1. Usage prévu ........... 28 6.3 Après l'utilisation ........ 35 2. Symboles utilisés ........29 7. Coiffures ..........35 3. Utilisation conforme aux 7.1 Boucles classiques ......35 recommandations ......... 30 7.2 Boucles légères .........
-
Seite 28: Usage Prévu
• Si l'appareil est utilisé dans une salle de bain, le câble doit être retiré après utilisation, car la proximité de l'eau représente un risque même lorsque l'appareil est éteint. • N'utilisez jamais l'appareil à proximité d'une baignoire, d'une bassine, d'une douche ou de tout autre récipient contenant de l'eau ou d'autres liquides – Risque d'électrocution ! •... -
Seite 29: Symboles Utilisés
2. Symboles utilisés Les symboles suivants sont employés dans ce mode d'emploi et sur l'appareil. L'appareil ne doit pas être utilisé près de l'eau ou dans l'eau (par exemple, lavabo, douche, baignoire) – Risque d'électrocution ! Danger Ce symbole vous avertit des risques de blessures ou des dangers pour votre santé. -
Seite 30: Utilisation Conforme Aux Recommandations
3. Utilisation conforme aux recommandations Le fer à friser ne doit être utilisé que pour former et styler la coiffure, dans le cadre d'un usage privé ! N'utilisez pas le fer à friser sur des cheveux synthétiques. N'utilisez pas le fer à friser sur des animaux. Avertissement N'utilisez l'appareil que de la façon suivante : •... -
Seite 31: Consignes De Sécurité
5. Consignes de sécurité Danger Pour éviter de nuire à votre santé, l'utilisation de l'appareil est fortement déconseillée dans les cas suivants : • N’immergez jamais l’appareil dans de l'eau ou un autre liquide !Risque d'électrocution ! • Si l'appareil tombe dans l'eau malgré toutes les mesures de sécurité, débranchez im- médiatement le câble d'alimentation de la prise ! Ne mettez pas les mains dans l'eau ! Risque d'électrocution ! •... -
Seite 32: Utilisation
6. Utilisation 6.1 Avant l'utilisation Avertissement Pour éviter de nuire à votre santé, respectez les points suivants avant d'utiliser l'ap- pareil : • Placez-vous sur une surface sèche et non conductrice. Risque d'électrocution ! • Vérifiez que vos mains sont bien sèches ! Risque d'électrocution ! •... - Seite 33 3. Coiffez vos cheveux avec un peigne afin de les démêler. 4. Branchez la fiche électrique sur une prise sec- teur adaptée, « OFF » s’affiche sur l’affichage de la température sur écran LCD [3]. Pour allumer le fer à friser, appuyez sur la touche MARCHE/ ARRÊT [6].
- Seite 34 6. Répartissez les cheveux en mèches d'une largeur d'environ deux centimètres. Maintenez la mèche serrée au niveau de la pointe des cheveux. 7. Faites passer délicatement la mèche de cheveux dans l'espace entre les deux résistances [2]. Veil- lez à laisser un espace suffisant entre votre main et les résistances [2].
-
Seite 35: Après L'utilisation
6.3 Après l'utilisation 1. Pour éteindre le fer à friser après utilisation, maintenez la touche MARCHE/ARRÊT [6] enfoncée pendant trois secondes. Avant, n'oubliez pas de déverrouiller la touche de ver- rouillage. « OFF » s’affiche sur l’affichage de la température sur écran LCD [3]. Le fer à friser est alors éteint. -
Seite 36: Boucles Légères
7.2 Boucles légères Ouvrez la boucle à la main, du haut vers le bas. Vous obtiendrez alors des boucles légères. Placez la mèche entre les Tournez le fer à friser à deux résistances et pla- 360° et faites-le glisser cez-le presque à la racine lentement vers le bas. -
Seite 37: Ondulations
7.4 Ondulations Vous obtiendrez alors des ondulations. Placez une mèche de Tournez le fer à friser à taille moyenne entre les 360° et faites-le glisser résistances. Tenez le fer à rapidement vers le bas le friser en biais au niveau de long de la mèche. -
Seite 38: Données Techniques
9. Données techniques Poids env. 337 g Alimentation électrique 100 - 240 V~, 50/60 Hz Consommation 35 - 40 W Plage de température env. 100 à 200 °C Classe de sécurité Conditions d'utilisation adapté uniquement à un usage en intérieur Plage de températures admissibles -10 à... -
Seite 39: Artículos Suministrados
ESPAÑOL Artículos suministrados Rizador/Estas instrucciones de uso Índice 1. Uso previsto ........... 40 7. Tipos de rizos ........48 2. Símbolos ..........41 7.1 Rizos clásicos ........48 3. Uso correcto .......... 42 7.2 Rizos suaves ........48 4. Descripción del aparato ......42 7.3 Rizos voluminosos ...... -
Seite 40: Uso Previsto
• Si el aparato se usa en un cuarto de baño, al terminar de usarlo debe desenchufarse el conector, puesto que la proximi- dad del agua representa un peligro, incluso si el aparato está apagado. • No utilice nunca el aparato cerca de bañeras, lavabos, duchas u otros recipientes que contengan agua u otros líquidos. -
Seite 41: Símbolos
2. Símbolos En las presentes instrucciones de uso y en el aparato se utilizan los siguientes símbolos. El aparato no debe usarse cerca del agua o en el agua (p. ej. lavabo, ducha, bañera). ¡Riesgo de descarga eléctrica! Peligro Aviso sobre riesgos de lesiones u otros peligros para la salud. Advertencia Indicación de seguridad sobre posibles desperfectos del aparato o de los accesorios. -
Seite 42: Uso Correcto
3. Uso correcto El rizador debe usarse exclusivamente para el peinado y el modelado del cabello en el ámbito privado. No utilice el rizador en cabellos postizos. No utilice el rizador en anima- les. Advertencia Utilice el aparato exclusivamente: • de forma externa. •... -
Seite 43: Indicaciones De Seguridad
5. Indicaciones de seguridad Peligro Para evitar perjuicios para la salud se desaconseja encarecidamente el uso del aparato en los siguientes casos: • ¡No sumerja nunca el aparato en agua ni en ningún otro líquido! ¡Peligro de descarga eléctrica! • Si a pesar de todas estas medidas de seguridad el aparato se cae al agua ¡desenchufe el conector inmediatamente! ¡No toque el agua! ¡Peligro de descarga eléctrica! •... -
Seite 44: Aplicación
• Si entrega el aparato a terceros deberá acompañarlo de estas instrucciones de uso. 6. Aplicación 6.1 Antes de la aplicación Advertencia Para evitar perjuicios para la salud, tenga en cuenta los siguientes puntos antes de la aplicación: • Permanezca sobre una superficie seca y que no conduzca la electricidad. ¡Peligro de descarga eléctrica! •... -
Seite 45: Comienzo De La Aplicación
6.2 Comienzo de la aplicación 1. Séquese el cabello completamente antes de utilizar el rizador. 2. Asegúrese de que su pelo esté limpio y libre de productos cosméticos. No se incluyen aquí pro- ductos que protegen el cabello del calor. 3. - Seite 46 5. Ajuste con el botón (+) [4] o el botón (-) [5] el ni- Nivel de Ti po de ca- vel de temperatura que desee. En el indicador de temperatura bello temperatura LCD [3] se muestra el nivel de tem- Cabello fino, que- peratura ajustado actualmente.
-
Seite 47: Después De La Aplicación
8. Desplace el rizador por el mechón prácticamen- te hasta la raíz. Mantenga la posición del rizador. Asegúrese de que las placas calentadoras [2] no entren en contacto con el cuero cabelludo ni las manos. 9. Gire el rizador 360° y desplácelo lentamente hacia abajo, a lo largo de todo el mechón. -
Seite 48: Tipos De Rizos
7. Tipos de rizos El rizador le permite probar fácilmente distintos tipos de rizos. 7.1 Rizos clásicos El resultado final es un rizo clásico. Nota Para dar mayor consistencia al rizo, pase más despacio el Coloque un mechón entre Gire el rizador 360° y des- rizador por el las placas calentadoras y plácelo lentamente hacia... -
Seite 49: Rizos Voluminosos
7.3 Rizos voluminosos Abra el rizo con la mano de dentro hacia fuera. El resultado final es un rizo volumi- noso. Coloque un mechón entre Gire el rizador 360° y las placas calentadoras y desplácelo hacia arriba a lo desplácelas por él prácti- largo de todo el mechón. -
Seite 50: Datos Técnicos
Indicaciones • El rizador no necesita mantenimiento. • Protéjalo del polvo, la suciedad y la humedad. • No lo meta en el lavavajillas. • Para la limpieza no utilice objetos afilados ni puntiagudos, ni productos de limpieza abrasivos ni corrosivos, ni tampoco cepillos duros. •... - Seite 51 ITALIANO Fornitura Arricciacapelli / Le presenti istruzioni per l'uso Sommario 1. Uso previsto ........... 52 7. Stili di ricci ..........60 2. Spiegazione dei simboli ......53 7.1 Ricci classici ........60 3. Uso conforme ........54 7.2 Ricci morbidi ........60 4.
-
Seite 52: Pericolo Di Scossa Elettrica
• Se l'apparecchio viene utilizzato in bagno, staccare la spina dopo l'uso in quanto la vicinanza all'acqua costituisce un peri- colo anche quando l'apparecchio è spento. • Non utilizzare mai l'apparecchio vicino a vasche, lavandini, docce o altri contenitori che contengono acqua o altri liquidi. Pericolo di scossa elettrica! •... -
Seite 53: Spiegazione Dei Simboli
2. Spiegazione dei simboli I seguenti simboli sono utilizzati nelle Istruzioni per l'uso e/o sull'apparecchio. Non conservare l'apparecchio in prossimità di acqua e non utilizzarlo in acqua (ad es. sul lavandino, in doccia, nella vasca da bagno). Pericolo di scossa elettrica! Pericolo Segnalazione di rischio di lesioni o pericoli per la salute Avvertenza... -
Seite 54: Uso Conforme
3. Uso conforme L'arricciacapelli può essere utilizzato esclusivamente per dare forma e acconciare i ca- pelli ed è destinato unicamente all'uso personale! Non utilizzare l'arricciacapelli su capelli finti. Non utilizzare l'arricciacapelli sugli animali. Avvertenza Utilizzare l'apparecchio esclusivamente: • per uso all'aperto. •... -
Seite 55: Avvertenze Di Sicurezza
5. Avvertenze di sicurezza Pericolo Per evitare danni alla salute, si sconsiglia l'utilizzo dell'apparecchio nei seguenti casi: • Non immergere mai l'apparecchio in acqua o altri liquidi! Pericolo di scossa elettrica! • Qualora l'apparecchio dovesse cadere in acqua nonostante tutte le precauzio- ni, staccare immediatamente la spina dalla presa! Non mettere le mani nell'acqua! Pericolo di scossa elettrica! •... -
Seite 56: Impiego
• Se l'apparecchio viene dato a terzi, consegnare anche le presenti istruzioni per l'uso. 6. Impiego 6.1 Prima dell'utilizzo Avvertenza Per prevenire danni alla salute, attenersi ai punti riportati di seguito prima dell'utilizzo: • Posizionarsi su una superficie asciutta e non conduttiva. Pericolo di scossa elettrica! •... -
Seite 57: Utilizzo Dell'apparecchio
6.2 Utilizzo dell'apparecchio 1. Asciugare completamente i capelli prima di utilizzare l'arricciacapelli. 2. Accertarsi che i capelli siano puliti e privi di pro- dotti per acconciatura. Sono esclusi i prodotti che proteggono i capelli dal calore. 3. Pettinare i capelli per districarli. 4. - Seite 58 5. Impostare il livello di temperatura desiderato con Livello di Tipo di capelli il pulsante (+) [4] o (-) [5]. Sul display LCD per l'in- temperatura dicazione della temperatura [3] viene visualizzato il Tra 100 °C e Capelli fini, fragili, livello di temperatura attualmente impostato.
-
Seite 59: Dopo L'utilizzo
8. Fare scorrere l'arricciacapelli lungo la ciocca quasi fino alle radici. Mantenere la posizione dell'arric- ciacapelli. Prestare attenzione a non toccare la cute o le mani con i tubi riscaldanti [2]. 9. Ruotare l'arricciacapelli di 360° e farlo scorrere lentamente verso il basso, lungo l'intera ciocca. Prestare attenzione a mantenere l'angolo di incli- nazione dell'arricciacapelli, in modo tale che la ciocca non si sovrapponga durante il trattamento. -
Seite 60: Stili Di Ricci
7. Stili di ricci Con l'arricciacapelli è possibile ottenere in tutta semplicità diversi tipi di ricci. 7.1 Ricci classici Il risultato finale è un riccio classico. Nota Per dare più sta- bilità ai ricci, tirare l'arricciacapelli più lentamente lungo Posizionare una ciocca Ruotare l'arricciacapelli di la ciocca. -
Seite 61: Ricci Voluminosi
7.3 Ricci voluminosi Aprire il riccio con la mano dall'inter- no verso l'esterno. Il risultato finale è un riccio volumi- noso. Posizionare una ciocca Ruotare l'arricciacapelli di tra i tubi riscaldanti e fare 360° e farlo scorrere lungo scorrere i tubi fino quasi l'intera ciocca verso l'alto. -
Seite 62: Dati Tecnici
Avvertenze • L'arricciacapelli non richiede manutenzione. • Proteggere l'arricciacapelli da polvere, sporcizia e umidità. • Non lavare l'arricciacapelli in lavastoviglie! • Non utilizzare sistemi di pulizia taglienti, appuntiti, abrasivi e corrosivi o spazzole dure! • Pulire l'arricciacapelli con un panno morbido inumidito con acqua calda. •... -
Seite 63: Teslimat Kapsamı
TÜRKÇE Teslimat kapsamı Bukle maşası / Bu kullanım kılavuzu İçindekiler 1. Kullanım amacı ........64 7. Bukle modelleri ........72 2. İşaretlerin açıklaması ......65 7.1 Klasik bukle ........72 3. Amacına uygun kullanım ....... 66 7.2 Gevşek bukleler ......... 72 4. -
Seite 64: Kullanım Amacı
• Cihaz banyoda kullanıldıktan sonra fişi elektrik prizinden çıka- rılmalıdır. Çünkü cihaz kapalı olsa bile suyun yakınında tehlike oluşturmaktadır. • Cihazı hiçbir zaman tehlike oluşturabileceği küvet, lavabo, duş ve benzeri su ya da sıvı içeren yerlerde kullanmayın. – Elektrik çarpma tehlikesi! •... -
Seite 65: İşaretlerin Açıklaması
2. İşaretlerin açıklaması Aşağıdaki semboller kullanım kılavuzunda ya da cihazın üzerinde kullanılmıştır. Cihaz, suya yakın alanlarda veya su içinde (örn. lavabo, duş teknesi, küvet) kullanılmamalıdır – Elektrik çarpması tehlikesi söz konusudur! Tehlike Yaralanma tehlikelerine veya sağlığınızla ilgili tehlikelere yönelik uyarı. Uyarı... -
Seite 66: Amacına Uygun Kullanım
3. Amacına uygun kullanım Bukle maşası sadece saçlarınızı biçimlendirmek ve şekillendirmek amacıyla şahsi kullanım içindir! Bukle maşasını sentetik saçlar üzerinde kullanmayın. Bukle maşasını hayvanlar üzerinde kullanmayın. Uyarı Cihazı sadece aşağıdaki amaçlarla kullanın: • Harici uygulama için kullanın. • Geliştirilme amacına uygun ve bu kullanım kılavuzunda belirtilen şekilde kullanın. Amacına uygun olmayan her türlü... -
Seite 67: Güvenlik Bilgileri
5. Güvenlik bilgileri Tehlike Sağlığınızın zarar görmesini önlemek için aşağıda belirtilen durumlarda cihazın kullanılmaması önerilir: • Cihazı hiç bir zaman suya ya da başka bir sıvıya sokmayın! Elektrik çarpma tehlikesi! • Tüm koruma önlemlerine rağmen cihaz suya düşerse, hemen elektrik fişini prizden çekin! Suyun içine elinizi sokmayın! Elektrik çarpma tehlikesi! •... -
Seite 68: Kullanım
6. Kullanım 6.1 Kullanımdan önce Uyarı Sağlığınızın zarar görmesini önlemek için, cihazı kullanmadan önce aşağıdaki nok- taları dikkate alın: • Kuru ve elektrik akımını iletmeyen bir yüzey üzerinde durun. Elektrik çarpma tehlikesi! • Ellerinizin kuru olduğundan emin olun! Elektrik çarpma tehlikesi! •... -
Seite 69: Uygulamaya Başlama
6.2 Uygulamaya başlama 1. Bukle maşasını kullanmadan önce saçlarınızı tamamen kurutun. 2. Saçınızın temiz olduğundan ve bir şekillendirme ürünü kullanmadığınızdan emin olun. Saçı ısıdan koruyan ürünler bunların dışındadır. 3. Saçınızı tarayarak dolaşan yerlerini açın. 4. Elektrik fişini uygun bir prize takın. LCD sıcaklık göstergesinde [3] “OFF”... - Seite 70 5. İstediğiniz sıcaklık kademesini (+) [4] veya (-) [5] Sıcaklık Saç tipi tuşunu kullanarak ayarlayın. LCD sıcaklık göster- kademesi gesinde [3], ayarlanmış olan güncel sıcaklık kade- İnce, yıpranmış, mesi gösterilir. AÇMA/KAPATMA düğmesine [6] iki 100°C - 140°C boyanmış veya kez basılarak sıcaklık ayarı sabitlenebilir. Ekranda rengi açılmış...
-
Seite 71: Kullanımdan Sonra
8. Bukle maşasını tutamın ucundan saç kökünün ya- kınına kadar getirin. Bukle maşasını sabit konumda tutun. Isıtıcı çubukların [2] kafa derinize veya elle- rinize temas etmemesine dikkat edin. 9. Bukle maşasını 360° döndürün ve maşayı tüm saç tutamınız boyunca yavaşça aşağı doğru getirin. Uygulama sırasında saç... -
Seite 72: Bukle Modelleri
7. Bukle modelleri Bukle maşası ile farklı bukle modellerini zahmetsizce deneyebilirsiniz. 7.1 Klasik bukle Sonuçta klasik bir bukle elde edersiniz. Daha sıkı bukle- lere sahip olmak istiyorsanız, bukle Bir saç tutamını iki ısıtıcı Bukle maşasını 360° dön- maşasını tutam çubuk arasına yerleştirin dürün ve yavaşça aşağıya boyunca daha ağır ve saç... -
Seite 73: Hacimli Bukleler
7.3 Hacimli bukleler Bukleyi elinizle içeriden dışarı doğru açın. Sonuçta hacimli bir bukle elde edersiniz. Bir saç tutamını iki ısıtıcı Bukle maşasını 360° dön- çubuk arasına yerleştirin dürün ve tüm saç tutamı ve saç hizasının yakınına boyunca yukarıya doğru kadar getirin. getirin. -
Seite 74: Teknik Veriler
Notlar • Bukle maşası bakım gerektirmez. • Bukle maşasını tozdan, kirden ve nemden koruyun. • Bukle maşasını bulaşık makinesinde temizlemeyin! • Keskin, sivri, aşındırıcı, yakıcı temizlik malzemeleri ya da sert fırçalar kullanmayın! • Bukle maşasını, yumuşak ve hafif ılık suyla ıslatılmış bir bezle silebilirsiniz. •... -
Seite 75: Комплект Поставки
РУССКИЙ Комплект поставки Прибор для завивки волос / Настоящая инструкция по применению Содержание 1. Назначение прибора ......76 7. Виды завивки ......... 84 2. Пояснения к символам ....... 77 7.1 Классические локоны ..... 84 3. Использование по назначению ..78 7.2 Мягкие локоны ......... 84 4. -
Seite 76: Назначение Прибора
• Если прибор используется в ванной комнате, после при- менения штекер следует извлечь из розетки, поскольку близость воды представляет собой опасность, даже если прибор выключен. • Никогда не используйте прибор вблизи ванн, умывальных раковин, душа, емкостей с водой или другими жидкостями —... -
Seite 77: Пояснения К Символам
2. Пояснения к символам В инструкции по применению и на приборе используются следующие символы. Запрещено использовать прибор вблизи воды и в воде (например, в раковине, душе, ванне): опасность поражения электрическим током! Опасно Предупреждает об опасности травмирования или ущерба для здоровья. Предостережение... -
Seite 78: Использование По Назначению
3. Использование по назначению Прибор для завивки волос предназначен только для придания формы волосам и стайлинга. Только для личного пользования! Не используйте прибор для завивки волос на искусственных волосах. Не используйте прибор для завивки волос на животных. Предостережение Используйте прибор исключительно в следующих целях: •... -
Seite 79: Указания По Технике Безопасности
5. Указания по технике безопасности Опасно Во избежание причинения вреда здоровью настоятельно не рекомен- дуется использовать прибор в описанных ниже случаях. • Никогда не погружайте прибор в воду или какую-либо другую жидкость! Опасность поражения электрическим током! • Если прибор несмотря на все меры предосторожности упал в воду, немедленно извлеките... -
Seite 80: Применение
• Ни в коем случае не открывайте прибор и не ремонтируйте его самостоятельно, поскольку надежность функционирования в этом случае больше не гарантируется. Несоблюдение этого требования ведет к потере гарантии. • В случае неисправности или повреждения прибора обратитесь за квалифицирован- ной помощью в специализированную мастерскую. •... -
Seite 81: Начало Применения
6.2 Начало применения 1. Прежде чем использовать прибор для завивки волос, полностью высушите волосы. 2. Убедитесь, что Ваши волосы чистые, и что на них не осталось средств для укладки. Исключе- ние составляют изделия, защищающие волосы от воздействия высокой температуры. 3. Расчешите волосы. 4. - Seite 82 5. При помощи кнопок (+) [4] и (–) [5] настройте не- Темпера- Тип волос обходимый температурный режим. На ЖК-ин- турный дикаторе температуры [3] отображается уста- режим новленный температурный режим. Сохранить тонкий, ломкий, настройки температуры можно двойным нажа- окрашенный или тием кнопки ВКЛ./ВЫКЛ. [6]. На дисплее поя- 100–140 °C осветленный...
-
Seite 83: После Использования
8. Проведите прибор для завивки волос вдоль пряди почти до корней волос. Удерживайте прибор в таком положении. Следите за тем, чтобы нагревательные элементы [2] не каса- лись кожи головы или рук. 9. Поверните прибор для завивки на 360° и мед- ленно проведите его вниз, вдоль всей пряди. Следите... -
Seite 84: Виды Завивки
7. Виды завивки С помощью данного прибора Вы можете экспериментировать с различными вида- ми завивки. 7.1 Классические локоны В результате у Вас получится классический локон. Указание Чтобы локон получился более Положите прядь волос Поверните прибор упругим, протя- между нагревательными для завивки на 360° и гивайте... -
Seite 85: Объемные Локоны
7.3 Объемные локоны Распушите локон, проведя по нему рукой изнутри наружу. В результате у Вас получится объемный локон. Положите прядь волос Поверните прибор для между нагревательными завивки на 360° и про- элементами и проведи- ведите его вдоль всей те их почти до корней пряди... -
Seite 86: Технические Характеристики
• Следите за тем, чтобы внутрь прибора не попала вода! Опасность поражения элек- трическим током! • Не используйте для очистки воспламеняемые жидкости! Опасность пожара! Указания • Прибор для завивки волос не требует технического обслуживания. • Защитите прибор для завивки волос от пыли, грязи и влажности. •... -
Seite 87: Гарантия И Обслуживание
11. Гарантия и обслуживание Мы предоставляем гарантию на дефекты материалов и изготовления на срок 24 месяца со дня продажи через розничную сеть Гарантия не распространяется: - на случаи ущерба, вызванного неправильным использованием - на быстроизнашивающиеся части - на дефекты, о которых покупатель знал в момент покупки - на... -
Seite 88: Zawartość Opakowania
POLSKI Zawartość opakowania Lokówka / Niniejsza instrukcja obsługi Spis treści 1. Zastosowanie......... 89 7. Style loków ..........97 2. Objaśnienie symboli ......90 7.1 Loki klasyczne ........97 3. Użytkowanie zgodne z przeznaczeniem 91 7.2 Loki miękkie ........97 4. Opis urządzenia ........91 7.3 Loki o dużej objętości ...... -
Seite 89: Zastosowanie
• Korzystając z urządzenia w łazience, należy po skończeniu używania wyjąć wtyczkę z gniazdka, ponieważ bliskość wody jest niebezpieczna również wtedy, gdy urządzenie jest wyłą- czone. • Nigdy nie używać urządzenia w pobliżu wanien, umywalek, na- trysków ani innych zbiorników wypełnionych wodą lub innymi cieczami, gdyż... -
Seite 90: Objaśnienie Symboli
2. Objaśnienie symboli W niniejszej instrukcji obsługi oraz na urządzeniu użyto poniższych symboli. Urządzenia nie należy używać w pobliżu wody ani w wodzie (np. w pobliżu umywalki, pod prysznicem, w wannie), gdyż grozi to porażeniem prądem! Niebezpieczestwo Ostrzeżenie przed niebezpieczeństwem obrażeń ciała lub utraty zdrowia. -
Seite 91: Użytkowanie Zgodne Z Przeznaczeniem
3. Użytkowanie zgodne z przeznaczeniem Lokówka może być używana wyłącznie do modelowania i stylizacji włosów w ramach prywatnego użytkowania! Nie wolno używać lokówki do stylizacji sztucznych włosów. Nie wolno używać lokówki do zabiegów u zwierząt. Ostrzeżenie Urządzenie może być stosować wyłącznie: •... -
Seite 92: Wskazówki Dotyczące Bezpieczeństwa
5. Wskazówki dotyczące bezpieczeństwa Niebezpieczeństwo Aby zapobiec obrażeniom kategorycznie odradza się używania urządzenia: • Nigdy nie zanurzać urządzenia w wodzie ani w innej cieczy! Niebezpieczeństwo porażenia prądem elektrycznym! • Jeżeli mimo podjęcia wszelkich środków ostrożności urządzenie wpadnie do wody, na- leży natychmiast wyjąć... -
Seite 93: Zastosowanie
• W przypadku usterki lub uszkodzenia urządzenia jego naprawę należy zlecić specjali- stycznemu zakładowi. • Używając urządzenia nigdy nie wolno pozostawiać go bez nadzoru. • Nie używać urządzenia na wolnym powietrzu. • Przekazując urządzenie innym osobom, należy również przekazać niniejszą instrukcję obsługi. 6. -
Seite 94: Rozpoczęcie Używania Urządzenia
6.2 Rozpoczęcie używania urządzenia 1. Przed użyciem lokówki należy dokładnie wysuszyć włosy. 2. Upewnić się, czy włosy są czyste i wolne od środ- ków do modelowania włosów. Wyjątek stanowią produkty, które chronią włosy przed ciepłem. 3. Rozczesać włosy, aby je rozplątać. 4. - Seite 95 5. Ustawić odpowiedni poziom temperatury za po- Poziom tem- Typ włosów mocą przycisku (+) [4] lub (–) [5]. Wskaźnik tem- peratury peratury LCD [3] pokazuje aktualnie ustawiony po- włosy delikatne, ziom temperatury. Poprzez dwukrotne wciśnięcie od 100°C do łamliwe, farbowa- przycisku włączania/wyłączania [6] można usta- 140°C ne i rozjaśniane...
-
Seite 96: Po Użyciu
8. Przeciągnąć lokówkę wzdłuż pasma prawie do cebulki włosa. Przytrzymać lokówkę w tej pozy- cji. Uważać, aby nie dotknąć grzałkami [2] skóry głowy ani dłoni. 9. Obrócić lokówkę o 360° i przeciągnąć ją powoli w dół wzdłuż całego pasma. Należy uważać na zachowanie kąta nachylenia lokówki tak, aby pod- czas używania urządzenia poszczególne pasma nie nakładały się... -
Seite 97: Style Loków
7. Style loków Za pomocą tej lokówki można bez problemu wypróbować różne style loków. 7.1 Loki klasyczne W ten sposób powstaje lok klasyczny. Wskazówka Aby sprawić, że loki będą trwalsze, należy wolniej Należy umieścić pasmo Obrócić lokówkę o 360° i przeciągnąć... -
Seite 98: Loki O Dużej Objętości
7.3 Loki o dużej objętości Rozciągnąć lok ręką od wewnątrz na zewnątrz. W ten sposób po- wstaje lok o dużej objętości. Należy umieścić pasmo Obrócić lokówkę o 360° między grzałkami i przecią- i przeciągnąć ją powoli gnąć lokówkę prawie do wzdłuż... -
Seite 99: Dane Techniczne
Wskazówki • Lokówka nie wymaga konserwacji. • Lokówkę należy chronić przed kurzem, zabrudzeniem i wilgocią. • Nie myć urządzenia w zmywarce! • Nie używać żadnych ostrych, szorujących czy agresywnych środków czyszczących ani twardych szczotek! • Lokówkę można czyścić miękką ściereczką zwilżoną ciepłą wodą. •... - Seite 100 Beurer GmbH • Söflinger Straße 218 • 89077 Ulm, Germany • www.beurer.com www.beurer-gesundheitsratgeber.com • www.beurer-healthguide.com...