Philips definition 15 Bedienungsanleitung
Quicklinks
- Before cutting, comb the hair so that it falls naturally.
English
- In general, it is advisable to start from the neck and work
towards the top of the head. Next cut the front and the top
of the head (fig. 18).
Hold the clipper so that the flat side of the comb
Important
attachment is directed towards the head. Move it slowly
upwards and then away from the head, cutting only a small
• Please read these instructions carefully in
amount at a time.
conjunction with the illustrations before using the
In the same manner cut the hair at the sides and the back
appliance.
of the head (fig. 19, 20).
• Before connecting the appliance, check if the
- If you want the hair cut on the sides or back of the head
voltage rating on the mains plug corresponds to
shorter than on top, change to a lower hair length setting
the mains voltage in your home.
and continue to cut against the direction of the hair growth.
• Regular cleaning and good maintenance
guarantee optimum performance and the longest
Cutting over styling comb or fingers
working life.
If you want to cut the hair to a length of more than 17 mm,
• Take care when using the hair clipper for the first
you can use the "over styling comb" method.
few times. Do not hurry. Make smooth and gentle
- Remove the comb attachment (fig. 3).
movements.
- Lift a small section of hair at a time with a styling comb
• Do not allow the hair clipper to become wet.
(fig. 21) or grasp the section of hair between two fingers
• Do not leave the appliance in a very warm place or
(fig. 22).
in direct sunlight.
Move the comb or fingers through the hair until only the
• Keep the hair clipper out of children's reach.
length sticks out which you want to clip off.
• Do not use the hair clipper when the skin is
- Trim the hair protruding from the comb or fingers.
infected.
Continue this procedure working from the front to the back
of the head. As you work to the back, you may gradually
cut hair shorter. To check the cutting length, take a cut-off
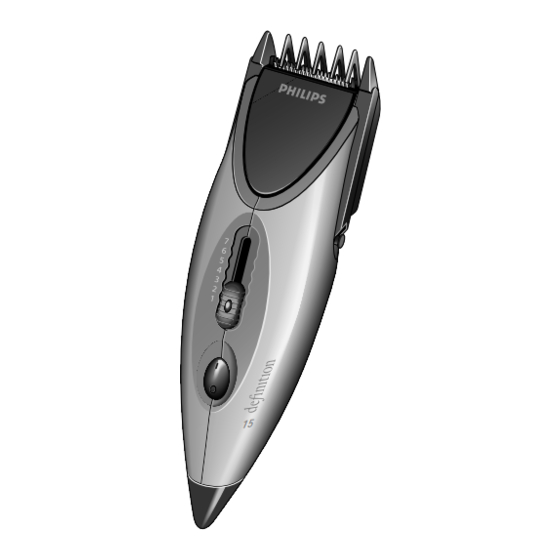
General description
(fig. 1)
hair section for measuring.
- Comb frequently to remove cut hair and to check for
A
Comb attachment (adjustable to various hair lengths,
uneven areas.
removable)
B
Cutting unit (removable)
Outlining
C
Cutting length control (press and slide)
- Comb the hair.
D
On/off switch
- Remove the comb attachment (fig. 3).
|
= On
- For even hair length at the base of the neck cut the hair as
O = Off
shown in fig. 23, holding the clipper in reversed position
E
Socket for appliance plug (low-voltage DC)
lightly against the hair. Make overlapping strokes
F
Appliance plug (low-voltage DC)
downwards to the neck (fig. 24).
G
Mains plug with built-in transformer
- Proceed in the same manner for cutting sideburns (fig. 25).
H
Brush
- For cutting the hair close to the ears put one corner of the
I
Oil
cutter on the hair. Ensure that the teeth are at a safe
J
Styling comb
distance from the ears (fig. 26).
Slowly and carefully shape the desired outline of the hair
(fig. 27).
Making the hair clipper ready for use
Crew cut (fig. 28)
Dependent upon the required application, you can use your
- Comb the hair into its natural direction.
hair clipper with or without the comb attachment.
- Select hair length setting 7 (maximum hair length). Cut the
If mounted, the comb attachment can be set to 7 cutting
hair from the back side of the neck towards the crown
length positions.
(fig. 29).
You can slide the control knob when the release button (on
- Cut the sides of the head making overlapping strokes
top of the knob) is kept pressed-down. When released, the
straight upwards (fig. 30), i.e. parallel to the sides of the
control knob is locked in the selected position.
head. Hold the comb attachment flat against the head.
Move the clipper slowly through the hair, leaving the hair
• Clipping with comb attachment
on top of the head uncut.
- Set the required cutting length (fig. 2). Keeping the control
- If you wish you can cut the hair at the neck and sides a
knob pressed-down (1), slide (2) it into one of the 7
second time, using a lower position (i.e. 3 or 4).
positions. Then release the knob.
- For a flat top look, cut the hair on the top of the head over a
styling comb or over the fingers (fig. 31, 32) using the hair
• Clipping without comb attachment
clipper without comb attachment.
- Pull the comb attachment from the appliance (fig. 3).
Also refer to section "Cutting over styling comb or fingers".
- Finish the haircut by outlining the neckline and sideburns.
- Insert the appliance plug into the connector (fig. 4).
Also refer to section "Outlining".
- Insert the mains plug into the wall socket (fig. 5).
(Please note: the mains plug and wall socket shown in the
Short cut
illustration are not applicable to the United Kingdom.)
- Comb the hair into its natural direction.
- Switch the appliance on (fig. 6).
- Select the desired hair length for the back and the sides of
the head.
- Cut the back and the sides of the head making overlapping
Tips
strokes straight upwards (fig. 33). Hold the comb
attachment flat against the head. Move the clipper slowly
• Ensure that your movements are well-controlled, especially
through the hair, leaving the hair on top of the head uncut.
when using without comb attachment. Touch the hair lightly
- Select the desired hair length for the top of the head.
with the hair clipper.
- Cut the top of the head (fig. 34). Start at the front side and
• Regularly shake (fig. 7) and/or blow (fig. 8) off the hairs
work towards the crown. Hold the comb attachment flat
from the top of the clipper.
against the head.
• While clipping with comb attachment: If much hair has
- For outlining use the hair clipper without comb attachment.
accumulated in the comb area, pull off the comb
Also refer to section "Outlining".
attachment (fig. 9) and remove the hair by shaking (fig. 10)
and/or blowing (fig. 11).
• If the cutting speed decreases it may be necessary to
remove, clean and lubricate the cutting unit.
Please refer to section "Cleaning: after each use".
• Always switch off after use. It is advisable to clean the
cutting unit directly after use.
Cleaning: after each use
- Switch off (fig. 12).
- Remove the cutting unit (fig. 13).
- Clean the cutting unit and the inside of the appliance using
the brush (fig. 14);
- Lubricate the cutting unit with five drops of oil (fig. 15).
- To reassamble, hook the cutting unit on to the housing as
illustrated (fig. 16) and push until you hear a click (fig. 17).
Replacement cutting unit
Use only an original Philips replacement cutting unit to
replace a worn or damaged cutting unit.
How to clip
General
• Ensure that your clipper is clean and oiled.
• Let the person whose hair you are going to cut sit so that
the top of his/her head is on your eye level. Wrap a towel
around his/her neck.
• Before you start cutting, comb the hair well. Ensure that it
is untangled. It is not necessary to wash the hair before
cutting.
• For good cutting control and a smooth result hold the
clipper in a relaxed grip.
• The best results will be achieved if the hair clipper is used
on dry hair.
• When cutting long or semi-long hair it is advisable to cut
over a styling comb or to grasp the hair between your
fingers as described in section "Cutting over styling comb
or fingers".
• For short hair, a light trimming at the neck and sides may
be all that is needed for a well-groomed haircut.
• At regular intervals stop cutting, comb the hair and check
the results so far.
Hair cutting with comb attachment
(4-17 mm remaining hair length)
- Begin with the setting for maximum hair length (i.e.
position 7). After you have familiarized yourself with the
product and have gained some experience, you may select
a particular hair length.
- You can select seven hair length settings (see fig. 2).
Setting
Hair length (mm)
7
17
6
15
5
13
4
11
3
9
2
7
1
4
Position
Hauteur de coupe (mm)
Français
7
17
6
15
5
13
4
11
Important
3
9
2
7
• Lisez ces instructions soigneusement en même
1
4
temps que les illustrations avant toute utilisation
de l'appareil.
- Avant de couper, coiffez les cheveux de façon à ce qu'ils
• Avant de brancher l'appareil, assurez- vous que la
tombent naturellement.
tension indiquée sur la fiche correspond à la
- En général, il est préférable de commencer par le cou et
tension du secteur de votre logement.
d'aller vers le haut de la tête. Ensuite coupez les cheveux
• Un nettoyage régulier et un bon entretien
de devant et sur le sommet de la tête (fig. 18).
garantissent des performances optimums et une
Tenez le côté plat du guide de coupe dirigé vers la tête.
durée de vie exceptionnelle.
Déplacez-le lentement vers le haut, coupez une petite
• Faites attention quand vous utilisez la tondeuse à
quantité de cheveux à la fois.
cheveux pour la première fois. Prenez votre
Procédez la même manière sur les côtés et à l'arrière de la
temps. Ayez des mouvements lents et contrôlés.
tête (fig. 19, 20).
• Ne laissez pas la tondeuse à cheveux dans un lieu
- Si vous désirez couper les cheveux des cotés ou de
humide.
derrière, plus courts que ceux du dessus, changez la
• Ne laissez pas l'appareil exposé à de trop fortes
hauteur de coupe.
chaleurs ou aux rayons directs du soleil.
• Maintenez la tondeuse à cheveux hors de portée
Coupe au peigne ou avec doigts
des enfants.
Si vous voulez couper les cheveux à une longueur
• N'utilisez pas la tondeuse quand vous avez une
supérieure à 17 mm, vous pouvez utiliser la "coupe au
infection de la peau.
peigne".
- Enlevez le guide de coupe (fig. 3).
- Prenez une petite mèche de cheveux à la fois avec un
Description générale
(fig. 1)
peigne (fig. 21) ou pincez-la avec vos doigts (fig. 22).
Déplacez le peigne ou les doigts le long de la mèche
A
Guide de coupe (ajustable, détachable)
jusqu'à la longueur souhaitée.
B
Unité de rasage (détachable)
- Coupez les cheveux à partir du peigne ou des doigts.
C
Réglage de longueur de coupe (pressez et faites
Continuez de cette façon en partant du devant jusqu'à
glisser)
l'arrière de la tête. Vous pouvez ainsi progressivement
D
Interrupteur Marche/Arrêt
couper les cheveux de plus en plus court. Vérifiez la
|
= Marche
longueur de coupe régulièrement.
O = Arrêt
- Coiffez fréquemment pour enlever cheveux coupés et
E
Prise pour connecteur (basse tension)
vérifiez d'éventuelles inégalités.
F
Connecteur (basse tension)
G
Fiche avec transformateur incorporé
Contours
H
Brosse
- Coiffez les cheveux.
I
Huile
- Enlevez le guide de coupe (fig. 3).
J
Peigne
- Pour égaliser la base du cou coupez les cheveux comme
indiqué dans le fig. 23, en maintenant la tondeuse dans la
position inverse et légèrement contre le poil (fig. 24).
Préparation de la tondeuse à cheveux à l'emploi
- Procédez de la même manière pour tailler les favoris
(fig. 25).
En fonction de l'application désirée, vous pouvez utiliser la
- Pour couper le poil près des oreilles placez un coin
tondeuse à cheveux avec ou sans le guide de coupe.
seulement de la tête de coupe sur le poil. Assurez-vous
Si vous utilisez le guide de coupe vous pouvez sélectionner
que les dents de la tondeuse sont à bonne distance des
7 longeurs de coupe.
oreilles (fig. 26).
Faites glisser le bouton de contrôle en appuyant sur le
Lentement et soigneusement formez le contour désiré
bouton de déverrouillage (sur sommet). Lorsqu'il est libéré,
(fig. 27).
le bouton de contrôle est verrouillé dans la position
sélectionnée.
Coupe en brosse (fig. 28)
- Coiffez les cheveux.
Taille avec guide de coupe
- Choisissez la hauteur de coupe 7 (maximum). Coupez les
- Sélectionnez la longueur de coupe désirée (fig. 2). Pressez
cheveux en partant de l'arrière du cou (fig. 29).
(1) et faites glisser le bouton de contrôle (2) sur une des 7
- Taillez les côtés, faites des coupes en partant du bord vers
positions. Relâchez le bouton.
le centre (fig. 30), par exemple, parallèles aux côtés de la
tête. Maintenez la tête de rasage tout contre la tête.
Taille sans guide de coupe
Bougez la tondeuse lentement sur les cheveux.
- Retirez le guide de coupe de l'appareil (fig. 3).
- Si vous le désirez vous pouvez couper les cheveux sur le
cou et les côtés une seconde fois, en utilisant une position
- Insérez le connecteur (fig. 4).
plus basse (ex: 3 ou 4).
- Insérez la fiche dans la prise de courant (fig. 5).
- Pour une coupe à ras, coupez les cheveux sur le sommet
- Mettez en marche l'appareil.
de la tête à l'aide d'un peigne ou des doigts (fig. 31, 32) et
en utilisant la tondeuse à cheveux sans le guide de coupe.
Référez-vous également au paragraphe "Coupe au peigne
Conseils
ou avec les doigts".
- Terminez la coupe en rectifiant les bords du cou et des
• Quand vous utilisez la tondeuse sans guide de coupe :
favoris. Référez-vous également au paragraphe
assurez-vous que vos mouvements sont contrôlés. Ayez
"Contours".
un toucher léger.
• Secouez régulièrement (fig. 7) et/ou soufflez (fig. 8) les
Coupe rase
cheveux du sommet de la tête.
- Coiffez les cheveux dans le sens de la pousse des
• Pendant la taille avec guide de coupe : Si des cheveux se
cheveux.
sont accumulés dans le peigne, retirez le guide de coupe
- Choisissez la longueur de cheveux désirée pour l'arrière et
(fig. 9) et enlevez les cheveux en secouant (fig. 10) et/ou
les côtés.
soufflant (fig. 11).
- Taillez ensuite en faisant des coupes du bord vers le
• Si la vitesse de coupe diminue il peut être nécessaire de
centre (fig. 33). Maintenez la tête de rasage tout contre la
nettoyer et lubrifier l'unité de rasage.
tête. Bougez la tondeuse lentement sur les cheveux.
Référez-vous au paragraphe "Nettoyage : après chaque
- Choisissez la longueur de cheveux désirée pour le haut de
utilisation".
la tête (fig. 34). Taillez en procédant de la même façon.
• Il est souhaitable de nettoyer l'unité de rasage après
- Pour les contours utilisez la tondeuse sans guide de
chaque utilisation.
coupe.
Référez-vous également au paragraphe "Contours".
Nettoyage: après chaque utilisation
- Arrêtez l'appareil (fig. 12).
- Enlevez l'unité de rasage (fig.13).
- Nettoyez l'unité de rasage et l'intérieur en utilisant la
brosse (fig. 14).
- Lubrifiez l'unité de rasage avec cinq gouttes d'huile
(fig. 15).
- Pour remonter, fixez l'unité de rasage sur le support
comme illustré (fig. 16) et poussez jusqu'à ce que vous
entendiez un clic (fig. 17).
Remplacement de l'ensemble tête de coupe
Utilisez uniquement un ensemble tête de coupe Philips pour
remplacer une unité de rasage usée ou endommagée.
Utilisation
Général
• Assurez-vous que votre tondeuse est nettoyée et huilée.
• Laissez la personne à qui vous aller couper les cheveux
s'asseoir de façon à avoir le sommet de sa tête à hauteur
de vos yeux. Enveloppez le cou à l'aide d'une serviette.
• Avant de commencer la coupe, coiffez les cheveux.
Assurez-vous qu'ils sont bien démêlés. Il n'est pas
nécessaire de faire un shampoing avant de les couper.
• Pour un bon contrôle de la coupe et un résultat satisfaisant
tenez la tondeuse correctement.
• Les meilleurs résultats seront obtenus si vous utilisez la
tondeuse à cheveux sur cheveux secs.
• Lors de la coupe de cheveux mi-longs il est souhaitable de
couper sur un peigne ou de pincer les cheveux entre vos
doigts comme décrit dans le paragraphe "Coupe au peigne
ou avec les doigts".
• Pour cheveux courts, une coupe légère sur le cou et sur
les côtés est généralement suffisante.
• A intervalles réguliers arrêtez la coupe, coiffez les cheveux
et vérifiez le résultat obtenu.
Coupe de cheveux avec guide de coupe
(4-17 mm de longueur de cheveux)
- Commencez avec la position maximum (hauteur de coupe
position 7). Après vous être familiarisé avec le produit et
avec un peu d'expérience, vous pouvez sélectionner la
hauteur de coupe définitive.
- Vous pouvez choisir 7 positions de hauteur de coupe (voir
fig. 2).
Deutsch
1
Wichtig
• Lesen Sie diese Gebrauchsanweisung sorgfältig
A
durch, und sehen Sie sich dabei die Abbildungen
I
an, bevor Sie das Gerät zum ersten Mal
verwenden.
• Prüfen Sie vor Inbetriebnahme, ob die
Spannungsangabe auf dem Netzstecker mit der
B
örtlichen Netzspannung übereinstimmt.
• Regelmäßige Reinigung und Wartung garantieren
eine gute Leistung und lange Lebensdauer des
Geräts.
• Gehen Sie bei den ersten Anwendungen behutsam
H
und mit ruhigen Bewegungen vor. Nehmen Sie
sich Zeit.
• Achten Sie darauf, daß das Gerät nicht mit Wasser
in Berührung kommt.
• Legen Sie das Gerät nicht in die Nähe von
Wärmequellen oder in direktes Sonnenlicht.
C
• Halten Sie Kinder von dem Gerät fern.
• Verwenden Sie das Gerät nicht bei entzündeter
oder infizierter Haut.
D
Allgemeine Beschreibung
(Abb. 1)
J
E
A
Kamm-Aufsatz, abnehmbar. Verschiedenen Haarlängen
anpaßbar.
B
Schneide-Einheit, abnehmbar.
C
Schnittlängen-Regler, drücken und schieben.
G
D
Ein-/Ausschalter
I = Ein
0 = Aus
F
E
Anschluß für Gerätestecker, Niedervolt Gleichstrom.
F
Gerätestecker, Niedervolt Gleichstrom.
G
Netzgerät
H
Bürste
I
Öl
J
Frisierkamm
2
3
4
1
Vorbereitung zum Gebrauch
2
Je nach dem gewünschten Haarschnitt können Sie das
Gerät mit oder ohne Kamm-Aufsatz verwenden.
Der Kamm-Aufsatz kann auf sieben verschiedene
Haarschnitt-Längen eingestellt werden.
5
6
Sie können die Schnittlänge einstellen, indem Sie den
Regler (C) verschieben, während Sie die Arretierung auf
dem Regler gedrückt halten. Die Schnittlänge ist eingestellt,
sobald Sie die Arretierung loslassen.
• Schneiden mit Kamm-Aufsatz
- Stellen Sie die gewünschte Schnittlänge ein (Abb. 2).
7
8
9
Halten Sie die Arretierung gedrückt (1), schieben Sie (2)
den Regler auf eine der 7 Positionen. Lassen Sie die
Arretierung los.
• Schneiden ohne Kamm-Aufsatz
- Ziehen Sie den Kamm-Aufsatz vom Gerät (Abb. 3).
- Stecken Sie den Gerätestecker (F) in den Anschluß (E)
10
11
(Abb. 4).
- Stecken Sie das Netzgerät in die Steckdose (Abb. 5).
- Schalten Sie das Gerät ein (Abb. 6).
Hinweise
• Achten Sie darauf, daß Sie mit ruhigen, gleichmäßigen
12
13
14
Bewegungen vorgehen, besonders wenn Sie ohne Kamm-
Aufsatz arbeiten.
• Schütteln (Abb. 7) oder blasen (Abb. 8) Sie regelmäßig die
abgeschnittenen Haare vom Gerät.
• Wenn Sie mit Kamm-Aufsatz arbeiten, und sich viele
Haare in diesem Teil angesammelt haben, dann ziehen Sie
den Kamm-Aufsatz ab (Abb. 9) und schütteln (Abb. 10)
oder blasen (Abb. 10) die Haare heraus.
15
16
17
2
• Wenn die Schergeschwindigkeit nachläßt, könnte es nötig
CLICK
oil
sein, die Schneide-Einheit abzunehmen, zu reinigen
und/oder zu ölen. - Vgl. den Abschnitt "Nach jedem
1
Gebrauch reinigen."
• Schalten Sie das Gerät nach Gebrauch immer aus. Es
empfiehlt sich, die Schneide-Einheit nach jedem Gebrauch
zu reinigen.
18
19
20
Nach jedem Gebrauch reinigen
- Schalten Sie das Gerät aus (Abb. 12).
- Nehmen Sie die Schneide-Einheit ab (Abb. 13).
- Reinigen Sie die Schneide-Einheit und das Innere des
Geräts mit der Bürste (Abb. 14).
21
22
- Geben Sie fünf Tropfen Öl auf die Schneide-Einheit
(Abb. 15).
- Setzen Sie das Gerät wieder zusammen, indem Sie die
Schneide-Einheit in das Gerät einhaken (Abb. 16) und
festdrücken ("Klick" - Abb.17).
Wechseln der Schneide-Einheit
23
24
25
Eine verbrauchte oder beschädigte Schneide-Einheit darf nur
gegen ein original Philips Ersatzteil ausgetauscht werden.
Die Verwendung des Geräts
Allgemeines
26
27
• Achten Sie darauf, daß Ihr Gerät sauber und geölt ist.
• Die Person, der Sie die Haare schneiden wollen, muß still
sitzen, den Kopf in Höhe Ihrer Augen. Legen Sie ihr ein
Tuch um die Schultern.
• Kämmen Sie das Haar vor dem Schneiden gründlich, so
daß es glatt liegt. Es ist nicht nötig, das Haar vor dem
Schneiden zu waschen.
• Sie erhalten das beste Ergebnis an trockenem Haar.
28
29
30
• Halten Sie das Gerät fest, aber unverkrampft.
• Langes oder halblanges Haar läßt sich am besten über
einen Frisierkamm schneiden. Sie können die Haare auch
zwischen Ihre Finger nehmen. - Vgl. den Abschnitt
"Schneiden über einen Frisierkamm oder über die Finger".
• Bei kurzem Haarschnitt kann es ausreichen, die
Seitenkanten und den Nacken beizuschneiden.
• Unterbrechen Sie von Zeit zu Zeit das Haareschneiden.
31
32
Kämmen Sie das Haar aus und prüfen Sie den bisherigen
Erfolg.
Haare schneiden mit dem Kamm-Aufsatz
für Haarschnitte von 4 bis 17 mm.
- Beginnen Sie mit der Einstellung 7 für maximale Länge.
Sind Sie dann mit der Handhabung des Geräts vertraut,
33
34
können Sie eine niedrigere Einstellung für kürzeres Haar
wählen.
- Sie können zwischen sieben Schnittlängen wählen
(Abb. 2):
Einstellung
Schnittlänge in mm
7
17
6
15
5
13
4
11
15
3
9
2
7
1
4
- Kämmen Sie das Haar vor dem Schneiden aus, damit es
auf natürliche Weise fällt.
- Im Regelfall beginnen Sie am Hals und arbeiten zur Mitte
des Kopfes hin. Danach schneiden Sie die Haare an der
Stirn und in der Mitte (Abb. 18).
Halten Sie das Gerät so, daß die flache Seite des Kamm-
Aufsatzes zum Kopf weist, und schneiden Sie nur kleine
Mengen Haar auf einmal.
In gleicher Weise schneiden Sie das Haar an der Seite und
im Nacken (Abb. 19 und 20).
- Soll das Haar an der Seite und im Nacken kürzer
geschnitten werden als die anderen Haare, so stellen Sie
eine kürzere Schnittlänge ein, und schneiden Sie gegen
die Haarwuchsrichtung.
Schneiden über einen Frisierkamm oder über die Finger
Soll das Haar länger als 17 mm geschnitten werden, so
können Sie mit Ihrem Gerät "über den Kamm" schneiden.
- Nehmen Sie den Kamm-Aufsatz ab (Abb. 3).
- Heben Sie mit einem Frisierkamm jeweils eine Strähne
Haar hoch (Abb. 21), oder nehmen Sie die Strähne
zwischen Ihre Finger (Abb. 22).
- Ziehen Sie das Haar durch den Kamm bzw. Ihre Finger, bis
soviel Haar herausschaut, wie Sie abschneiden wollen.
- Schneiden Sie diese Länge mit dem Gerät ab.
Arbeiten Sie in dieser Weise von der Stirn bis zum Nacken,
wo Sie das Haar nach und nach kürzer fassen können.
Prüfen Sie die Schnittlänge, indem Sie eine bereits
geschnittene Strähne anheben und zum Maßstab nehmen.
- Kämmen Sie das Haar öfters zwischendurch, um
abgeschnittenes Haar auszukämmen und unebene Stellen
("Treppen") zu erkennen.
Konturen schneiden
- Kämmen Sie das Haar.
- Nehmen Sie den Kamm-Aufsatz ab (Abb. 3).
- Schneiden Sie die Konturen an den Seiten, am Hals und
am Nacken mit der umgekehrt gehaltenen Schneide-
Einheit (Abb. 23) unter leichtem Druck. Ziehen Sie das
Gerät in überlappenden Zügen zum Hals abwärts
(Abb. 24).
- Gehen Sie in gleicher Weise bei den Koteletten vor
(Abb. 25).
- Nahe den Ohren setzen Sie nur eine Kante der Schneide-
Einheit an. Geben Sie acht, daß die Zähne der Schneide-
Einheit nicht ans Ohr geraten (Abb. 26).
Ziehen Sie die Konturen langsam und vorsichtig (Abb. 27)
nach.
Bürstenschnitt (Abb. 28)
- Kämmen Sie das Haar in Haarwuchsrichtung.
- Stellen Sie die Schnittlängen-Regler auf Position 7, die
maximale Einstellung, und schneiden Sie vom Nacken her
nach oben (Abb. 29).
- Schneiden Sie die Seiten in vertikalen, parallel
überlappenden Zügen nach oben (Abb. 30). Halten Sie
dabei den Kamm-Aufsatz mit der flachen Seite gegen den
Kopf. Gehen Sie langsam vor, und lassen Sie das Haar
oben auf dem Kopf ungeschoren.
- Sie können das Vorgehen bei Bedarf mit einer kürzeren
;
Einstellung, also 3 oder 4, wiederholen.
- Wenn Sie die Haare auf dem Kopf flach und eben
schneiden wollen, so schneiden Sie mit dem Gerät ohne
Kamm-Aufsatz über einen waagerecht gehaltenen Kamm
bzw. Ihre Finger (Abb. 31 und 32). - Vgl. den Abschnitt
"Schneiden über einen Frisierkamm oder über die Finger".
- Konturieren Sie den Schnitt wie im Abschnitt "Konturen
schneiden" beschrieben.
Kurzer Haarschnitt
- Kämmen Sie das Haar in Haarwuchsrichtung.
- Stellen Sie die Schnittlänge für die Seiten und den Nacken
ein.
- Schneiden Sie Seiten- und Nackenhaare in überlappenden
Zügen zum Hals abwärts (Abb. 33). Halten Sie den Kamm-
Aufsatz flach gegen den Kopf. Führen Sie die Schneide-
Einheit langsam durch das Haar an den Seiten, ohne aber
die Haare auf dem Kopf zu schneiden.
- Stellen Sie die Schnittlänge für das obere Haar ein.
- Schneiden Sie das Haar auf der Mitte des Kopfes
(Abb. 34). Beginnen Sie an der Stirn, und schneiden Sie
das Haar zur Mitte des Kopfes. Halten Sie den Kamm-
Aufsatz flach gegen den Kopf.
- Zum Konturieren ohne Kamm-Aufsatz verfahren Sie, wie
im Abschnitt "Konturen schneiden" beschrieben.
4203 000 38101

Verwandte Anleitungen für Philips definition 15


Inhaltszusammenfassung für Philips definition 15
- Seite 1 - Geben Sie fünf Tropfen Öl auf die Schneide-Einheit entendiez un clic (fig. 17). (Abb. 15). Use only an original Philips replacement cutting unit to - Setzen Sie das Gerät wieder zusammen, indem Sie die replace a worn or damaged cutting unit.
- Seite 2 Als de opzetkam op zijn plaats is gezet, kunt u deze op 7 Breng langzaam en behoedzaam de gewenste contour van Usate esclusivamente le unità di taglio Philips per sostituire • Antes de usar el aparato, lean cuidadosamente Dependendo do que pretenda fazer, poderá usar a máquina posição contrária, suavemente contra o cabelo.