Herunterladen Inhalt Inhalt Diese Seite drucken
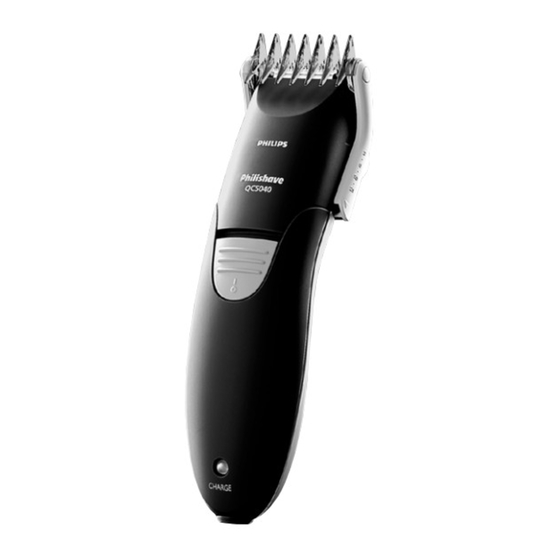
Philips 1000 Serie Bedienungsanleitung
Vorschau ausblenden Andere Handbücher für 1000 Serie:

Werbung

Verfügbare Sprachen
  • DE

Verfügbare Sprachen

  • DEUTSCH, seite 15
QC5040

Werbung

Inhaltsverzeichnis
loading

Inhaltszusammenfassung für Philips 1000 Serie

  • Seite 1 QC5040...
  • Seite 3: Inhaltsverzeichnis

    English 4 DEutsCh 15 Ελληνικα 27 Español 40 Français 51 italiano 62 nEDErlanDs 73 português 84 türkçE 95...
  • Seite 4: English

    English introduction Congratulations on your purchase and welcome to Philips! To fully benefit from the support that Philips offers, register your product at www.philips. com/welcome. Your new Philips hair clipper adapts to the contours of the head and allows comfortable use.
  • Seite 5: Compliance With Standards

    30 minutes before you use it. Compliance with standards This Philips appliance complies with all standards regarding electromagnetic fields (EMF). If handled properly and according to the instructions in this user manual, the appliance is safe to use based on scientific evidence available today.
  • Seite 6 English Insert the appliance plug into the appliance. Put the adapter in the wall socket. , The charging light goes on to indicate that the appliance is charging. Note: The charging light does not change colour and does not go out when the appliance is fully charged. optimising the lifetime of the battery - Discharge the battery completely twice a year by letting the motor run until it stops.
  • Seite 7: Using The Appliance

    English using the appliance Clipping with comb attachment Note: Make sure your hair is clean and dry. Do not use the appliance on freshly washed hair. Comb your hair with a styling comb in the hair growth direction. Slide the comb attachment into the guiding grooves of the appliance (‘click’).
  • Seite 8 English Put the adapter in the wall socket. Wait a few seconds and then slide the on/off switch to the ‘on’ position. Move the appliance through the hair slowly. - Start clipping at the highest setting of the comb attachment and reduce the hair length setting gradually.
  • Seite 9 English graduation The Philips hair clipper not only allows you to cut the hair evenly at the same length all over the head, it also enables you to achieve a smooth transition from longer hair on top of the head to shorter hair on the back and sides of the head.
  • Seite 10 English Only cut the hair ends. The hairline has to be close to the ear. To contour the neckline and sideburns, turn the appliance and make downward strokes. Move the appliance slowly and smoothly. Follow the natural hairline. Cutting over styling comb or fingers This technique can be used to obtain hair lengths over 21 mm.
  • Seite 11 English Cut the hair protruding from the comb or fingers. Continue this procedure and comb frequently to remove cut hair and to check for unevenly cut sections. Cleaning Clean the appliance after every use. Never use scouring pads, abrasive cleaning agents or aggressive liquids such as alcohol, petrol or acetone to clean the appliance.
  • Seite 12 Only replace a damaged or worn cutting unit with an original Philips cutting unit. Push the middle part of the cutting unit upwards with your thumb until it opens and then pull it off the appliance.
  • Seite 13: Removing The Rechargeable Battery

    If you have trouble removing the battery, you can also take the appliance to a Philips service centre. The staff of this centre will remove the battery for you and will dispose of them in an environmentally safe way.
  • Seite 14: Guarantee And Service

    If you need service or information or if you have a problem, please visit the Philips website at www.philips.com or contact the Philips Consumer Care Centre in your country (you find its phone number in the worldwide guarantee leaflet).
  • Seite 15: Einführung

    Einführung Herzlichen Glückwunsch zu Ihrem Kauf und willkommen bei Philips! Um den Support von Philips optimal nutzen zu können, registrieren Sie Ihr Produkt bitte unter www.philips.com/welcome. Dieser neue Haarschneider von Philips passt sich den Konturen des Kopfes an und bietet eine einfache Handhabung.
  • Seite 16 Feuchtigkeitsschwankungen ausgesetzt, sollten Sie es vor Gebrauch 30 Minuten an die Umgebung anpassen lassen. normerfüllung Dieses Philips Gerät erfüllt sämtliche Normen bezüglich elektromagnetischer Felder (EMF). Nach aktuellen wissenschaftlichen Erkenntnissen ist das Gerät sicher im Gebrauch, sofern es ordnungsgemäß und entsprechend den Anweisungen in dieser...
  • Seite 17: Für Den Gebrauch Vorbereiten

    DEutsCh Für den gebrauch vorbereiten laden Laden Sie das Gerät vor dem ersten Gebrauch mindestens 12 Stunden lang auf. Ein vollständig geladenes Gerät kann bis zu 35 Minuten schnurlos betrieben werden. Laden Sie das Gerät nicht länger als 24 Stunden. Vergewissern Sie sich, dass das Gerät ausgeschaltet ist.
  • Seite 18: Das Gerät Benutzen

    DEutsCh So benutzen Sie den Haarschneider mit Netzstrom: Schalten Sie den Haarschneider aus, und schließen Sie ihn an das Stromnetz an. Warten Sie einige Sekunden, und schalten Sie dann das Gerät ein. Das gerät benutzen haare mit dem kammaufsatz schneiden Hinweis: Ihr Haar muss sauber und trocken sein.
  • Seite 19 DEutsCh Schnittlängeneinstellung Verbleibende Haarlänge 9 mm 12 mm 15 mm 18 mm 21 mm Stecken Sie den Adapter in die Steckdose. Warten Sie einige Sekunden, und schieben Sie dann den Ein-/Ausschalter auf ‘On’ (‘Ein’). Führen Sie das Gerät langsam durch das Haar. - Schneiden Sie zunächst mit der höchsten Einstellung des Kammaufsatzes, und verringern Sie die Schnittlängeneinstellung stufenweise.
  • Seite 20 Sie ihn vom Gerät ab, und blasen oder schütteln Sie die Haare heraus. abstufung Mit dem Philips Haarschneider können Sie das Haar nicht nur auf einheitliche Länge schneiden, sondern auch einen sanften Übergang von längerem Haar oben auf dem Kopf zu kürzerem Haar hinten und an den Seiten erzielen.
  • Seite 21 DEutsCh Ziehen Sie den Kammaufsatz vom Gerät. Kämmen Sie das Haar über die Ohren, bevor Sie die Konturen um die Ohren herum schneiden. Neigen Sie das Gerät so, dass nur eine Ecke der Schneideeinheit die Haarspitzen berührt. Schneiden Sie nur die Haarspitzen. Die Haarlinie sollte dicht am Ohr verlaufen.
  • Seite 22: Reinigung

    DEutsCh haare über einen Frisierkamm oder die Finger schneiden Diese Technik kann benutzt werden, um Frisuren mit Haarlängen über 21 mm zu schneiden. Diese Technik setzt ein gewisses Geschick voraus und sollte nur von erfahrenen Benutzern angewendet werden. Nehmen Sie den Kammaufsatz vom Gerät. Kämmen Sie eine kleine Haarsträhne nach oben.
  • Seite 23 Gerät, bis sie hörbar einrastet (2). Ersatz Wenn der Adapter defekt oder beschädigt ist, darf er nur durch ein Original-Ersatzteil ausgetauscht werden, um Gefährdungen zu vermeiden. Tauschen Sie abgenutzte oder beschädigte Schneideeinheiten nur durch Original Philips Schneideeinheiten aus.
  • Seite 24: Umweltschutz

    Akku, bevor Sie das Gerät an einer offiziellen Recyclingstelle abgeben. Geben Sie den gebrauchten Akku bei einer Batteriesammelstelle ab. Falls Sie beim Entfernen des Akkus Probleme haben, können Sie das Gerät auch an ein Philips Service-Center geben. Dort wird der Akku umweltgerecht entsorgt. Den akku entfernen Entnehmen Sie den Akku erst, wenn er ganz leer ist.
  • Seite 25 DEutsCh Trennen Sie das Gerät vom Stromnetz und lassen Sie es so lange laufen, bis es zum Stillstand kommt. Drücken Sie mit dem Daumen auf die Mitte der Schneideeinheit, bis sie sich öffnet und nach oben vom Gerät abheben lässt. Entfernen Sie die Metallklemme der Akkueinheit mit einem Schraubendreher.
  • Seite 26: Garantie Und Kundendienst

    DEutsCh garantie und kundendienst Benötigen Sie weitere Informationen oder treten Probleme auf, besuchen Sie bitte die Philips Website (www.philips.com), oder setzen Sie sich mit einem Philips Service-Center in Ihrem Land in Verbindung (Telefonnummer siehe Garantieschrift). Sollte es in Ihrem Land kein Service-Center geben, wenden Sie...
  • Seite 27: Ελληνικα

    Ελληνικα Εισαγωγή Συγχαρητήρια για την αγορά σας και καλώς ήρθατε στη Philips! Για να επωφεληθείτε πλήρως από την υποστήριξη που παρέχει η Philips, καταχωρήστε το προϊόν σας στην ιστοσελίδα www.philips.com/welcome. Η νέα σας κουρευτική μηχανή της Philips προσαρμόζεται στο περίγραμμα του κεφαλιού και...
  • Seite 28 περιβάλλοντος της συσκευής, δώστε τη δυνατότητα στη συσκευή να εγκλιματιστεί για 30 λεπτά πριν τη χρησιμοποιήσετε. Συμμόρφωση με πρότυπα Η συγκεκριμένη συσκευή της Philips συμμορφώνεται με όλα τα πρότυπα που αφορούν τα ηλεκτρομαγνητικά πεδία (EMF). Εάν γίνει σωστός χειρισμός και σύμφωνος με τις...
  • Seite 29: Προετοιμασία Για Χρήση

    Ελληνικα επιστημονικών αποδείξεων που είναι διαθέσιμες μέχρι σήμερα. Προετοιμασία για χρήση Φόρτιση Φορτίστε τη συσκευή για τουλάχιστον 12 ώρες πριν τη χρησιμοποιήσετε για πρώτη φορά. Μια πλήρως φορτισμένη συσκευή επιτρέπει έως και 35 λεπτά αυτονομίας. Μη φορτίζετε τη συσκευή για περισσότερο από 24 ώρες.
  • Seite 30: Χρήση Της Συσκευής

    Ελληνικα Χρήση της συσκευής μέσω ρεύματος Όταν η επαναφορτιζόμενη μπαταρία είναι άδεια, μπορείτε επίσης να χρησιμοποιήσετε τη συσκευή συνδεδεμένη στην πρίζα. Μη χρησιμοποιείτε τη συσκευή συνδεδεμένη στην πρίζα όταν η μπαταρία είναι πλήρως φορτισμένη. Για να χρησιμοποιήσετε την κουρευτική μηχανή συνδεδεμένη...
  • Seite 31 Ελληνικα Για να ρυθμίσετε το εξάρτημα χτένας στην επιθυμητή ρύθμιση μήκους μαλλιών, πιέστε το κουμπί ρύθμισης (1) και σύρετε το εξάρτημα χτένας προς τα επάνω ή προς τα κάτω (2). Ρυθμίσεις μήκους μαλλιών Όταν το εξάρτημα χτένας είναι προσαρτημένο, η συσκευή διαθέτει 7 διαφορετικές ρυθμίσεις μήκους...
  • Seite 32 και φυσήξτε ή/και τινάξτε το εξάρτημα για να απομακρυνθούν οι τρίχες. Διαβάθμιση Η κουρευτική μηχανή της Philips σάς δίνει τη δυνατότητα όχι μόνο να κόβετε ομοιόμορφα τα μαλλιά όλου του κεφαλιού στο ίδιο μήκος, αλλά επίσης και να επιτυγχάνετε μια ομαλή μετάβαση...
  • Seite 33 Ελληνικα κεφαλιού σε κοντύτερα μαλλιά στο πίσω μέρος και στα πλαϊνά του κεφαλιού. Ξεκινήστε το κούρεμα με τη ρύθμιση 7 για το μέγιστο τελικό μήκος μαλλιών των 21χιλ. Στη συνέχεια, επιλέξτε μια μικρότερη ρύθμιση για κοντύτερο τελικό μήκος μαλλιών. Κόψτε τα μαλλιά σε όλα τα μέρη του κεφαλιού...
  • Seite 34 Ελληνικα Κρατήστε τη συσκευή σε τέτοια κλίση, ώστε μόνο ένα άκρο του κόπτη να ακουμπά τις άκρες των μαλλιών. Κόψτε μόνο τις άκρες των μαλλιών. Η γραμμή των μαλλιών θα πρέπει να είναι κοντά στα αυτιά. Για να διαμορφώσετε το περίγραμμα στο λαιμό...
  • Seite 35 Ελληνικα Χτενίστε ένα μικρό τμήμα μαλλιών προς τα επάνω. Σηκώστε τα μαλλιά με μια χτένα ή κρατήστε τα ανάμεσα στα δάχτυλά σας μέχρι να προεξέχει μόνο το μήκος που χρειάζεται να κοπεί. Κόψτε τα μαλλιά που προεξέχουν από τη χτένα ή τα δάχτυλα. Συνεχίστε...
  • Seite 36 να αντικατασταθεί μόνο με αυθεντικό προς αποφυγή κινδύνου. Αντικαθιστάτε μια χαλασμένη ή φθαρμένη μονάδα κοπής μόνο με γνήσια μονάδα κοπής της Philips. Πιέστε το μεσαίο τμήμα της μονάδας κοπής προς τα επάνω με τον αντίχειρά σας μέχρι να ανοίξει και, στη συνέχεια, τραβήξτε τη από...
  • Seite 37 την μπαταρία σε επίσημο σημείο συλλογής για μπαταρίες. Εάν αντιμετωπίσετε δυσκολίες στην αφαίρεση της μπαταρίας, μπορείτε να απευθυνθείτε σε ένα εξουσιοδοτημένο κέντρο σέρβις της Philips, όπου θα αφαιρέσουν την μπαταρία και θα την απορρίψουν με τρόπο ασφαλή για το περιβάλλον. αφαίρεση της επαναφορτιζόμενης...
  • Seite 38 Ελληνικα Πιέστε το μεσαίο τμήμα της μονάδας κοπής προς τα επάνω με τον αντίχειρά σας μέχρι να ανοίξει και, στη συνέχεια, τραβήξτε τη από τη συσκευή. Αφαιρέστε το μεταλλικό κλιπ με ένα κατσαβίδι. Ανοίξτε το περίβλημα. - Εισαγάγετε ένα κατσαβίδι μέσα σε μία από τις...
  • Seite 39 επισκεφτείτε την ιστοσελίδα της Philips στη διεύθυνση www.philips.com ή επικοινωνήστε με το Κέντρο Εξυπηρέτησης Καταναλωτών της Philips στη χώρα σας (θα βρείτε το τηλέφωνο στο φυλλάδιο διεθνούς εγγύησης). Εάν δεν υπάρχει Κέντρο Εξυπηρέτησης Καταναλωτών στη χώρα σας, απευθυνθείτε στον τοπικό αντιπρόσωπό σας...
  • Seite 40: Español

    Enhorabuena por la compra de este producto y bienvenido a Philips. Para sacar el mayor partido de la asistencia que Philips le ofrece, registre su producto en www.philips.com/welcome. Su nuevo cortapelos de Philips se adapta a los contornos de la cabeza y permite un uso cómodo.
  • Seite 41: Preparación Para Su Uso

    30 minutos antes de utilizarlo. Cumplimiento de normas Este aparato Philips cumple todos los estándares sobre campos electromagnéticos (CEM). Si se utiliza correctamente y de acuerdo con las instrucciones de este manual, el aparato se puede usar de forma segura según los conocimientos científicos...
  • Seite 42 Español Inserte la clavija del aparato en el mismo. Enchufe el adaptador a la toma de corriente. , El piloto de carga se enciende para indicar que el aparato se está cargando. Nota: El piloto de carga no cambia de color ni se apaga cuando el aparato está...
  • Seite 43: Uso Del Aparato

    Español uso del aparato Corte de pelo con peine-guía Nota: Asegúrese de que el cabello esté limpio y seco. No utilice el aparato con el pelo recién lavado. Peine el pelo con un peine en la dirección de crecimiento del pelo. Deslice el peine-guía del cortapelos por las ranuras de guía del aparato (“clic”).
  • Seite 44 Español Enchufe el adaptador a la toma de corriente. Espere unos segundos y desplace el interruptor de encendido/apagado a la posición de encendido. Desplace el aparato lentamente por el pelo. - Comience a cortar el pelo con la posición más alta del peine-guía y vaya reduciendo la posición de longitud gradualmente.
  • Seite 45 Español graduación El cortapelos no sólo le permite cortar el pelo uniformemente a una misma longitud por toda la cabeza, sino que también le permite pasar gradualmente de un corte más largo en la parte superior de la cabeza a uno más corto en las partes posterior y laterales.
  • Seite 46 Español Incline el aparato de forma que sólo un extremo del elemento de corte toque las puntas del pelo. Corte sólo las puntas del pelo. La línea del pelo debe quedar próxima a la oreja. Para perfilar la línea del cuello y las patillas, dé la vuelta al aparato y haga pasadas hacia abajo.
  • Seite 47 Español Quite el peine-guía Peine un poco de pelo hacia arriba. Levante el pelo con el peine o sujételo entre los dedos hasta que sobresalga únicamente la parte que va a cortar. Recorte el pelo que sobresalga del peine o de los dedos.
  • Seite 48 Sustituya las unidades de corte gastadas o deterioradas únicamente por unidades de corte Philips originales. Presione con el pulgar la parte central de la unidad de corte hacia arriba hasta que se abra y sáquela del aparato.
  • Seite 49: Medio Ambiente

    Si no puede sacar la batería, puede llevar el aparato a un servicio de asistencia técnica de Philips. El personal del servicio de asistencia extraerá la batería y se deshará de ella de forma no perjudicial para el medio ambiente.
  • Seite 50: Garantía Y Servicio

    Web de Philips en www.philips.com, o póngase en contacto con el Servicio de Atención al Cliente de Philips en su país (hallará el número de teléfono en el folleto de la garantía mundial). Si no hay Servicio de Atención al Cliente de Philips en su...
  • Seite 51: Français

    Français introduction Félicitations pour votre achat et bienvenue dans l’univers Philips ! Pour profiter pleinement de l’assistance Philips, enregistrez votre produit sur le site à l’adresse suivante : www.philips.com/welcome. Votre nouvelle tondeuse à cheveux Philips s’adapte aux contours de la tête, garantissant un excellent confort d’utilisation.
  • Seite 52: Conformité Aux Normes

    30 minutes avant de l’utiliser. Conformité aux normes Cet appareil Philips est conforme à toutes les normes relatives aux champs électromagnétiques (CEM). Il répond aux règles de sécurité établies sur la base des connaissances scientifiques actuelles s’il est manipulé...
  • Seite 53 Français Ne chargez jamais l’appareil pendant plus de 24 heures. Assurez-vous que l’appareil est éteint. Insérez la fiche dans l’appareil. Branchez l’adaptateur sur la prise secteur. , Le voyant de charge s’allume pour indiquer que l’appareil se charge. Remarque : Le voyant ne s’éteint pas et ne change pas de couleur lorsque la charge de l’appareil est terminée.
  • Seite 54: Utilisation De L'appareil

    Français utilisation de l’appareil utilisation avec sabot Remarque : Assurez-vous que vos cheveux sont secs et propres. N’utilisez pas l’appareil sur des cheveux qui viennent d’être lavés. Démêlez vos cheveux à l’aide d’un peigne dans le sens de leur pousse. Faites glisser le sabot dans les rainures de l’appareil (clic).
  • Seite 55 Français Branchez l’adaptateur sur la prise secteur. Patientez quelques secondes, puis réglez le bouton marche/arrêt sur la position On (Marche). Déplacez lentement l’appareil. - Optez tout d’abord pour la longueur de coupe la plus élevée et passez ensuite progressivement à des longueurs de coupe inférieures.
  • Seite 56 Français gradation La tondeuse à cheveux Philips vous permet non seulement de couper les cheveux de façon régulière mais également d’obtenir une coupe nette en commençant par le haut de la tête où les cheveux sont plus longs vers la nuque et les côtés où les cheveux sont plus courts.
  • Seite 57 Français Coupez uniquement la pointe des cheveux en suivant le contour de l’oreille. Pour tondre la nuque et les favoris, retournez l’appareil et déplacez-le vers le bas. Déplacez l’appareil lentement en suivant l’implantation des cheveux. Coupe à l’aide d’un peigne ou des doigts En procédant ainsi, vous pouvez obtenir une longueur de cheveux supérieure à...
  • Seite 58 Français Coupez les mèches qui dépassent du peigne ou des doigts. Continuez ainsi et peignez à intervalles réguliers pour retirer les mèches coupées et pour uniformiser les zones irrégulières. nettoyage Nettoyez l’appareil après chaque utilisation. N’utilisez jamais de tampons à récurer, de produits abrasifs ou de détergents agressifs tels que de l’alcool, de l’essence ou de l’acétone pour nettoyer l’appareil.
  • Seite 59 éviter tout accident. Un bloc tondeuse usé ou endommagé doit être remplacé uniquement par un bloc tondeuse Philips d’origine. Appuyez sur la partie centrale du bloc tondeuse avec votre pouce et faites-le glisser vers le haut pour le retirer.
  • Seite 60: Retrait De La Batterie Rechargeable

    à un endroit assigné à cet effet. Si vous n’arrivez pas à retirer la batterie, vous pouvez apporter l’appareil dans un Centre Service Agréé Philips qui prendra toute l’opération en charge pour préserver l’environnement. retrait de la batterie rechargeable Retirez la batterie rechargeable lorsqu’elle est...
  • Seite 61: Garantie Et Service

    Si vous souhaitez obtenir des informations supplémentaires ou faire réparer l’appareil, ou si vous rencontrez un problème, rendez-vous sur le site Web de Philips à l’adresse www.philips.com ou contactez le Service Consommateurs Philips de votre pays (vous trouverez le numéro de téléphone correspondant sur le dépliant de...
  • Seite 62: Italiano

    Congratulazioni per l’acquisto e benvenuti in Philips! Per trarre il massimo vantaggio dall’assistenza Philips, registrate il vostro prodotto su www.philips. com/welcome. Il vostro nuovo regolacapelli Philips si adatta alle linee della testa e consente un utilizzo semplice. importante Prima di utilizzare l’apparecchio, leggete attentamente il presente manuale e conservatelo per eventuali riferimenti futuri.
  • Seite 63: Conformità Agli Standard

    30 minuti prima di utilizzarlo. Conformità agli standard Questo apparecchio Philips è conforme a tutti gli standard relativi ai campi elettromagnetici (EMF). Se utilizzato in modo appropriato seguendo le istruzioni contenute nel presente manuale utente, l’apparecchio consente un utilizzo sicuro come...
  • Seite 64 italiano Non caricate l’apparecchio per più di 24 ore. Controllate che l’apparecchio sia spento. Inserite lo spinotto nell’apparecchio. Inserite la spina dell’adattatore nella presa di corrente. , Quando l’apparecchio viene ricaricato, si accende la spia di ricarica. Nota La spia di ricarica non cambia colore e non si spegne quando l’apparecchio è...
  • Seite 65 italiano Attendete alcuni secondi, quindi accendete l’apparecchio. Modalità d’uso dell’apparecchio Come tagliare i capelli usando il pettine regolacapelli Nota assicuratevi che i capelli siano puliti e asciutti. Non utilizzate l’apparecchio con i capelli ancora bagnati. Pettinate i capelli nella direzione di crescita utilizzando un pettine.
  • Seite 66 italiano Impostazione della lunghezza di Lunghezza ottenuta taglio 9 mm 12 mm 15 mm 18 mm 21 mm Inserite la spina dell’adattatore nella presa di corrente a muro. Attendete alcuni secondi, quindi fate scorrere l’interruttore on/off sulla posizione “on”. Passate l’apparecchio con movimenti lenti. - Iniziate a tagliare i capelli impostando il pettine sul valore massimo e riducete progressivamente la lunghezza.
  • Seite 67 Il regolacapelli Philips vi permette non solo di tagliare i capelli in modo uniforme e alla stessa lunghezza su tutta la testa, ma anche di ottenere gradualmente capelli più...
  • Seite 68 italiano Estraete il pettine dall’apparecchio. Prima di iniziare a rifinire i contorni intorno alle orecchie, pettinate le punte sulle orecchie. Inclinate l’apparecchio in modo tale che solo un bordo del gruppo lame sfiori la punta dei capelli. Tagliare solo le punte dei capelli, definendo il contorno vicino alle orecchie.
  • Seite 69 italiano Come tagliare i capelli con il pettine a mano o con le dita Questa tecnica può essere usata per ottenere lunghezze superiori a 21 mm. Ricordate che si tratta di una tecnica particolarmente difficile da apprendere, consigliata solo agli utenti più esperti. Rimuovete il pettine regolacapelli.
  • Seite 70 Sostituite il blocco lame danneggiato o usurato solo con una parte di ricambio originale Philips. Con il pollice, premete la parte centrale del blocco coltelli verso l’alto fino a quando si apre, quindi estraetelo dall’apparecchio.
  • Seite 71: Tutela Dell'ambiente

    Smaltite la batteria in un apposito centro di raccolta. In caso di difficoltà durante la rimozione della batteria, consegnate l’apparecchio a un centro di assistenza Philips, che si occuperà della rimozione della batteria e del relativo smaltimento. rimozione della batteria ricaricabile Rimuovete la batteria ricaricabile solo se completamente scarica.
  • Seite 72: Garanzia E Assistenza

    Se avete bisogno di assistenza o informazioni o in caso di problemi, visitate il sito Web Philips all’indirizzo www.philips.com oppure contattate il Centro Assistenza Clienti Philips del vostro Paese (per conoscere il numero di telefono consultate l’opuscolo della garanzia).
  • Seite 73: Nederlands

    Gefeliciteerd met uw aankoop en welkom bij Philips! Als u volledig wilt profiteren van de ondersteuning die Philips biedt, registreer uw product dan op www. philips.com/welcome. Uw nieuwe Philips-haartrimmer volgt de contouren van het hoofd en is gemakkelijk in het gebruik.
  • Seite 74: Naleving Van Richtlijnen

    Dit Philips-apparaat voldoet aan alle richtlijnen met betrekking tot elektromagnetische velden (EMV). Mits het apparaat op de juiste wijze en volgens de instructies in deze gebruiksaanwijzing wordt gebruikt, is het veilig te gebruiken volgens het nu beschikbare wetenschappelijke bewijs.
  • Seite 75 nEDErlanDs Een volledig opgeladen apparaat heeft een snoerloze gebruikstijd tot 35 minuten. Laad het apparaat niet langer dan 24 uur op. Zorg ervoor dat het apparaat is uitgeschakeld. Steek het apparaatstekkertje in het apparaat. Steek de adapter in het stopcontact. , Het oplaadlampje gaat branden om aan te geven dat het apparaat wordt opgeladen.
  • Seite 76: Het Apparaat Gebruiken

    nEDErlanDs het apparaat gebruiken knippen met opzetkam Opmerking: Zorg ervoor dat uw haar schoon en droog is. Gebruik het apparaat niet op pasgewassen haar. Kam uw haar met een stylingkam in de haargroeirichting. Schuif de opzetkam in de geleidegroeven op het apparaat (‘klik’).
  • Seite 77 nEDErlanDs Steek de adapter in het stopcontact. Wacht een paar seconden en zet vervolgens de aan/uitschakelaar in de ‘aan’-stand. Beweeg het apparaat langzaam door het haar. - Begin met knippen op de hoogste stand van de opzetkam en verlaag de haarlengtestand geleidelijk.
  • Seite 78 Met de haartrimmer van Philips kunt u niet alleen het haar overal op het hoofd op één lengte knippen, maar u kunt ook een gelijkmatige overgang van langer haar boven op het hoofd naar korter haar aan de achterkant en zijkanten van het hoofd creëren.
  • Seite 79 nEDErlanDs Knip alleen de haarpunten. De haarlijn moet dicht langs het oor lopen. Om de neklijn en de bakkebaarden bij te werken moet u het apparaat omdraaien en neerwaartse bewegingen maken. Maak langzame en soepele bewegingen en volg de natuurlijke haarlijn. knippen langs de stylingkam of vingers Deze techniek kan worden gebruikt om haarlengten langer dan 21 mm te verkrijgen.
  • Seite 80 nEDErlanDs Knip het haar dat boven de kam of de vingers uitsteekt af. Ga op deze manier verder. Kam het haar regelmatig om afgeknipte haren te verwijderen en het te controleren op ongelijkmatig geknipte stukken. schoonmaken Maak het apparaat na ieder gebruik schoon. Gebruik nooit schuursponzen, schurende schoonmaakmiddelen of agressieve vloeistoffen zoals alcohol, benzine of aceton om het apparaat...
  • Seite 81 Vervang een beschadigd of versleten knipelement alleen door een origineel Philips-knipelement. Duw met uw duim het middelste gedeelte van het knipelement omhoog totdat het openklapt en trek het knipelement dan van het apparaat...
  • Seite 82: De Accu Verwijderen

    Lever de accu in op een officieel inzamelpunt voor batterijen. Als u problemen ondervindt bij het verwijderen van de accu, kunt u met het apparaat ook naar een Philips- servicecentrum gaan. Medewerkers van dit centrum verwijderen dan de accu voor u en zorgen ervoor dat deze op milieuvriendelijke wijze wordt verwerkt.
  • Seite 83: Garantie En Service

    Als u service of informatie nodig hebt of als u een probleem hebt, bezoek dan de Philips-website (www.philips.nl), of neem contact op met het Philips Consumer Care Centre in uw land (u vindt het telefoonnummer in het ‘worldwide guarantee’- vouwblad). Als er geen Consumer Care Centre in...
  • Seite 84: Português

    Parabéns pela sua compra e bem-vindo à Philips! Para tirar todo o partido da assistência fornecida pela Philips, registe o seu produto em www.philips. com/welcome. O seu novo aparador de cabelo Philips adapta-se aos contornos da cabeça e permite uma utilização confortável.
  • Seite 85: Conformidade Com As Normas

    30 minutos antes de o utilizar. Conformidade com as normas Este aparelho Philips cumpre com todas as normas correspondentes a campos electromagnéticos (EMF). Se manuseado correctamente e de acordo com as instruções fornecidas neste manual do utilizador, o aparelho pode ser utilizado em segurança com base...
  • Seite 86 português Não carregue o aparelho por mais de 24 horas. Certifique-se de que o aparelho está desligado. Introduza a ficha do aparelho no aparelho. Ligue o adaptador à tomada eléctrica. , A luz de carga acende-se para indicar que o aparelho está...
  • Seite 87: Utilizar O Aparelho

    português utilizar o aparelho aparar com o pente acessório Nota: Certifique-se de que o seu cabelo está limpo e seco. Não utilize o aparelho em cabelos húmidos. Penteie o seu cabelo com um pente no sentido do crescimento do cabelo. Encaixe o pente acessório nas ranhuras do aparelho (‘clique’).
  • Seite 88 português Ligue o adaptador à tomada eléctrica. Aguarde alguns segundos e deslize o interruptor ligar/desligar para a posição ‘on’. Movimente o aparelho suavemente pelo cabelo. - Comece a aparar o cabelo na definição mais alta do pente acessório e vá reduzindo gradualmente a definição de comprimento do cabelo.
  • Seite 89 português graduação O aparador Philishave não só permite cortar o cabelo uniformemente, com igual comprimento em toda a cabeça, como também permite fazer uma transição suave de cabelo mais comprido na parte de cima da cabeça para cabelo mais curto no pescoço e dos lados.
  • Seite 90 português Incline o aparelho de forma a que apenas uma das extremidades da lâmina toque nas pontas do cabelo. Corte apenas as pontas. A linha de cabelo deve ficar junto à orelha. Para contornar a linha do pescoço e as patilhas, vire o aparelho e faça passagens de cima para baixo.
  • Seite 91 português Retire o pente acessório. Penteie uma pequena parte do cabelo para cima. Levante o cabelo com um pente ou segure-o entre os dedos até deixar de fora apenas o cabelo que precisa de ser cortado. Corte o cabelo que fica para fora do pente ou dos dedos.
  • Seite 92 Substitua uma unidade de corte danificada ou gasta apenas por outra unidade de corte Philips original. Com o polegar, empurre a parte central da unidade de corte para cima até abrir e depois puxe-a para fora do aparelho.
  • Seite 93: Meio Ambiente

    Elimine a bateria num ponto de recolha oficial para baterias. Se tiver problemas na remoção da bateria, pode também levar o aparelho a um centro de assistência Philips, que poderá remover a bateria por si e eliminá-la de forma segura para o ambiente.
  • Seite 94: Garantia E Assistência

    Se necessitar de assistência ou informações ou se tiver problemas, visite o Web site da Philips em www.philips.com ou contacte o Centro de Apoio ao Consumidor da Philips no seu país (pode encontrar os números de telefone no folheto da garantia mundial).
  • Seite 95: Türkçe

    Ürünümüzü satın aldığınız için teşekkür ederiz; Philips’e hoş geldiniz! Philips’in sunduğu destekten tam faydalanmak için lütfen ürününüzü şu adrese kaydedin: www.philips.com/welcome. Yeni Philips saç kesme makinesi, başınızın kıvrımlarına uyum gösterir ve rahat bir kullanım sağlar. Önemli Cihazı kullanmadan önce bu kullanım kılavuzunu okuyun ve gelecekte de başvurmak üzere saklayın.
  • Seite 96 önce cihazın 30 dakika boyunca ortam koşullarına uygun hale gelmesini bekleyin. standartlara uyum Bu Philips cihazı elektromanyetik alanlarla (EMF) ilgili tüm standartlara uygundur. Bu cihaz, gereği gibi ve bu kılavuzdaki talimatlara uygun şekilde kullanıldığında, bugünün bilimsel verilerine göre kullanımı güvenlidir.
  • Seite 97 türkçE Cihazın fişini cihaza takın. Adaptörü prize takın. , Cihaz şarj olmaya başladığında, şarj ışığı yanar. Dikkat: Cihaz tamamen şarj olduğunda, şarj ışığı renk değiştirmez ve sönmez. pil ömrünü uzatma - Cihazın pilini yılda iki kere, motoru duruncaya dek çalıştırarak boşaltın. - Pil tamamen şarj olduğunda adaptörün fişini prizden çıkarın.
  • Seite 98 türkçE Cihazın kullanımı Tarak aparatı ile saç kesme Dikkat: Saçınızın temiz ve kuru olduğundan emin olun. Cihazı yeni yıkanmış saçta kullanmayın. Saçlarınızı,şekillendirme tarağıyla uzama yönünde tarayın. Tarak aparatını cihazın oluklarına doğru kaydırın (‘klik’). Tarak aparatını istenilen saç uzunluğunda ayarlamak için, ayar düğmesine basın (1) ve tarak aparatını...
  • Seite 99 türkçE Adaptörü prize takın. Birkaç saniye bekleyin ve sonra açma/kapama düğmesini “açık” konuma getirin. Saç kesme cihazını saçlarda yavaşça hareket ettirin. - Kesme işlemine, tarak aparatının en yüksek ayarından başlayın ve saç uzunluğu ayarını aşamalı olarak düşürün. - İleride saç kesimi yaparken hatırlatıcı olması için, belirli bir saç...
  • Seite 100 Derecelendirme Philips saç kesme makinesi, başınızın her yerindeki saçları eşit uzunlukta kesmenize olanak sağlamasının yanı sıra, başınızın üst kısmındaki daha uzun saçlardan arka ve yan kısımlardaki daha kısa saçlara düzgün bir geçiş yapmanızı sağlar. 21 mm’lik maksimum saç uzunluğu için, ayar 7’de kesmeye başlayın.
  • Seite 101 türkçE Sadece saç uçlarını kesin. Saç çizgisi kulağa yakın olmalıdır. Enseye ve favorilere şekil vermek için, saç kesme cihazını çevirin ve aşağıya doğru darbeler uygulayın. Cihazı yavaş ve yumuşak hareket ettirin. Doğal saç çizgisini izleyin. Tarak veya parmak arası üzerinden kesim Bu teknik 21 mm üzerinde saç...
  • Seite 102 türkçE Tarak veya parmaklarınızın dışında kalan saçı kesin. Bu işleme devam edin ve kesilen saçı almak ve eşit kesilmeyen kısımları kontrol etmek için saçı sık sık tarayın. temizleme Her kullanım sonrasında cihazı mutlaka temizleyin. Cihazı temizlemek için ovma telleri, alkol, benzin veya aseton gibi aşındırıcı...
  • Seite 103 Adaptör hasarlıysa, bir tehlikeyi önlemek için mutlaka orijinal modeli ile değiştirildiğinden emin olun. Hasar görmüş veya yıpranmış bir kesici üniteyi sadece orijinal Philips kesici üniteyle değiştirin. Kesici ünitenin orta kısmına ünite açılana kadar baş parmağınızla bastırın ve çekerek cihazdan çıkartın.
  • Seite 104 çekiyorsanız, cihazı bir Philips servis merkezine de verebilirsiniz. Bu merkezdeki personel pili sizin yerinize çıkaracak ve çevreye zarar vermeyecek şekilde atacaktır. Şarj edilebilir pilin çıkarılması Şarj edilebilir pili ancak tamamen boşaldığında çıkartın. Cihazın fişini prizden çekin ve cihazın motoru durana kadar cihazı...
  • Seite 105: Garanti Ve Servis

    Servise ya da daha fazla bilgiye ihtiyaç duyarsanız veya bir sorunla karşılaşırsanız, www.philips.com.tr adresindeki Philips Internet sitesini ziyaret edin veya ülkenizde bulunan Philips Müşteri Merkezi ile iletişim kurun (telefon numarasını dünya çapında geçerli garanti belgesinde bulabilirsiniz). Ülkenizde bir Müşteri Merkezi yoksa, yerel Philips bayiine başvurun.
  • Seite 108 4203.000.5478.3...

Diese Anleitung auch für:

Qc5040Qc5040/00

Inhaltsverzeichnis