Medion LIFE X64777 Bedienungsanleitung
Micro-audio-system

Verwandte Anleitungen für Medion LIFE X64777


Inhaltszusammenfassung für Medion LIFE X64777
- Seite 1 Bedienungsanleitung User Manual Kullanım kılavuzu Micro-Audio-System Micro audio system Mikro stereo sistem MEDION LIFE ® ® X64777 (MD 47777)
-
Seite 2: Inhaltsverzeichnis
Inhaltsverzeichnis Zu dieser Anleitung ..................5 1.1. In dieser Anleitung verwendete Warnsymbole und Signalwörter ..5 Bestimmungsgemäßer Gebrauch .............. 6 Konformitätsinformation ................6 Sicherheitshinweise ..................7 4.1. Betriebssicherheit ....................7 4.2. Aufstellungsort ......................7 4.3. Reparatur ........................8 4.4. Umgebungstemperatur ..................9 4.5. - Seite 3 Radio ......................24 11.1. Sendersuchlauf .......................24 11.2. Sender speichern und aufrufen ................24 11.3. Sender automatisch speichern .................24 CDs und USB-Speicher wiedergeben ............25 12.1. Hinweise zu den Medien ..................25 12.2. Disk einlegen ......................26 12.3. Wiedergabe starten/anhalten ................26 12.4. Titelwahl, Schneller Rück-/Vorlauf ..............26 12.5.
-
Seite 4: Zu Dieser Anleitung
1. Zu dieser Anleitung Lesen Sie vor Inbetriebnahme die Sicherheitshinweise aufmerksam durch. Beachten Sie die Warnungen auf dem Gerät und in der Bedie- nungsanleitung. Bewahren Sie die Bedienungsanleitung immer in Reichweite auf. Wenn Sie das Gerät verkaufen oder weitergeben, händigen Sie unbedingt auch diese Anleitung aus. -
Seite 5: Bestimmungsgemäßer Gebrauch
Sicherheit zuständige Person beaufsichtigt oder erhielten von ihr Anweisungen, wie das Gerät zu benutzen ist. Kinder sollten beaufsichtigt werden, um sicherzustellen, dass sie nicht mit dem Gerät spielen. 3. Konformitätsinformation Hiermit erklärt die Medion AG, dass das Produkt mit den folgenden europäischen Anforderungen übereinstimmt: • EMV-Richtlinie 2004/108/EG •... -
Seite 6: Sicherheitshinweise
4. Sicherheitshinweise 4.1. Betriebssicherheit • Das Gerät ist nicht dafür bestimmt, durch Personen (ein- schließlich Kinder) mit eingeschränkten physischen, senso- rischen oder geistigen Fähigkeiten oder mangels Erfahrung und/oder mangels Wissen benutzt zu werden, es sei denn, sie werden durch eine für ihre Sicherheit zuständige Person be- aufsichtigt oder erhielten von ihr Anweisungen, wie das Gerät zu benutzen ist. -
Seite 7: Reparatur
• Verlegen Sie die Kabel so, dass niemand darauf treten, oder darüber stolpern kann. • Achten Sie auf genügend große Abstände in der Schrank- wand. Halten Sie einen Mindestabstand von 10 cm rund um das Gerät zur ausreichenden Belüftung ein. •... -
Seite 8: Umgebungstemperatur
4.4. Umgebungstemperatur • Das Gerät kann bei einer Umgebungstempera tur von 0 °C bis +35 °C und bei einer relati ven Luftfeuchtigkeit von < 80 % (nicht kondensierend) betrieben werden. • Im ausgeschalteten Zustand kann das Gerät bei -20 °C bis +60 °C gelagert werden. -
Seite 9: Cd-Spieler
• Um die Stromversorgung zu Ihr Gerät zu unterbrechen, zie- hen Sie den Netzstecker aus der Steckdose. GEFAHR! Stromschlaggefahr! Im Inneren des Gerätes befinden sich stromführende Teile. Bei diesen besteht durch unabsichtlichen Kurz- schluss die Gefahr eines elektrischen Schlages oder ei- nes Brandes. -
Seite 10: Batterien
4.7. Batterien Die Fernbedienung wird mit Batterien betrieben. Beachten Sie hierzu folgende Hinweise: • Halten Sie Batterien von Kindern fern. Falls eine Batterie ver- schluckt wurde, suchen Sie umgehend einen Arzt auf. • Prüfen Sie vor dem Einlegen der Batterien, ob die Kontakte im Gerät und an den Batterien sauber sind, und reinigen Sie die- se gegebenenfalls. -
Seite 11: Lieferumfang
5. Lieferumfang Bitte überprüfen Sie die Vollständigkeit der Lieferung und benachrichtigen Sie uns bitte innerhalb von 14 Tagen nach dem Kauf, falls die Lieferung nicht komplett ist. Mit dem von Ihnen erworbenen Bildschirm haben Sie erhalten: • Micro-Stereo-System • Fernbedienung inkl. Batterien (2x 1,5 V-Batterie R03/LR03/AAA/Micro) •... -
Seite 12: Geräteübersicht
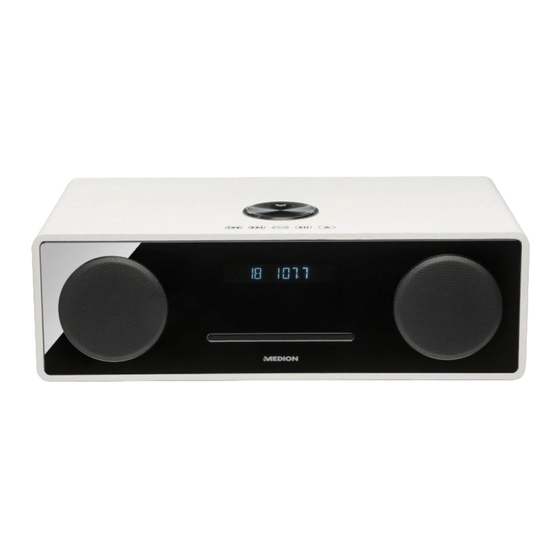
6. Geräteübersicht 6.1. Vorderseite Lautsprecher IR-Sensor für Fernbedienung Display CD-Fach... -
Seite 13: Oberseite
6.2. Oberseite PAIR 9 10 – Gerät einschalten/ausschalten – Betriebsart wählen - / + – Lautstärkeregler – CD/USB/BT: Vorheriger Titel / Radio: Vorheriger gespeicherter Sender/ Sendersuchlauf rückwärts – CD/USB/BT: Nächster Titel / Radio: Nächster gespeicherter Sender/ Sendersuchlauf vorwärts PA I R –... -
Seite 14: Rückseite
6.3. Rückseite Öffnungen für Subwoofer F M – Antennenanschluss U S B – USB-Anschluss A U D I O I N – Audio-Eingang L - A U X I N - R – AUX-Eingang Cinch – Kopfhöreranschluss 3,5 mm Klinke A C ~ –... -
Seite 15: Fernbedienung
6.4. Fernbedienung E J E C T – Disk auswerfen Betriebsarten wählen C D – CD-Modus AUDIO F M – Radio-Modus A U X I N – Anschluss AUX IN A U D I O – Anschluss AUDIO IN B T – Bluetooth-Modus U S B –... -
Seite 16: Vorbereitung
7. Vorbereitung 7.1. Batterien in die Fernbedienung einlegen Legen Sie die beiden 1,5 V-Batterien R03/LR03/AAA/Micro in die Fernbedienung ein. Öffnen Sie den Batteriefachdeckel. Legen Sie die Batterie so ein, dass der Minuspol der Batterien an den Federn an- liegt. -
Seite 17: Anschlüsse
8. Anschlüsse 8.1. Kopfhörer anschließen Auf der Rückseite des Gerätes befindet sich ein 3,5 mm Kopfhöreranschluss. Stecken Sie einen Kopfhörer mit einem 3,5 mm Klinkenstecker in den Kopfhörer- anschluss. Ist ein Kopfhörer angeschlossen, werden die Lautsprecher abgeschaltet. Die Laut- stärkeregelung ist weiterhin möglich, um die Lautstärke des Kopfhörers zu verän- dern. -
Seite 18: Antennenanschluss
8.2. Antennenanschluss Für den Radioempfang verbinden Sie ein Antennenkabel mit dem Antennenan- schluss F M am Gerät. • Eine Wurfantenne ist mitgeliefert. Schließen Sie die Wurfantenne an und richten Sie sie für den besten Empfang aus. • Alternativ können Sie ein Wandantennenkabel verwenden, das Sie mit dem ent- sprechenden Anschluss in der Wand verbinden. -
Seite 19: Externes Gerät Am Anschluss Aux In Anschließen
8.4. Externes Gerät am Anschluss AUX IN anschließen Sie können ein externes Gerät (z. B. ein Fernsehgerät) zur Tonübertragung am Mi- crosystem anschließen. Dazu benötigen Sie ein Audio Cinch-Verbindungskabel. Schließen Sie ein Ende der Cinch-Stecker an den Anschlüssen A U X I N links und rechts an. -
Seite 20: Usb-Gerät Anschließen
9. USB-Gerät anschließen Am USB-Anschluss können Sie USB-Speichersticks anschließen. Damit können Mu- sikstücke von einem USB-Speicherstick wiedergegeben werden. Der USB-Anschluss unterstützt keine Video-Wiedergabe. Außerdem können Sie Akkus von USB-Geräten mit 5V/500mA aufladen. Schließen Sie ein USB-Gerät am USB-Anschluss U S B an. 10. -
Seite 21: Uhrzeit
10.2. Uhrzeit 10.2.1. Uhrzeit anzeigen Die Uhrzeit kann sowohl im eingeschalteten Zustand des Gerätes als auch im Stand- by-Modus angezeigt werden. Als Standard wird die Uhrzeit im Standby-Modus an- gezeigt. Drücken Sie die Taste D I S P L AY . Die Uhrzeit wird für Sekunden angezeigt. ... -
Seite 22: Eingestellten Timer Deaktivieren
10.3.2. Eingestellten Timer deaktivieren Sie können den Timer deaktivieren. Drücken Sie die Taste T I M E R im Standby-Betrieb. Der eingestellte Timer ausgeschaltet. 10.4. Sleeptimer verwenden Mit dem Sleeptimer schaltet sich das eingeschaltete Gerät nach einer definierten Zeit automatisch ab. ... -
Seite 23: Radio
11. Radio Sie können mit diesem Gerät das analoge FM-Radio empfangen Drücken Sie die Taste F M auf der Fernbedienung. Wenn Sie die Wurfantenne angeschlossen haben, richten Sie die Antenne für den optimalen Empfang aus. Das Display zeigt den Namen des Radiosender, die Frequenz und ggf. den Speicher- platz des Senders im Wechsel an. -
Seite 24: Cds Und Usb-Speicher Wiedergeben
12. CDs und USB-Speicher wiedergeben Wählen Sie mit der Fernbedienung die gewünschte Betriebsart − USB oder − CD angezeigt wird. 12.1. Hinweise zu den Medien Am USB-Anschluss U S B können Sie USB-Speichersticks anschließen. Beachten Sie folgendes: • Aufgrund der zahlreichen verschiedenen Dateisysteme und Dateiformate kann die Funktion von angeschlossenen Speichern nicht garantiert werden. -
Seite 25: Disk Einlegen
12.2. Disk einlegen Achten Sie darauf, dass vor dem Gerät ca. 15 cm Platz ist, damit die CD beim Ausfah- ren nicht behindert wird. Drücken Sie bei eingeschaltetem Gerät die Taste Schieben Sie eine Disk langsam mit der beschrifteten Seite nach oben in das Diskfach ein. -
Seite 26: Bluetooth-Modus
13. Bluetooth-Modus Sie können mittels Bluetooth schnurlos Titel von externen Geräten (z. B. MP3 Player oder Mobiltelefon mit Bluetooth) auf diesem Gerät wiedergeben. Drücken Sie die Taste B T auf der Fernbedienung. 13.1. Bluetooth-Geräte koppeln Drücken Sie die Taste PA I R / I N F O , um den Kopplungmodus zu aktivieren. Aktivieren Sie ebenso die Bluetooth-Funktion auf ihrem externen Gerät und füh- ren die einen Kopplungsvorgang durch. -
Seite 27: Wenn Störungen Auftreten
15. Wenn Störungen auftreten Sollten Störungen auftreten, prüfen Sie bitte zunächst, ob Sie das Problem selbst beheben können. Die folgende Übersicht kann Ihnen dabei helfen. ACHTUNG! Versuchen Sie auf keinen Fall, das Gerät selbst zu repa- rieren. Wenn eine Reparatur notwendig ist, wenden Sie sich bitte an unser Service-Center oder eine andere ge- eignete Fachwerkstatt. -
Seite 28: Reinigung
16. Reinigung Bevor Sie das Gerät reinigen, ziehen Sie unbedingt immer zuerst den Netzstecker. Verwenden Sie für die Reinigung nur ein trockenes, weiches Tuch. Benutzen Sie kei- ne chemischen Lösungs- und Reinigungsmittel, weil diese die Oberfläche und/oder die Beschriftungen des Gerätes beschädigen können. 17. -
Seite 29: Technische Daten
18. Technische Daten Spannung AC 100 - 240V ~ 50/60Hz Leistungsaufnahme im Betrieb Ausgangsleistung 2 x 25W RMS Display LCD mit Hintergrundbeleuchtung 8 Segmente, 1 Zeile, 62 x 12 mm Batterien Fernbedienung 2 x 1,5V R03/LR03/AAA/Micro RDS-UKW Stereo-Radio Senderspeicher UKW-Band 87,5 –... -
Seite 30: Impressum
Vervielfältigung in mechanischer, elektronischer und jeder an- deren Form ohne die schriftliche Genehmigung des Herstellers ist verboten Das Copyright liegt bei der Firma: Medion AG Am Zehnthof 77 45307 Essen Deutschland Die Anleitung kann über die Service Hotline nachbestellt werden und steht über das Serviceportal www.medionservice.de zum Download zur Verfügung.