Werbung
Verfügbare Sprachen
Verfügbare Sprachen
Quicklinks
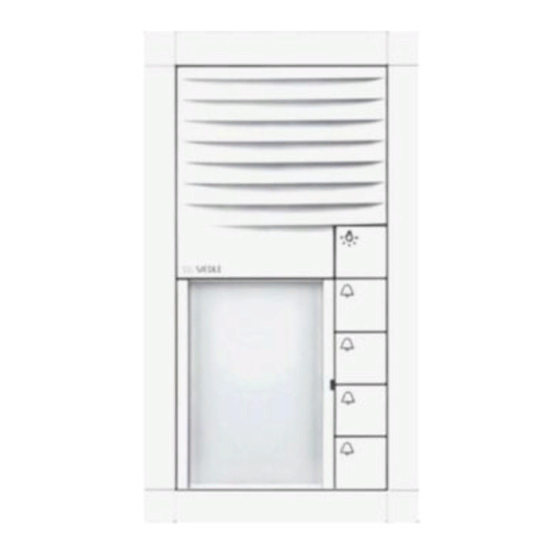
Siedle Vario
Produktinformation
Montageanleitung
Product information
Installation instructions
Information produit
Instructions de montage
Opuscolo informativo
sul prodotto
Istruzioni per
il montaggio
Productinformatie
Montagehandleiding
Produktinformation
Montagevejledning
Produktinformation
Monteringsanvisning
Información de producto
Instrucciones de montaje
Informacja o produkcie
Instrukcja montażu
Информация о продуктах
Инструкция по монтажу
Werbung

Verwandte Anleitungen für SSS Siedle Siedle Vario


Inhaltszusammenfassung für SSS Siedle Siedle Vario
- Seite 1 Siedle Vario Produktinformation Montageanleitung Product information Installation instructions Information produit Instructions de montage Opuscolo informativo sul prodotto Istruzioni per il montaggio Productinformatie Montagehandleiding Produktinformation Montagevejledning Produktinformation Monteringsanvisning Información de producto Instrucciones de montaje Informacja o produkcie Instrukcja montażu Информация о продуктах...
- Seite 6 Deutsch Montageanleitung dachziegelartig unter dem oberen 13 Die Zwischenstege von Kombi 1 Empfohlene Einbauhöhe liegt. Bei vertikalem Einbau ist rahmen ab Größe 600 x 500 mm ca. 1,60 m bis Kameramitte. bilden ein Kreuz. In diesem Kreuz auch darauf zu achten, dass die Bei Anlagen ohne Video sollte seitliche Folie unter dem benach...
- Seite 7 18 Hohlwandbefestigungszubehör Beschriftung ZHB 612-… am GU 611-… mon 22 TastenModul mit Schrauben tieren und die Klemmplättchen dreher öffnen und Schrifttasche hinter das Unterputzgehäuse entnehmen. Zum Einsetzen die drehen. Schrifttasche einseitig unterklemmen GU 611-… mit montiertem und mit leichtem Druck schließen. ZHB 612-… in den Ausschnitt 23 InformationsModul ausbauen, einsetzen und festschrauben.
- Seite 8 English Installation instructions that the sealing film of the lower 13 The intermediate webs of 1 Recommended mounting height mounting frame overlaps that of the combination frames from size appr. 1.60 m to centre camera. In lower frame in fish-scale formation. 600 x 500 mm form a cross. An systems without video, the centre of When mounting vertically, ensure adjusting screw is recessed into this...
- Seite 9 Français 18 Mount hollow wall mounting Lettering Instructions de montage accessory ZHB 612-… at the 22 Open the call button module 1 Hauteur de montage conseillée GU 611-… and turn the clamping using a screwdriver and remove the env. 1,60 m du centre de la caméra. plate behind the flush mount inscription panel.
- Seite 10 que la feuille d´étanchéïté du cadre 13 Les entretoises des cadres 18 Montez l´accessoire mur creux de montage inférieur se trouve sous combinés, à partir d’une taille de ZHB 612-… sur le GU 611-… et celle du haut, comme l´imbrication 600 x 500 mm, forment une croix. vissez les plaquettes de serrage der...
- Seite 11 Italiano Marquage Istruzioni per il montaggio da equipaggiare con il telaio di 22 Ouvrir le module de touches avec 1 Altezza di montaggio raccoman montaggio dall’alto verso il basso, un tournevis et retirer la pochette data circa 1,60 m fino al centro così...
- Seite 12 13 Gli archetti intermedi delle 18 Montare l’accessorio parete Diciture cornici con dimensioni superiori a con intercapedine ZHB 612-… sul 22 Aprire il modulo tasti con il cac 600 x 500 mm formano una croce. GU 611-… e rotare le lamine di ciavite ed estrarre il supporto delle In questa croce è...
-
Seite 13: Montagehandleiding
Nederlands Montagehandleiding positie, altijd van beneden naar 13 De tussenstangen van combi 1 Aanbevolen inbouwhoogte boven worden aangebracht, zodat frames vanaf grootte 600 x 500 mm ca. 1,60 m tot het midden van de het afdichtingsfolie van een lager vormen een kruis. In dit kruis is een camera. - Seite 14 Dansk 18 Hollewandbevestiging Beschrifting Montagevejledning ZHB 612-… op GU 611-… monteren 22 Toetsenmodule met schroeven 1 Anbefalet monteringshøjde en de klemlipjes achter het inbouw draaier openen en beletteringsvakje ca. 1,60 m op til midten af kame huis draaien. verwijderen. Voor het plaatsen het raet. Ved anlæg uden video skal GU 611-…...
- Seite 15 montagerammen ved siden af. 14 Tilslutningsledningerne afisoleres, Udtagning af modulet Montagerammen bringes i indgreb trykkes ned mod kabinetbunden 20 Tag moduler ud af montage med frembygningsdåsen med et og fastgøres med kabelholderne. rammen: Oplåsningsmekanismen let trysk Overflødige låsetapper kan Anlægget tilsluttes klemrækken udløses ved at stikke varionøglen i afmonteres frembygningsdåsen i overensstemmelse med eldia...
-
Seite 16: Monteringsanvisning
Svenska Monteringsanvisning Snäpp fast monteringsramen i det 15 Sätt i monteringsramen tillsam 1 Rekommenderad monteringshöjd utanpåliggande höljet genom att mans med kombiramen så att kom ca 1,60 m till mitten på kameran. trycka lätt. De låspinnar som inte biramens tätningsprofil är öppen Vid anläggningar utan video måste behövs kan tryckas ut ur det utanpå... - Seite 17 Español Modulupptagning Instrucciones de montaje deben dotarse, estando en posición 20 Ta ur modulerna ur monterings horizontal, siempre de abajo hacia 1 Altura de montaje recomendada ramen: Upplåsningsmekanismen aprox. 1,60 m hasta el centro de arriba con el bastidor de montaje, utlöses genom att sticka in la cámara.
- Seite 18 los bornes pueda leerse vertical una Montaje en pared hueca Servicio sobre otra. 17 Dibujar la abertura para la car 21 Soltar el estribo de alambre de la 13 Las bridas intermedias de bas casa de empotrar GU 611-…. Para parte posterior del módulo y engati tidor combinado a partir del tamaño ello se coloca el cartón adjunto llarlo por delante en el sujetador del...
- Seite 19 Polski Instrukcja montażu żeniu poziomym, należy zawsze 13 Mostki pośrednie na ramie 1 Zalecana wysokość montażu wyposażać w ramkę montażową od wielofunkcyjnej od wielkości 600 × ok. 1,60 m od środka kamery. dołu do góry tak, aby folia uszczel 500 mm tworzą krzyż. W ten krzyż Dla systemów bez wideo środek niająca dolnej ramy montażowej wpuszczona jest śruba regulacyjna...
- Seite 20 18 Akcesoria do montażu do ściany Napisy szczelinowej ZHB 612-… zamon 22 Moduł przycisków otworzyć tować na GU 611-… i obrócić płytki za pomocą śrubokręta i wyjąć blokujące za obudową podtynkową. kieszonkę na opis. Aby włożyć GU 611-… z zamontowanym kieszonkę na opis, należy ją zablo ZHB 612-…...
- Seite 21 русский Инструкция по монтажу 7 Установить монтажную рамку 12 Извлечь комбинированную 1 Рекомендуемая высота мон- так, чтобы уплотнительная клеммную колодку из упаковки тажа: ок. 1,60 м до центра пленка находилась у верхнего и модуля, повернув на прибл. 45° камеры. В системах без видео правого...
- Seite 22 16 Комбинированную рамку «Охранно-сигнальная система» вместе с монтажной рамкой ZDS 601-… и контроллера полностью прижать к стене и при- охранно-сигнальной системы винтить к корпусу для скрытого DSC 602-… (см. информацию о монтажа входящим в комплект продукте ZDS 601-…). поставки быстродействующим винтом, повернув...
- Seite 24 S. Siedle & Söhne © 1997/12.16 Telefon- und Telegrafenwerke OHG Printed in Germany Best. Nr. 200016130-02 Postfach 1155 78113 Furtwangen Bregstraße 1 78120 Furtwangen Telefon +49 7723 63-0 Telefax +49 7723 63-300 www.siedle.de info@siedle.de...