Herunterladen Inhalt Inhalt Diese Seite drucken

Axis P3364–VE Installationsanleitung

Network camera serie
Vorschau ausblenden Andere Handbücher für P3364–VE:
Inhaltsverzeichnis

Werbung

Verfügbare Sprachen
  • DE

Verfügbare Sprachen

  • DEUTSCH, seite 49
AXIS P33–VE Network Camera Series
AXIS P3364–VE
AXIS P3365–VE
AXIS P3367–VE
AXIS P3384–VE
Installation Guide

Werbung

Inhaltsverzeichnis
loading

Inhaltszusammenfassung für Axis P3364–VE

  • Seite 1 AXIS P33–VE Network Camera Series AXIS P3364–VE AXIS P3365–VE AXIS P3367–VE AXIS P3384–VE Installation Guide...
  • Seite 2 Every care has been taken in the preparation of this • Restrictions of Hazardous Substances (RoHS) Directive document. Please inform your local Axis office of any 2011/65/EU. See Disposal and Recycling 3. inaccuracies or omissions. Axis Communications AB cannot A copy of the original declaration of conformity may be be held responsible for any technical or typographical errors obtained from Axis Communications AB.
  • Seite 3 FAQ database. Japan Search by product, category, or phrase この装置は、クラスB 情報技術装置です。この装置 • report problems to Axis support staff by logging in to は、家庭環境で使⽤することを⽬ 的としています your private support area が、この装置がラジオやテレビジョン受信機に近 • chat with Axis support staff 接して使⽤されると、...
  • Seite 5: Hazard Levels

    AXIS P33–VE Network Camera Series Safety Information Read through this Installation Guide carefully before installing the product. Keep the Installation Guide for future reference. Hazard Levels Indicates a hazardous situation which, if not avoided, will result in DANGER death or serious injury.
  • Seite 6 Battery The Axis product uses a 3.0 V BR/CR2032 lithium battery as the power supply for its internal real-time clock (RTC). Under normal conditions this battery will last for a minimum of five years. Low battery power affects the operation of the RTC, causing it to reset at every power-up. When the battery needs replacing, a log message will appear in the product’s server report.
  • Seite 7 AXIS P33–VE Network Camera Series Dome Cover NO TICE TICE TICE • Be careful not to scratch, damage or leave fingerprints on the dome cover because this could decrease image quality. If possible, keep the protective plastic on the dome cover until the installation is complete.
  • Seite 9: Installation Steps

    This Installation Guide provides instructions for installing AXIS P3364–VE/P3365–VE/AXIS P3367–VE/AXIS P3384–VE Network Camera on your network. For other aspects of using the product, see the User Manual available at www.axis.com Installation Steps 1. Make sure the package contents, tools and other materials necessary for the installation are in order.
  • Seite 10: Hardware Overview

    AXIS P33–VE Network Camera Series • Cable shield • Pendant kit including weather shield • Audio I/O cable with pre-mounted gasket For information about available accessories, see www.axis.com Hardware Overview Network connector Audio out LED indicators (network, status, power)
  • Seite 11: Mounting Bracket

    AXIS P33–VE Network Camera Series Audio in I/O connector Control button Fan connector SD card slot Mounting bracket 10 Unit casing 11 Spring 12 Camera heater 13 Dome cover 14 Weather shield 15 Bottom holes 16 Side holes 17 Network cable Mounting Bracket The mounting bracket has 4 mounting patterns (A, B, C, D).
  • Seite 12: Led Indicators

    AXIS P33–VE Network Camera Series LED Indicators Note • The Status LED can be configured to be unlit during normal operation. To configure, go to Setup > System Options > Ports & Devices > LED. See the online help for more information.
  • Seite 13 When a signal is received the state changes and the input becomes active (shown under System Options > Ports & Devices). Audio Connector The Axis product has the following audio connectors: • Audio in (pink) – 3.5 mm input for a mono microphone, or a line-in mono signal.
  • Seite 14: Specifications

    AXIS P33–VE Network Camera Series • Resetting the product to factory default settings. See page 25. • Connecting to an AXIS Video Hosting System service or AXIS Internet Dynamic DNS Service. For more information about these services, see the User Manual. Specifications Operating Conditions The Axis product is intended for outdoor use.
  • Seite 15 AXIS P33–VE Network Camera Series Function Notes Specifications 0 V DC 0 V DC (-) DC output Can be used to power auxiliary equipment. 3.3 V DC Note: This pin can only be used as power out. Max load = 50 mA...
  • Seite 16: Connection Diagrams

    Install the Hardware Note • This Axis product can be mounted with the cables routed through or along the wall. • This product can be fitted with a metal conduit for protecting the cabling when the cables are routed along the wall.
  • Seite 17 AXIS P33–VE Network Camera Series Metal conduit (not included) Perform the hardware installation in the following order: 1. Prepare the Network Cable 2. Replace Clear/Smoked Dome Cover (Optional) 3. Route the Cables 4. Install the Camera Unit 5. Adjust the Position of the Lens 6.
  • Seite 18 L-key. Replace Clear/Smoked Dome Cover (Optional) The Axis product is supplied with an optional dome. To replace the dome cover: 1. Loosen the four screws under the dome cover that hold the dome in place.
  • Seite 19 AXIS P33–VE Network Camera Series Mounting bracket Network cable with gasket Unit casing Wall gasket Bottom gasket Spring Route the Cables through the Wall 1. Drill four holes in the wall using the drill template. 2. Route the network cable and, if required, the I/O and audio cables through the wall and through the holes in the mounting bracket.
  • Seite 20 AXIS P33–VE Network Camera Series 1. Remove the side lid that is attached to the unit casing by removing the screw. 2. Loosen the two screws on the cable shield and detach the bottom part. 3. Attach the bottom part of the cable shield to the unit casing with the screw.
  • Seite 21 AXIS P33–VE Network Camera Series Install the Camera Unit NO TICE TICE TICE Risk of heater malfunctioning. Make sure the switch under the camera is configured to HEATER-PoE CLASS 3. Note Be careful to not stretch the network cable, or bend it unnecessarily, as this can break the cable.
  • Seite 22 4. Once satisfied, gently tighten the locking screw to secure the lens holder’s position. Tilt the Lens NO TICE TICE TICE Valid for AXIS P3365–VE/P3367–VE/P3384–VE: The lens should not be tilted more than 90°, this may cause damage to the product. Follow the instructions below.
  • Seite 23 AXIS P33–VE Network Camera Series The illustration below shows an indoor variant. Locking screw Lens holder Lens Screws 1. Open the Live View page, see Access the Product on page 25. 2. Loosen the two screws. 3. Check the Live View page and tilt the lens to the desired position.
  • Seite 24 AXIS P33–VE Network Camera Series Complete the Installation 1. Rotate the black shield inside the dome cover so it does not cover the lens. Black shield 2. If required, attach the weather shield to the camera before you attach the dome cover: Remove the two screws in the dome cover.
  • Seite 25: Access The Product

    The installation is now complete. Access the Product AXIS IP Utility and AXIS Camera Management are recommended methods for finding Axis products on the network and assigning them IP addresses in Windows®. Both applications are free and can be downloaded from www.axis.com/techsup The product can be used with most operating systems and browsers.
  • Seite 26: Further Information

    Further Information The User Manual is available at www.axis.com Visit www.axis.com/techsup to check if there is updated firmware available for your network product. To see the currently installed firmware version, go to Setup > About. Visit Axis learning center www.axis.com/academy for useful trainings, webinars, tutorials and guides.
  • Seite 27: Niveaux De Risques

    AXIS P33–VE Network Camera Series Informations sur la sécurité Lisez attentivement ce guide d'installation avant d'installer l'appareil. Conservez le guide d'installation pour toute référence ultérieure. Niveaux de risques Indique une situation dangereuse qui, si elle n'est pas évitée, DANGER entraînera le décès ou des blessures graves.
  • Seite 28 éviter d'endommager le produit. Batterie Le produit Axis utilise une batterie au lithium BR/CR2032 3,0 V comme alimentation de son horloge en temps réel interne (RTC). Dans des conditions normales, cette batterie a une durée de vie minimale de cinq ans.
  • Seite 29 AXIS P33–VE Network Camera Series • Risque d'explosion si la batterie est remplacée de façon incorrecte. • Remplacez-la uniquement par une batterie identique ou une batterie recommandée par Axis. • Mettez au rebut les batteries usagées conformément aux réglementations locales ou aux instructions du fabricant de la batterie.
  • Seite 31: Procédures D'installation

    Guide d'installation Ce Guide d'installation fournit des instructions pour l'installation de la caméra réseau AXIS P3364–VE/P3365–VE/AXIS P3367–VE/AXIS P3384–VE sur votre réseau. Pour toute autre information relative à l’utilisation du produit, consultez le manuel de l’utilisateur disponible sur le site www.axis.com Procédures d’installation...
  • Seite 32: Aperçu Du Matériel

    Protection de câble • Kit d'adaptateur de suspension comprenant une protection étanche • Câble d'E/S audio avec joint préinstallé Pour plus d’informations sur les accessoires disponibles, consultez le site www.axis.com Aperçu du matériel Connecteur réseau Sortie audio Voyants DEL (réseau, état, alimentation)
  • Seite 33 AXIS P33–VE Network Camera Series Entrée audio Connecteur d'E/S Bouton de commande Connecteur de ventilateur Emplacement pour carte SD Support de fixation 10 Boîtier de l'unité 11 Ressort 12 Régulateur de chaleur de la caméra 13 Couvercle de dôme 14 Protection étanche 15 Trous de la partie inférieure...
  • Seite 34 AXIS P33–VE Network Camera Series Voyants Note • Le voyant d'état peut être éteint pendant le fonctionnement normal. Pour ce faire, rendez-vous dans Setup > System Options > Ports & Devices > LED (Configuration > Options système > Ports et dispositifs > DEL). Consultez l'aide en ligne pour plus d'informations.
  • Seite 35 (sous System Options > Ports & Devices (Options du système > Ports et dispositifs)). Connecteur audio Le produit Axis dispose des connecteurs audio suivants : • Entrée audio (rose) – entrée de 3,5 mm pour microphone mono ou signal d'entrée mono.
  • Seite 36: Caractéristiques Techniques

    • Réinitialisation du produit aux paramètres d’usine par défaut. Cf. page 48. • Connexion au service du Système d'hébergement vidéo AXIS ou au service AXIS Internet Dynamic DNS. Pour plus d'informations sur ces services, reportez-vous au Manuel de l'utilisateur. Caractéristiques techniques Conditions d'utilisation L'appareil Axis est uniquement destiné...
  • Seite 37: Consommation Électrique

    AXIS P33–VE Network Camera Series Consommation électrique A A A VIS Risque de dysfonctionnement du régulateur de chaleur. Assurez-vous que le commutateur placé sous la caméra est en position HEATER-PoE CLASS 3. Produit AXIS P3364–VE Alimentation par Ethernet (PoE) IEEE 802.3af/802.3at Type 1 AXIS P3365–VE...
  • Seite 38: Schémas De Connexion

    AXIS P33–VE Network Camera Series Connecteur audio Connecteurs audio 3,5 mm (stéréo) 1 Pointe 2 Anneau 3 Manchon Masse Entrée audio Entrée micro/ligne Sortie audio Masse Sortie ligne (mono) Schémas de connexion Connecteur d'E/S 0 V CC (-) Sortie CC 3,3 V, maxi. 50 mA Entrée numérique 0 à...
  • Seite 39: Installation Du Matériel

    AXIS P33–VE Network Camera Series Installation du matériel Note • Cette caméra peut être montée avec les câbles d’alimentation acheminés à travers ou le long du mur. • Cette caméra peut être dotée d’un conduit métallique pour protéger les câbles en cas d'acheminement des câbles le long du mur.
  • Seite 40 AXIS P33–VE Network Camera Series Préparation du câble réseau Note • Ne forcez pas l’entrée du connecteur réseau dans le joint. • Ne percez pas le joint avec un couteau ou tout autre objet tranchant. Si vous utilisez un câble autre que celui fourni, il est nécessaire de préparer un câble réseau avec un joint.
  • Seite 41 AXIS P33–VE Network Camera Series Support de fixation Câble réseau avec joint Boîtier de l'unité Joint du mur Joint inférieur Ressort Acheminement des câbles à travers le mur 1. Percez quatre trous dans le mur en vous servant du gabarit de perçage.
  • Seite 42 AXIS P33–VE Network Camera Series Préparation du boîtier de l’unité Si les câbles doivent être acheminés le long du mur, préparez le boîtier de l’unité de la manière suivante : 1. déposez le couvercle latéral du boîtier de l’unité en retirant la vis.
  • Seite 43: Installation De La Caméra

    AXIS P33–VE Network Camera Series 7. Faites glisser les joints le long des câbles et fixez-les dans les trous. Les joints doivent être parfaitement ajustés aux trous, sans plis ni courbures. 8. Fixez à nouveau la partie supérieure de la protection de câble en serrant les deux vis.
  • Seite 44 AXIS P33–VE Network Camera Series Ajuster la position de l’objectif Vous pouvez pivoter l'objectif et l'incliner afin de couvrir une certaine zone d'intérêt et d'ajuster l'image en direct. Rotation de l'objectif Note La marque sur le couvercle de l’objectif est par défaut tournée vers le haut (support mural).
  • Seite 45 Inclinez l'objectif A A A VIS Valable pour les modèles AXIS P3365–VE/P3367–VE/P3384–VE : L'objectif ne doit pas être incliné de plus de 90°, cela pourrait endommager le produit. Suivez les instructions ci-dessous. L'illustration ci-dessous montre une version d'intérieur.
  • Seite 46: Fin De L'installation

    AXIS P33–VE Network Camera Series Réglage de la mise au point et du zoom A A A VIS Le réglage manuel de la mise au point et du zoom peut endommager l’objectif. Note • Du fait de la réfraction du dôme, l'image peut apparaître légèrement floue une fois le dôme installé.
  • Seite 47: Utilisez Le Produit

    L'installation est maintenant terminée. Utilisez le produit Si vous souhaitez rechercher des produits Axis sur le réseau ou leur affecter des adresses IP sous Windows®, nous recommandons l’utilisation des applications AXIS IP Utility et AXIS Camera Management. Ces deux applications sont gratuites et peuvent être téléchargées depuis www.axis.com/techsup...
  • Seite 48: Informations Sur La Garantie

    Pour connaître la version du microprogramme actuellement installée, reportez-vous à la page Setup > About (Configuration > À propos de). Visitez le centre de formation en ligne Axis sur le site www.axis.com/academy pour en savoir plus sur les formations, les webinaires, les tutoriels et les guides.
  • Seite 49: Gefährdungsstufen

    AXIS P33–VE Network Camera Series Sicherheitsinformation Lesen Sie das Installationshandbuch sorgfältig durch bevor sie das Produkt installieren. Bewahren Sie das Installationshandbuch für zukünftige Zwecke auf. Gefährdungsstufen Weist auf eine gefährliche Situation hin, die, falls nicht verhindert, GEFAHR zu Tod oder schweren Verletzungen führt.
  • Seite 50 Produkts, wenn ein Batteriewechsel erforderlich ist. Weitere Informationen über den Serverbericht finden Sie auf den Setup-Seiten des Produkts, oder wenden Sie sich an den Axis Support. Die Batterie sollte nur bei Bedarf ersetzt werden. Wenden Sie sich in diesem Fall an den Axis Support unter www.axis.com/techsup.
  • Seite 51 AXIS P33–VE Network Camera Series • Die Batterie darf nur durch eine identische Batterie oder eine von Axis empfohlene Batterie ersetzt werden. • Verbrauchte Batterien sind gemäß den örtlichen Vorschriften oder den Anweisungen des Herstellers zu entsorgen. Kuppelabdeckung HINWEIS HINWEIS HINWEIS •...
  • Seite 53: Installationsschritte

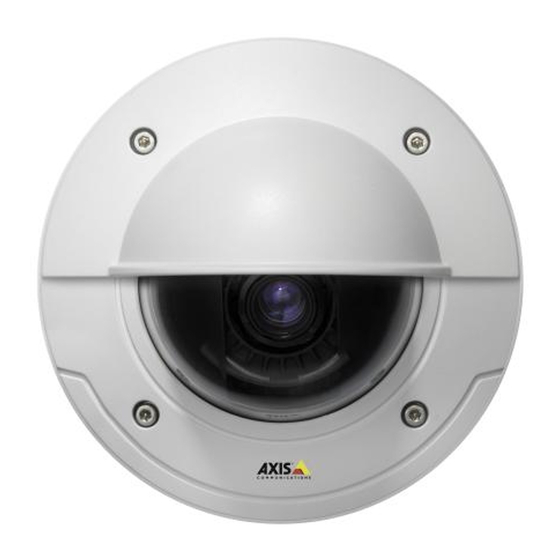
    AXIS P33–VE Network Camera Series Installationsanleitung In dieser Anleitung wird die Installation der Netzwerk-Kameras AXIS P3364–VE/P3365–VE/AXIS P3367–VE/AXIS P3384–VE in Ihrem Netzwerk beschrieben. Weitere Informationen zur Verwendung dieses Produkts finden Sie im Benutzerhandbuch unter www.axis.com. Installationsschritte 1. Stellen Sie sicher, dass die Packungsinhalte, Werkzeuge und andere notwendige Materialien für die Installation in Ordnung sind.
  • Seite 54: Übersicht Über Die Hardware

    AXIS P33–VE Network Camera Series • Kabelabdeckung • Hängemontage-Satz mit Wetterschutz • Audio-E/A-Kabel mit vormontierter Dichtung Unter www.axis.com finden Sie Informationen über verfügbares Zubehör. Übersicht über die Hardware Netzwerkanschluss Audioausgang LED-Anzeigen (Netzwerk, Status, Stromversorgung)
  • Seite 55 AXIS P33–VE Network Camera Series Audioeingang E/A-Anschluss Steuertaste Lüfteranschluss SD-Kartensteckplatz Montagehalterung 10 Kameragehäuse 11 Feder 12 Kameraheizelement 13 Kuppelabdeckung 14 Wetterschutz 15 Untere Bohrungen 16 Seitliche Bohrungen 17 Netzwerkkabel Montagehalterung Die Montagehalterung besitzt 4 Montagemuster (A, B, C, D). Die Montagemuster folgen der Norm für die folgenden Montageoptionen: •...
  • Seite 56: Anschlüsse Und Tasten

    AXIS P33–VE Network Camera Series LEDs Beachten • Die Status-LED kann so eingestellt werden, dass sie während des Normalbetriebs nicht leuchtet. Diese Konfiguration können Sie unter Setup > System Options > Ports & Devices > LED (Setup > Systemoptionen > Ports und Geräte > LED) einstellen. Weitere Informationen finden Sie in der Online-Hilfe.
  • Seite 57 Status und der Eingang wird aktiviert (siehe System Options > Ports & Devices (Systemoptionen > Anschlüsse & Geräte)). Audioanschlüsse Das Axis Produkt ist mit den folgenden Audioanschlüssen ausgestattet: • Audioeingang (rosa) – 3,5-mm-Anschluss für ein Monomikrofon oder ein Monosignal.
  • Seite 58: Technische Daten

    Die Steuertaste hat folgende Funktionen: • Zurücksetzen des Produkts auf die Werkseinstellungen. Siehe Seite 71. • Verbinden mit einem AXIS Video Hosting System-Service oder einem AXIS Internet Dynamic DNS-Service. Weitere Informationen zu diesen Diensten finden Sie in der Bedienungsanleitung. Technische Daten Betriebsbedingungen Das Axis Produkt ist für die Verwendung im Freien konzipiert.
  • Seite 59 AXIS P33–VE Network Camera Series Stromverbrauch HINWEIS HINWEIS HINWEIS Risiko einer Fehlfunktion des Heizelements. Stellen Sie sicher, dass der Schalter an der Kameraunterseite auf HEATER-PoE CLASS 3 eingestellt ist. Produkt AXIS P3364–VE Power over Ethernet (PoE) IEEE 802.3af/802.3at Typ 1 Klasse 3 AXIS P3365–VE...
  • Seite 60 AXIS P33–VE Network Camera Series Digitalein- Zum Aktivieren mit Kontakt 1 0 bis max. 40 V DC gang verbinden; zum Deaktivieren nicht anschließen. Digital- Bei Aktivierung mit Kontakt 1 0 bis max. 40 V DC, Open Drain, ausgang verbunden; wenn deaktiviert: 100 mA frei (nicht verbunden).
  • Seite 61: Anschlussschaltbilder

    Digitalausgang 0 bis max. 40 V DC, Open Drain, 100 mA Installieren der Hardware Beachten • Bei der Montage dieses Axis Produkts können Sie die Kabel entweder durch die Wand oder entlang der Wand führen. • Sie können die Netzwerk-Kamera mit einer Kabelführung aus Metall zum Schutz der Kabel ausstatten, wenn die Kabel an der Wand entlang geführt werden.
  • Seite 62: Vorbereiten Des Netzwerkkabels

    AXIS P33–VE Network Camera Series Kabelführung aus Metall (nicht enthalten) Führen Sie die Hardwareinstallation in folgender Reihenfolge durch: 1. Vorbereiten des Netzwerkkabels 2. Austauschen der klaren/getönten Kuppelabdeckung (optional) 3. Verlegen der Kabel 4. Installieren der Kameraeinheit 5. Einstellen der Objektivposition 6.
  • Seite 63: Austauschen Der Klaren/Getönten Kuppelabdeckung (Optional)

    AXIS P33–VE Network Camera Series Falls ein anderes als das mitgelieferte Kabel verwendet wird, müssen Sie ein Netzwerkkabel mit einer Dichtung vorbereiten. Führen Sie das Kabel vorsichtig durch die mitgelieferte Dichtung und bringen Sie einen Netzwerkstecker am Kabel an. Möglicherweise müssen Sie mit dem Resitorx-Schraubendreher ein Loch in die Dichtung stechen.
  • Seite 64 AXIS P33–VE Network Camera Series Montagehalterung Netzwerkkabel mit Dichtung Kameragehäuse Wanddichtung Untere Dichtung Feder Verlegen der Kabel durch die Wand 1. Bohren Sie mithilfe der Bohrschablone vier Löcher in die Wand. 2. Führen Sie das Netzwerkkabel sowie bei Bedarf das E/A- bzw. Audiokabel durch die Wand und durch die Löcher in der Halterung.
  • Seite 65 AXIS P33–VE Network Camera Series Vorbereiten des Kameragehäuses Wenn die Kabel an der Wand entlang geführt werden sollen, bereiten Sie das Kameragehäuse wie folgt vor: 1. Nehmen Sie die am Kameragehäuse befestigte Seitenabdeckung ab, indem Sie die Schraube entfernen. 2. Lösen Sie die beiden Schrauben an der Kabelabdeckung und nehmen Sie den unteren Teil ab.
  • Seite 66: Installieren Der Kameraeinheit

    AXIS P33–VE Network Camera Series 5. Setzen Sie das Kameragehäuse auf die Halterung und befestigen Sie es, indem Sie die vier Schrauben anziehen. 6. Führen Sie das Netzwerkkabel sowie bei Bedarf das E/A- bzw. Audiokabel durch die Löcher im Boden nach oben in das Kameragehäuse.
  • Seite 67: Einstellen Der Objektivposition

    AXIS P33–VE Network Camera Series Kameraeinheit Feder Netzwerkkabel Einstellen der Objektivposition Das Objektiv kann gedreht und gekippt werden, sodass ein ausgewählter Bereich als Live-Bild dargestellt wird. Drehen des Objektivs Beachten Die Markierung auf der Objektivabdeckung weist standardmäßig nach oben (Wandmontage).
  • Seite 68 Neigen des Objektivs HINWEIS HINWEIS HINWEIS Gilt für AXIS P3365–VE/P3367–VE/P3384–VE: Das Objektiv darf nicht mehr als 90° geneigt werden, andernfalls kann das Produkt beschädigt werden. Befolgen Sie dazu die folgenden Anweisungen. Die folgende Abbildung zeigt ein Modell für Innenräume. Feststellschraube...
  • Seite 69: Einstellen Von Fokus Und Zoom

    AXIS P33–VE Network Camera Series Neigen Sie das Objektiv. 5. Ziehen Sie die beiden Schrauben an. Einstellen von Fokus und Zoom HINWEIS HINWEIS HINWEIS Durch das manuelle Einstellen von Fokus und Zoom kann das Objektiv beschädigt werden. Beachten • Aufgrund der Lichtbrechungen auf der Glasoberfläche kann das Bild leicht unscharf erscheinen, nachdem die Kuppel installiert wurde.
  • Seite 70: Zugriff Auf Das Produkt

    Die Installation ist damit abgeschlossen. Zugriff auf das Produkt Für die Suche nach Axis Produkten im Netzwerk und zur Zuweisung einer IP-Adresse unter Windows® werden AXIS IP Utility und AXIS Camera Management empfohlen. Beide Anwendungen sind kostenlos und können von unserer Website unter www.axis.com/techsup heruntergeladen werden.
  • Seite 71: Zurücksetzen Auf Werkseinstellungen

    Wartung) auf. Weitere Informationen Das Benutzerhandbuch finden Sie unter www.axis.com. Unter www.axis.com/techsup finden Sie Firmware-Aktualisierungen für Ihre Netzwerkprodukte. Um die aktuell installierte Firmware-Version zu sehen, gehen Sie auf Einrichten > Über. Besuchen Sie das Axis-Schulungszentrum www.axis.com/academy für anregende Schulungen, Webinare, Lernprogramme und Anleitungen.
  • Seite 72: Gewährleistung

    AXIS P33–VE Network Camera Series Gewährleistung Informationen zur Gewährleistung der Axis Produkte und hierzu verbundene Informationen, finden Sie unter www.axis.com/warranty/...
  • Seite 73: Livelli Di Pericolo

    AXIS P33–VE Network Camera Series Informazioni di sicurezza Leggere con attenzione questa guida all'Installazione prima di installare il dispositivo. Conservare questo documento per usi futuri. Livelli di pericolo Indica una situazione pericolosa che, se non evitata, provoca morte PERICOLO o lesioni gravi.
  • Seite 74 • Durante il trasporto del dispositivo Axis, utilizzare l'imballaggio originale o equivalente per evitare danni al dispositivo. Batteria Il prodotto Axis utilizza una batteria al litio da 3,0 V BR/CR2032 come alimentazione per il suo real-time clock (RTC) interno. In condizioni normali questa batteria avrà una durata minima di cinque anni.
  • Seite 75 AXIS P33–VE Network Camera Series • Smaltire le batterie usate in base alle normative locali o alle istruzioni del produttore della batteria. Cupola di protezione A A A VVISO VVISO VVISO • Fare attenzione a non graffiare, danneggiare o lasciare impronte sulla cupola di protezione, perché...
  • Seite 77: Procedure Di Installazione

    AXIS P33–VE Network Camera Series Guida all'installazione La presente Guida all'installazione fornisce le istruzioni necessarie per installare la telecamera di rete AXIS P3364–VE/P3365–VE/AXIS P3367–VE/AXIS P3384–VE nella rete in uso. Per ulteriori informazioni sull'utilizzo del dispositivo, consultare la guida per l'utente disponibile all'indirizzo www.axis.com Procedure di installazione 1.
  • Seite 78: Panoramica Dell'hardware

    • Kit per montaggio a sospensione con schermo di protezione dagli agenti atmosferici • Cavo I/O audio con guarnizione premontata Visitare il sito web www.axis.com per informazioni sugli accessori disponibili. Panoramica dell'hardware Connettore di rete Uscita audio Indicatori LED (rete, stato, alimentazione)
  • Seite 79 AXIS P33–VE Network Camera Series Ingresso audio Connettore I/O Pulsante di comando Connettore della ventola Slot per scheda SD Staffa di montaggio 10 Casing dell'unità 11 Molla 12 Riscaldatore della telecamera 13 Copertura a cupola 14 Schermo di protezione dagli agenti atmosferici...
  • Seite 80: Indicatori Led

    AXIS P33–VE Network Camera Series Indicatori LED Nota • Lo status del LED può essere configurato per essere spento durante il normale funzionamento. Per configurarlo, selezionare Setup > System Options > Ports & Devices > LED (Configurazione > Opzioni di sistema > Porte & Dispositivi > LED). Per ulteriori informazioni, consultare l'aiuto in linea.
  • Seite 81 (visualizzato in System Options > Ports & Devices (Opzioni di Sistema > Porte e Dispositivi)). Connettore audio Il dispositivo Axis dispone dei seguenti connettori audio: • Ingresso audio (rosa) - Ingresso audio da 3,5 mm per microfono in mono o segnale mono line-in.
  • Seite 82: Dati Tecnici

    • Ripristino del dispositivo alle impostazioni predefinite di fabbrica. Consultare pagina 94. • Collegamento a un servizio AXIS Video Hosting System o AXIS Internet Dynamic DNS Service. Per ulteriori informazioni su questi servizi, consultare il Manuale Utente. Dati tecnici Condizioni di funzionamento Il dispositivo Axis è...
  • Seite 83 AXIS P33–VE Network Camera Series Connettori Connettore I/O Morsettiera a 4 pin Per un esempio di schema, consultare Schema delle connessioni alla pagina 84. Funzione Note Specifiche 0 V CC 0 V CC (-) Il pin può essere utilizzato anche per...
  • Seite 84 Ingresso digitale da 0 a max 40 V CC, open-drain, 100 mA Installare l’hardware Nota • Questo dispositivo Axis può essere montato installando i cavi attraverso la parete o lungo di essa. • Questo dispositivo può essere munito di una canalina metallica per proteggere i cavi nel caso in cui vengano installati lungo la parete.
  • Seite 85 AXIS P33–VE Network Camera Series Canalina in metallo (non inclusa) Eseguire l'installazione dell'hardware rispettando l'ordine seguente: 1. Preparazione del cavo di rete 2. Sostituzione della copertura della cupola trasparente/fumé(opzionale) 3. Installazione dei cavi 4. Installazione dell'unità telecamera 5. Regolazione della posizione dell'obiettivo 6.
  • Seite 86 AXIS P33–VE Network Camera Series Se si utilizza un cavo diverso da quello fornito, sul cavo di rete è necessario montare una guarnizione. Spingere delicatamente il cavo nella guarnizione fornita e fissarlo ad un connettore di rete. Può talvolta essere necessario forare la guarnizione con il cacciavite L-key.
  • Seite 87 AXIS P33–VE Network Camera Series Staffa di montaggio Cavo di rete con guarnizione Casing dell'unità Guarnizione parete Guarnizione inferiore Molla Installazione dei cavi attraverso la parete 1. Praticare quattro fori nella parete utilizzando la maschera di foratura. 2. Far passare il cavo di rete e, se necessario, i cavi I/O e audio attraverso la parete e i fori sulla staffa di montaggio.
  • Seite 88 AXIS P33–VE Network Camera Series Preparazione del casing dell'unità Se i cavi devono passare lungo la parete, attenersi alla seguente procedura per preparare il casing dell'unità: 1. Rimuovere la copertura laterale fissata al casing dell'unità rimuovendo la vite. 2. Allentare le due viti sulla schermatura del cavo e staccare la parte inferiore.
  • Seite 89 AXIS P33–VE Network Camera Series 6. Tirare il cavo di rete e, se necessario, i cavi I/O e audio verso l'alto attraverso i fori inferiori nel casing dell'unità. 7. Far scorrere le guarnizioni lungo i cavi e inserirle nei fori. Controllare che le guarnizioni si inseriscano a fondo nei fori, senza pieghe o curvature.
  • Seite 90 AXIS P33–VE Network Camera Series Regolazione della posizione dell'obiettivo L'obiettivo può essere ruotato e inclinato per coprire una determinata area di interesse e regolare le immagini dal vivo. Rotazione dell'obiettivo Nota Il contrassegno sul coperchio dell'obiettivo è orientato verso l'alto per impostazione predefinita (montaggio a parete).
  • Seite 91 Inclinazione dell'obiettivo A A A VVISO VVISO VVISO Valido per AXIS P3365–VE/P3367–VE/P3384–VE: L'obiettivo non deve essere inclinato di oltre 90° poiché il dispositivo potrebbe danneggiarsi. Seguire le istruzioni riportate qui sotto. L'illustrazione qui sotto mostra una variante per interni. Vite di arresto...
  • Seite 92: Completamento Dell'installazione

    AXIS P33–VE Network Camera Series 5. Serrare le due viti. Regolazione della messa a fuoco e dello zoom A A A VVISO VVISO VVISO La regolazione manuale della messa a fuoco e dello zoom può danneggiare l'obiettivo. Nota • Una volta montata la cupola, l'immagine potrebbe apparire leggermente sfocata a causa della rifrazione.
  • Seite 93 A questo punto l'installazione è completata. Accedere al dispositivo AXIS IP Utility e AXIS Camera Management sono i metodi consigliati per trovare i dispositivi Axis in rete e assegnare loro un indirizzo IP in Windows®. Queste applicazioni sono entrambe gratuite e possono essere scaricate da www.axis.com/techsup...
  • Seite 94: Ripristino Dei Valori Predefiniti Di Fabbrica

    Per conoscere la versione del firmware installata, andare su Setup (Impostazioni) > About (Informazioni su). Visitare il centro di apprendimento Axis alla pagina www.axis.com/academy per servizi di formazione utili, webinar, tutorial e guide.
  • Seite 95: Informazioni Sulla Garanzia

    AXIS P33–VE Network Camera Series Informazioni sulla garanzia Per informazioni sulla garanzia del dispositivo Axis e informazioni ad esso relative, consultare la pagina www.axis.com/warranty/...
  • Seite 97 AXIS P33–VE Network Camera Series Información de seguridad Lea esta Guía de instalación con atención antes de instalar el producto. Guarde la Guía de instalación para poder consultarla en otro momento. Niveles de peligrosidad Indica una situación peligrosa que, si no se evita, provocará...
  • Seite 98 Batería Este producto de Axis utiliza una batería de litio BR/CR2032 de 3,0 V como fuente de alimentación del reloj interno en tiempo real. En condiciones normales, esta batería durará un mínimo de cinco años.
  • Seite 99 AXIS P33–VE Network Camera Series • Sustituya la batería por una batería idéntica u otra batería recomendada por Axis. • Deseche las baterías usadas de conformidad con la normativa local o las instrucciones del fabricante. Cubierta del domo A A A VISO...
  • Seite 101: Contenido Del Paquete

    Esta Guía de instalación incluye las instrucciones necesarias para instalar la cámara de red AXIS P3364–VE/P3365–VE/AXIS P3367–VE/AXIS P3384–VE en su red. Para conocer otros aspectos de uso del producto, consulte el Manual del usuario disponible en www.axis.com. Pasos de la instalación 1.
  • Seite 102: Información General Del Hardware

    • Kit colgante que incluye parasol • Cable de E/S de audio con junta montada previamente Para obtener información sobre los accesorios disponibles, vea www.axis.com. Información general del hardware Conector de red Salida de audio Indicadores LED (red, estado y encendido)
  • Seite 103: Soporte De Montaje

    AXIS P33–VE Network Camera Series Entrada de audio Conector de E/S Botón de control Conector del ventilador Ranura para tarjetas SD Soporte de montaje 10 Carcasa de la unidad 11 Muelle 12 Calefactor de la cámara 13 Cubierta del domo...
  • Seite 104: Indicadores Led

    AXIS P33–VE Network Camera Series Indicadores LED Nota • Se puede configurar el LED de estado para que se apague durante el funcionamiento normal. Para ello, vaya a Setup > System Options > Ports & Devices > LED (Configuración > Opciones del sistema > Puertos y dispositivos > LED) . Vea la ayuda en línea para obtener más información.
  • Seite 105 (se indica en System Options > Ports & Devices (Opciones del sistema > Puertos y dispositivos)). Conector de audio El producto de Axis integra los siguientes conectores de audio: • Entrada de audio (rosa): entrada de 3,5 mm para micrófono mono, o entrada de línea de señal mono.
  • Seite 106: Especificaciones

    Restablecer el producto a la configuración predeterminada de fábrica. Vea página 119. • Conectarse a un servicio AXIS Video Hosting System o al Servicio de DNS dinámico de Internet de AXIS. Para obtener más información sobre estos servicios, consulte el Manual del usuario.
  • Seite 107 AXIS P33–VE Network Camera Series Producto Temperatura Humedad Clasificación AXIS P3364–VE IEC 62262 IK10 De -40 °C a 55 °C Humedad relativa AXIS P3365–VE NEMA 250 Tipo 4X del 10 al 100 % (con condensación) AXIS P3367–VE AXIS P3384–VE Consumo...
  • Seite 108 AXIS P33–VE Network Camera Series Entrada Conéctela al pin 1 para activarla o déjela De 0 a 40 V CC máx. digital suelta (desconectada) para desactivarla Salida digital Conectada al pin 1 cuando se activa y suelta De 0 a 40 V CC máx., (sin conectar) cuando está...
  • Seite 109: Diagramas De Conexión

    Salida digital: de 0 a 40 V CC máx., colector abierto, 100 mA Instalación del hardware Nota • Este producto de Axis puede montarse tendiendo los cables a través de la pared o sobre esta. • Este producto también puede equiparse con un conducto metálico para proteger el cableado cuando se tiende sobre la pared.
  • Seite 110 AXIS P33–VE Network Camera Series Conducto metálico (no incluido) Instale el hardware en el siguiente orden: 1. Preparación del cable de red 2. Sustitución de la cubierta del domo transparente/ahumada (opcional) 3. Tendido de los cables 4. Instalación de la unidad de la cámara 5.
  • Seite 111 AXIS P33–VE Network Camera Series Si se utiliza un cable distinto al que se proporciona, es necesario preparar un cable de red con una junta. Con cuidado, empuje el cable a través de la junta que se proporciona y acople un conector de red.
  • Seite 112 AXIS P33–VE Network Camera Series Soporte de montaje Cable de red con junta Carcasa de la unidad Junta de pared Junta inferior Muelle Tendido de los cables a través de la pared 1. Utilice la plantilla de perforado para realizar cuatro orificios en la pared.
  • Seite 113 AXIS P33–VE Network Camera Series 1. Retire la tapa lateral de la carcasa de la unidad quitando el tornillo. 2. Afloje los dos tornillos del blindaje de cable y separe la parte inferior. 3. Utilice el tornillo para ajustar la parte trasera del blindaje de cable a la carcasa de la unidad.
  • Seite 114 AXIS P33–VE Network Camera Series 8. Apriete los dos tornillos para volver a unir la parte superior del blindaje de cable. Instalación de la unidad de la cámara A A A VISO VISO VISO Riesgo de fallo de funcionamiento del calefactor. Asegúrese de que el interruptor de debajo de la cámara esté...
  • Seite 115 AXIS P33–VE Network Camera Series Rotación del objetivo Nota La marca de la cubierta del objetivo se encuentra orientada hacia arriba de forma predeterminada (montaje en pared). 1. Abra la página Live View (Vista en directo), vea Acceso al producto en la página 118.
  • Seite 116 A A A VISO VISO VISO Válido para AXIS P3365–VE/P3367–VE/P3384–VE: el objetivo no debe inclinarse más de 90°; hacerlo puede ocasionar daños en el producto. Siga las instrucciones indicadas a continuación. En la siguiente ilustración se muestra una variante de interior.
  • Seite 117: Finalización De La Instalación

    AXIS P33–VE Network Camera Series Nota • Debido a la refracción del domo, la imagen puede aparecer ligeramente desenfocada una vez colocado. Para corregir esto, vaya a la página web Focus Adjustment (Ajuste del enfoque) en Setup (Configuración) > Basic Setup (Configuración básica) > Focus &...
  • Seite 118: Acceso Al Producto

    Acceso al producto Se recomiendan AXIS IP Utility y AXIS Camera Management como métodos para buscar los productos de Axis en la red y asignarles direcciones IP en Windows®. Ambas aplicaciones son gratuitas y pueden descargase de www.axis.com/techsup El producto se puede utilizar con la mayoría de los sistemas operativos y navegadores. Los navegadores recomendados son ®...
  • Seite 119: Restablecimiento A La Configuración Predeterminada De Fábrica

    Visite el centro de aprendizaje de www.axis.com/academy para consultar guías, tutoriales, seminarios web y cursos que pueden resultarle útiles. Información de garantía Para obtener más detalles sobre la garantía del producto Axis y la información relacionada con ella, consulte www.axis.com/warranty/...
  • Seite 121 AXIS P33–VE Network Camera Series 安 安 安 全 全 全 情 情 情 報 報 報 本製品を設置する前に、このインストールガイドをよくお読みください。 インス トールガイドは、後で参照できるように保管しておいてください。 危 危 危 険 険 険 レ レ レ ベ ベ ベ ル ル ル 回避しない場合、死亡または重傷につながる危険な状 危 危 危 険 険 険...
  • Seite 122 AXIS P33–VE Network Camera Series 安 安 安 全 全 全 ⼿ ⼿ ⼿ 順 順 順 注記 • 本製品は、お使いになる地域の法律や規制に準拠して使⽤してください。 • 本製品は乾燥した換気のよい環境に保管してください。 • 本製品に衝撃または強い圧⼒を加えないでください。 • 本製品を不安定なブラケット、表⾯、または壁に設置しないでください。 • 本製品を設置する際には、適切な⼯具のみを使⽤してください。 電動⼯具を 使⽤して過剰な⼒をかけると、製品が損傷することがあります。 • 化学薬品、腐⾷剤、噴霧式クリーナーは使⽤しないでください。 • 清掃には、きれいな⽔に浸した清潔な布を使⽤してください。 • 製品の技術仕様に準拠したアクセサリーのみを使⽤してください。 これらの アクセサリーは、Axisまたはサードパーティから⼊⼿できます。 • Axisが提供または推奨する交換部品のみを使⽤してください。...
  • Seite 123 AXIS P33–VE Network Camera Series • 使⽤済みバッテリーは、地域の規制またはバッテリーメーカーの指⽰に 従って廃棄してください。 ド ド ド ー ー ー ム ム ム カ カ カ バ バ バ ー ー ー 注記 • 画質低下の原因となるので、ドームカバーに傷や指紋を付けたり、損傷しな いように注意してください。 可能であれば、設置が完了するまでドームカ バーに保護プラスチックを付けたままにしてください。 • ⾁眼で⾒て汚れがない場合は、ドームカバーを掃除しないでください。ま た、絶対に表⾯を磨かないでください。 過度な清掃により、表⾯が破損す ることがあります。 • ドームカバーの通常のクリーニングには、磨耗防⽌タイプの無溶媒の中性⽯ 鹸またはきれいな⽔で薄めた洗剤と、柔らかい清潔な布を使⽤することをお...
  • Seite 125 AXIS P33–VE Network Camera Series イ イ イ ン ン ン ス ス ス ト ト ト ー ー ー ル ル ル ガ ガ ガ イ イ イ ド ド ド こ の イ ン ス ト ー ル ガ イ ド で...
  • Seite 126 AXIS P33–VE Network Camera Series IP51準拠天井埋め込みキット • ペンダントキット • ケーブルシールド • ウェザーシールド付きペンダンアダプタートキット • ⾳声I/Oケーブル (ガスケット取り付け済み) • www.axis.com 利⽤可能なアクセサリーについては、 を参照してください ハ ハ ハ ー ー ー ド ド ド ウ ウ ウ ェ ェ ェ ア ア ア の の の 概 概 概 要 要 要...
  • Seite 127 AXIS P33–VE Network Camera Series ⾳声出⼒ LEDインジケータ (ネットワーク、ステータス、電源) ⾳声⼊⼒ I/Oコネクタ コントロールボタン ファンコネクタ SDカードスロット 取り付けブラケット 10 ユニットケーシング 11 スプリング 12 カメラヒーター 13 ドームカバー 14 ウェザーシールド 15 底⾯の⽳ 16 側⾯の⽳ 17 ネットワークケーブル 取 取 取 り り り 付 付 付 け け け ブ ブ ブ ラ ラ ラ ケ ケ ケ ッ ッ ッ ト ト ト...
  • Seite 128 AXIS P33–VE Network Camera Series LED イ イ イ ン ン ン ジ ジ ジ ケ ケ ケ ー ー ー タ タ タ ー ー ー 注意 • ステータスLEDは、正常動作時に消灯させることができます。 設定は、 [Setup [Setup [Setup - - - System System System Options...
  • Seite 129 AXIS P33–VE Network Camera Series 注記 本製品を使⽤する場所の地域条例、環境、電気的条件によっては、シールド ネットワークケーブル (STP) の使⽤が推奨または必須になります。 本製品を ネットワークに接続して屋外または電気的に厳しい環境に配線する場合は、 ⽤途に合ったネットワークケーブルを使⽤してください。 ネットワーク装置 がメーカーの指⽰どおりに設置されていることを確認します。 法的要件に ついては、を参照してください。 I/O コ コ コ ネ ネ ネ ク ク ク タ タ タ 外部装置を接続し、カメラに対するいたずらの警報、動体検知、イベントトリ ガー、低速度撮影、アラーム通知などを使⽤することができます。 I/Oコネクタ は、0 V DC基準点と電⼒ (DC出⼒) に加えて、以下のインターフェースを提供します。 デ デ デ ジ ジ ジ タ タ タ ル ル ル 出 出 出 ⼒ ⼒ ⼒ ‒ リレーやLEDなどの外部デバイスを接続します。 接続され...
  • Seite 130 コ コ コ ン ン ン ト ト ト ロ ロ ロ ー ー ー ル ル ル ボ ボ ボ タ タ タ ン ン ン 126ページの、ハードウェアの概要 コントロールボタンの位置については、 を参 照してください。 コントロールボタンは、以下の⽤途で使⽤します。 143ページ 製品を⼯場出荷時の設定にリセットする。 を参照してください。 • AXIS Video Hosting SystemサービスまたはAXIS Internet Dynamic DNSサービ • スに接続する。 これらのサービスの詳細については、ユーザーズマニュ アルを参照してください。 仕 仕 仕 様 様 様 動 動 動 作 作 作 条 条 条 件 件 件 本製品は屋外対応モデルです。...
  • Seite 131 AXIS P33–VE Network Camera Series 製 製 製 品 品 品 等 等 等 級 級 級 温 温 温 度 度 度 湿 湿 湿 度 度 度 AXIS P3364‒VE IEC 62262 IK10 10〜100% RH -40 °C〜55 °C AXIS P3365‒VE NEMA 250 Type 4X (結露可)
  • Seite 132 AXIS P33–VE Network Camera Series 0〜40 V DC (最⼤) デジタル⼊ 動作させるにはピン1に接続し、動作 させない場合はフロート状態 (未接続) ⼒ のままにします。 動作させるにはピン1に接続し、動作 0〜40 V DC (最⼤)、 デジタル出 オ ー プ ン ド レ イ ⼒ させない場合はフロート状態 (未接続) にします。 誘導負荷 (例: リレー) とと ン、100 mA もに使⽤する場合は、過渡電圧から保 護するため、ダイオードを負荷と並列...
  • Seite 133 AXIS P33–VE Network Camera Series 接 接 接 続 続 続 図 図 図 I/O コ コ コ ネ ネ ネ ク ク ク タ タ タ 0 V DC (-) DC出⼒3.3 V、最⼤50 mA デジタル出⼒0〜最⼤40 V DC デジタル出⼒0〜40 V DC (最⼤)、オープンドレイン、100 mA ハ...
  • Seite 134 AXIS P33–VE Network Camera Series ⾦属製のコンジット (⾮付属品) ハードウェアの設置は、以下の順序で実施してください。 ネットワークケーブルの準備 クリア/スモークドームカバーを交換する (オプション) ケーブルの配線 カメラユニットの設置 レンズの位置の調整 フォーカスとズームの調整 設置の完了 ネ ネ ネ ッ ッ ッ ト ト ト ワ ワ ワ ー ー ー ク ク ク ケ ケ ケ ー ー ー ブ ブ ブ ル ル ル の の の 準 準 準 備 備 備...
  • Seite 135 AXIS P33–VE Network Camera Series 付属のケーブル以外のケーブルを使⽤する場合は、ネットワークケーブルにガスケッ トを装着する必要があります。 ケーブルを付属のガスケットを通してゆっくり押 し、ネットワークコネクタを取り付けます。 ガスケットに、いじり⽌めトルクス L型 レンチを使⽤して⽳をあける必要がある場合があります。 ク ク ク リ リ リ ア ア ア / / / ス ス ス モ モ モ ー ー ー ク ク ク ド ド ド ー ー ー ム ム ム カ カ カ バ バ バ ー ー ー を を を 交 交 交 換 換 換 す す す る る る ( ( ( オ オ オ プ プ プ シ シ シ ョ ョ ョ ン ン ン ) ) ) ドームカバーを交換するには、次の⼿順に従います...
  • Seite 136 AXIS P33–VE Network Camera Series 取り付けブラケット ガスケット付きネットワークケーブル ユニットケーシング 壁⾯ガスケット 底部のガスケット スプリング 壁 壁 壁 の の の 中 中 中 を を を 通 通 通 し し し た た た ケ ケ ケ ー ー ー ブ ブ ブ ル ル ル 配 配 配 線 線 線...
  • Seite 137 AXIS P33–VE Network Camera Series ユ ユ ユ ニ ニ ニ ッ ッ ッ ト ト ト ケ ケ ケ ー ー ー シ シ シ ン ン ン グ グ グ の の の 準 準 準 備 備 備...
  • Seite 138 AXIS P33–VE Network Camera Series 6. ネットワークケーブや、必要に応じて、I/Oおよび⾳声ケーブルを、ユニッ トケーシングの底⾯の⽳を通して引き込みます。 7. ケーブルに沿ってガスケットを移動させ、側孔にはめ込みます。 ガスケッ トは、折ったり、曲げたりせずに、孔にぴったりとはめ込みます。 8. ケーブルシールドの上部を、2本のネジで再度取り付けます。 カ カ カ メ メ メ ラ ラ ラ ユ ユ ユ ニ ニ ニ ッ ッ ッ ト ト ト の の の 設 設 設 置 置 置...
  • Seite 139 AXIS P33–VE Network Camera Series レ レ レ ン ン ン ズ ズ ズ の の の 位 位 位 置 置 置 の の の 調 調 調 整 整 整 レンズを回転およびチルトさせることで、特定の対象範囲をカバーしたり、ライブ ビュー画像を調節できます。 レ レ レ ン ン ン ズ ズ ズ の の の 回 回 回 転 転 転...
  • Seite 140 AXIS P33–VE Network Camera Series 4. 確認後、固定ネジを静かに締め、レンズホルダーの位置を固定します。 レ レ レ ン ン ン ズ ズ ズ の の の チ チ チ ル ル ル ト ト ト 注記 AXIS P3365‒VE/P3367‒VE/P3384‒VE P3365‒VE/P3367‒VE/P3384‒VE が対象: 90°を超えてレンズをチルトし AXIS AXIS P3365‒VE/P3367‒VE/P3384‒VE ないでください。製品が破損する場合があります。 次の⼿順に従います。 下図は屋内向けシリーズを⽰しています。...
  • Seite 141 AXIS P33–VE Network Camera Series フ フ フ ォ ォ ォ ー ー ー カ カ カ ス ス ス と と と ズ ズ ズ ー ー ー ム ム ム の の の 調 調 調 整 整 整...
  • Seite 142 ウェザーシールド ネジとワッシャー これで、カメラの設置は完了です。 製 製 製 品 品 品 へ へ へ の の の ア ア ア ク ク ク セ セ セ ス ス ス ネットワーク上でアクシス製品を検索したり、Windows®でそれにIPアドレスを割り当 てるには、AXIS IP UtilityまたはAXIS Camera Managementの使⽤をお勧めします。 い www.axis.com/techsup ずれのアプリケーションも無料で、 からダウンロードできます 本製品は、ほとんどのオペレーティングシステムとブラウザーでご利⽤いただけま す。 推奨ブラウザは以下のとおりです。...
  • Seite 143 AXIS P33–VE Network Camera Series ⼯ ⼯ ⼯ 場 場 場 出 出 出 荷 荷 荷 時 時 時 の の の 設 設 設 定 定 定 に に に リ リ リ セ セ セ ッ ッ ッ ト ト ト す す す る る る...
  • Seite 145 AXIS P33–VE Network Camera Series 安 安 安 全 全 全 信 信 信 息 息 息 安装该产品前请仔细通读该安装指南。请保管好安装指南以供以后查阅。 危 危 危 险 险 险 等 等 等 级 级 级 表示有危险的情形,如果不能避免,将导致死亡或严重的 危 危 危 险 险 险 个人伤害。 表示有危险的情形,如果不能避免,将导致死亡或严重的 警 警 警 告 告 告...
  • Seite 146 AXIS P33–VE Network Camera Series 安 安 安 全 全 全 说 说 说 明 明 明 注意 • 使用该安讯士产品必须符合当地法律法规要求。 • 安讯士产品应存放在干燥通风的环境中。 • 应避免对安讯士产品造成冲撞或重压。 • 不得将本产品安装于不稳固的支架、表面或墙面上。 • 安装安讯士产品时,请使用适用工具。使用电动工具时过度用力可能对产品 造成损坏。 • 请勿使用化学制剂、腐蚀性制剂或气雾性清洁剂。 • 使用浸有净水的干净抹布进行清洁。 • 所用附件必须符合该产品的技术规格要求。可由安讯士或第三方供应商提供。 • 必须使用安讯士提供或推荐的零件。 • 请勿试图自己修理该产品。维修事务请联系安讯士支持人员或您的安讯士 经销商。...
  • Seite 147 AXIS P33–VE Network Camera Series 球 球 球 型 型 型 罩 罩 罩 注意 • 切勿刮伤或损坏球型罩或在球型罩上留下指纹,因为这样会降低图像质量。请 尽可能地将防护塑料保留在球型罩上,直至安装完成。 • 不要清洗外表看起来干净的球型罩,不要磨光表面。过度的清洗可能会损 坏表面。 • 对球型罩进行一般清洗时,建议使用非磨蚀性且不含溶剂的中性肥皂或与净水 混合的洗涤剂以及柔软、干净的抹布。最好使用纯净的温水进行清洗。使用柔 软、干净的抹布擦干,防止水斑。 • 切勿使用烈性洗涤剂、汽油、苯或丙酮等,并避免在阳光直射下或高温环境 中清洗球型罩。...
  • Seite 149 AXIS P33–VE Network Camera Series 安 安 安 装 装 装 指 指 指 南 南 南 本 安 装 指 南 说 明 了 如 何 在 网 络 上 安 装 AXIS P3364–VE/P3365–VE/AXIS P3367–VE/AXIS P3384–VE 网络摄像机。有关使用该产 www.axis.com 品的其他信息,请参见用户手册,网址:...
  • Seite 150 AXIS P33–VE Network Camera Series 含风雨罩的吊装套件 • 带预装垫圈的音频 I/O 线缆 • www.axis.com 如欲了解有关可用附件的信息,请访问 硬 硬 硬 件 件 件 概 概 概 览 览 览 网络接口 音频输出 LED 指示灯(网络、状态、电源) 音频输入...
  • Seite 151 AXIS P33–VE Network Camera Series I/O 接口 控制按钮 风扇接口 SD 卡插槽 安装支架 10 单元外壳 11 弹簧 12 摄像机加热器 13 球型罩 14 风雨罩 15 底孔 16 侧孔 17 网线 安 安 安 装 装 装 支 支 支 架 架 架...
  • Seite 152 AXIS P33–VE Network Camera Series LED 指 指 指 示 示 示 灯 灯 灯 备注 • 状态 LED 指示灯可被配置为在工作正常时不亮。进行配置请访问设 设 设 置 置 置 > > > 系 系 系 统 统 统 选 选 选 项 项 项 > > > 端 端 端 口 口 口 和 和 和 设 设 设 备 备 备 > > > LED LED 。如欲了解更多信息,请参见在线帮助。...
  • Seite 153 AXIS P33–VE Network Camera Series I/O 接 接 接 口 口 口 与外部设备联合使用,例如:用于面向防篡改告警、移动侦测、事件触发、延时录像及 报警通知的应用。除了 0 V DC参考点和电源(DC 输出),I/O 接口还提供以下接口: 数 数 数 字 字 字 输 输 输 出 出 出 –用于连接外部设备,如继电器和 LED 灯。已连接设备可通过 • VAPIX® 应用编程接口(API)、Live View(实时视图)页面上的输出按钮 或 Action Rule(操作规则)激活。当警报设备被激活后,该输出接口将显...
  • Seite 154 AXIS P33–VE Network Camera Series 控 控 控 制 制 制 按 按 按 钮 钮 钮 硬件概览 在第150页 有关控制按钮的位置信息,请参见 。 控制按钮用于: 第165页 将产品重置为出厂默认设置。参见 。 • 连接至安讯士视频托管系统服务或安讯士互联网动态 DNS 服务。有关这些服 • 务的更多信息,请参见用户手册。 规 规 规 格 格 格 工 工 工 作 作 作 条 条 条 件 件 件...
  • Seite 155 AXIS P33–VE Network Camera Series 接 接 接 口 口 口 I/O 接 接 接 口 口 口 4 针接线端子 连接图 在第156页 如欲获取示例图表,请参见 。 功 功 功 能 能 能 针 针 针 备 备 备 注 注 注 规 规 规 格 格 格...
  • Seite 156 AXIS P33–VE Network Camera Series 连 连 连 接 接 接 图 图 图 I/O 接 接 接 口 口 口 0 V DC (-) DC 输出 3.3 V ,最大 50 mA 数字输入 0 至最大 40 V DC 数字输出 0 至最大 40 V DC,开漏, 100 mA 安...
  • Seite 157 AXIS P33–VE Network Camera Series 金属线管(不含) 按下列顺序执行硬件安装: 准备网线 替换透明型/烟雾型球型罩(可选) 布线 安装摄像机单元 调整镜头的位置 调整对焦和变焦 完成安装 准 准 准 备 备 备 网 网 网 线 线 线 备注 • 不要将网络接口插入垫圈。 • 不要用刀或其它锋利的物体在垫圈上戳洞。...
  • Seite 158 AXIS P33–VE Network Camera Series 如果不使用随附的网线而使用其它网线,您需要准备一根带有垫圈的网线。轻轻地推 动网线穿过随附的垫圈并装上一个网络接口。可能需要用一个 resitorx L 型内六角扳 手在垫圈上戳一个洞。 替 替 替 换 换 换 透 透 透 明 明 明 型 型 型 / / / 烟 烟 烟 雾 雾 雾 型 型 型 球 球 球 型 型 型 罩 罩 罩 ( ( ( 可 可 可 选 选 选 ) ) )...
  • Seite 159 AXIS P33–VE Network Camera Series 安装支架 带有垫圈的网线 单元外壳 墙壁垫圈 底部垫圈 弹簧 穿 穿 穿 过 过 过 墙 墙 墙 壁 壁 壁 布 布 布 线 线 线 1. 使用钻孔样板在墙壁中钻四个孔。 2. 穿过墙壁和安装支架上的孔布置网线(必要时布置 I/O 线和音频线)。 3. 使用适用于墙壁材质的四个螺丝和栓塞将安装支架固定在墙壁上。 4. 将弹簧推开,将摄像机单元从单元外壳上卸下。 5. 将墙壁垫圈从单元外壳中卸下。如果只有一根线缆,仅需卸下一个垫圈。...
  • Seite 160 AXIS P33–VE Network Camera Series 3. 使用螺丝,将线缆挡板的底部零件连接至单元外壳。 线缆挡板的顶部零件(可选附件) 线缆挡板的底部零件(可选附件) 单元外壳 沿 沿 沿 墙 墙 墙 壁 壁 壁 布 布 布 线 线 线 备注 为了避免与湿气有关的问题,建议从下往上将线缆连接至摄像机,并将线 缆孔朝下放置。 1. 使用钻孔样板在墙壁中钻四个孔。 2. 使用适用于墙壁材质的四个螺丝将安装支架固定在墙壁上。 3. 将弹簧推开,将摄像机单元从单元外壳上卸下。 4. 卸除单元外壳中的底部垫圈。如果只有一根线缆,仅需卸下一个垫圈。 5. 拧紧四个螺丝,将单元外壳固定在安装支架上。 6. 向上拉动网线(必要时还有 I/O 线和音频线)穿过单元外壳中的底孔。...
  • Seite 161 AXIS P33–VE Network Camera Series 1. 将网线(必要时还有音频线和 I/O 线)连接至摄像机单元。建议按图所示将 网线拧成环状。 2. 插入 SD 内存卡(可选)。 3. 将单元外壳中的弹簧推开并将摄像机单元扣合入位。 4. 将风扇接口连接至摄像机单元的接口。 风扇接口 摄像机单元 弹簧 网线 调 调 调 整 整 整 镜 镜 镜 头 头 头 的 的 的 位 位 位 置 置 置...
  • Seite 162 AXIS P33–VE Network Camera Series 锁定螺丝 镜头支架 标记(设计 A) 标记(设计 B) 2. 松开锁定螺丝。 3. 查看实 实 实 时 时 时 视 视 视 图 图 图 页面,调转镜头支架,将镜头旋转 90° 或 180°。 4. 在感到满意后,轻轻拧紧锁定螺丝,固定镜头支架位置。 垂 垂 垂 直 直 直 转 转 转 动 动 动 镜 镜 镜 头 头 头...
  • Seite 163 AXIS P33–VE Network Camera Series 锁定螺丝 镜头支架 镜头 螺丝 1. 打开实 实 实 时 时 时 视 视 视 图 图 图 页面,请参见 访问产品 在第165页 。 2. 松开两个螺丝。 3. 查看实 实 实 时 时 时 视 视 视 图 图 图 页面,将镜头垂直转动至适当位置。...
  • Seite 164 AXIS P33–VE Network Camera Series 完 完 完 成 成 成 安 安 安 装 装 装 1. 旋转球型罩内部的黑色挡板,使其不会挡住镜头。 黑色档板 2. 必要时,在安装球型罩之前将风雨罩安装至摄像机: 请卸下球型罩内的两个螺丝。 将这些螺丝上的垫圈安装在风雨罩上使用的螺丝上,并安装风雨罩。 3. 请确保橡胶垫圈安全装置在球型罩上。 4. 使用干燥的软布擦拭球型外壳,清除灰尘和指纹,并使用吹风机吹去镜头 上的灰尘。 5. 拧紧 4 个螺丝,将球型罩安装至单元外壳。 6. 当安装好球型罩时,确保摄像机正确对焦。...
  • Seite 165 AXIS P33–VE Network Camera Series 单元外壳 球型罩 风雨罩 螺丝和垫圈 安装完成。 访 访 访 问 问 问 产 产 产 品 品 品 AXIS IP Utility 和AXIS Camera Management 推荐用于查找网络上的安讯士产品, 并在 Windows 中为它们分配 IP 地址®。两款应用都免费提供,并可在下列网址中 www.axis.com/techsup 下载: 该产品可配合多数操作系统和浏览器使用。推荐下列浏览器 Internet Explorer (搭配 Windows)...
  • Seite 166 AXIS P33–VE Network Camera Series 备注 www.axis.com/techsup 安装和管理软件工具可通过以下网站中的支持页面获取: 要将产品重置为出厂默认设置,请执行以下操作: 1. 断开产品电源。 硬件概览 在第150页 2. 按住控制按钮不放,重新连接电源。请参见 。 3. 按住控制按钮 15–30 秒的时间,直至 LED 状态指示灯闪烁淡黄色。 4. 松开控制按钮。当 LED 状态指示灯变为绿色时,结束此过程。该产品已重 置为出厂时的默认设置。如果网络上没有可用的DHCP服务器,则默认的 IP 地址为 192.168.0.90 5. 借助安装和管理软件工具,分配 IP 地址,设置密码及访问视频流。 也可通过 Web 界面将参数重置为出厂默认设置。访问设 设 设 置 置 置 > > > 系 系 系 统 统 统 选 选 选 项 项 项 > > > 维 维 维 护 护 护 。...
  • Seite 168 Installation Guide Ver. M2.4 AXIS P33–VE Network Camera Series Date: March 2017 © Axis Communications AB, 2015 - 2017 Part No. 1673503...

Diese Anleitung auch für:

P3384–veP3367–veP3365–ve

Inhaltsverzeichnis