Herunterladen Inhalt Inhalt Diese Seite drucken
Axis P33-Serie Installationsanleitung
Vorschau ausblenden Andere Handbücher für P33-Serie:

Werbung

Verfügbare Sprachen
  • DE

Verfügbare Sprachen

  • DEUTSCH, seite 29
INSTALLATION GUIDE
AXIS P33 Network Camera Series
AXIS P3343 Network Camera
AXIS P3344 Network Camera
AXIS P3343-V Network Camera
AXIS P3344-V Network Camera

Werbung

Inhaltsverzeichnis
loading

Inhaltszusammenfassung für Axis P33-Serie

  • Seite 1 INSTALLATION GUIDE AXIS P33 Network Camera Series AXIS P3343 Network Camera AXIS P3344 Network Camera AXIS P3343-V Network Camera AXIS P3344-V Network Camera...
  • Seite 2 Australia - This electronic device meets the Search by product, category, or phrases requirements of the Radio communications • report problems to Axis support by logging in to your (Electromagnetic Compatibility) Standard AS/NZS private support area. CISPR22. The AXIS P3343, AXIS P3344, AXIS P3343-V and AXIS P3344-V Network Cameras use a 3.0V CR2032...
  • Seite 3: Package Contents

    • Before you begin, make sure that the package contents, the required cables, tools, and documentation are available. See Package contents below • This network camera is intended to operate with PoE; if not available use AXIS PoE Midspan 1 port (not included)
  • Seite 4: Hardware Overview

    Page 4 AXIS P3343/P3343-V/P3344/P3344-V Installation Guide Hardware overview Camera unit Control button Audio Audio Network connector I/O connector LED indicators (PoE) Camera unit Dome cover Network cable Wall screws...
  • Seite 5: Mount The Camera

    Page 5 Mount the camera The AXIS P3343/P3343-V/AXIS P3344/P3344-V can be mounted with the cables routed through or along the wall. This product can also be fitted with a metal conduit for protecting the cabling when they are routed along the wall. See the illustration below.
  • Seite 6: Assign An Ip Address

    If your network does not have a DHCP server, the network camera will use 192.168.0.90 as the default IP address. AXIS IP Utility and AXIS Camera Management are the recommended methods for setting an IP address in Windows. These free applications are available on the Axis Network Video Product CD supplied with this product, or they can be downloaded from www.axis.com/techsup Depending on...
  • Seite 7 AXIS IP Utility automatically discovers and displays Axis devices on your network. You can also manually set a static IP address through this application. AXIS IP Utility is available on the Axis Network Video Product CD, or it can be downloaded from www.axis.com/techsup Note that you must install the network camera on the same network segment (physical subnet) as the computer running AXIS IP Utility.
  • Seite 8 Automatic discovery 1. Check that the camera is connected to the network and that power has been applied. 2. Start AXIS Camera Management. When the camera appears in the window, right-click the link and select Live View Home Page. 3. See page 9 for instructions on how to set the password.
  • Seite 9 See page 12. If required, click Yes to install AMC (AXIS Media Control), which allows viewing of the video stream in Internet Explorer. You will need administrator rights on the computer to do this.
  • Seite 10 Page 10 AXIS P3343/P3343-V/P3344/P3344-V Installation Guide Adjust the Lens Open the Live View page in the web interface and Horizon line make the following adjustments to the camera: 1. Loosen the locking screw and tilt adjustment screws. 2. Turn the lens (with the lens holder) to the desired position.
  • Seite 11 Bonjour bookmark in your browser (e.g. Safari) and click on the link to access the camera’s web pages. A free service from Axis that allows you to quickly and simply AXIS Dynamic DNS install your camera. Requires an Internet connection with no Service HTTP proxy.
  • Seite 12 Page 12 AXIS P3343/P3343-V/P3344/P3344-V Installation Guide Unit connectors Network connector - RJ-45 Ethernet connector. Supports Power over Ethernet. Using shielded cables is recommended. Audio in - 3.5mm input for a mono microphone, or a line-in mono signal (left channel is used from a stereo signal).
  • Seite 13: Led Indicators

    AXIS P3343/P3343-V/P3344/P3344-V Installation Guide Page 13 The following connection diagram gives an example of how to connect an auxiliary device to the AXIS P3343/P3343-V/P3344/P3344-V. E.g. push button 3.3V max. 50mA LED indicators Color Indication Network Green Steady for connection to a 100 Mbit/s network. Flashes for network activity.
  • Seite 14: Resetting To The Factory Default Settings

    Please refer to the documentation for your router for further instructions. For more information on this and other topics, visit the Axis Support Web at www.axis.com/techsup Further information The user’s manual is available from the Axis Web site at www.axis.com or from the Axis Network Video Product CD supplied with this product. Tip! Visit www.axis.com/techsup to check if there is updated firmware available for your AXIS product.
  • Seite 15: Guide D'installation

    Deux étiquettes adhésives portant le numéro de série Kit de montage Tournevis Resitorx, gabarit de perçage, 2 vis et chevilles, bloc de connexion CD de la caméra vidéo sur IP Axis comprenant la documentation, les outils d’installation et les autres logiciels Documentation Guide d’installation (le présent document)
  • Seite 16: Description Du Matériel

    Page 16 AXIS P3343/-V/ AXIS P3344/-V Guide d'installation Description du matériel Caméra Bouton de commande Audio Audio sortie entrée Connecteur E/S Connecteur réseau Témoins DEL (PoE) Caméra Bulle du dôme Câble réseau Vis murales...
  • Seite 17: Montage De La Caméra

    Page 17 Montage de la caméra La AXIS P3343/P3343-V/AXIS P3344/P3344-V peut être montée avec les câbles d'alimentation acheminés à travers le mur ou le long du mur. Ce produit peut également être doté d’un conduit métallique pour protéger le câblage lors d’un acheminement des câbles le long du mur.
  • Seite 18: Attribution D'une Adresse Ip

    AXIS P3344/P3344-V utilisera l’adresse IP 192.168.0.90 comme adresse IP par défaut. Il est conseillé d’utiliser AXIS IP Utility et AXIS Camera Management pour configurer une adresse IP sous Windows. Ces deux applications gratuites sont disponibles sur le CD de la caméra vidéo sur IP Axis joint à...
  • Seite 19 AXIS IP Utility recherche et affiche automatiquement les périphériques Axis sur votre réseau. Vous pouvez également configurer manuellement une adresse IP statique avec cette application. AXIS IP Utility est disponible sur le CD de la caméra vidéo sur IP Axis. Vous pouvez également la télécharger à partir du site www.axis.com/techsup.
  • Seite 20 1. Vérifiez que la caméra est connectée au réseau et sous tension. 2. Lancez AXIS Camera Management. Lorsque la caméra apparaît dans la fenêtre, cliquez sur le lien avec le bouton droit de la souris et sélectionnez Live View Home Page (Page d’accueil –...
  • Seite 21 Pour accéder au produit, le mot de passe par défaut de l’administrateur, root, doit être configuré. Pour ce faire, utilisez la boîte de dialogue Configure Root Password (Configurer le mot de passe root) qui s’affiche lorsque vous accédez à la caméra AXIS P3343/P3343-V/AXIS P3344/P3344-V pour la première fois.
  • Seite 22 5. Saisissez le mot de passe de la manière indiquée ci-dessus et cliquez sur OK. Si vous avez oublié votre mot de passe, vous devrez rétablir les paramètres d’usine par défaut de votre AXIS P3343/P3343-V/AXIS P3344/P3344-V. Reportez-vous à la page 25.
  • Seite 23 AXIS P3343/-V/ AXIS P3344/-V Guide d’installation Page 23 Réglage de l’objectif Ouvrez la page Live View (Vue en Ligne d’horizon direct) dans l’interface Web et effectuez les réglages suivants sur la caméra : 1. Desserrez la vis de verrouillage et les vis de réglage de l’inclinaison.
  • Seite 24 Bonjour dans votre navigateur (par exemple, Safari), ultérieure) puis cliquez sur le lien pour accéder aux pages Web de la caméra. Tous Service Axis gratuit vous permettant d’installer rapidement et AXIS Dynamic DNS facilement votre caméra. Nécessite une connexion Internet sans Service proxy HTTP.
  • Seite 25 -s 408 <Adresse IP> ping -s 408 192.168.0.125 4. Redémarrez la caméra AXIS P3343/-V/ AXIS P3344/-V en débranchant et en rebranchant le câble réseau. 5. Fermez l’invite de commande quand vous voyez « Reply from 192.168.0.125:... » (Réponse de 192.168.0.125 : ...) ou un message similaire.
  • Seite 26 Page 26 AXIS P3343/-V/ AXIS P3344/-V Guide d'installation Connecteur pour terminaux E/S : utilisé dans le cadre d’applications telles que la détection de mouvement, le déclenchement d’événements, l’enregistrement à intervalles et les notifications d’alarme. Il assure l’interface avec : broche 4...
  • Seite 27 AXIS P3343/-V/ AXIS P3344/-V Guide d’installation Page 27 Le schéma de câblage qui suit fournit un exemple de connexion d’un périphérique auxiliaire à l’AXIS P3343/-V/ AXIS P3344/-V. E.g. push button 3.3V max. 50mA Indicateurs DEL Couleur Indication Réseau Vert Continu en cas de connexion à un réseau de 100 Mbits/s. Clignote en cas d’activité...
  • Seite 28: Plus D'informations

    Axis Support Web à l’adresse www.axis.com/techsup. Plus d’informations Le manuel de l’utilisateur est disponible sur le site Web d’Axis (www.axis.com) et sur le CD de la caméra vidéo sur IP Axis fourni avec ce produit. Conseil : Visitez le site www.axis.com/techsup pour vérifier si des micrologiciels mis à...
  • Seite 29 Kabel, Werkzeuge sowie die Dokumentation vorhanden sind. Siehe Paketinhalt unten. • Diese Netzwerk-Kamera wird über Power over Ethernet (PoE) mit Strom versorgt. Falls PoE nicht zur Verfügung steht, verwenden Sie den AXIS PoE Midspan für 1 Anschluss (separat erhältlich) Paketinhalt...
  • Seite 30: Hardwareübersicht

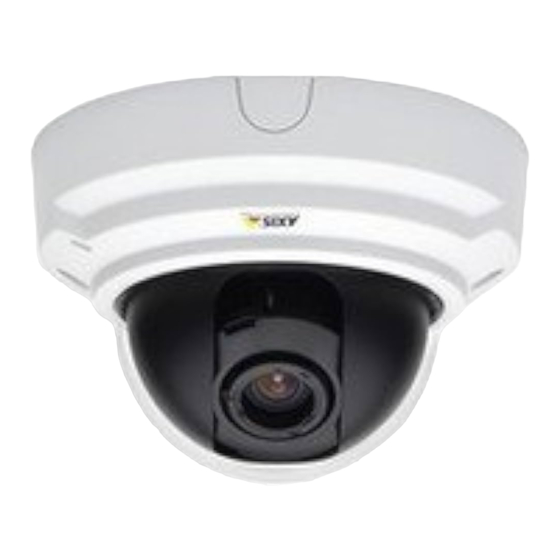
    Seite 30 AXIS P3343/P3343-V Installationsanleitung Hardwareübersicht Kameraeinheit Steuertaste Audio Audio Ausgang Eingang LED- Netzwerkanschluss E/A-Anschluss Anzeigen (PoE) Kameraeinheit Kuppelabdeckung Netzwerkkabel Wandschrauben...
  • Seite 31: Montieren Der Kamera

    Seite 31 Montieren der Kamera Bei der Montage der AXIS P3343/P3343-V/AXIS P3344/P3344-V können Sie die Kabel entweder durch die Wand oder entlang der Wand führen. Sie können die Netzwerk-Kamera auch mit einer Kabelführung aus Metall zum Schutz der Kabel ausstatten, wenn die Kabel an der Wand entlang geführt werden.
  • Seite 32: Zuweisen Einer Ip-Adresse

    Wenn Ihr Netzwerk über keinen DHCP-Server verfügt, wird für die AXIS P3343/P3343-V Netzwerk-Kamera die Standard-IP-Adresse 192.168.0.90 verwendet. AXIS IP Utility und AXIS Camera Management sind die empfohlenen Methoden zur Festlegung einer IP-Adresse unter Windows. Diese kostenlosen Anwendungen finden Sie auf der Axis Netzwerk-Videoprodukt-CD, die dem Produkt beiliegt.
  • Seite 33 1. Stellen Sie sicher, dass die AXIS P3343/-V/ AXIS P3344/-V Netzwerk-Kamera an das Netzwerk und die Stromversorgung angeschlossen ist. 2. Starten Sie AXIS IP Utility. 3. Doppelklicken Sie auf das Symbol der AXIS P3343/-V/ AXIS P3344/-V, um die Startseite der Kamera zu öffnen. 4. Anweisungen zum Festlegen des Kennworts finden Sie auf Seite35.
  • Seite 34: Axis Camera Management - Mehrere Kameras/Große Installationen

    1. Stellen Sie sicher, dass die Kamera an das Netzwerk und die Stromversorgung angeschlossen ist. 2. Starten Sie AXIS Camera Management. Wenn das Symbol der Kamera angezeigt wird, klicken Sie mit der rechten Maustaste darauf und wählen Sie „Live View Home Page“ (Homepage der Live-Ansicht).
  • Seite 35: Festlegen Des Kennworts

    2. Geben Sie die gewünschte Information ein und klicken Sie auf OK. Das Zertifikat wird erstellt, und das Kennwort kann jetzt sicher festgelegt werden. Der gesamte Datenverkehr der AXIS P3343/-V/ AXIS P3344/-V Netzwerk-Kamera wird ab diesem Zeitpunkt verschlüsselt. 3. Geben Sie ein Kennwort ein, und wiederholen Sie die Eingabe, um die korrekte Schreibweise zu bestätigen.
  • Seite 36 AXIS P3343/-V/ AXIS P3344/-V auf die Werkseinstellungen zurückgesetzt werden. Siehe Seite39. Klicken Sie auf „Yes“ (Ja), um AMC (AXIS Media Control) zu installieren. Nach Abschluss der Installation können Sie Videoströme im Microsoft Internet Explorer anzeigen. Hierzu müssen Sie über Administratorrechte für den Computer verfügen.
  • Seite 37: Installation Abschließen

    AXIS P3343/P3343-V Installationsanleitung Seite 37 Installation abschließen 1. Wenn die Kabel entlang der Wand verlegt sind, nehmen Sie das Seitenteil von der Kuppelabdeckung der Kamera ab. 2. Bringen Sie das schwarze Schutzschild in der Kuppelhaube durch Drehen in Übereinstimmung mit der Kameraposition.
  • Seite 38: Andere Methoden Zum Festlegen Der Ip-Adresse

    -s 192.168.0.125 00:40:8c:18:10:00 temp ping -s 408 <IP-Adresse> ping -s 408 192.168.0.125 4. Starten Sie die AXIS P3343/-V/ AXIS P3344/-V neu, indem Sie das Netzwerkkabel abziehen und wieder anschließen. 5. Schließen Sie die Befehlszeile, sobald „Reply from 192.168.0.125:...“ (Antwort von...
  • Seite 39 AXIS P3343/P3343-V Installationsanleitung Seite 39 6. Starten Sie einen Browser, geben Sie im Adressfeld „http://<IP-Adresse>“ ein und drücken Sie die Eingabetaste auf der Tastatur. Hinweise: • So öffnen Sie die Eingabeaufforderung unter Windows: Wählen Sie im Startmenü die Option „Ausführen...“ und geben Sie „cmd“ ein. Klicken Sie auf „OK“.
  • Seite 40 Seite 40 AXIS P3343/P3343-V Installationsanleitung E/A-Anschluss - Wird z. B. für Bewegungserkennung, Ereignisauslösung, Zeitrafferaufnahmen, Alarmbenachrichtigungen usw. verwendet. Bildet die Schnittstelle für: Anschluss 4 Anschluss 2 • 1 Transistorausgang - Zum Anschluss externer Geräte, wie Relais Anschluss 3 Anschluss 1 und LEDs. Angeschlossene Geräte können über die VAPIX API (Application Programming Interface), über die Ausgabeschaltflächen auf der Seite „Live...
  • Seite 41: Led-Anzeigen

    AXIS P3343/P3343-V Installationsanleitung Seite 41 Das folgende Anschlussschaltbild zeigt ein Beispiel für den Anschluss eines Zusatzgeräts an die AXIS P3343/-V/ AXIS P3344/-V. E.g. push button 3.3V max. 50mA LED-Anzeigen Farbe Bedeutung Netzwerk Grün Leuchtet konstant bei Verbindung mit einem 100-MBit/s-Netzwerk. Blinkt bei Netzwerkaktivität.
  • Seite 42: Wiederherstellen Der Werkseitigen Standardeinstellungen

    Benutzerhandbuch. Über das Internet auf die Kamera zugreifen Nach der Installation können Sie über Ihr lokales Netzwerk (LAN) auf die AXIS P3343/-V/ AXIS P3344/-V zugreifen. Um auch über das Internet auf die Kamera zugreifen zu können, müssen Sie die Netzwerk-Router so konfigurieren, dass diese den eingehenden Datenverkehr zulassen, was üblicherweise durch Zuweisung eines bestimmten Ports geschieht.
  • Seite 43: Guía De Instalación

    Kit de montaje Destornillador Resitorx, plantilla de taladro, 2 tornillos y tacos, bloque de conectores de E/S CD de los productos de vídeo en red de AXIS, incluida la documentación del producto, herramientas de instalación y otro software Material impreso Guía de instalación (este documento)
  • Seite 44: Presentación Del Hardware

    Página 44 AXIS P3343/P3343-V/AXIS P3344/P3344-V Guía de instalación Presentación del hardware Cámara Botón de control Salida de Audio Entrada de Audio Connector de red Connector E/S Indicadores LED (PoE) Cámara Cubierta de domo Cable de red Tornillos de montaje en pared...
  • Seite 45: Montaje De La Cámara

    Página 45 Montaje de la cámara La AXIS P3343/P3343-V/AXIS P3344/P3344-V puede montarse haciendo pasar los cables guiados a través o a lo largo de la pared. Este producto se puede instalar con un conducto metálico para proteger el cableado cuando los cables se pasen guiados a lo largo de la pared. Consulte la siguiente ilustración.
  • Seite 46 Ethernet y necesita una dirección IP para el acceso. Actualmente, la mayoría de redes disponen de un servidor DHCP que asigna direcciones IP a los dispositivos conectados de forma automática. Si su red no dispone de un servidor DHCP, la cámara de red AXIS P3343/P3343-V/AXIS P3344/P3344-V utilizará 192.168.0.90 como dirección IP predeterminada.
  • Seite 47 AXIS IP Utility detecta y muestra automáticamente los dispositivos Axis que existen en la red. A través de esta aplicación también puede configurar manualmente una dirección IP estática. AXIS IP Utility está disponible en el CD de los productos de vídeo en red de Axis, o bien puede descargarse en www.axis.com/techsup .
  • Seite 48 1. Compruebe que la cámara esté conectada a la red y que recibe alimentación. 2. Inicie AXIS Camera Management. Cuando la cámara aparezca en la ventana, haga clic con el botón derecho en el enlace y seleccione Live View Home Page (Página de inicio de Live View).
  • Seite 49 AXIS P3343/P3343-V/AXIS P3344/P3344-V Guía de instalación Página 49 Configuración de la contraseña Para poder acceder al producto, hay que configurar la contraseña del usuario predeterminado para el administrador root. Al acceder por primera vez a la cámara de red aparecerá el cuadro de diálogo Configure Root Password (Configurar contraseña de root).
  • Seite 50: Ajuste Del Objetivo

    Página 50 AXIS P3343/P3343-V/AXIS P3344/P3344-V Guía de instalación En caso necesario, haga clic en Yes (Sí) para instalar el AMC (AXIS Media Control) y así permitir la visualización de vídeo continuo en Internet Explorer. Para ello, debe tener derechos de administrador en su equipo.
  • Seite 51: Finalización De La Instalación

    Bonjour™ del explorador (p. ej., Safari) y haga clic en el vínculo para acceder a las páginas Web de la cámara. Todos Servicio gratuito suministrado por Axis que permite instalar la Servicio de DNS cámara de forma rápida y sencilla. Es necesario disponer de dinámico de AXIS...
  • Seite 52 -s 408 192.168.0.125 ping -s 408 <Dirección IP> 4. Para reiniciar la AXIS P3343/AXIS P3344, desconecte y vuelva a conectar el cable de red. 5. Cierre la línea de comando cuando vea “Reply from 192.168.0.125:…” (Respuesta de 192.168.0.125:…) o similar.
  • Seite 53 AXIS P3343/P3343-V/AXIS P3344/P3344-V Guía de instalación Página 53 Conector del terminal de E/S: Utilizado en aplicaciones como detección de movimiento, activación de eventos, grabación de secuencias y notificaciones de alarma. Proporciona la interfaz para: Pin4 Pin2 • 1 salida de transistor: Para conectar relés e indicadores LED. Se...
  • Seite 54: Indicadores Led

    Página 54 AXIS P3343/P3343-V/AXIS P3344/P3344-V Guía de instalación El diagrama de conexiones siguiente ofrece un ejemplo de cómo conectar un dispositivo auxiliar a la AXIS P3343/AXIS P3344. E.g. push button 3.3V max. 50mA Indicadores LED Color Indicación Verde Fijo para indicar la conexión a una red de 100 Mbits/s. Parpadea para indicar actividad en la red.
  • Seite 55: Más Información

    éste y otros temas, visite la página Web de soporte de Axis en www.axis.com/techsup Más información El manual del usuario está disponible en el sitio Web de Axis, en www.axis.com, o en el CD de los productos de vídeo en red de Axis suministrado con este producto. Un consejo: Visite www.axis.com/techsup para comprobar si hay disponible firmware actualizado para el...
  • Seite 56 Página 56 AXIS P3343/P3343-V/AXIS P3344/P3344-V Guía de instalación...
  • Seite 57: Contenuto Della Confezione

    Vedere la sezione Contenuto della confezione seguente. •Questa videocamera di rete è progettata per essere utilizzata con la tecnologia PoE. Se tale tecnologia non è disponibile, utilizzare un midspan PoE AXIS a 1 porta (non fornito di serie).
  • Seite 58: Panoramica Dell'hardware

    Pagina 58 Guida all'installazione della videocamera AXIS P3343/-V/P3344/-V Panoramica dell’hardware Videocamera Pulsante di comando Uscita audio Ingresso audio Connettore di rete Morsettiera I/O Indicatori (PoE) Videocamera Copertura a cupola Cavo di rete Viti per il montaggio a muro...
  • Seite 59: Montaggio Della Videocamera

    Pagina 59 Montaggio della videocamera La videocamera AXIS P3343/P3343-V/AXIS P3344/P3344-V può essere montata installando i cavi all'interno o lungo la parete. La videocamera può essere munita di un tubo protettivo in metallo per proteggere i cavi nel caso in cui vengano installati lungo la parete. Vedere la seguente figura.
  • Seite 60 Se la rete non dispone di un server DHCP, per la videocamera di rete AXIS P3343/P3343-V/AXIS P3344/P3344-V viene utilizzato l'indirizzo IP predefinito 192.168.0.90. I metodi consigliati per impostare un indirizzo IP in Windows sono AXIS IP Utility e AXIS Camera Management. Queste applicazioni gratuite sono disponibili sul CD Axis Network Video fornito con il prodotto, oppure possono essere scaricate dalla pagina web www.axis.com/techsup.
  • Seite 61 Si tenga presente che la videocamera di rete AXIS P3343/AXIS P3344 deve essere installata sullo stesso segmento di rete (subnet fisica) del computer su cui è in esecuzione AXIS IP Utility. Rilevamento automatico 1. Verificare che la videocamera di rete AXIS P3343/AXIS P3344 sia collegata alla rete e alimentata correttamente.
  • Seite 62 Rilevamento automatico 1. Verificare che la videocamera sia collegata alla rete e alimentata correttamente. 2. Avviare AXIS Camera Management. Appena viene visualizzata la videocamera, fare clic con il pulsante destro sul collegamento e selezionare Live View Home Page (Pagina iniziale immagini dal vivo).
  • Seite 63: Impostazione Della Password

    Per poter accedere al prodotto, è necessario impostare la password dell'utente amministratore predefinito root. Quando si accede alla videocamera per la prima volta, viene visualizzata la finestra di dialogo Configure Root Password (Configura password root) AXIS P3343/AXIS P3344. Per evitare l'interruzione della connessione di rete durante l'impostazione della password root, è...
  • Seite 64: Regolazione Dell'obiettivo

    AXIS P3343/AXIS P3344. Vedere la pagina 68. Se necessario, fare clic su Yes (Sì) per installare AMC (Axis Media Control) che consente di visualizzare il flusso video in Microsoft Internet Explorer. A questo scopo è necessario disporre dei privilegi di amministratore.
  • Seite 65: Completamento Dell'installazione

    Guida all'installazione della videocamera AXIS P3343/-V/P3344/-V Pagina 65 Completamento dell'installazione 1. Se i cavi sono stati installati lungo la parete, rimuovere il coperchio laterale dalla copertura a cupola della videocamera. 2. Ruotare lo schermo di protezione di colore nero all'interno della cupola per posizionare correttamente la videocamera.
  • Seite 66 -s 408 192.168.0.125 ping -s 408 <Indirizzo IP> 4. Riavviare la videocamera AXIS P3343/AXIS P3344 scollegando e ricollegando il cavo di rete. 5. Chiudere la finestra MS-DOS appena viene visualizzato il messaggio "Reply from 192.168.0.125:…" (Risposta da 192.168.0.125) o altro messaggio equivalente.
  • Seite 67 Guida all'installazione della videocamera AXIS P3343/-V/P3344/-V Pagina 67 Note: • Per aprire una finestra MS-DOS in Windows: dal menu Start, scegliere Esegui... e digitare cmd. Fare clic su OK. • Per utilizzare il comando ARP in un sistema operativo Mac OS X, usare l'utility Terminal, in...
  • Seite 68 Pagina 68 Guida all'installazione della videocamera AXIS P3343/-V/P3344/-V Connettori Connettore di rete - Connettore Ethernet RJ-45. Supporta Power over Ethernet. Si consiglia l’uso di cavi schermati. Ingresso audio - Ingresso audio da 3,5 mm per microfono in mono o segnale mono line-in (il canale sinistro è...
  • Seite 69: Indicatori Led

    Guida all'installazione della videocamera AXIS P3343/-V/P3344/-V Pagina 69 Il seguente schema dei collegamenti mostra come collegare una periferica ausiliaria alla videocamera AXIS P3343/AXIS P3344. E.g. push button 3.3V max. 50mA Indicatori LED Colore Indicazione Rete Verde Luce fissa: connessione di rete a 100 Mbit/s. Luce lampeggiante: attività di rete.
  • Seite 70: Ripristino Delle Impostazioni Di Fabbrica

    Per ulteriori istruzioni, consultare la documentazione del router. Per maggiori informazioni su questo e altri argomenti, visitare il sito web per il supporto Axis all'indirizzo www.axis.com/techsup. Ulteriori informazioni La Guida per l’utente è disponibile sul sito web di Axis all’indirizzo www.axis.com oppure sul CD fornito con il prodotto. Suggerimento! Visitare il sito di Axis all’indirizzo www.axis.com/techsup per verificare la disponibilità...
  • Seite 71 AXIS P3343-VE/P3344-VE Installation Guide Page 71...
  • Seite 72 Installation Guide Ver.1.0 AXIS P3343/AXIS P3343-V/AXIS P3344/AXIS P3344-V Printed: June 2009 © Axis Communications AB, 2009 Part No. 35428...

Diese Anleitung auch für:

P3343P3344P3343-vP3344-v

Inhaltsverzeichnis